

Nothing is perfect, period. And the same is true for your Lenovo laptop. If you have a Lenovo laptop and keep getting the warning message that Lenovo is plugged in and not charging every time you charge your device, here are the possible causes and solutions.
Admit it, you have at least once seen the aforementioned warning message on the device screen and wondered why this is so. Right? This is a rather annoying and serious problem. Because in this case, your laptop will no longer charge until you fix the problem.
In this article, we will consider this issue in detail. You will find answers why the situation occurs when Lenovo connects but does not charge, and how to fix it.
What are common battery related issues in Lenovo laptops?
There are several problems that can occur with a Lenovo laptop. But below are the most common problems reported by most users.
- The battery stops charging before it is fully charged.
- The battery shows that it is fully charged, but it is not!
- The battery is not detected by the system and a red cross (❌) is displayed instead.
- The battery does not charge at all or shows that it is incompatible.
- The battery stops charging when it reaches 96% or 98%.
- Repeating battery status: “Lenovo is plugged in but not charging.”
Why is my Lenovo laptop not charging?
Now you must be wondering why your Lenovo battery problem is not fully charging. You will receive answers to this question in this section.
Some Lenovo laptops are designed to maximize laptop battery life through a feature called Power Management Settings. And if you notice that your battery is not charging above 60%, this setting may have been enabled.
You need to disable its setting in order to fix the charging problem, and in order to do this, you need to know which preloaded version you have on your laptop. Below are the various preloaded versions. And the steps they need to disable this setting.
1. For Lenovo Power Management
- Open Lenovo Energy Management.
- There will be different battery settings on the screen, select the one you want.
2. For OneKey optimizer
- Open the OneKey optimizer.
- Select the Energy Saver tab on the screen to open it.
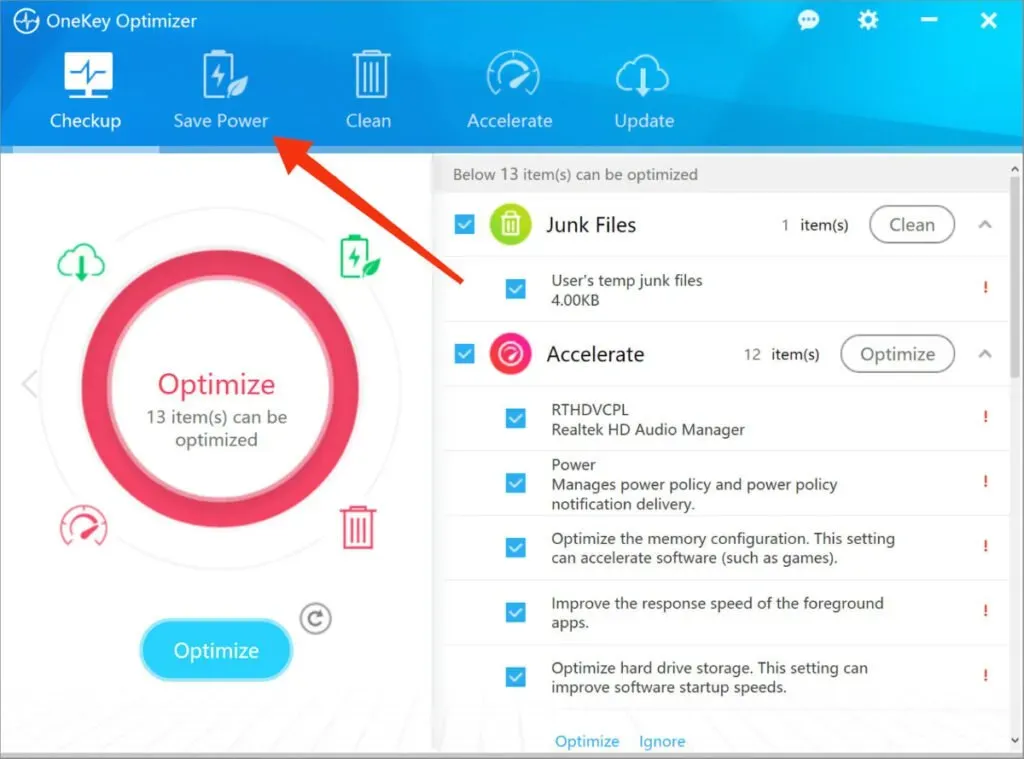
- Tap “Battery Saver”on the screen.
- You need to turn off save mode so that your device’s battery can be fully charged.
3. For Lenovo Vantage
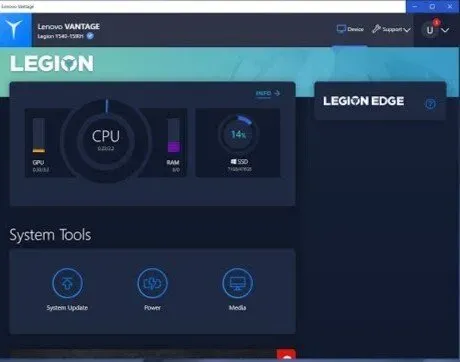
- Access to your device.
- Open My Device Settings on the screen.
- Click Battery.
- Now disable save mode.
4.Lenovo Settings
- Open Lenovo settings.
- Select the power management icon.
- Now disable save mode.
These are all the pre-boots you might have on your Lenovo laptop and the steps needed to disable the settings. Once you do that, the battery issue should be resolved.
Lenovo plugged in but not charging? Here are 10 ways to fix it!
Troubleshooting – In most cases, Lenovo connects to the network but does not charge. You can use several fixes yourself, these fixes are mentioned below.
- Restart your Lenovo laptop
- Check all physical cable connections
- Remove the battery and connect to a power source
- Make sure you are using the correct charger and port
- Check for hardware problems
- Power Reset Your Lenovo Notebook
- Update your battery drivers
- Update your Basic Input/Output System (BIOS) settings
- Get another laptop charger
- Contact Lenovo Support
Let’s discuss each of them in detail below.
1. Restart your Lenovo laptop.
This fix works in almost all cases and with any problem. You can always try restarting your Lenovo laptop first if you see this warning on the screen.
To restart your laptop, you can simply follow the basic shutdown and restart process.
And if your laptop doesn’t work at all, you can try a forced restart. This can be done by holding the power button for a few seconds until the screen goes black. Press the power button again to turn on the laptop.
Check if your laptop is charging normally or not. If not, move on to the next solution.
2. Check all physical cable connections
You should always start with a basic fix to check for possible hardware issues before moving on to any technical part of the laptop.
- Check all physical power cable connections.
- If the connector is not securely connected to the laptop, reconnect it.
- Inspect the area where the cable connects to the AC adapter.
- There may be a problem with the charging cable, which may be broken. Or the AC adapter is not working properly due to a technical issue.
- Check the electrical outlet if there are any electrical problems. Because there may not be enough electricity in the outlet, which can cause a problem.
- Check if the charger is properly connected to the outlet.
Once you check all these connections and still nothing changes, then just try other fixes.
3. Remove the battery and connect to a power source.
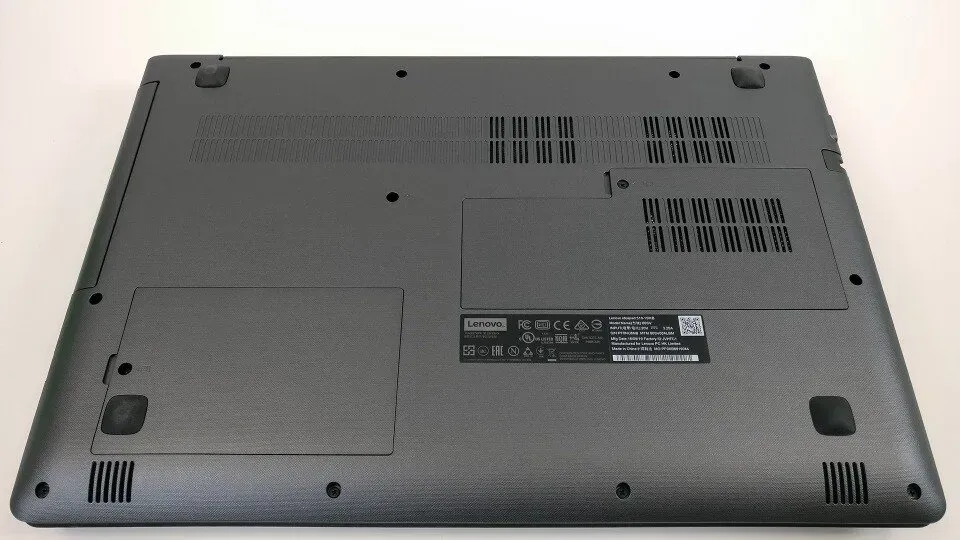
This fix will help you determine if the problem is with your laptop battery or not. In this, you need to remove the battery from the laptop. This can be easily done if your laptop has a removable battery.
To do this, pull on a few tabs on the bottom of the device. If you still can’t figure it out, you can always check the Google manual or YouTube video for your specific laptop.
If the battery is not yet discharged, you must turn it off before removing the battery completely. Also disconnect all accessories if they are connected to the laptop.
Then hold down the power button for a few seconds to reset any remaining charge. Once that’s done, plug the charger into your laptop and try turning it on. If the laptop works normally after that, the problem is most likely in the battery.
You can try cleaning the compartment with a cotton or linen cloth. Then install the battery correctly into the compartment. If the problem persists, you most likely have a dead battery that needs to be replaced.
If your laptop battery is non-removable, you can always try opening the car. But doing so will void the warranty of the laptop and may result in serious damage to the laptop.
Therefore, it is safest to take the laptop to a professional, as they have the right tools to remove the battery. They will recommend a possible solution to this problem.
4. Make sure you are using the correct charger and port
With this fix, you can make sure that the laptop is getting enough power.
Most laptops only have one charging port, but newer models have more than one. Some ports are for data transfer only. So to determine if the connected port is the correct one, you can check the power icon or try connecting to each port one by one.
In doing so, you will find the correct port.
Other than that, you should always use the original charger that you get with your laptop. A fake or dual charger can seriously damage your laptop. For example, this can lead to slow charging or no laptop charging at all. Although some chargers may not support larger laptops.
Finally, check your power source, as sometimes some sources may not draw enough power to fully charge the battery. Although this will keep the battery stable, it will not boost the level.
5. Check for Hardware Issues
Check hardware components such as a failed AC adapter and/or charging cable. If any of them are broken or damaged, that could be the cause of the problem. Therefore, you can try to charge it with another charger if you have one, or buy a new original laptop charger.
6. Power reset Lenovo laptop
This fix is a combination of removing the battery and restarting the laptop. With this, you need to reboot and remove the battery at the same time. This is done with the following steps.
- Turn off your laptop.
- Disconnect the charger from the laptop.
- Then remove the battery by pulling the tab on the underside of the laptop.
- Press the power button and hold it for a few seconds.
- Slide the battery back into the bay and close the tabs underneath the laptop.
- Reconnect the cable.
- Turn on your laptop.
This is how you do a hard power reset of your Lenovo laptop.
To factory reset your laptop using Lenovo OneKey Recovery (OKR), please review this guide.
7. Update battery drivers
If you have an outdated battery driver, it will cause problems charging your beloved laptop. Drivers depend on your laptop model, so you should always go to the manufacturer’s website to manually download them.
In addition, you can choose specially designed programs to download drivers for your laptop. These are the programs responsible for determining the appropriate drivers for your model. By doing this, you will not make mistakes and download the correct drivers.
8. Update your Basic Input/Output System (BIOS) settings

The basic input/output system (BIOS) is pre-installed on the motherboard. It is responsible for loading the system. Along with that, it can fix hardware issues on your device.
And if there is something wrong with this system, your laptop may experience several problems, including improper charging. And in order to fix this problem, you need to update the basic I/O system of your laptop.
To do this, follow the steps given below.
- Go to the Lenovo laptop support page.
- Select the “Detect Product”option on the screen.
- You will access the product page.
- Open Drivers and Software.
- Click BIOS.
- To update the BIOS, follow the instructions displayed on the screen.
- Reboot your laptop and after that you need to connect the cable.
Just be aware that if you make any mistake while updating your BIOS, you may lose all your data. Therefore, it is recommended that you back up your data before starting this process.
9. Get another laptop charger
Everything that can be done with the available resources is mentioned above. The next thing you can try is getting a different laptop charger. You don’t need to buy a new one if one of your friends has a similar charger.
You can plug it into your laptop and see if it works. If yes, then the problem was in your charger, and if not, then the problem is really in your battery.
And if you choose the purchase option, you should always consider purchasing from Lenovo’s official website or store. It might cost you a little more than a third-party laptop charger, but it’s the safest option.
Third party chargers are unreliable; they can cause other problems for the laptop. But still, if you buy a third-party charger, check the reviews about it first.
10. Contact Lenovo Support
Finally, if after everything you’ve done and after trying every fix your laptop is still facing the same issue, you need to take the device to a Lenovo store. And if not, you can always contact them by phone or online through the Lenovo support page.
Because, finally, it can be concluded that the problem is in the battery, in which case you should always seek professional help.
Before you do try to experiment with the battery, it will void your warranty and exceed your repair costs.
How to increase the battery life of your Lenovo laptop?
We understand that every laptop has a battery life, and so does a Lenovo laptop. But there are a few more things you can do to improve battery life.
Below are some of the things you can do to improve the battery life of your Lenovo laptop.
1. Turn on Airplane Mode
This is the best way to save your laptop battery. But this can only be done when you are not using the Internet. This prolongs battery life as all apps run in the background.
Please note that this will disable push notifications. Following are the steps required to enable Airplane Mode.
- Open the start menu.
- Select a gear option.
- Click on the “Network and Internet”option.
- Select “Airplane Mode”on the left side of the screen.
- Turn on airplane mode by pressing the button.
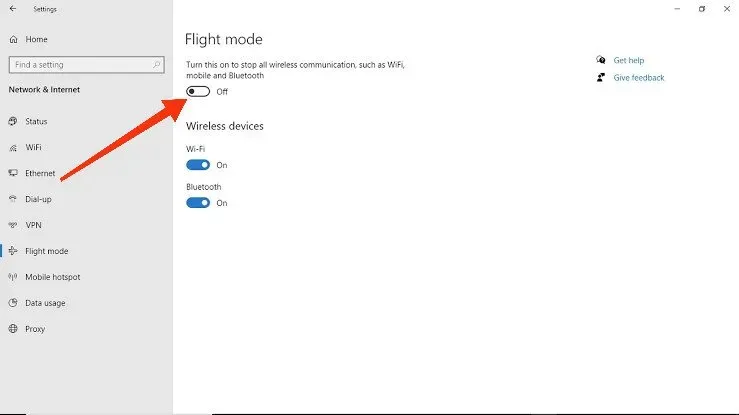
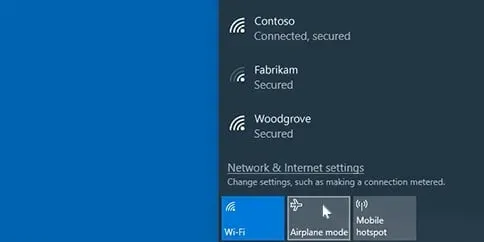
This will activate the mode. Or click the Airplane icon to turn on Airplane mode.
2. Adjust the brightness
A bright screen can be the main reason why your battery drains quickly. Not only that, it can also cause eye fatigue and irritation.
Thus, you should always adjust your screen brightness and to do so, follow the steps mentioned below.
- Open the start menu.
- Select a gear option.
- Select the “System”option.
- Now you can see the screen brightness slider. Move the slider to the left to decrease and to the right to increase the brightness level.
In addition, you can also turn off the keyboard backlight if you are not using your device in the dark.
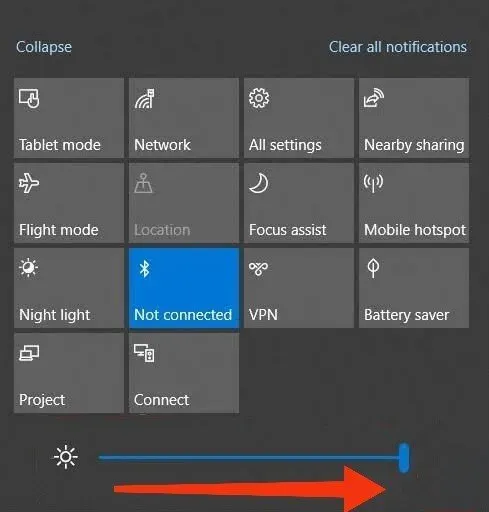
3. Use the Windows Battery Performance Slider
You can adjust the battery performance slider if you want to improve performance or battery life.
To change this setting, follow the steps below.
- You will see a battery icon in the right corner of the screen. Click on this icon.
- Now you can see the battery slider on the screen.
- Slide to the left to enable the power mode for maximum battery life.
This will automatically dim the screen (if it is not connected to a charger). Along with that, it will suspend apps running in the background.
And you can always change the settings if you change your mind.
4. Wake up the laptop and put it into sleep mode.
There are two modes available in Windows laptops i.e. hibernation mode and sleep mode when you are using the laptop.
Sleep mode is used to shut down the system completely. This mode should only be used if you are sure that the laptop will not be used for a long time.
In sleep mode, the laptop still uses the battery to power the RAM; therefore, this mode drains more battery.
5. Close apps/programs that consume the most power
Some apps may not use the maximum battery while others may consume the most power. You may not be using this app at the moment, it only runs in the background and may still drain your battery.
Hence, you can check which applications are using the most laptop power by following the steps given below.
- Open the start menu.
- Select a gear option.
- Select the “Battery”option.
- In the App Battery Usage section, you can check how much battery is being used by each app. You can check it for the last 24 hours or the last seven days by changing the settings at the top of the app list.
Consequently, you can close applications that are unnecessarily consuming more power.
6. Update your system
Upgrading your system is always the best option, as it not only improves battery efficiency, but it can also solve other problems. Hence, update your system as soon as you are notified that a new update is available.
But you can always manually check for updates by following the steps given below.
- Open the start menu.
- Select a gear option.
- Select the Update & Security option.
- Select Check for updates on the screen.
If any new updates appear on the screen, select them to install. Your system will be updated after all these steps.
There is no exact number or guarantee of how much these options will improve battery performance, but they will certainly make a difference. And none of them cost a penny, so why not try them at least once.
Is there a way to charge a Lenovo laptop without a charger?
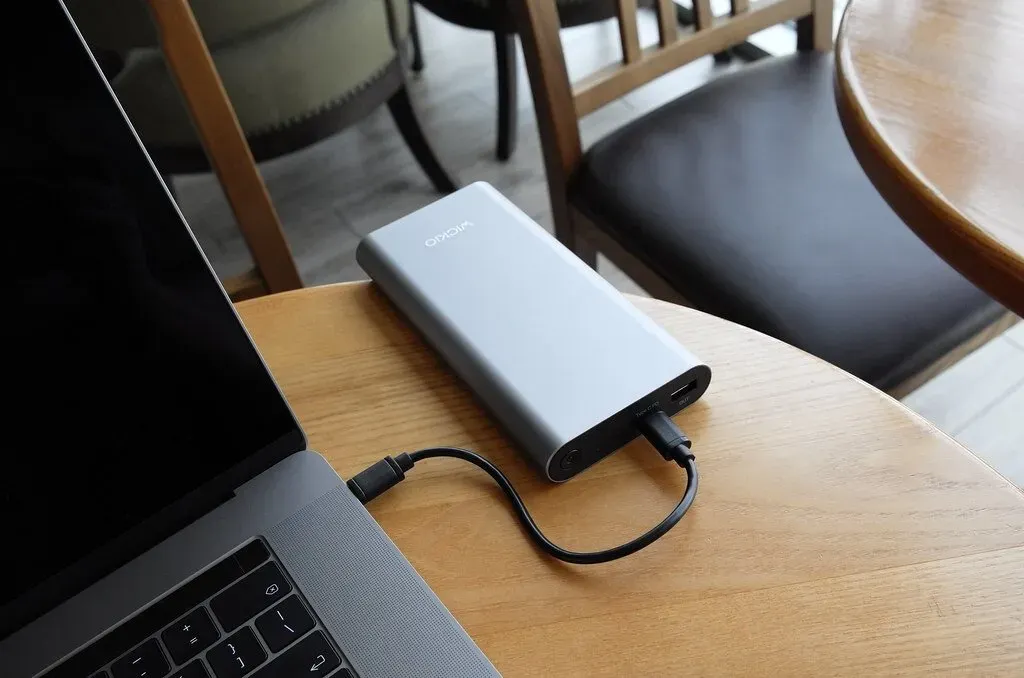
Yes, there is a way to charge a Lenovo laptop without a charger. This is easy to do with a power bank or portable charger.
Following are the things you need to do for this:
- Buy a power bank.
- Charge your device.
- Connect the power supply to the laptop.
- Just wait until the laptop is fully charged.
Just make sure the power supply supports your laptop and delivers optimal power.
Also, if your laptop has a USB-C connection, you can charge it via USB if the charger supports Power Delivery. And follow the steps given below to charge your laptop by this method:
- You need to purchase a USB-C charger and make sure the voltage is correct.
- Connect USB-C to your laptop and then to a power source.
- Hence, your laptop will start charging.
You can only connect this USB-C port to your phone charger if it also supports a USB-C port. Although the charging speed will be slow due to the different voltage ranges of phone and laptop chargers. Therefore, you should only use this charging method when absolutely necessary.
You can also use a universal charger that can be used for phones or different laptop models to charge your Lenovo laptop. This device (universal charger) comes with various types of AC adapters. At the same time, you do not need different chargers for different devices, this is enough.
Conclusion
Therefore, you may have solved the problem – Lenovo is no longer charging and we hope the article helped you in this process. And with the help of the BONUS section, you can also increase the battery life of your device. All of these problems are quite common and can occur unmistakably.
And if not treated in time, serious problems can arise in the future.
Plus, all of the above fixes won’t cost you a dime, unless you have to carry them to a service store. But this may not be necessary in more than 95% of cases.
Frequently Asked Questions (FAQ)
How do I know if my laptop battery or charger is bad?
You can check if your laptop battery or charger is faulty by following the steps given below. – You need to remove the battery. – Connect the charger. – If the AC charger is connected successfully and your system is working properly, then the charger is OK. And a battery issue. Otherwise, it may be a bad charger.
How to reset Lenovo laptop battery?
All you have to do to reset your Lenovo laptop battery is to fully charge it and then drain the battery completely. Hence, you will reset your Lenovo laptop battery.
My Lenovo laptop says no battery detected. What should I do?
You need to remove the battery from the system and reinstall it if the “Battery Not Detected”warning appears on the screen. You can also try unplugging the power adapter and then restarting it. Finally, you can check for a BIOS update by checking out the article above.
Can I charge a Lenovo laptop using USB?
Yes, you can charge your Lenovo laptop using USB. Only if your laptop has a USB-C connection, you can charge it via USB if the charger supports Power Delivery. And follow the steps given below to charge your laptop by this method. – You need to purchase a USB-C charger and make sure the voltage is correct. – Connect the USB-C to your laptop and then to a power source. – Therefore, your laptop will start charging.