
DNS (Domain Name System) is a directory that translates domain names or host names into Internet Protocol (IP) addresses.
As a result of this procedure, users can easily visit websites on the Internet using web browsers.
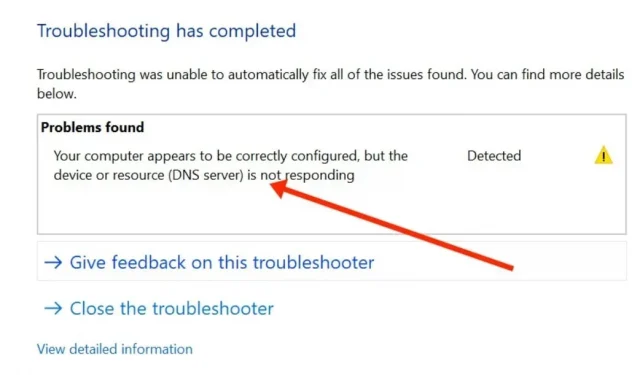
You cannot browse the website unless you first connect to DNS errors. During the procedure, you may receive a notification such as “DNS server is not responding”.
This suggests that the autonomous naming systems responsible for resolving hostnames to IP addresses did not respond.
These kinds of DNS problems can occur for a variety of reasons. Fortunately, most of them have simple solutions.
In this article, we will define the “DNS Server Not Responding”warning and discuss some common causes.
Then in Windows, we will show you different options to solve this problem.
What does “DNS server not responding”mean?
DNS is a naming system that translates alphanumeric domain names (or “host names”) into numeric IP addresses. DNS servers essentially work as relays.
“DNS server not responding”means that your browser was unable to connect to the Internet.
DNS failures are usually caused by user-side issues such as a faulty network or internet connection, incorrect DNS settings, or an outdated browser.
They can also be caused by a momentary server outage that renders DNS unavailable.
How to fix DNS errors “DNS server not responding”in Windows?
Now that you know what this warning means and are aware of some possible causes, it’s time to start fixing it. Let’s take a look at 10 possible solutions to the “DNS server not responding”problem on a Windows device.
- Switch to another browser
- Start your computer in safe mode
- Temporarily disable your antivirus software and firewall
- Disable secondary connections
- Disable Windows Peer-to-Peer Networking Feature
- Restart your router
- Clear your DNS cache and reset your IP
- Disable IPv6
- Change the default DNS server on your Windows computer
- Install updated network adapter drivers on your computer
Now let’s look at each solution one by one:
Solution 1: Switch to a different browser
The first approach is to analyze the problem by checking your DNS connections. To solve this problem, simply switch or update your web browser.
To do this, consider using a different browser to access the Internet. For example, if Google Chrome or Brave is your default browser, try Mozilla Firefox or Microsoft Edge.
If switching browsers helps, you’ll probably need to update your regular browser or uninstall and reinstall it. If that doesn’t work, try uninstalling and then reinstalling your favorite browser.
Solution 2 – Start your computer in safe mode
The “DNS server is not responding”error message may appear if your operating system is not working properly. As a result, you can try starting your Windows device in Safe Mode to see if that solves the problem.
This limits the files and resources needed to run Windows and can be an effective approach to diagnosing problems.
- To start your Windows 10 PC in safe mode, first click the Windows button, then hover over the power symbol.
- Then, while holding down the Shift key, select Restart.
- Click “Troubleshoot”> “Advanced”in the window that appears.
- Select “Startup Options”then “Restart”from the “Advanced”menu.
- You can enable Safe Mode or Safe Mode with Networking by pressing 4 or 5.
- After that, your computer will restart in safe mode.
- If you are using Windows 7 or earlier, you can restart your computer in Safe Mode by selecting Power > Restart. Then, while it loads, press and hold the F8 key.
Solution 3 – Temporarily disable your antivirus software and firewall
Antivirus programs and firewalls are essential to protect your devices, but sometimes they can cause problems that disrupt network connections.
- For Windows users, go to Control Panel.
- Select Update & Security > Windows Security > Virus & Threat Protection > Manage Settings.
Solution 4 – Disable Secondary Connections
Another possible approach is to disable all available secondary connections on your device. Make sure that only the connection you are currently using is active.
- On Windows, type “Network Connections”into the search box on the desktop taskbar. Then select View Network Connections.
- The network connections page opens. Any connections that are not in use will be marked with a red (X) next to them. Right-click one and select Disable.
- Repeat for any sitelinks that are currently inactive. When you’re done, restart your browser and try accessing the website again.
Solution 5 – Disable Windows peer-to-peer networking feature
This feature helps save your device’s download bandwidth. Basically, it allows you to download a Windows update once and then use your device to distribute or share the new version with other computers on your local network.
Unfortunately, this can also sometimes break DNS procedures. As a result, it’s worth disabling it to see if that solves the problem message you’re currently seeing.
- To do this, navigate to the Windows icon, then Settings, then Update & Security.
- In the window that appears on the left, select Delivery Optimization.
- Toggle the switch next to “Allow downloads from other computers”to disable it.
When you’re done, restart your computer and try visiting the website again.
Solution 6 – Reboot your router
Most modems have a power button that allows you to quickly turn them off. After about a minute, restart the modem and wait for it to reconnect. When this happens, check if you can access the Internet using your browser.
It should be noted that simply rebooting the router is not always enough. You must reset it by unplugging it completely and then waiting at least 30 seconds before plugging it back in and back on.
Solution 7 – Clear your DNS cache and reset your IP
If you’ve ruled out your browser, antivirus software, and router as possible causes, it’s time to look into your DNS settings. This is important for both privacy and security.
As with the router cache, your DNS may need to be flushed before it can properly connect to the Internet, or your IP address may need to be reset.
- If you’re using Windows, start by typing “cmd”into the search area on your taskbar and open the command line app.
- Type ipconfig /flushdns and press Enter in the window that appears.
When the operation is complete, you will receive a notification that the DNS cache has been correctly flushed. This procedure should be repeated for the following commands:
- ipconfig /registerdns
- ipconfig /release
- ipconfig /update
Solution 8 – Disable IPv6
IPv6 is the latest version of the Internet protocol that helps route data between networks and the Internet.
Unfortunately, this can also be the source of the “DNS Server Not Responding” error you are currently experiencing.
- Removing IPv6 from your computer is another possible approach.
- On Windows, open the Network Connections control panel and right-click on the current connection. Select Properties from the drop down menu.
- Scroll down until you find Internet Protocol Version 6 (TCP/IPv6) in the Network tab of the panel that appears.
- If it is checked, clear the check box and click OK. Refresh your browser and try connecting to the Internet again.
Solution 9 – Change the default DNS server on your Windows computer
Another fix for “DNS Server Not Responding” in Windows is to change the default DNS server. The first step in doing this in Windows 7, 8, or 10 is to enter the network connection properties.
- Start by clicking the Windows button in the lower left corner of the taskbar.
- Type Network Connections in the search area.
- Then, in the option that opens, click View Network Connections.
- Then select the internet adapter you are currently using (LAN for Ethernet cable connections or WLAN for wireless network connections).
- Right-click your Internet adapter and select Properties.
- Select Internet Protocol Version 4 (TCP/IPv4) in the window that appears and click the Properties button.
- Select Use the following DNS server addresses and enter a different server address to manually specify a different DNS server address.
- For example, in the “Preferred DNS Server”section, enter “8.8.8.8”for the Google DNS server. Then, in the “Alternate DNS Server”section, enter “8.8.4.4”and click “OK”.
There is an alternative to using the public DNS servers of Google and many other organizations.
Solution 10 – Install updated network adapter drivers on your computer
Another reason for the “DNS Server Not Responding”notification to appear is that your current Windows network adapter driver is old or outdated.
In this case, the solution may be to buy a new adapter driver or update the existing one.
There are two ways to update the network adapter driver. One option is to do it manually, which you should only do if you have some experience with drivers.
You can also use an automated program for this, such as Driver Easy or Snappy Driver Installer (SDI).
Any of these options will detect your system and find the necessary drivers to use it.
Restart your computer after downloading SDI and installing the latest drivers. Then, to make sure the problem is fixed, connect to the Internet again.
Conclusion
The “DNS Server Not Responding”warning indicates that your browser is unable to connect to the Internet, which is often caused by DNS failures or network issues.
You also need to make sure that your domain name is active and that you have a reliable Internet Service Provider (ISP).
We hope this post helped you resolve the “DNS Server Not Responding”issue.