Have an important meeting at the office or with a client and Zoom isn’t working on your Mac? Well, besides being frustrating, it can lead to potential monetary losses.
Luckily, the solutions provided here will surely resolve the issues you are facing while using the Zoom app on your Mac. Let’s start with the basics and work our way up to solve this problem.
1. Make sure you have the Zoom app installed
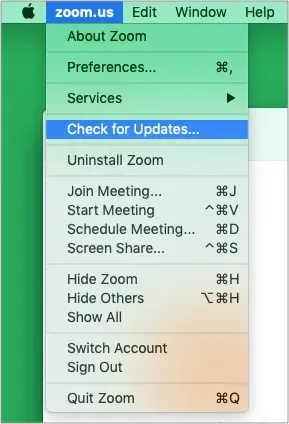
You can join a Zoom meeting through a browser. There are also extensions for Chrome and Firefox, but the options and features are limited. Sometimes it may even work incorrectly. Thus, for the best results, consider downloading the Zoom app. If you already have the app, launch it and click zoom.us on the top menu bar. Then click “Check for Updates”and install if an update is available.
2. Check if your Mac is connected to the Internet.
Before we go any further, it’s important to make sure your Mac has an active and stable internet connection. To do this, open a browser and try to visit the page. If the Internet is not working, follow this guide to fix Wi-Fi issues on Mac.
Secondly, if you are using a VPN on your Mac, consider turning it off. Sometimes Zoom may not work with some VPN services.
Advice. The faster the Internet, the better the Zoom experience. If you have slow internet, or are downloading or uploading something or streaming a movie to another device connected to the same Wi-Fi, consider stopping this during a Zoom call.
3. Check the status of the Zoom server.
Although rare, it is possible that everything is fine on your end, and the problem lies on the side of Zoom. So it’s very important to make sure everything works on the Zoom side as well. To do this, go to the Zoom status page and make sure everything is working. If not, you may have to wait until everything is fixed.
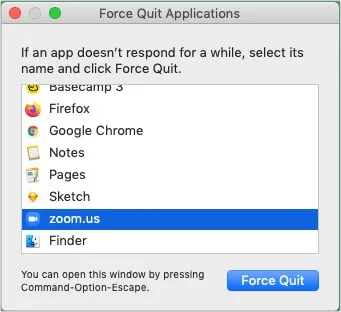
4. Force close the Zoom app.
- Click on the Apple logo in the top left corner.
- Select Force logout.
- Select zoom.us and click Force Sign Out.
- After a few seconds, open the Zoom app again.
5. Restart your Mac
- Click the Apple logo in the top left corner and select Restart.
- After restarting your Mac, try using Zoom. Most likely it will work.
6. Give Zoom the necessary permissions
Zoom requires a microphone, camera, and a few other permissions to function properly and provide a complete video conferencing experience. To do this, it is crucial to make sure that the application has the correct permissions.
- Click the Apple logo in the top left corner and select System Preferences.
- Click Security & Privacy. Make sure you are on the “Privacy”tab.
- Camera: Click “Camera”on the left sidebar and make sure “Zoom.us.app”is checked. If not, click on the padlock in the bottom left corner, authenticate with your Mac password, and check the “Zoom”box.
- Microphone: Make sure Zoom is allowed to access your Mac’s microphone.
- If you’re using macOS Catalina or macOS Big Sur, click Files and Folders and check the Zoom box. This will allow you to share files from the chat and save them, as well as record calls locally on your Mac.
- Then click “Screen Recording”and check the “Magnify”box. This allows you to share your Mac’s screen during Zoom calls.
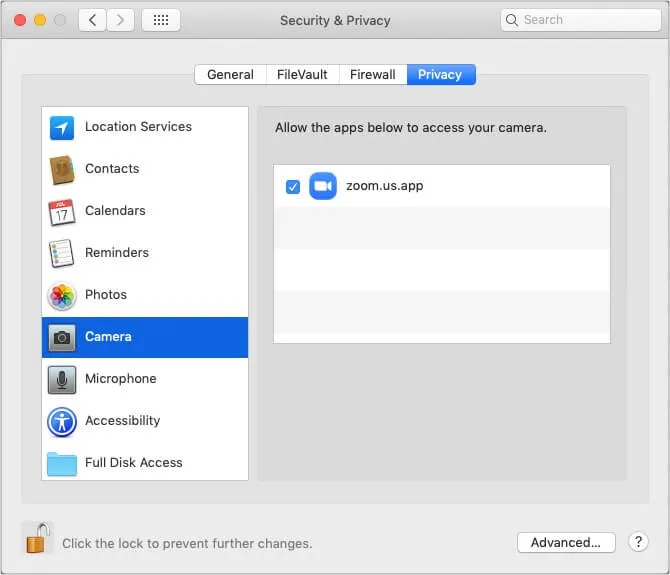
After granting the required permission, close the Zoom app and reopen it. Now everything should work correctly.
7. Close other applications using your Mac’s camera and microphone.
Are you running other apps in the background (like Skype, Discord, FaceTime, etc.) using your Mac’s camera, microphone, or while recording your screen? If yes, close these applications. Zoom may not be able to access your camera or microphone if another app is using them.
8. Close other applications that consume significant resources
Press command + space bar to bring up Spotlight search. Now type in Activity Monitor and open this app.
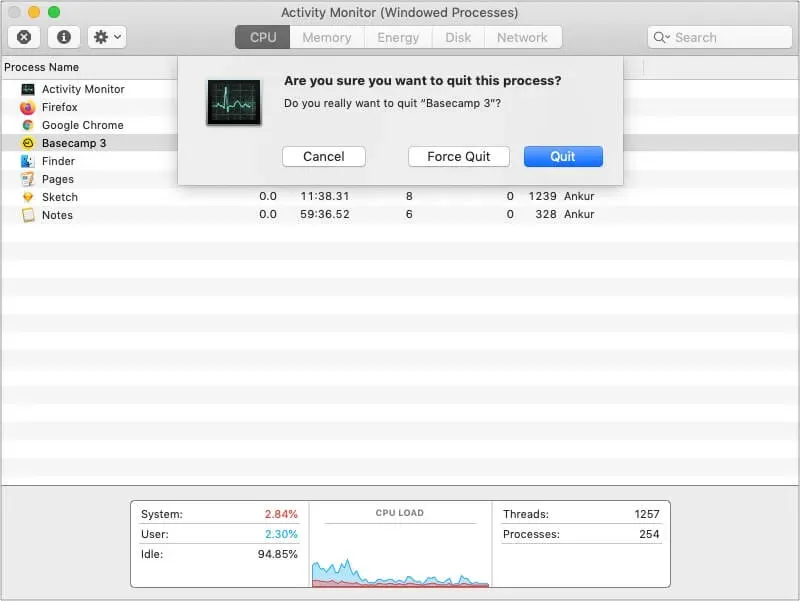
From here, if you find that applications are the most/unnecessarily CPU intensive, consider closing them. To do this, click on the application/process name and click on the x in the top left corner. Finally, click “Exit”.
9. Uninstall and reinstall Zoom
- Force exit from Zoom.
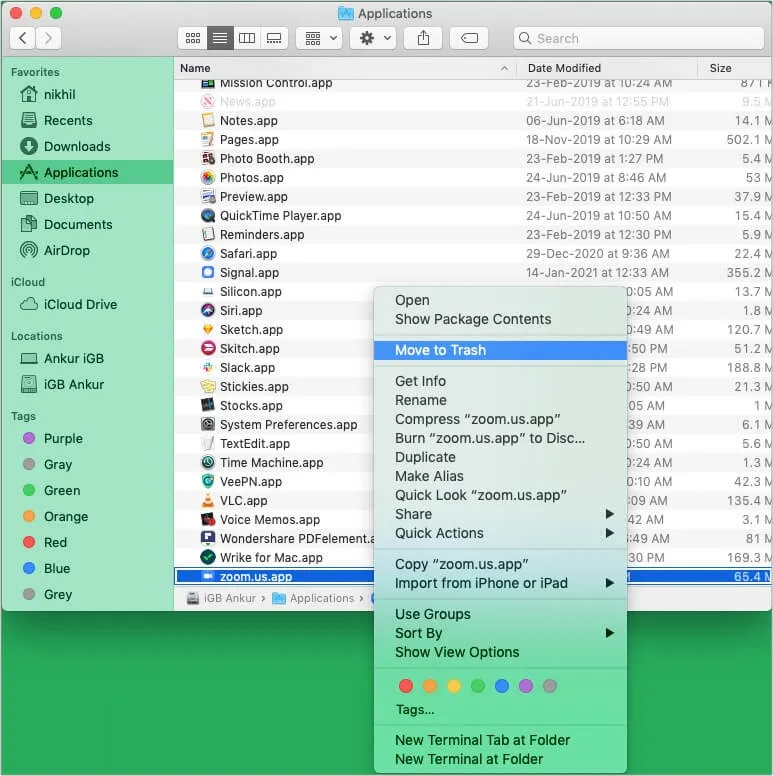
- Open Finder → Applications → and right click on zoom.us.app
- Click Move to Trash.
- Empty the Trash and restart your Mac.
- Finally, download and install Zoom again. Give it the necessary permissions the first time you call Zoom.
10. Disable firewall
In some cases, disabling the firewall may help Zoom to function properly. To do this, open System Preferences and click on Security & Privacy. Click Firewall. Then click “Turn off firewall”. Once that’s done, restart your Mac and try using Zoom. It should work without any issues.
Is scaling convenient again on a Mac?
I believe the steps above helped you get Zoom working on your Mac again. In the rare case that this is not the case, consider contacting Zoom Support.
Also, if you’re having trouble running Zoom on your iPhone or iPad, we also have a few proven fixes for that.
Finally, it would be ideal to take a few minutes and learn the Zoom keyboard shortcuts for Mac. It will enhance your experience and even save time!


