


Annoying to receive a notification “Could not send message. Click to check the message and try again.”
There may be several reasons for receiving such notification(s). And here you are roaming the net looking for a solution to this error.
You don’t have to worry because in this article, you will learn several solutions to solve the problem when SMS is not sent in Android.

Why does my Android phone get a notification that a message hasn’t been sent?
Below are a few possible reasons why your Android device keeps getting the “Message not sent”error message.
- “Default SIM for SMS/Text”is not set. In some cases, users may not install a SIM card for text messaging on your Android. Or, even if you set the default SIM card, the SIM card does not currently support text messages.
- Check if your SIM (prepaid) has enough credit. Send a message. The prepaid SIM requires a minimum credit balance to send a message. Check your account before trying to resend a message that failed.
- The messaging app is outdated.
- The SIM card may not be installed correctly.
- The recipient’s number may be incorrect.
- Your phone number may be blocked on the recipient’s phone.
13 Fixes for SMS Not Sending in Android
- Restart your Android phone
- Turning airplane mode on or off
- Set the default SIM for sending texts or choose the correct SIM
- Force stop the messaging app
- Check if your SMSC number is active
- Clear message cache
- Update your messaging app
- Reinsert the SIM card
- Check if the error only occurs for one recipient
- Set your default messaging app
- Check if there are enough funds in your prepaid account
1. Restart your Android phone
Suppose you are facing some kind of error on your android phone or any other device. In this case, Restart can handle the most common problems. Restarting helps resolve errors by cleaning up memory, stopping memory leaks, fixing software crashes, and improving performance.
Therefore, if you are facing the “Message not sent” error on your Android phone, try restarting your device and resending the erroneous message. If the problem persists, you can try the following solutions.
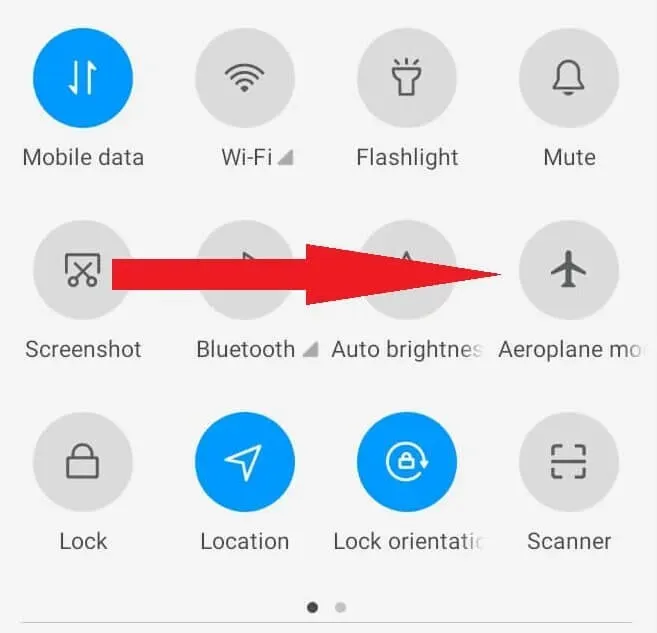
2. Turn airplane mode on and off.
Refresh your cellular network by turning airplane mode on and off. Airplane mode disables all network connections and statistics on an Android device.
Drag the screen from above and touch the airplane icon. When turned on, it will turn blue. Wait about 30 seconds. Touch the airplane icon again to turn it off. Now you can try to resend the failed message.
3. Set the default SIM card for sending texts, or select the correct SIM card.
The “Message not sent”error is most common on Android phones with multiple SIM card slots. On dual SIM phones, users can select two different SIM cards to make calls and send text messages. Sometimes there is confusion when only one of the SIM cards is active.
Let’s say you set up an inactive SIM for sending messages on Android. Then you will indeed get a “Message not sent”error message. You can fix this problem by changing the default SIM slot to send messages to the active SIM.
- Open the Settings app on Android.
- Go to SIM card settings or SIM manager. Different Android brands have different addresses.
- In the Preferred SIM section, you can see the default SIM for calls, texts, and cellular data. Select an active SIM card or a SIM card with sufficient balance as the new default.
- Close the Settings app and then try resending the failed message.
4. Force stop the Messages app
You can then try restarting the Message app on your Android phone. Force stop the Android Message app and then restart it to clear the temporary memory.
- Open the Settings app.
- Go to Applications/Application Info-> Manage Applications.
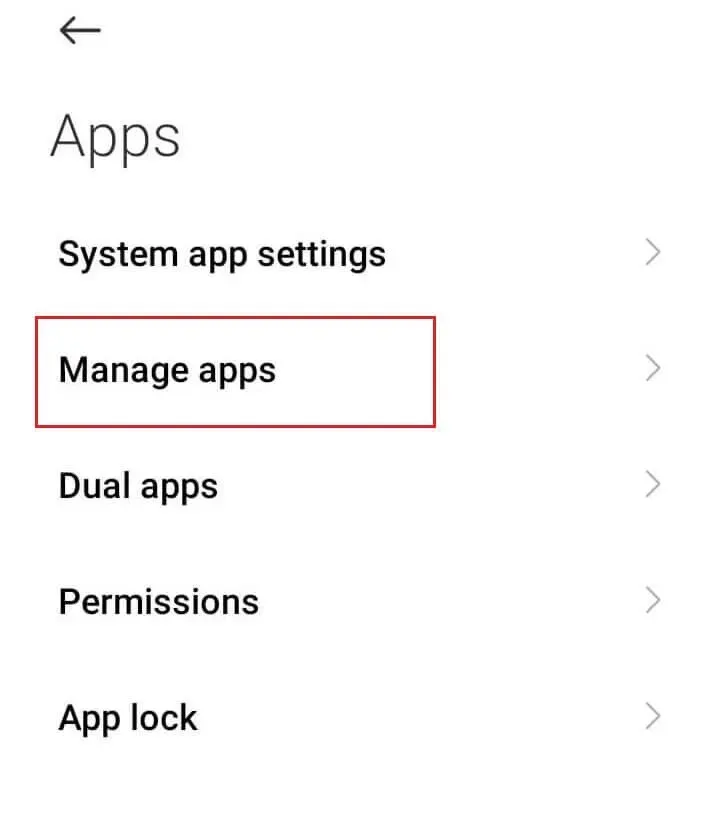
- Scroll down the list of apps and tap Messages.
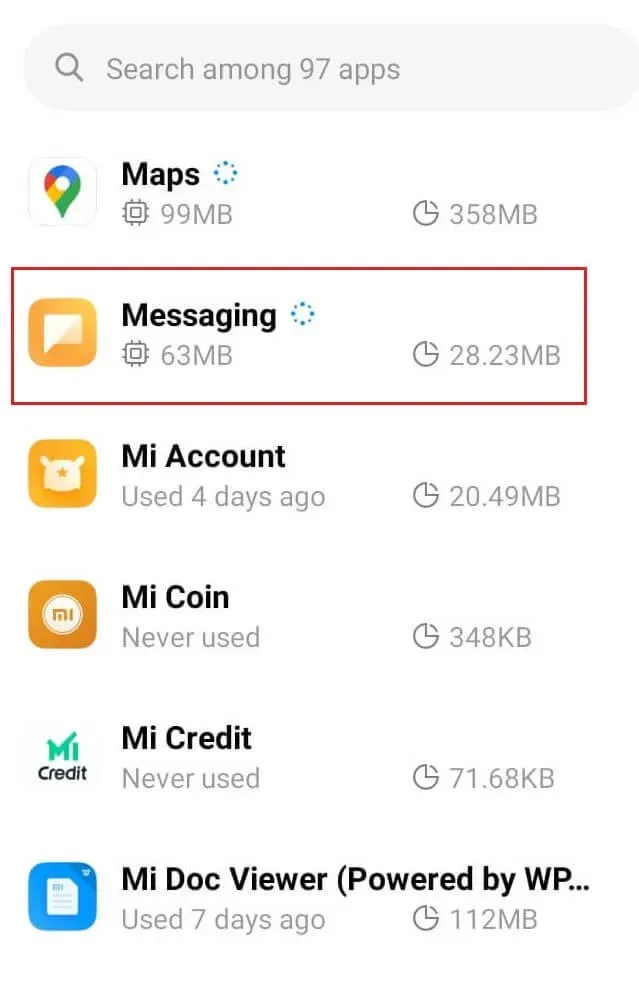
- Tap the Force Stop option at the bottom of the screen.
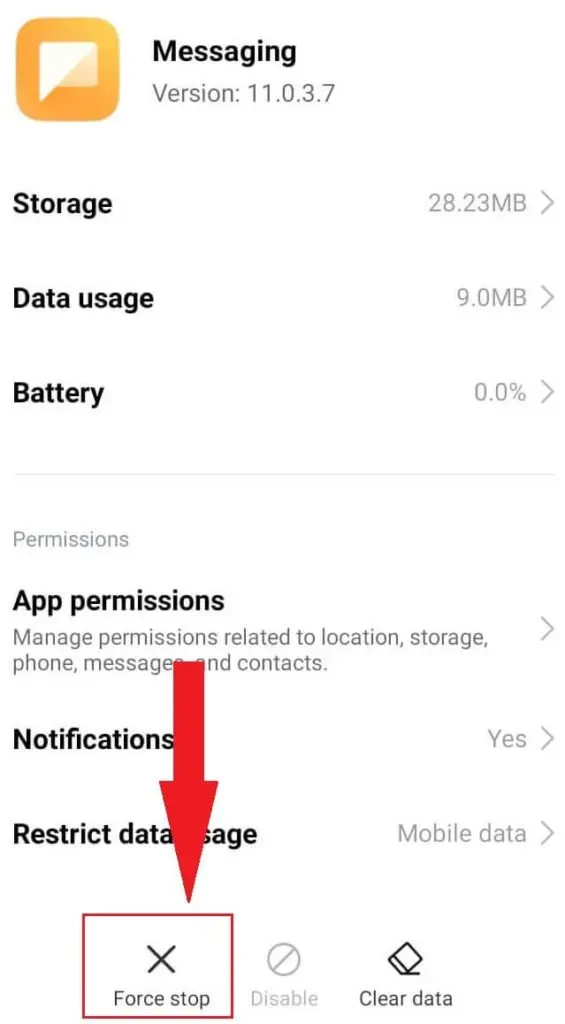
- Close the Settings app.
- Click “In the messaging app”, then try to resend the message that failed to send.
5. Check if your SMSC number is active
- Open the default system messaging app.
- Click “Settings”or the gear icon.
- Scroll down the page and click “Advanced Settings”or “Advanced”.
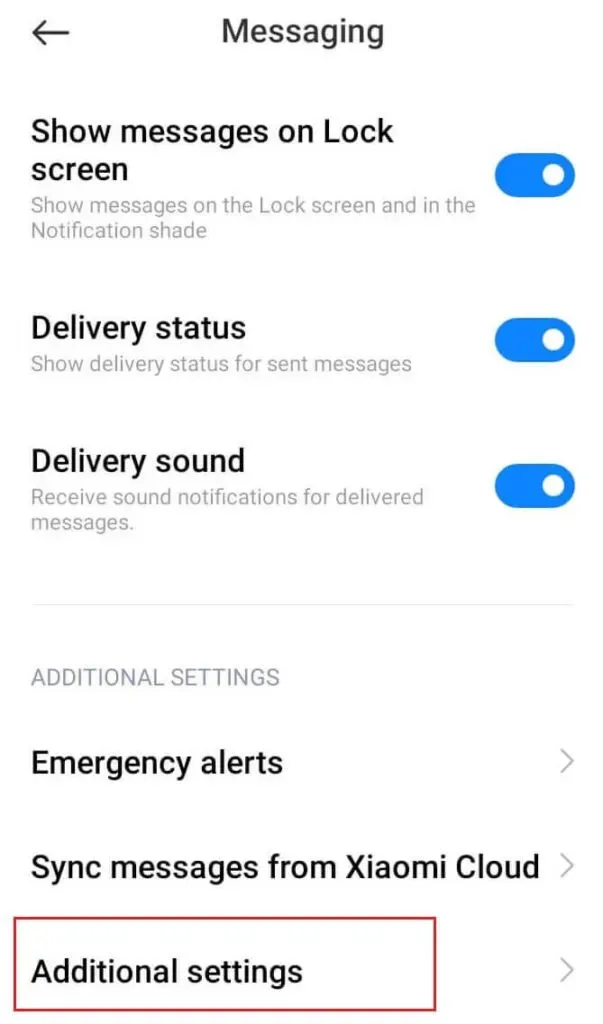
- Click on the Short Message Service Center (SMSC) option.
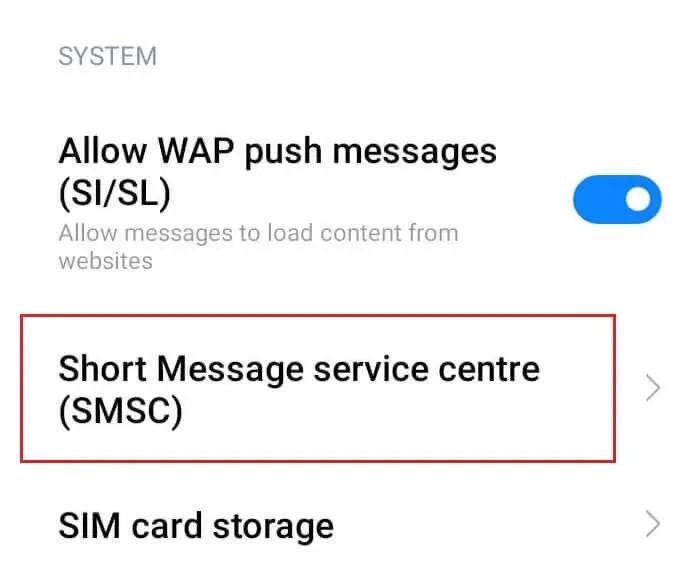
- Compare the number in the text box with the number provided on your service provider’s website.
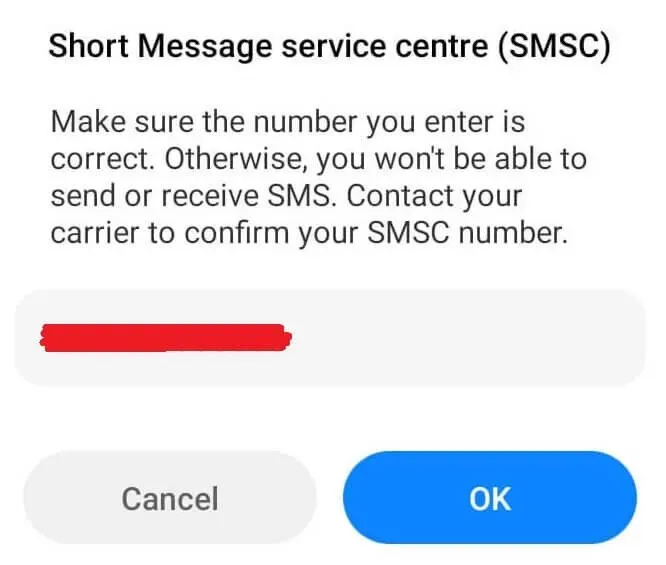
- Change SMSC number; if it doesn’t match, click OK.
- Restart your Android phone.
Now try to resend the failed message. However, if the solution does not work, you can contact customer support.
6. Clear the cache storage of the Messages app.
If the above solution doesn’t work, you can try wiping your cache. Cache. The cache stores data that helps Android run faster. But clearing the cache regularly can help eliminate bugs and improve performance.
- Open the Settings app.
- Go to Applications-> Application Management.
- Scroll through the list of apps and tap Messages.
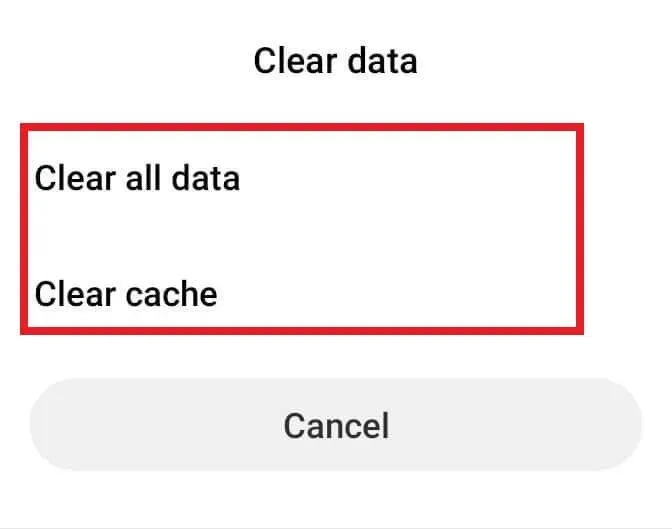
- Click on the “Clear data”option at the bottom of the screen.
- Select the “Clear Cache”option from the two options.
- Close the Settings app, launch the Messages app, and try resending the failed message.
7. Update your messaging app
Regular updates protect your Android phone from bugs and minor bugs. It also helps improve computational efficiency. Therefore, if you encounter the “Message not sent”error, try updating your messaging app to the latest version.
- Open the Google Play Store app.
- Click on your profile avatar in the upper right corner of the screen.
- Click on the “Manage apps and devices”option.
- Select Available Updates.
- Scroll through the list of pending updates and click Update next to the Messaging App option.
- Open the Messages app after the update is complete. Resubmit the error message and check if the problem persists.
8. Check for Android system updates
The OS update package contains fixes for minor crashes and bugs and improves the performance of your device. You can unknowingly resolve the error if you update your Android phone regularly.
- Open the Settings app.
- Go to “About Phone”-> “UI/OS Version”.
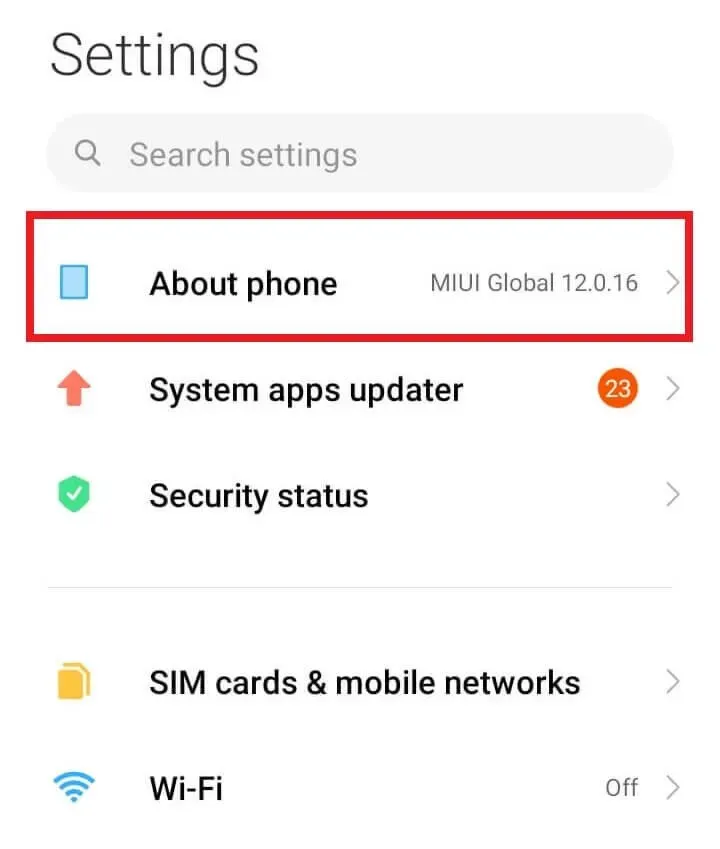
- Click Check for updates.
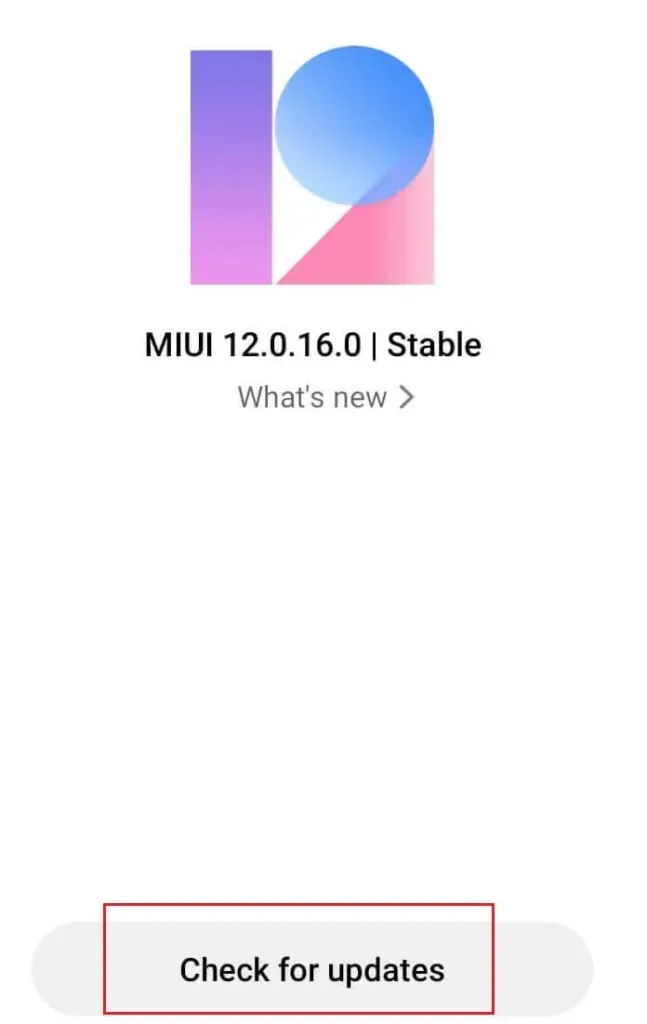
- Download and install the required updates.
- Reboot your phone.
9. Reinsert the SIM card
A problem with the SIM card results in a “Message not sent”error. You can then try to reinsert the SIM card. Insert the SIM card correctly or try another SIM card slot that fits the SIM card.
10. Check if the error only occurs for one recipient
If your phone number is blocked on the recipient’s Android device. Or the recipient’s number is invalid. You may then receive an error message “Failed to send message”. To find out if the error only occurs with one recipient, try sending the message to a different number. If the message is sent, the first recipient might be the problem.
Otherwise, you add the recipient’s number to your blacklist. In this case, you may also receive an error notification. Try removing the recipient’s number from the black list.
- Open the Settings app on your Android phone.
- Go to “Call Settings”-> “Black List”.
- Click on the “Blocked Numbers”option.
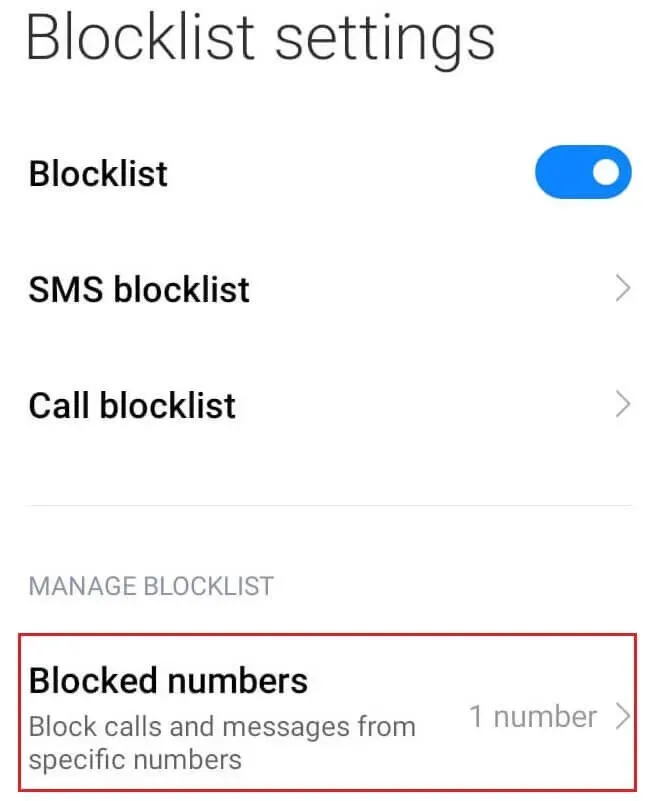
- Check if the recipient’s number is on the list. If the number is on the list, unblock it.
- Press and hold the number you want to unblock.
- Select Unblock from the list of options.
- Close the Settings app
11. Set the system default messaging app
Many users have installed third-party apps that manage calls and text messages on their Android phones. While the GUI appears to be more advanced than a simple messaging app, you may encounter bugs and bugs with these third-party apps.
Try changing the default back to the native system messaging app. Then try resending the failed message and check if the issue is resolved.
12. Check if there are enough funds in your prepaid account
The SMS service requires a minimum credit to be able to send messages. If there are not enough funds in your prepaid account, outgoing services will be stopped. Try to check if your current package is valid and if it is ok, check the status of the SMS and if the SMS service is active on your SIM card.
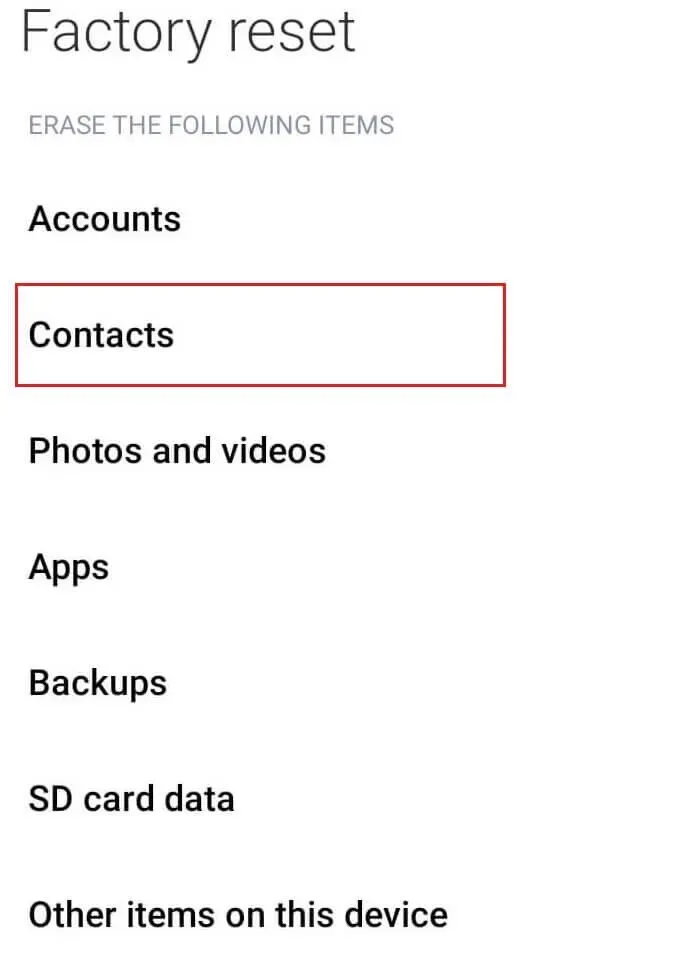
13. Perform a factory reset
A factory reset is the ideal solution if the source of the error is related to your Android phone. Go to “Settings”-> “About phone”-> “Reset settings”. Click “Erase All Data”. Enter the security password to confirm the operation.
Also, back up your important data to your computer or cloud storage so that you can restore your phone after a factory reset.
Conclusion
You may get frustrated when you get the error “Could not send message”. And even more annoying if you can’t solve the problem with outgoing texts. However, we hope that you will pinpoint the source of the error using the solutions listed in this article. And solve the error with the appropriate solution.
Frequently Asked Questions (FAQ)
How can I check if my number is blocked on the recipient’s phone?
Let’s say you’re not sure if your number is blocked on another phone. Then first try to call this number or send SMS. If you receive an error notification, try calling or texting from a different number. If the call comes from another number and you cannot get through using your number, you can be sure that you have been blocked.
How to fix “Unable to send SMS”error on Android phones?
First of all, try resetting or restarting your phone. If that doesn’t work, try toggling airplane mode on and off. The error may occur when using third-party messaging applications. Set the native system messaging app as the default app. Other solutions include updating the Messages app to the latest version, clearing the app’s cache, setting the default active SIM for sending texts, etc.
What does the notification “Failed to send message”mean?
The literal meaning of this notice is that the carrier cannot send the message to the recipient. When your service provider does not receive your SMS data, or even receives, but cannot send them to the addressee or recipient.
What is SMSC and how does it work?
The Short Message Service Center (SMSC) acts as a hub that processes text messages for a subset of mobile phone numbers. It is responsible for receiving, routing, forwarding and storing text messages or SMS from clients.