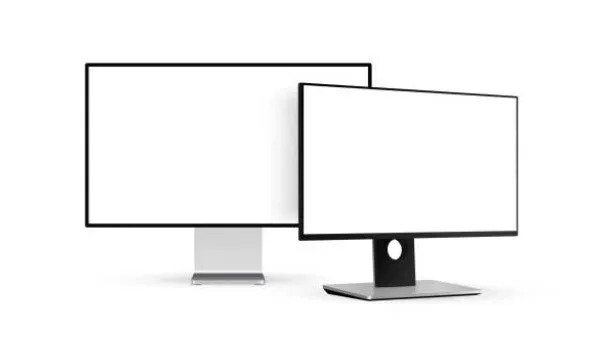

Versions of the Windows operating system supported by Microsoft allow multiple monitors and dual monitors. You can connect multiple monitors to your computer.
A Windows computer can have multiple monitors. Windows designates one of the monitors as primary and the rest as secondary.
The default monitor on which Windows shows all content is the primary monitor. It is very important to decide which monitor you want to use as your computer’s primary display.
Windows 10 users who have multiple monitors can choose their primary monitor at any time. Multi-monitor support is a lifesaver for advanced users, as most of them have multiple monitors connected to their PC.
How to Change Primary and Secondary Monitor in Windows
- Change Primary and Secondary Monitors on Windows 11
- Change Primary and Secondary Monitor in Windows 7
- Change Primary and Secondary Monitor in Windows 10
- Using Nvidia Control Panel, Change Primary Monitor in Windows 10
- Change Primary Monitor Using AMD Radeon Settings in Windows 10
Note. Consider connecting HDMI to the monitor you intend to use as your primary display.
Some users claim that a monitor connected via HDMI is indeed considered the main monitor. It may not be possible for all of you to benefit from this, but some of you may.
1. Change primary and secondary monitors to Windows 11.
Follow these instructions to change the primary and secondary displays in Windows 11:
- To access Windows settings, use Win+I.
- Make sure the System tab is selected.
- On the right, select the Display option.
- Expand the Multiple Displays section.
- To select a monitor as your primary monitor, click it.
- Select an option to make this the default display.
2. Change primary and secondary monitor in Windows 7
On a computer running Windows 7 and with multiple monitors connected, you can easily switch the primary monitor:
- Right-click an empty area on the desktop.
- On the Screen Resolution tab, click.
- All computers connected to the computer will be visible if you change the appearance of the display.
- Next to each image is a number on the screen.
- The monitor currently configured as your computer’s primary monitor has a 1 in the center of the screen.
- To select the monitor you want to use as your computer’s primary display, click on it.
- Check the “Use this gadget as my primary monitor”box.
- Select Make this my primary display based on the version of Windows you’re using to enable it.
- This will tell Windows 10 to switch to the monitor you just selected as your primary display.
- The changes you have made to your computer’s display settings will take effect as soon as you click Apply.
- Close the Screen Resolution window by clicking OK.
3. Change primary and secondary monitor in Windows 10
The procedures are slightly different in Windows 10. The names change from time to time, but the basic approach remains the same.
- Anywhere on the desktop can be right-clicked to bring up the Display Settings menu.
- Select multiple displays to change the primary and secondary monitors in Windows.
- Here each screen will be shown in graphical form. The screens can be easily distinguished from each other.
- Select the monitor display you want to use as the primary display.
- Select Make this my primary display from the bottom navigation menu of the screen now.
- If the Set as Primary Display option is greyed out, the monitor you are trying to set as Primary Display is probably already installed.
- If your computer has graphics hardware installed, graphics application display settings may take precedence over system default settings.
- If so, launch the app and set it as your primary display on the settings screen.
- Also, make sure the displays are deployed.
- There will be no primary monitor unless the displays are extended because all monitors will be treated the same.
- On Windows 10, you can change your display settings to expand these displays.
4. Using the Nvidia control panel, change the primary monitor in Windows 10.
Your computer is equipped with an NVIDIA graphics card. On Windows 10, you can also change your primary display using your own settings program.
The NVIDIA Control Panel is what it’s called. Let’s start the procedures now.
- Right-click on the desktop and select NVIDIA Control Panel from the menu to launch the NVIDIA Control Panel.
- Select “Start”and type.
NVIDIA Control Panel» into the search bar. - You can change any setting after starting the NVIDIA Control Panel.
- It allows you to change the color, brightness, contrast, resolution and refresh rate of your display.
- To change the way your graphics card handles 3D applications and games, use the NVIDIA Control Panel.
- Look under the Display section on the left side and select Set up multiple displays.
- Make it your primary monitor by right-clicking on the display number you want to use as your primary monitor.
- After selecting “Apply”, click “Yes”to confirm your choice.
- At this point, your main display should be ready to use. If something went wrong, reread the instructions and correct the errors.
5. Change the primary monitor using AMD Radeon settings in Windows 10.
Windows 10 users can change their primary monitor using AMD’s customization software. AMD’s gaming control panel, Radeon Settings, was created to give gamers granular control over their PCs and games.
Numerous elements allow players to personalize their experience such as display choices, performance modifications, and game profiles.
- Right-click on the desktop and select “AMD Radeon Settings”from the context menu to access AMD Radeon settings.
- Double-click the Radeon symbol in the notification area while holding down the Alt key.
- Gamers can record and share gameplay videos using Radeon Settings, and even stream games live on Twitch or YouTube.
- Whether it’s a casual PC gamer or an avid gamer, Radeon Settings has something to offer.
- So be sure to check out Radeon Settings if you’re looking for more control over your PC and games.
- At the top of the window, select Eyefinity.
- To create a display group and enter your monitors, select Display Setup.
- You should be able to organize displays after creating this display group.
- Select this option to arrange your displays however you like.
- You can save your settings by exiting the software.
- Your primary display should be positioned where you want it on all of your monitors using the AMD Radeon settings.
Change primary monitor in Windows 10 and apply these display settings
Adjust monitor resolution
- Select “Display”by right-clicking on the desktop.
- The available monitors appear at the top of the dialog box results as blue numbered boxes.
- Each box is a monitor.
- Select the monitor you want to change the display.
- The “Advanced Display Options”link can be found at the bottom of the dialog box.
- Select the desired resolution by clicking the “Resolution”drop-down menu.
- Click “Apply”when you’re done.
Customize the display style of the monitor
- Select “Display”by right-clicking on the desktop.
- The available monitors appear at the top of the dialog box results as blue numbered boxes. Each box is a monitor.
- Select one of the following options by selecting “Multiple Displays”from the drop-down list.
- To make the display on the secondary monitor mirror the display on the main monitor, select Duplicate These Displays.
- To spread the desktop across all monitors, select Extend These Displays.
- To disable Monitor 2 and use only Monitor 1, select Show Only 1.
- To disable Monitor 1 and use Monitor 2, select Show Only 2.
- Click “Apply”when you’re done.
Set monitor position
- Select “Display”by right-clicking on the desktop. The available monitors appear at the top of the dialog box results as blue numbered boxes.
- Make sure display “1”is on the left and monitor “2”is on the right if you want the mouse to move from monitor to monitor from left to right.
- Click, drag and drop the blue numbered boxes in the desired location to move the monitors.
- Click the “Identify”link if you’re not sure which monitor is labeled “1”or “2”.
- The assigned monitor number will be displayed on the screen of each monitor.
- Click “Apply”when you’re done.
Conclusion
A dual monitor configuration allows you to work more productively. Switching between primary and secondary monitors is necessary to obtain the desired results.
Going to the Display Settings menu is a quick fix. Another approach is to access a dedicated control panel for your GPU. Additional options are available here that may be useful for your customization.
Follow all the steps above to change primary and secondary monitors in Windows 10, 11, 7.
All methods are easy to implement and will help you enjoy working on two monitors.
FAQ
How to change primary and secondary monitor in Windows 10?
– Select “Display”by right-clicking on the desktop. The available monitors are displayed at the top of the result dialog box.– Each field represents a monitor. “Make this my primary display.”The secondary display will immediately switch to the other monitor. – To apply the changes, click Apply.
How to change primary and secondary monitor in Windows 11?
In Windows 11, you must press the Win + I button to access Windows settings to switch between primary and secondary monitors. Next, expand the Multiple Displays option under System > Display. If you look, the “Make this my primary display”checkbox is greyed out. This means that the monitor you have selected is the primary display. You must select the desired monitor and check the corresponding box.
What is the name of the second monitor?
The use of multiple physical display devices such as monitors, televisions, and projectors to expand the area available to computer programs running on the same computer system is known as a multi-monitor, also known as a multi-screen and multi-head.
Why are my dual monitors showing the same thing?
When you right-click on the desktop, choose “Screen Resolution”from the menu. Use the “Multiple Displays”drop-down menu in the dialog box to select “Extend these displays”. Click the “Detect”button on the screen if that doesn’t work.