
Taking screenshots is easy and useful. But it’s important to find the right methods for taking screenshots, so you can use whichever method you like. Some like to use keyboard shortcuts, while others like to click on apps.
If you want to know the best way to take screenshots on Dell laptops, desktops, Chromebooks, and tablets, jump to the right section and learn the easy steps .
How to Take a Screenshot on Dell Laptops and Desktops (Windows 11, 10, 8, 7)
- Scissors
- Print Screen Hotkey (PrntScr)
- Snip & Sketch (best method)
- Xbox Game Bar
- Third party screenshot apps
1. Scissors
The Snipping Tool comes preinstalled with Windows 7, 8, 10, and 11. It first appeared in Windows Vista. We all know that Vista was not a success, but the Snipping Tool was. That’s why it’s still a popular and easy way to take screenshots on any version of Windows.
1.1 Quickly take a screenshot with the Snipping Tool
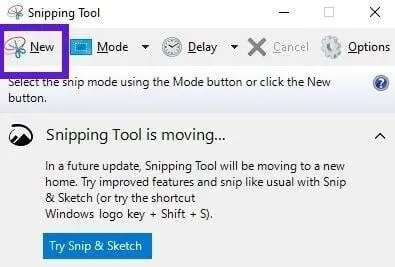
- Open the start menu, type “
snipping tool“and open the first application. - You will see a small window with several options.
- Open the window where you want to take a screenshot, go to the Snipping Tool and click the “Create”button to quickly take a screenshot.
- The entire screen will turn gray and the mouse cursor will change to a crosshair cursor.
- Click and drag the cursor to take a screenshot. Release when you’re done.
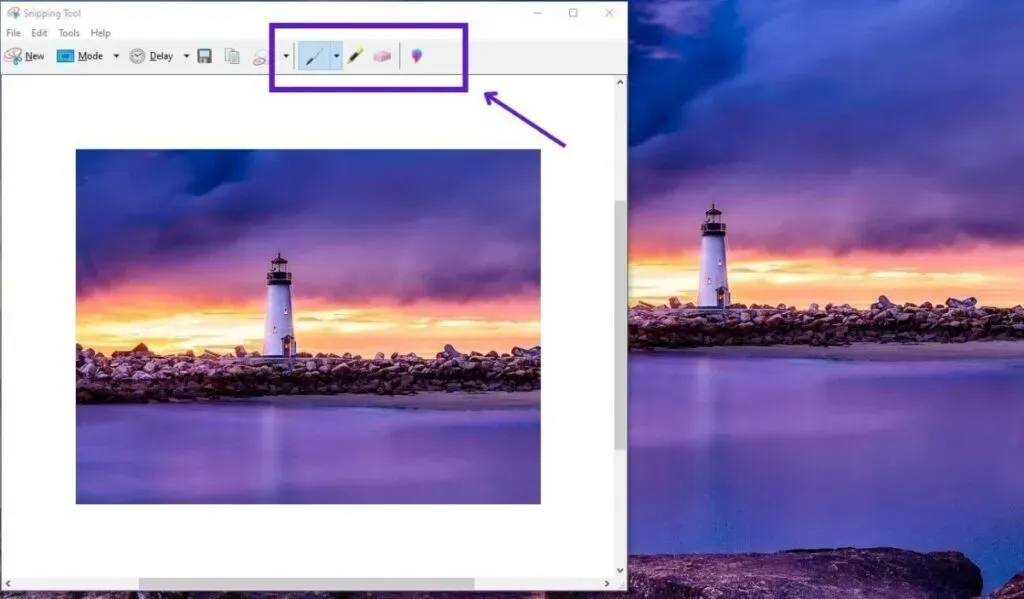
- The screenshot will open in the Snipping Tool where you can either save it directly or edit it before saving.
- For editing, you can use the pen, marker and eraser. Click the balloon icon to open the image with Paint 3D for further editing.
- Now click the floppy disk icon to save the image.
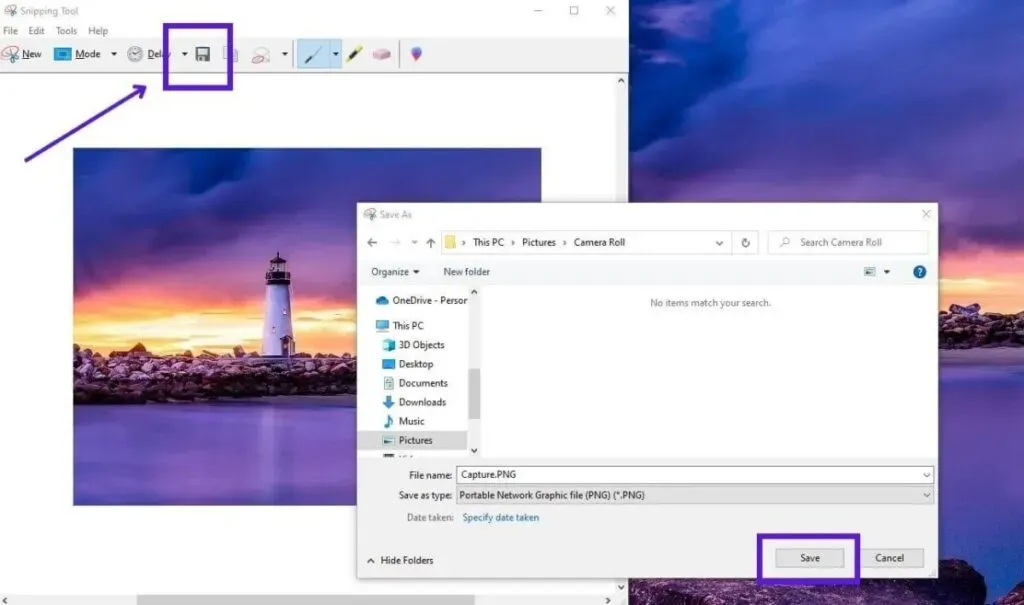
- Enter a name, choose a location and format for saving the screenshot.
- The screenshot is saved in PNG format by default. You can change the format by clicking the drop-down menu next to “Save as type”and selecting the format you want. It offers PNG, JPG, GIF and MHT.
- For further or correct editing, open the screenshot with the photoshop application.
1.2 Use the screenshot mode in the Snipping Tool
You know how to quickly take a screenshot, but there are screenshot modes that make it easier to choose.
- Open the Scissors tool by clicking the start menu, typing “cut tool”and launching the application.
- When the Snipping Tool opens, click “Mode”.
- A small list will appear with three options. You can select Freeform Clipping, Rectangular Clipping (default), and Window Clipping.
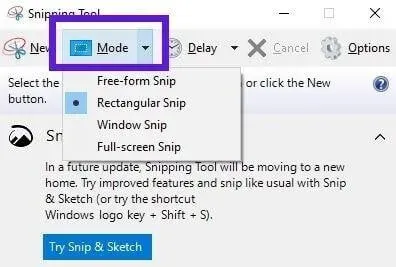
- With Free-form Snip, you can take a screenshot by moving the mouse cursor in any direction and in any pattern, just like using a pen. In most cases, this is not the recommended method for taking screenshots.
- Rectangular Snip allows you to take screenshots in any rectangle or square shape. In this mode, the choice is easier.
- Using Window Snip is useful if you want to take a screenshot of the entire active window. You can select a window and click to capture. No need to click and drag to select an area.
For some people, the Snipping Tool is a slow method for taking screenshots, but it has many benefits.
- With the Snipping Tool, you can select a part of the screen to capture. You don’t need to crop the image later to suit your needs. You can select an area when taking a screenshot.
- You can also select the location, image name, and format.
- It provides editing options for editing an image before saving it.
- The screenshot you take is automatically copied to your clipboard, so once you take a screenshot, you can directly paste it into any chat or document without saving it.
The Snipping Tool also has some limitations. For example, you cannot take screenshots of lists and menus that disappear when you click anywhere else.
For example, you can’t take a screenshot of the Start menu with the Snipping Tool. You will open the start menu, but when you try to invoke the Snipping Tool, the start menu will disappear.
In addition, you also cannot take screenshots of full-screen games and videos with the Snipping Tool.
If you’re having these issues, use methods 2 and 3 to take screenshots.
2. Hot key Print Screen (PrntScr)
Dell laptops and many other brands have a special key for taking screenshots – the Print Screen key. Label options include PrintScreen, PrntScr, PrtSc, PrtScn, and PrtScn. When you press a key, it takes a screenshot of the entire screen. Here’s how to use it:
- Open a window or fullscreen game/video you want to capture.
- Press the PrntScr key on your keyboard. It is located in the top row of the keyboard. The screenshot will be taken and saved in the Pictures folder. Full location: This PC > Pictures > Screenshots.
- If you didn’t take a screenshot, press the Windows logo key + PrntScr key or Fn key + PrntScr key. Fn is a function key.
- Moreover, to take a screenshot of a specific window, press ALT+PrntScr.
The Print Screen method is quick and easy. Its main advantage is that it allows you to take screenshots of full-screen programs so that you can easily take screenshots of any video or game.
Plus, it also doesn’t disappoint when taking screenshots of lists and menus that disappear if you click elsewhere. You can open the menu and press the shortcut keys to take a screenshot.
The Print Screen method is not always good.
- Due to its nature, it cannot allow the user to select the image’s location, name, and format.
- You also don’t have the option to edit the image before saving it.
- On top of that, in most cases there is no visual cue when a screenshot is taken using this method. So, if you are new to this method, you might have to go to the specified folder to check if the screenshot was taken or not.
- There is no way to select the area of the screen you want to capture as either the entire screen or the active window is captured.
If these shortcomings annoy you, use Snip & Sketch to capture screenshots.
3. Snip & Sketch (best method)
If you are using Windows 10 or 11, you have another simple yet powerful screenshot tool that comes preinstalled – Snip & Sketch. It is now considered by Microsoft as the main screen capture app, although you can still use the Snipping Tool.
Here is how to use Snip & Sketch on Dell computers:
3.1 Take a screenshot by opening the Snip & Sketch app
- Click the start menu, type “snip and sketch”and launch the app.
- Open the window you want to take a screenshot of.
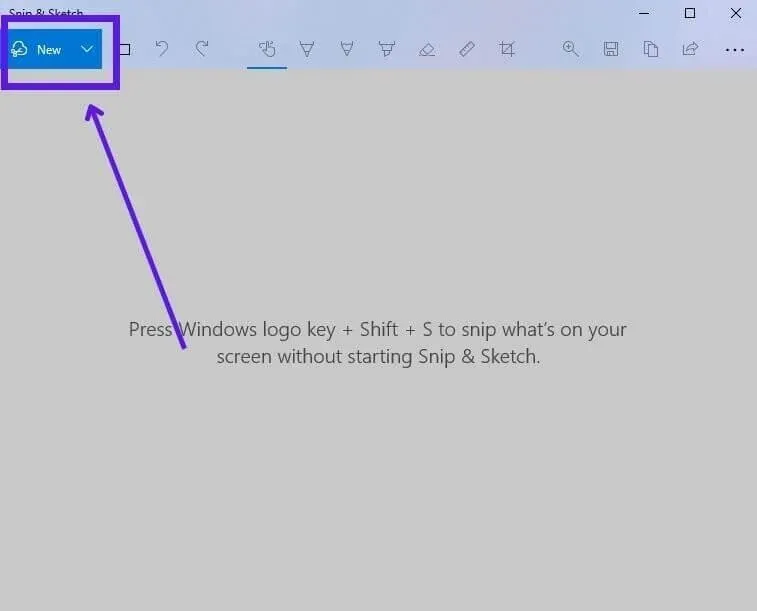
- In Snip & Sketch, click the “Create”button.
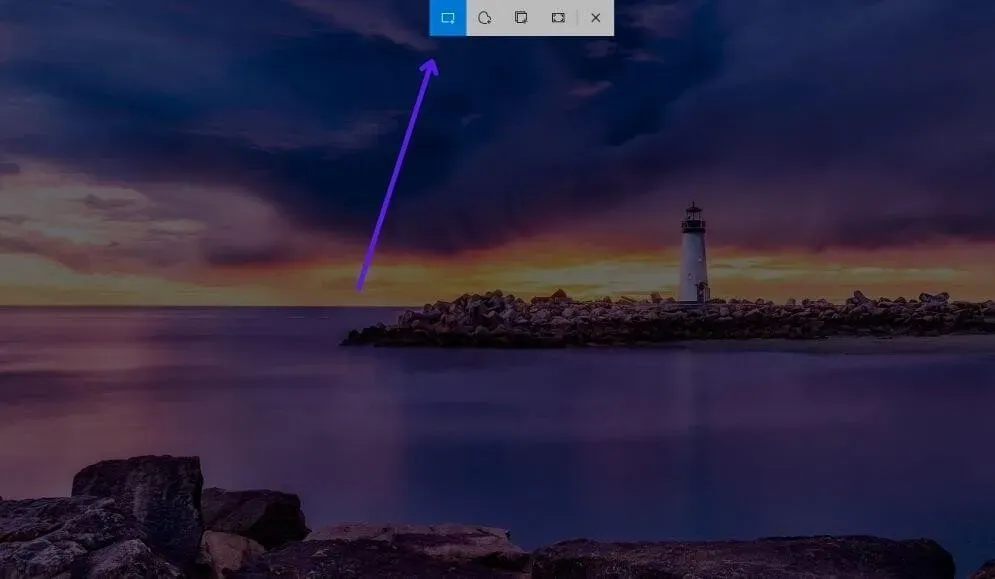
- A dark overlay will appear on the screen. This means the screen is ready to be captured.
- Click and drag the mouse cursor to take a screenshot. The default screenshot mode is Rectangular Slice mode. You can choose Freeform Snip, Window Snip and Fullscreen Snip.
- When a screenshot is taken, it is copied to the clipboard and you can also access it from the notification center.

- When you click on the captured screenshot, it will open with Snip & Sketch where you can edit it or save it directly.
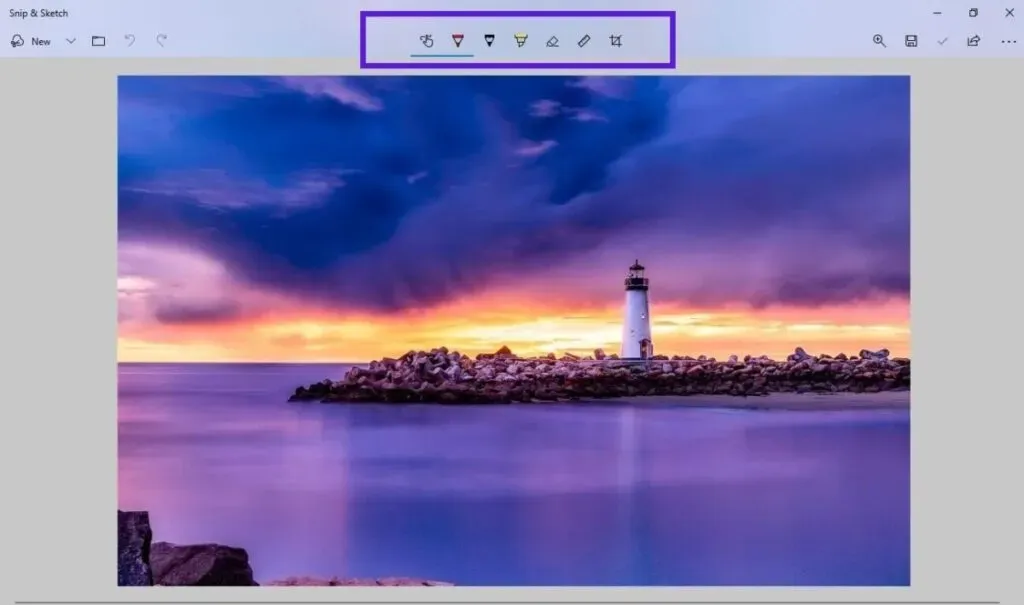
- After editing, click the floppy disk icon in the toolbar, or press CTRL + S to save a screenshot.
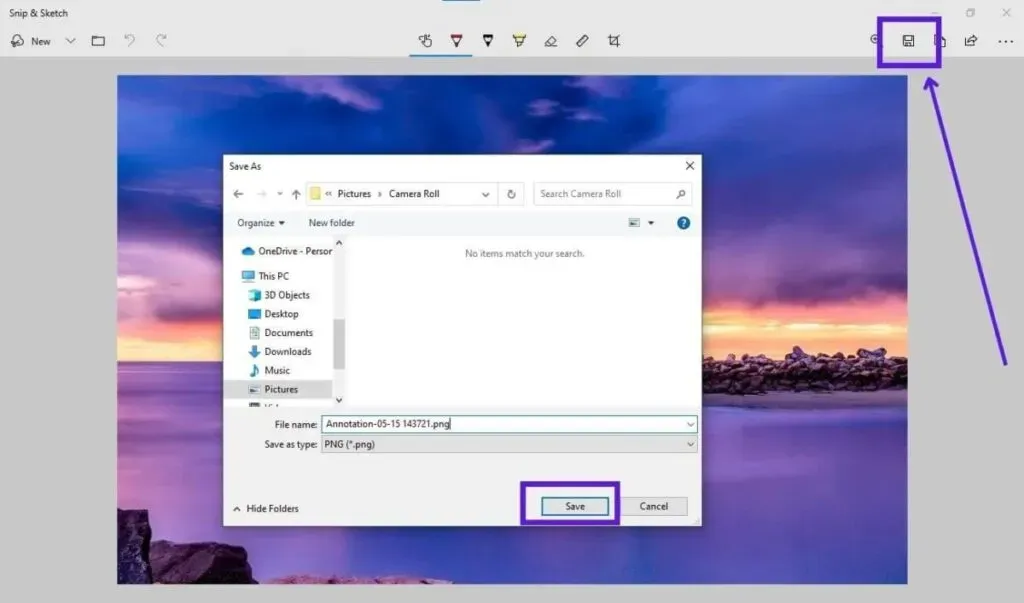
- Save the screenshot by entering a name and choosing a location and format.
3.2 Taking Screenshots with the Snip & Sketch Keyboard Shortcut (Quick Method)
If you want to quickly capture images or take a screenshot of menus or lists that disappear if you click anywhere else, use the Snip & Sketch hotkey.
- Open the screen you want to capture.
- Press the Windows + SHIFT + S keys at the same time.
- You will see a dark overlay on the screen. Click and drag the mouse cursor to take a screenshot. This also works for full screen videos and games.
Snip & Sketch is as good as it gets because:
- You can select a part of the screen to take screenshots.
- It easily takes screenshots of full-screen programs. What’s more, it can also take screenshots of menus and lists that disappear when you click elsewhere.
- You can choose a name, location, and image format.
- You get editing tools to edit the image before saving it quickly.
- The captured screenshot is copied to the clipboard, so you can use it anywhere by pressing CTRL + V.
4. Xbox Game Bar
Xbox Game Bar is a tool for recording and capturing the screen in games. Like the options above, it is also preinstalled in Windows 10 and 11. If you use the above three methods, you won’t need this option as it’s not recommended unless you’re gaming or taking screenshots.
But if you want to capture screens while playing, you can use the Print Screen, Snip & Sketch or Game Bar method.
- Open the start menu, type “
game bar“and open the application. - Several widgets will open and your screen will go dark.
- Click the camera icon on the widget in the upper left corner of the screen.
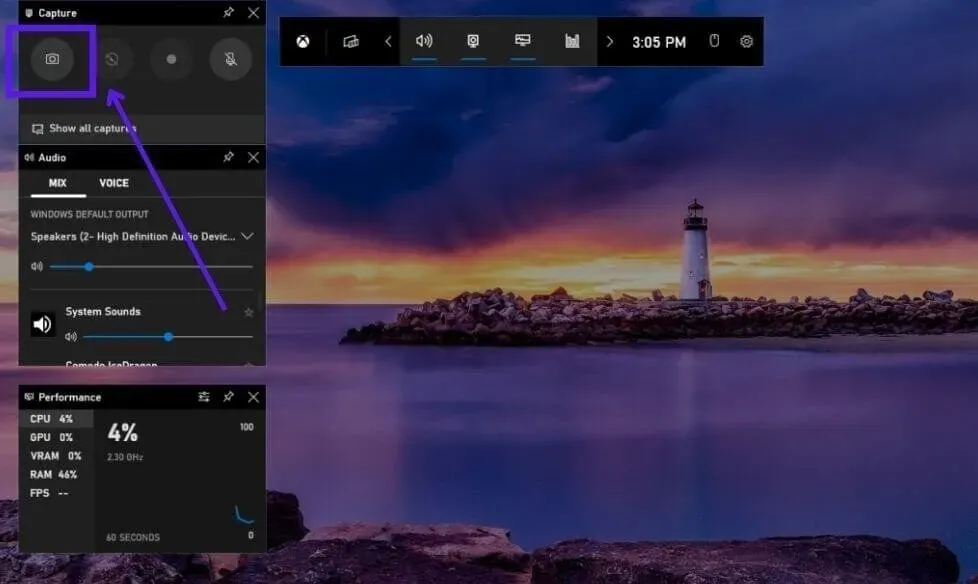
- You will receive a notification that the screenshot has been taken.
- Screenshots are saved in This PC > Videos > Snapshots.
Game bar only captures images of full-screen programs, so it’s useful for gamers and those who want to take screenshots of full-screen apps. Otherwise, you have better options in Snipping Tool, Print Screen, and Snip & Sketch.
5. Third party screenshot apps
If you want to explore other apps that allow you to take screenshots, you can search the web. Many free tools take screenshots and allow you to make screen recordings.
- Open a web browser and visit Google.
- Search for “free screenshot tools for Windows”.
- Go to several websites and install some applications.
- Find the app that works best for you.
- Delete all others.
How to take screenshots on Dell tablets?
Windows runs on most Dell tablets, but some also have Android.
- Take Screenshots on Dell Windows Tablets
- Take a Screenshot on Dell Android Tablets
1. Take Screenshots on Dell Windows Tablets
All Dell tablets running Windows 8.1, 10 or 11 can take screenshots just like Windows laptops or desktops. So you can use the screenshot methods in Dell Windows laptop section.
The best methods for taking screenshots on Windows are the Snipping Tool and Snip & Sketch. You don’t need to install anything with them as they are pre-installed and free to use.
How to use the Print Screen key on a tablet?
Dell tablets or any other tablets do not have a Print Screen key for taking screenshots. Instead, you can take screenshots using the tablet’s physical buttons.
- Bring the page, window, or application you want to capture.
- Press the power + volume down keys at the same time.
- A screenshot of the entire screen will be taken.
2. Take a Screenshot on Dell Android Tablets
Android tablets work a little differently than Windows tablets. You have the following options for taking a screenshot on Dell Android tablets.
2.1 Use physical keys
- Raise the screen you want to capture.
- Press the power button + volume down button on your tablet to take a screenshot of the entire screen.
- You may get a popup where you can edit and save the screenshot.
2.2 Take a screenshot using the quick settings menu
There is a screenshot option in the quick settings menu. So you use this if you don’t like pressing the power button and volume keys frequently.
- Navigate to the screen you want to take a screenshot of.
- Swipe down from the top and tap the screenshot button in the quick settings menu.
- The entire screen will be captured.
- Edit and save the screenshot.
2.3 Installing third party applications
The Google Play Store is filled with many free and paid screenshot and screen recording apps with various features.
- Open the Google Play Store.
- Find “Application Screenshot”.
- Look for apps with good ratings and high downloads.
- Install some of them to test them out.
- Keep the best and delete the rest.
How do I take screenshots on a Dell Chromebook?
- Take screenshots with the screen capture tool
- Take a quick screenshot with a keyboard shortcut
1. Take Screenshots with the Screen Capture Tool
Google Chrome OS has a built-in screenshot tool called Screen Capture. You can access it by pressing the shortcut keys or from the quick settings panel.
1.1 Accessing a screenshot using a keyboard shortcut
- Make sure you are in the window you want to capture in order to take a screenshot.
- Press CTRL+SHIFT+Show Windows at the same time.
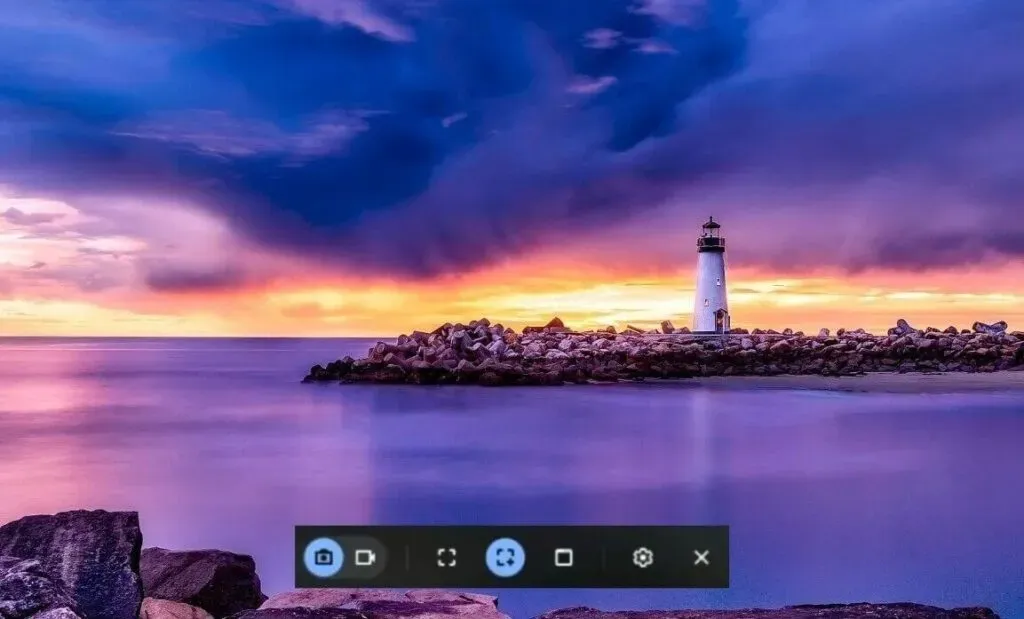
- The Screen Capture toolbar will appear at the bottom of the screen. The tool is small, but consists of three sections.

- The first section has a camera icon for screenshots and a video camera icon for screen recording. The camera icon is selected by default.
- The second section allows you to select the screenshot mode. It offers full-screen screenshots, rectangular screenshots, and screenshots of the active window. Rectangular Screenshot Mode is the default mode.
- The third section has two icons. One for the settings and the other for the close button.
- To take a screenshot, click and drag your mouse over the part of the screen you want to take.
- If you want to change the mode, click the mode, such as full screen mode, and take a screenshot.
- You will receive a notification that your screenshot has been taken. You can click “Show Folder”to navigate directly to the folder, or manually navigate to the screenshots folder. Screenshots are saved in the Downloads folder.
- You can also change where screenshots are saved. Call up a screenshot by pressing the shortcut keys. Then click the settings icon and choose “Choose Folder”.
1.2 Accessing a screenshot from the quick settings panel
If you don’t want to hit keyboard shortcuts every time or tend to forget keyboard shortcuts, you can access the tool from the Quick Settings panel:
- Click on the time in the lower right corner of the screen.
- A panel will appear. Select “Screenshot”from the various options on the panel.
- The screen capture tool will appear.
- Take a screenshot or record your screen.
2. Take a quick screenshot with a keyboard shortcut
If you want to take multiple screenshots, you may need a dedicated shortcut key to press whenever you want to take a screenshot. Chrome OS also offers this. Takes a screenshot of the entire screen.
- When you are on the screen you want to capture, press CTRL + Show windows at the same time.
- A screenshot of the entire screen will be taken.
- Navigate to your Downloads folder to access screenshots.
Conclusion
Capturing screenshots on any Dell laptop, tablet or Chromebook is easy because no matter what operating system you’re using, you’ve got pre-installed tools to easily take screenshots.
FAQ
Which button is a screenshot on the keyboard?
The Print Screen (PrntSc) button on the keyboard takes a screenshot when certain keys are pressed. Try these keyboard shortcuts: – Windows logo key + PrntSc key – Fn key + PrntSc key (Fn is a function key)
How to take a screenshot on Dell without the Print Screen button?
If your Dell laptop is running Windows, you can use the Snipping Tool to take screenshots. You don’t need the “Print Screen”button for this. – Open the Start Menu, type “”snipping tooland open the first app. – Click “Create”and select an area to capture the screenshot.
How to take a screenshot without Windows Key or Print Screen?
You can use Snip & Sketch or the Snipping Tool to take a screenshot without the Windows key or Print Screen.- Type “snipping tool“or “snip & sketch“and open the app from the start menu.- Click “Create”and take a screenshot.
How to manually take a screenshot in Windows?
To manually take a screenshot in Windows, use the Snipping Tool or Snip & Sketch.– Open the Start menu, type “”snip & sketchor “snipping tool,”and launch the application. – Select “Create”and take a screenshot manually.