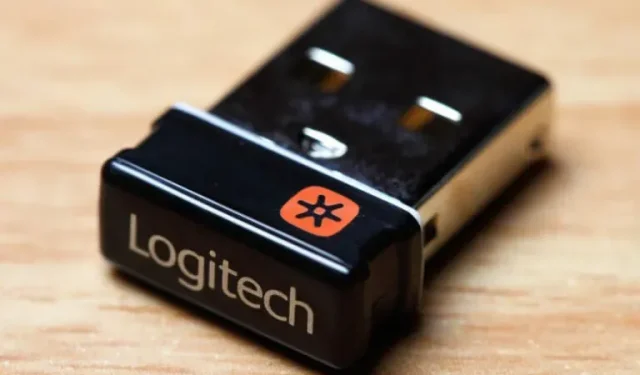
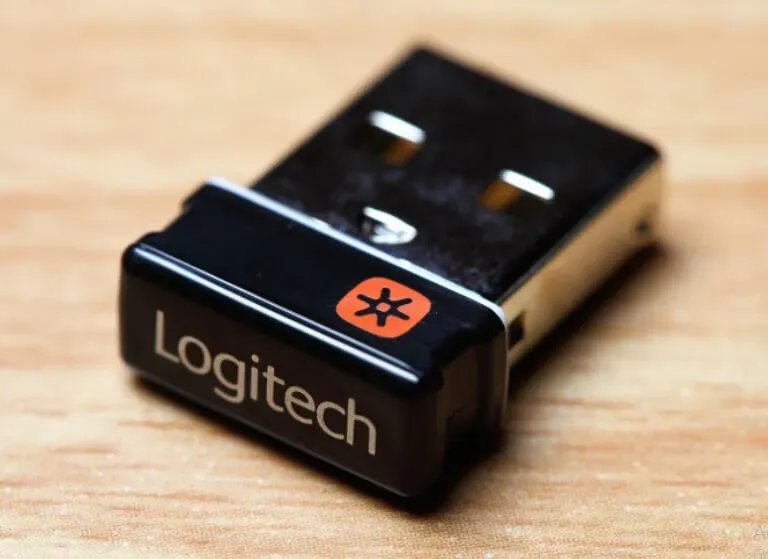
The Unifying receiver is a small device used to receive signals from wireless devices. And the Logitech Unifying Receiver is used to receive and control all Logitech wireless devices connected to your PC or laptop.
Usually the receiver looks like a compact flash drive. You can control your wireless devices with one merging receiver if they are included.
So if you are one of those users who are having technical issues connecting their Logitech peripherals to their Unifying receiver. Then you are in the right place. This article discusses errors you may encounter while using the Logitech Unifying Receiver and how to fix them.
What are the main reasons for a Logitech Unifying receiver not working?
Below is a list of reasons why users encounter this error:
- Windows updates. Some potential Windows updates are blocking all Logitech peripherals from connecting to the Logitech Unifying receiver. Remove updates that interfere with your receiver.
- There is no Logitech Unifying software on the PC. If your PC or laptop does not have the Logitech Unifying software, you may encounter this error.
- Configuration mismatch. The basic configuration settings of your Unifying receiver may be incorrect, resulting in an inoperable error.
- Missing or corrupted driver files. Any equipment requires appropriate software to operate. USB driver files such as ‘usb.inf’ and ‘usb.PNF’ may be missing or corrupted resulting in this error.
- Third Party Applications. If you already have similar software, such as MotioninJoy, installed on your computer, a conflict that occurs due to such logic can lead to an error. Disabling third party application, local driver files and software may resolve this error.
- Power saving function. If you set “Allow this computer to turn off this device to save power”, the USB port may be disabled to increase battery life.
Solutions to Fix Logitec Unifying Receiver Not Working Error
Below is a list of possible solutions that can resolve the Logitech Unifying Receiver is not working error on your PC:
- Turn your computer off and on again
- Install the Logitech Unifying Software
- Download and install Logitech SetPoint
- Remove the latest Windows update
- Disable Power Save for USB
- Check the integrity of the USB driver files
- Removing problematic software
- Update Logitech Receiver Drivers and Firmware
1. Turn your computer off and on again
Turning the power on and off means draining every iota of electricity running through your computer. Cycling the power will force your PC or laptop to refresh all temporary memory and configuration settings.
- Turn off your computer.
- Disconnect all cables and other things from your PC.
- Disconnect your computer’s power cable.
- Press and hold the power button for a minute.
- If you are using a laptop, disconnect the battery.
- Wait about 5 minutes before putting all connections back in place.
- Turn on your computer.
Check if the issue is resolved by shutting down and shutting down your computer.
2. Install the Logitech Unifying driver software.
Logitech launched the Unifying software to ensure smooth operation and a seamless user experience. Installing this software on your PC or laptop can make it easier to sync the receiver with your computer and other Logitech devices. It also helps you manage multiple peripherals and add or remove devices using the Unifying receiver.
- Visit the official Logitech Unifying software web page.
- Select the type of OS platform you are using.
- Download the installation file to your computer. Click Download Now.
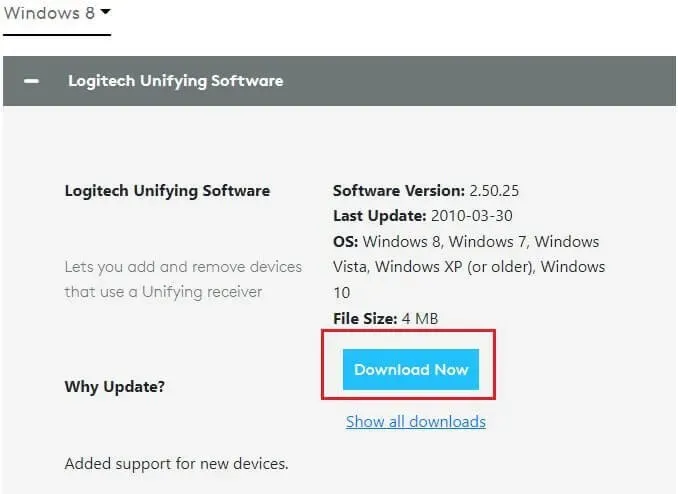
- Run the file.
- Restart your computer once after installation.
- Then launch the Logitech Unifying software in administrator mode.
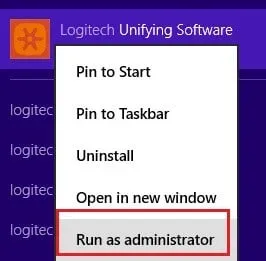
You can now try connecting your Logitech devices to the receiver and see if they work properly.
3. Download and install the Logitech SetPoint software.
Logitech SetPoint lets you customize mouse and keyboard button styles, touchpad and numeric keypad settings, and other device settings on your PC. Another plus of this software is that it automatically detects any Logitech devices connected to the PC.
- Click this link to visit the Logitech Support SetPoint website.
- Select your OS version from the drop-down menu, then click Download Now.
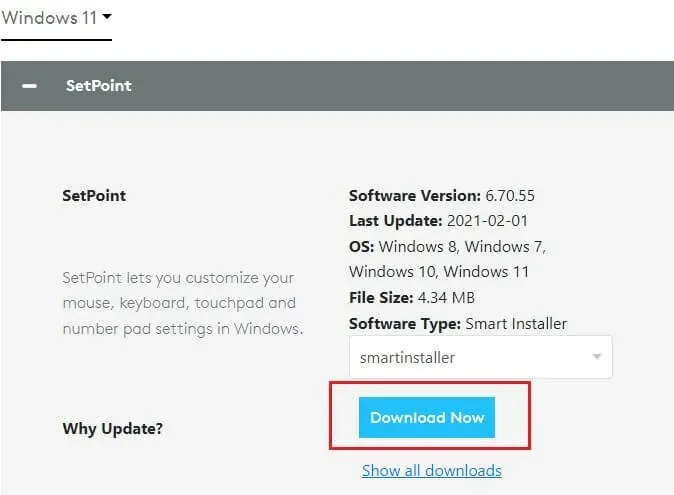
- Set the setpoint. Restart your computer after installation.
- Right-click the SetPoint shortcut on the desktop and select “Run as administrator”.
If everything is working correctly, you may see notifications for newly connected Logitech devices.
4. Uninstall the latest Windows update.
It was discussed in the previous section that the “not working” error can occur after users have installed a certain Windows update. Therefore, if other solutions do not work for your computer, try uninstalling the latest Windows updates.
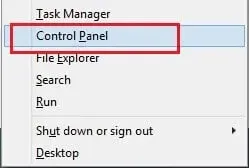
- Press the Windows key + X key. Click on the “Control Panel”option.
- Click Windows Updates.
- Select the “View installed updates”option from the left pane.
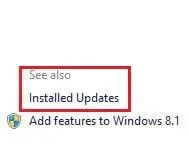
- Right-click on installed updates and select Uninstall.
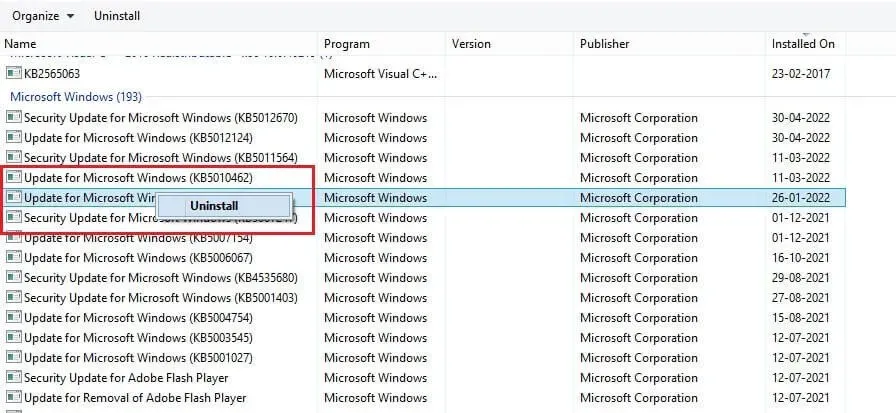
- Once uninstalled, restart your computer properly.
Now try to reinsert the Logitech Unifying receiver. Check if it works correctly. If so, take precautions to not install that particular Windows Update again.
5. Disable the power saving feature for the USB receiver.
Power saving features are standard on laptops. The power saving feature closes unnecessary programs to extend battery life. So if you find that your mouse or keyboard has stopped working, it could be the power saving feature that killed the USB driver. Turning it off may help resolve your Logitech Unifying receiver not working issue.
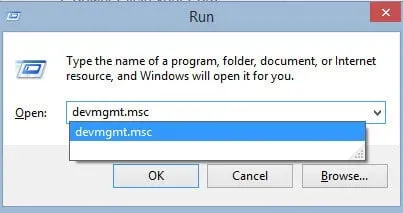
- Open the Run dialog box by pressing the Windows key + R.
- Enter “
devmgmt.msc“and click “OK”.
- Scroll down the Device Manager list and expand the Universal Serial Bus Controllers option.
- Locate your Logitech Unifying receiver. The name can contain the keyword “USB Enhanced Host Controller”.
- Right-click the device and select Properties.
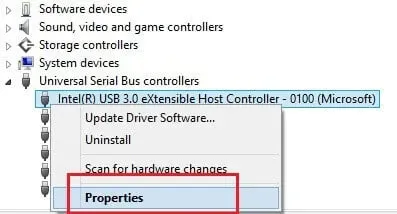
- Click the Power Management tab.
- Uncheck “Allow this computer to turn off this device to save power”.
- Click OK.
- Restart your computer and check if the receiver and devices are working properly.
6. Check the integrity of the USB driver files
Try verifying the integrity of the USB drivers. Each hardware requires the appropriate software (driver) to work properly. The USB driver is responsible for the smooth operation between USB devices and the computer. Therefore, if the driver is missing or some files are corrupted, the USB port will not work properly.
- Open Windows Explorer on your computer.
- Enter the following in the address bar “C:\Windows\INF”
- Find two files: “usb.inf”and “usb.PNF”.
- You can type usb.inf and usb.PNF into the Windows Explorer search box.
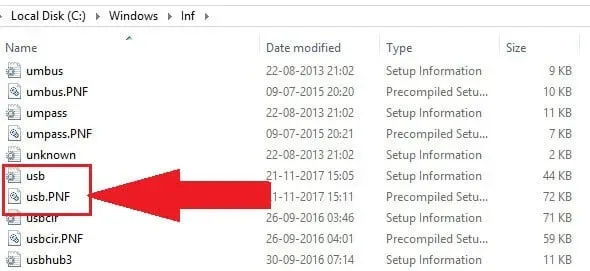
- If they are not in the folder, then download them online.
- Alternatively, you can copy these two files from another computer that has the same version of the operating system.
- After installing the required driver, restart your computer.
Now you can check if the problem is fixed and your computer can connect to all Logitech products.
7. Remove problematic software
Conflicting third party software can also be a major cause of the receiver not working properly. This situation is more noticeable with software similar to the Unifying receiver. One common example of such Software is the MotioninJoy Gamepad tool.
Removing similar software from your PC or laptop can potentially fix the error that is bothering you.
- Press Windows + X. The power menu will appear on the screen.
- Select the “Control Panel”option.
- Go to “Programs”-> “Uninstall a program”.
- In addition, you can also run the code “
appwiz.cpl“in the “Run”dialog box. - Right click on the software or program you want to uninstall.
- Click Remove.
- The uninstall wizard will start working to complete the process. Wait for the process to complete.
- Restart Windows once after the operation.
Now check if the issue has been resolved. Otherwise, you may need to erase the associated Software (MotioninJoy) device drivers.
Removing device drivers associated with third-party software
- Open the Run dialog box by pressing the Windows + R keys on your keyboard.
- Type “
devmgmt.msc“and press the enter key. - Locate any device drivers installed by the Software.
- Right-click the driver and select Uninstall.
- Click “OK”when asked to confirm.
Wait! The process has not been completed yet. Some files remain on your system. Go to the registry and find the destination folder for these files. Then erase them.
Delete DS3 files from registry
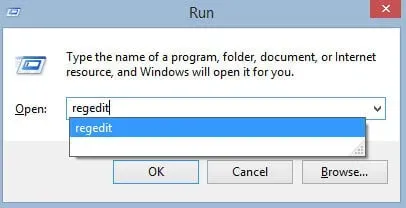
- Open the Run dialog box by pressing the Windows key + R.
- Enter
regeditthe text box and click OK.
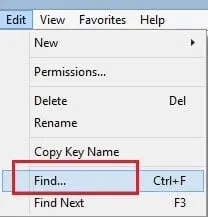
- On the top toolbar of the Registry Editor, click Edit, then Find.
- Type “
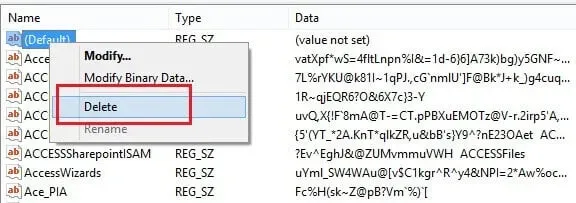
DS3“in the search bar, then click “Search”. - The search is complete, then right-click on each DS3 file on the screen and select Delete.
- Close the registry and restart your computer.
- Plug in all your Logitech and Unifying Receiver devices and check if they are working properly.
8. Update your Logitech receiver drivers and firmware.
Updating the Logitech Unifying receiver driver and associated device firmware may resolve the error your computer is experiencing. The process is very simple and automated. Follow the step by step guide and update all Logitech drivers and firmware.
- Download Logitech driver and firmware updates from this link.
- Depending on your computer’s operating system, you may be able to download a Mac- or PC-compatible file.
- Run the file. The Logitech Firmware Update tool will launch on your computer.
- Click Continue.
- The program looks for Logitech devices connected to your computer and requires a firmware update.
- If the device needs to be updated, select the “Update”option.
- And if all devices are up to date, select Close.
- Restart your computer and connect your Unifying Receiver and Logitech devices. Check if they are in proper working order.
Conclusion
Don’t worry if you find that your Logitech Unifying receiver is not working and cannot connect to your Logitech peripheral. This article provides solutions to overcome this error and restore the optimal connection state. You need to pinpoint the source of the error and apply the appropriate fix.
Frequently Asked Questions (FAQ)
Why isn’t my Logitech Unifying receiver working?
According to several user reports, the Logitech Unifying receiver stopped working after downloading a certain Windows Update package. Another reason why the receiver may be blocked is a conflict with similar third-party software. MotioninJoy is one such example. Other minor causes include the computer’s power saving feature, missing or corrupted driver files, Logitech Unifying software missing from your PC or laptop, etc.
How do I get my Logitech Unifying receiver to work?
The first solution you can try is to uninstall the specific Windows update that is causing this problem. Second, you can install the latest Logitech Unifying software to control your receiver and Logitech peripherals. Powering your PC or laptop off and on, uninstalling conflicting third-party software, repairing missing or corrupted driver files, disabling the USB power saving feature, etc. can also resolve the issue.
Do I need to install Logitech Unifying Software?
The Logitech Unifying software is a great addition to your computer if you want to control your Logitech peripherals with a single receiver. The software allows you to manage all of your Logitech devices connected to your computer. This software makes it easy to add and remove devices. So the answer is YES. You need to install the Logitech Unifying software.
How do I reprogram my Unifying Receiver?
Reprogramming your Unifying receiver requires the Logitech Connection Utility. Download the utility from the official Logitech website. Run the file in administrator mode. Follow the on-screen instructions given by this utility and you will be prompted to turn your Logitech device on and off. Turn each Logitech peripheral on and off, and the Connection Utility does the rest.
