
For many of us, taking screenshots is a daily activity. They are easy to catch and serve many purposes. Your Lenovo laptop is also equipped with screen capture features that you can use without installing anything.
Let’s learn how to take a screenshot on Lenovo PC and tablet. Plus, if you’re using a Lenovo Chromebook, we’ve got you covered too.
5 Ways to Take a Screenshot on Lenovo Laptops (Windows 11, 10, 8.1, 7)
Are you using a Lenovo IdeaPad, ThinkPad, Yoga, or any other Windows model? Use these methods to capture screenshots:
- Print Screen Shortcut Key
- Scissors
- Fragment and sketch
- Game panel
- Free Screenshot Apps for Windows
1. Print screen shortcut key
If you are using any version of Windows and your keyboard has a Print Screen key, you can use it to take screenshots. The Print Screen button is written as PrntSc, PrntSn, PrtSc, or any other option.
It’s mostly found in the very top row of the keyboard with the Insert and Delete keys, but you should also look for it in the bottom row of the keyboard. You may also see a small scissor icon on the PrtScn key on some Lenovo laptops.
Okay, but how to take screenshots with it? I pressed the Print Screen button and nothing happened. If you’re interested, follow these steps to take a picture with a PrtSc dongle on a Lenovo PC:
- Open a window, game, video, or anything you want to capture.
- Press the Windows logo and PrtSc keys on your keyboard at the same time. It will take a screenshot of the entire screen and store it in This PC > Pictures > Screenshots. To make sure it worked, you need to check the folder.
- If the above key combination does not take a screenshot, press the Fn + PrtSc key at the same time. The Fn key is mostly found on the last row of the keyboard. Check the Screenshots folder again to make sure the screenshot was taken.
- To take a screenshot of the active window, press Alt + PrtSc at the same time.
The Print Screen screenshot method is a quick way to take a screenshot. Thus, it is suitable for users who want to take many screenshots in a short amount of time, or for any user who wants to capture the entire screen just by pressing keyboard shortcuts.
This method also allows you to take screenshots of full-screen apps so that you can easily capture the screens of any video or game. And since it doesn’t interrupt anything, you can continue watching or playing while taking screenshots.
Speaking of interruption-free, you can take screenshots of lists, menus, and dialog boxes that disappear when you click elsewhere with this method.
On the other hand, Print Screen is not for people who like to select a part of the screen to capture a screenshot of. What’s more, people who want to edit an image right away won’t like the Print Screen method. If you need these features, don’t skip methods 2 and 3.
2. Scissors
The connection between Microsoft Windows and the Snipping Tool is long and strong. Even though Microsoft is promoting its successor (Snip & Sketch), the Snipping Tool is a pretty good tool for taking screenshots. It comes pre-installed in Windows 7, 8.1, 10 and 11. For Windows 7, this is the best method for taking screenshots without installation.
Let’s learn how to use the Snipping Tool:
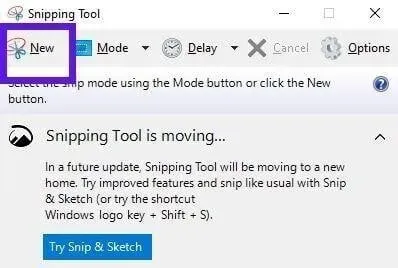
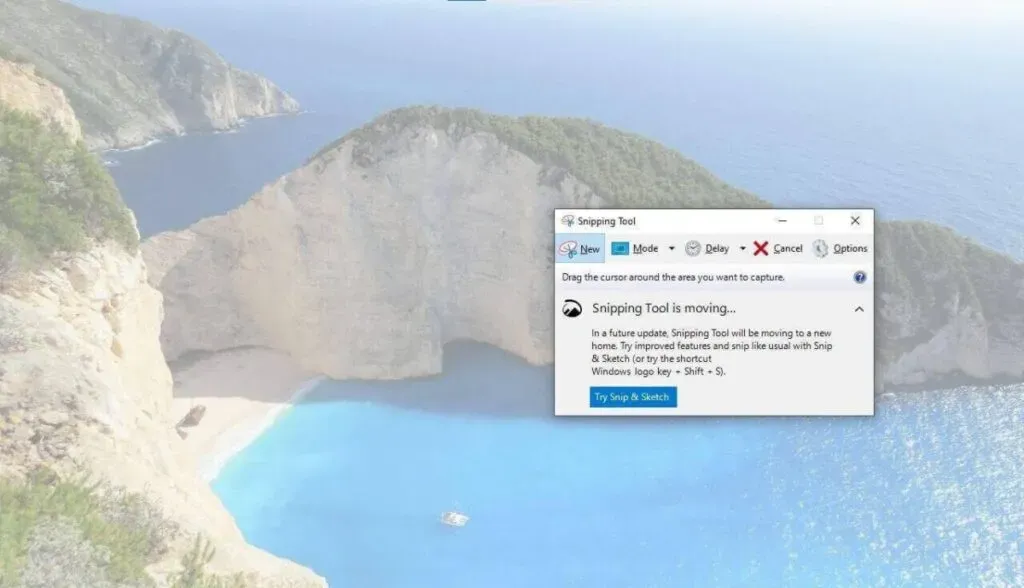
- To open the Snipping Tool, open the start menu, type “snipping tool”and launch the application.
- You will see a small application open.
- Click “Create”to take a screenshot. You can select the part of the screen you want to capture (custom screenshot). It is called the “Rectangular Cut”mode. This is the most efficient method and also the default option.
- If you want to take a screenshot of the active window, you can click Mode and select Window Snip.
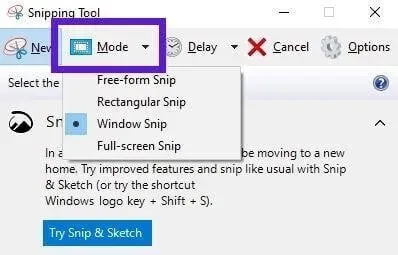
- Similarly, to take a screenshot of the entire screen, go to “Mode”and select “Full Screen Snapshot”. The moment you select an option, it will take over your entire screen.
- Also, if you want to take a screenshot without being limited to a rectangular or any other shape, select Freeform Crop. You can click and drag your mouse like a pen anywhere to take a screenshot.
- When you click “Create”, the entire screen turns gray. This means that you can now select a portion of the screen to capture.
- Click and drag the crosshair cursor to take a screenshot.
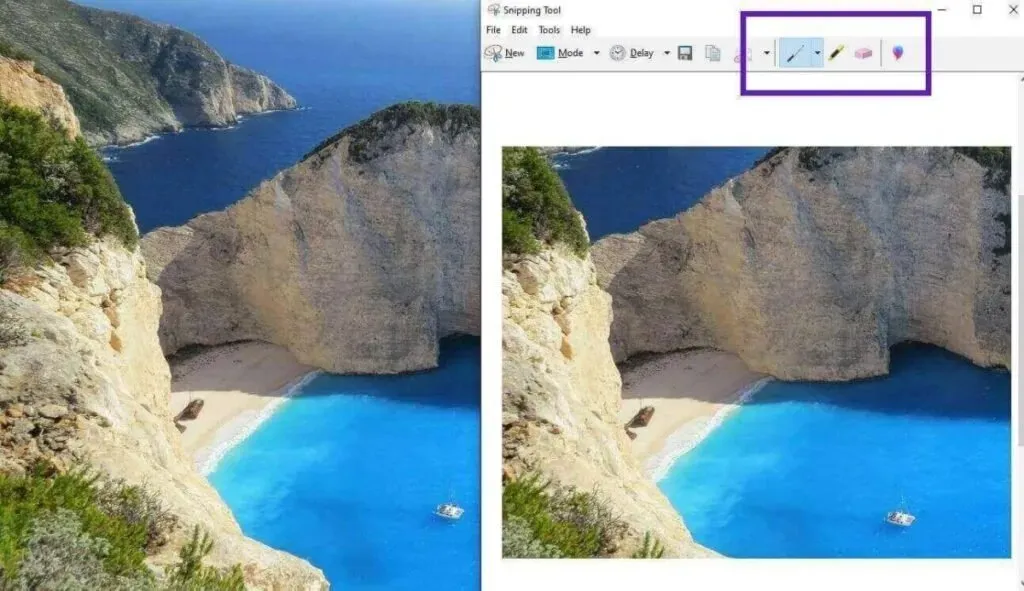
- The screenshot will open in the Snipping Tool with some editing options so you can quickly tag something or do something else and then save it. For editing, you have a pen, highlighter, and eraser in the toolbar. For further editing, open it with Paint 3D by clicking on the balloon icon.
- To save the image, click the floppy disk icon in the toolbar, or press CTRL+S on your keyboard.
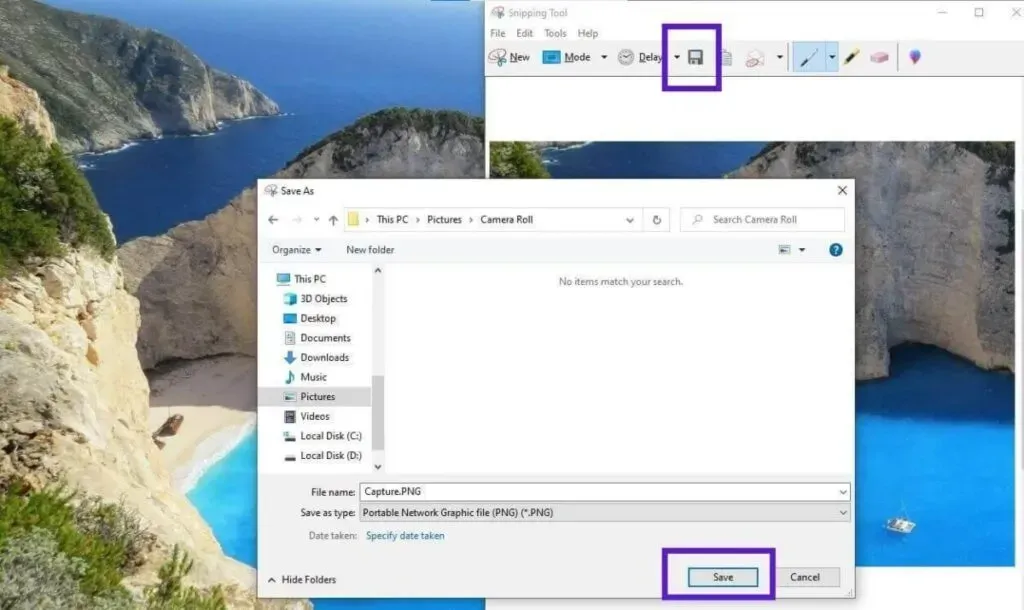
- A dialog box will open. Choose a location, name, and image format, and click Save. You can choose from JPG, PNG, GIF and MHT formats. But JPG and PNG are mostly used. The first is for smaller sizes and the second is for better quality.
The Snipping Tool has several good aspects such as:
- It provides you with the option to save the image, name the image, and select the image format.
- What’s more, with it, you can select a part of the screen, since you’re not stuck with a screenshot of the entire screen. This makes it easier to take screenshots and share them.
- Speaking of sharing, when you take a screenshot with the Snipping Tool, it gets copied to your clipboard so you can paste it anywhere, even if you haven’t saved the image yet.
There are some things the Snipping Tool can’t fix, like it can’t take a screenshot of dialog boxes and menus that disappear when you click somewhere else.
It does not have a shortcut key with which you can launch the application. Its keyboard shortcut only works when you are in the Snipping Tool window. Moreover, it cannot be used to take screenshots of full-screen applications.
If you want a better option and you’re using Windows 7, use method 5. However, if you’re using a Lenovo computer with Windows 11 or 10, check out method 3.
3. Snip & Sketch
Some users like the Print Screen method because it’s fast, while others prefer the Snipping Tool because it allows them to select an area to capture. Snip & Sketch combines the features of both of these tools as it has the best features of both methods without their drawbacks. It is preinstalled in Windows 10 and 11.
3.1 How to open Snip & Sketch?
There are three ways to open Snip & Sketch:
- Click the start menu, type “snip and sketch”and launch the app.
- When the app opens, click the “Create”button in the top left corner to prepare the app for taking a screenshot.
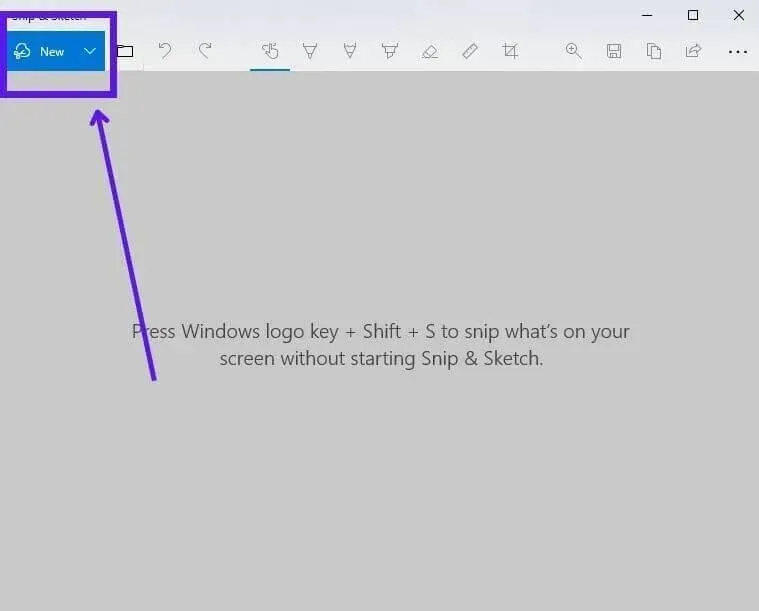
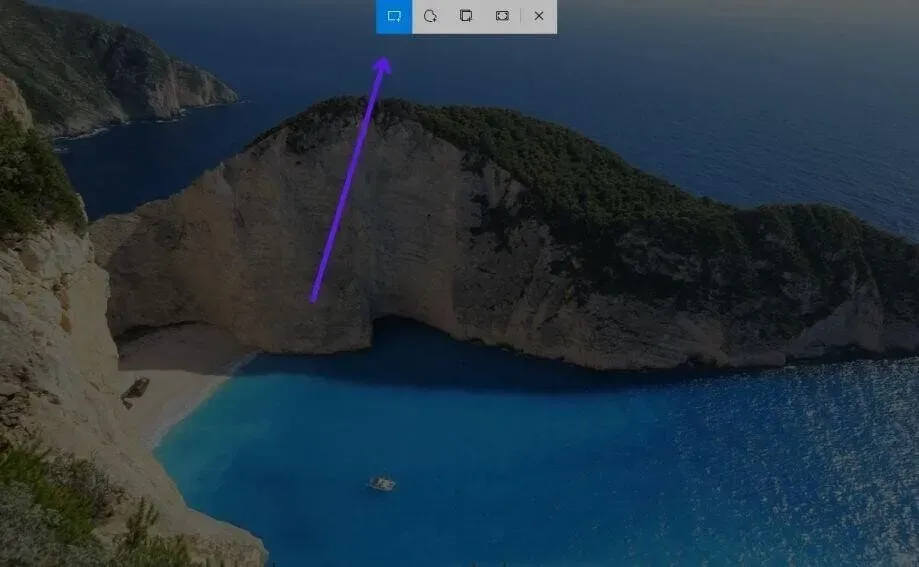
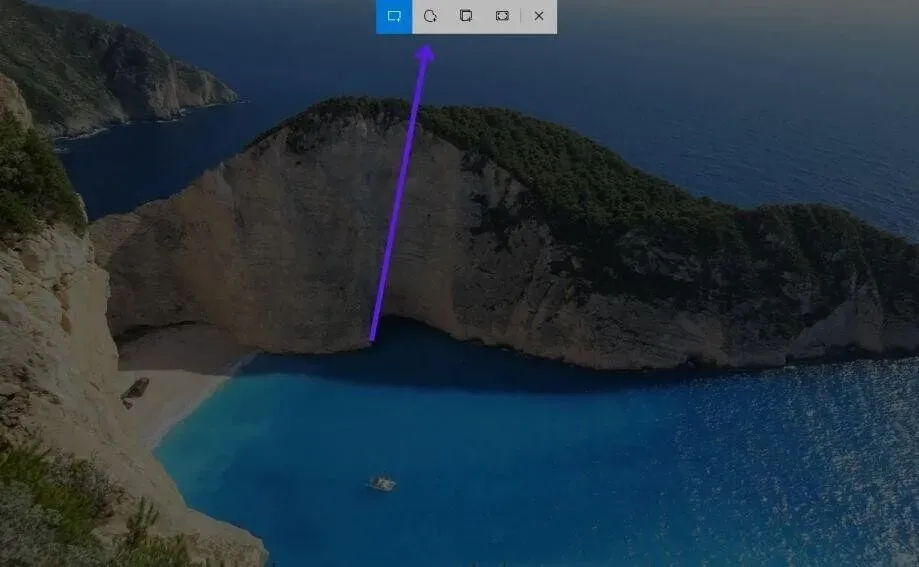
- The visual cue is that your entire screen will get a black overlay and Snip & Sketch screen capture options will appear in the top center of the screen.
OR
- If you like keyboard shortcuts, you can press the Windows + SHIFT + S keys at the same time to get a dark overlay and instant screen capture options at the top of the screen.
OR
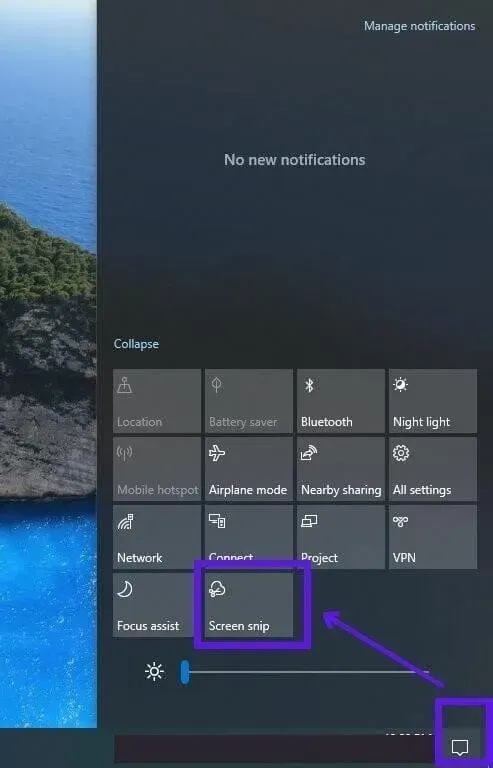
- If you want another easier way to open Snip & Sketch without a keyboard shortcut or typing anything, click the notification icon at the end of the taskbar to open the Notification Center.
- Click the Screen Snip button to see the same dark overlay and screenshot options at the top of the screen.
3.2 Take a custom screenshot by selecting a part of the screen
This method is useful if you don’t want to capture the entire screen or window.
- Open Snip & Sketch by pressing Windows logo + SHIFT + S.
- When the screen is dimmed, click the single rectangle icon at the top of the screen to make a rectangular slice. It is also selected by default.

- Click and drag the mouse cursor to select the area you want to capture. Release when you’re done.
- The screenshot will be saved to the clipboard. You can access it by clicking on the notification.
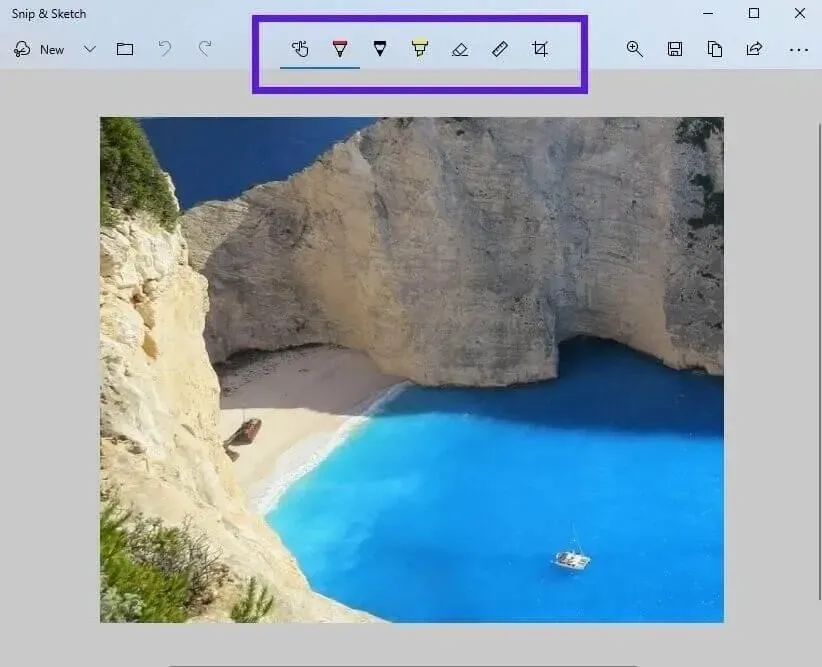
- The screen image will open in Snip & Sketch with some editing options to quickly make some changes if you want. These options make it easy to annotate and tag a screenshot.
- To save a screenshot, click the floppy disk icon in the upper right corner of the screen, or press CTRL+S.
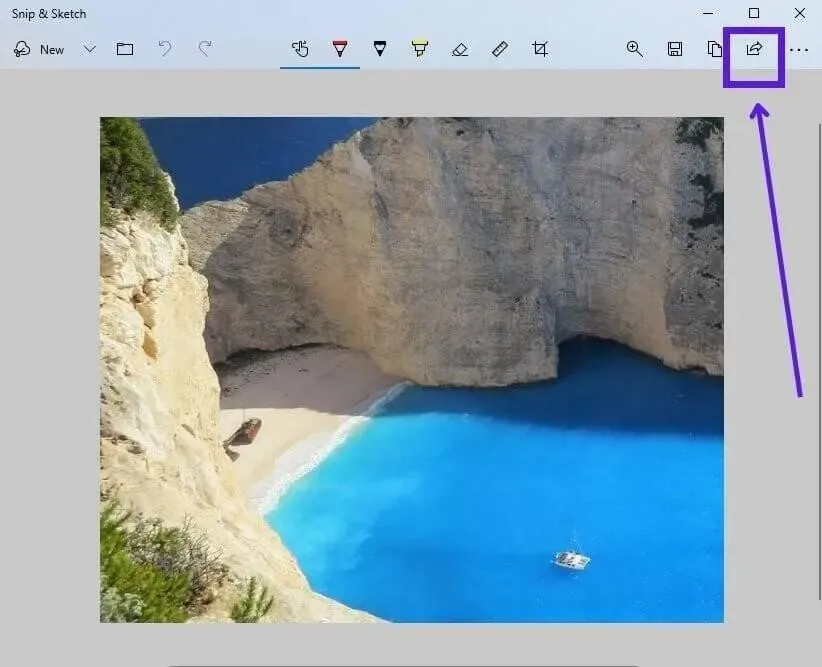
- To share a screenshot, click the arrow button in the top right corner of the toolbar.
- Name the image, choose its location, and choose a format. The default location is the user account’s Pictures folder, and the default image format is PNG.
3.3 Take a Freeform Screenshot
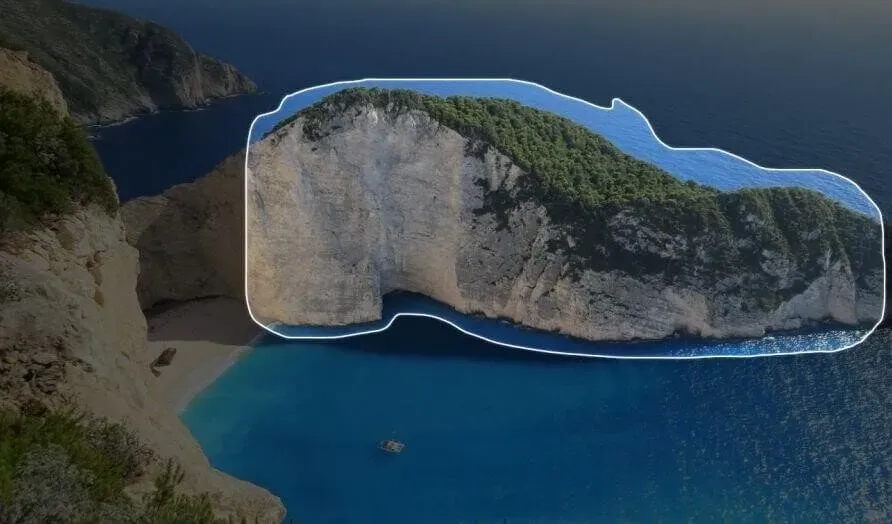
If you like to photograph things that are not square or rectangular, you can use the Freeform Snip option.
- Open Snip & Sketch by pressing the Windows logo + SHIFT + S keys.
- When the screenshot options appear, click the custom form icon.
- Select an area of the screen by freely moving the mouse cursor anywhere.
- Once you’ve taken a screenshot, edit it if you like and then save it by pressing CTRL+S.
3.4 Screenshot of active window
If you only want to capture the entire window (rather than the entire screen), use the Window Clipping option.
- Open, cut and draw.
- At the top of the screen, click the stacked squares icon.

- Now hover over the window you want to capture and click it to take a screenshot.
- Open the image through notifications. It will open in Snip & Sketch.
- Make changes or annotations if you like, and then save them.
3.5 Capture the entire screen
To take a screenshot of the entire screen, you can click the “Full Screen Snapshot”button. It works identical to the Print Screen method, but you can open the image with Snip & Sketch and edit it before saving.
- Launch Snip & Sketch by pressing Windows + SHIFT + S keys.
- At the top of the screen, click the “Full Screen”icon right before the “Close”icon.

- It will instantly take a screenshot of the entire screen.
- Open the image from the notification.
- The screenshot will open in Snip & Sketch where you have several editing tools.
- Edit and save it.
3.6 Why use Snip & Sketch?
The biggest advantage of Snip & Sketch is that it allows you to take full screen screenshots. Thus, while playing or watching a video in full screen mode, you can press keyboard shortcuts to capture part of the screen or the entire screen.
Plus, you can easily take screenshots of tricky menus and lists that disappear when you click somewhere else. For example, the context menu in any application or on the Windows desktop, the Start menu, the Settings menu in some applications, and others. With it, you can simply call up the menu, press the shortcut keys and take a screenshot.
In addition, you get several screen selection modes for taking a screenshot and can edit it before saving. In addition, it allows you to choose the location, name, and image format.
4. Game bar
Game bar in Windows 10 and 11 is designed to allow gamers to take screenshots and record them while playing games. If you are a gamer, you will love it. But if you want a simple screenshot tool, you won’t like it and you’d better use the Snipping Tool or Snip & Sketch. Either way, here’s how to use the Game Bar:
- Open the start menu, type “Game Bar”and launch the first app.
- You will see several open widgets.
- To take a screenshot, click the camera icon in the top left widget.
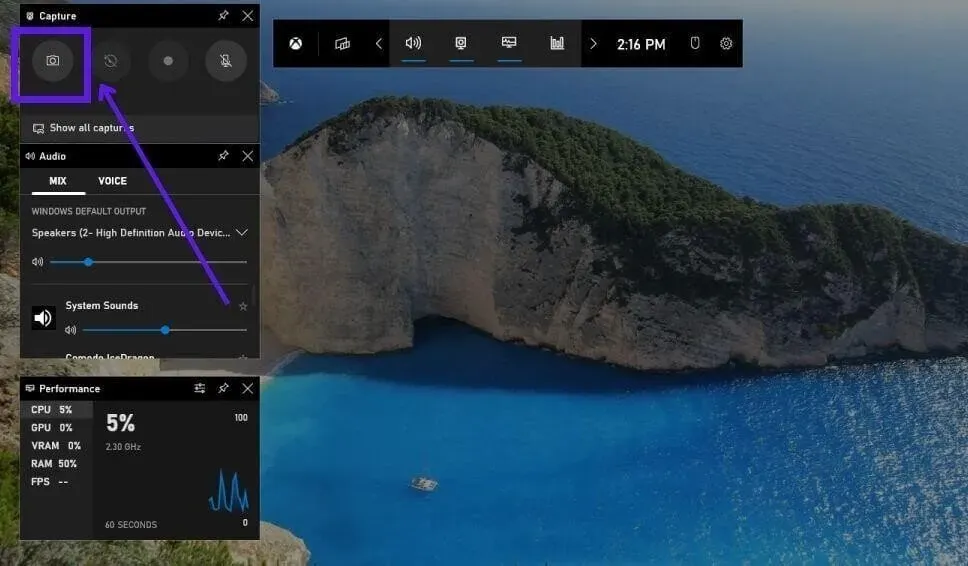
- You will receive a notification that the screenshot has been saved.
- To access the screenshot, select This PC > Video > Captures.
- There is no default application for editing, but you can right-click on a screenshot and open it with Paint 3D or any other editing application.
5. Free Screenshot Apps for Windows
It’s hard to find the right screenshot tool with all the right features. For us, the best free built-in tool is Snip & Sketch, but if you’re using Windows 7 or don’t like Snip & Sketch, you can search the web for the best free apps to suit your needs.
5.1 Internet search
- Launch a web browser and search Google for “free screenshot tools for Windows”.
- Visit several websites to find free apps.
- Install a few of them and find a good one.
- Uninstall any other apps you have installed for experimentation.
5.2 Microsoft Store Search
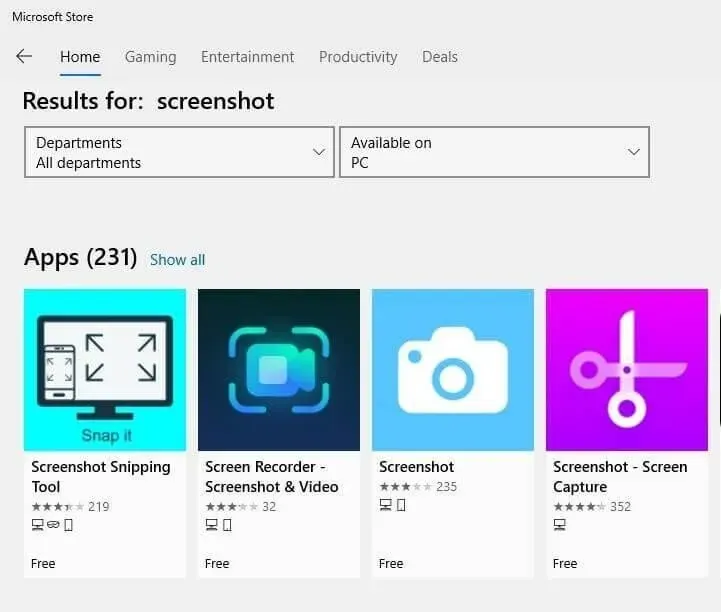
- Open the Microsoft Store.
- Enter ‘
screenshot‘ in the search field. - Look for apps that say “Free”underneath.
- Install a few of them to test them out.
- Keep one and remove the rest.
How to take screenshots on Lenovo Chromebook?
Chromebooks use Chrome OS, which is said to be lightweight and fast. To take screenshots on a Lenovo Chromebook, it’s best to use the Chromebook’s built-in Screen Capture tool.
- Taking screenshots with Screen Capture
- Taking a screenshot of the active window
1. Take screenshots with Screen Capture
With Screen Capture, you can take screenshots and record screens. We will use the screenshot function.
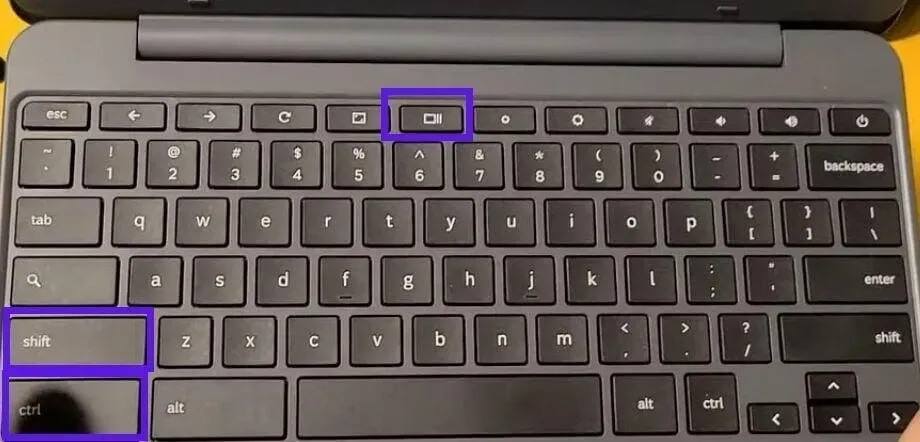
- Open the screenshot by pressing CTRL+SHIFT+Show windows at the same time. Or tap Time in the bottom right corner of the screen and select Screenshot.
- You will see the tool at the bottom of the screen.
- There are two screen capture options. The camera icon is for snapshots and the video icon is for screen recording.
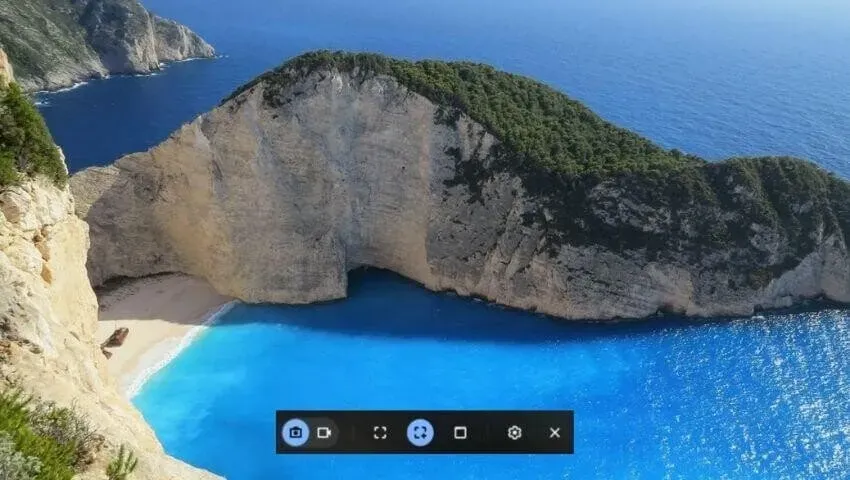
- With Screen Capture, you can capture the entire screen, select a rectangular part of the screen, or take a screenshot of the active window.
- Rectangular screenshot mode is selected by default.
- To take a screenshot, press, hold, and drag your mouse cursor to the area of the screen you want to capture, then release.
- The notification will indicate that the screenshot has been taken.
- You can find the screenshot in your Downloads folder.
2. Take a screenshot of the active window
In some cases, it is enough for us to take a screenshot of the active window. You can use the selection box to select the active window, but a faster way is to use the dedicated shortcut key for this.
- Keep the window you want to capture in the foreground.
- Simultaneously press CTRL+Show Window.
- The screenshot will be taken and saved in your Downloads folder.
How to take screenshots on Lenovo tablets?
- Taking screenshots on Lenovo Windows tablets
- Capturing Screenshots on Lenovo Android Tablets
1. Taking screenshots on Lenovo Windows tablets
Windows tablets have the same options as Windows laptops. Thus, you can use some of the screenshot methods mentioned in the Lenovo laptops section. The best way is to use the Snip & Sketch app.
1.1 Using Snip & Sketch
- Go to the Notification Center by tapping the area where you see the numbered notifications (far right of the taskbar).
- Click the Screenshot button.
- Your screen will be dimmed and the Snip & Sketch options will be visible at the top of the screen.
- Take a screenshot.
- Then edit it and save.
1.2 Physical buttons
If you want to instantly capture the entire screen, you can also use the power and volume buttons to take screenshots.
- Raise the screen to be captured.
- Press the on/off button and the volume down button at the same time.
- A screenshot will be taken.
2. Taking screenshots on Lenovo Android tablets
On Android tablets, the methods for taking screenshots are similar to any tablets and smartphones.
2.1 Physical buttons
You can take a screenshot of the entire screen by pressing the physical buttons on your Lenovo tablet:
- Navigate to the app or screen you want to capture.
- Press the power + volume down keys at the same time.
- A screenshot will be taken.
- You may receive a notification and the option to edit it before saving. If not, go to Gallery and edit the screenshot from there.
2.2 Take a screenshot from the quick settings panel
It does the exact same thing as the above method, with the only difference being that you don’t have to press the physical keys as this can be done by going to the quick settings panel.
- Raise the screen to be captured.
- Swipe down from the top to see the notification area and quick settings panel.
- Tap the screenshot icon.
- Edit and save the screenshot.
2.3 Third Party Applications
The above two methods take a screenshot of the entire screen. If you want to select a portion of the screen or more options, install screenshot apps from the Google Play Store.
- Open the Google Play Store
- Search for “screenshot app”.
- Try some apps.
Conclusion
On Lenovo devices, you can take screenshots or select a specific area of the screen for each screenshot, depending on the operating system and the screenshot method you use.
FAQ
How to take a screenshot on a Lenovo laptop?
To take a screenshot on a Lenovo laptop, press the Fn + PrtScn keys or the Windows logo + PrtScn keys at the same time.
How to take a screenshot on a Lenovo laptop without a button?
On a Windows Lenovo laptop, take screenshots without the Print Screen button or Power button using the Snipping tool (Windows 7) or Snip and Sketch (Windows 11/10).– Open the Start menu, type ‘ snipping tool‘ or ‘ s nip & sketch‘ and run the application. – Click “Create”. – Select the screenshot area to take a screenshot.
How to take a screenshot without the power button?
To take a screenshot on a tablet without a power button, use the Action Center or the Quick Settings Panel. On Windows tablets, tap on the far right of the taskbar (next to the time and date) to open the Action Center. Then click the “Screenshot”button. On Android tablets, swipe down from the top and tap the Screenshot button or the screenshot icon.
What is the key to take a screenshot on Lenovo?
To take a screenshot on a Lenovo laptop, press the Windows logo keys + PrtSc or Fn + PrtSc at the same time. On Lenovo laptops with Windows 11/10, you can also press Windows logo + SHIFT + S to take a photo.