
We music lovers will forget to keep the keys, but not the headphones. After all, headphones are the most used gadgets after smartphones. If you’re having trouble using headphones and are having problems, please use headphones.
Then yes, you are in the right place. In this article, I will help you solve the problem – My headphones are not working. So let’s get started.
Reasons Why Headphones Not Working in Windows
Numerous reasons can prevent you from using your headphones on windows or whatever device you use. This could be a corrupted device driver, removed updates, poorly configured sound settings, or faulty sound drivers.
If the problem is not with your device, it may be the headphones. So, regarding the above issues, you will need to follow the approach below to fix my headphones not working.
Troubleshooting steps My headphones are not working
- Make sure your headphones are connected properly (when using wired headphones)
- Setting audio output options
- Change default audio format
- Use the Windows Sound Troubleshooter
- Reboot your device
- Check for sound driver updates
- Roll back sound driver updates
- Install/Uninstall Windows Update
- Enable jack detection (for wired headphones)
- If all else fails, consider repairing or replacing
1. Make sure the headphones are connected properly (when using wired headphones).
Let’s say you’re facing a problem while using headphones with your device. Then the first thing you need to do is to check if your headphones are properly connected to your device.
If not, connect it correctly. You can also try plugging and unplugging your headphones a few times, as well as cleaning the headphone jack with a cotton swab to remove excess dust or dirt from the jack.
If this does not solve your problem, move on to the next fix below.
2. Set your default playback device
Let’s say you have connected your headphones to your device. But the audio output of the device is not set to your headphones. Then you won’t hear anything from your device.
And for that, you will need to change the default audio device on your system. Thus, telling the default device which gadget it needs to reach.
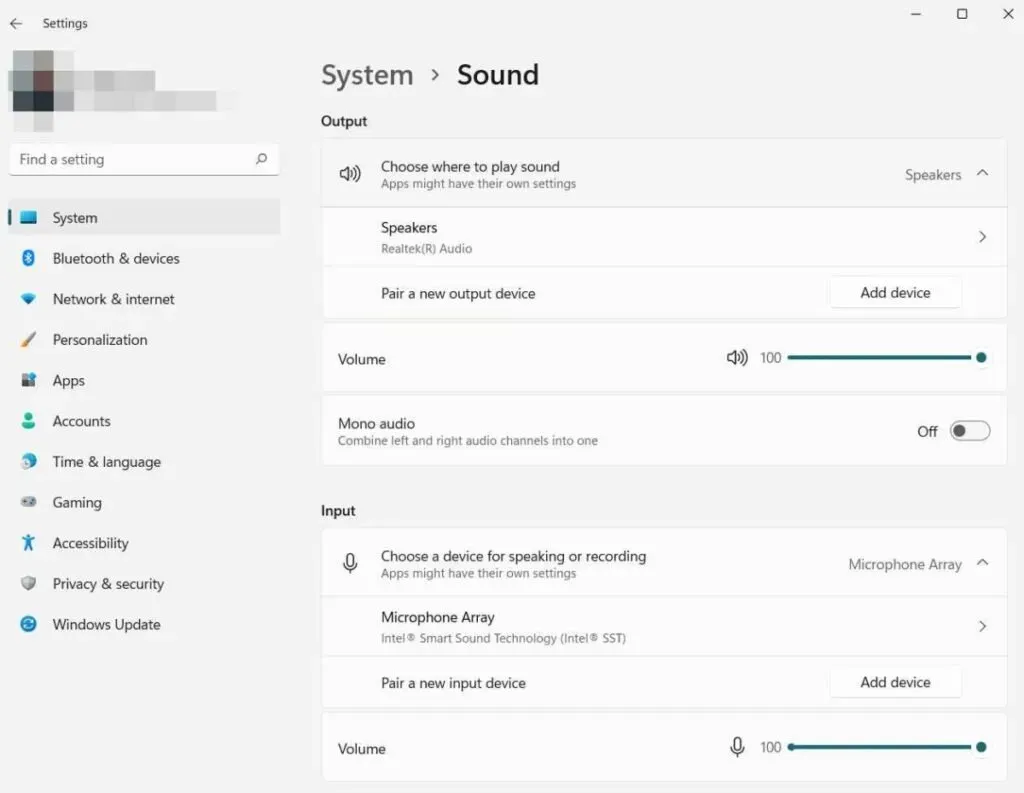
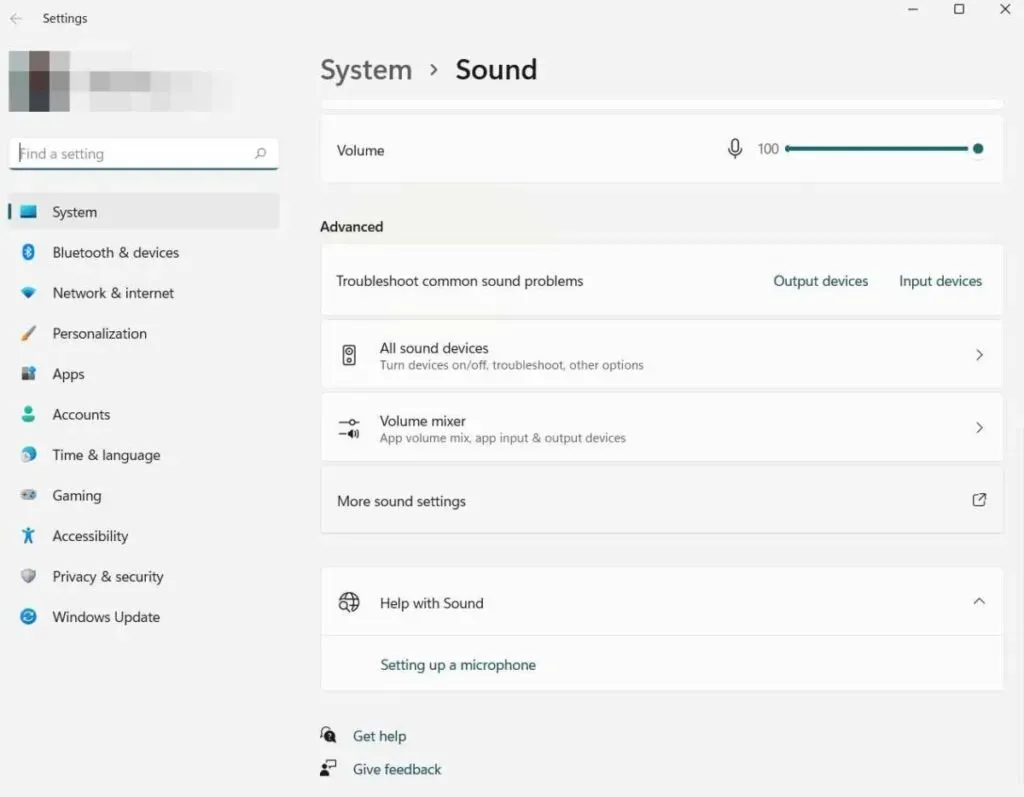
To change audio output settings, follow these steps:
- Search for sound settings in the search bar.
- Now about the displayed window. You will probably see the option “Choose where to play sound”. Click on it. And select the device you want to play sound on.
Let’s say you’re using working wired headphones. You will then see the Headphones option that you can select to play audio. But if you are using wireless headphones or Bluetooth headphones.
You need to check your bluetooth settings. If your device is available in the list of Bluetooth audio devices, select it. If it is not listed, select the option to add a new device and add it.
Now try playing any music and see if that solves the problem.
3. Change default audio format
The above steps if you were unable to resolve the issue. Then the next step you can take is to check if the default audio format matches the capacity of your headphones.
The audio format specifies the frequency range and other important layout that your device should be able to handle. And if your device doesn’t meet your system requirements, it won’t be able to play sound either. To check the default audio format on your device, follow the instructions below:
- Reopen your audio settings by searching the search bar. Or you can also go to the sound icon in the lower right corner of the taskbar to open sound settings by right clicking it.
- Find advanced settings and open them.

- Further in the “Playback”tab. Right-click on headphones and select properties.
- Now go to the “Advanced”tab. On the Advanced tab, you will see the default format for your system.
- One by one, select the speed and bit depth in the options, and click “Test”on the right. Try running everything until you find the one that’s right for you.
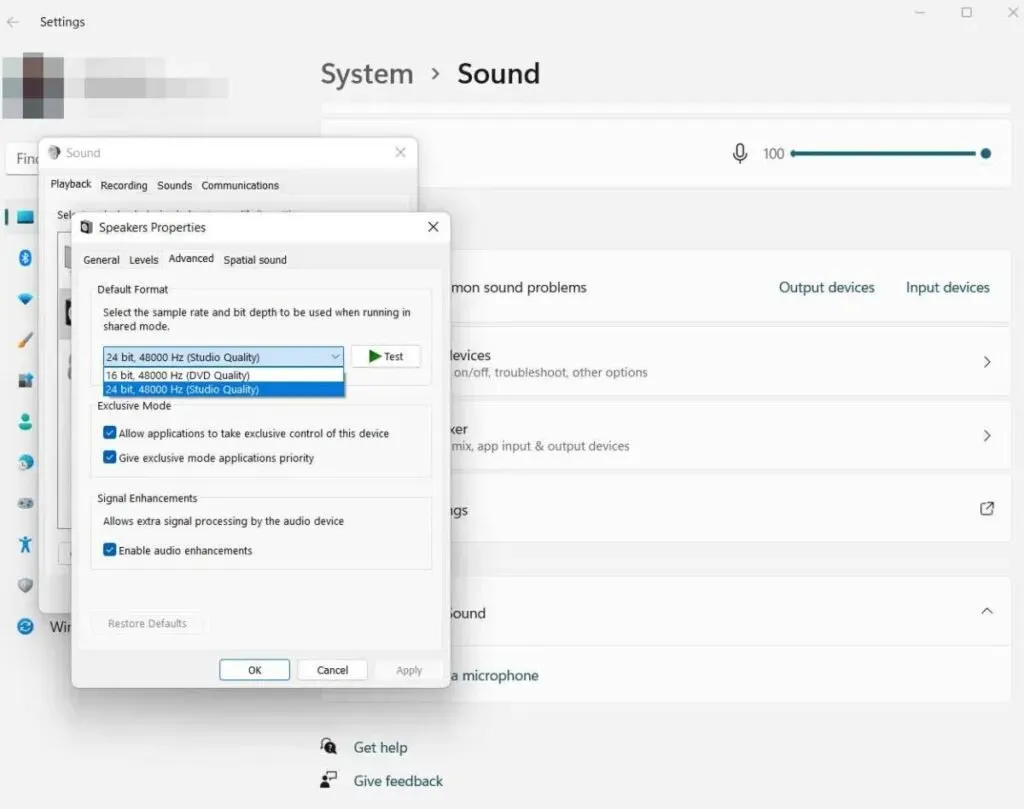
- Find the right one for you. Click the Apply button and then the OK button.
Now try to play a piece of music after connecting the headphones. And see if that solves the problem.
4. Use the Windows Sound Troubleshooter
If nothing has worked for you so far. Running the automatic troubleshooter might save you. To run the troubleshooter, follow the instructions below:
- Open sound settings.
- Now look for the “Troubleshoot audio”option.
- And select the Outdevices mentioned in it.
- This will launch the output device troubleshooter.
- Then select the device you want to fix.
- Wait while the troubleshooter scans your device.
- It will automatically fix problems on your device if they are found.
5. Restart your device
In most cases, it solves the problem. Because your windows may need to be restarted to process properly. Follow the instructions here to reboot your system.
- Navigate to the Windows key and press the power button.
- Now select reboot system.
But if that doesn’t work for you. Go to next step.
6. Check for sound driver updates.
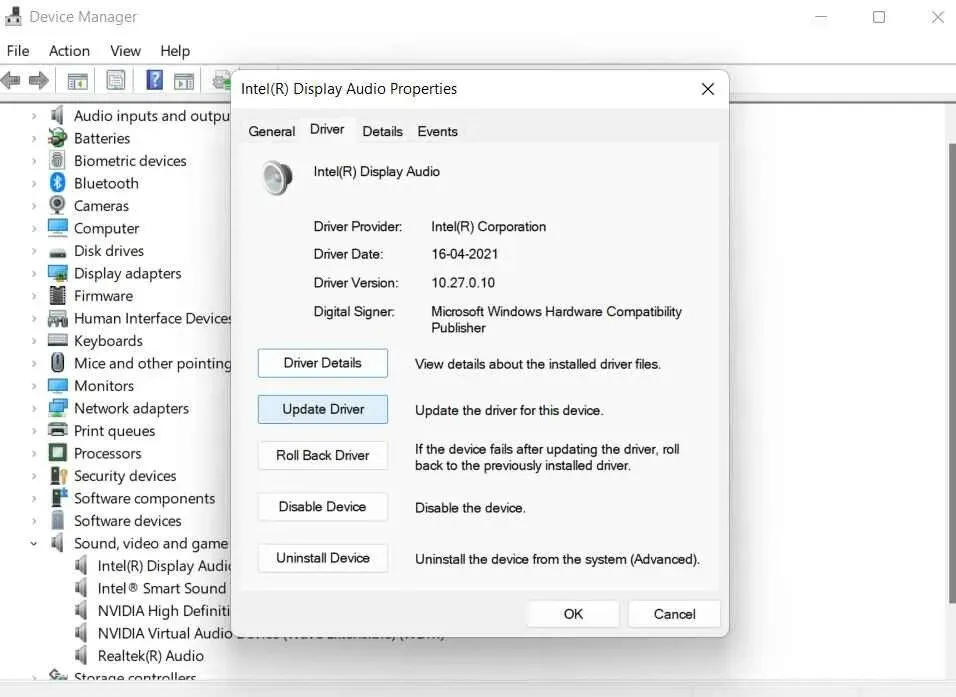
In some cases, outdated audio drivers can also cause you problems. In this case, you will need to update your sound card drivers. To do this, follow the instructions below:
- Go to Device Manager. You can find it in the search bar.
- Now move on to sound, video and game controllers.
- Right click Audio Drivers and select properties.
- Then go to the “Driver”tab and click on “Update Driver”.
Check if it works. If not, move on to the next fix.
7. Roll back driver updates
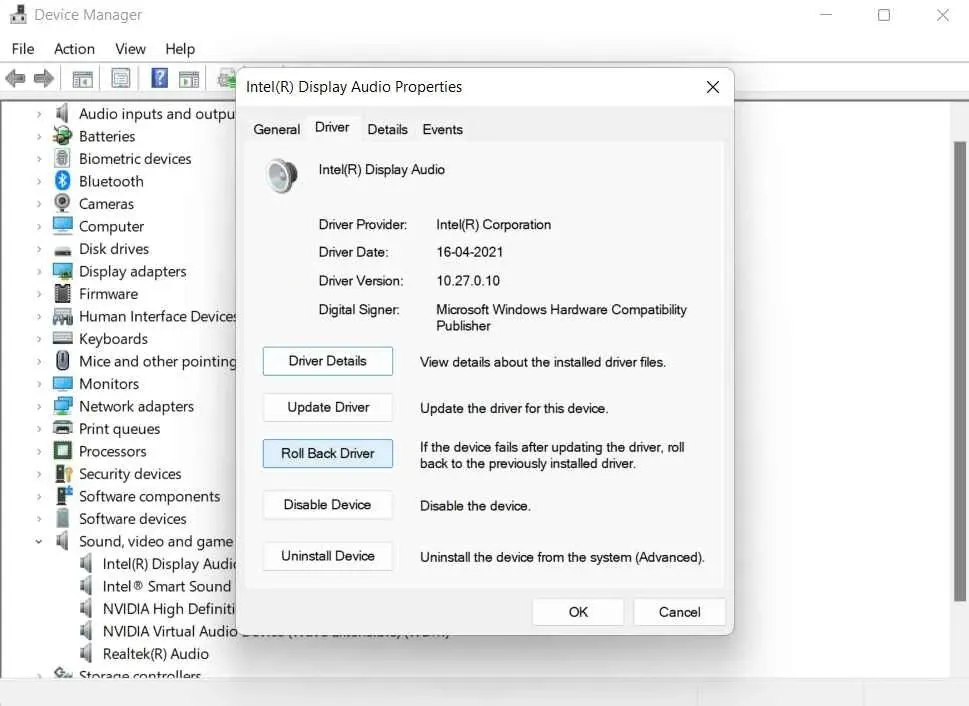
Not always system updates come forever. New updates may conflict with a different system configuration and possibly cause a problem if you have recently installed new drivers. Then you can try to roll back the driver. Therefore, to make sure that this is not the case, we will try to roll back the sound drivers.
- Go to device manager.
- Find sound drivers in the menu.
- Now right click on the sound driver and open its properties.
- Next, go to the Driver tab and select Roll Back Driver.
Now check again if this solves your problem.
8. Install/Uninstall Windows Update
If the problem is still not solved. Check if your device is updated to the latest version. If not, then there is a possibility of getting an error. To check if your device is up to date, follow the instructions below:
- Open Windows Settings.
- In the top right corner, you will see Windows Update.
- Once you open it, a green check for updates button will appear.
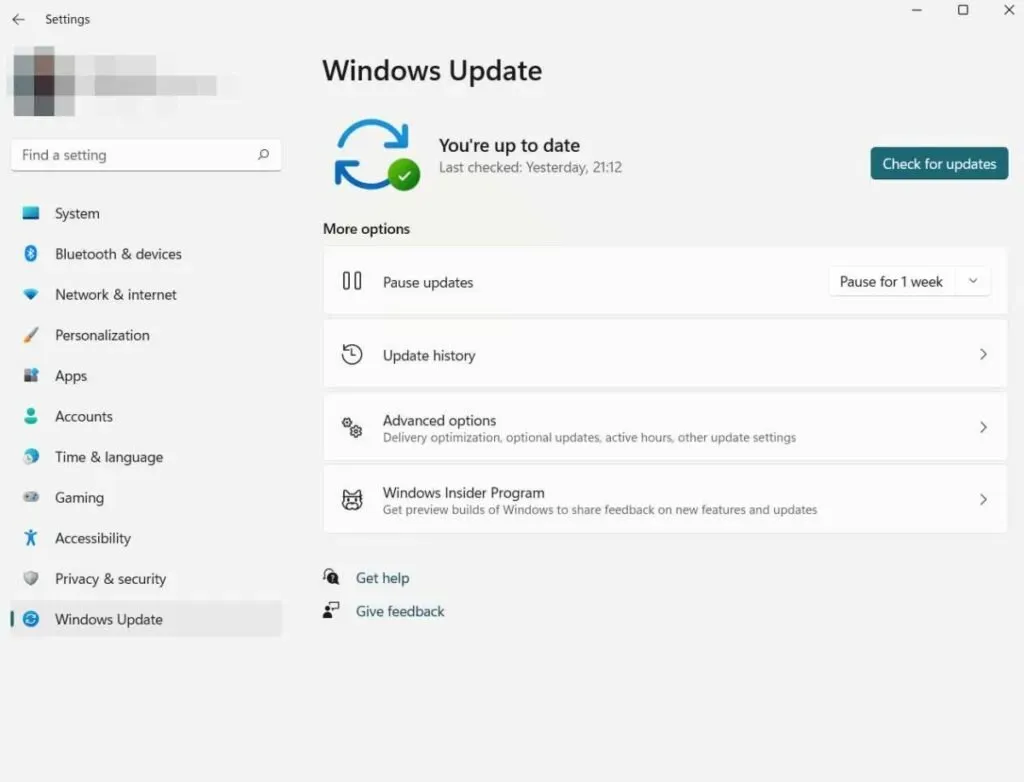
- Click on it and see if there are updates available.
- If they are, install them.
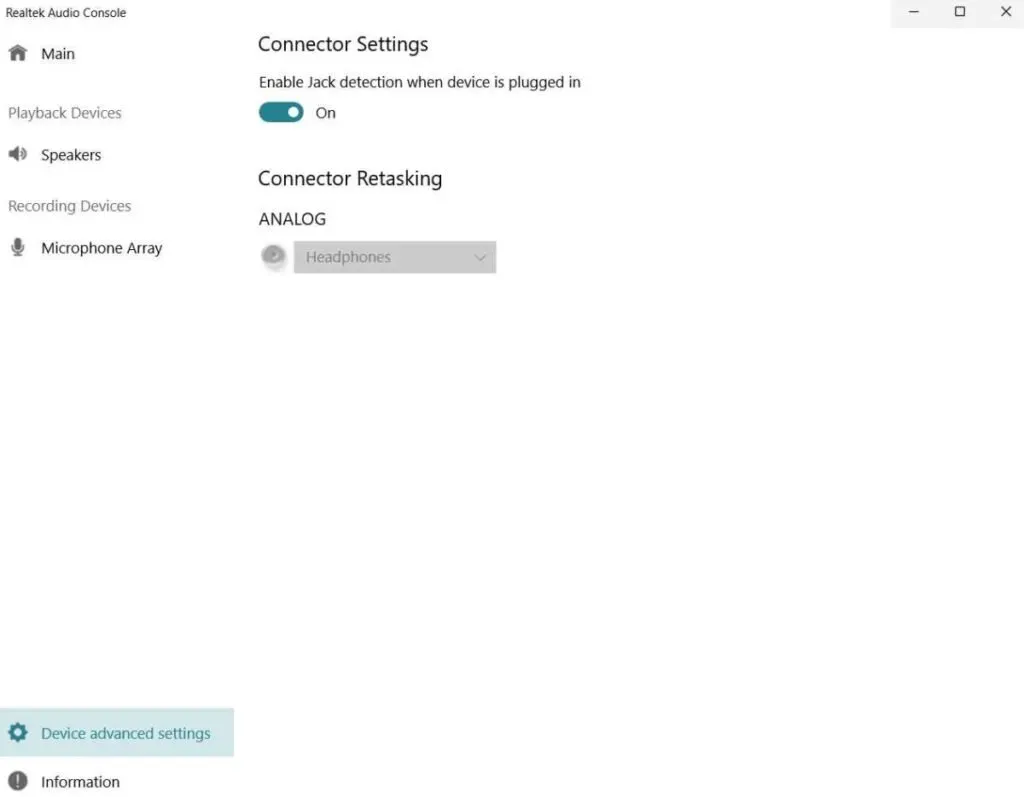
9. Enable jack detection (for wired headphones)
By this time, you should have fixed your headphone not working issue. If not, the last thing you might want to check is to make sure your PC has automatic headphone jack detection enabled. To do this, follow the instructions below:
- Find Realtek Audio Console in the search bar.
- There, find Advanced device settings.
- In the connector settings, allow the connector to be detected when the device is connected.
10. If all else fails, consider repairing or replacing
If none of the above helped you troubleshoot. Then consider repairing or replacing your headphones. You can also try plugging in any other headphones or headphones to determine if the problem is with your laptop or headphones.
FAQ:
How to fix headphones that are not working?
Try plugging and unplugging your headphones a few times. If this does not help, restart your device.
Why are my headphones not playing sound?
It is possible that the audio output on your device is set to some other device than the headphones.
Why are my headphones connected but not working?
Try cleaning the headphone jack with a cotton swab. There may be dust and dirt inside the headphones. This prevents your headphones from working properly.