

Your iPhone contains a ton of sensitive and personal information. This includes your photos, videos, audio notes, banking apps, notes, passwords, contacts, and more. Therefore, to ensure that your valuable data is not misused, stolen or hacked, you must take steps to keep your iPhone secure.
In this guide, we give you 17 tips to help you further strengthen your iPhone and keep its data safe.
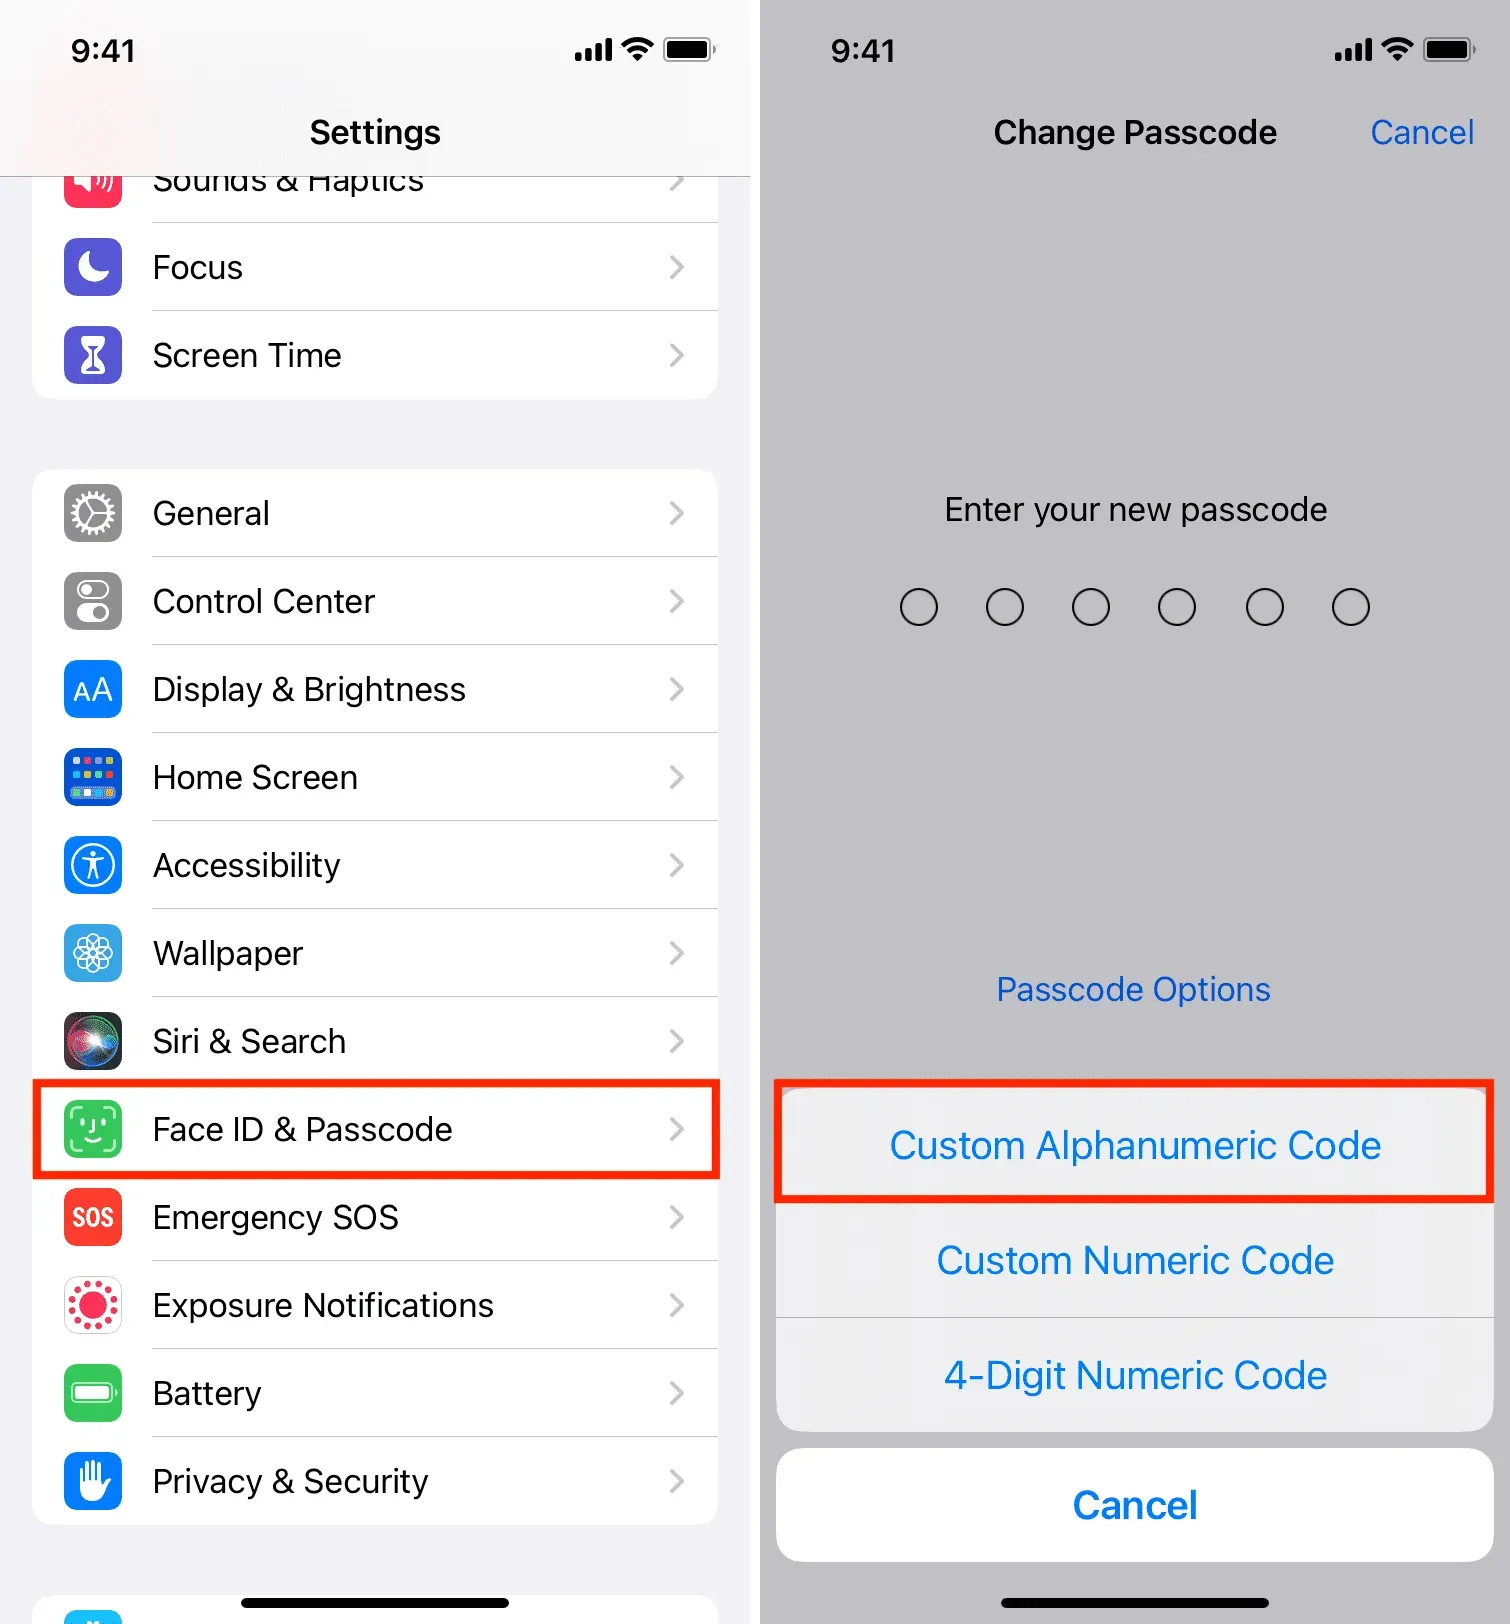
1. Add a secure alphanumeric passcode
You should never store your iPhone without a passcode. And even the password you set should be long and hard to guess. This will make it nearly impossible for anyone else to guess your password, even if they get physical access to your device.
To do this, go to iPhone Settings > Face ID/Touch ID & Passcode. If you’re already using a password, click Change Password > Password Options and select Custom Alphanumeric Code.
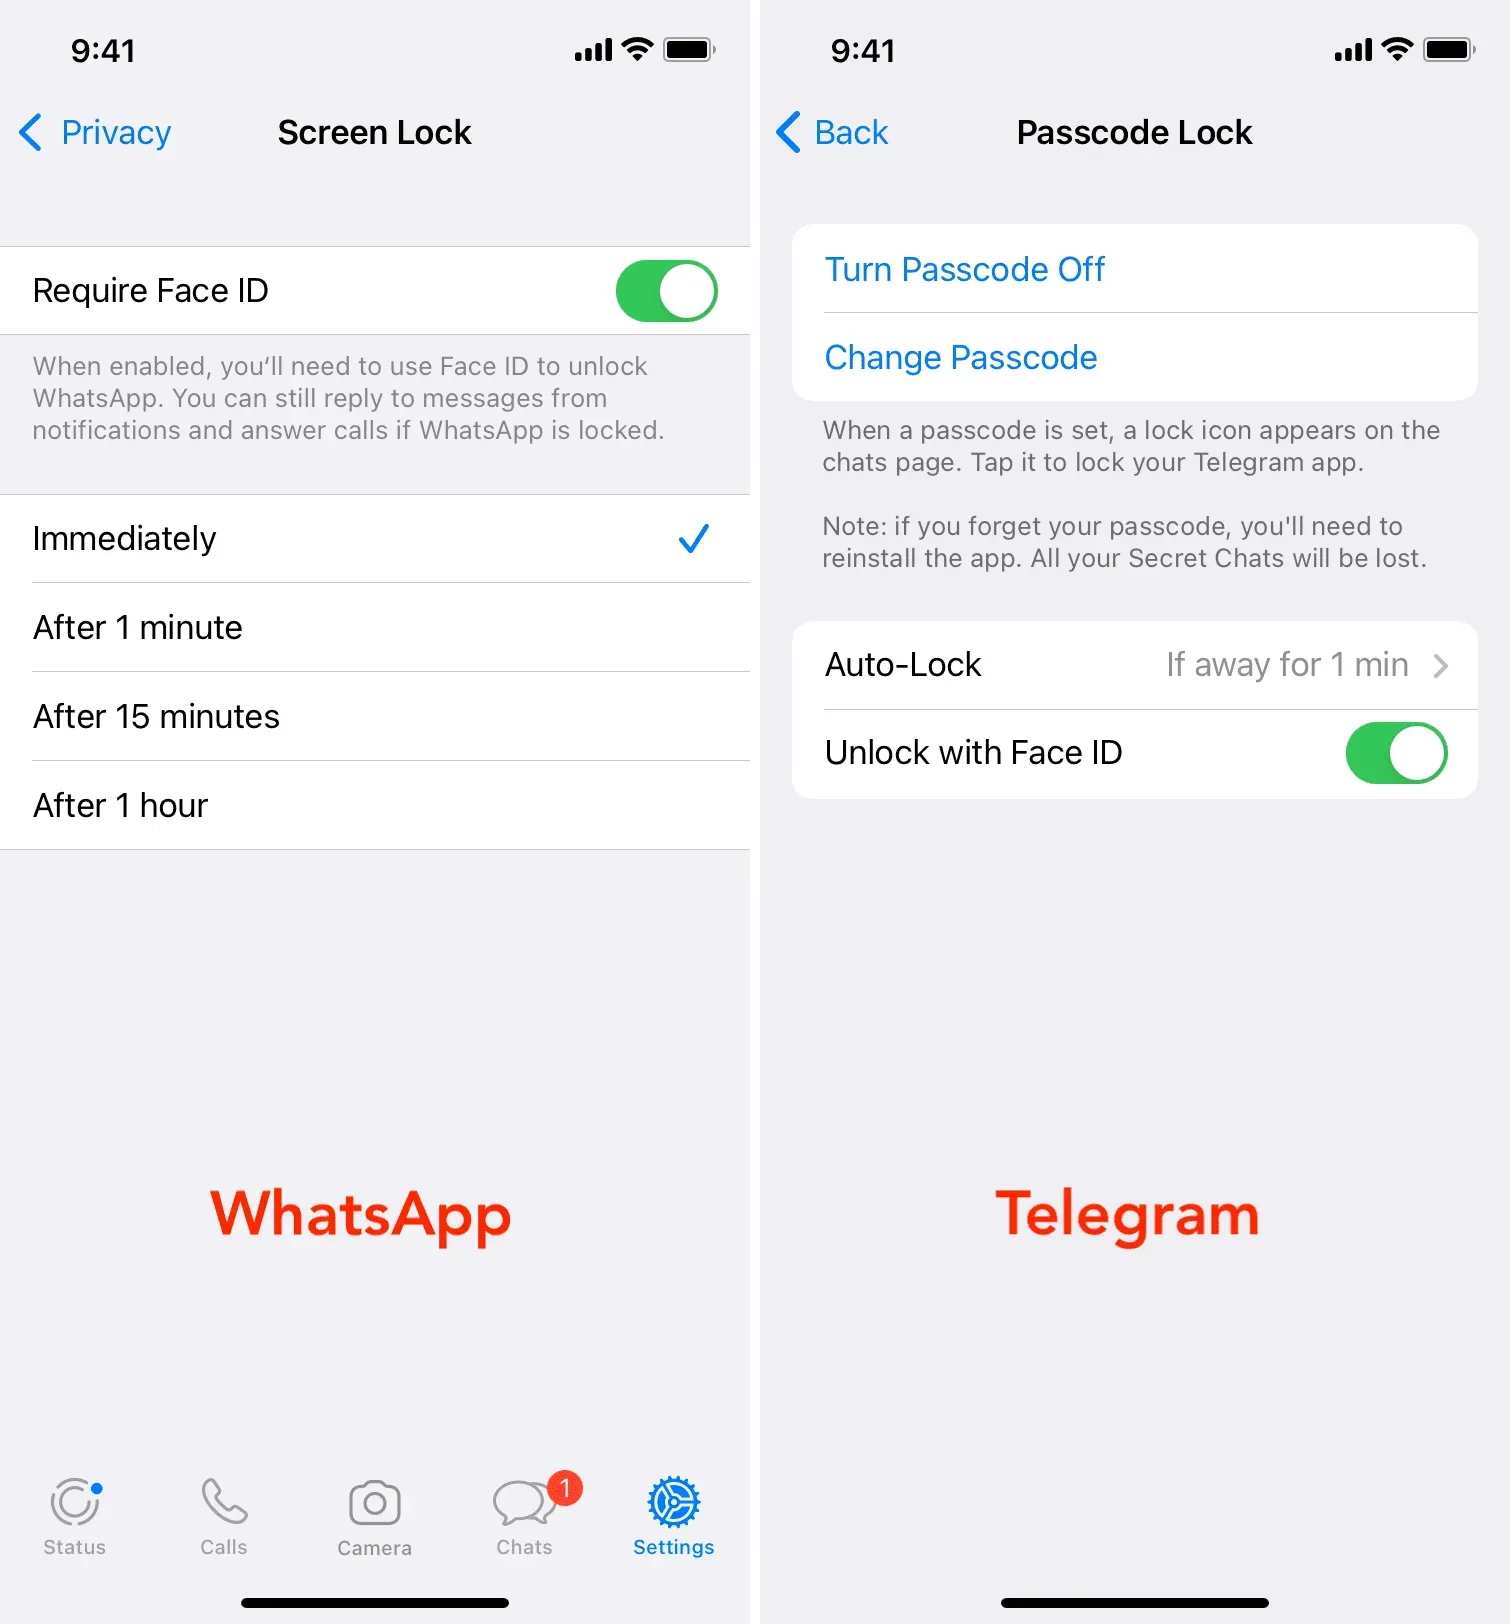
2. Add more app passwords
Many chat apps, banking apps, payment apps, note-taking apps, etc. offer the option of adding a password lock. Dig into the appropriate app setting and turn it on. If the application does not have it, you can contact its developer and request such a feature.
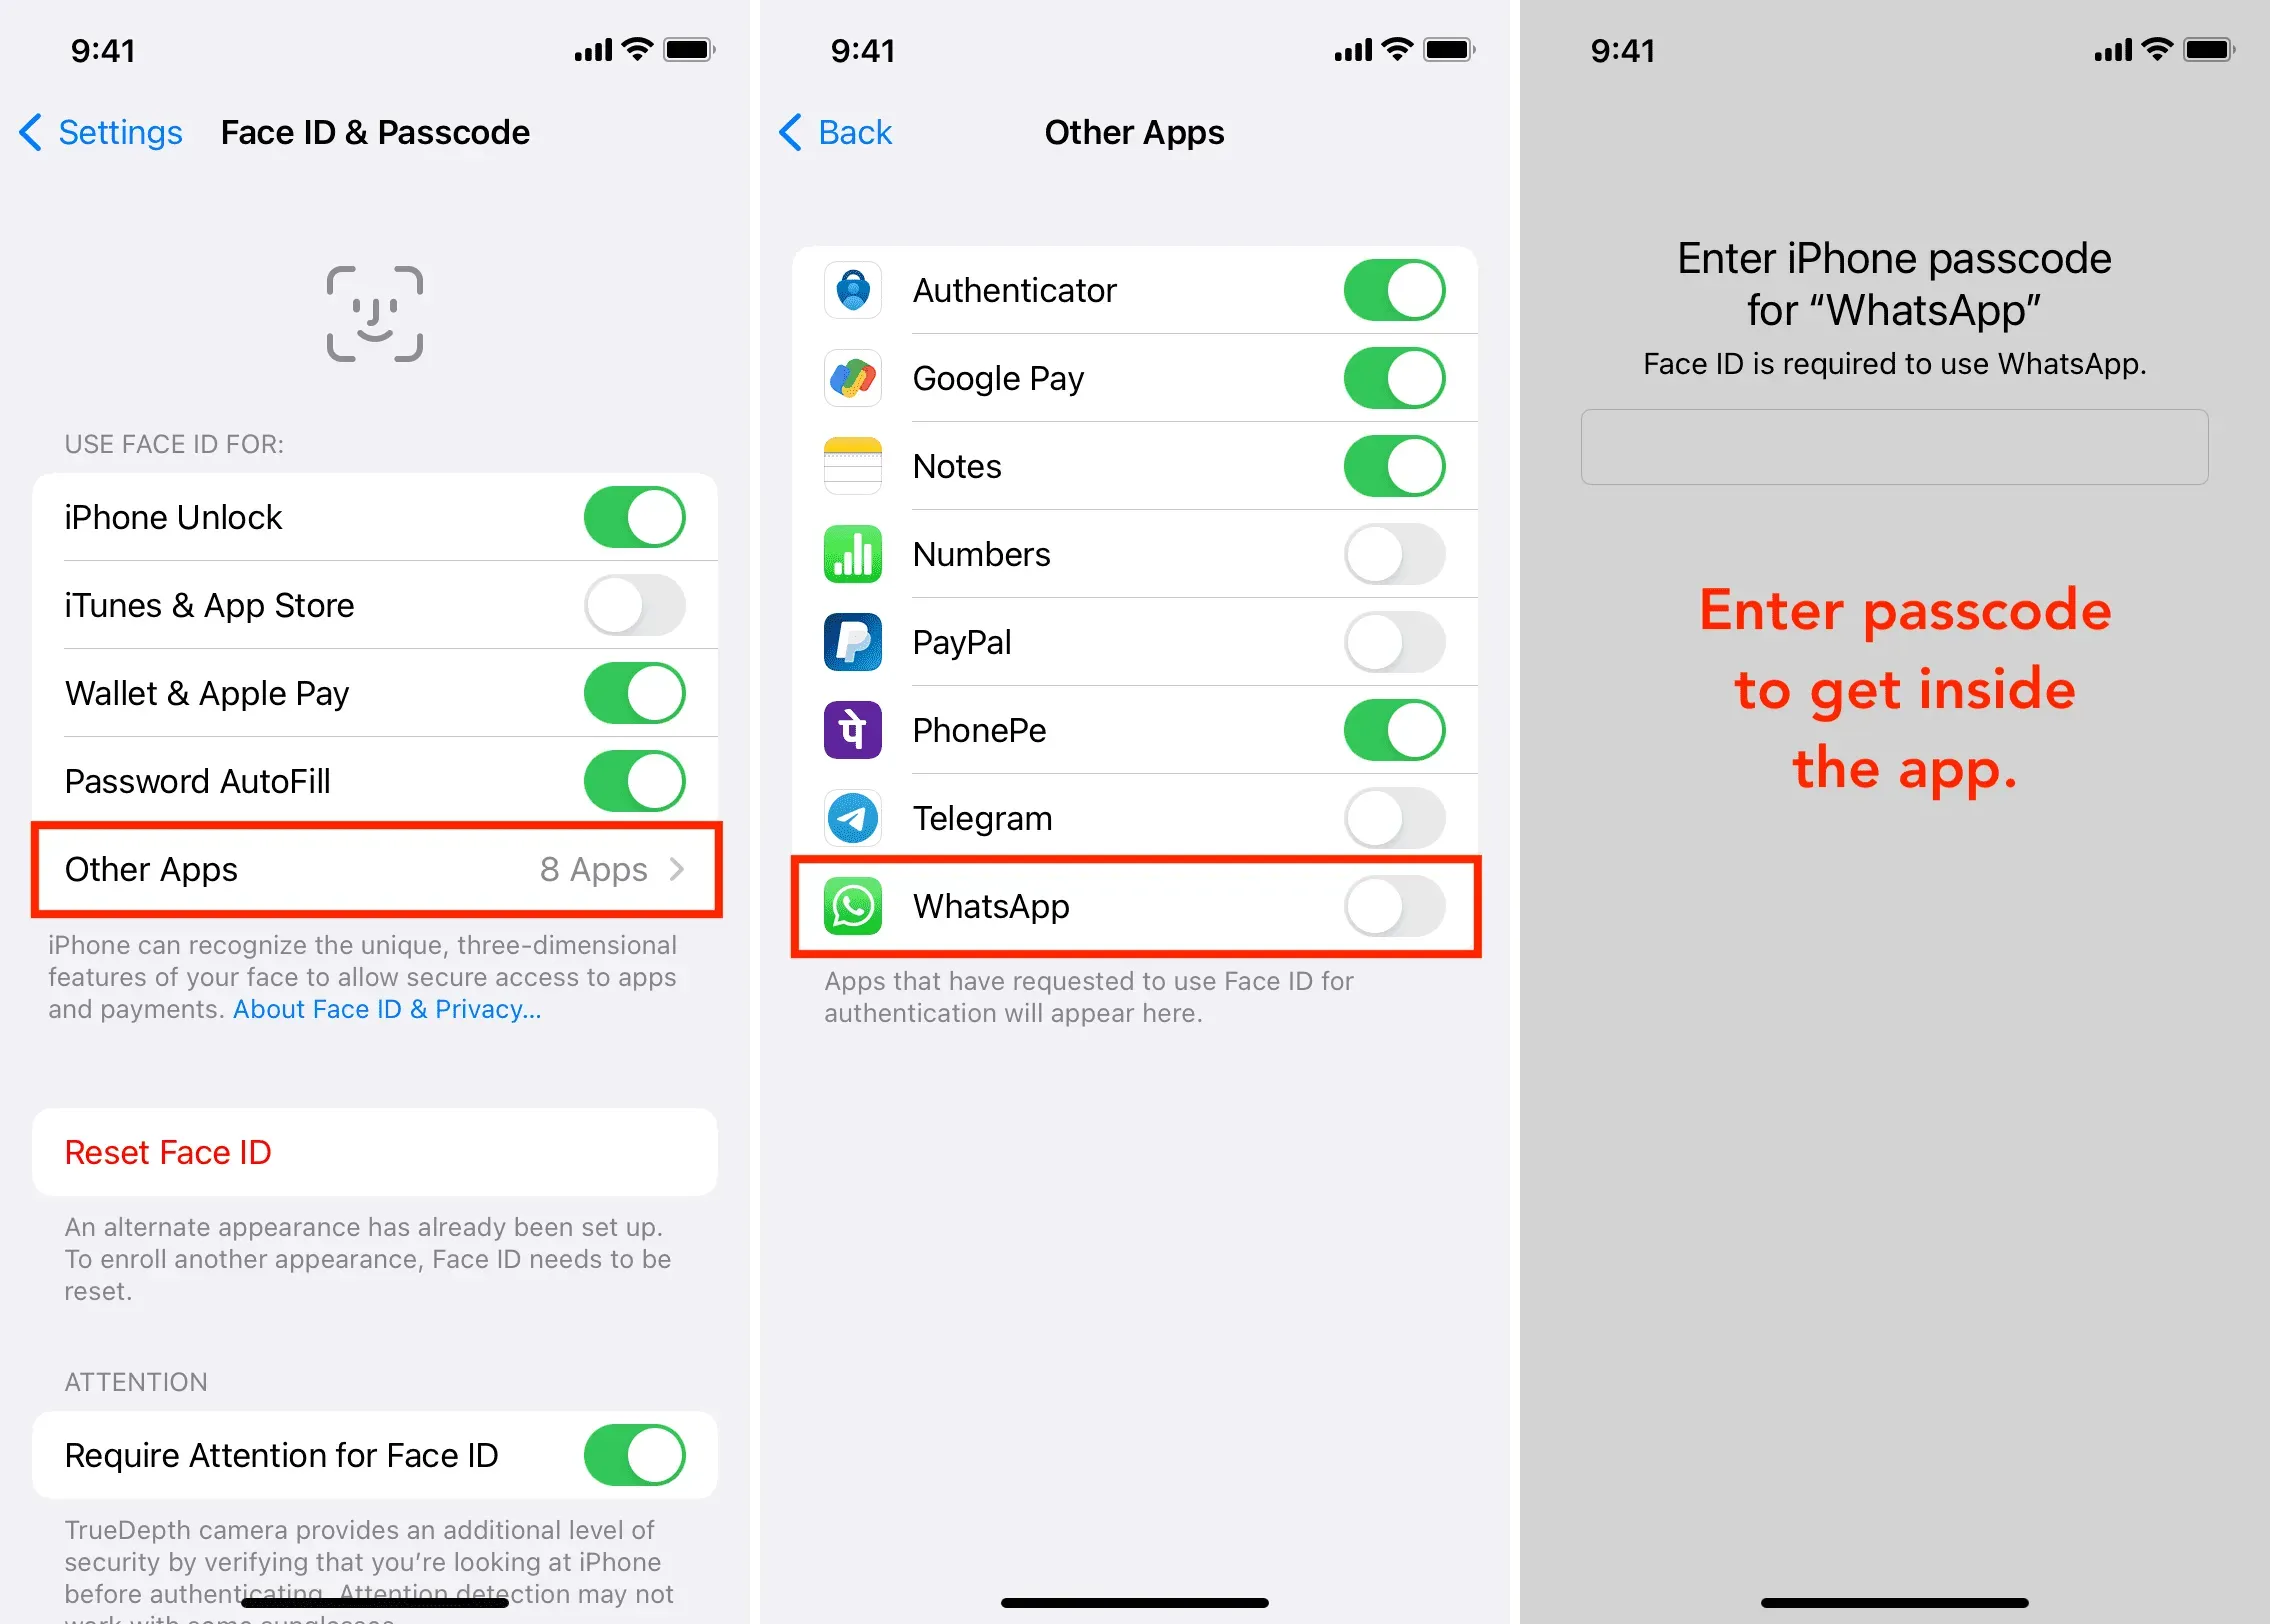
Have you added a second Face ID or other people’s Touch ID to your iPhone? If so, they can get inside your iPhone and your biometrically unlocked apps. To resolve this issue, set the affected third-party app to open with a passcode instead of Face ID or Touch ID.
You can view all apps that use Face ID (or Touch ID) by going to Settings > Face ID & Passcode. From here, tap More Apps and turn off the toggle for the desired app. After that, this app will not be able to use Face ID and will only unlock when you enter your device passcode (which you shouldn’t share with anyone).
In addition, you can also remove extra unwanted fingerprints or face from Face ID.
4. Remove fingerprints and Face ID of other people
You can add up to five fingerprints to iPhone Touch ID and two faces to Face ID.
When you got your iPhone, you may have excitedly added the fingerprints of several family members or set up a second face for Face ID.
Go to Settings > Face ID & Passcode and Reset Face ID. This will remove all faces. After that, set up Face ID for yourself again.
If your iPhone has Touch ID, go to Settings > Touch ID & Passcode. From here, swipe left on additional fingerprints and delete them.
Advice. When you are on the Touch ID screen and place your finger on the Touch ID button, it highlights the added fingerprint corresponding to that finger.
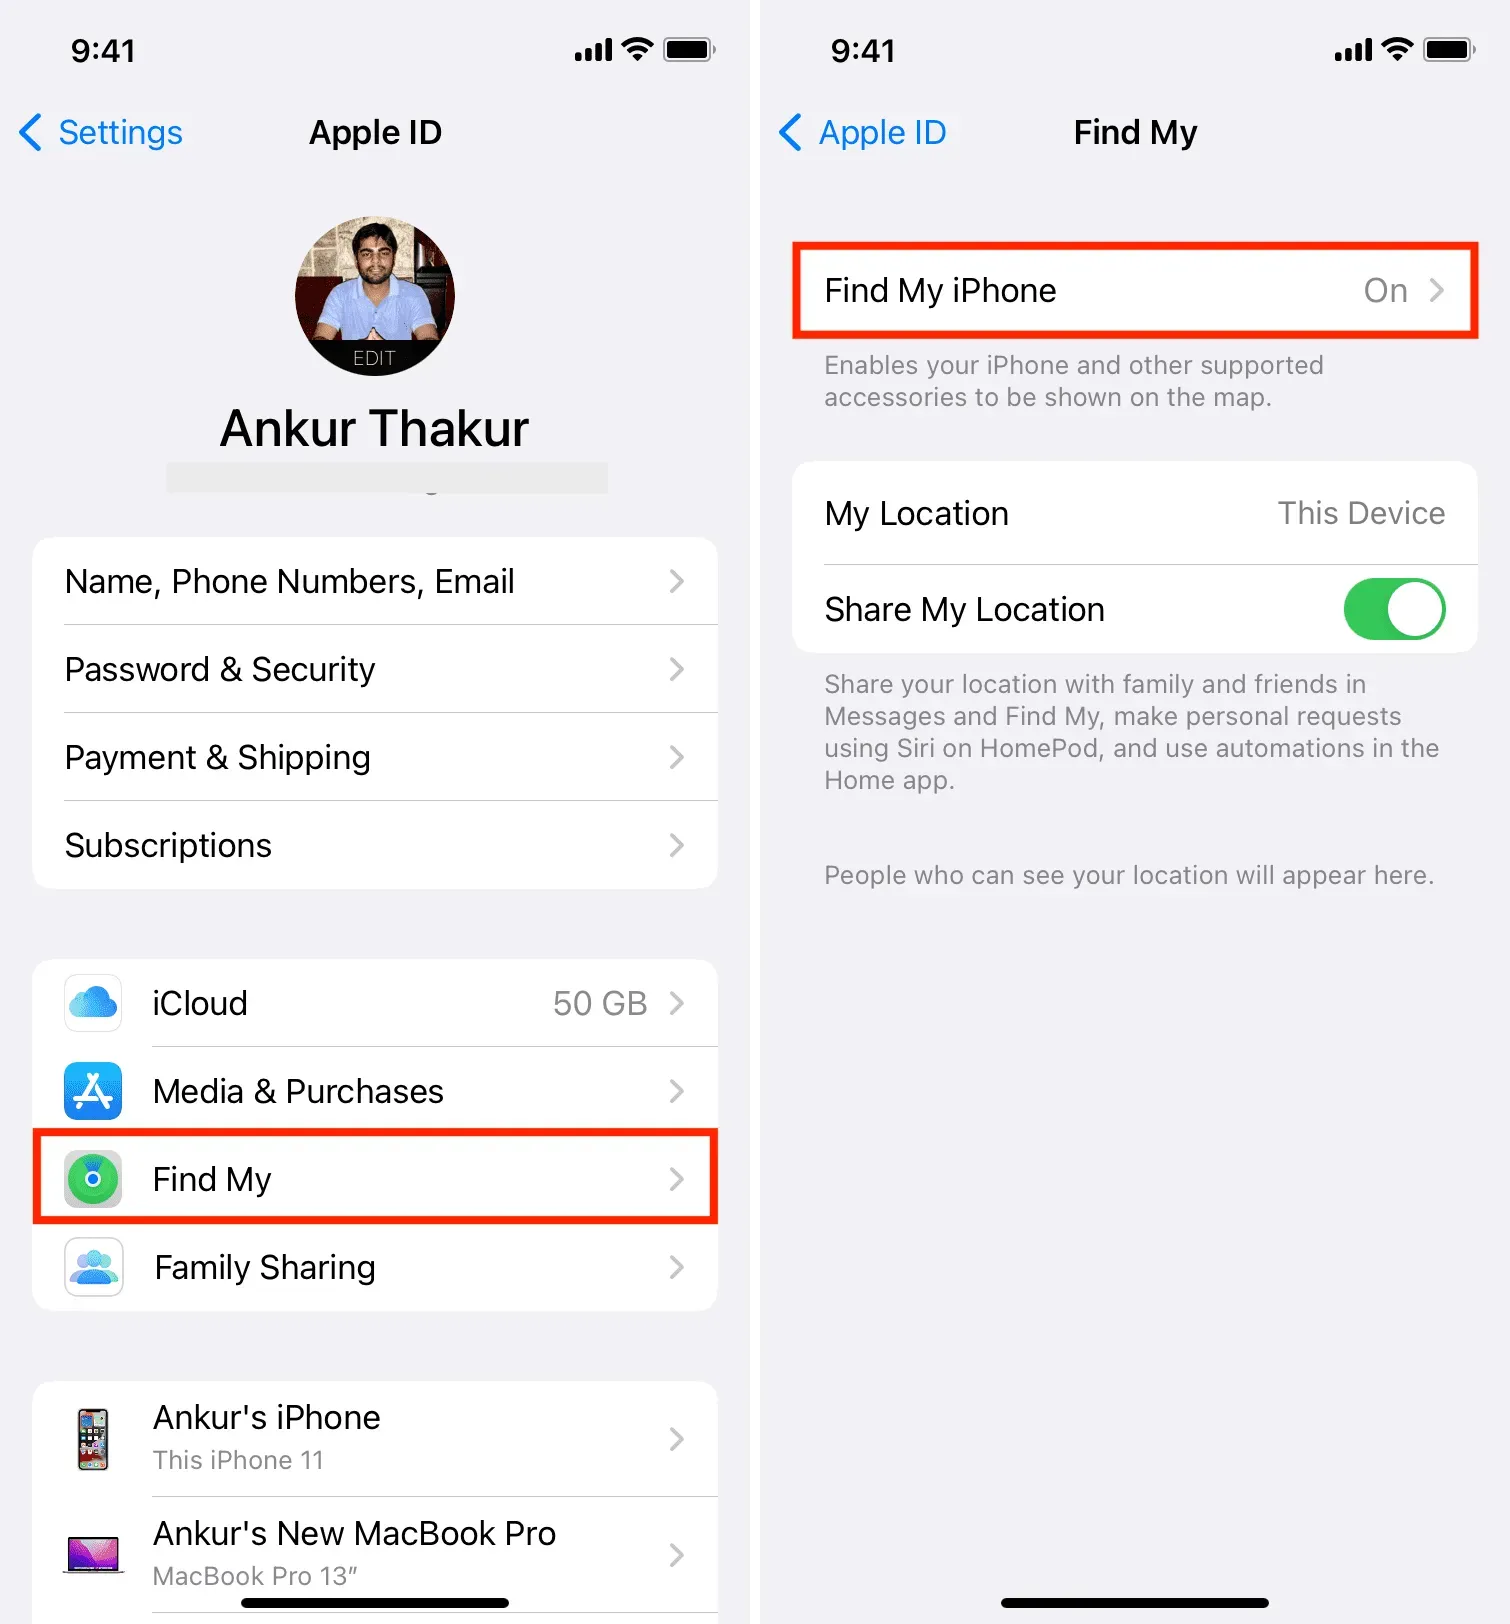
5. Make sure Find My iPhone is turned on.
Find My allows you to locate your iPhone, lock it, display a message on the lock screen, play a sound, and wipe your device if it’s lost. This is one of the most important features that you should support on your iPhone, iPad, Mac and Apple Watch. You can check its status by going to Settings > Your Card > Find My iPhone > Find My iPhone.
6. Remove unknown and unnecessary configuration profiles
Configuration profiles allow large corporations and offices to better manage their employees’ iPhones and iPads. However, some dubious websites will display a professional-looking iOS-style pop-up and trick you into installing random profiles that can be used to use your data and your device.
Unless you’re running the iOS beta, or your iPhone isn’t provided or managed by your organization/school for custom settings, apps, and so on, then ideally, your device shouldn’t have any configuration profiles. device.
To check, go to iPhone Settings > General > VPN & Device Management. If you see any unnecessary profile here, delete it from here and restart your iPhone.
7. Set a shorter auto-lock duration
Auto-Lock locks your iPhone unless you manually lock it. The shorter the auto-lock setting, the better, as it shortens the time your iPhone stays unlocked. To change this, go to iPhone Settings > Display & Brightness > Auto-Lock and set it to 30 seconds or 1 minute.
8. Use two-factor authentication for all supported services
Two-factor authentication acts as an additional wall of protection. Almost all major services, from email and social media to banks, support this. Dig into the privacy and security settings of the respective service to find the two-factor authentication option.
Related Tutorials:
- How to Set Up and Use the Built-in Two-Factor Authentication Code Generator on iPhone and iPad
- How to set up two-factor authentication on Twitter without a phone number
- Instagram Adds Security-Aware Verification and Authentication Tools
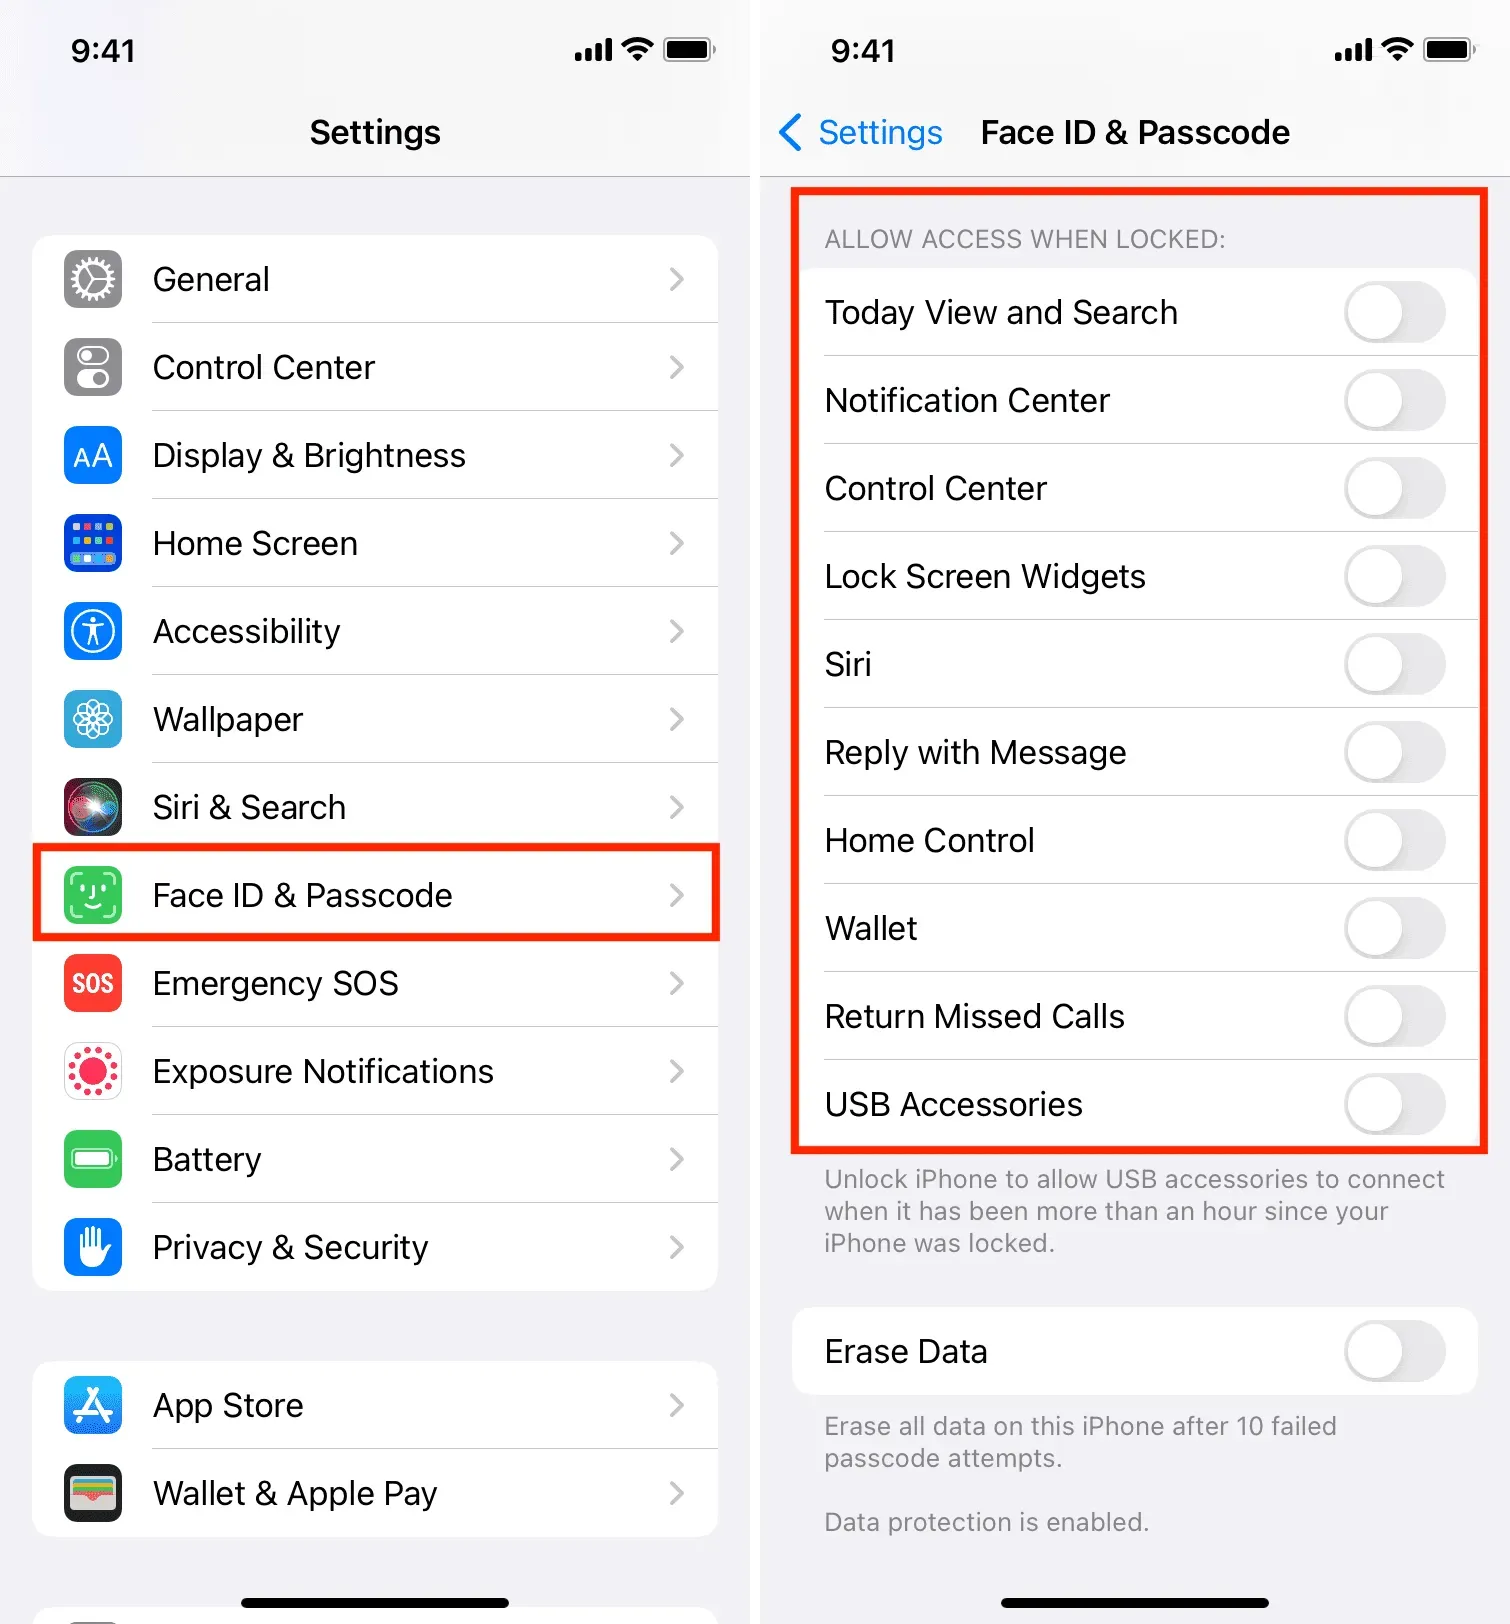
9. Prevent sensitive information from appearing on the lock screen.
You can prevent certain apps from showing notifications on the lock screen (next tip). Also, if you go to iPhone Settings > Face ID/Touch ID & Passcode, you can turn off some features like Today, Search, Wallet, Reply with Message, etc.. d., from working on the lock screen.
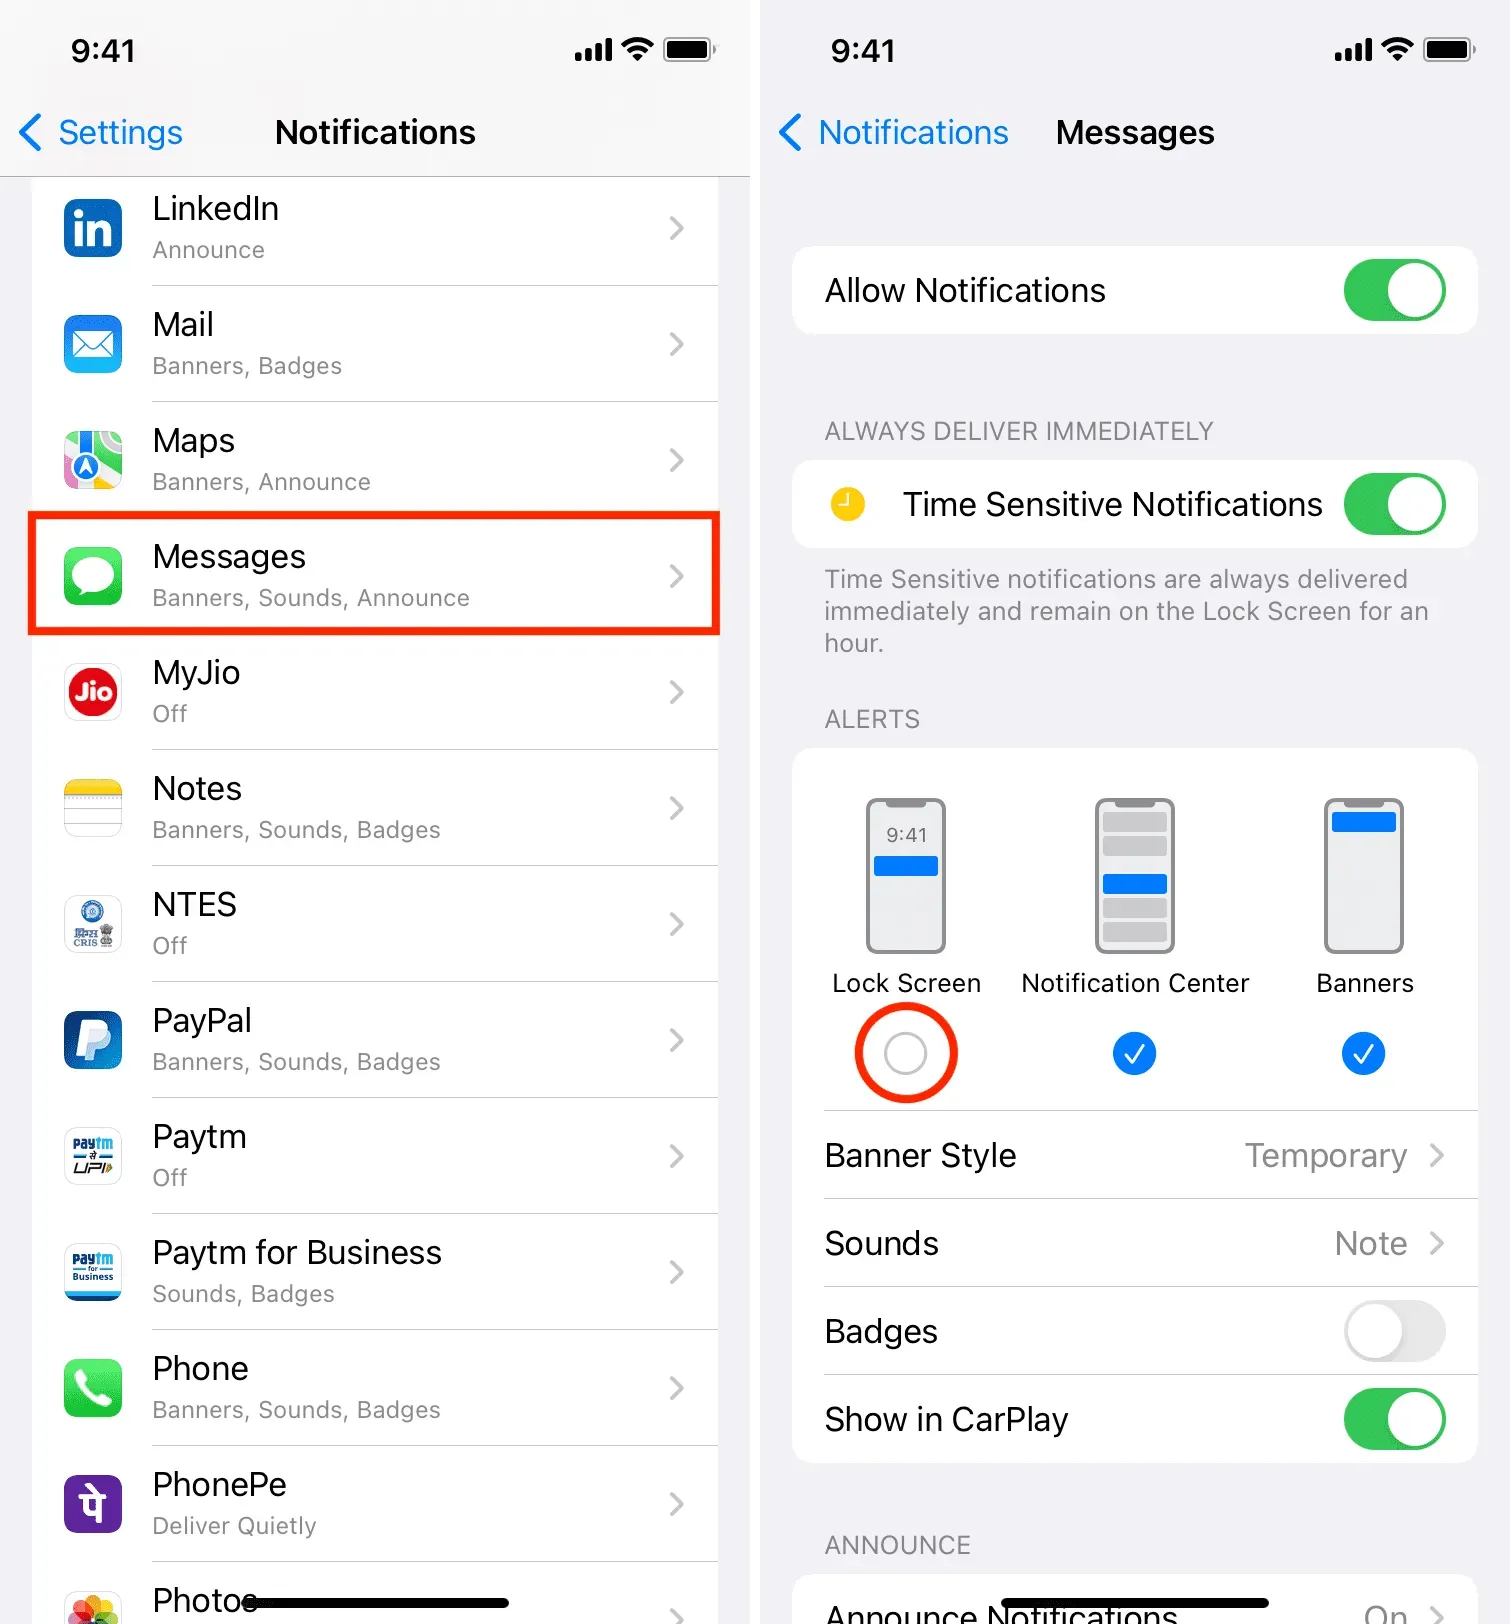
10. Manage app notifications on your lock screen
If you have sensitive apps, you can prevent their notifications from appearing on the lock screen. This ensures that any observer cannot view these notifications.
Go to Settings > Notifications and tap the app’s name. Then uncheck “Lock screen”to prevent this app’s notification from appearing on the lock screen.
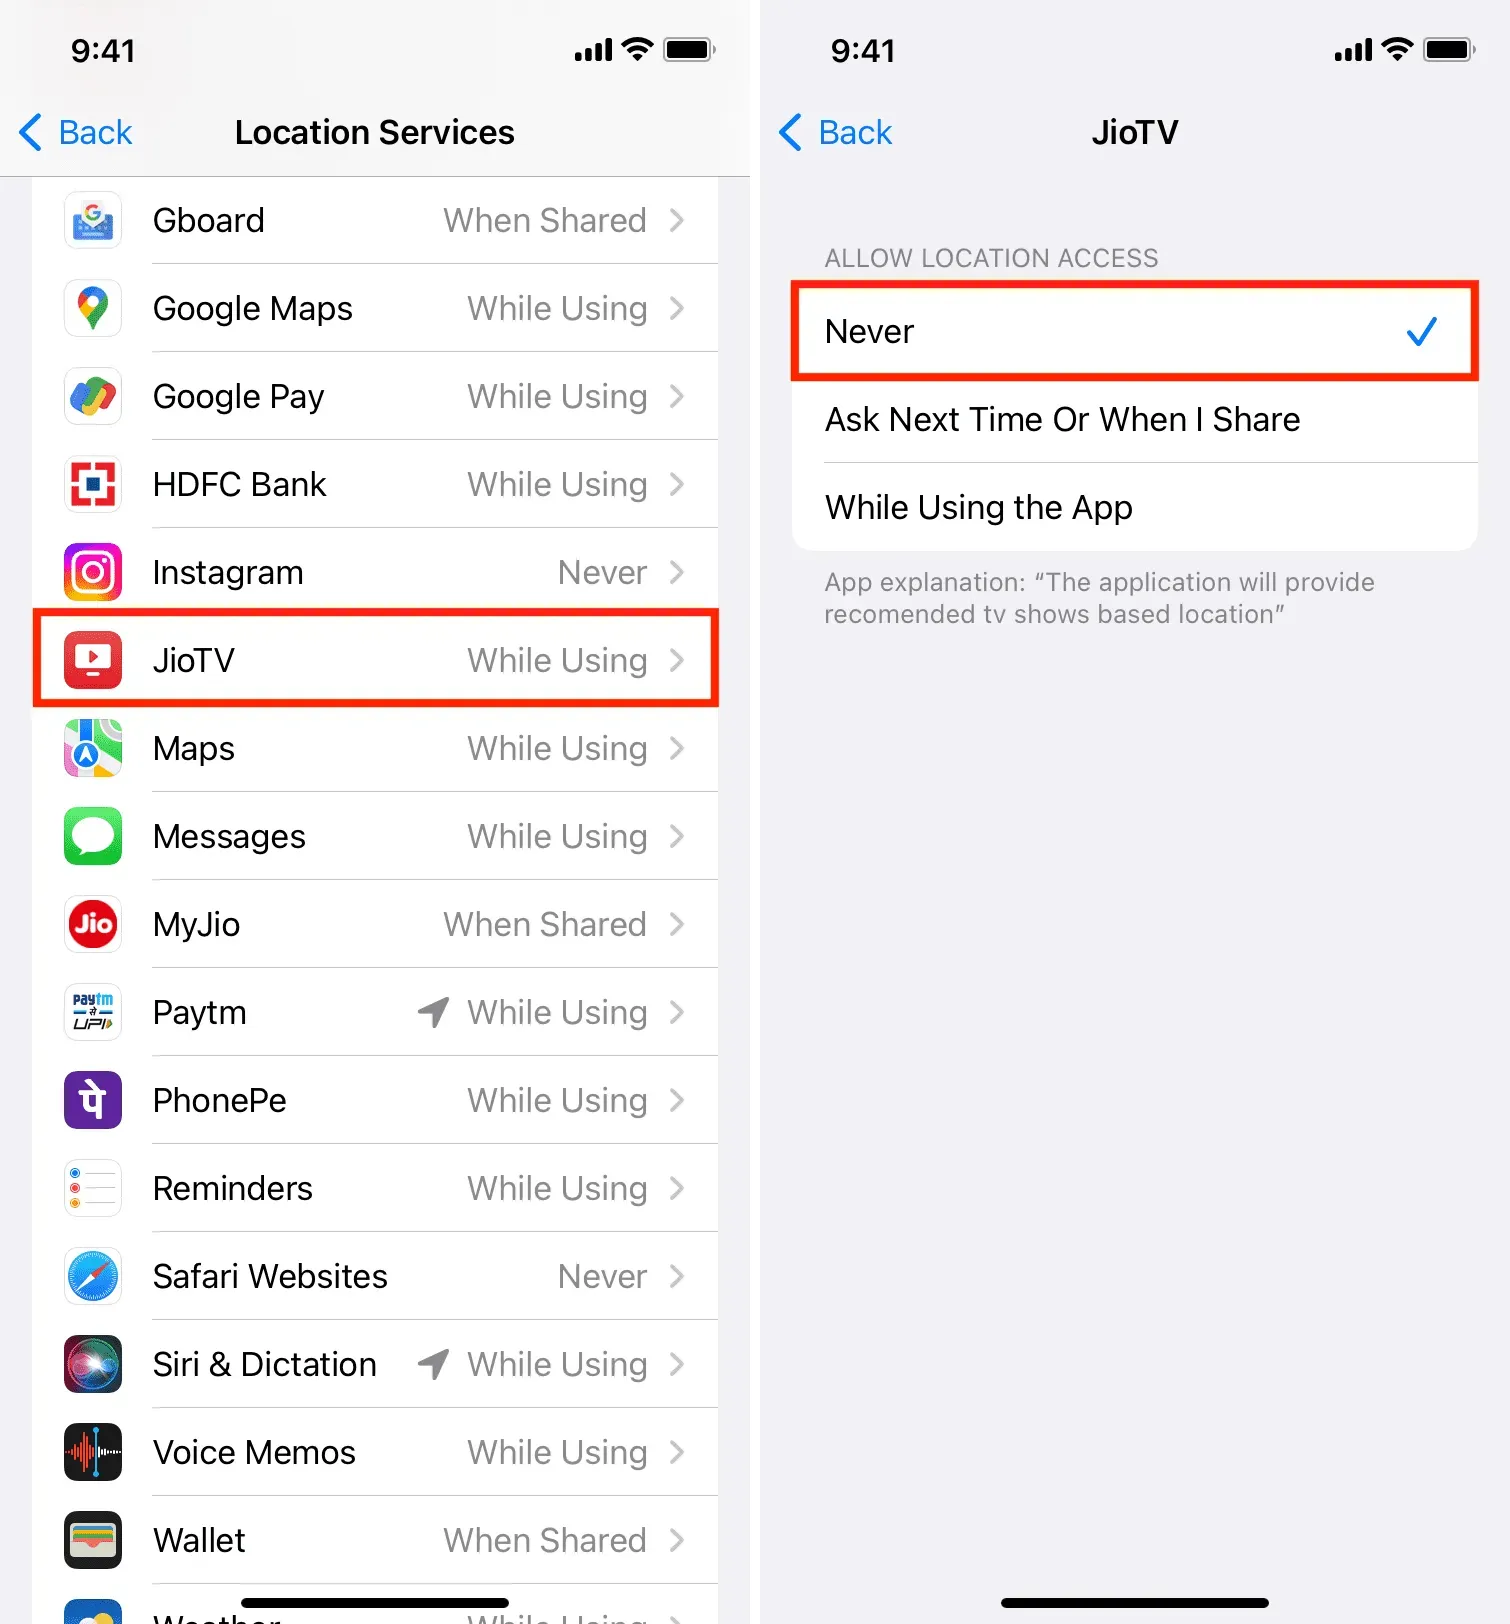
11. Check App Location Access
Some apps, like Uber, need to have access to your location in order to work. However, a few apps ask for your location, but can work just fine even if their location permissions are revoked.
You can view and manage them in iPhone Settings > Privacy > Location Services. From here, tap the app and select “Never”to prevent it from accessing your location.
12. Double check other privacy settings
Location aside, it would also be a good idea to go to iPhone Settings > Privacy regularly and make sure that only a few apps have access to your contacts, microphone, camera, and other privacy settings.
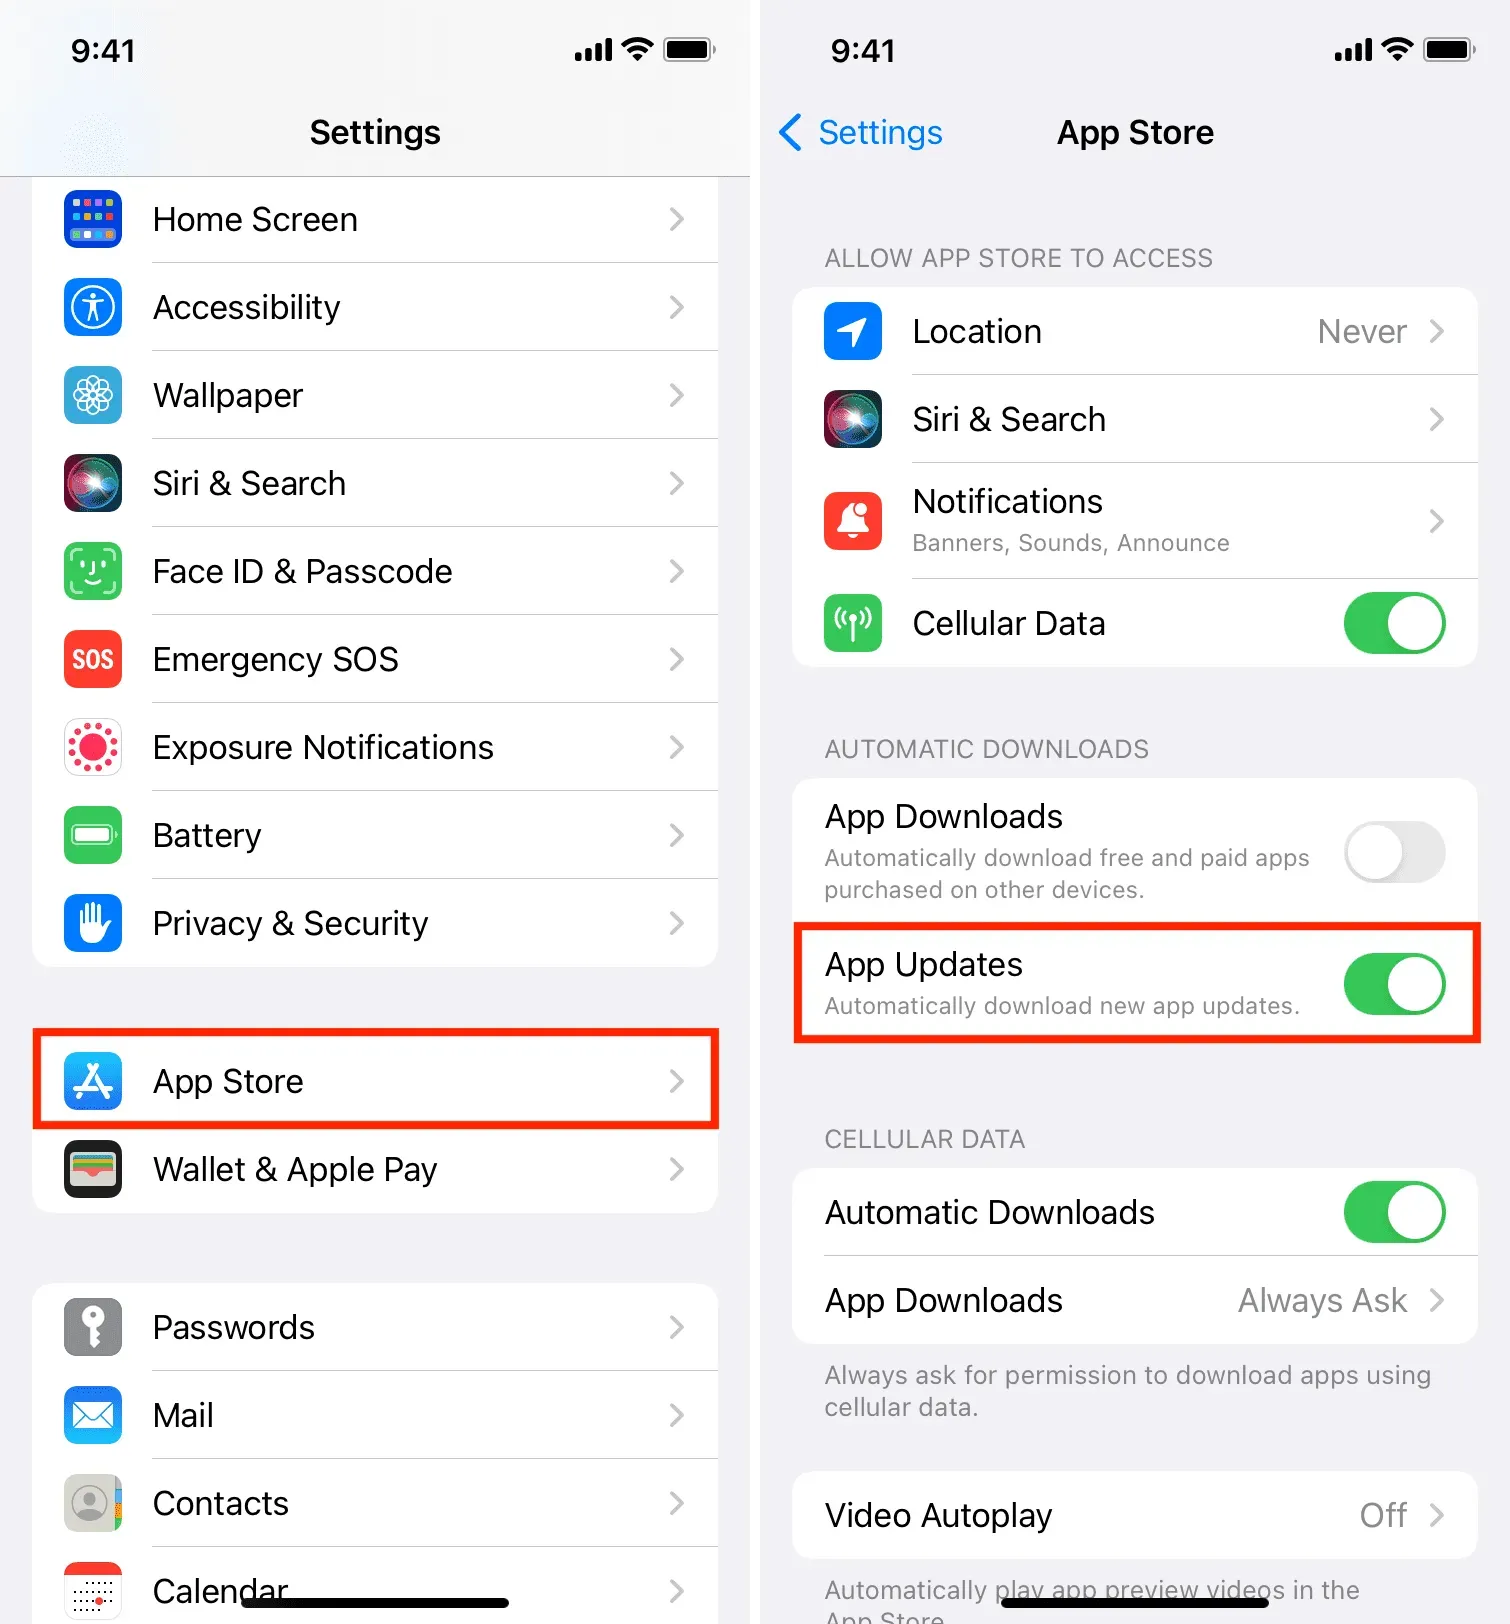
13. Keep your apps up to date by turning on auto-update
Application developers regularly publish updates to fix bugs and add new features. The newest version of the app is usually better with fixes and security improvements.
Because manually updating each app can be a daunting task, go to iPhone Settings > App Store and turn on App Updates under Automatic Downloads. If you rarely have Wi-Fi but have unlimited cellular data, you can enable automatic downloads to take care of app updates via mobile data.
14. Install the latest version of iOS
Apple releases iOS updates that fix known bugs, improve overall security, and are recommended for all iPhone users. If you’re using an older version of iOS, go to Settings > General > Software Update to download and install the latest build of iOS.
15. Prevent your iPhone from automatically connecting to Wi-Fi and hotspots.
You can prevent your iPhone from automatically connecting to open Wi-Fi networks and hotspots, as these can be easily used (and deployed publicly in many cases) to steal your data.
To manage this, go to iPhone Settings > Wi-Fi and choose Off. for “Prompt to connect to a network”and “Never”to automatically connect to an access point.
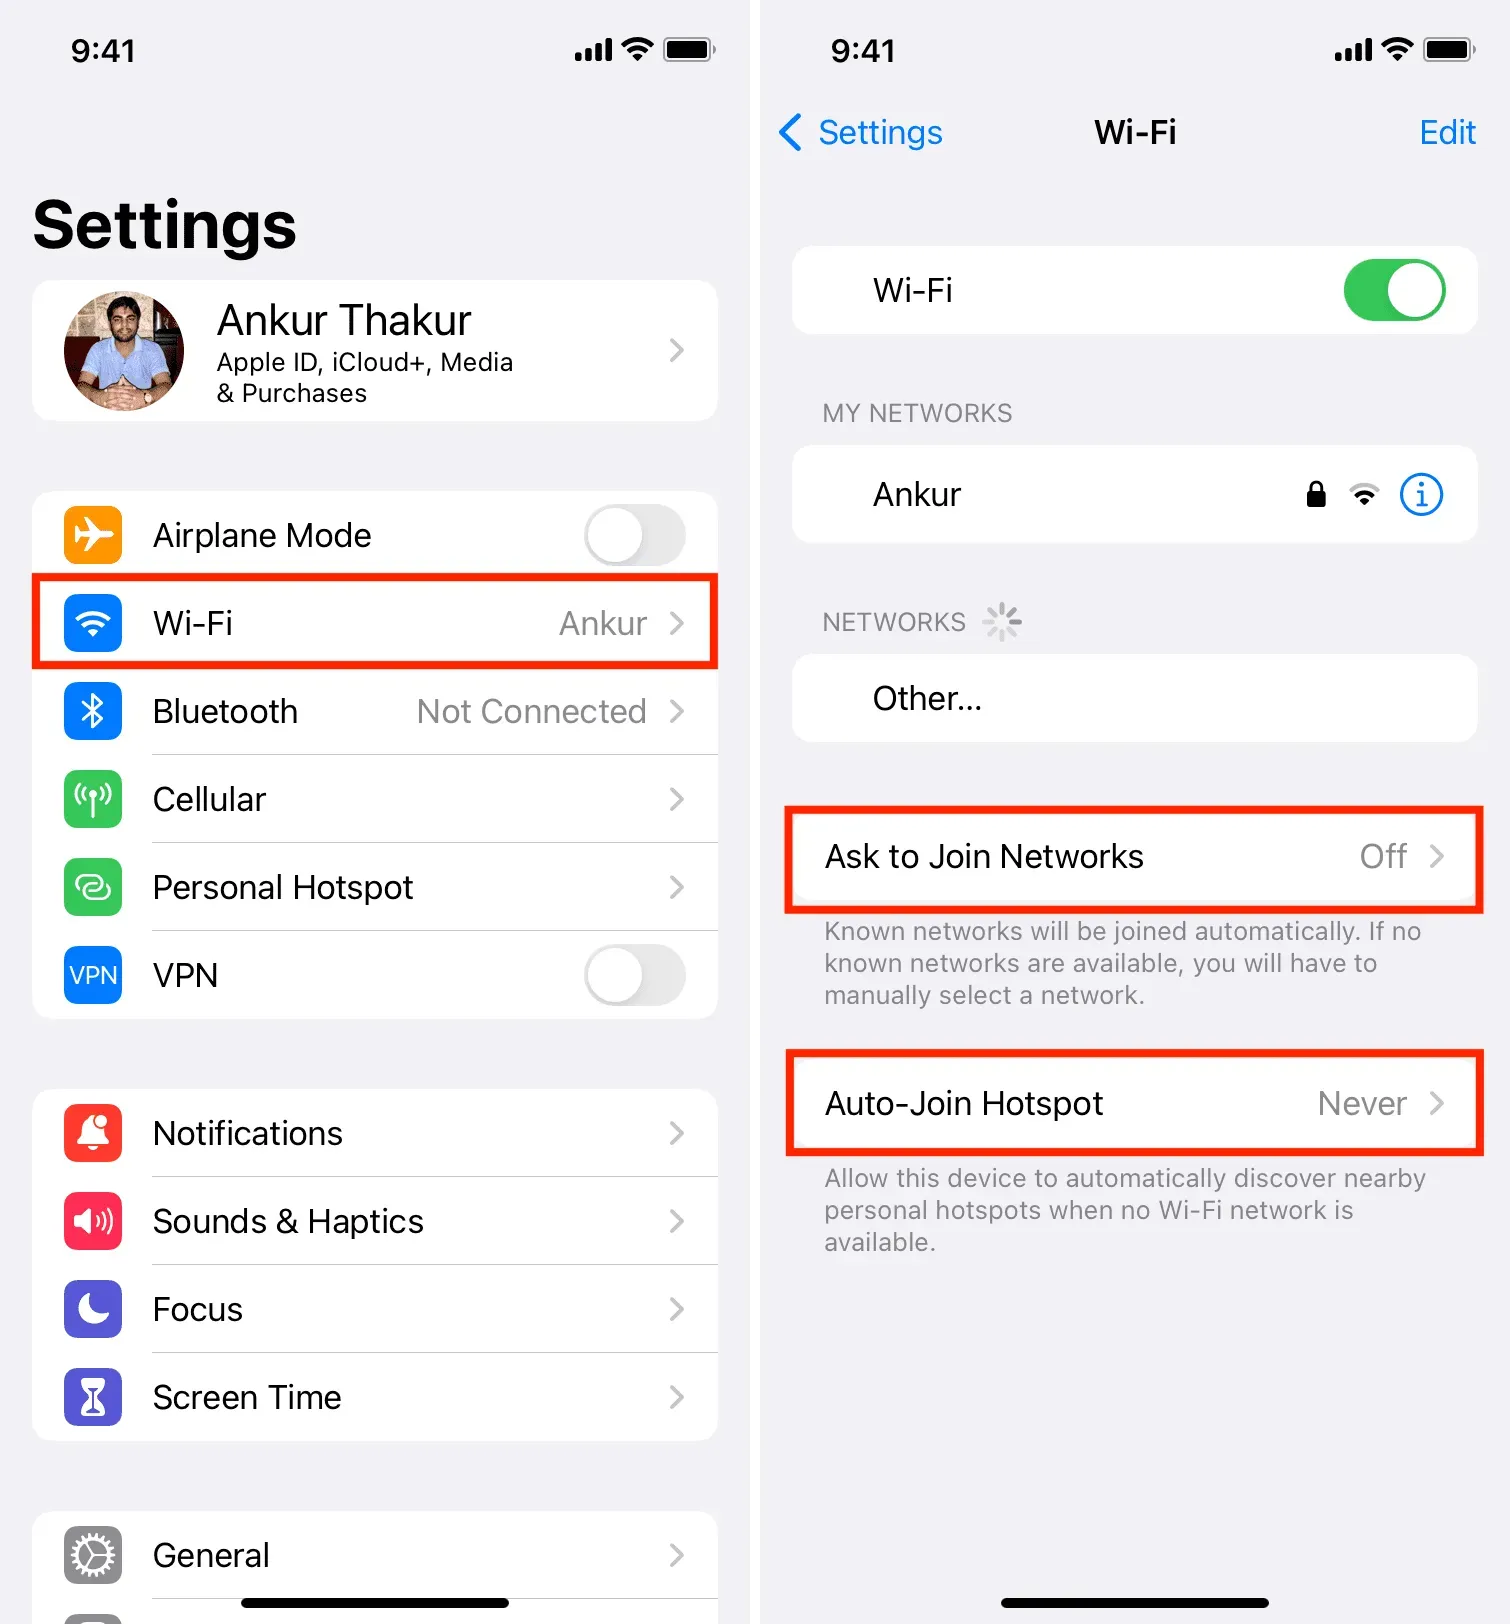
Alternatively, you can click (i) next to a previously connected network and disable auto-join, or click “Forget this network”if you don’t plan to use this Wi-Fi network in the near future.
16. Don’t Use a Free VPN Unnecessarily
Free VPNs have to find a way to make money, and most of the time, that’s with your data. If you need to use a VPN, it’s best to look into and get the paid version of a reliable VPN. And if you don’t want to do that, make sure you use free VPNs sparingly.
17. Don’t download almost any app and learn it first.
The App Store is well regulated and Apple has a system of checks and balances. However, there have been many instances of imposters or insecure apps making their way into the iOS App Store. So when you want to download an app for a specific task, do your due diligence and get apps that are regularly updated, have good ratings and reviews, etc.
And even when you open an app, don’t click “Allow”on every popup it presents. Read the warning and only allow the app to access your location, contacts, microphone, etc. if you think it’s necessary.
Here are some important tips to help keep your iPhone and its data safe. If you have additional recommendations, please leave them in the comments below.