Some emails are only effective if sent on time, such as morning to-do lists, reports, or birthday wishes. A convenient technique is to schedule them so that they reach the recipient on time. And while the stock email app for iOS and macOS doesn’t support such a feature, there are tricks and hacks for scheduling email on iPhone, iPad, and Mac.
How to Schedule Emails on iPhone or iPad to Send Later
Since the default iOS Mail app doesn’t have this feature, we’ll have to rely on third-party mail apps like Spark, Gmail, Newton Mail, etc. The best part is that it’s pretty easy; let me illustrate this with the example of Spark and Gmail.
Schedule email on iOS device via Spark
If you don’t already have the Spark app, download it and sign in with your email account.
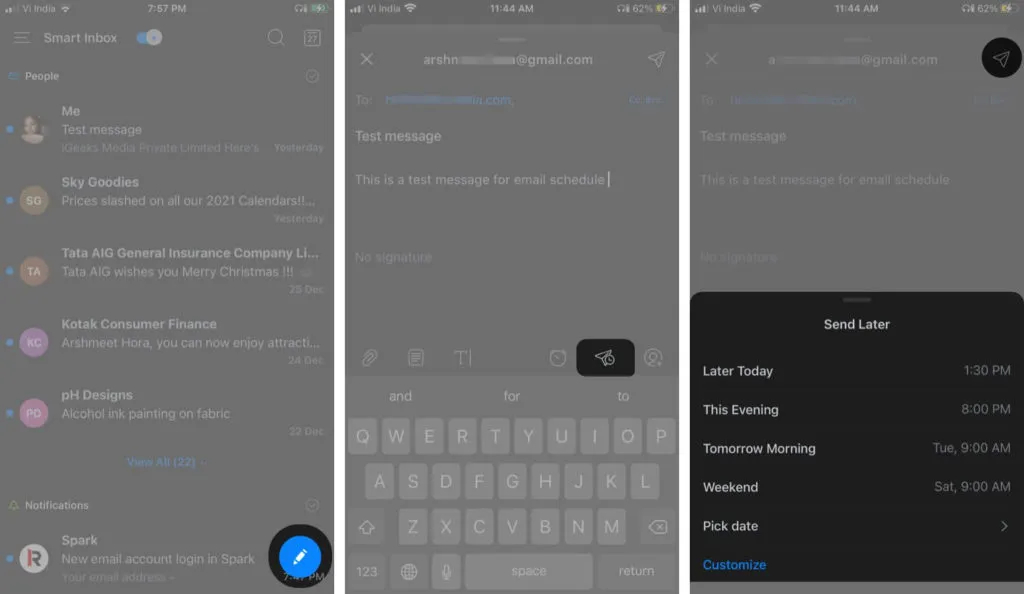
- Click on the pen icon to create a new email.
- Select a recipient, a subject, and write your message as usual.
- Now, tap the Email Scheduling icon in the bottom right corner.
- Here you can choose one of the pre-defined schedules or choose your own date by clicking “Choose Date”. Note. Spark allows you to schedule posts up to six months in advance.
- To send an email, click the “Send”icon in the upper right corner.
Your message will be automatically sent at the desired date and time. Until it is sent, the message will be stored in the Outbox.
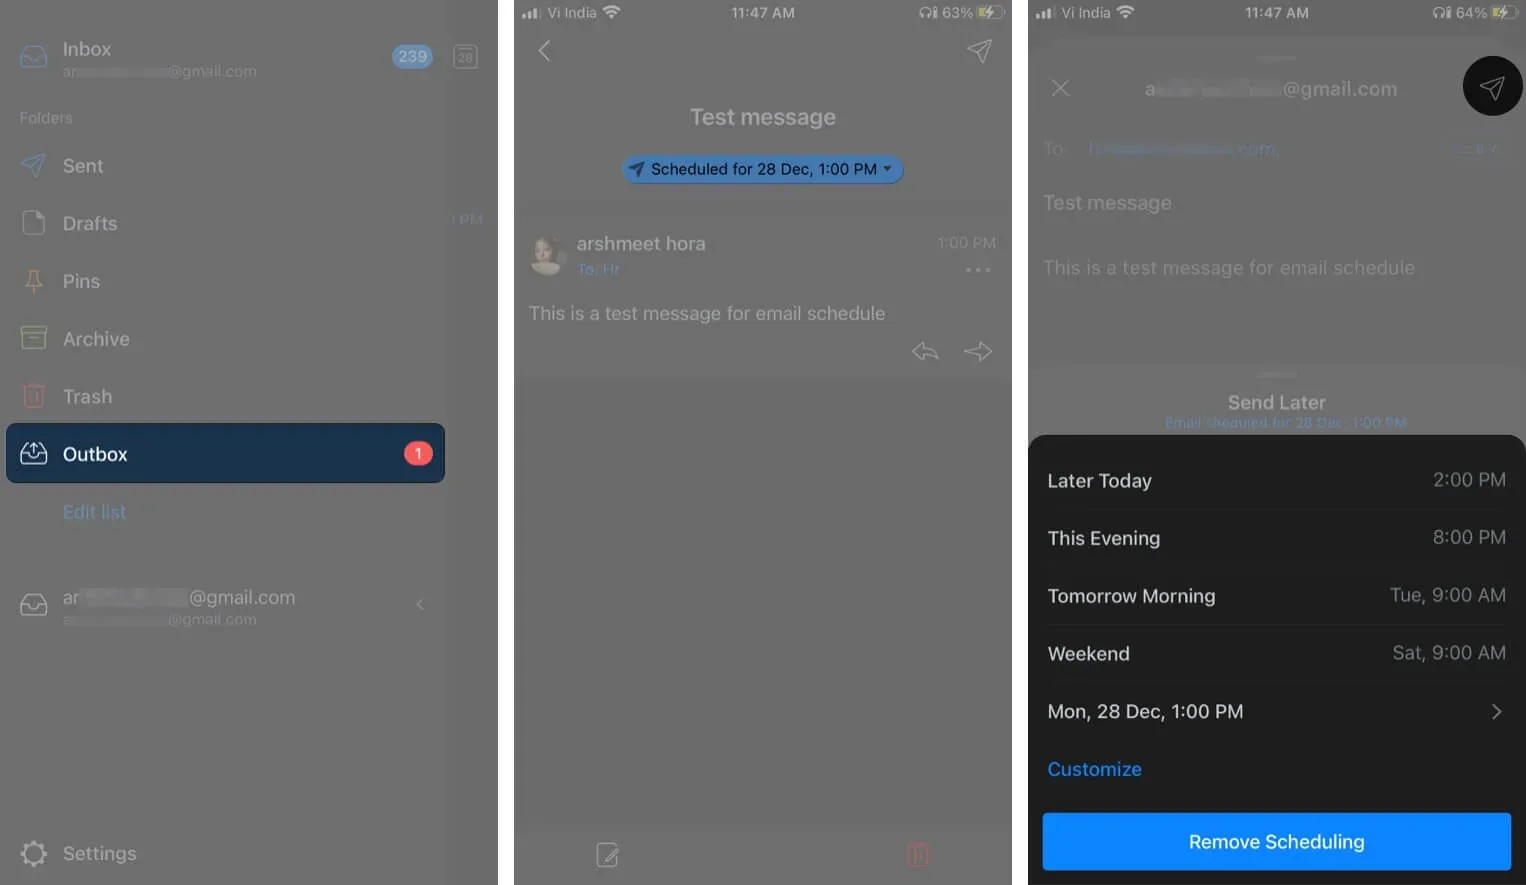
If you want to delete or reschedule an email, launch the Spark app → three horizontal lines → Outbox → select a scheduled email → Edit icon → Schedule icon → select Customize or Delete Schedule respectively.
If you prefer the Gmail app, follow these steps:
Schedule email in Gmail for iPhone and iPad
- Launch the Gmail app and click Compose.
- Add a recipient, subject, and message. Now select the three dot icon in the top right corner.
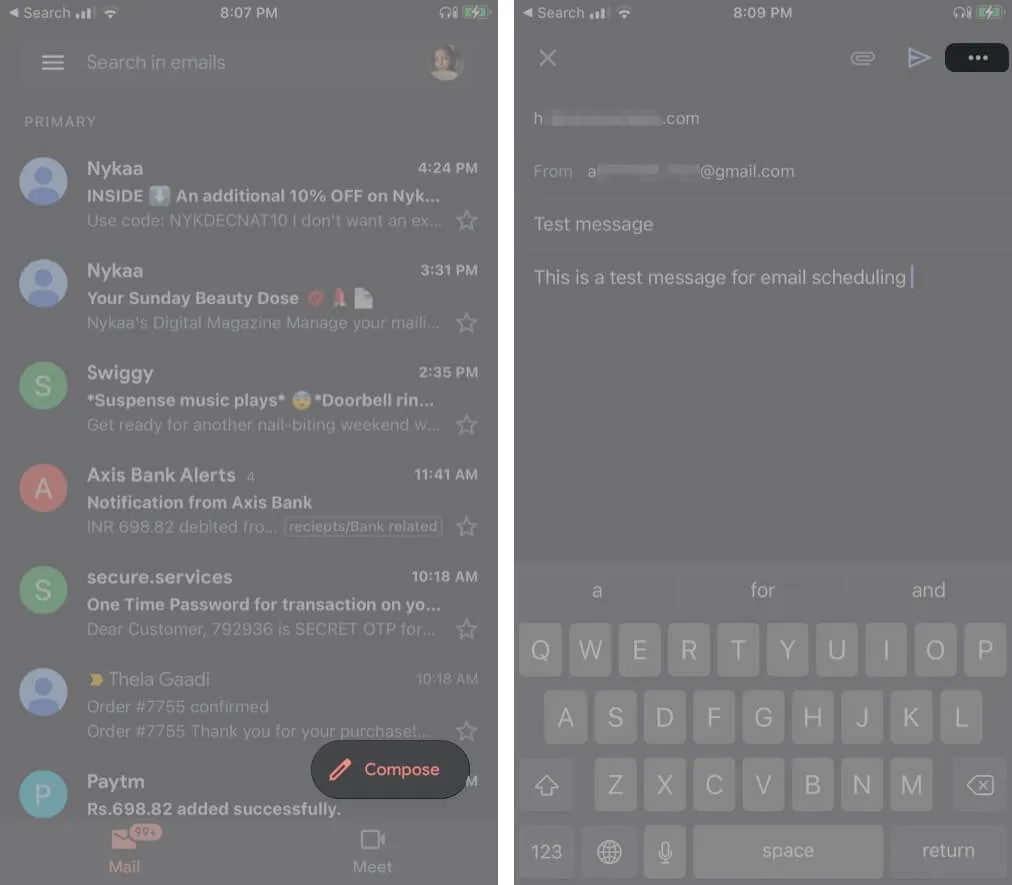
- Click Send Schedule from the options.
- Select one of the options or click “Select date and time”to select a custom date and time.
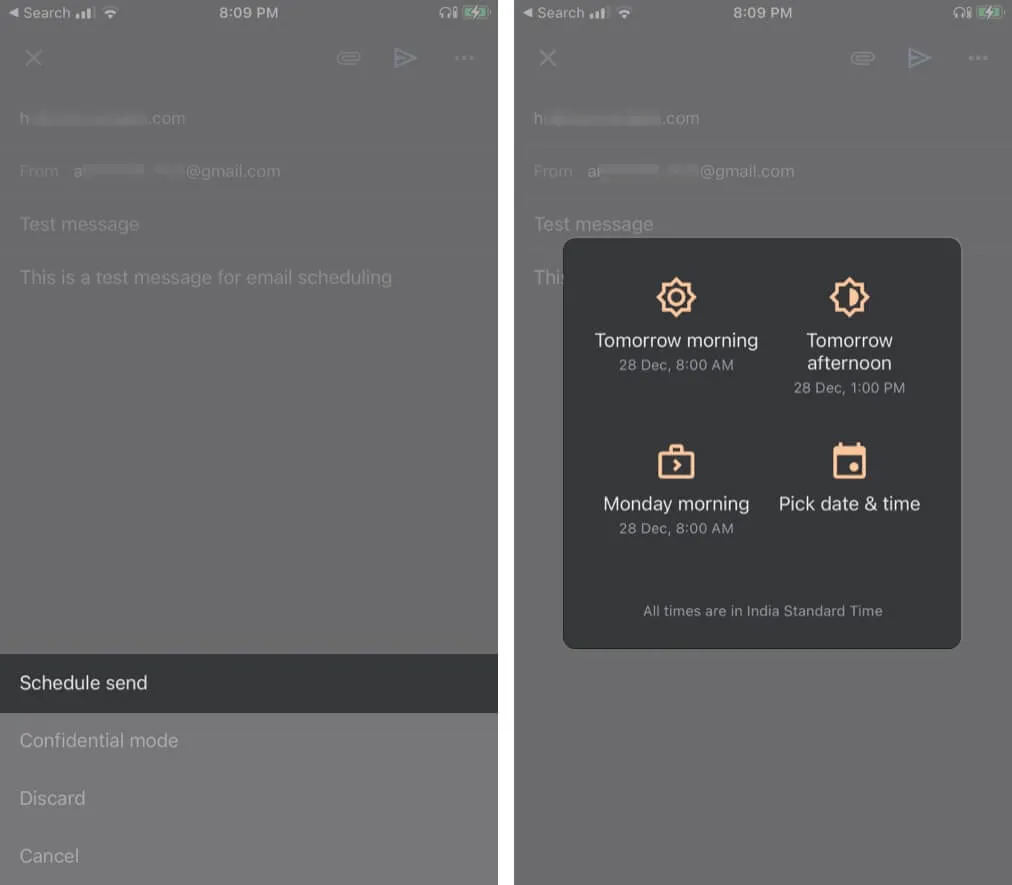
And it’s done. Notably, Google allows you to schedule up to 100 emails years in advance.
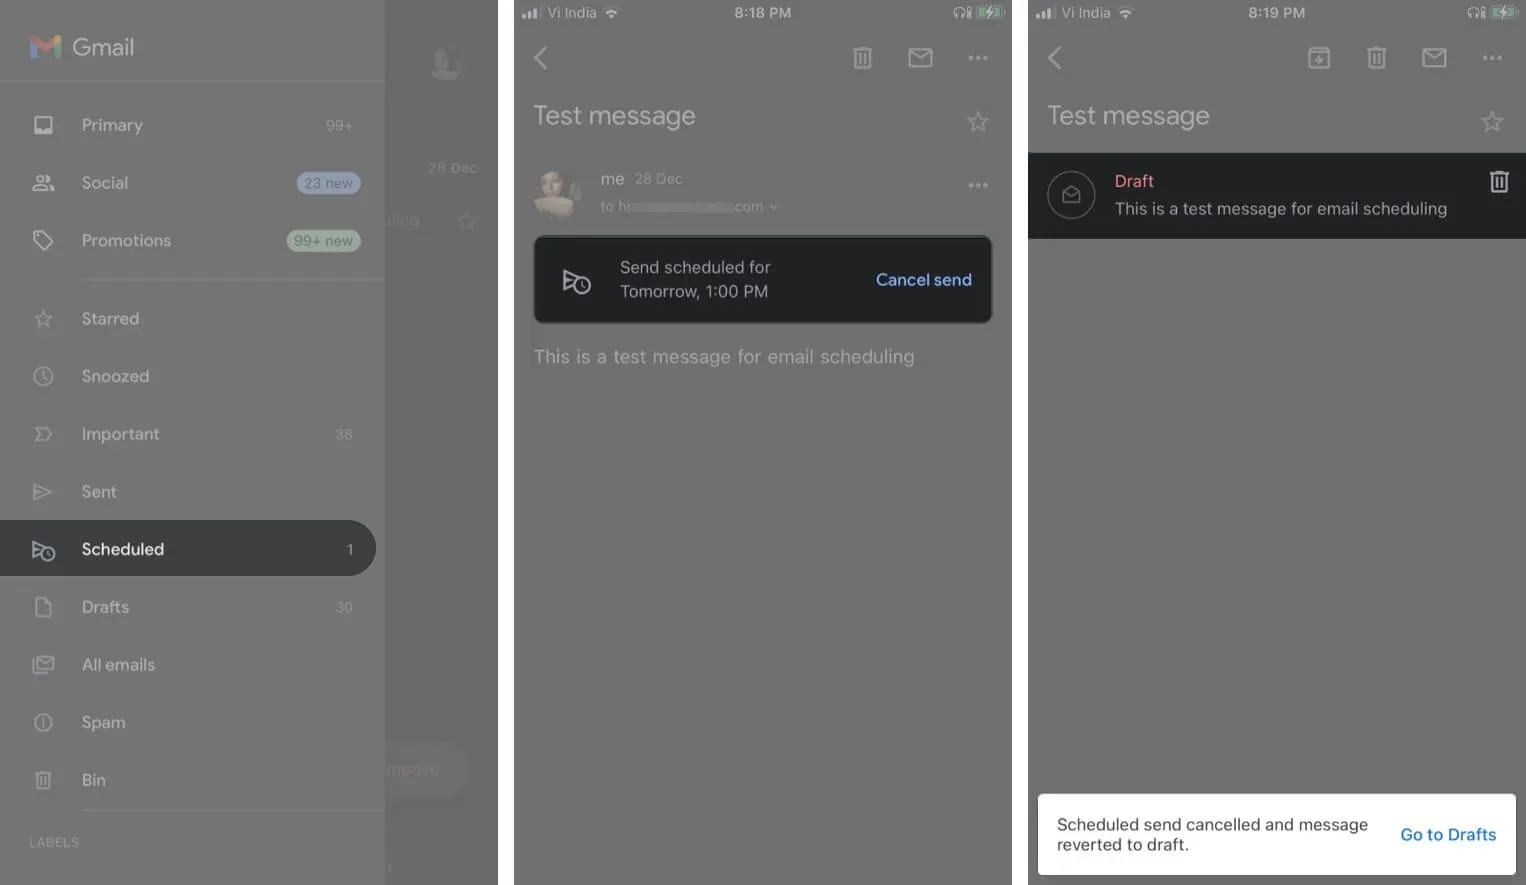
If you want to cancel, view, or change your schedule, please go to Gmail → Scheduled → select an email → click Unsend → tap the email again → repeat steps 2 to 4.
For more cool Gmail hacks and tricks, check out our detailed guide here.
When it comes to Mac, you can use a third party app or a neat Automator trick to schedule emails.
How to Schedule Email on Mac to Send Later
Automator is a preinstalled app on all Mac computers. It allows you to create workflows and scripts and automatically perform repetitive tasks, including scheduling messages in Apple Mail.
Set up email with Automator on Mac
- Launch the Automator app, select “Workflow”and click “Select”.
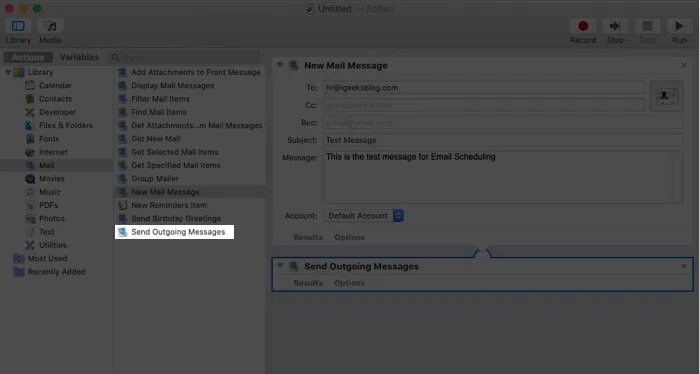
- Find the mail in the Library section of the sidebar. Then drag the New Mail Message option to the main window.
- Now compose your email, add a recipient, a subject, and enter your message.
- After that, select the “Send outgoing messages”option in the sidebar, drag it under the current task in the main window.
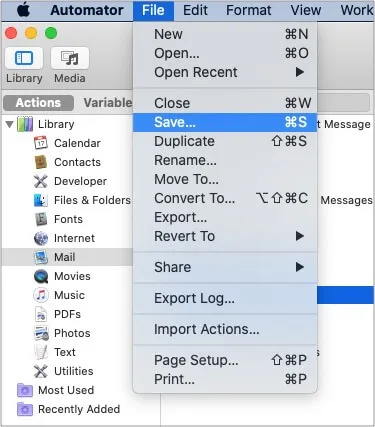
- Go to File and select Save. Here, name the file, select “Application”from the “File Format”menu, and click “Save.”
Once the file is saved, you can schedule the email to be sent using the Calendar app.
Scheduling email with the Calendar app on macOS
- Open the Calendar app.
- Double-tap the desired date to create an event.
- Name the event, set the time, and click Alert in the menu.
- Navigate to Custom from the dropdown and select “Open File”in the first box.
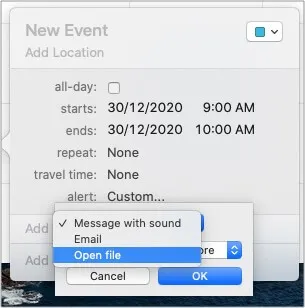
- Click on the next field, select “Other”and add the generated automation file.
- Change the alert time to “During the event”and click “OK”.

That’s all!
The calendar event will trigger the automation at the right time and send an email. Make sure your Mac is on and connected to the internet at this time, otherwise the event will be missed.
To continue scheduling email with Automator, create a new workflow or edit a saved one and add it to a calendar event.
While this is a handy tool, there are quite a few steps involved in mixing. Also, it does not support attachments. You might want to try an easier method using a third party application like Spark.
Download the Spark app on your Mac and sign in with your email account.
Schedule Email on Mac with Spark
- Compose an email, add a recipient, a subject, and write a message.
- Click the Schedule icon next to the Submit button.
- Choose from predefined dates and times, or customize it to your preference and click Set Time when you’re ready.
- Now click the Schedule button to confirm the action.
This is a pretty easy way to schedule email from your Mac.
Enjoy the freedom of scheduling email on iPhone, iPad and Mac.
While Apple excels at many things, the iOS app isn’t quite ready yet. It lacks some major cool features, including email scheduling. Maybe that’s why the Cupertino giant lets you switch the default email browser on the iPhone.
What do you think of the default mail app? Which third party app do you prefer the most? Let us know in the comments section below.