

Shooting, editing and sharing images with iPhone has never been easier. Some of these images will be immediately shared with friends or uploaded to social networks. However, most of them will need to be stored on the laptop for safe and easy access later.
Learning how to transfer photos from iPhone to Mac is vital if you want to modify or back up your images on your laptop.
You have plenty of alternatives to transfer images from your iPhone to your PC or Mac. Since they are both Apple devices, there are many ways to transfer images from iPhone to Mac, but the process is not as complicated as you might imagine. We will teach you how to transfer images from your iPhone to computer.
Bulk export photos from iPhone to Mac with maximum speed
When updating software or moving to a new iPhone, MacX MediaTrans is the most suitable iTunes option for transferring images between iPhone 13/12 and Mac (Monterey).
To free up space on your iPhone, you can bulk delete images and replace heic with jpg. Sync your iOS music, ringtones, audiobooks, videos and even iTunes purchases to your Mac without data loss.
Transfer all or some photos from iPhone to Mac selectively.
- Import all photos from iPhone to Mac at once
- Transfer photos from iPhone to Mac using the Photos app
- Import Photos from iPhone to Mac with Image Capture App
- Import Photos from iPhone to Mac with Preview App
- Transfer photos and other information from iPhone to Mac with a USB cable
You can use the instructions below if you only want to transfer a few images from an album to your Mac, rather than all photos from iPhone or an entire album.
- Get AnyTrans for Mac and install it > Use a USB cable to connect iPhone to laptop > Select the “Photos”option in the “Device Manager”interface.
- Select the album containing the photos you want > Select the images you want to transfer > To transfer the photos you want to your Mac, tap the “To Mac”option in the top corner.
1. Import all photos from iPhone to Mac at once
Here is how to transfer all images from your iPhone to your Mac, including Camera Roll images, Photo Stream images, iTunes synced photos, iCloud shared images, album images and some other individual albums.
You can use the Any Trans method mentioned above to transfer 3D images at the same time.
The most common way to bulk import images from iPhone or iPad to Macintosh is to connect your gadget to your Macbook and use the import feature in the Photos app.
Additional tools like Image Capture and Preview app can be used to move all images from iPhone to Mac in addition to Photos app.
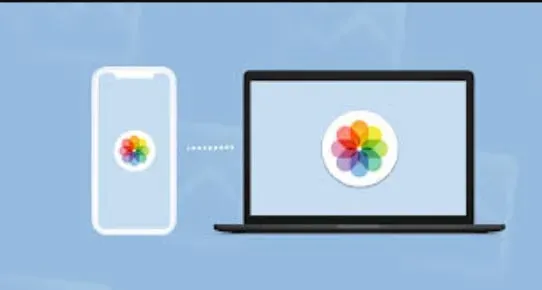
2. Transfer photos from iPhone to Mac with Photos app.
As stated earlier, the most popular and preferred way to transfer images from iPhone to Macintosh is through the Photos app.
- To secure your iPhone, connect it to your computer and enter a passcode if required.
- On your Macintosh, launch the Photos app (if it’s not already open).
- In Photos, go to the Devices area, select your iPhone, and click the down arrow next to Transfer to.
- Worth noting: You can use LaunchPad and the app catalog to open the Photos app.
- Choose Latest Album from the pop-up menu, enter an image for your new photo gallery, and then choose Create.
- On the next page, select “Transfer All”or “Separately select images and import selected”.
- Wait for the images from your iPhone to be uploaded to your MacBook’s new images folder.
3. Import photos from iPhone to Mac using Image Capture app.
Another option to transfer images from iPhone to computer is to use the Image Capture app that comes with your Macbook.
- Connect iPhone to Mac > Enter iPhone screen lock security code when prompted.
- Launch Image Capture from the application folder or launch pad on your Macintosh.
- Select your iPhone in the Gadgets tab of the Photo Capture program > click the direction arrow next to “Import to”and choose a destination for exported images on your Macbook (Desktop, Downloads, etc.).
- Worth noting: By default, Image Capture saves images to your MacBook’s Pictures folder.
- After selecting the destination, click “Download All”to download all images from iPhone to your Mac.
- Mac will save images from your iPhone in a specific folder named after your iPhone.
- Worth noting: if you don’t want all your images to be transferred, select them manually and then click “Upload”.
- On your computer, the selected images will be in a specific folder named after your iPhone.
4. Import Photos from iPhone to Mac with Preview App
Using the Preview app on your Macbook is a quick and easy way to move pictures from your iPhone to your computer.
- To protect your iPhone, connect it to your computer and enter a passcode.
- Use the launcher to launch the Preview app on macOS.
- Click the “Import all new photos from your iPhone”button on the “File”tab on the taskbar.
- If a pop-up window appears with the message “image transfer failed…”, click “OK”to close it.
- On the next page, you can select “Pictures”individually, or use the “Edit”feature in the navigation bar to select “All iPhone Photos”by clicking “Select All”.
- Untick all photos by pressing Command + I.
- Click the “Import”button once the images are selected.
- Choose a location for the imported photos on your Macbook on the next page. Then click “Select Destination”.
- Pause for the photos from your iPhone to be downloaded to your Mac.
5. Transfer photos and other information from iPhone to Mac with a USB cable.
If the above procedure fails, you can use iMobie AnyTrans, a specialized tool. This app can do much more than just share photos/screenshots. Other data such as contacts, call history, text messages, etc. can be transferred between iOS devices. You can move all or some of your photos with AnyTrans.
Apart from data transfer, AnyTrans can also backup your iPhone, restore the backup when needed, and handle iCloud/iTunes data among other things. And before you use AnyTrans, take a look at the following exceptional features to download iPhone images.
How to AirDrop Images from iPhone to Mac
Then swipe up from the panel dock to access the Control Center and press “AirDrop”. You can also enable AirDrop by going to Settings > General > AirDrop. Select “Contacts Only”or “Everyone”depending on who you want to share the images with.
And here’s how to use AirDrop to import iPhone pictures to your MacBook:
- Launch the Photos app on your iPhone and find the images you want to download to your Macbook pro.
- Make sure you’re viewing photos in thumbnail view, and then click “Select”in the top right corner.
- Select the images you want to transfer to your MacBook (Import selected photos is marked with a blue checkmark).
- Now click the share button / click import selected photos.
- Click the hostname of your Macintosh in the AirDrop box.
- Approve the images on your Macbook to be stored in your library.
How to sync pictures from iPhone to Mac using iCloud
Apple’s online photo storage service is called iCloud Photos. When you turn on iCloud Photos, all your iPhone photos are stored in iCloud and can be viewed and downloaded from your Mac.
It is important to note that your iPhone and Macbook must be registered with the same Apple ID. Here is how to use iCloud to transfer iPhone pictures to your Mac:
- On your Macbook, go to System Preferences > Choose iCloud and click the Apple icon in the top left corner of the bar.
- Select the iCloud Photo Library (iCloud Photos in macOS Mojave) check box.
- Go to Settings > Photos > iCloud Photos and make sure it’s turned on.
How to Email Photos from iPhone to Mac
Email becomes a great option if you just need to move a few pictures from your iPhone to your Macbook and don’t have access to your macOS. Here’s how to email photos from your iPhone to your Mac:
- On your iPhone, open the Photos app > To open the Albums page, tap Albums > select the desired album.
- Select “Edit”from the drop-down menu > select the photos you want to transfer > select “E-mail”from the drop-down menu when clicking the “Share”button.
- Enter your email address, click “Email”> “Send”> “Log in to your Mac’s email account”and transfer the photos to your Mac.
FAQ
Why can’t I move pictures from iPhone to Mac?
Go to iPhone Settings, then iCloud, and finally Photos. Make sure “iCloud Photos App”is turned on. Check if the “Optimize storage”box is checked. If this feature is enabled, turn it off and wait for your iPhone to finish uploading photos to iCloud.
What should I do if my computer does not recognize iPhone?
Before you continue, make sure your iOS or iPadOS gadget is turned on, secure, and on the home screen. Make sure your MacBook or Windows computer has the latest software. Make sure you have the most recent version of iTunes installed if you are using it. Untie your smartphone and click “Trust”. If you receive a “Trust this computer”warning.
What to do if photos are not showing up on Mac?
Make sure your Wi-Fi is turned on so you can connect to the internet. Select [your name] > iCloud > Photos from the drop-down menu under Settings. Make sure upload to my photo stream is enabled. If you don’t see this option, turn on iCloud Photographs to store your photos and videos in the cloud.
Where are photos stored on my Mac?
The default system photo library is located in the Photos folder of your Macbook. Other photo libraries can be created on your Macbook Air and other storage devices. You should always use the Photos app when accessing photos in the Photo Library.