
Some apps look great in dark mode and some don’t. So when you have system-wide dark mode enabled on your iPhone and you’re using an app that only looks good in light mode, you usually have to turn dark view off manually and then turn it back on when you leave. But there is a workaround that can automate this process.
Arguably the best dark mode improvement coming in iOS 13 is the dark and light appearance for each app. Only it’s not as easy as flipping a switch. While iOS 15 and iOS 16 have a “Per-App Settings”section in Accessibility settings that lets you set app-specific text size, button shapes, color style, and other settings, there’s no “Use Dark Mode”or “Use Light mode.
Instead, you’ll need to look to see if the app in question has an override in its settings, and if not, you’ll have to set up two or more automations in the shortcuts to reach per-app dark mode settings. You can create a very simple automation that turns on dark or light mode when you open the app, but this has drawbacks, namely that your system as a whole will be affected.
If you want to keep your iPhone’s system-wide dark or light mode setting after exiting an app that you’ve assigned dark or light mode automation to, the workflows are a little more complicated, but not complicated. This is the closest we get to assigning each app a preferred dark or light appearance, which we’ll see until Apple gives us a real per-app option or until all apps include overrides.
Option 1: Use lock switches for individual apps
Some third-party apps have built-in dark mode override settings that allow you to leave the app in dark mode, light mode, or sync with the system-wide look and feel. If you choose to have an app use a particular look and feel, it will always use that look and will not affect the current system-wide setting.
So if you set the app to light mode only and dark mode is currently enabled system wide, the app will use the light view and you will see the system-wide night view for everything else when you exit the app.
Not all applications have an override, but some notable ones include:
- Facebook: Go to Menu -> Settings & Privacy -> Settings -> Dark Mode.
- Google Maps: From the Explore or Go tab, tap your profile icon, then go to Settings -> Dark Mode.
- Messenger: Tap your profile icon in any tab, then select Dark Mode.
- Snapchat: Tap your profile icon on any tab, then select the settings gear and then App Appearance.
- TikTok: On the Profile tab, tap the three-line menu icon, then select Dark Mode.
- YouTube: Tap your profile icon on any tab other than Shorts, then go to Settings -> General -> Dark Theme. (Note that YouTube doesn’t give you the option to leave it the same as system-wide, so it’s always light or dark depending on your preference.)
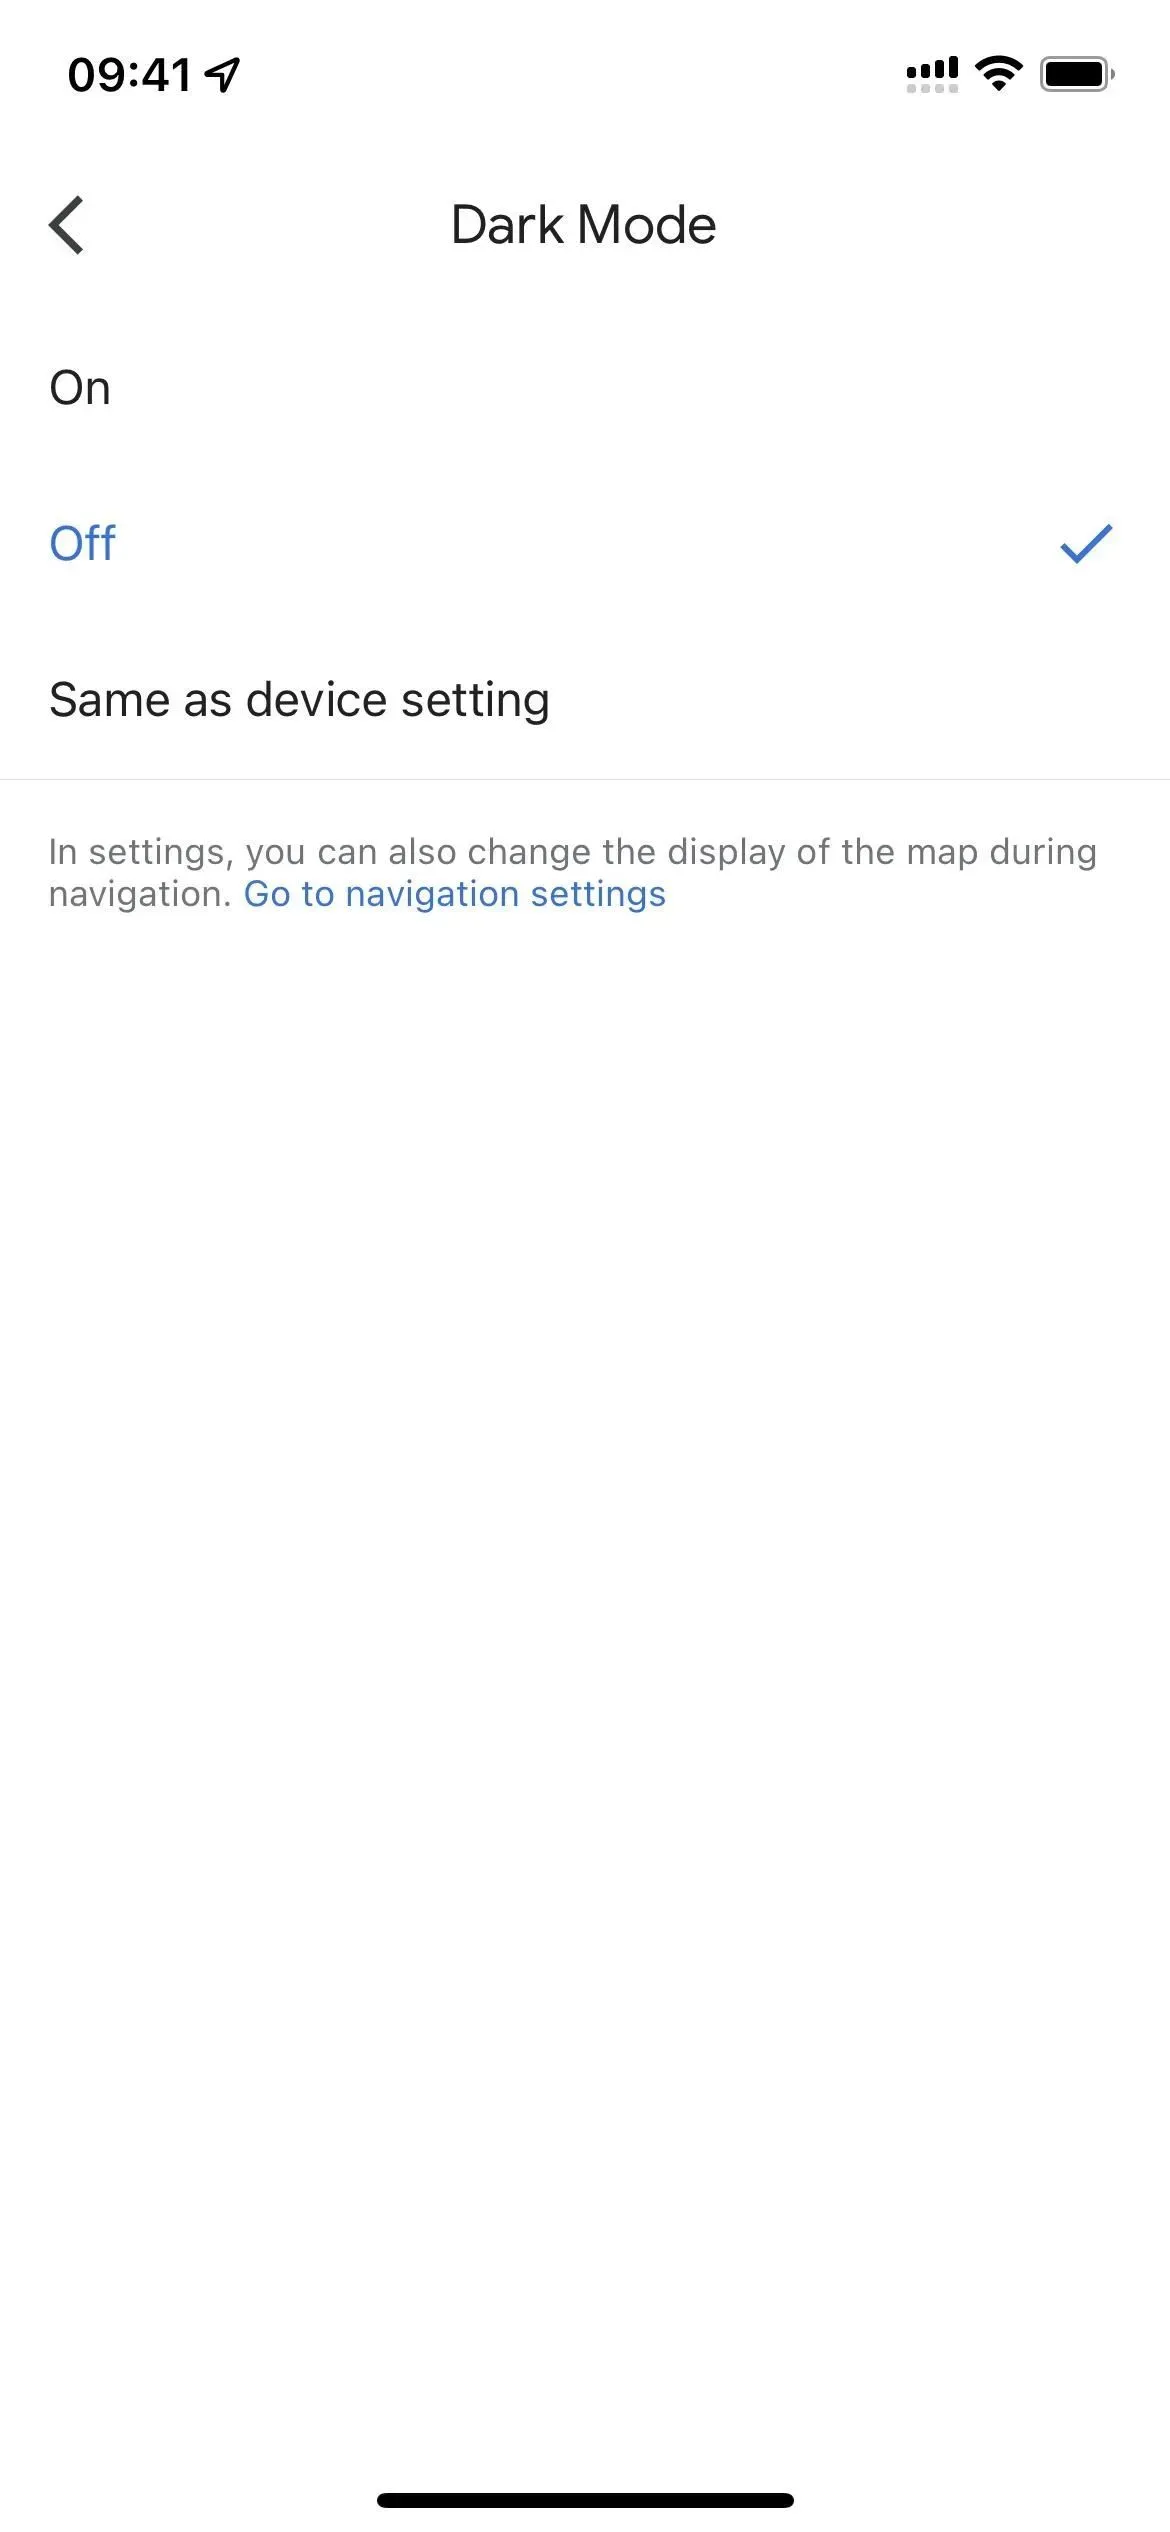
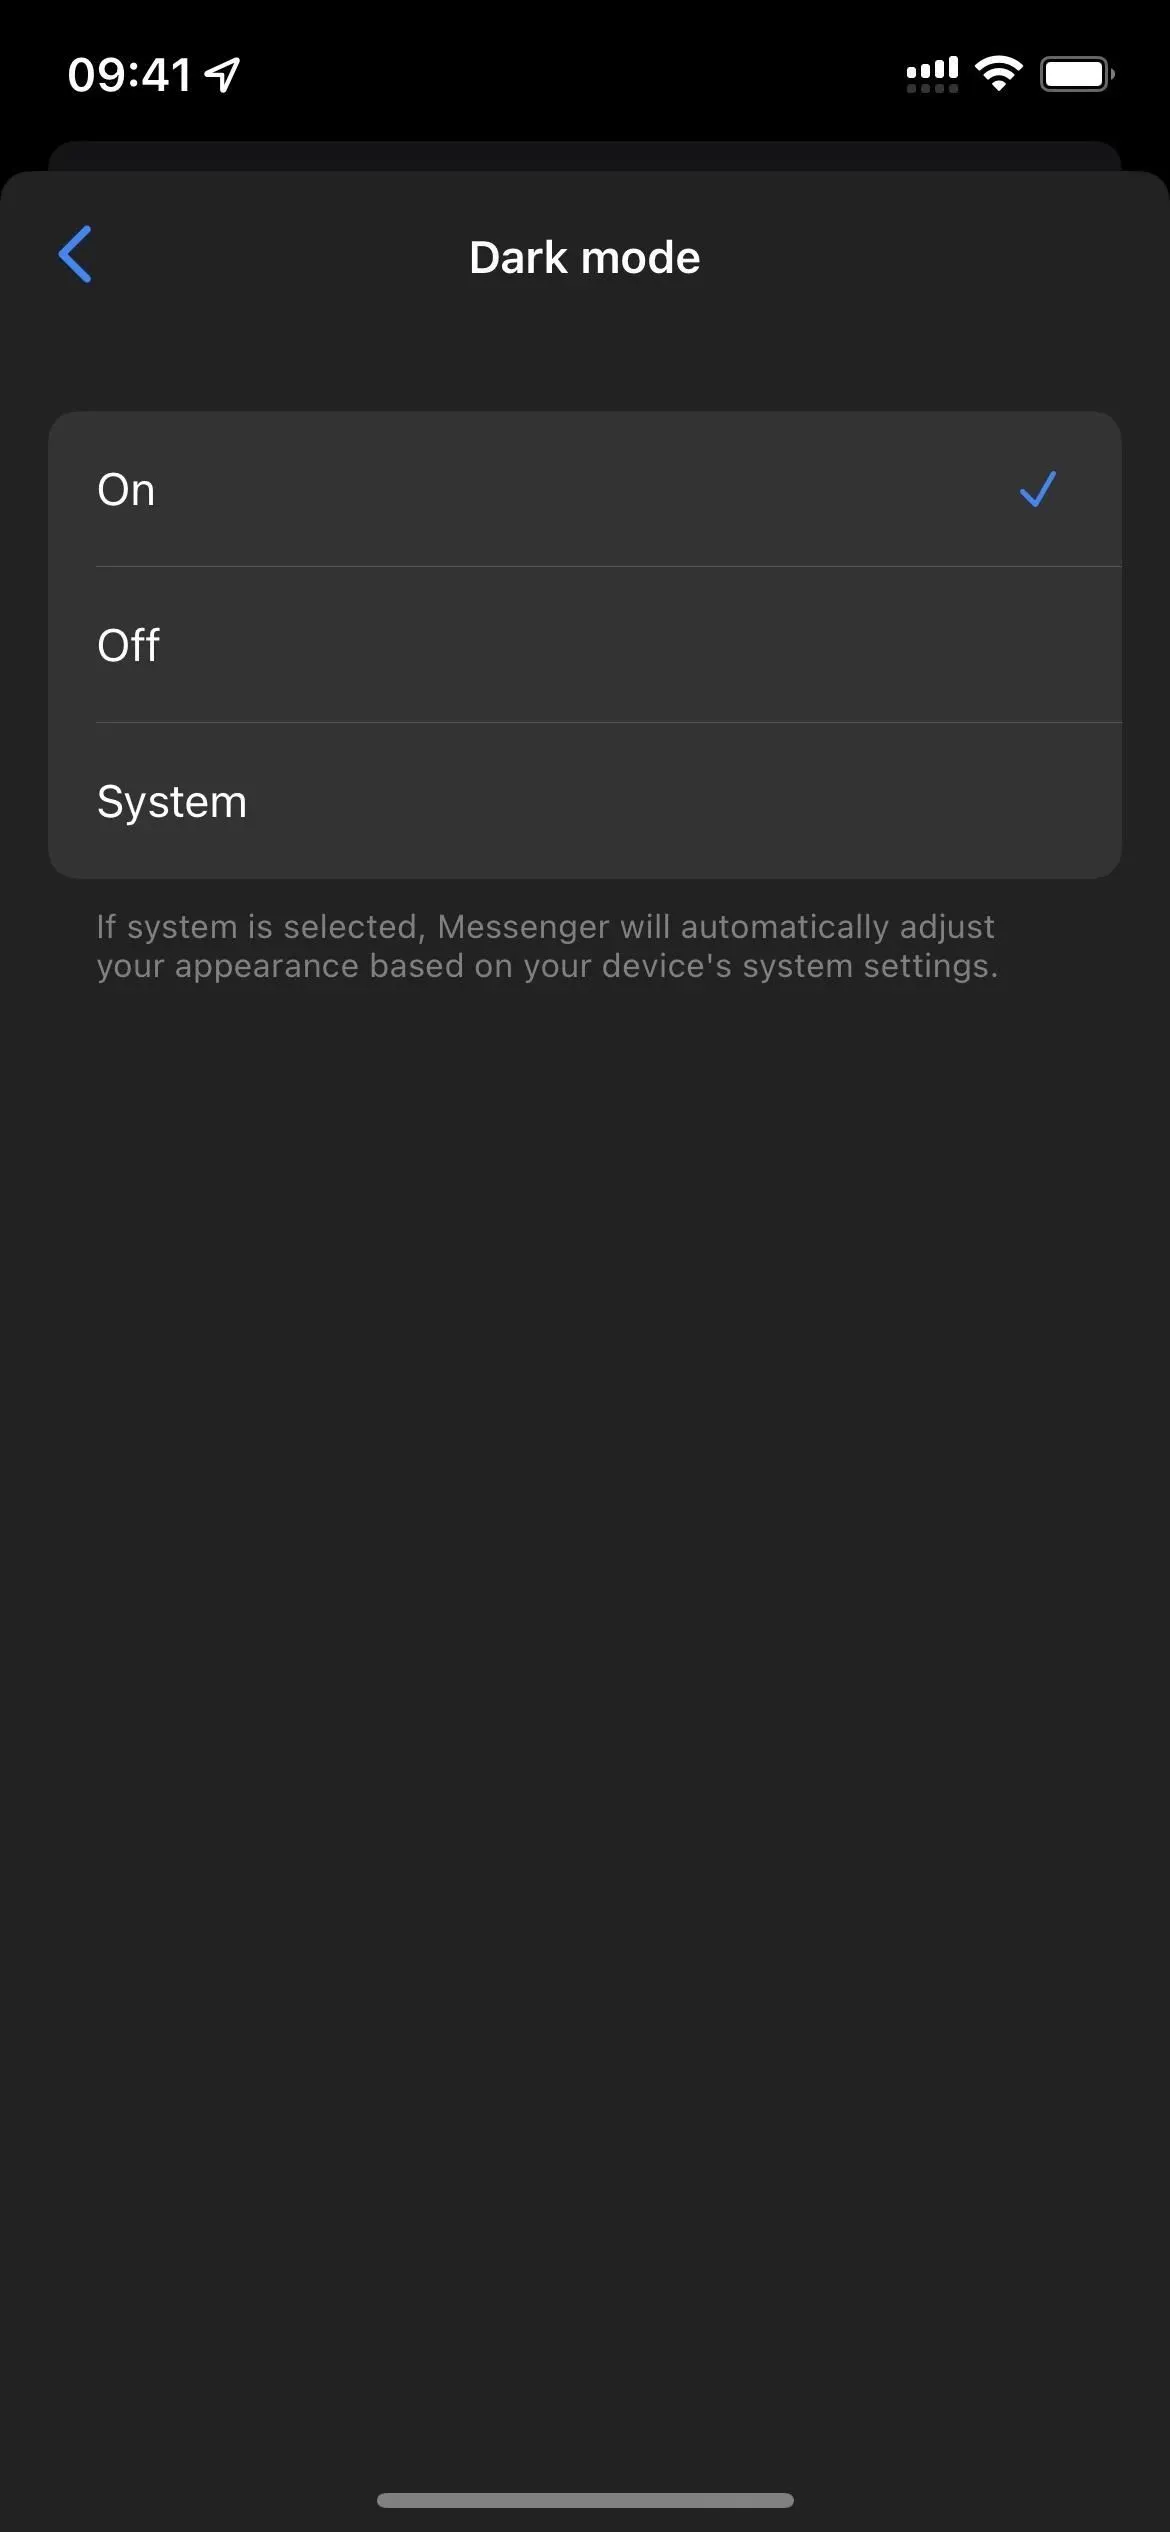

From left to right: Redefining Google Maps, Messenger and Snapchat.
Option 2: Create your own app lock switches
If the app itself doesn’t override the device-wide dark mode setting, you’ll need to create an automation that turns on dark mode or light mode for all the apps you choose. You’ll then need another one when you close those apps, which will revert the look to what it was before the apps were opened. Thus, assigning a specific appearance to applications will not affect the system-wide settings.
Step 1. Create an empty TXT or RTF document in files
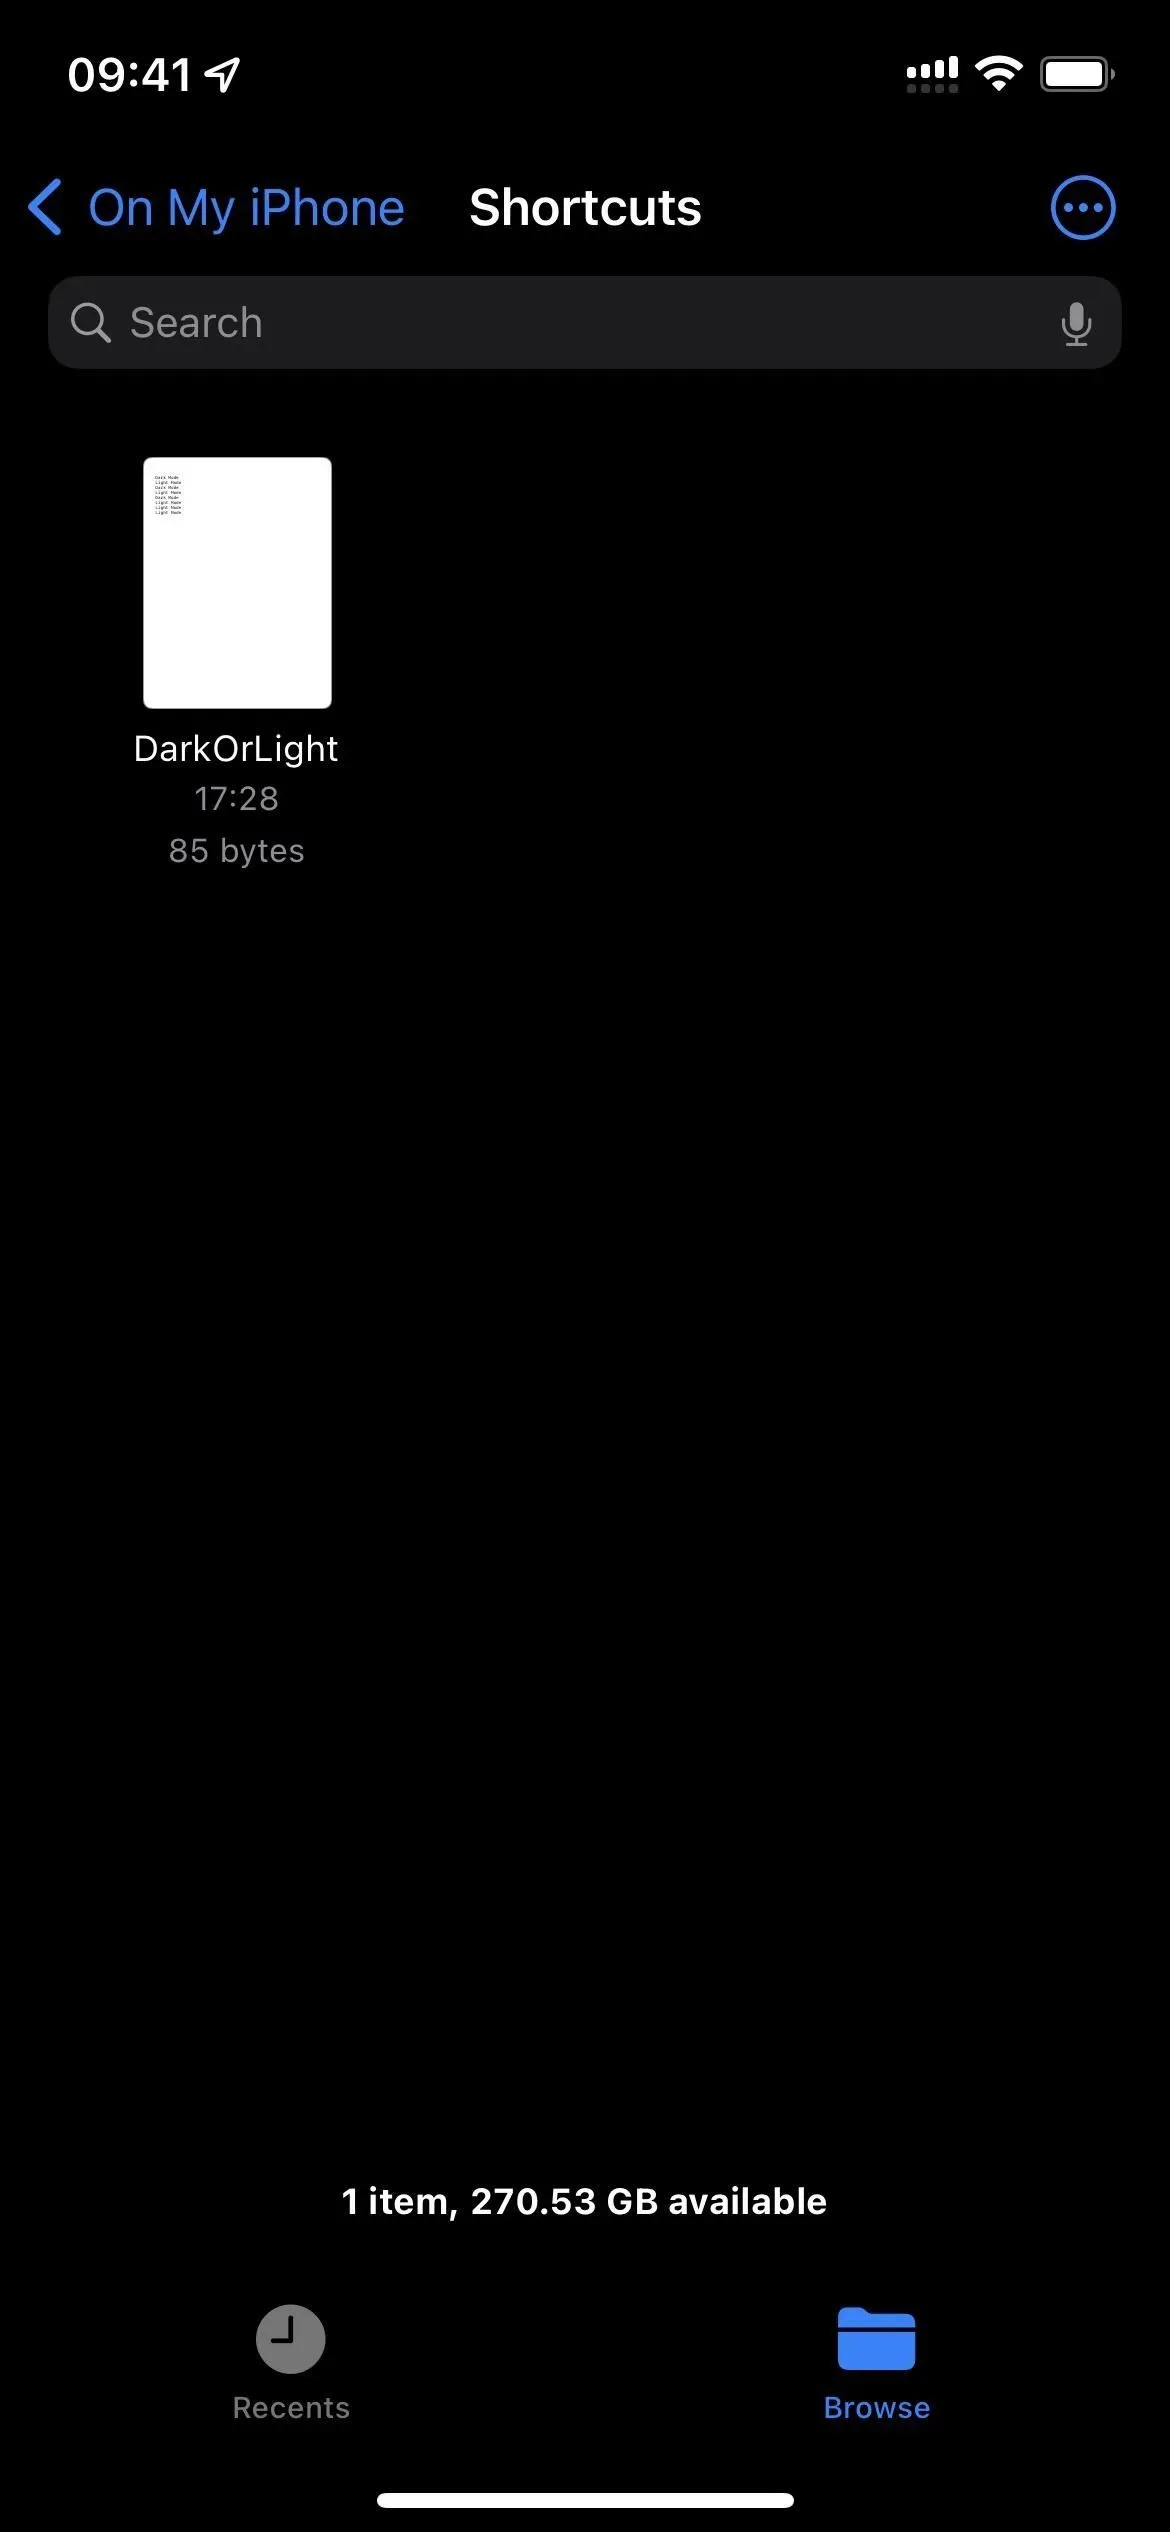
Before you automate, create a new file. txt or. rtf with a name like “DarkOrLight”and then move it to a specific location in the Files apps. Since you want the automation to work whether you have Internet access or not, I would suggest putting it in the Shortcuts folder in the On My iPhone directory rather than somewhere in iCloud.
You can create an empty file. txt or. rtf on your computer and then share it with your iPhone. Or you can use an app like Pages or Readdle’s Documents on your iPhone and save it directly to a directory of your choice in Files.
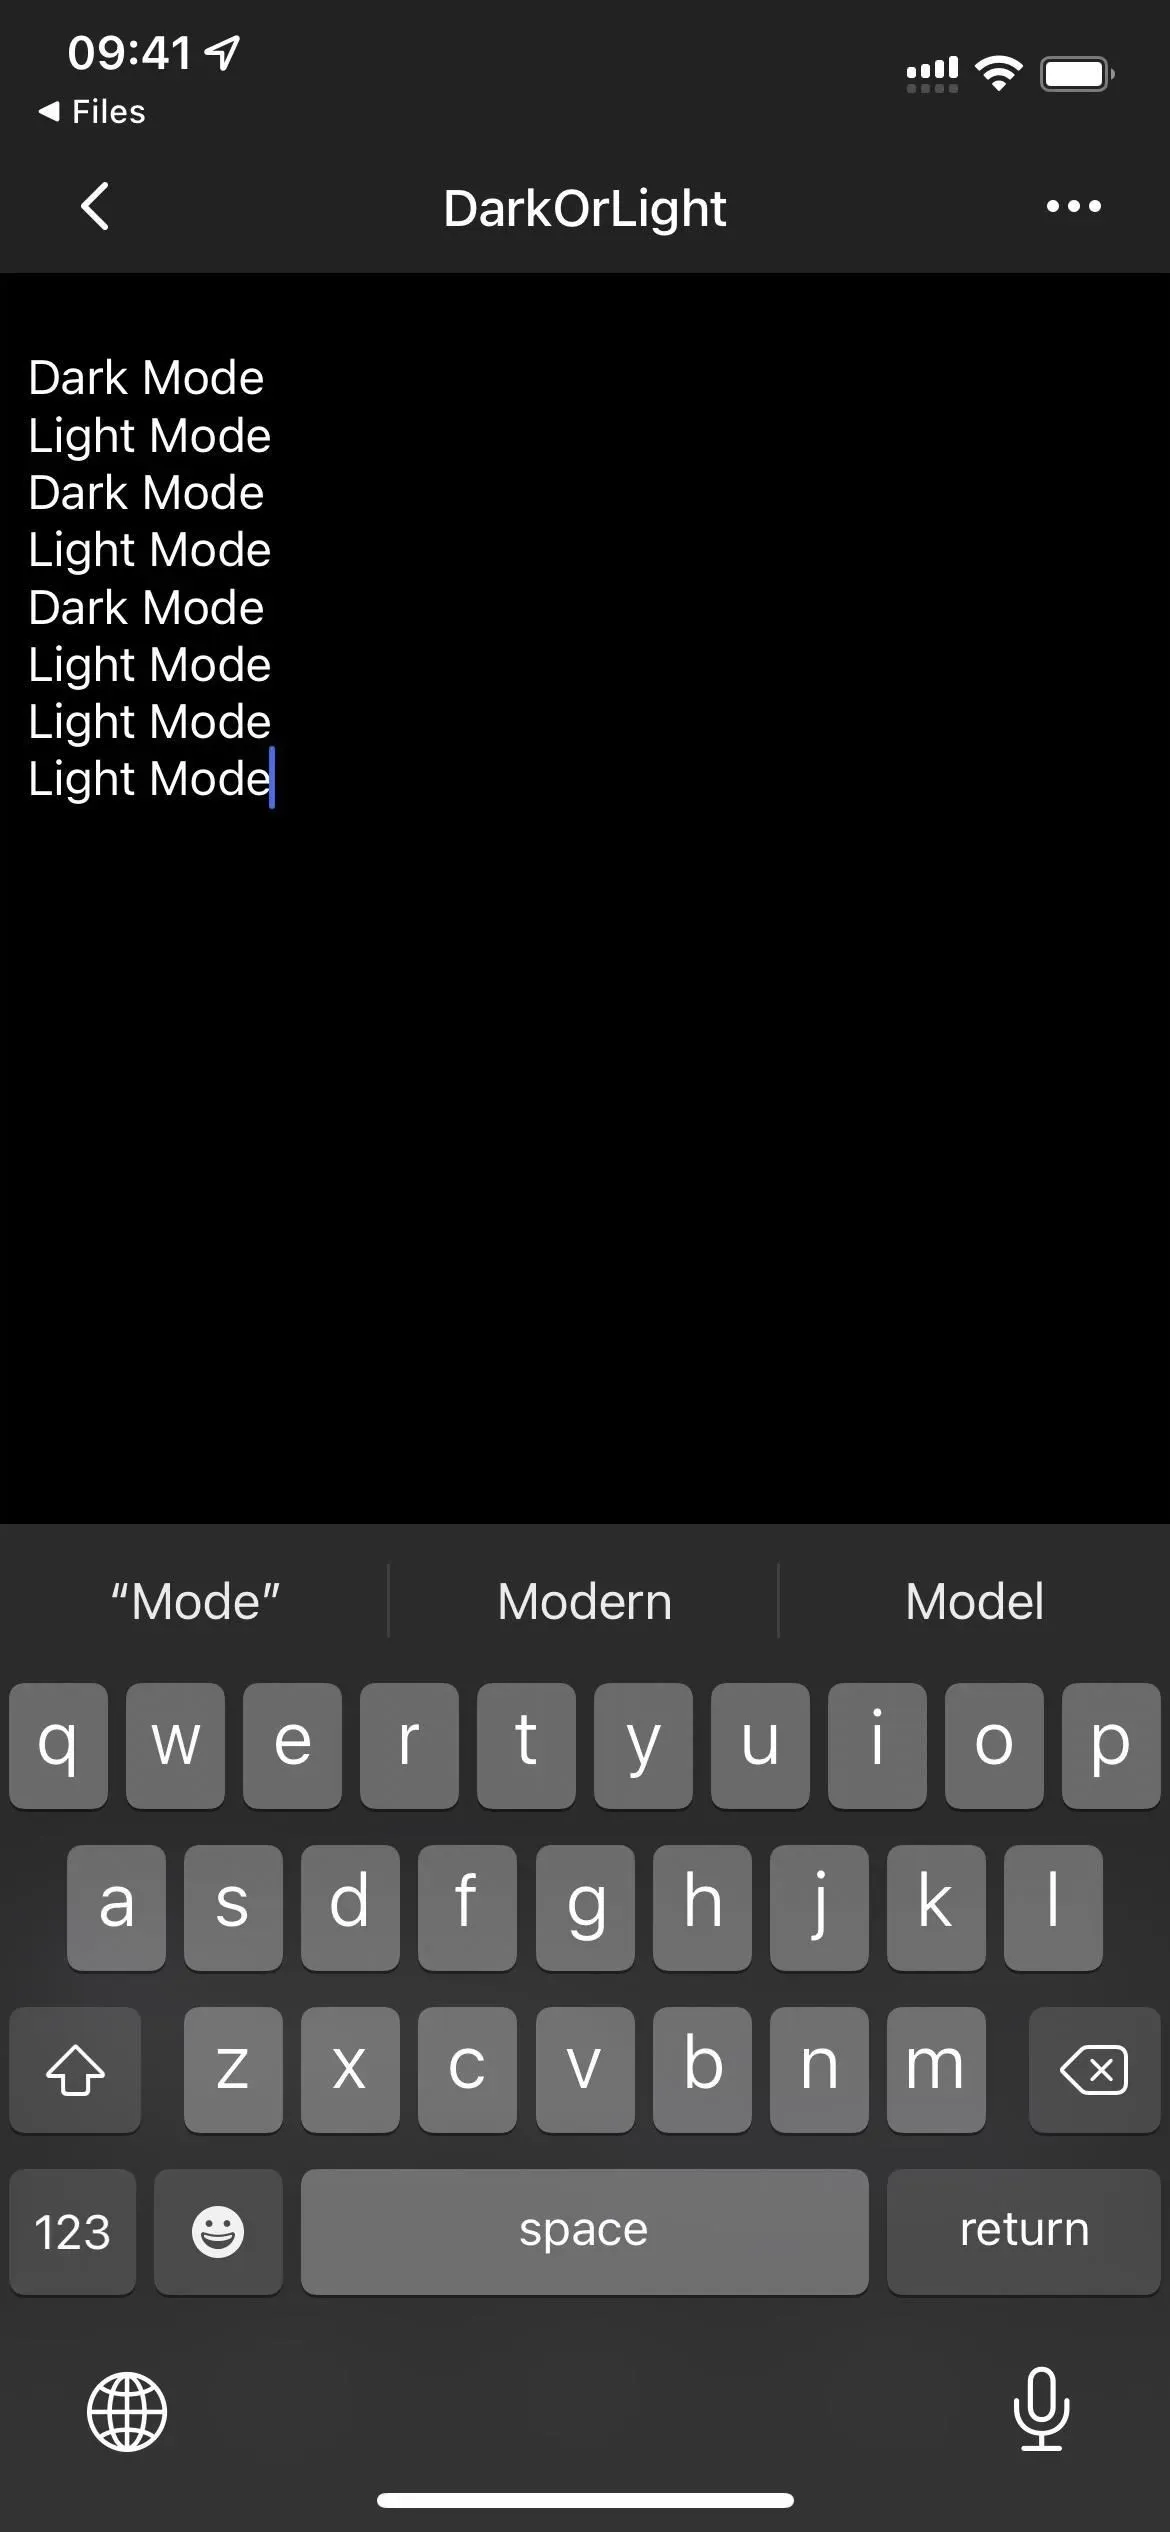
The first automation will use a file to write the name of the current appearance as “Dark Mode”or “Light Mode”before the opening app switches to its assigned dark or light mode. The second automation will then look at that file whenever the application closes and switch to whatever look and feel it reads.
Step 2: Set Apps to Always Use Dark or Light Mode
Now it’s time for the first automation. This is where you choose dark mode or light mode and give all apps the look you want. If you want some apps to stay dark while others always look light, you need to create separate automations for each one. The automation will also detect the previously used look and feel and record the state in the document that the second automation will refer to.
- Open the Shortcuts app.
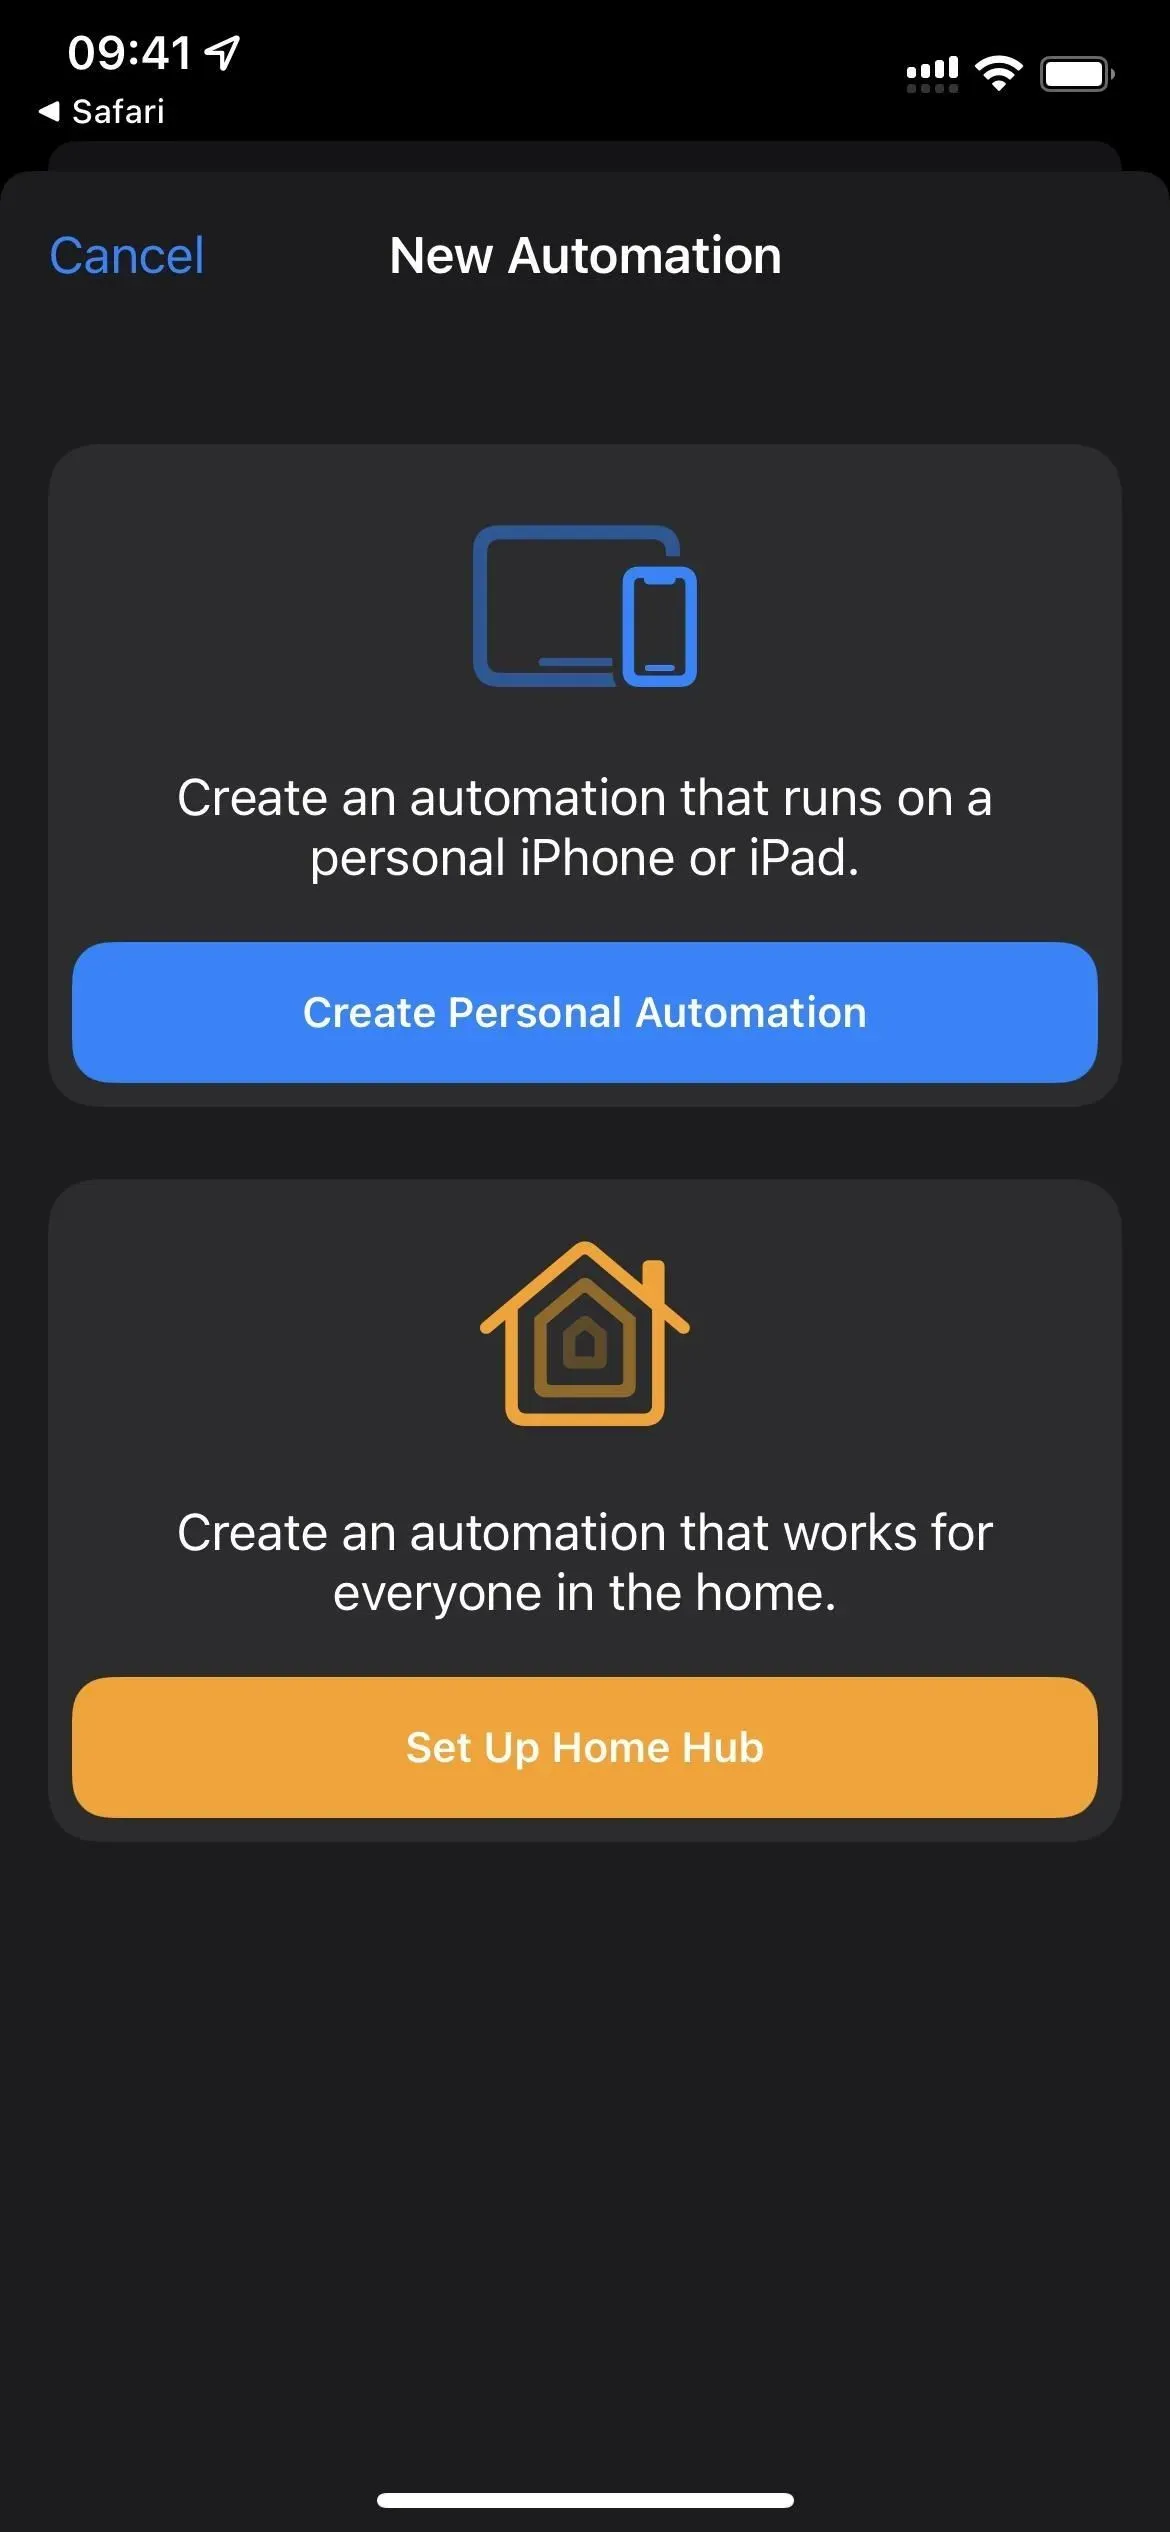
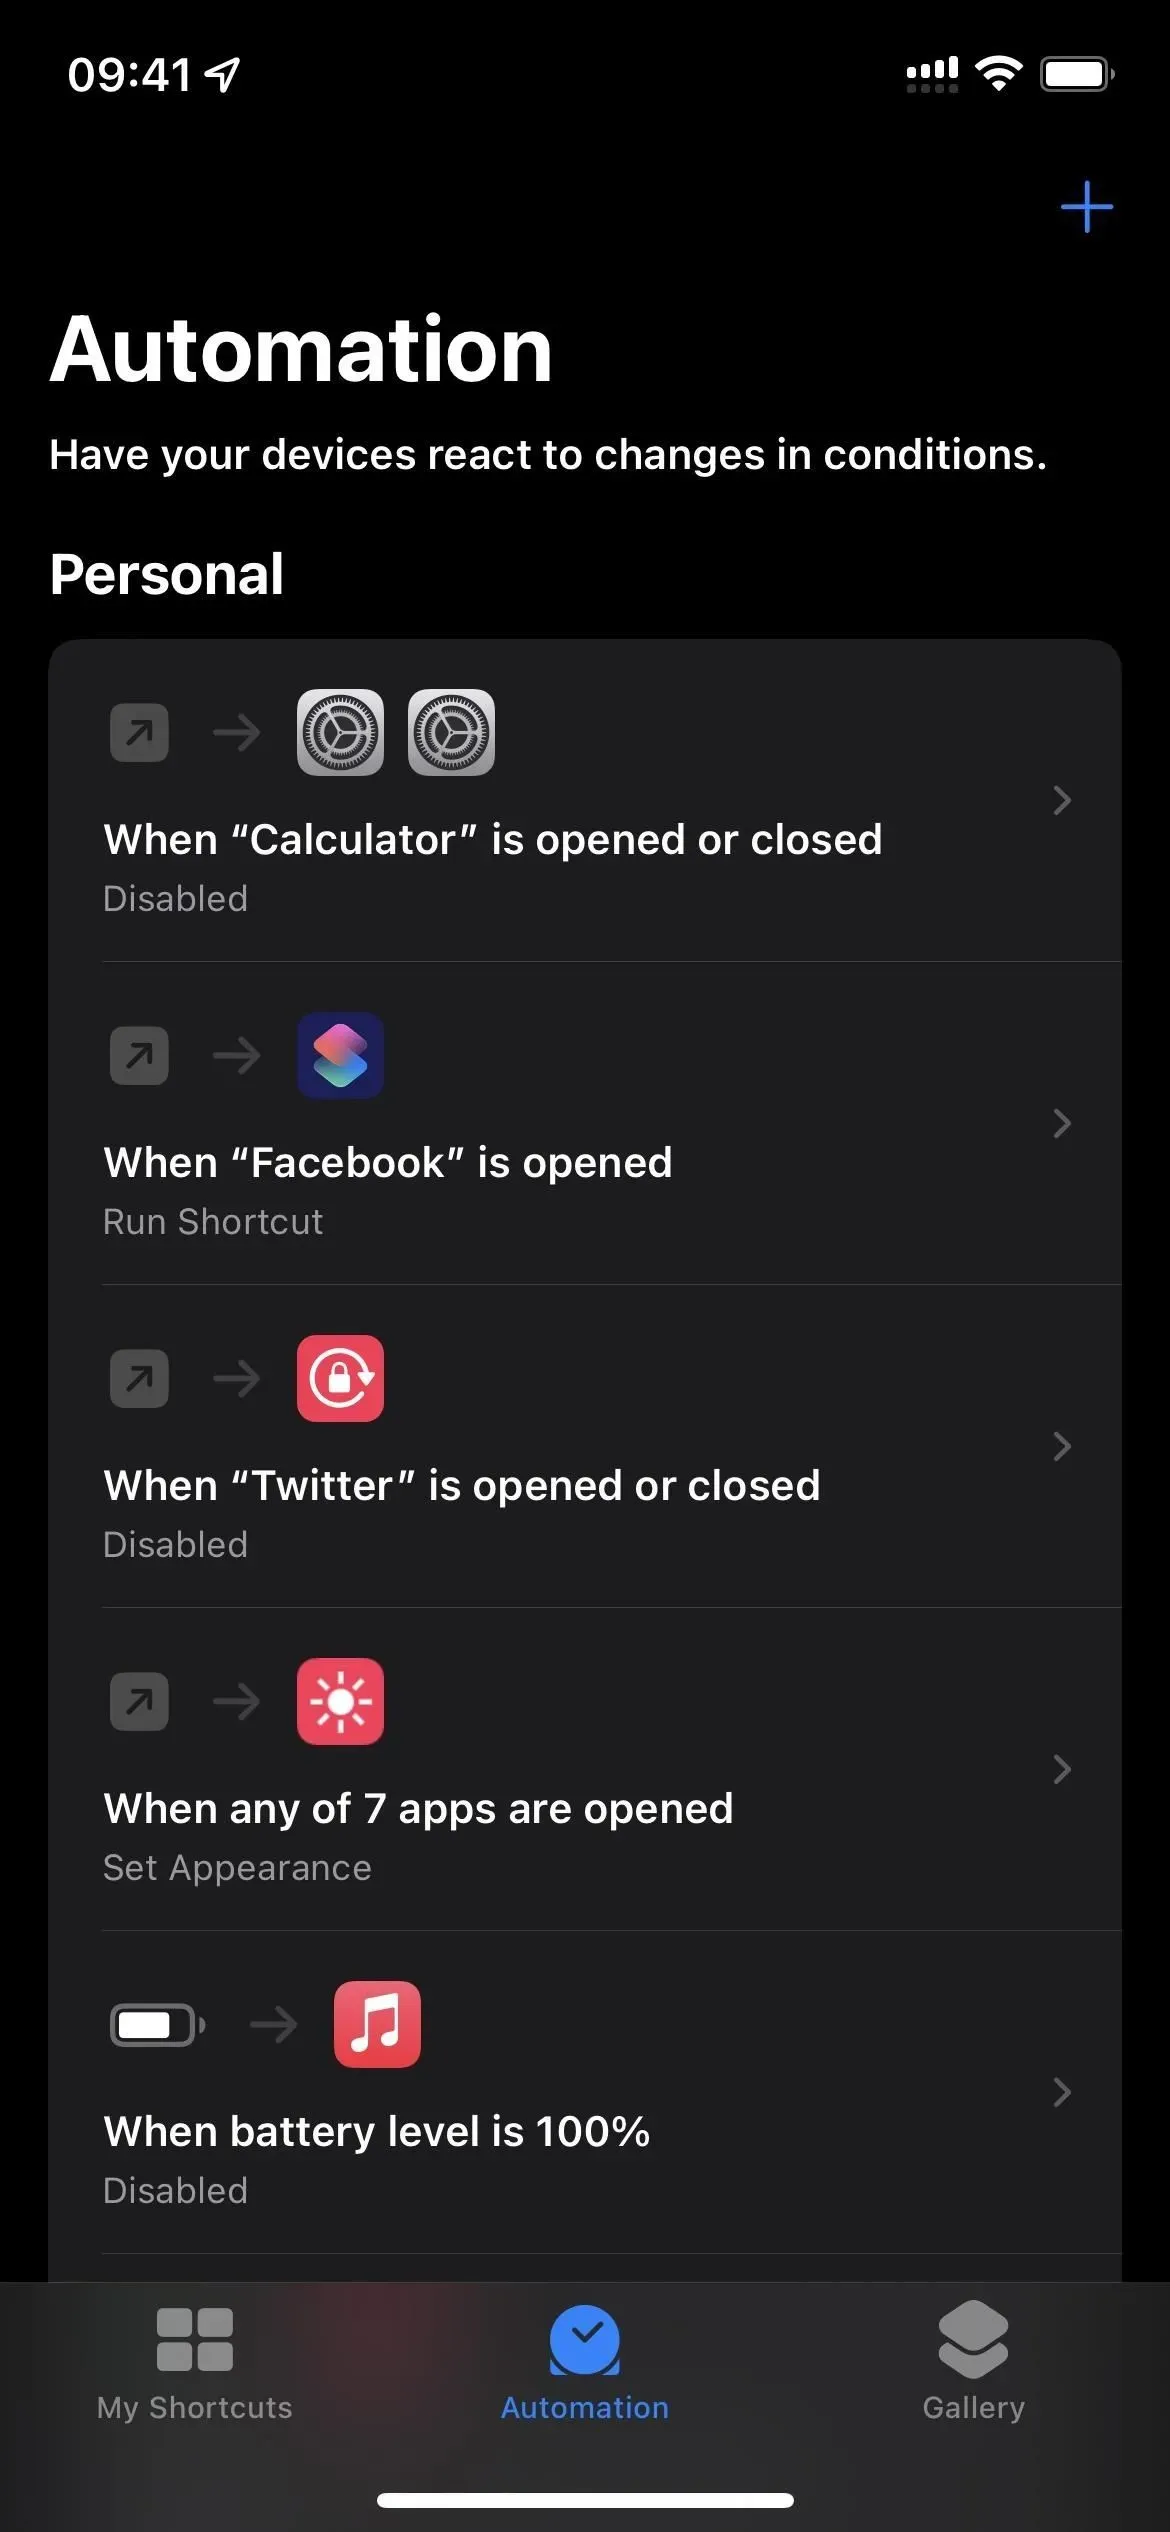
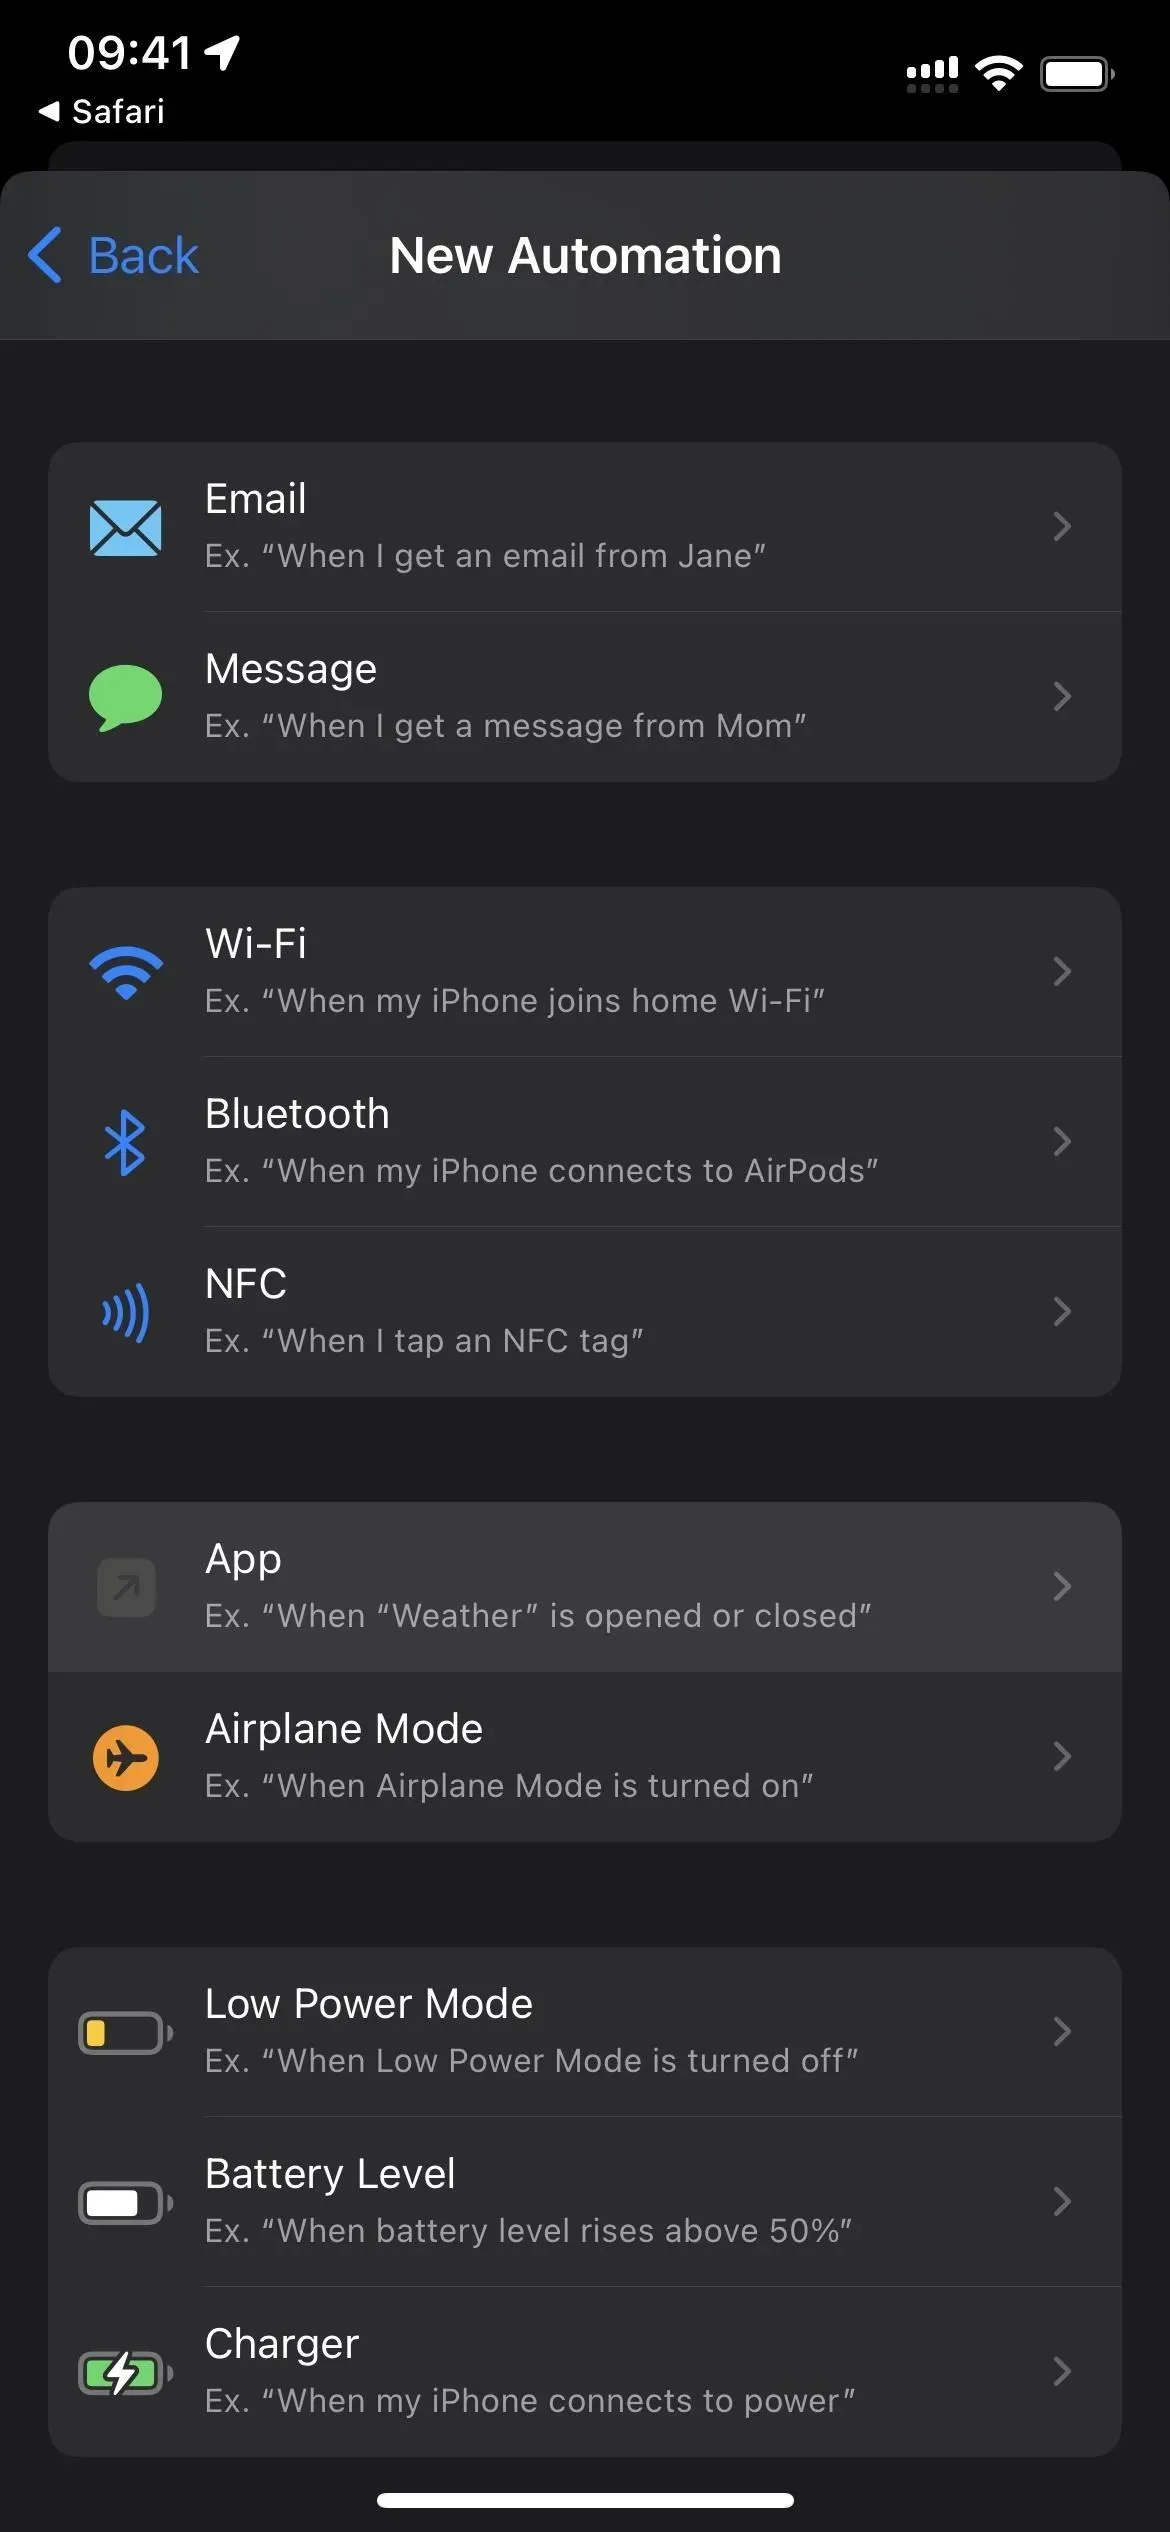
- Launch a new personal automation from the Automation tab.
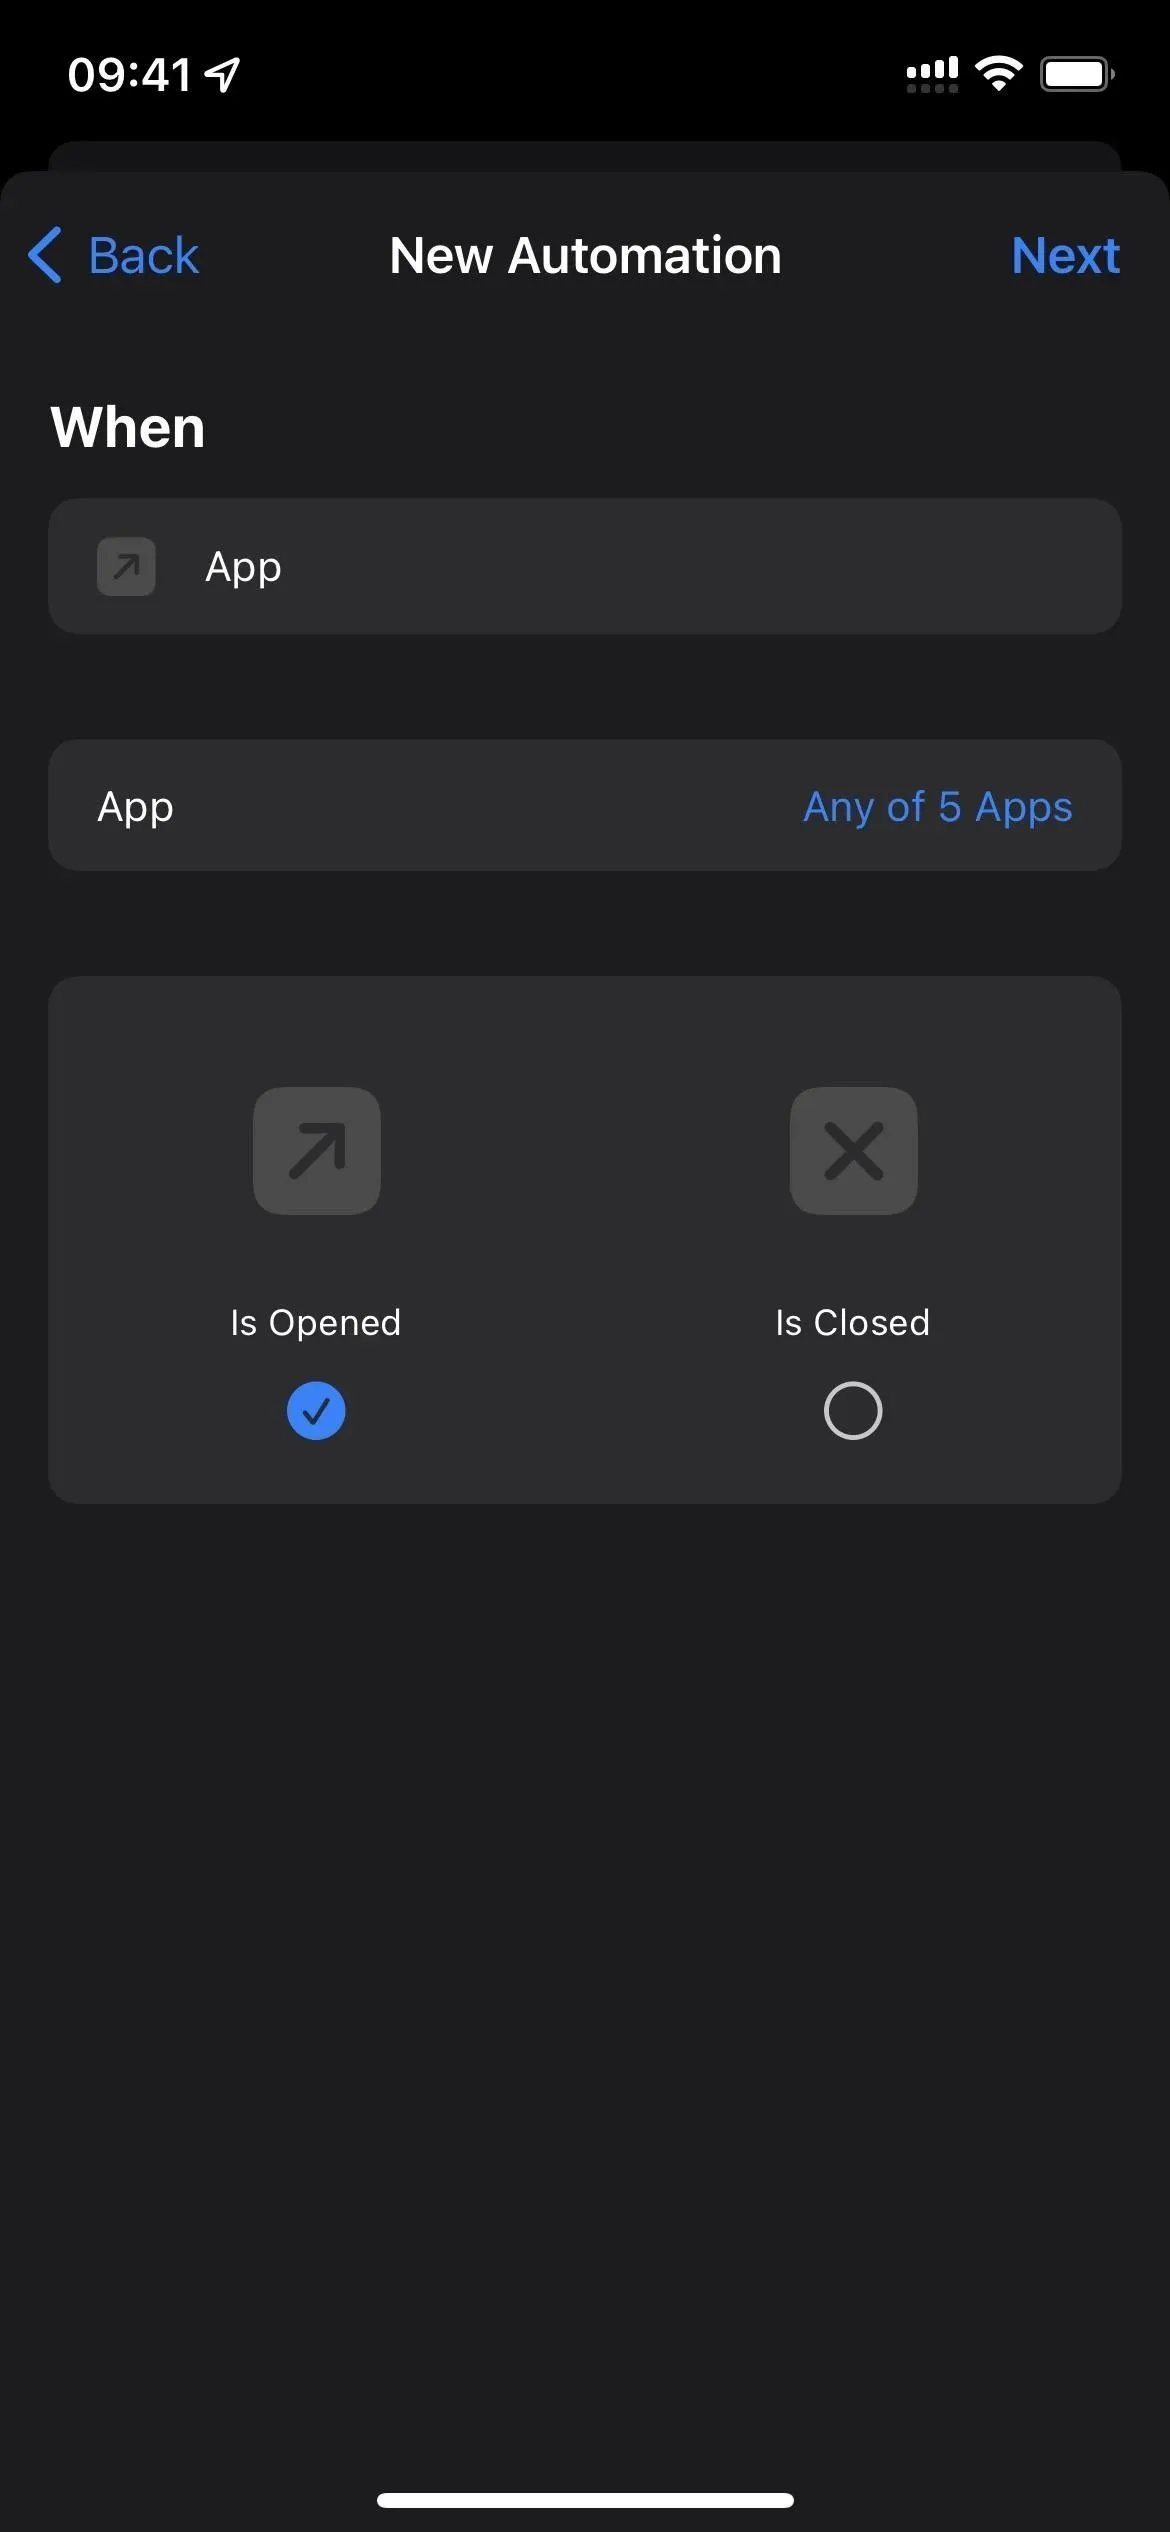
- Select “Application”as the trigger.


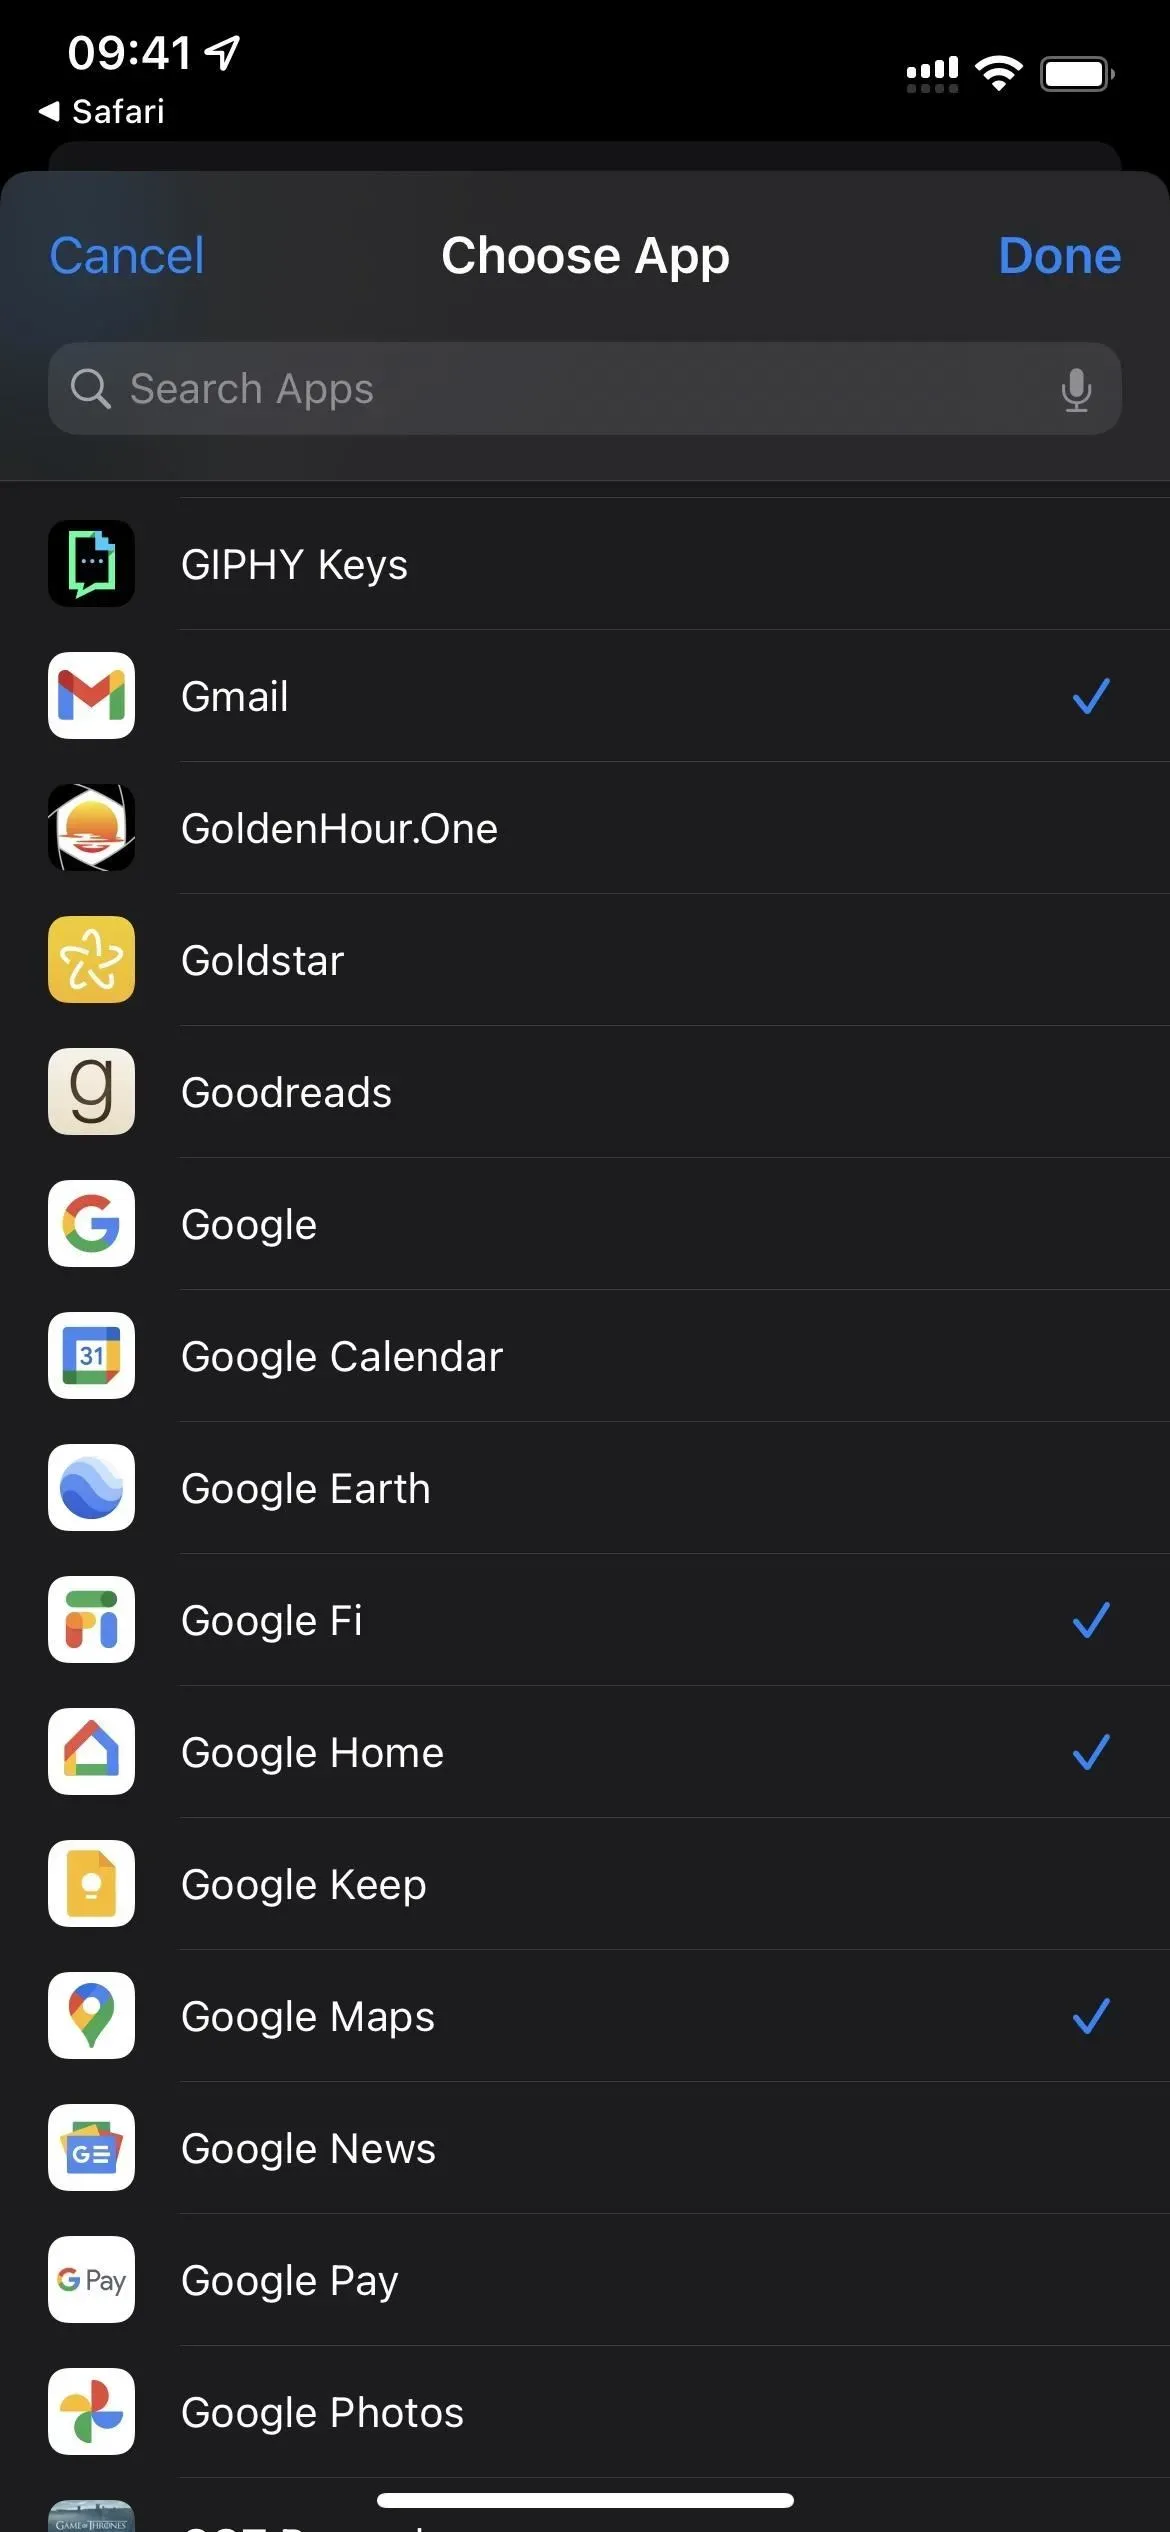
- Click “Select”next to “Application”.
- Check all the required applications and click Finish.
- Make sure the checkbox is “Open”and not “Closed”.
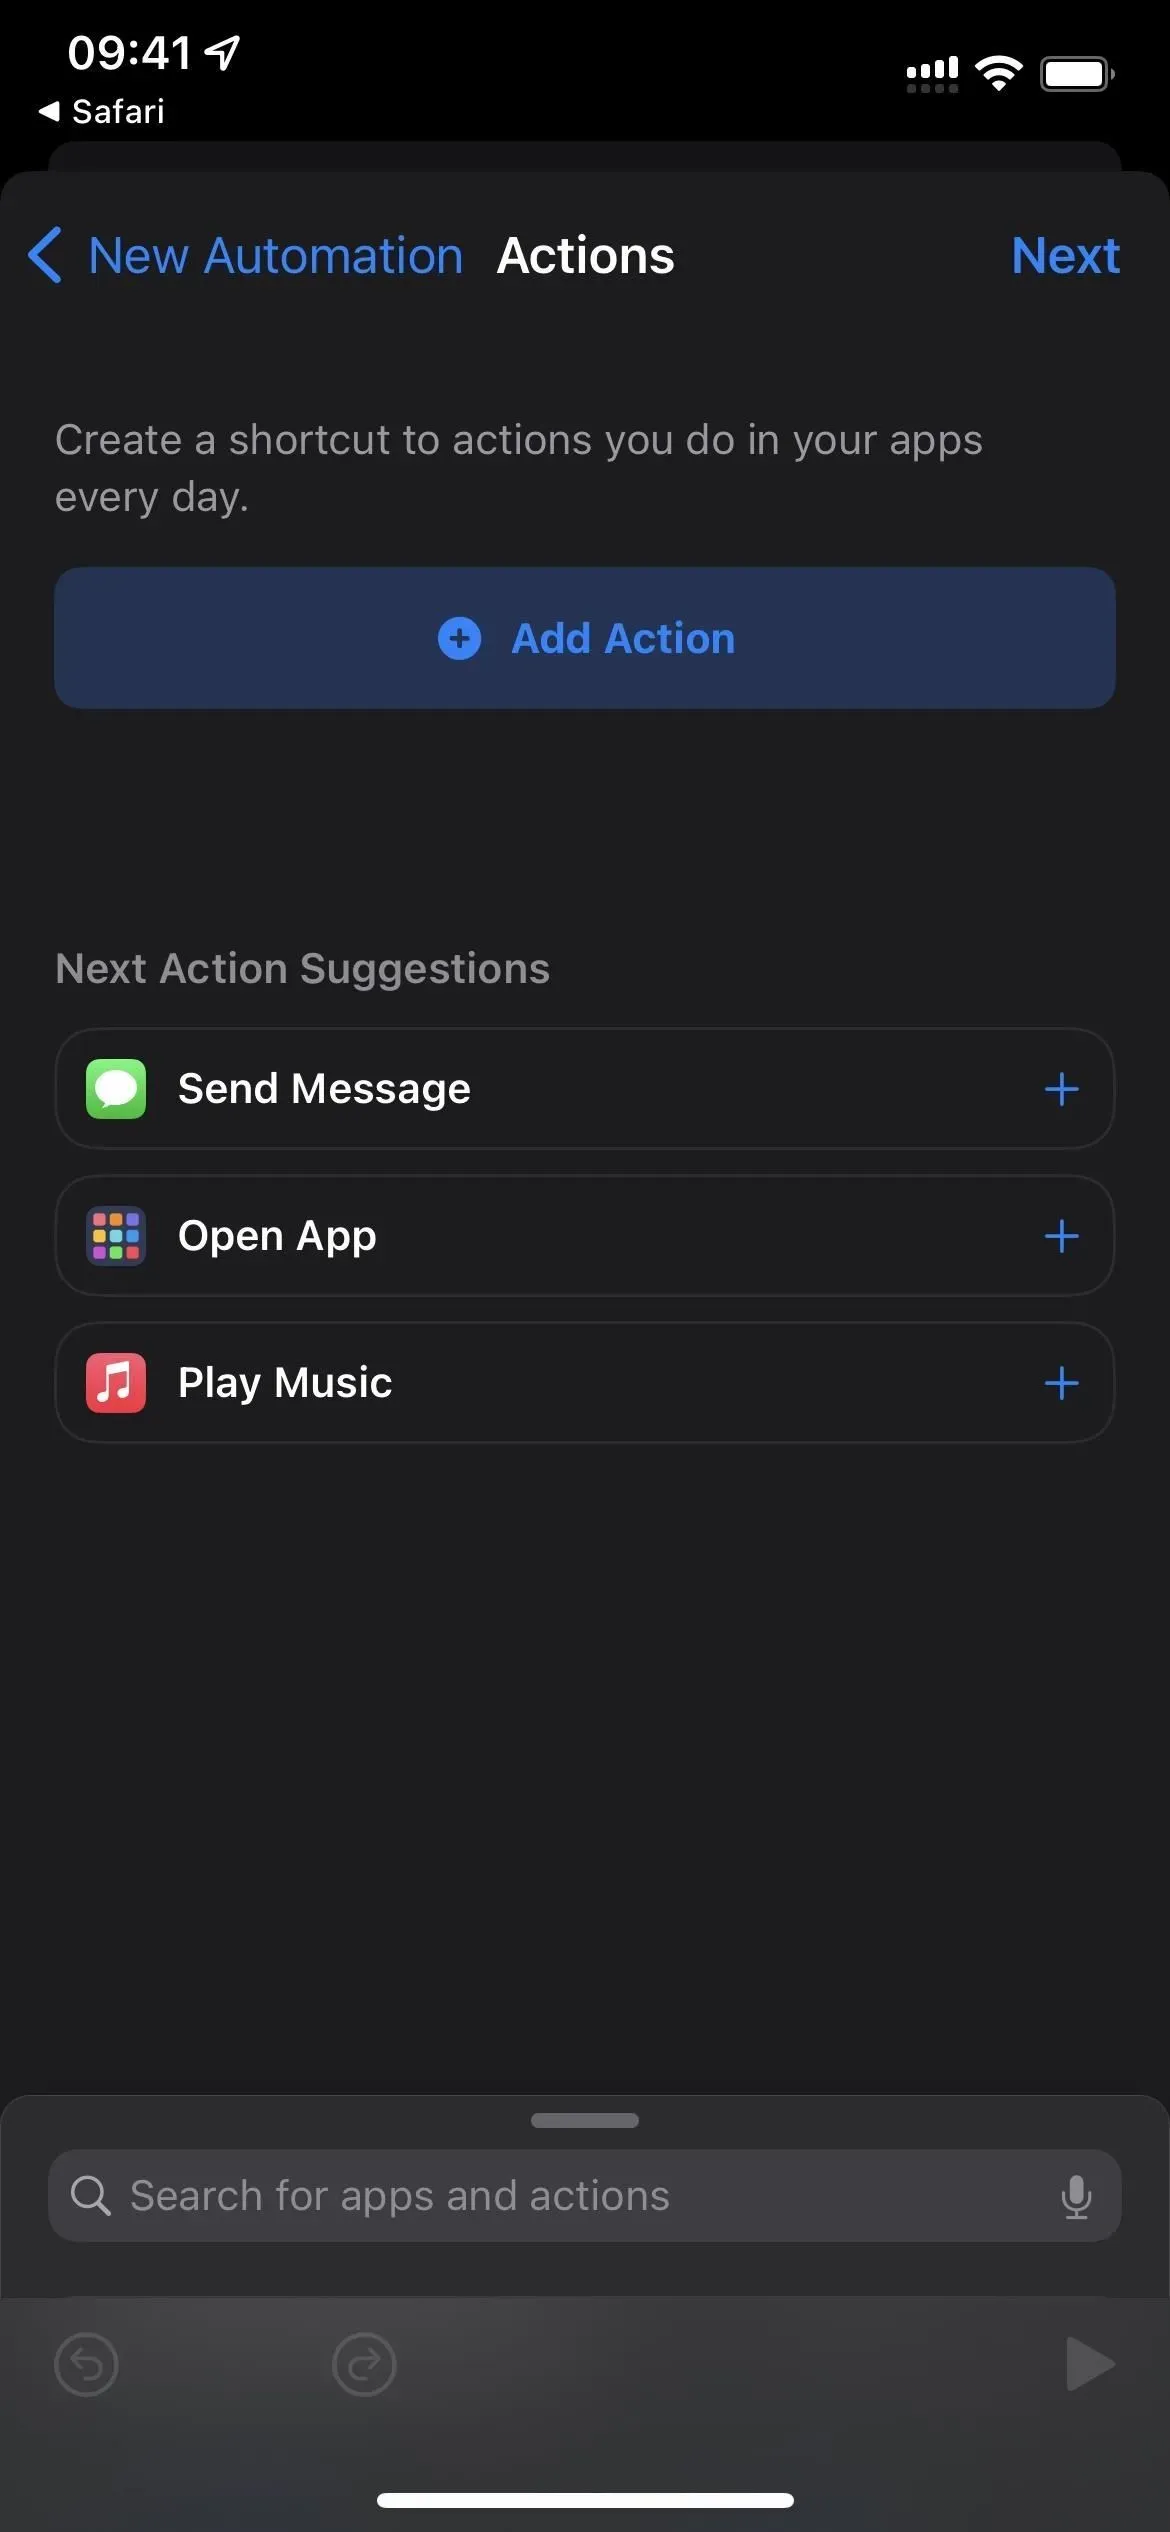
- Click “Next”to continue.


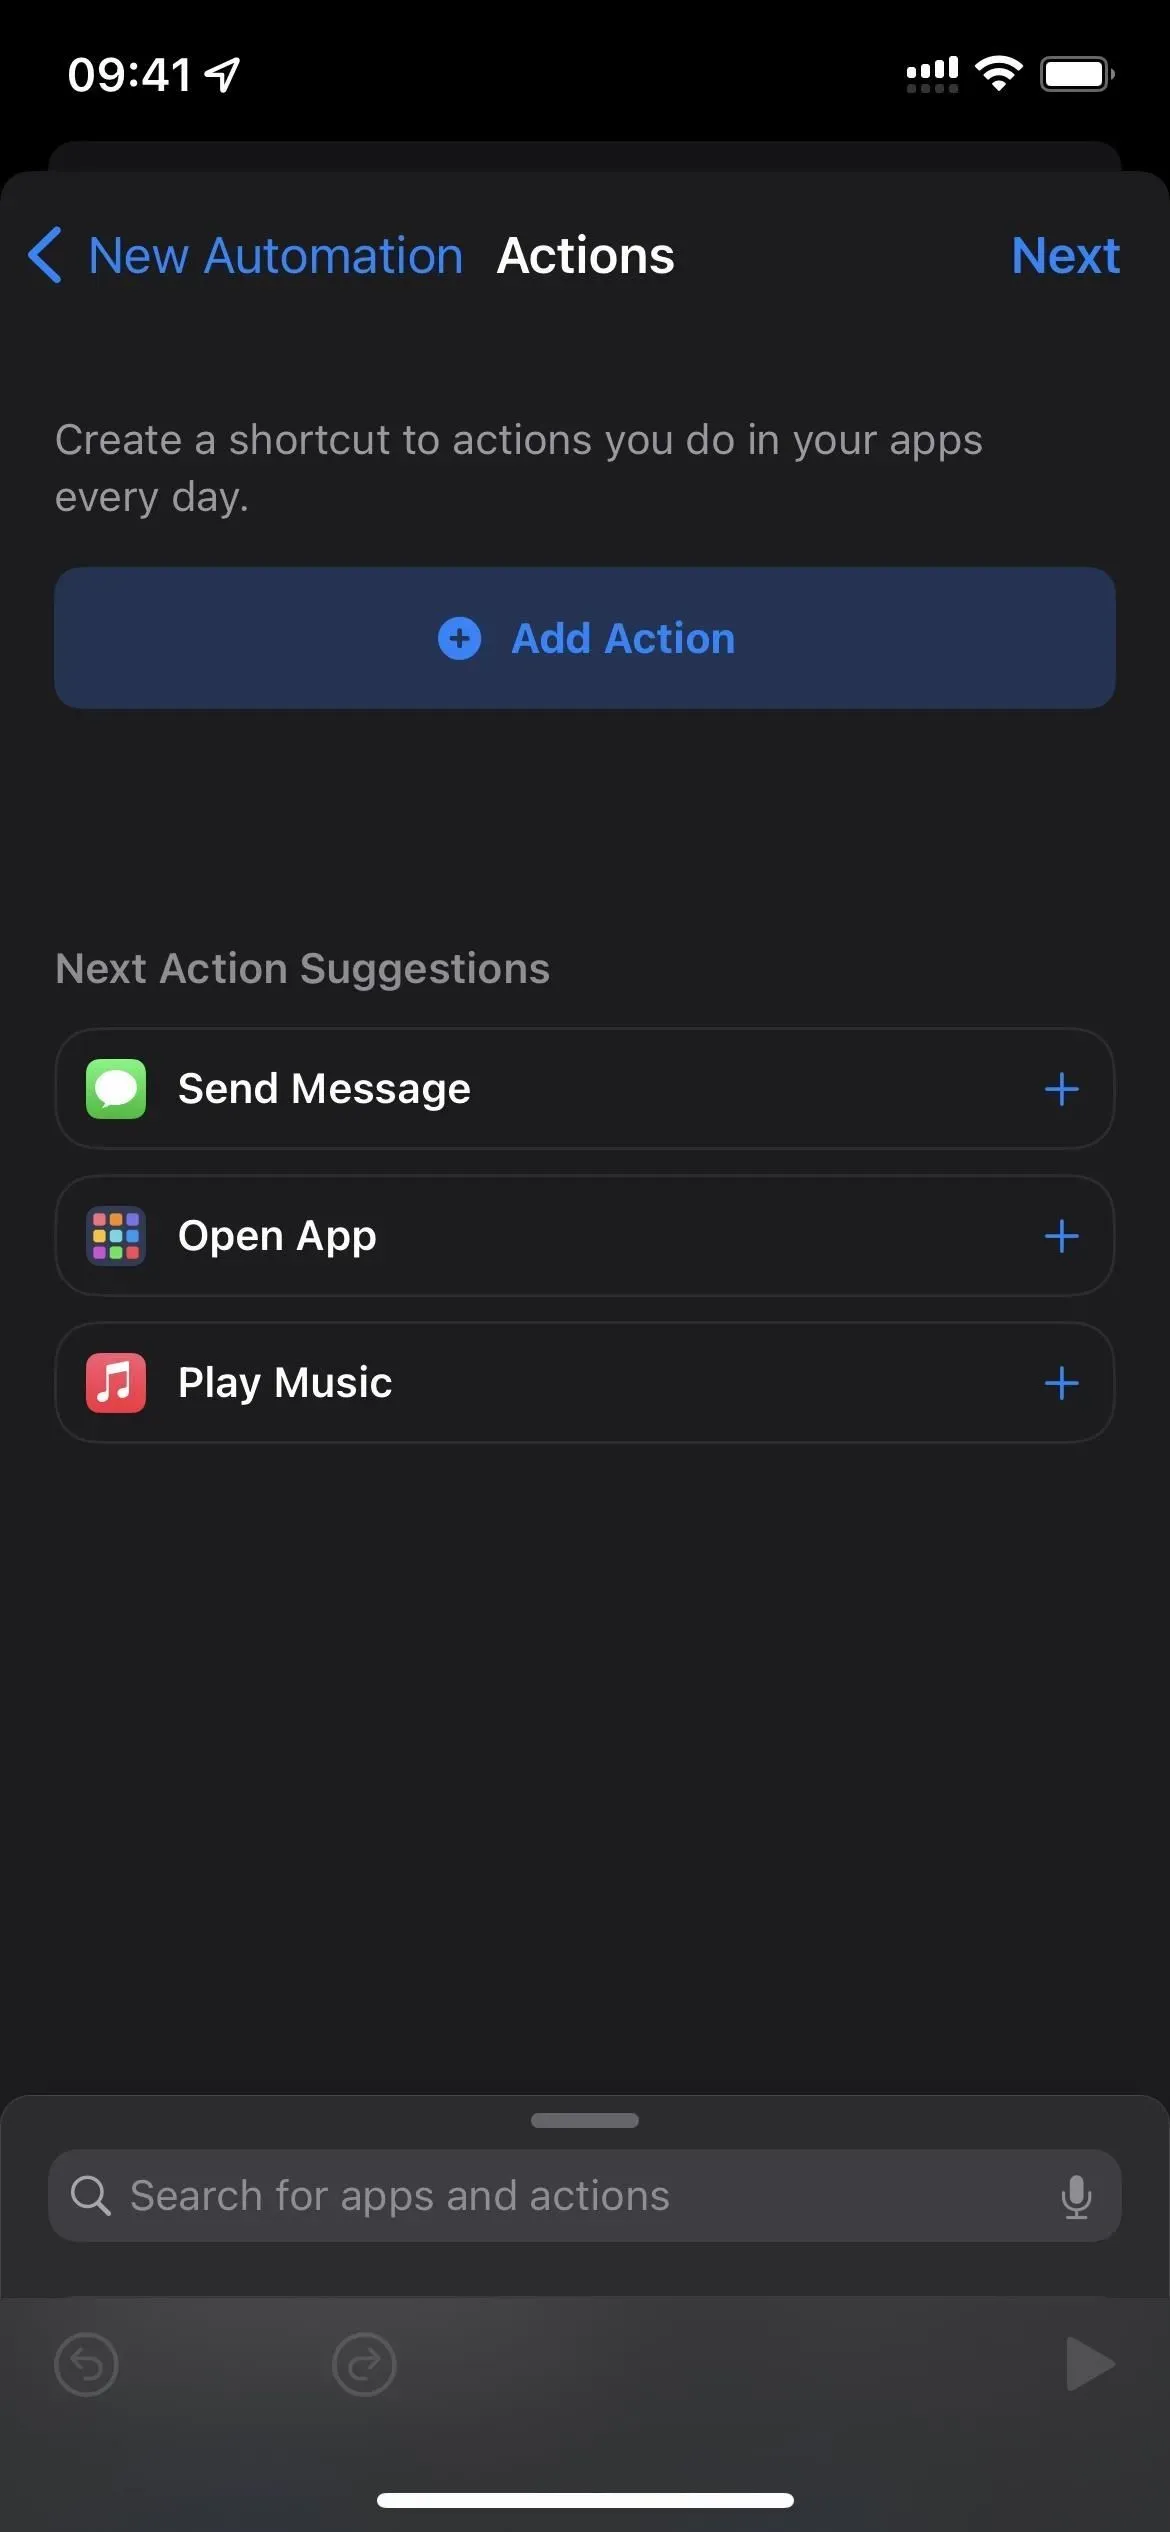
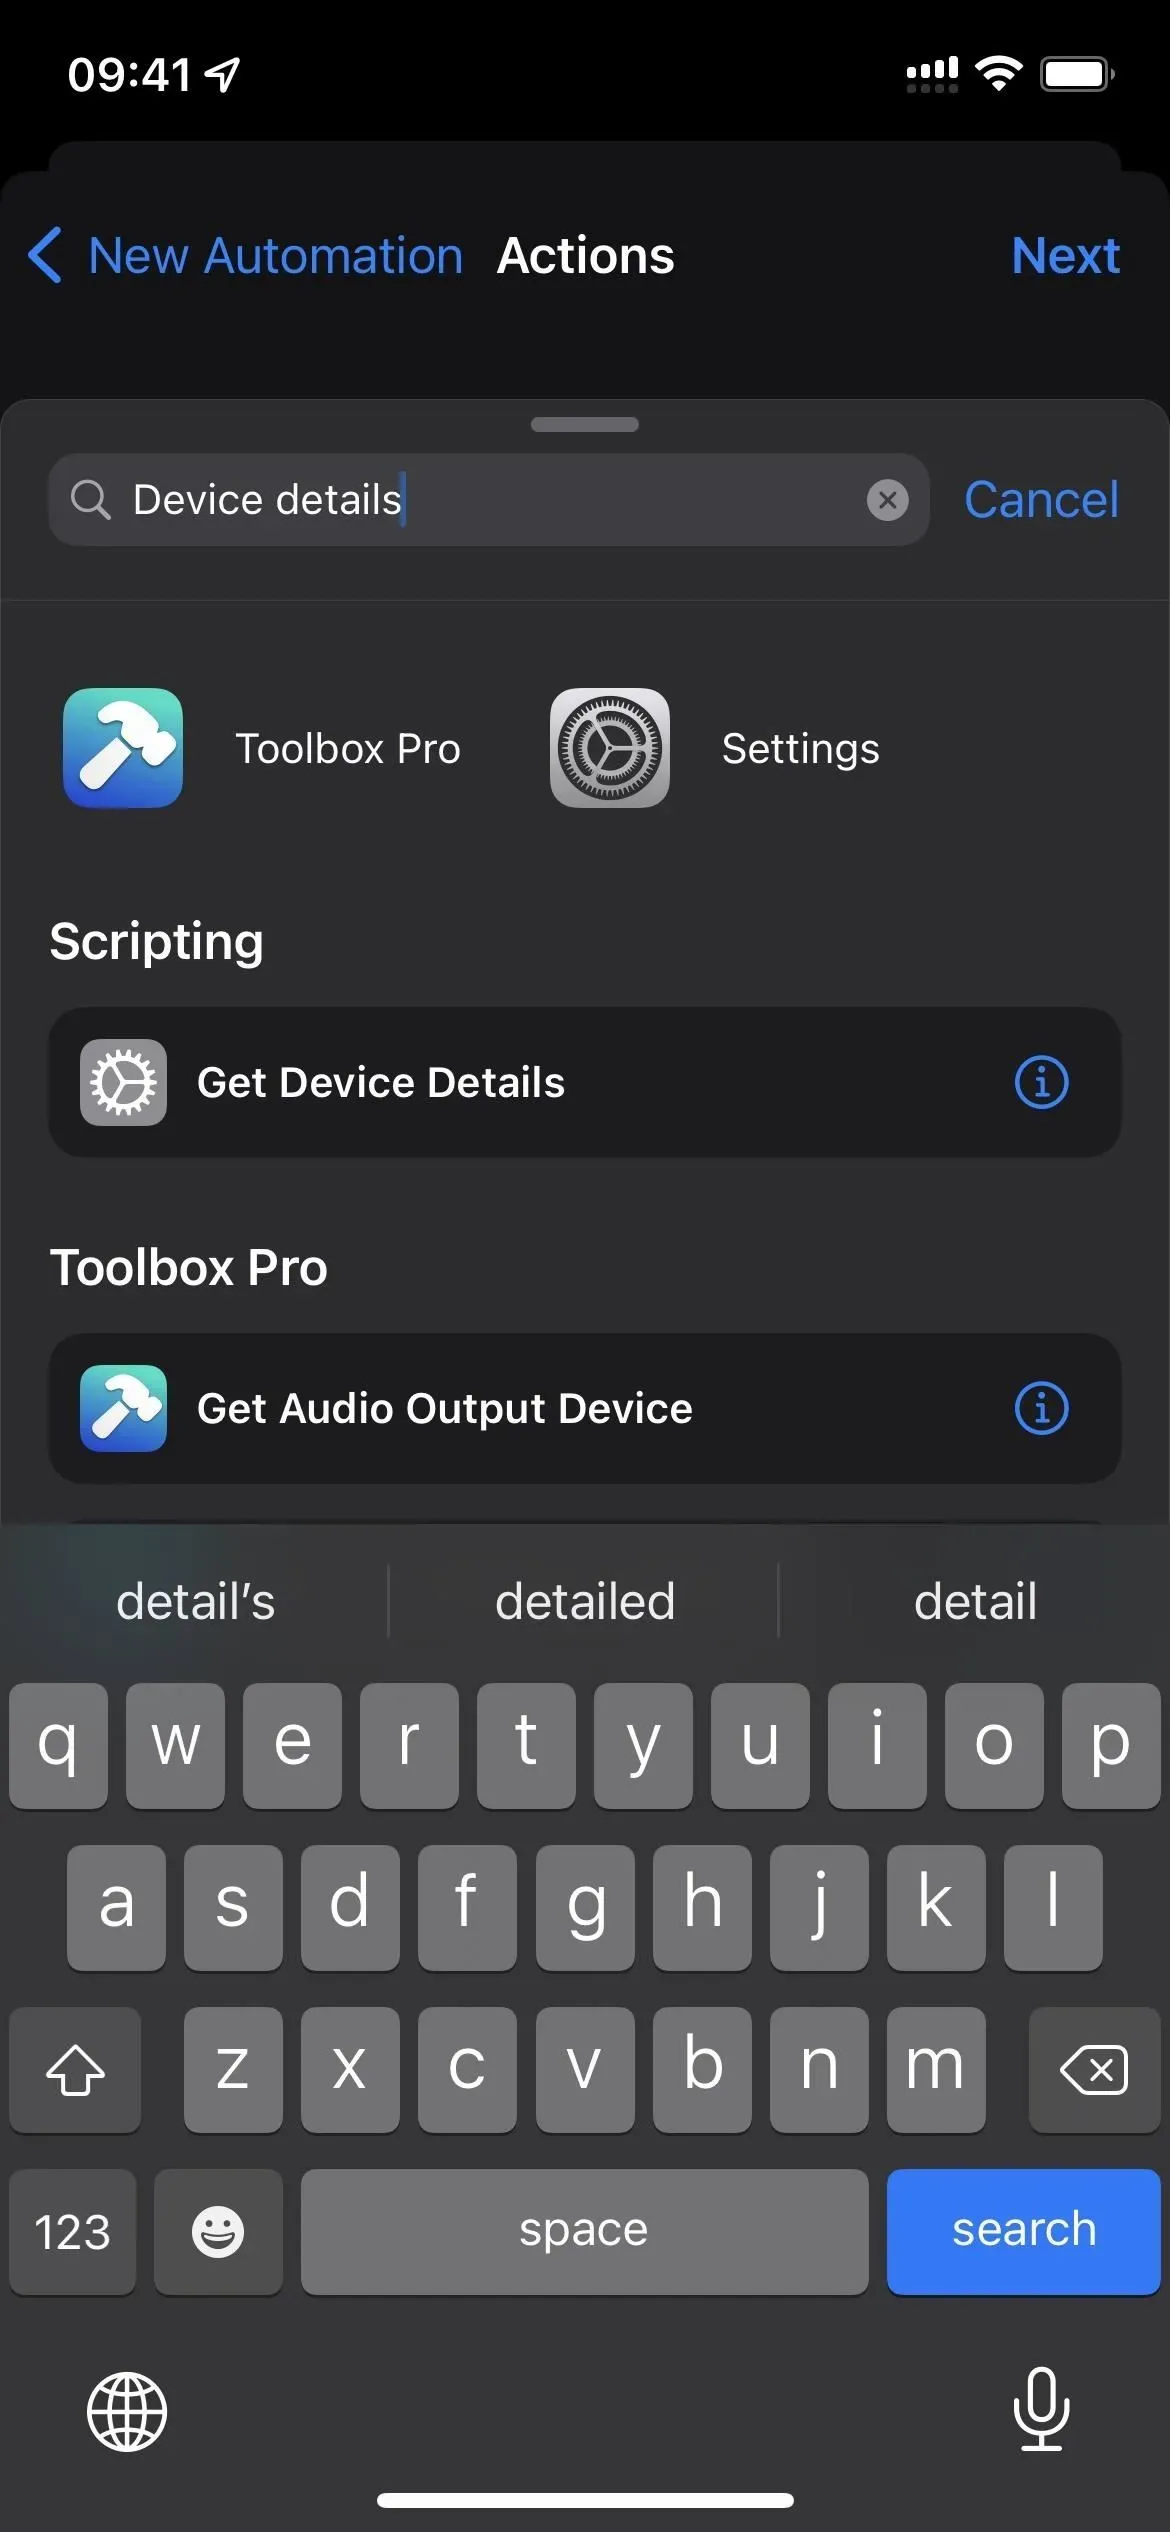
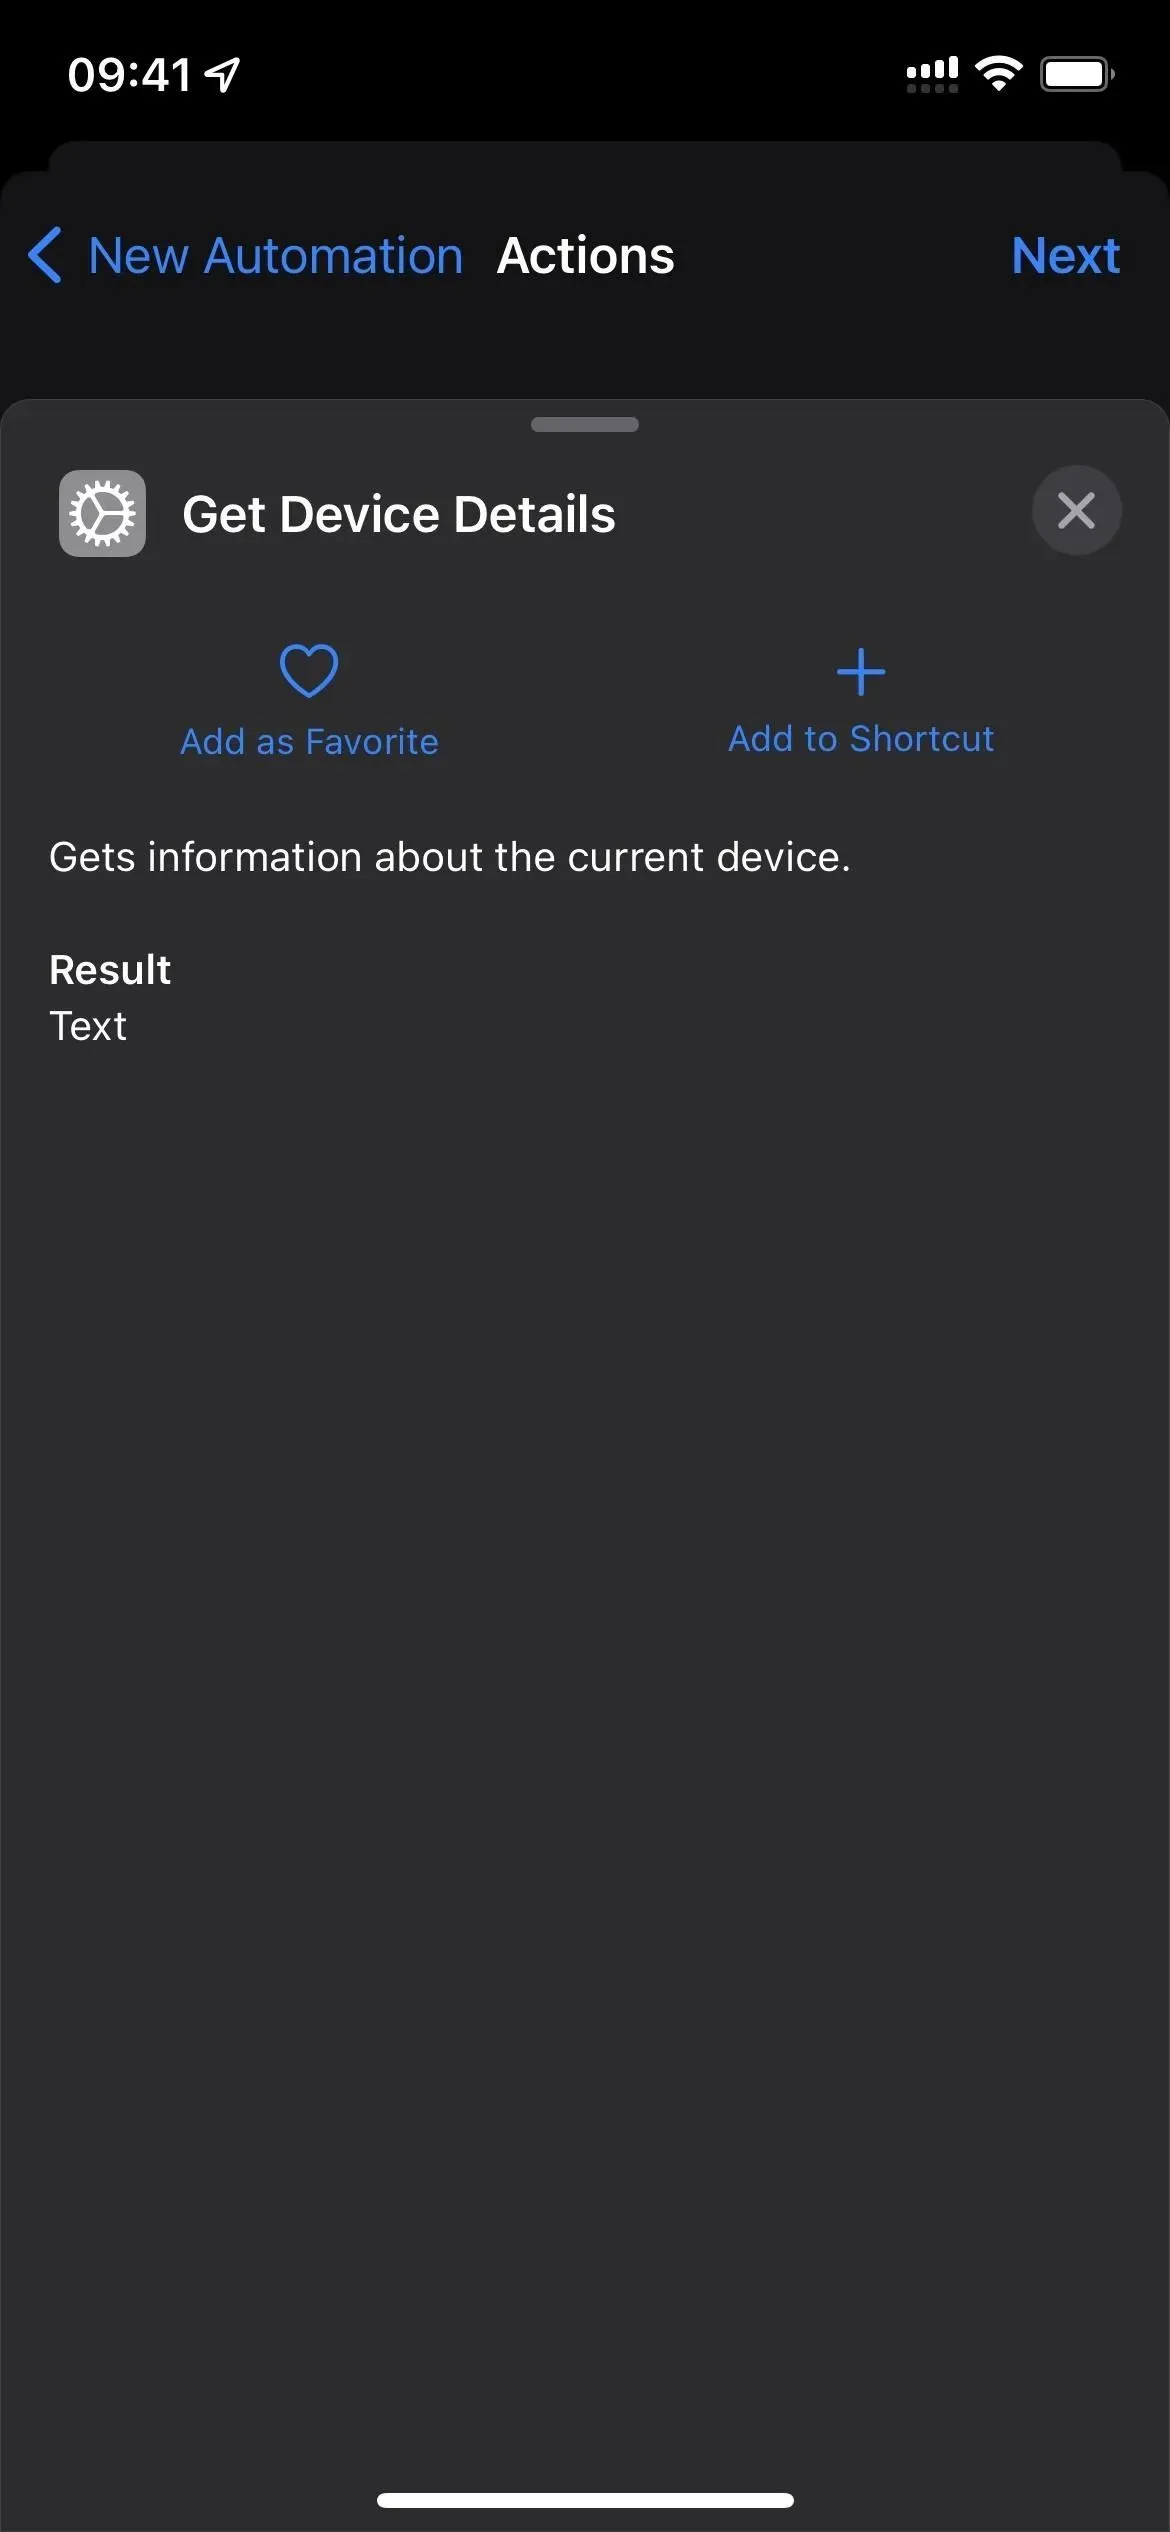
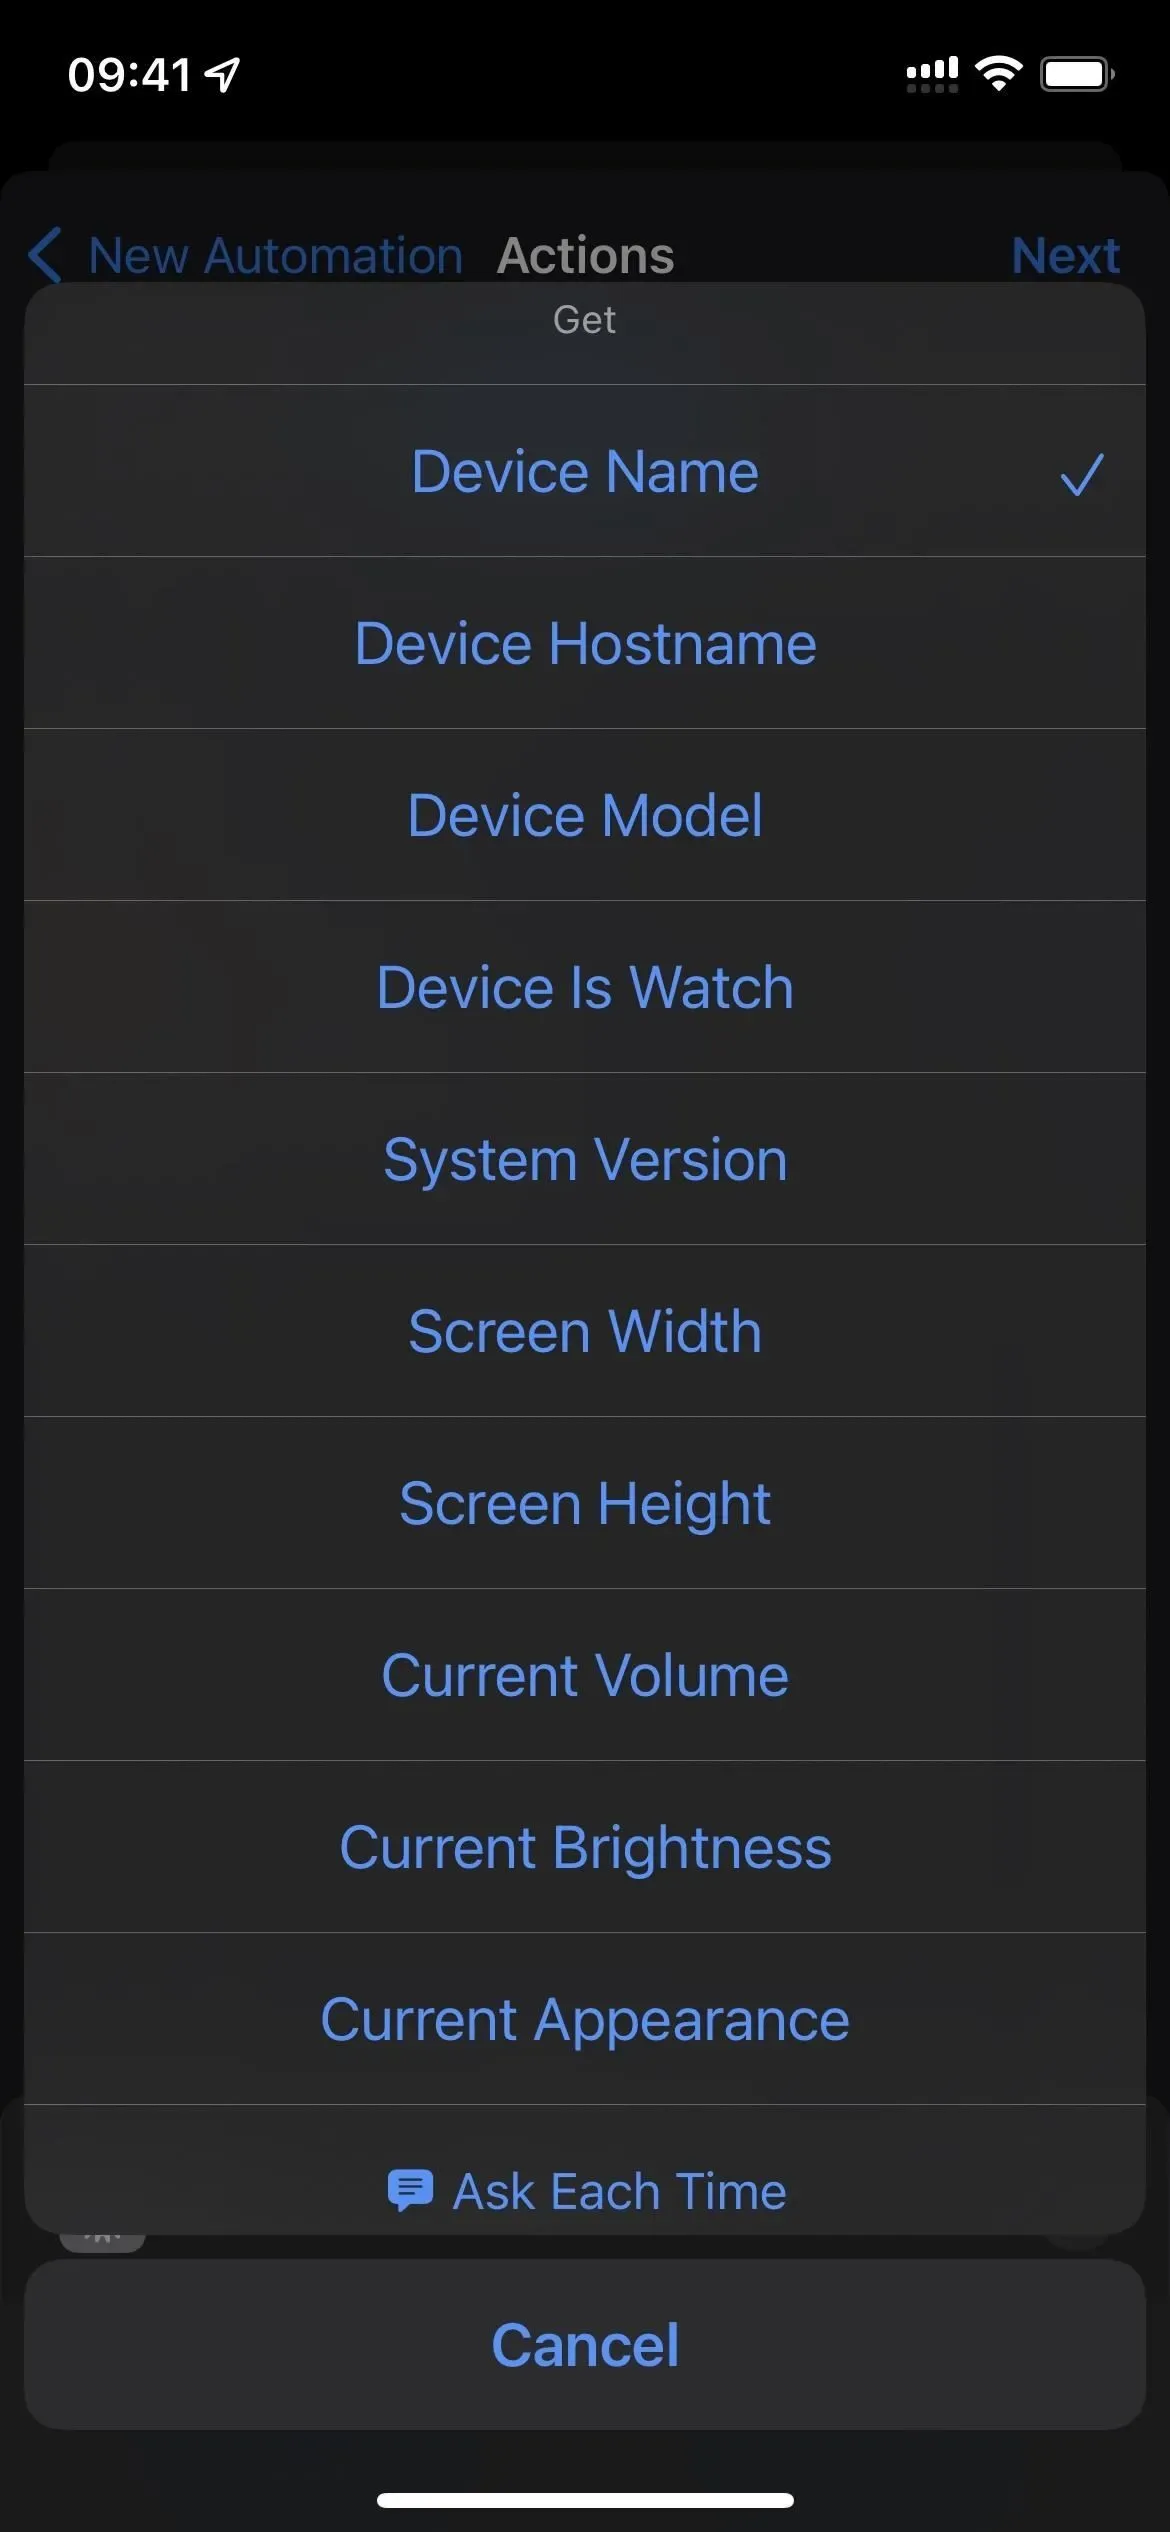
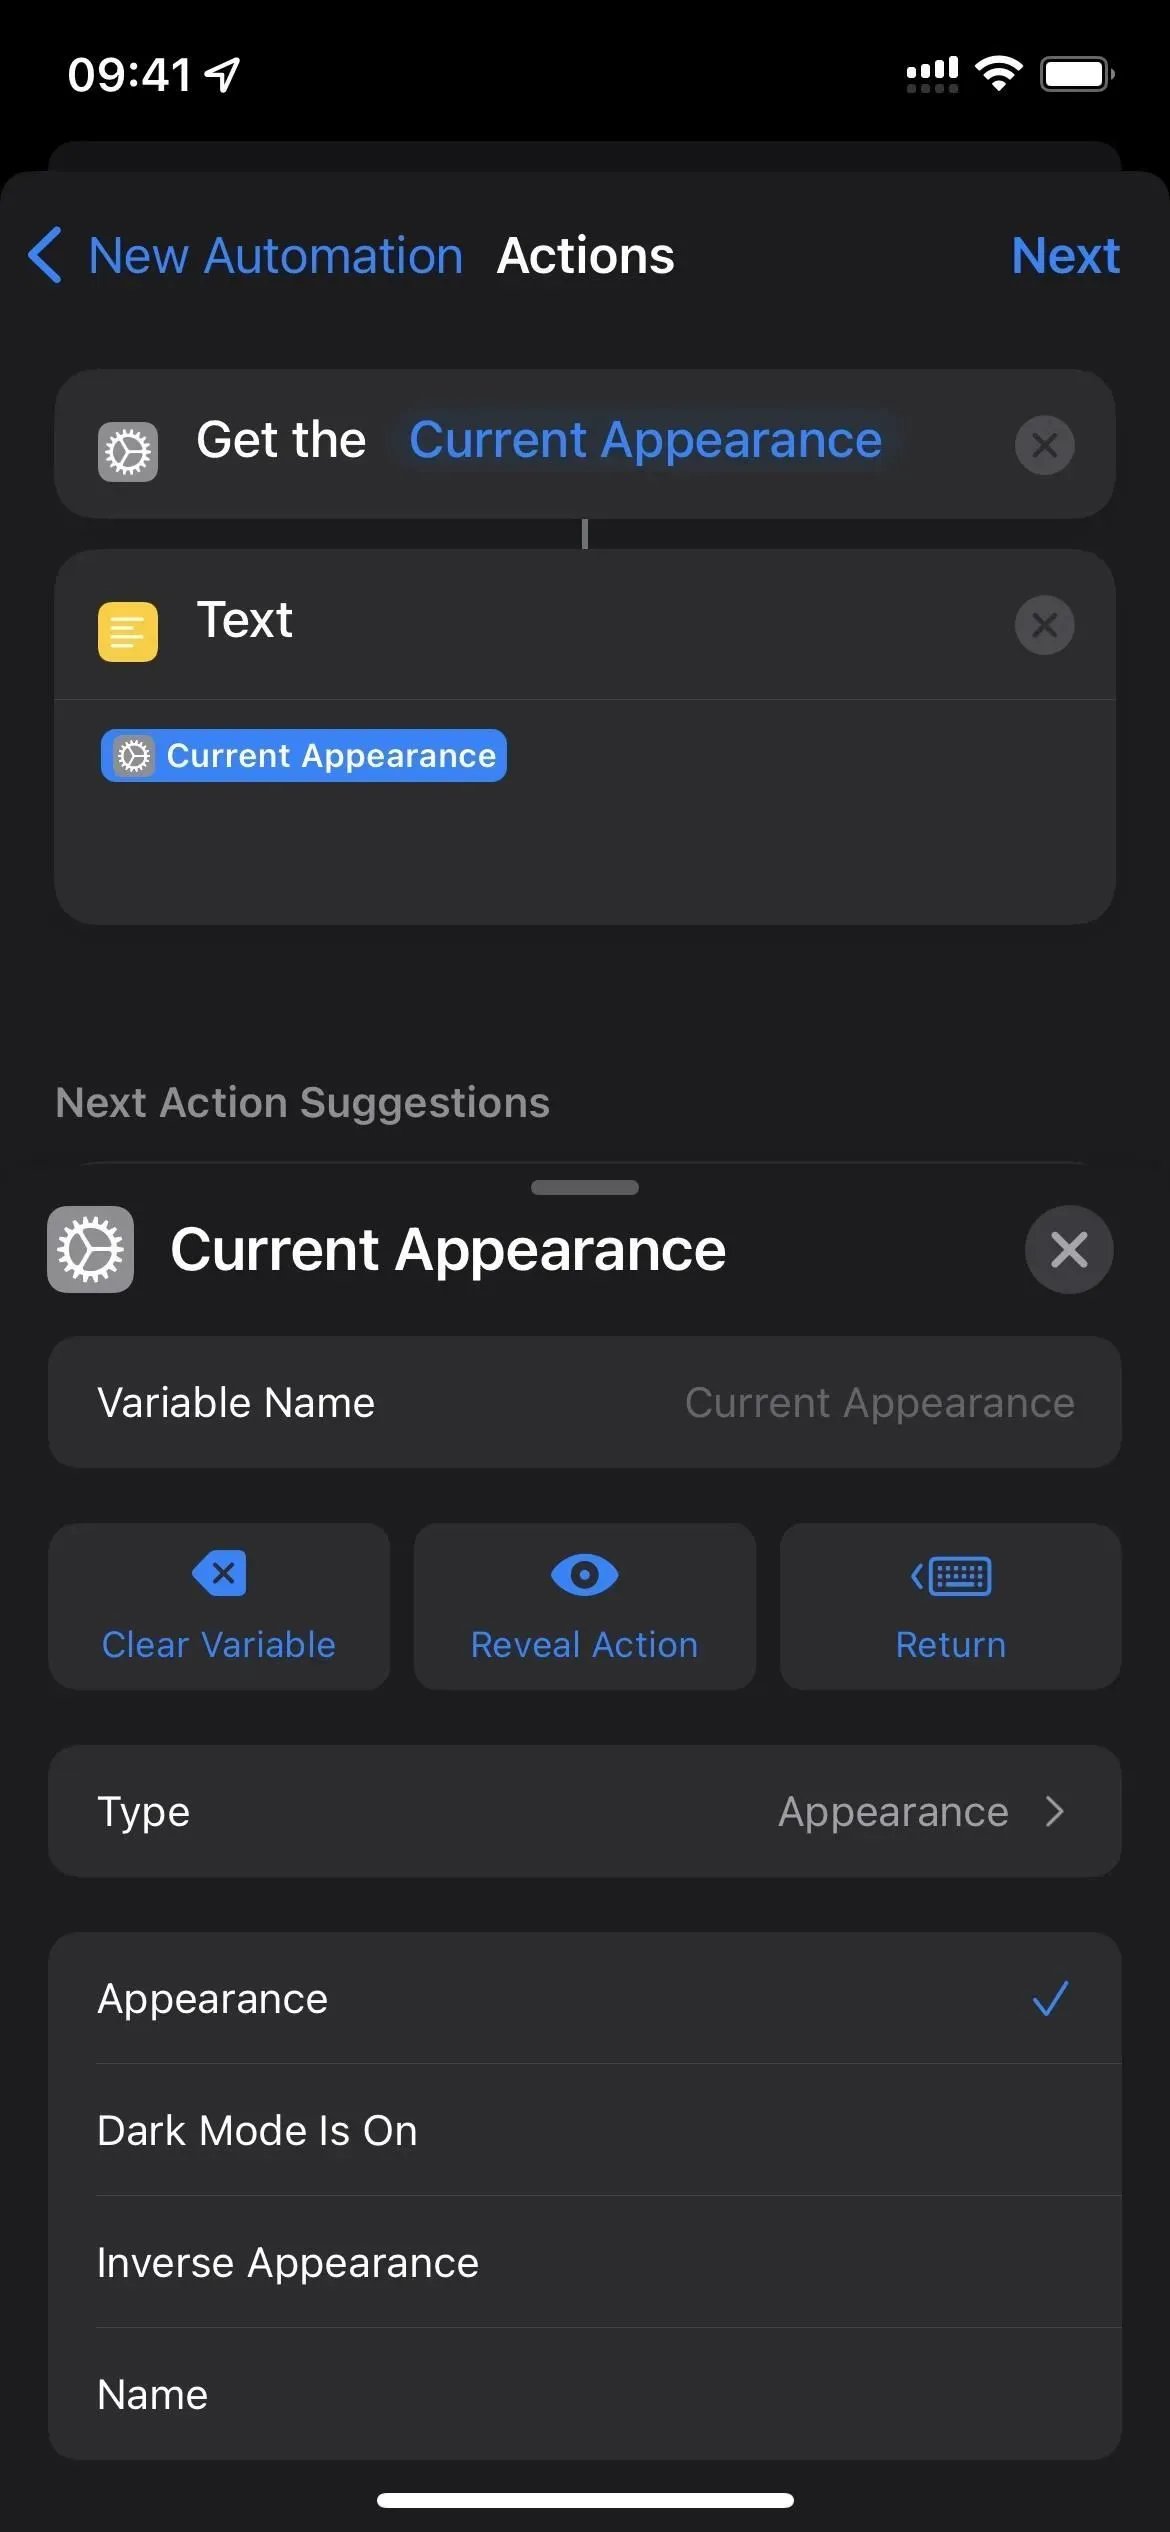
- Add a “Get device information”action.
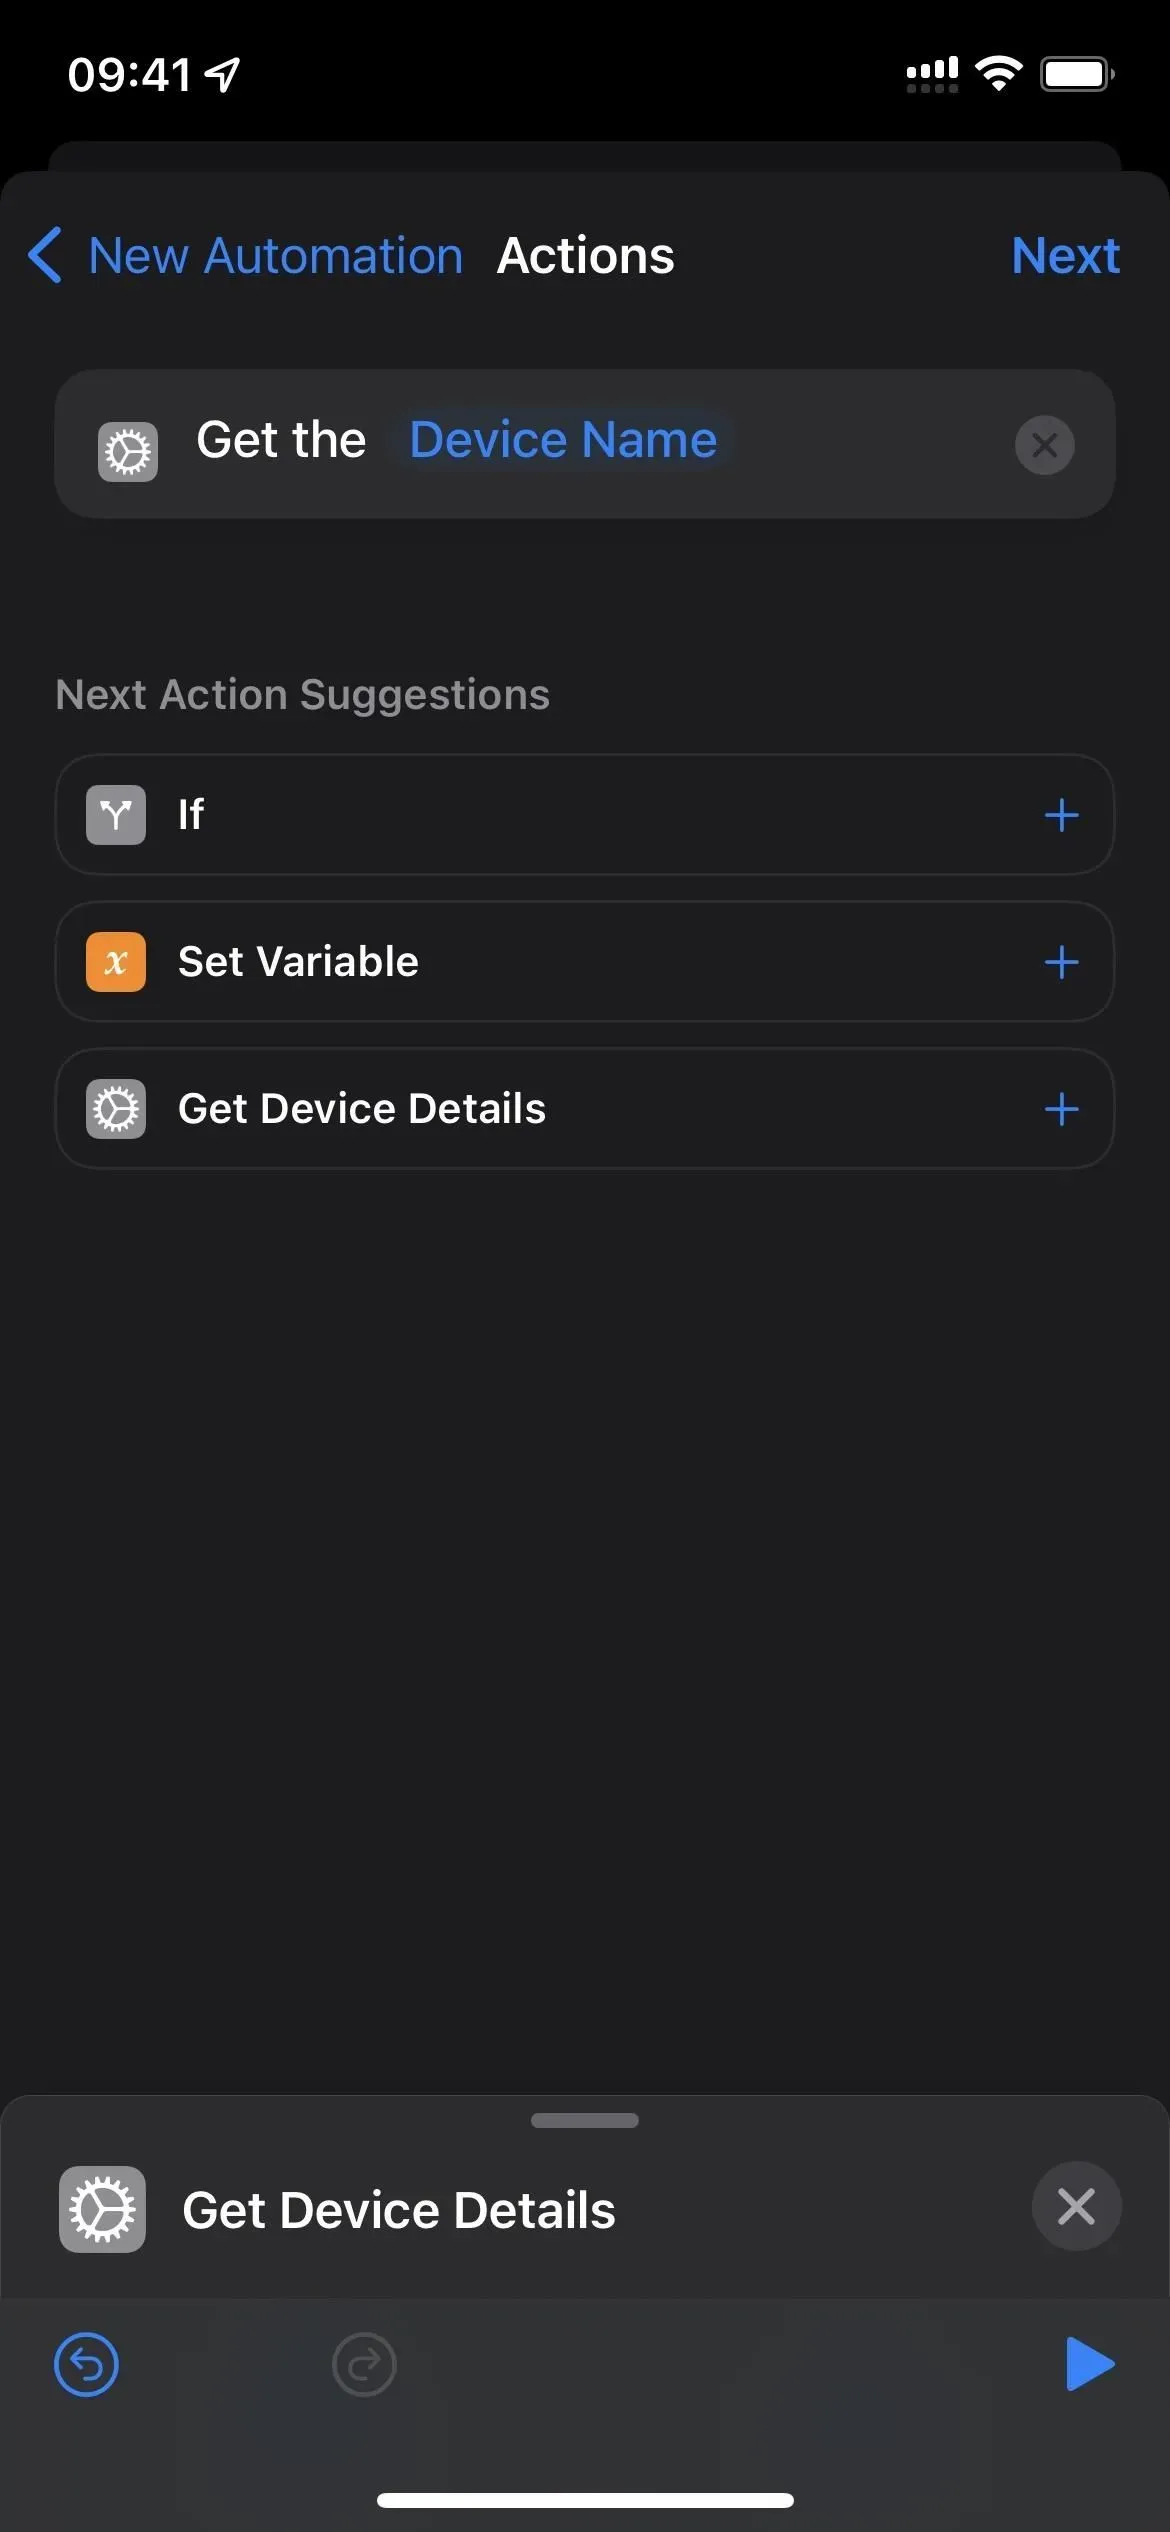
- Click “Device Name”in the “Get Device Information”action field.
- Select Current Appearance.
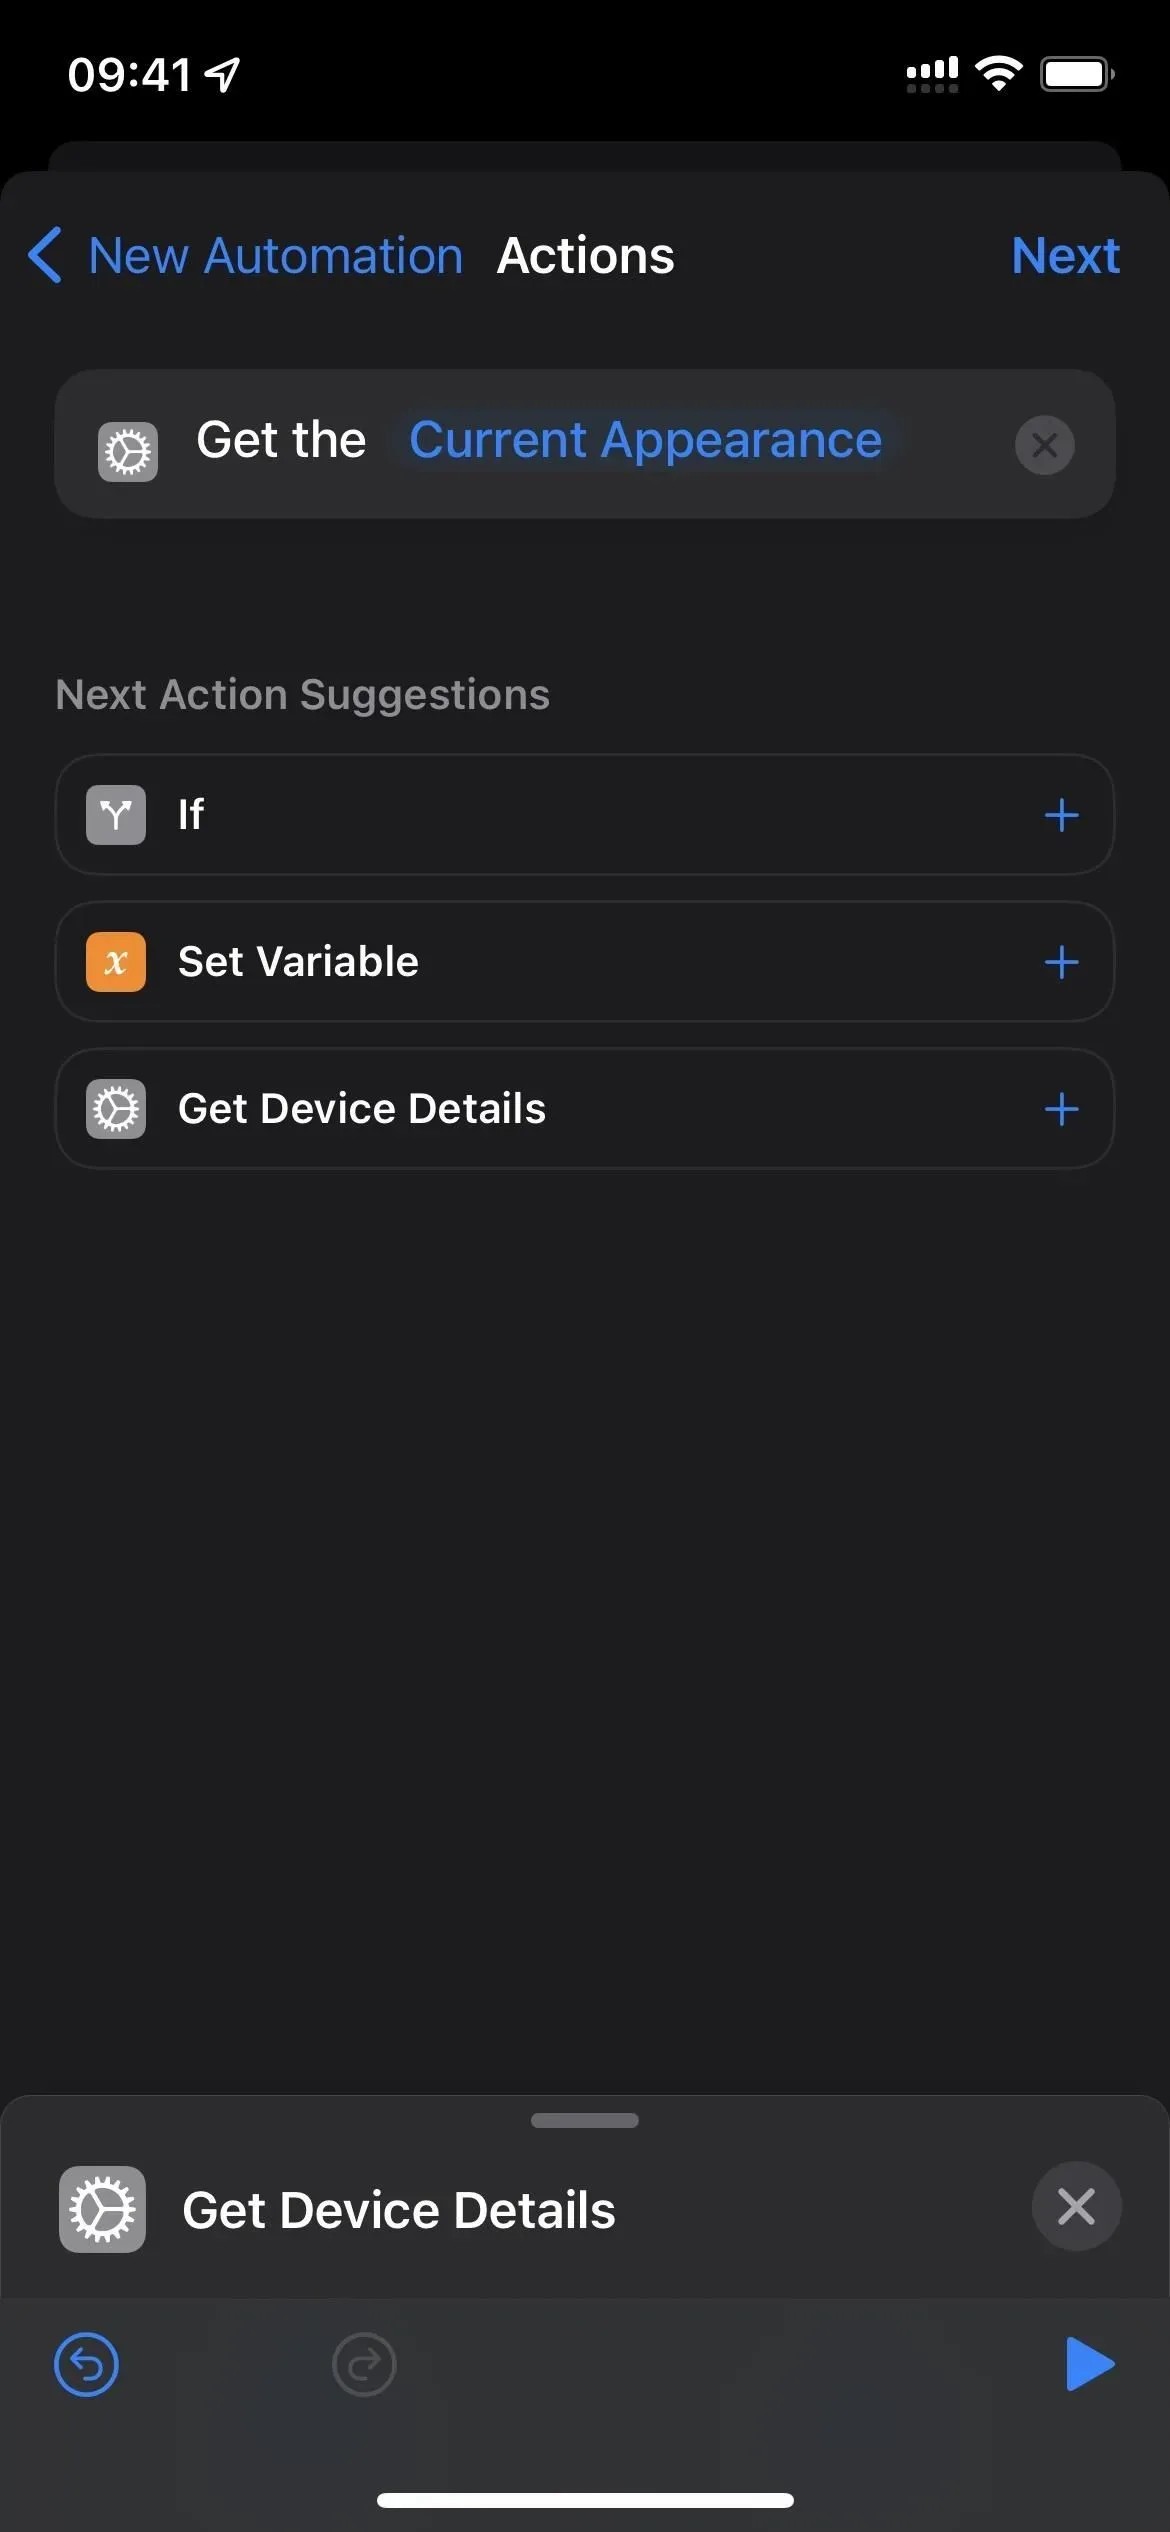
- Add a Text action below the Get Device Information action field.


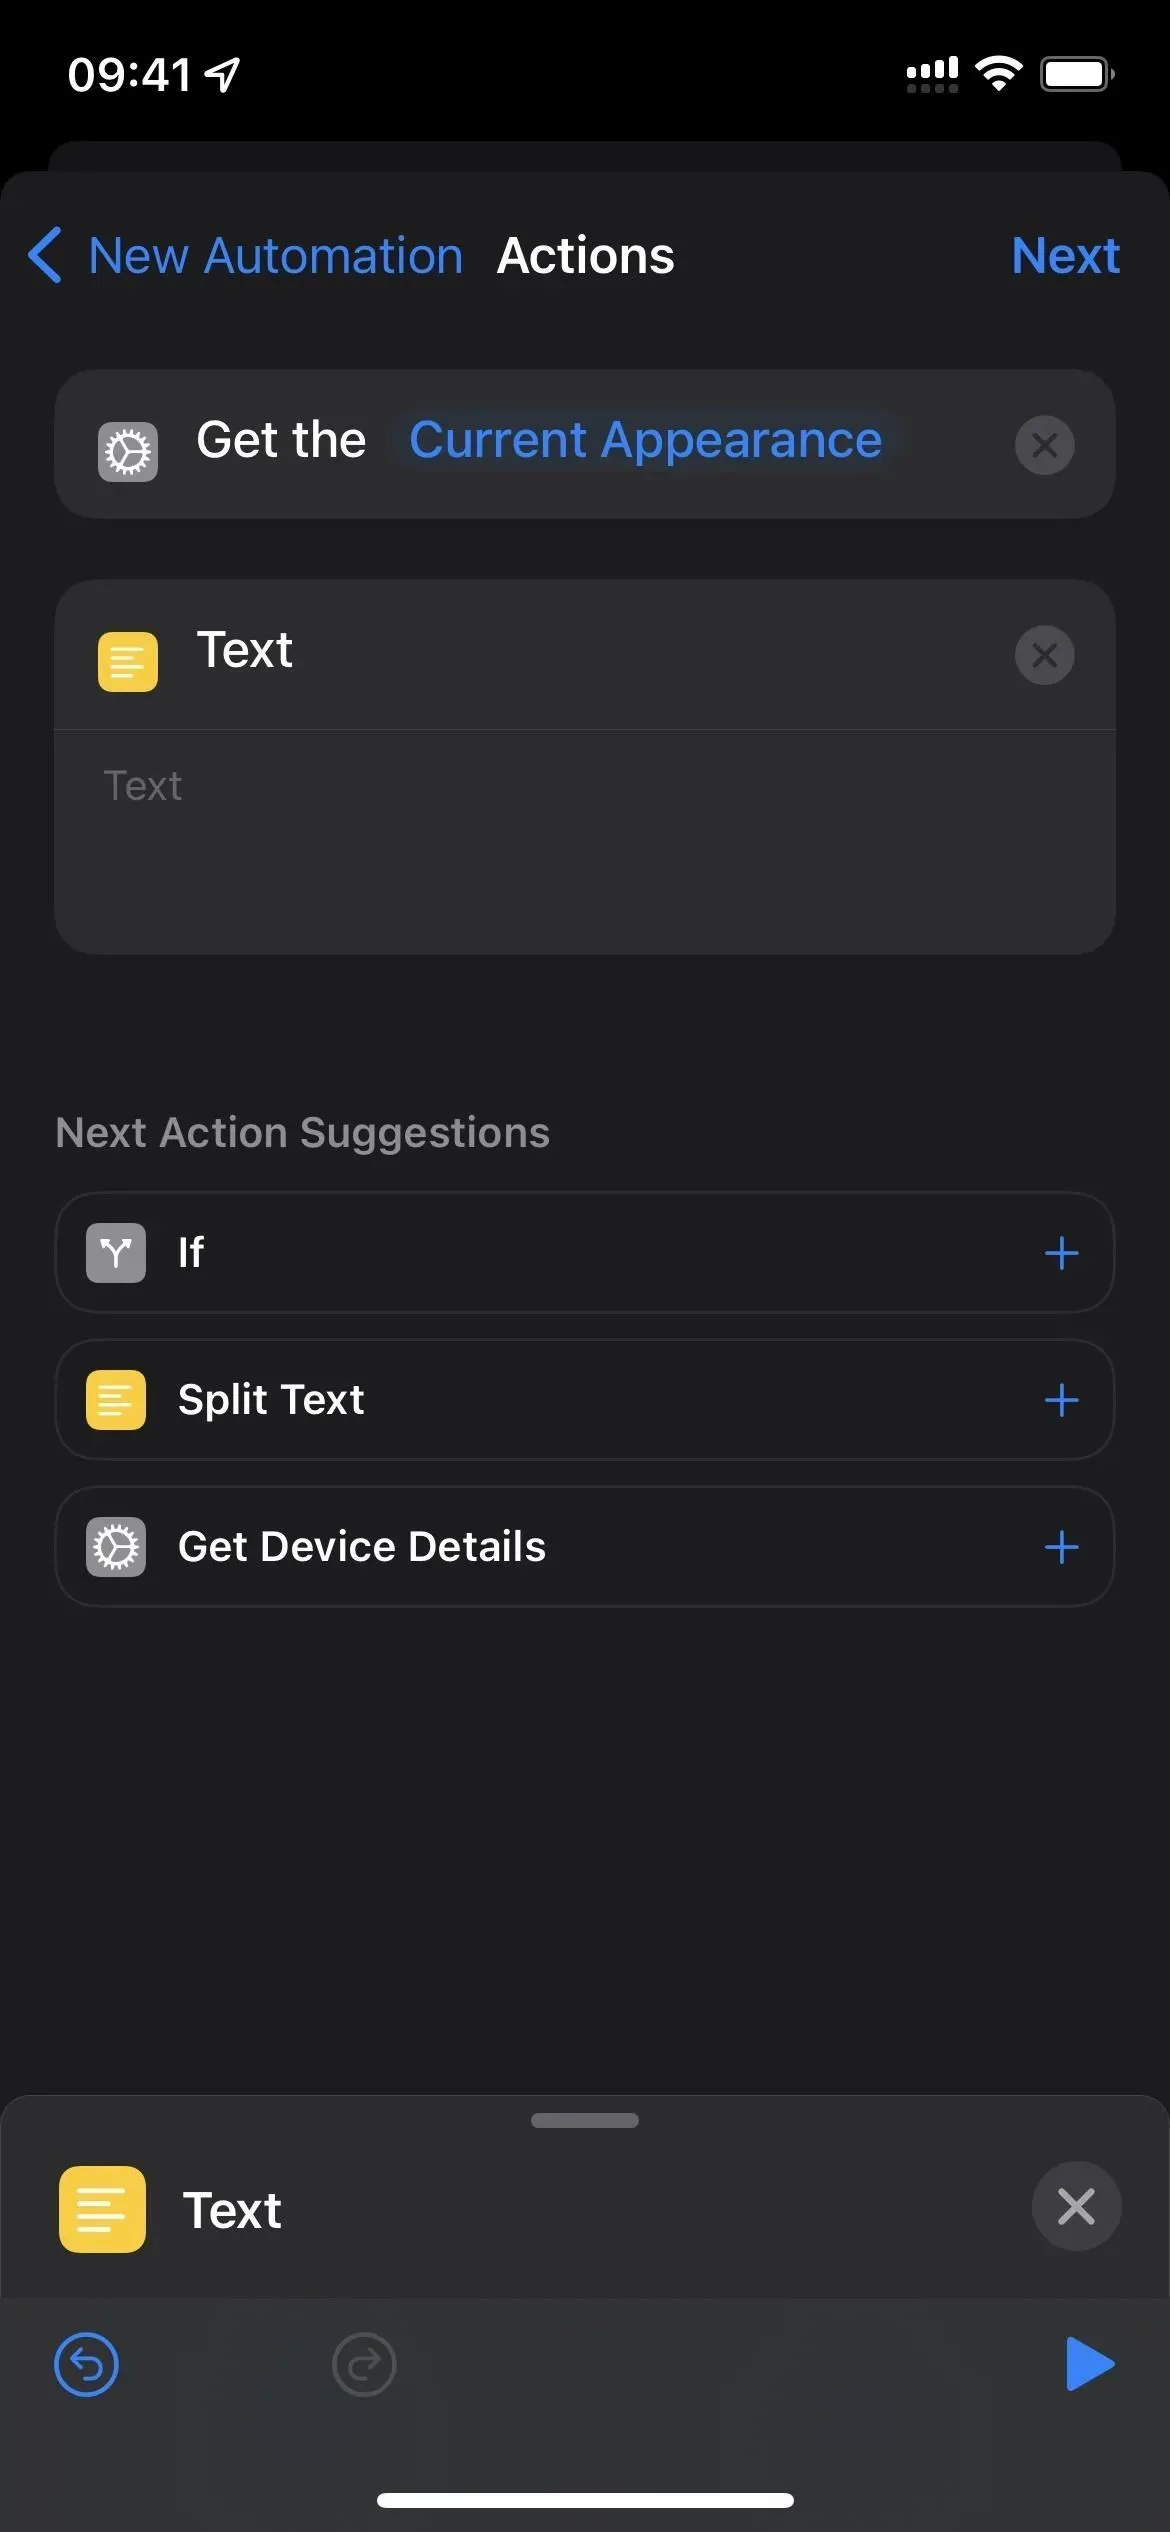
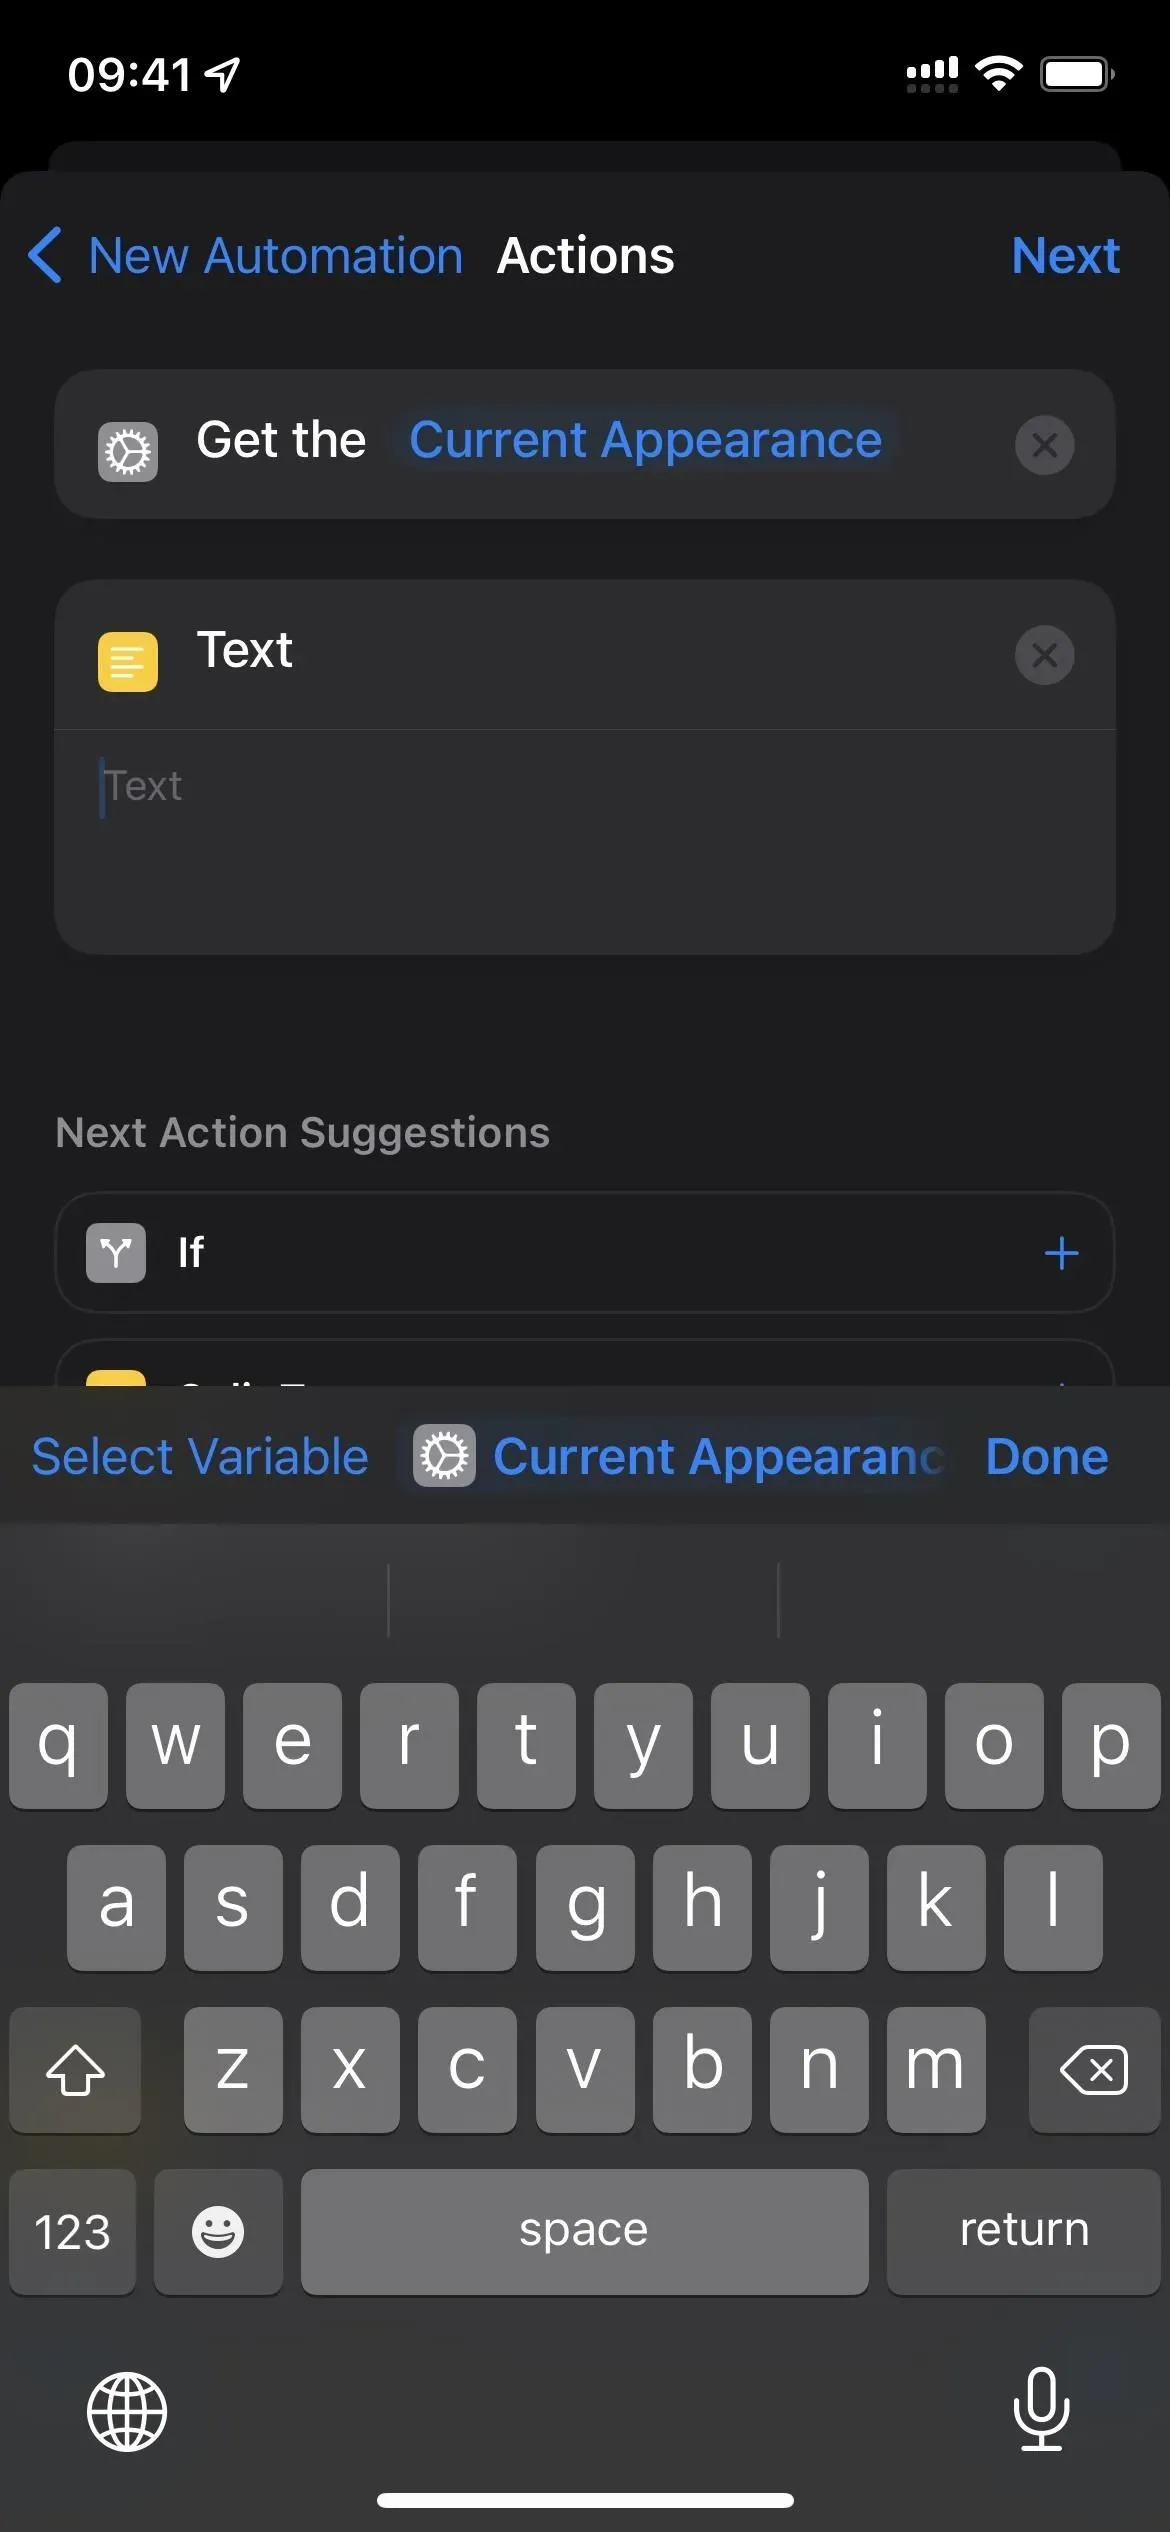
- Tap in the Text action field.
- Select “Current Appearance”as the variable.
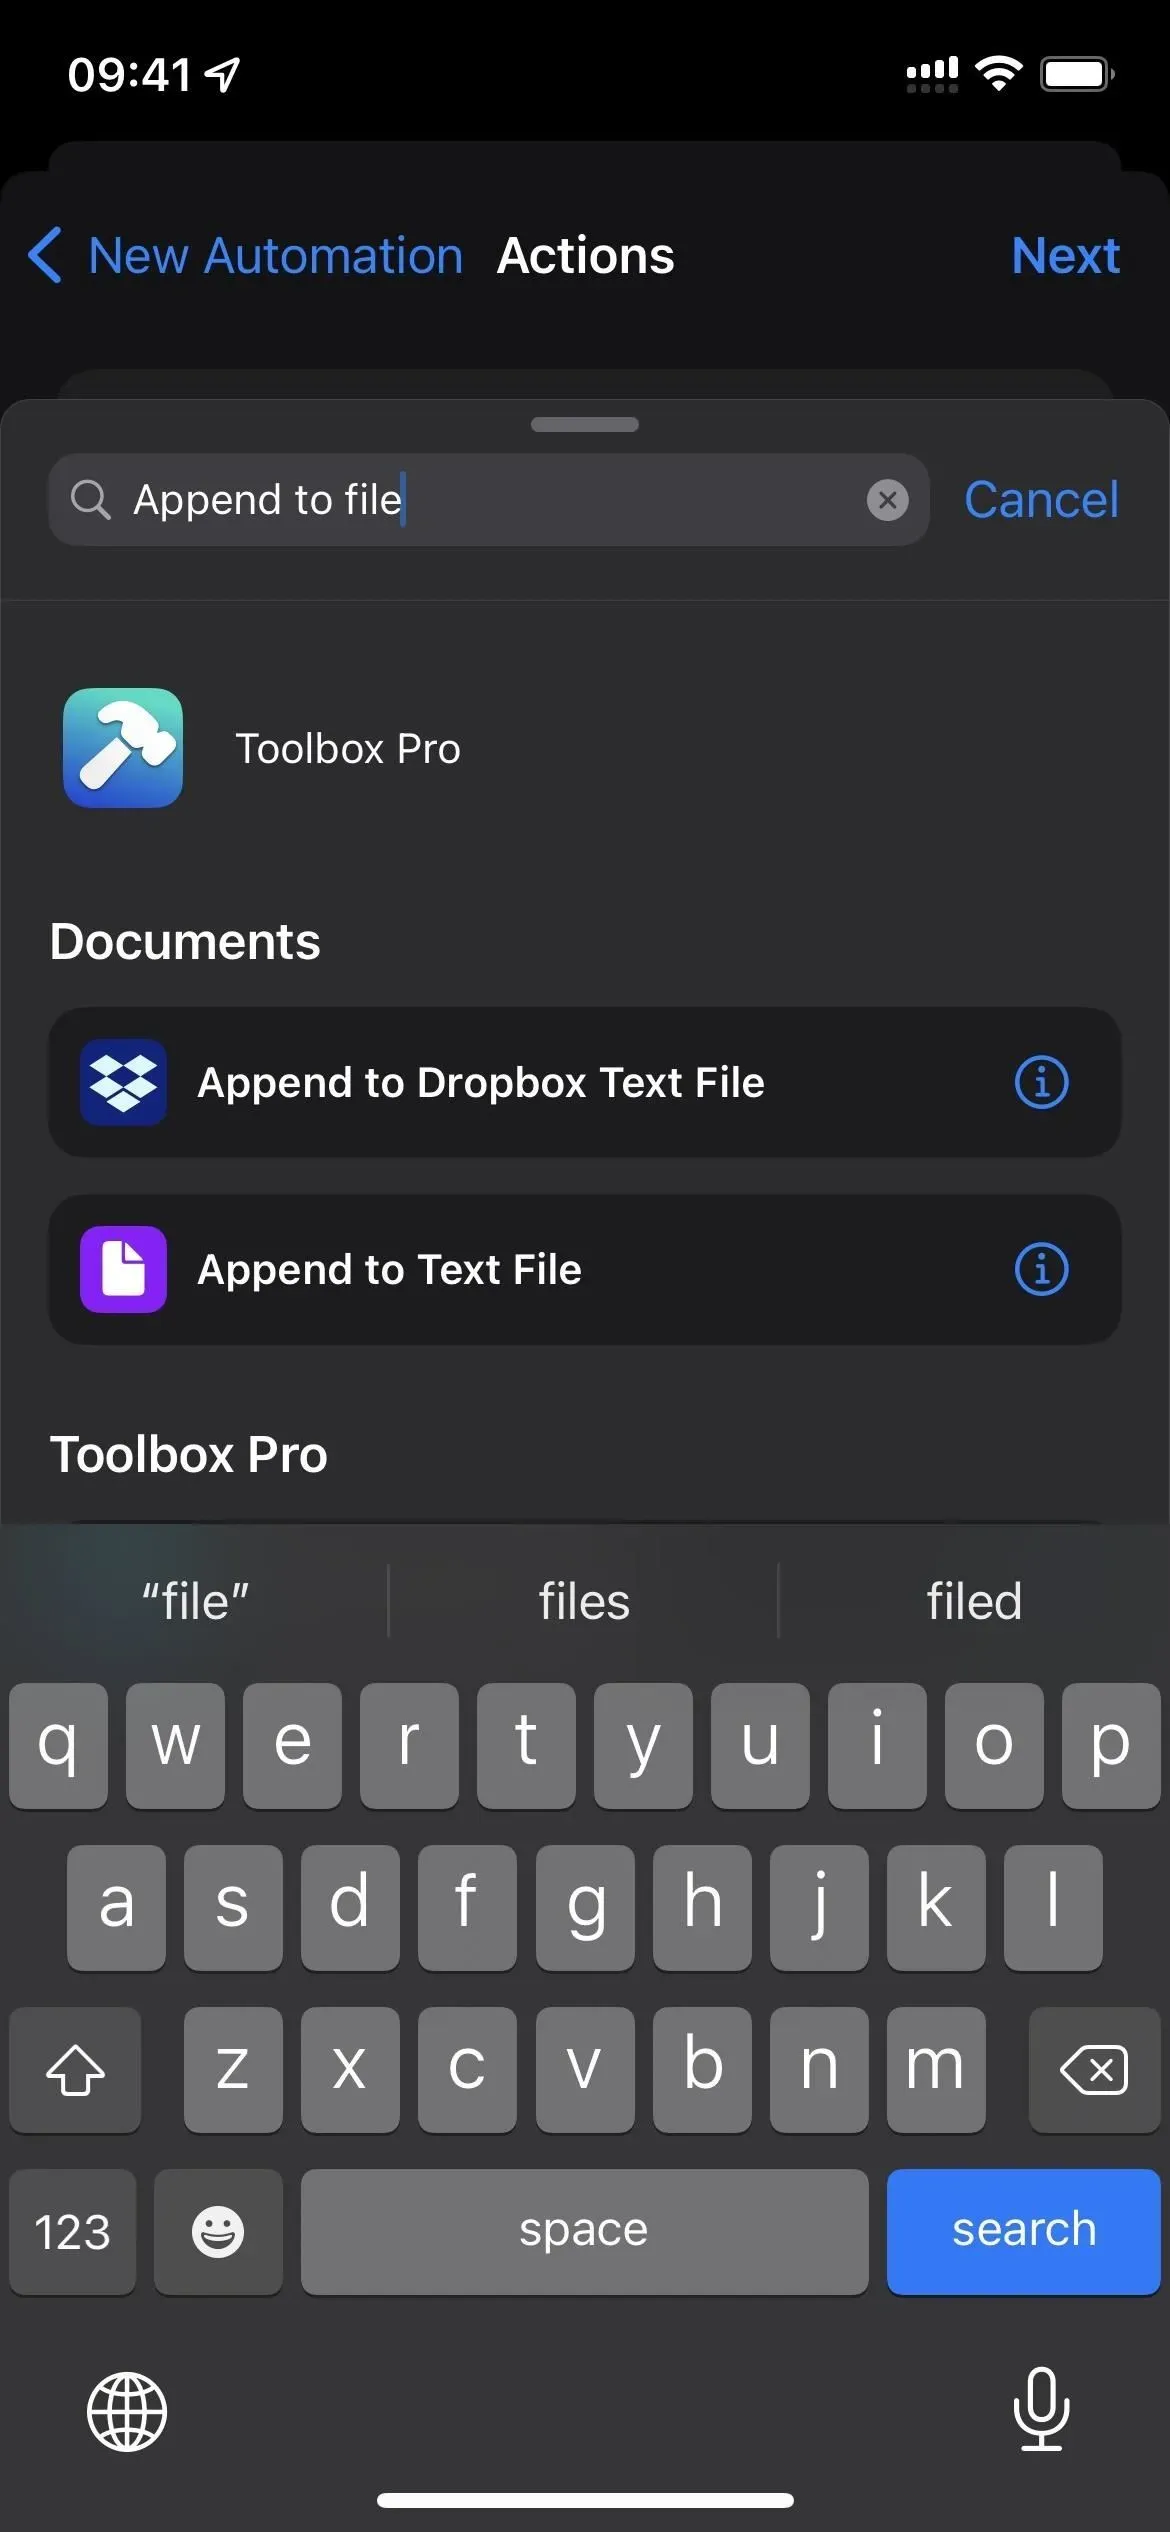
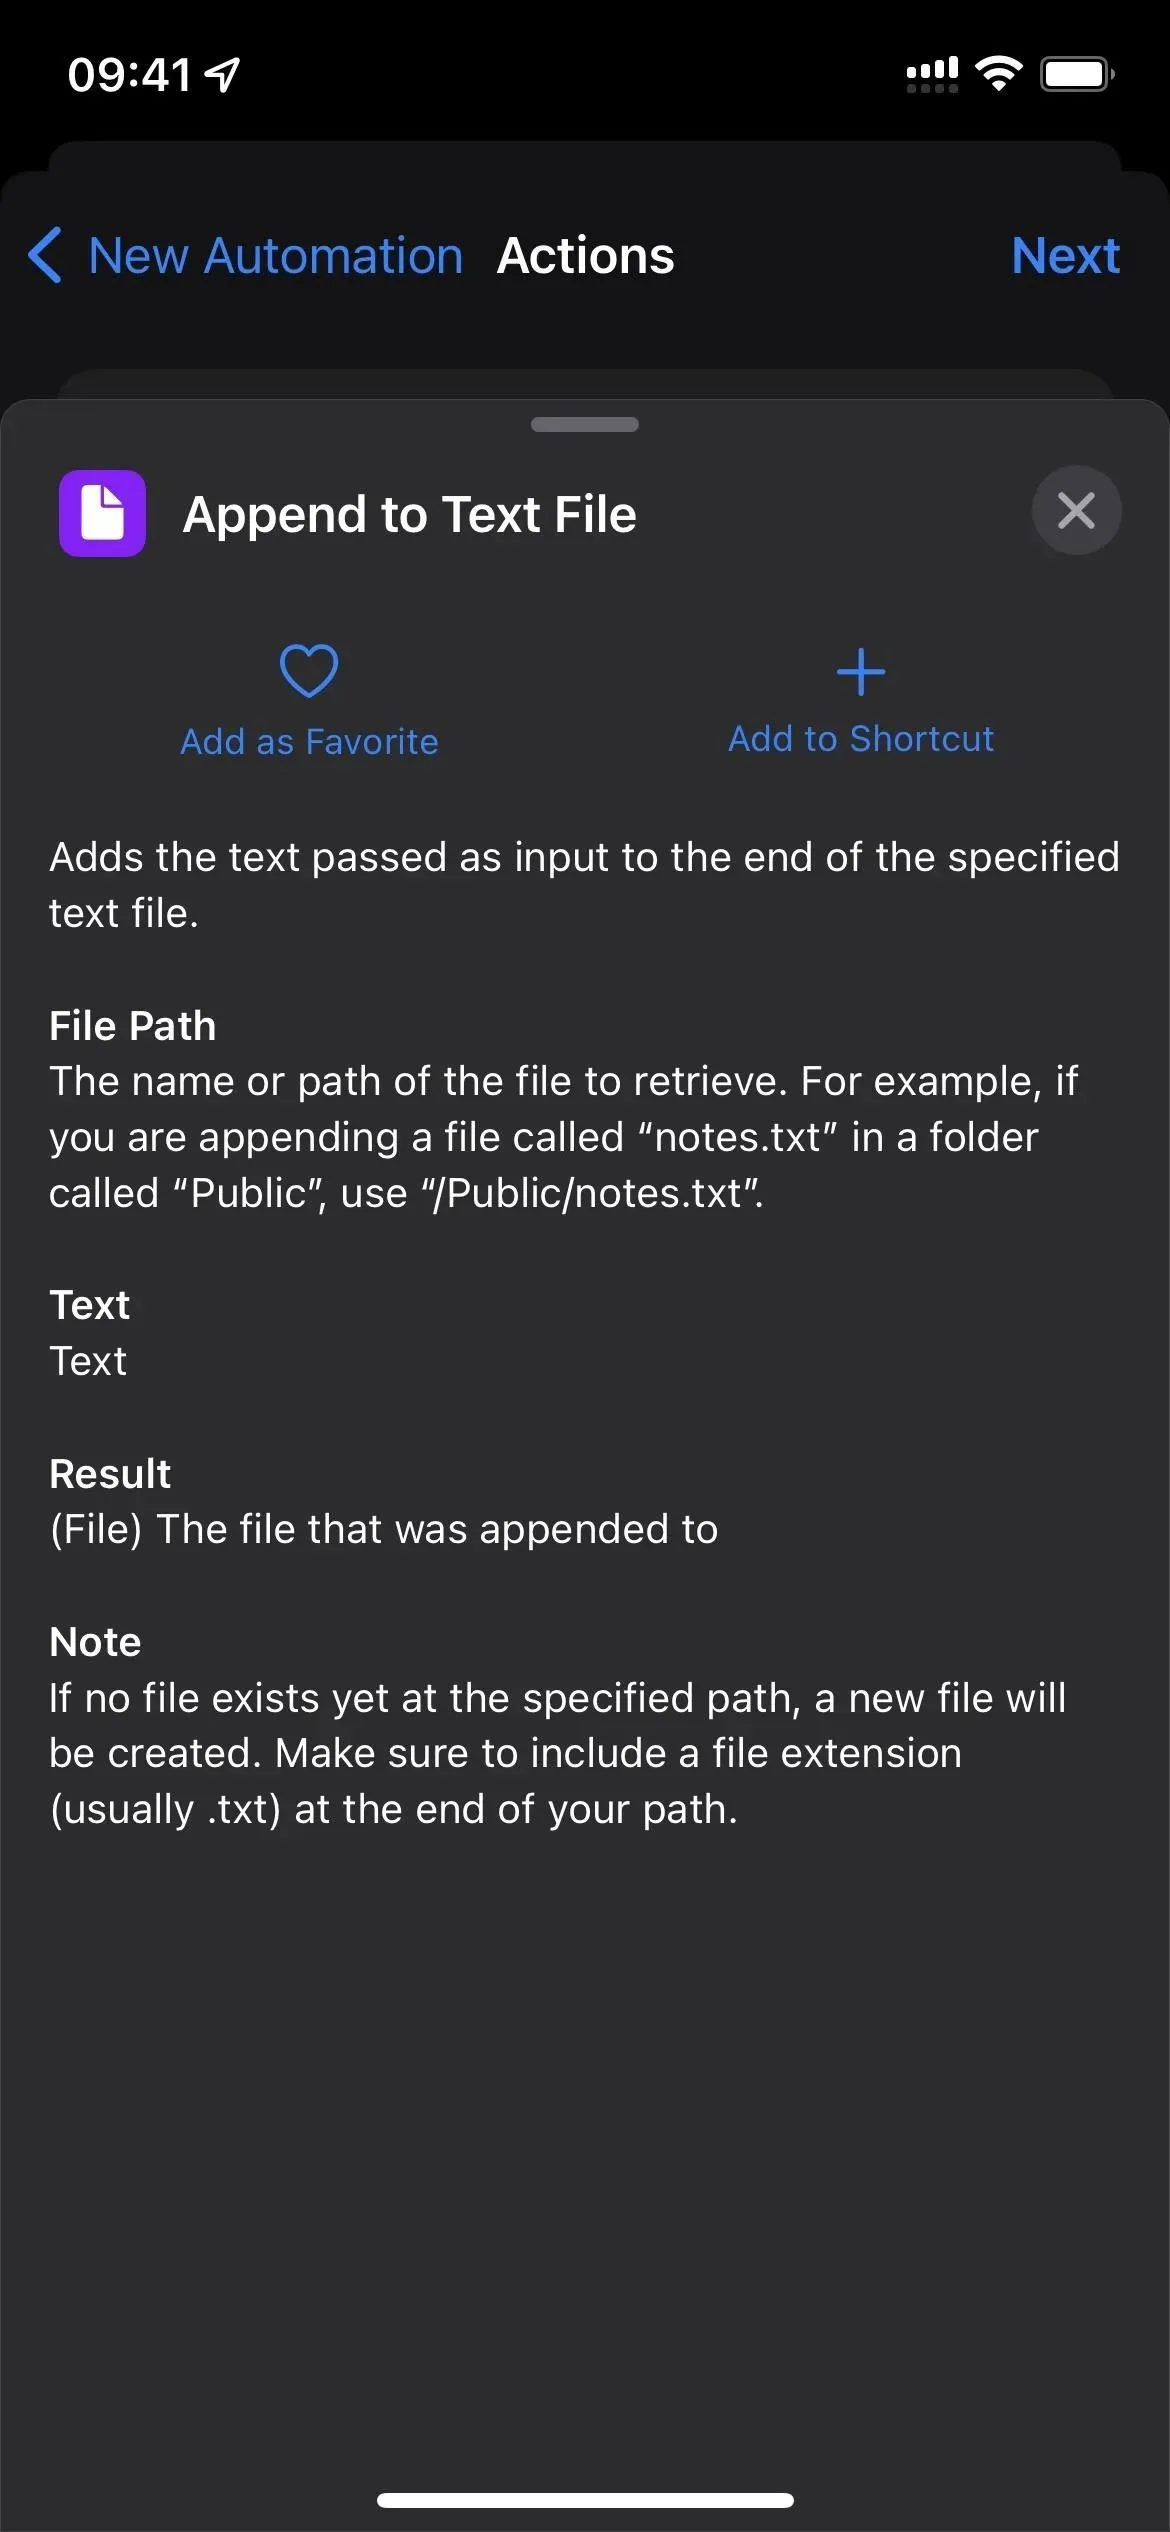
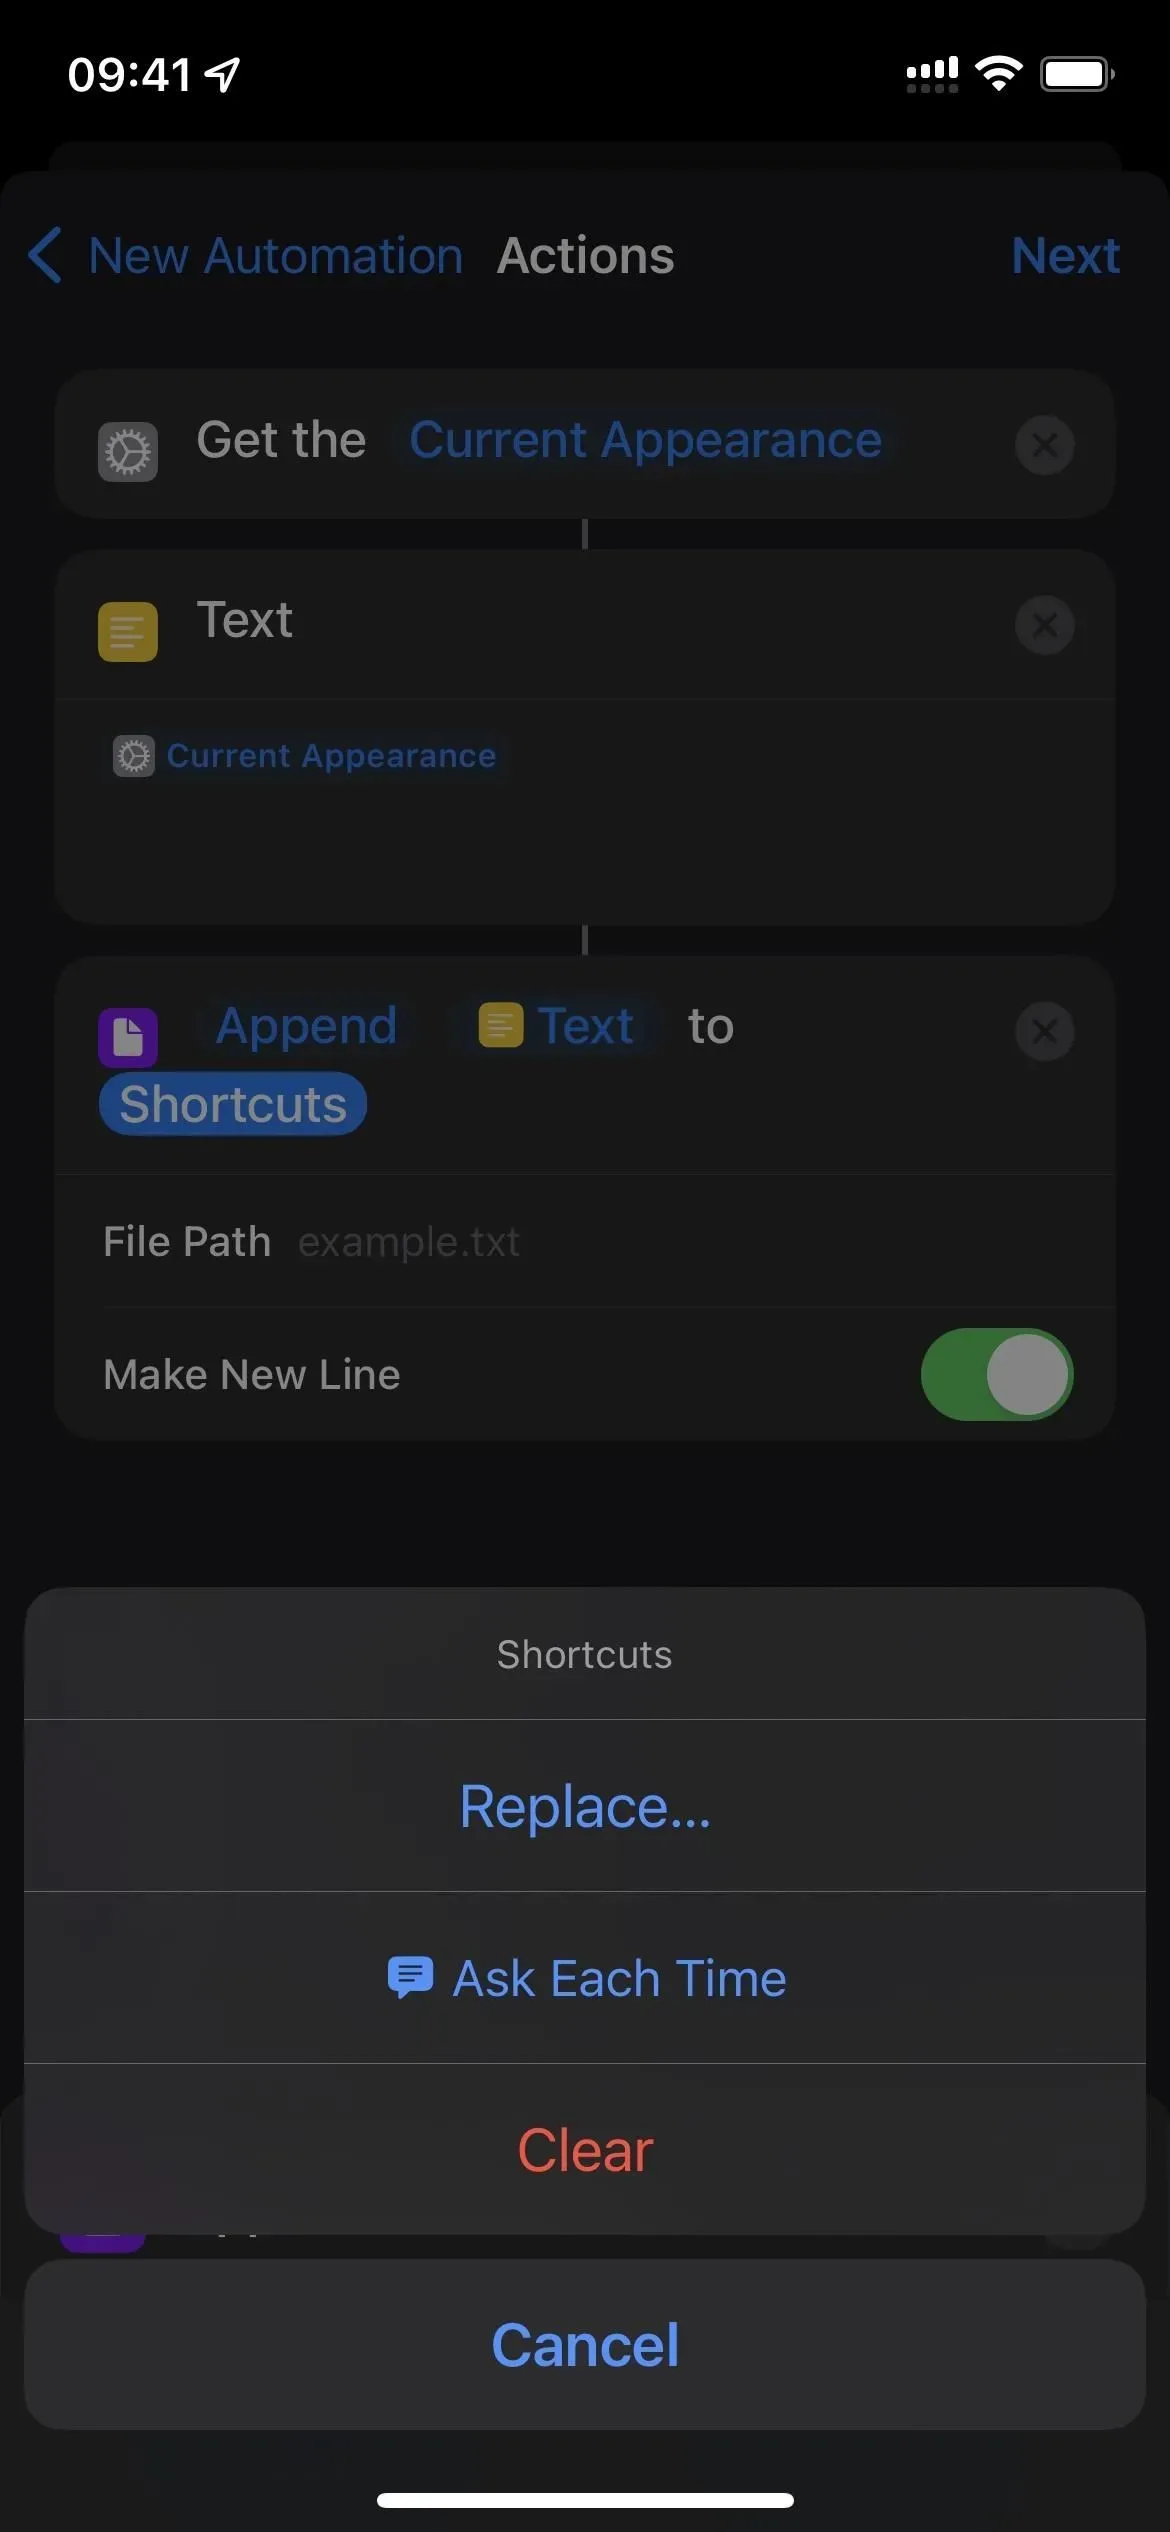
- Add an Add to Text File action below the Text action field.
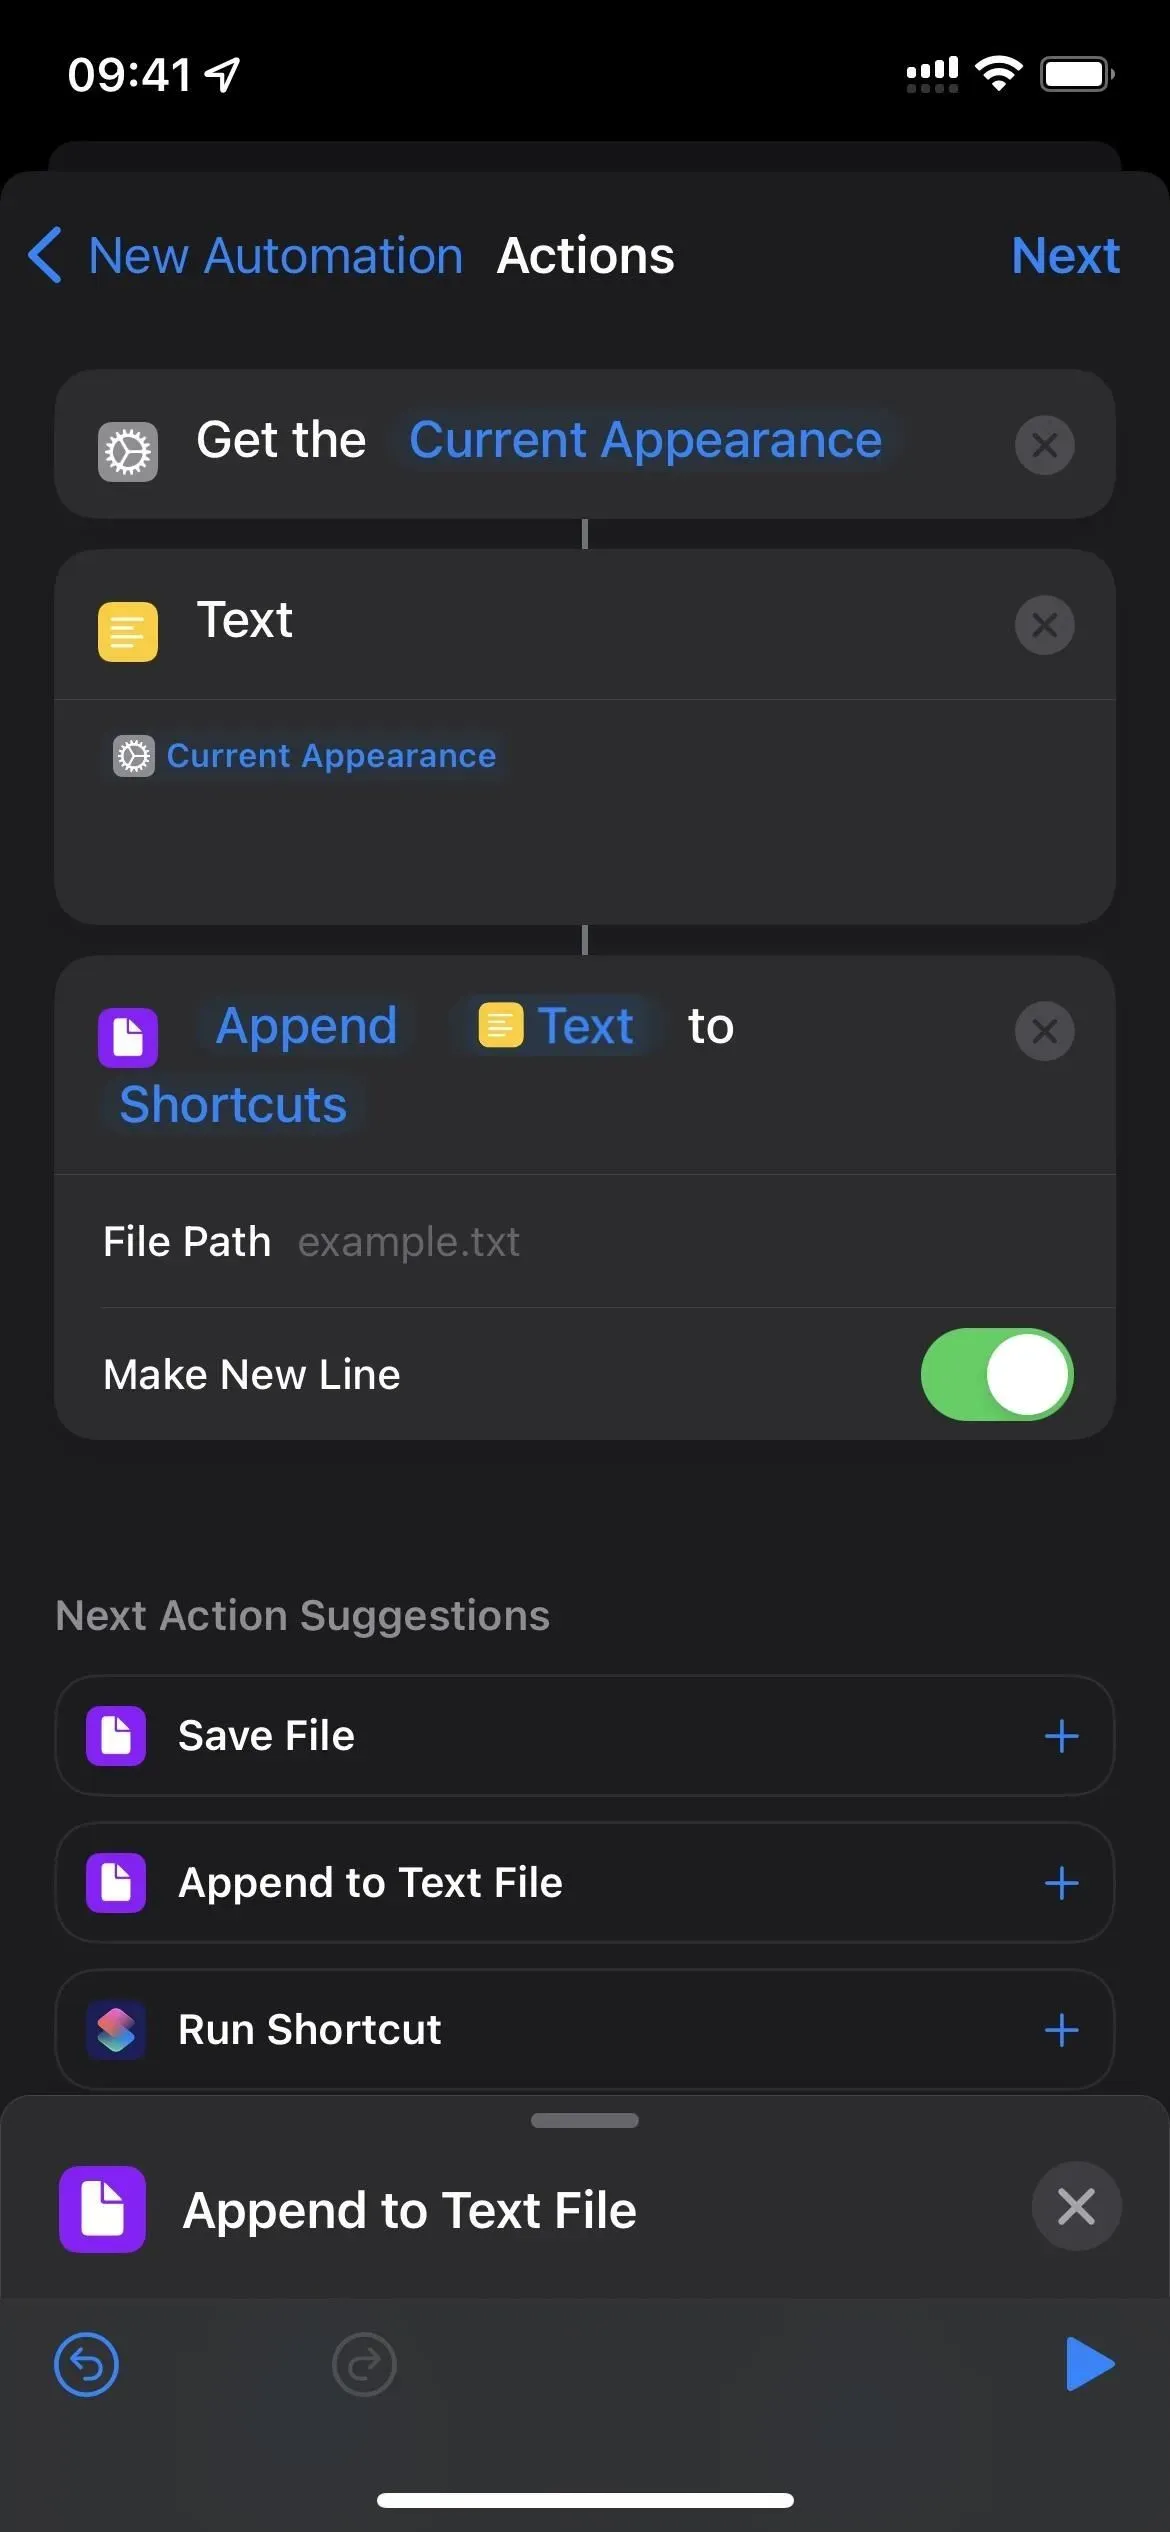
- Tap a directory in the Add action field. (My Labels.)
- Select “Replace…”from the menu.
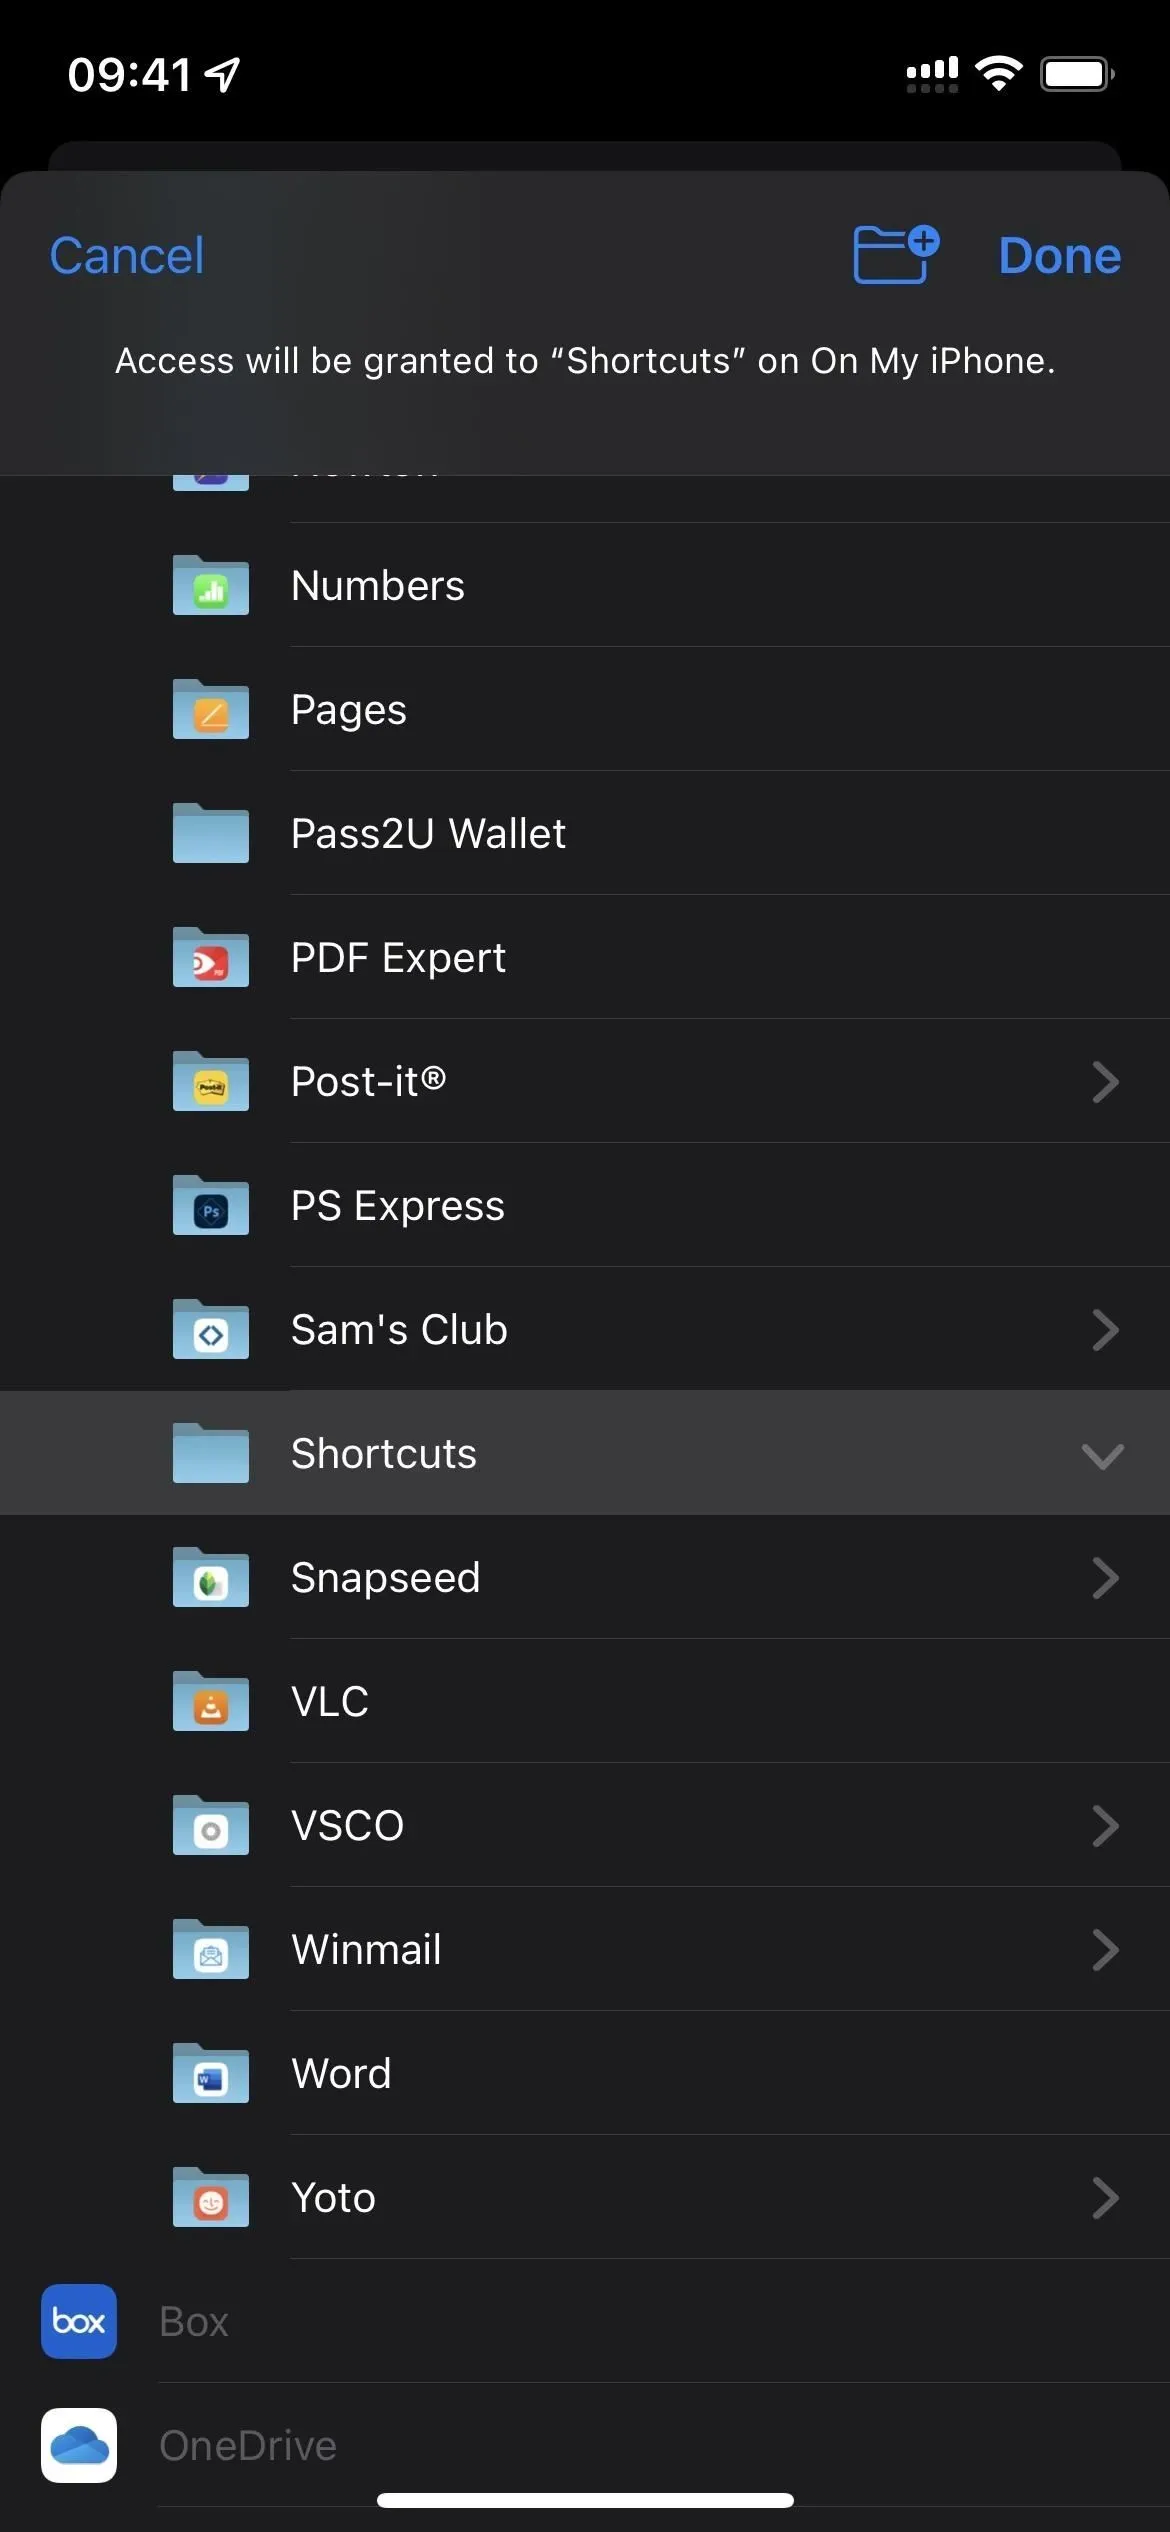
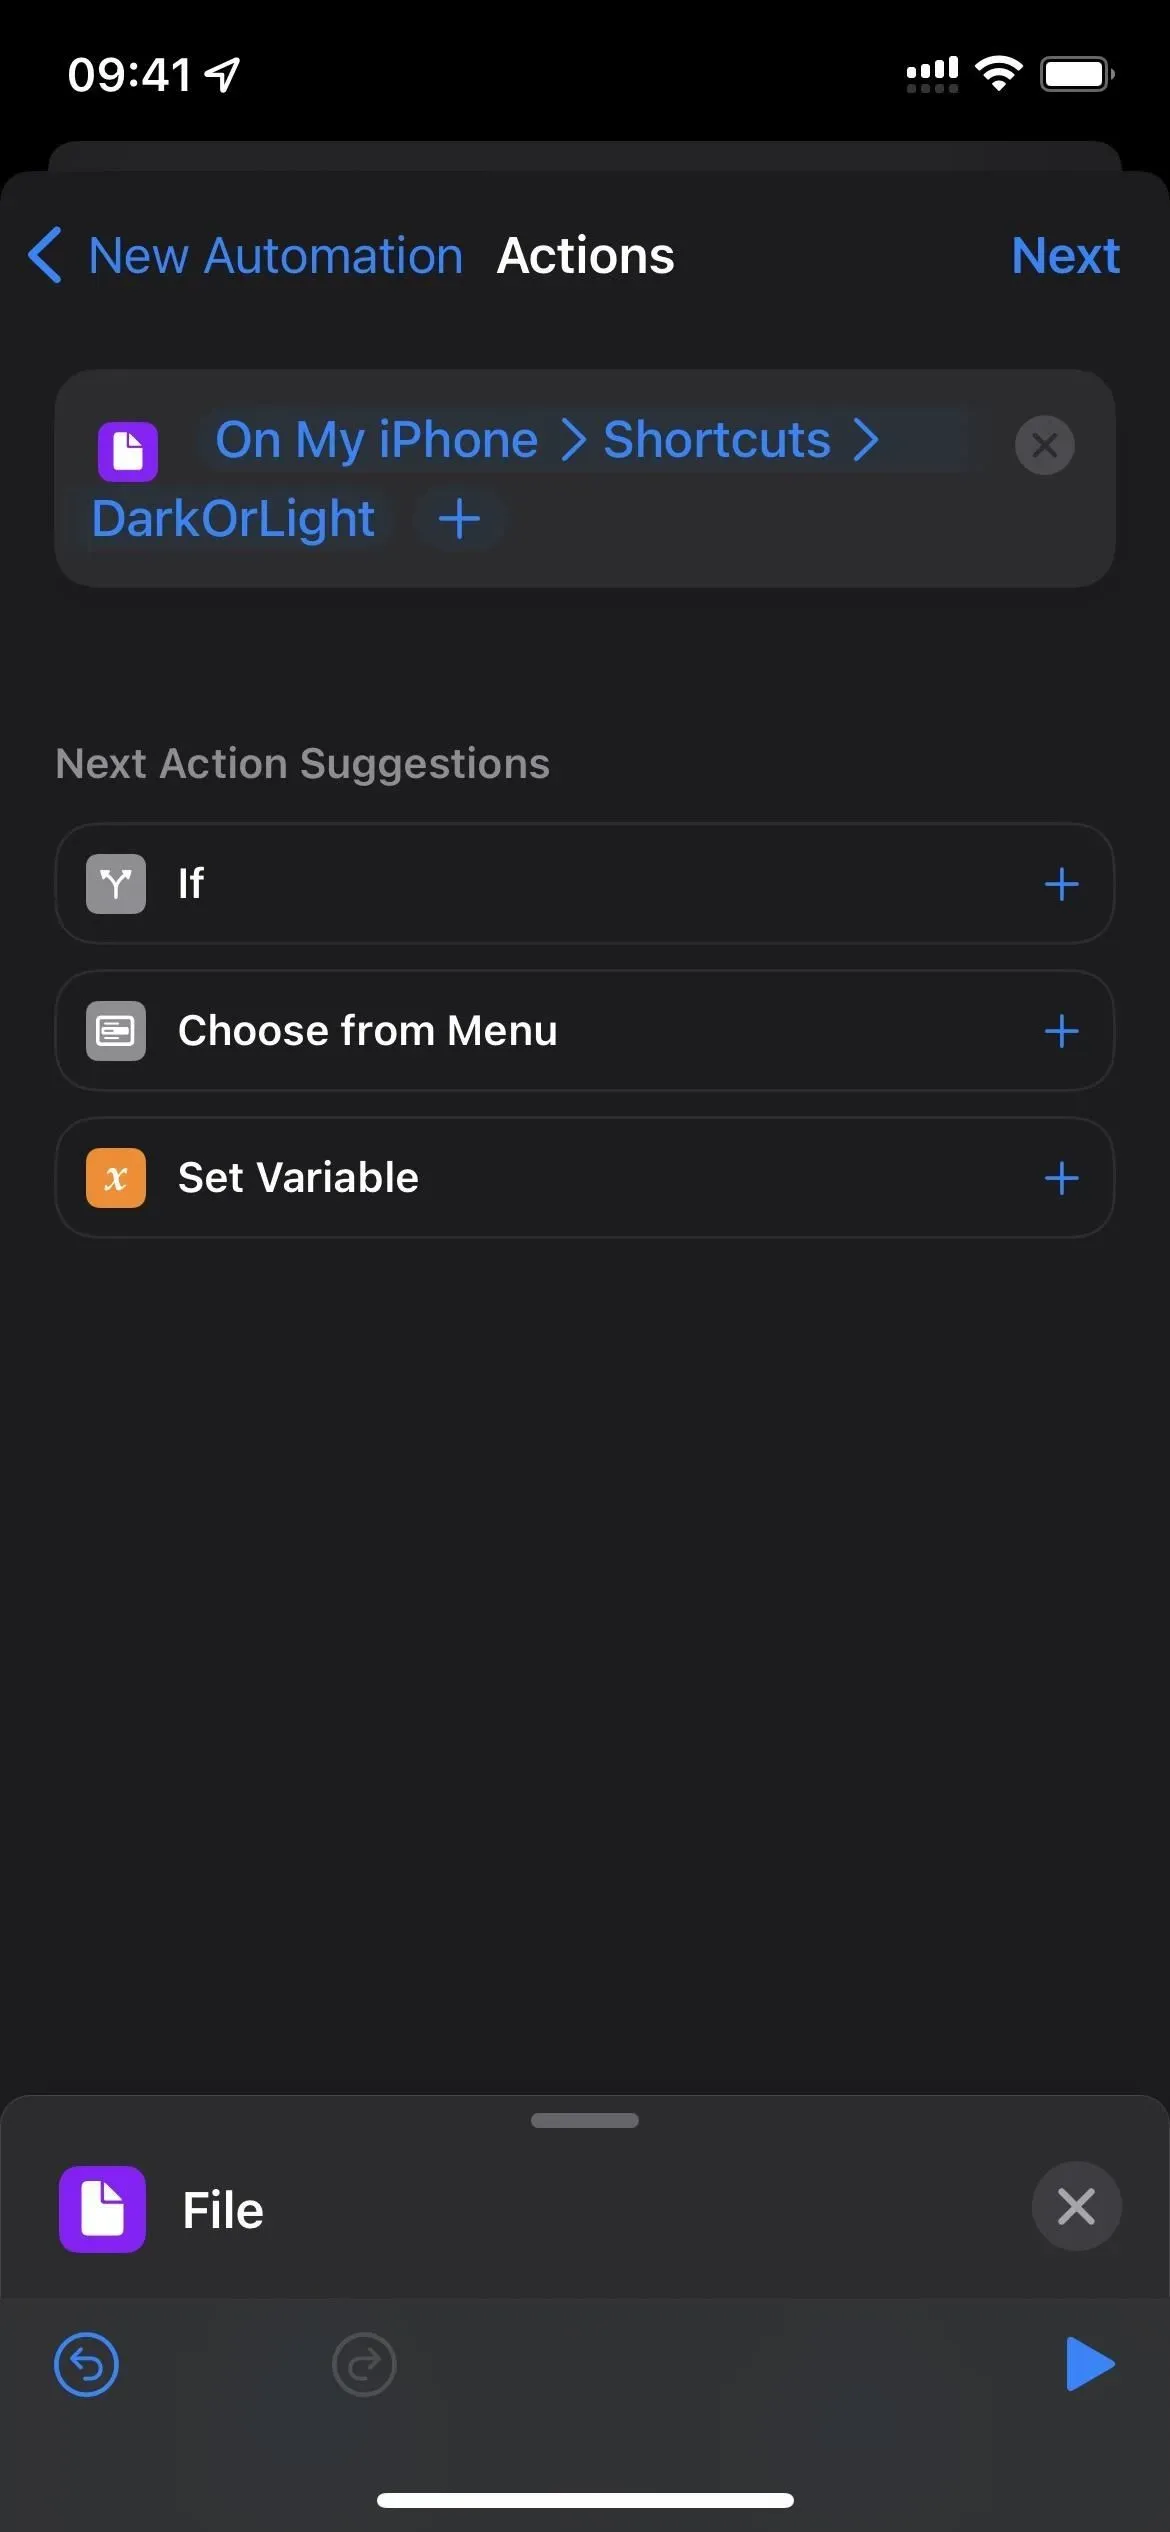
- Select the location where your file is located.
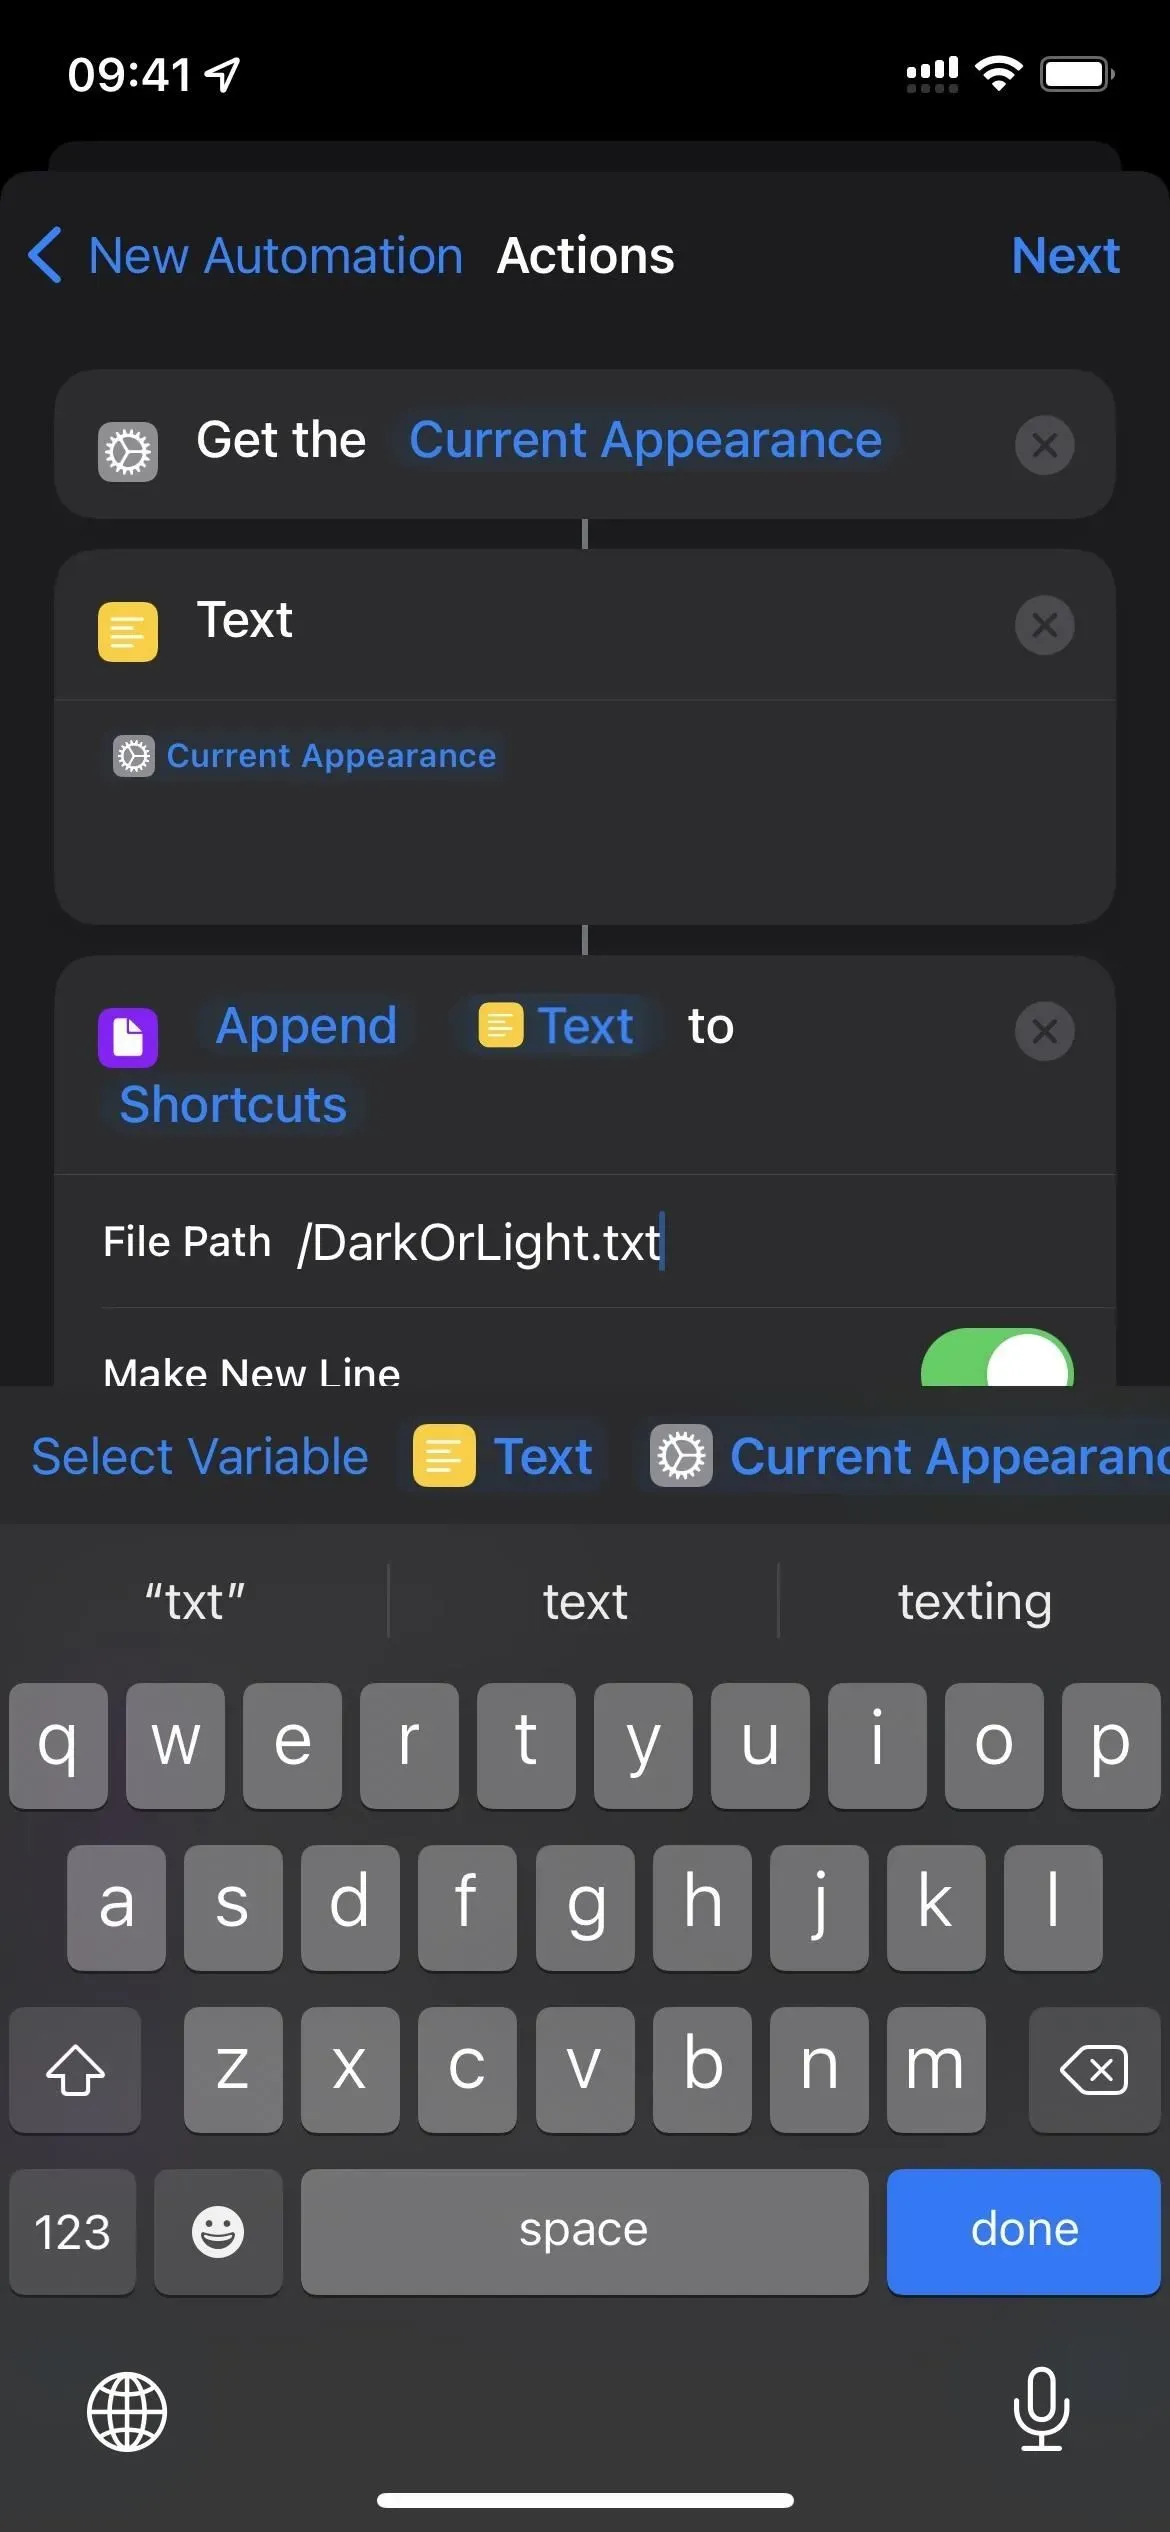
- Enter a filename beginning with / (slash) as the file path. (My file is /DarkOrLight.txt.)
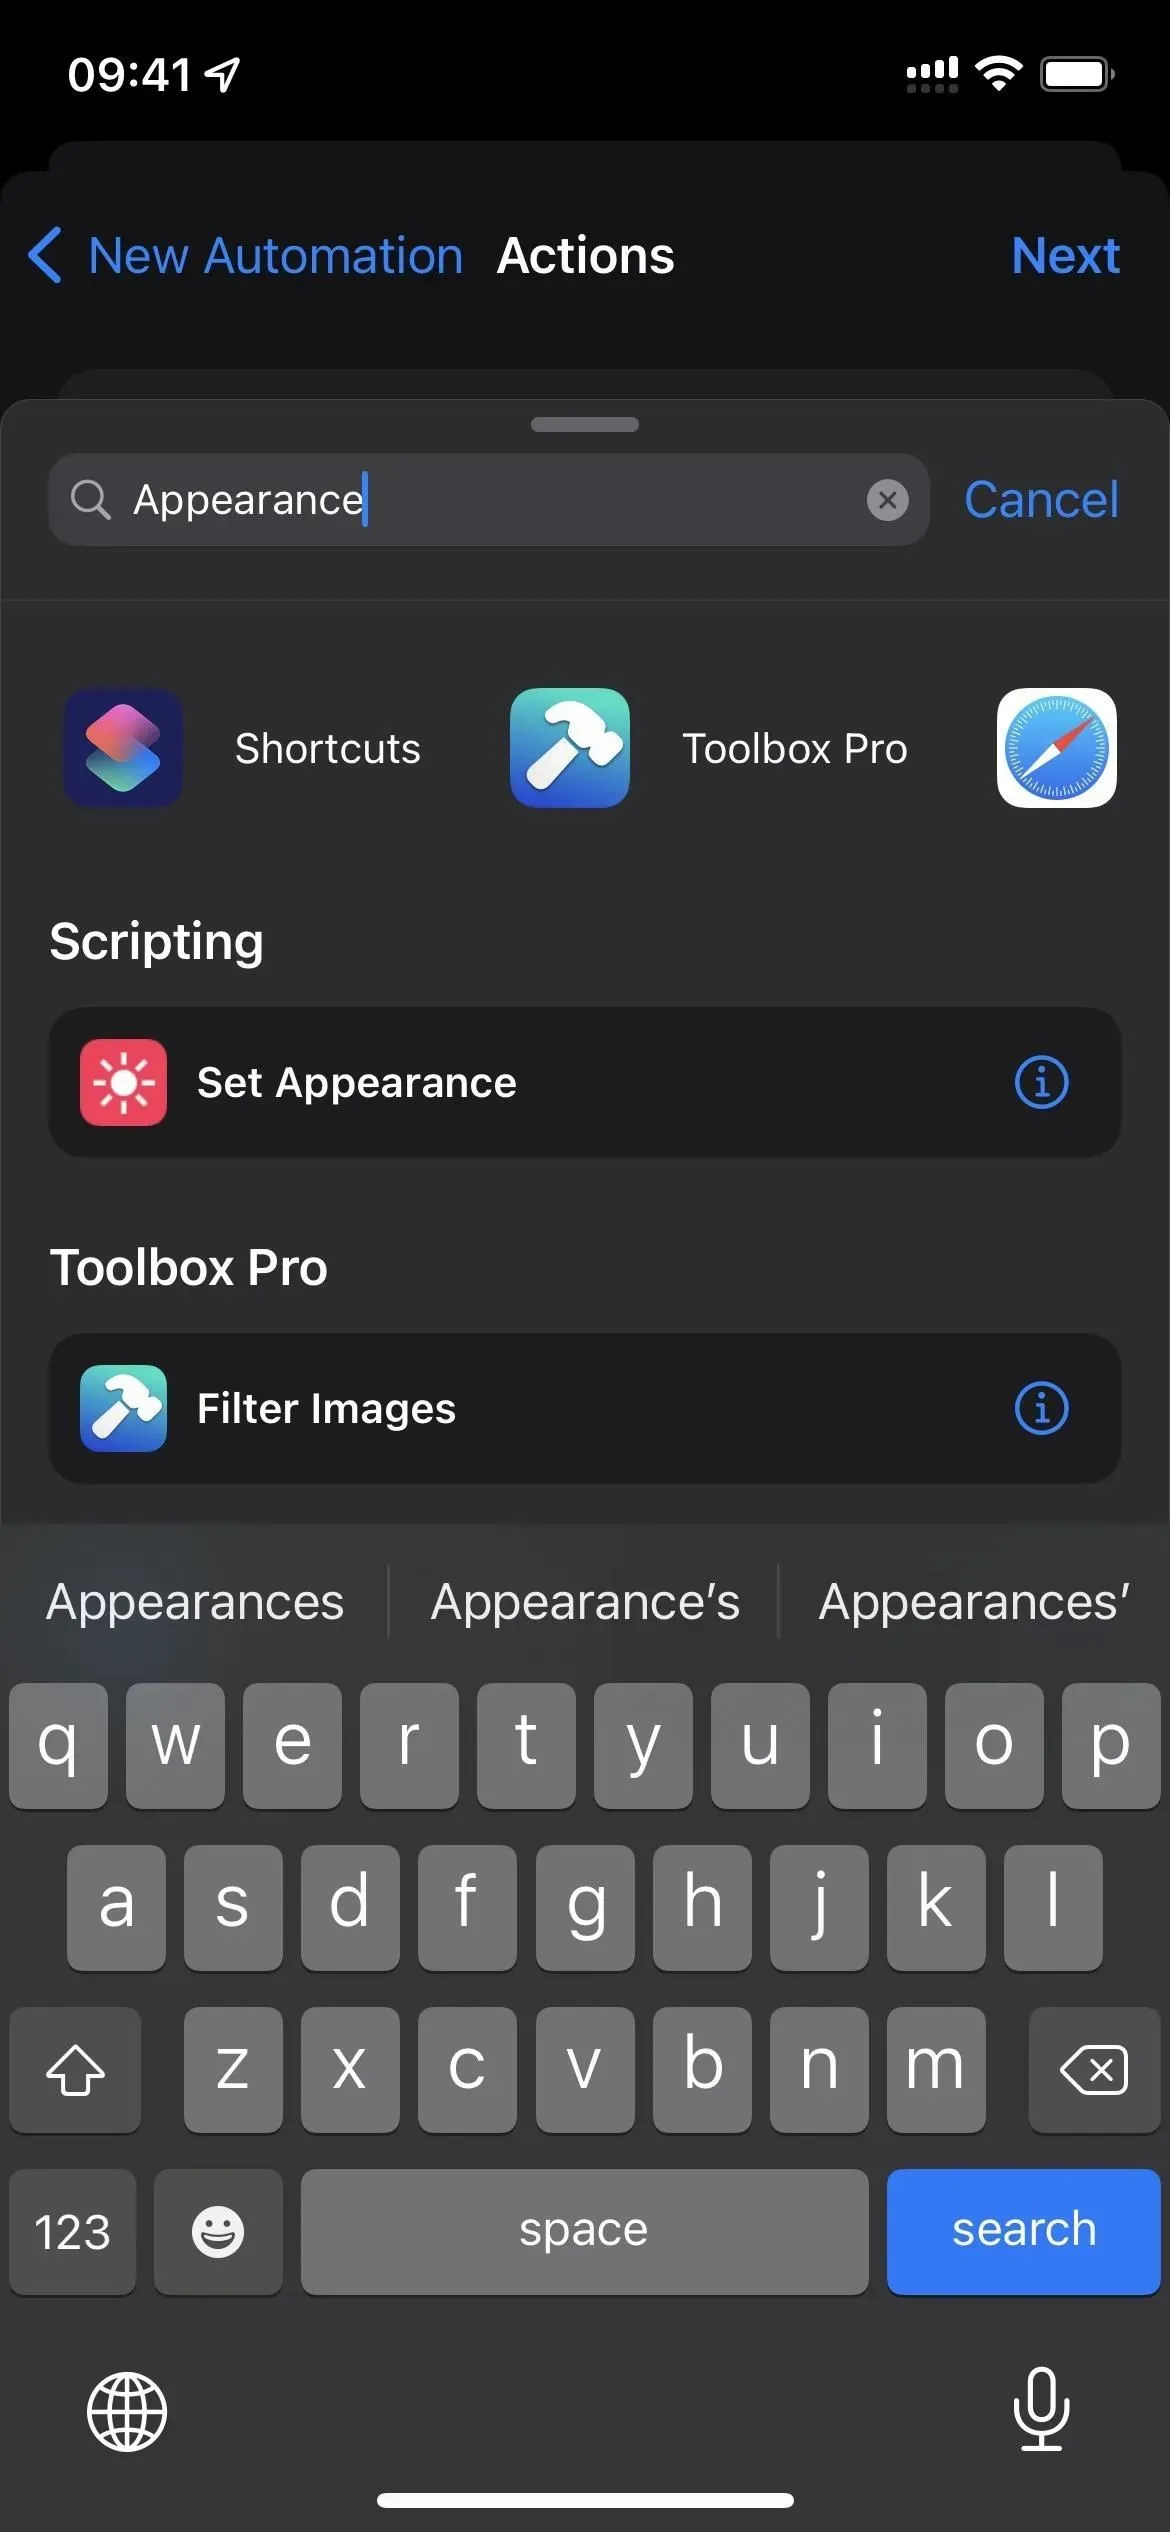
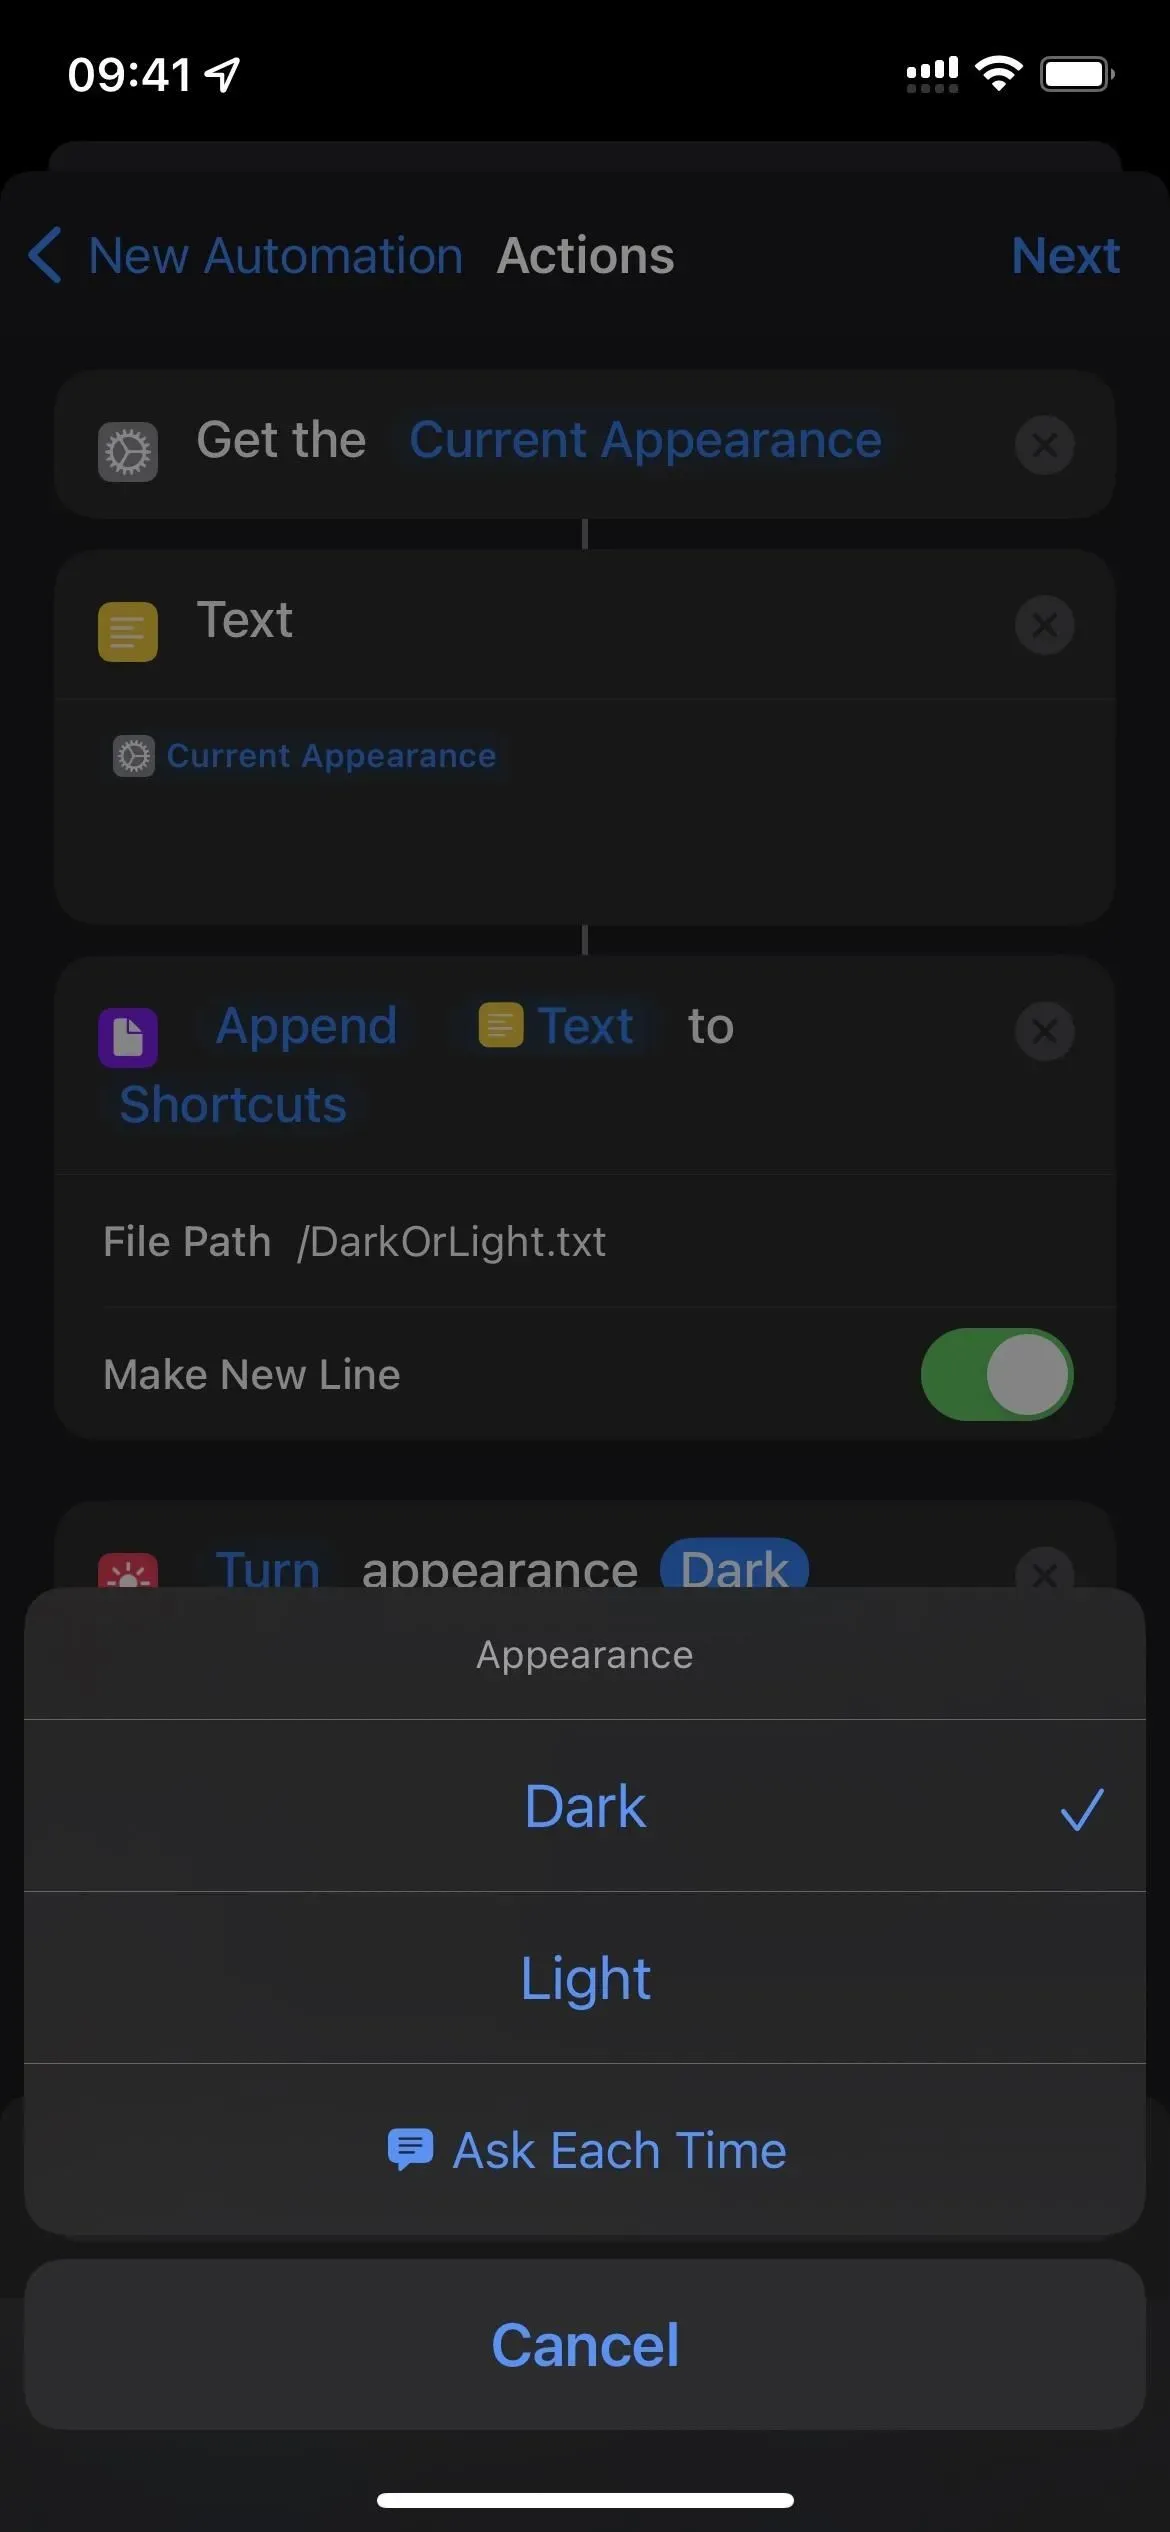
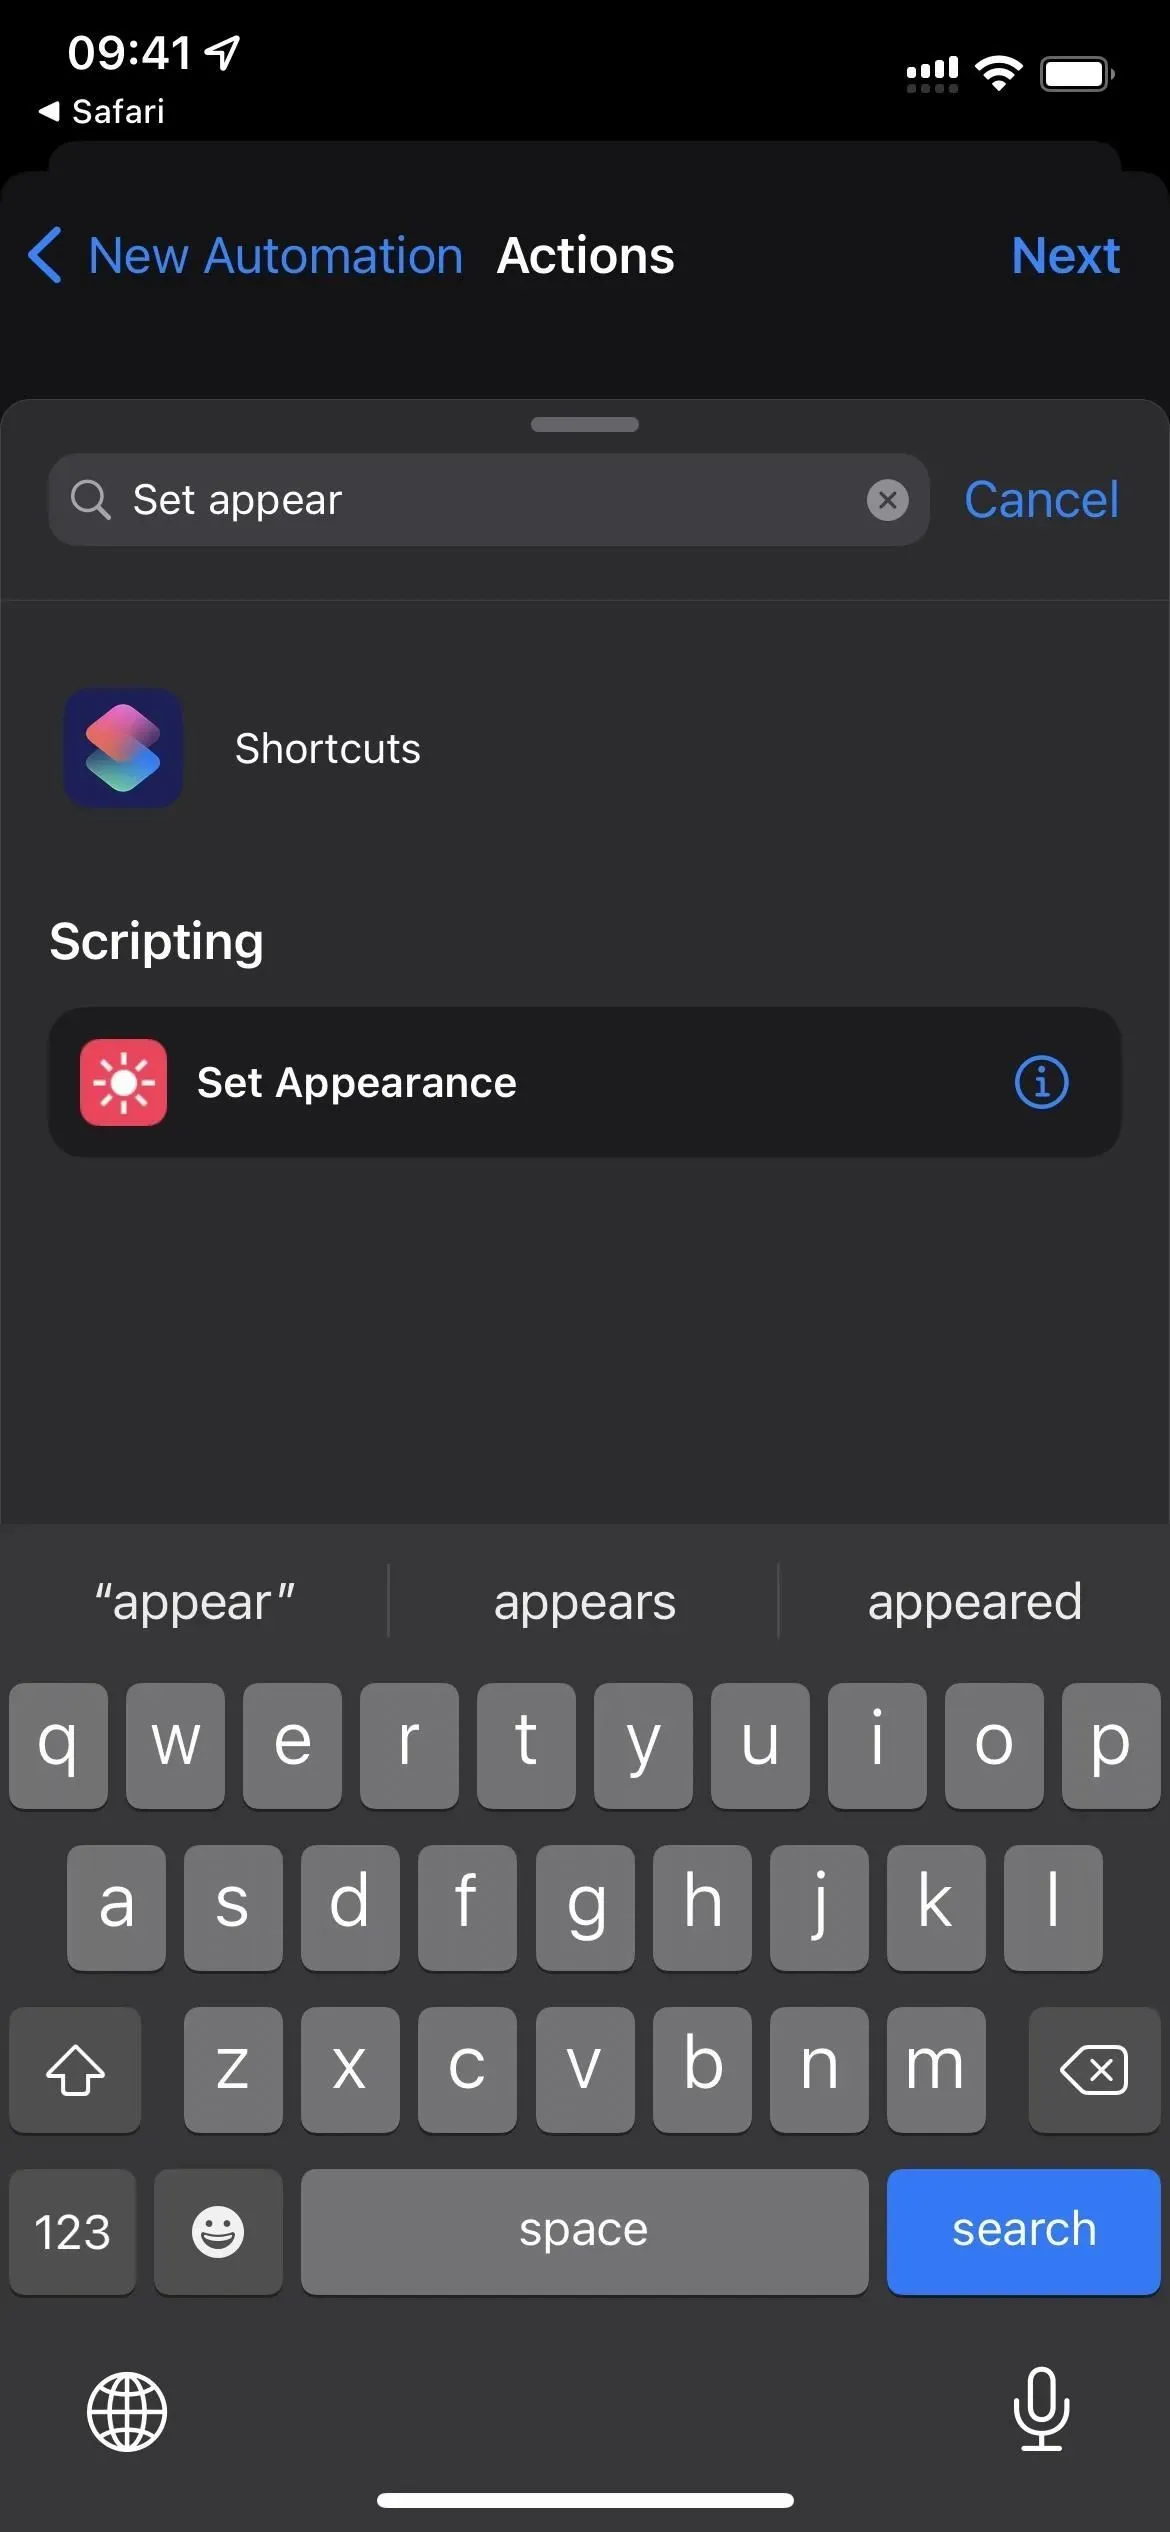
- Add a Set Appearance action below the Add to Text File action field.
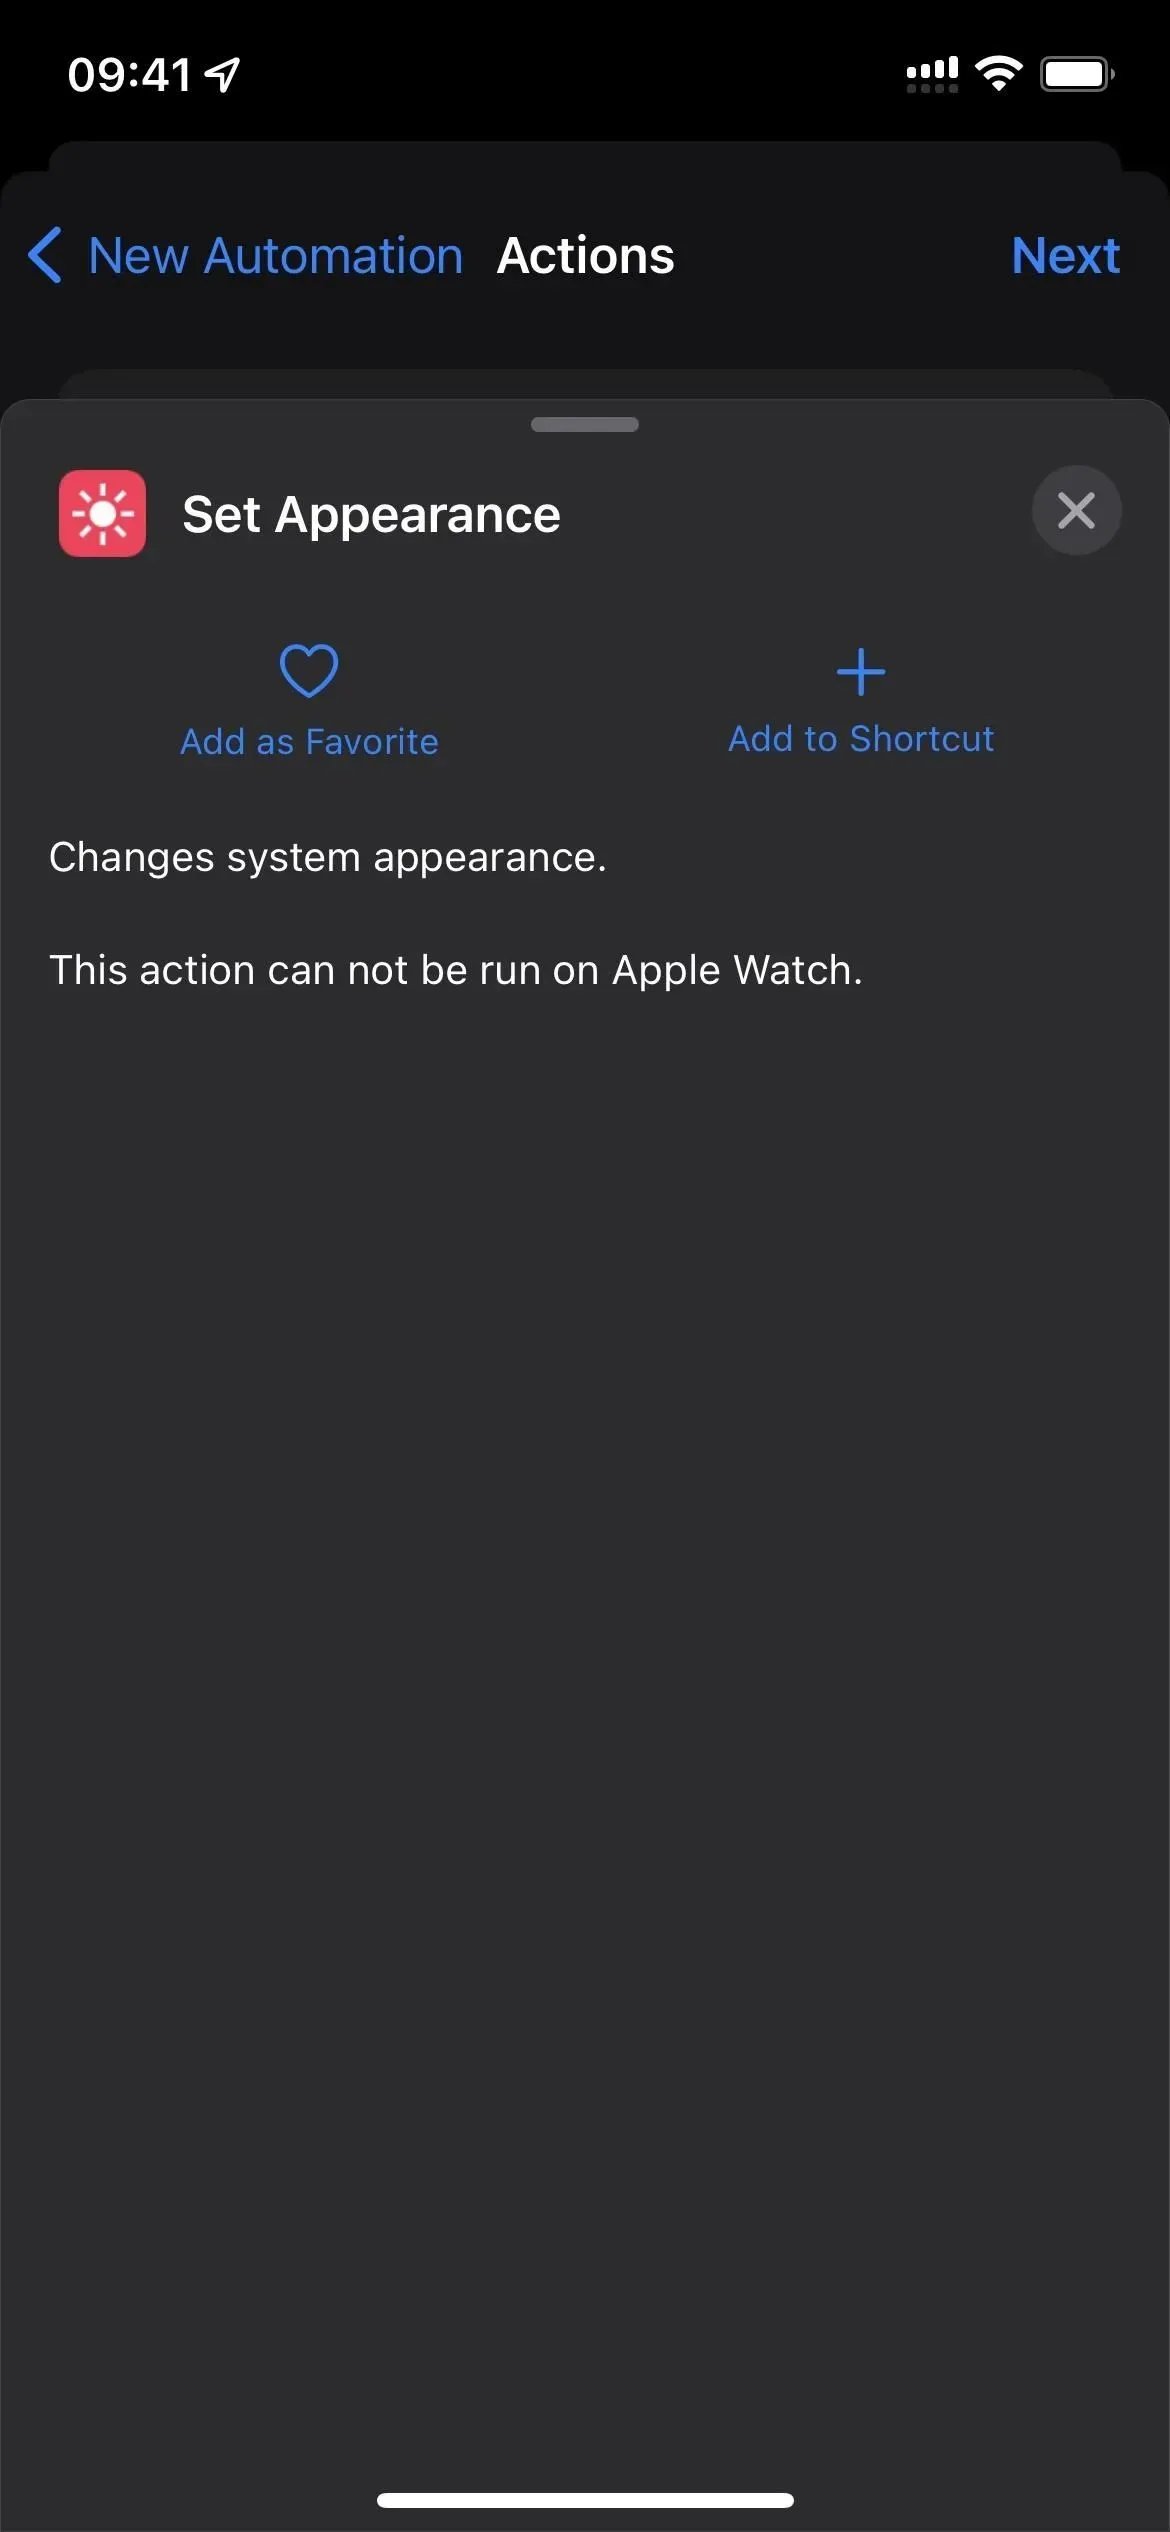
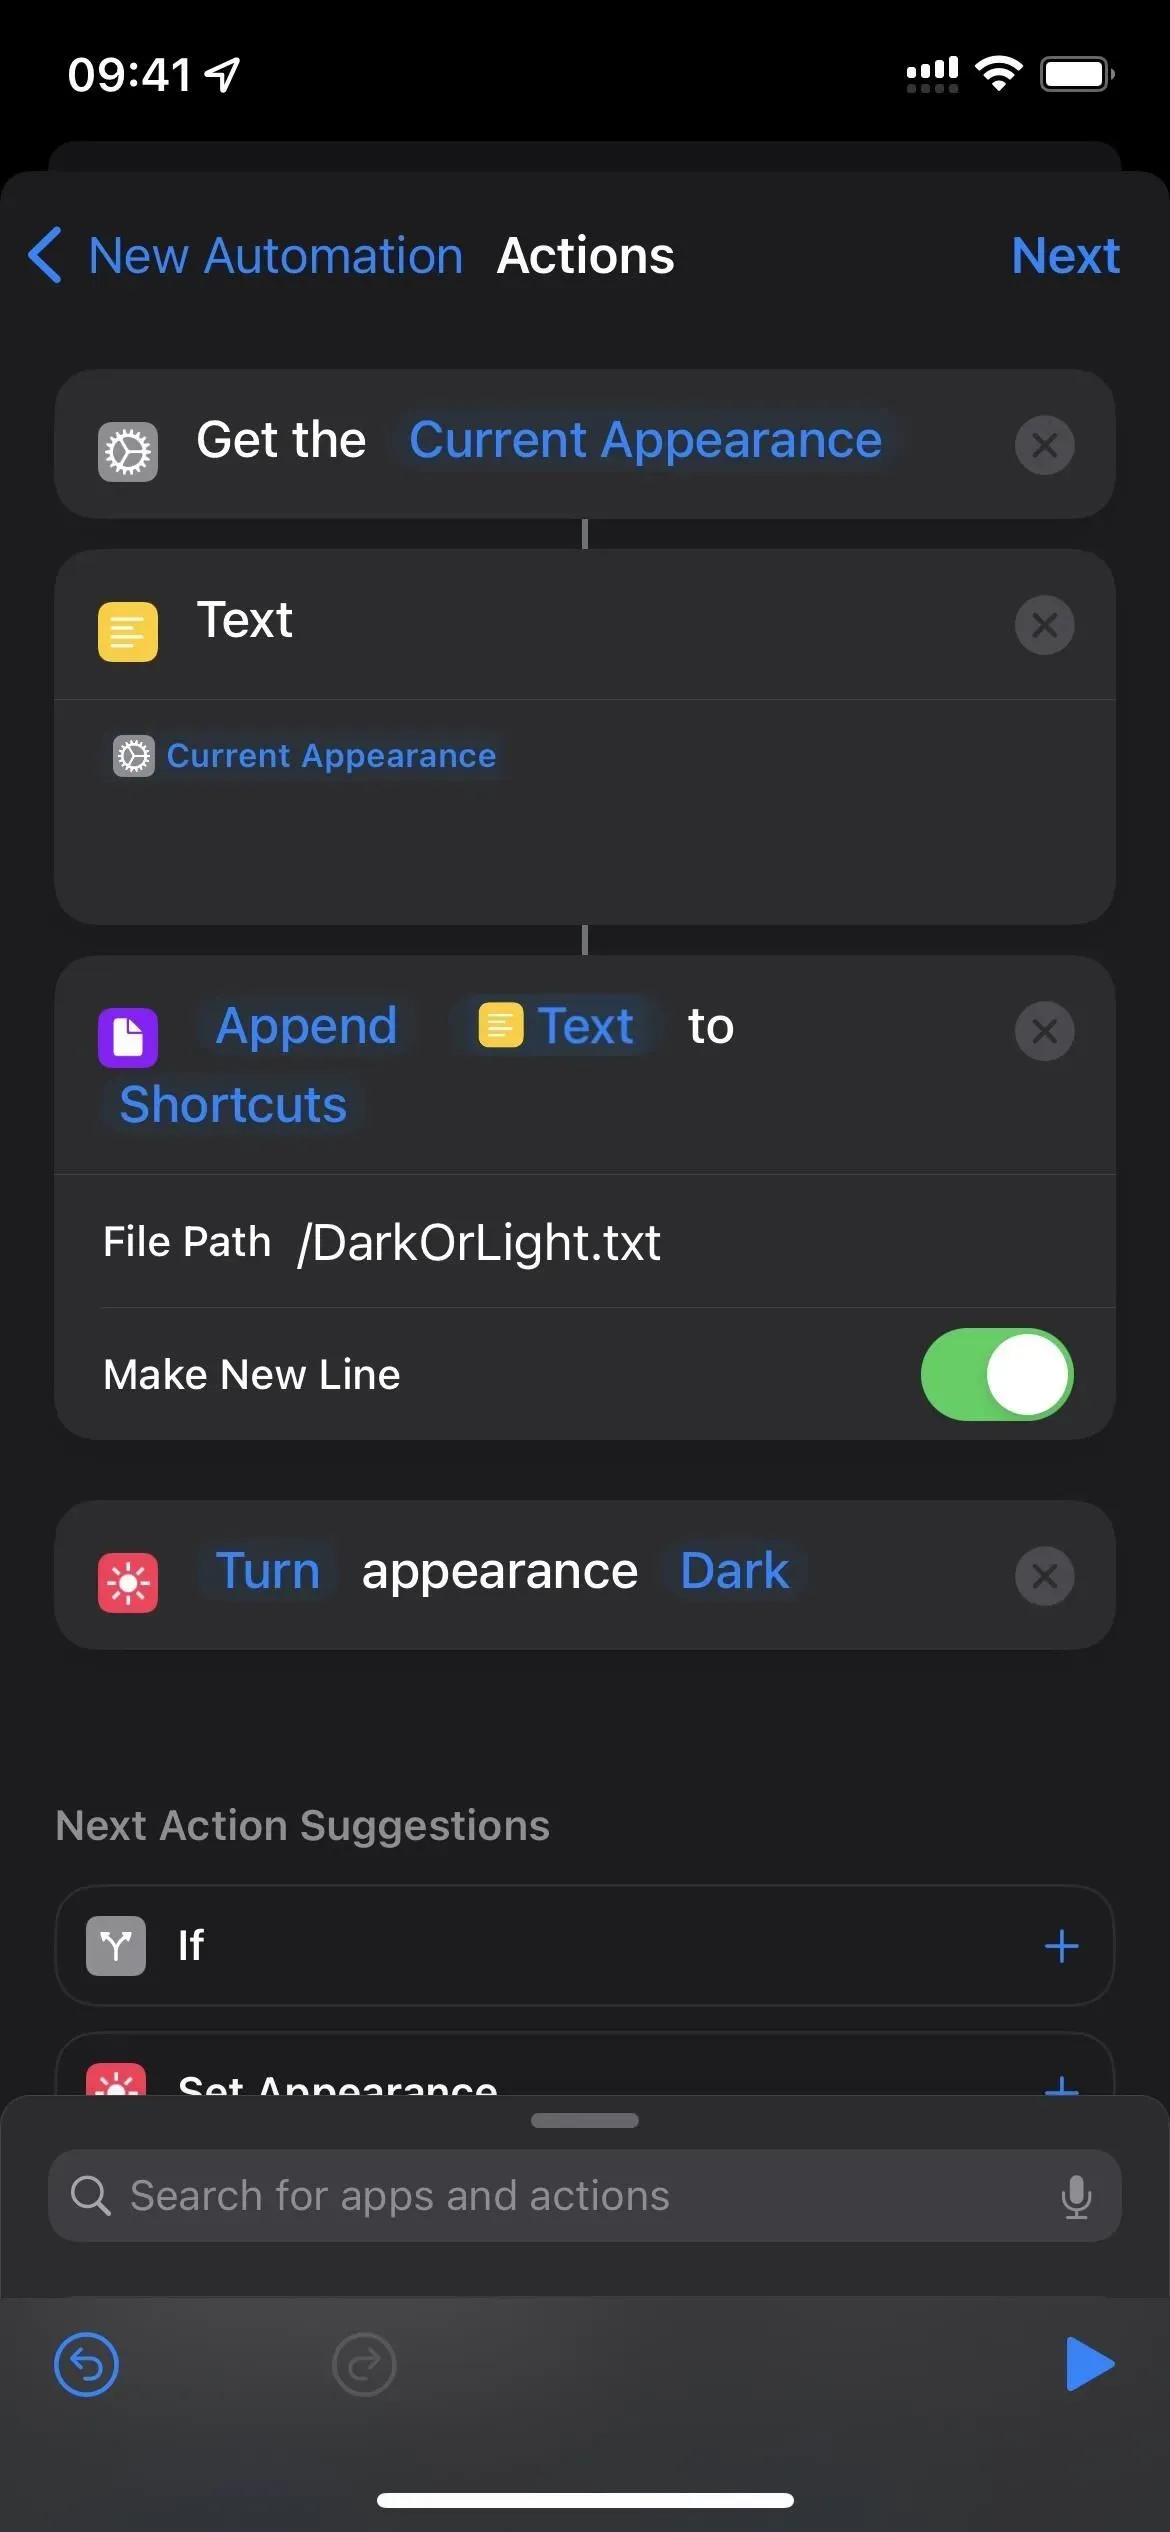
- Skip this part if you want apps to use dark mode. Otherwise, click “Dark”in the action field and select “Light”.
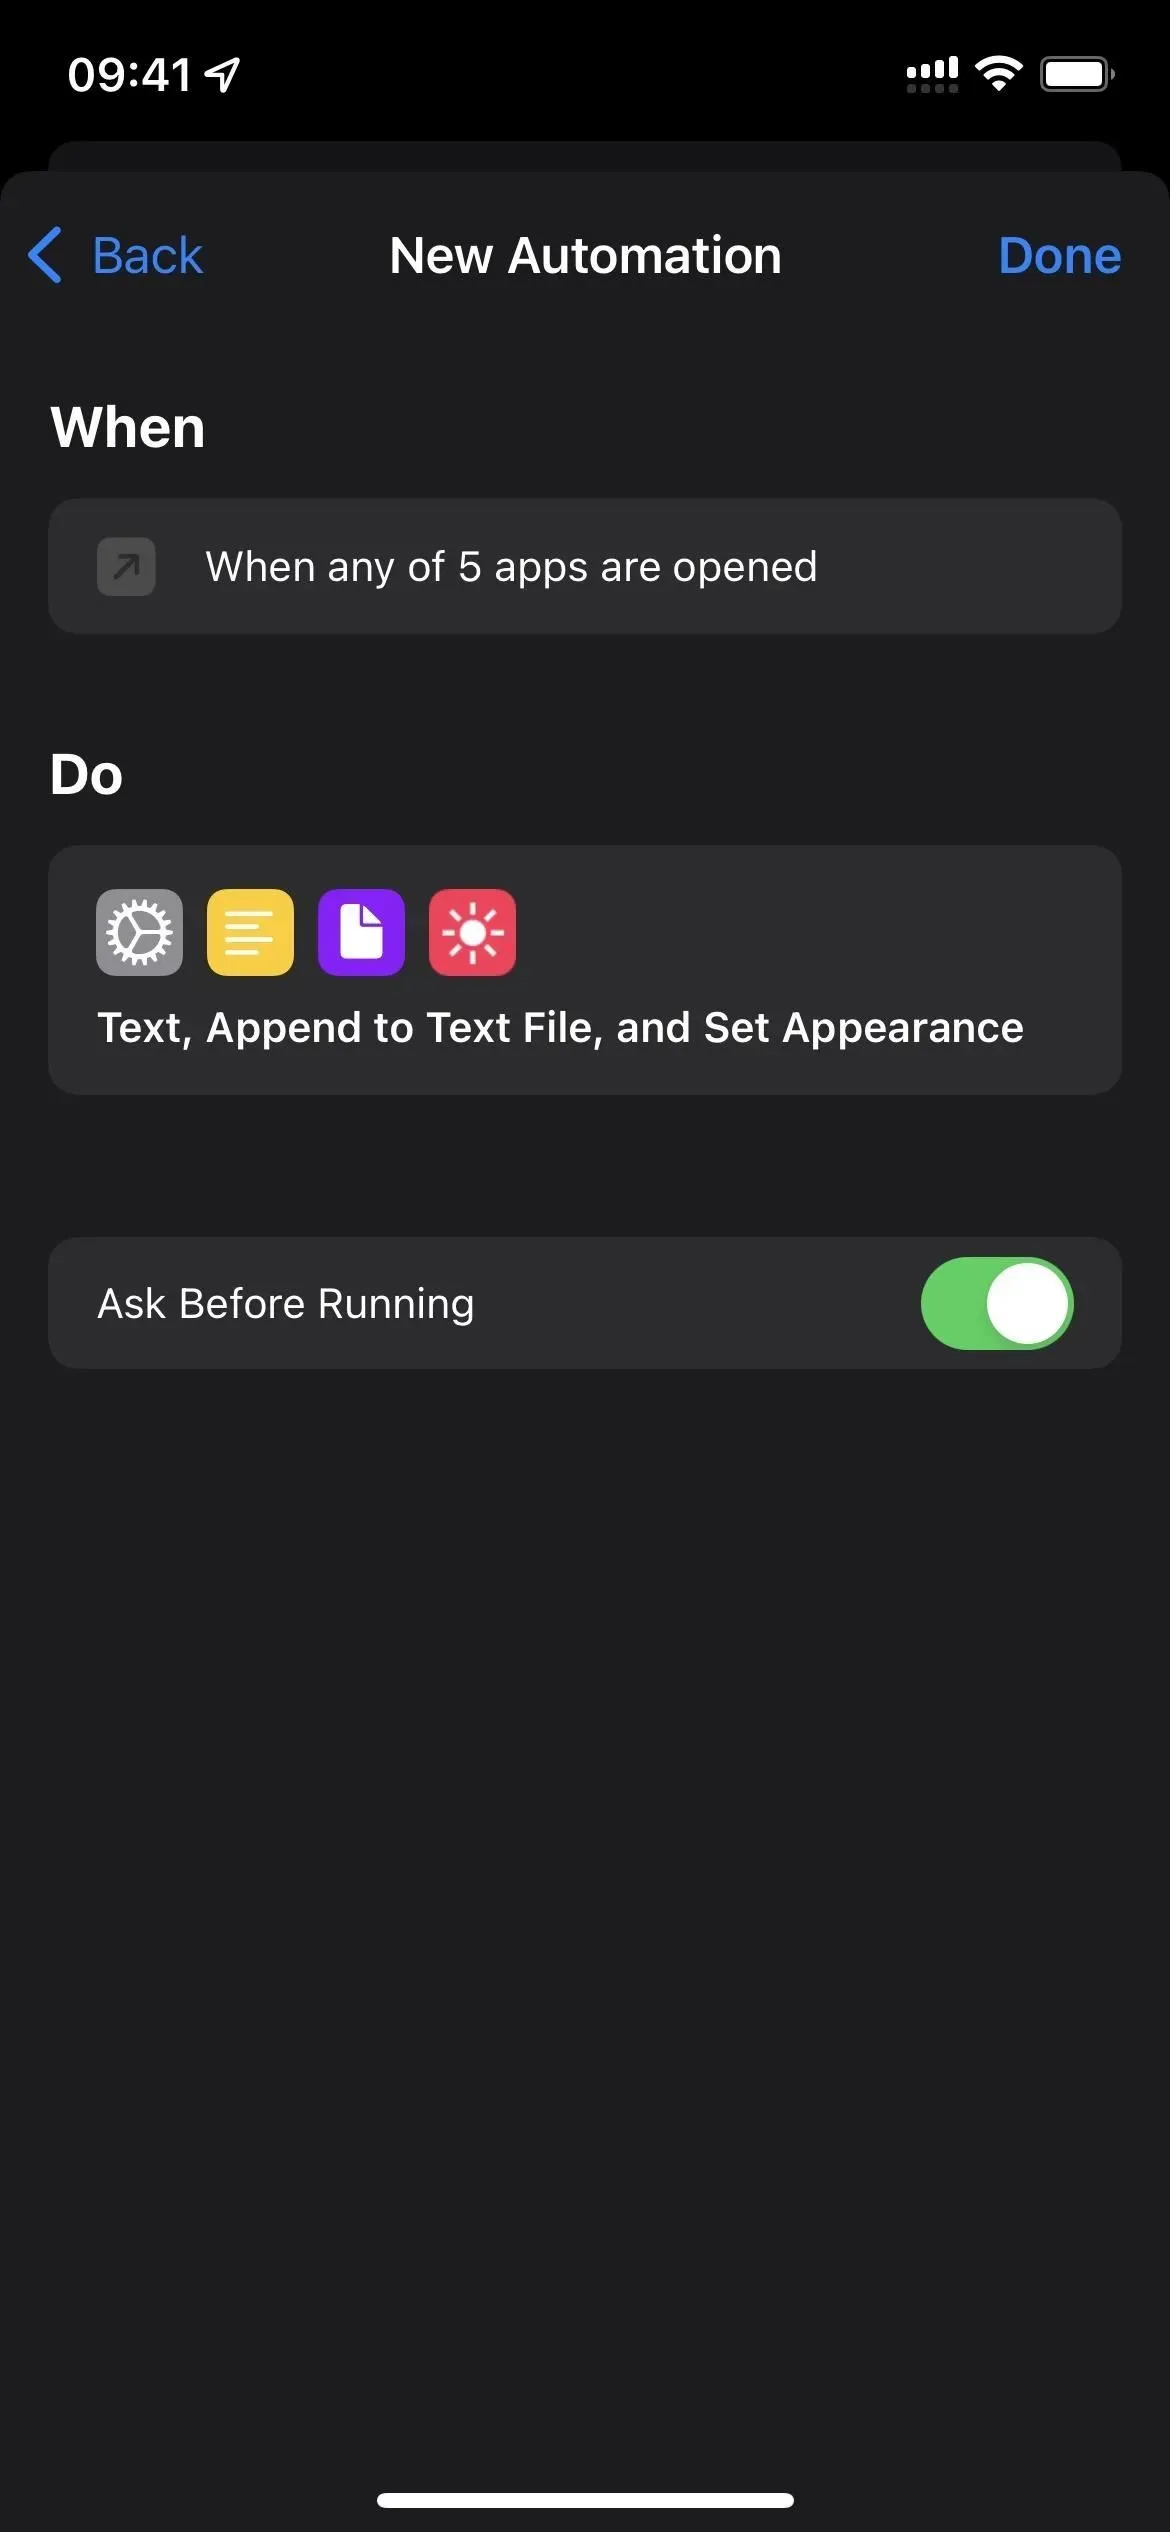
- Click “Next”to continue.
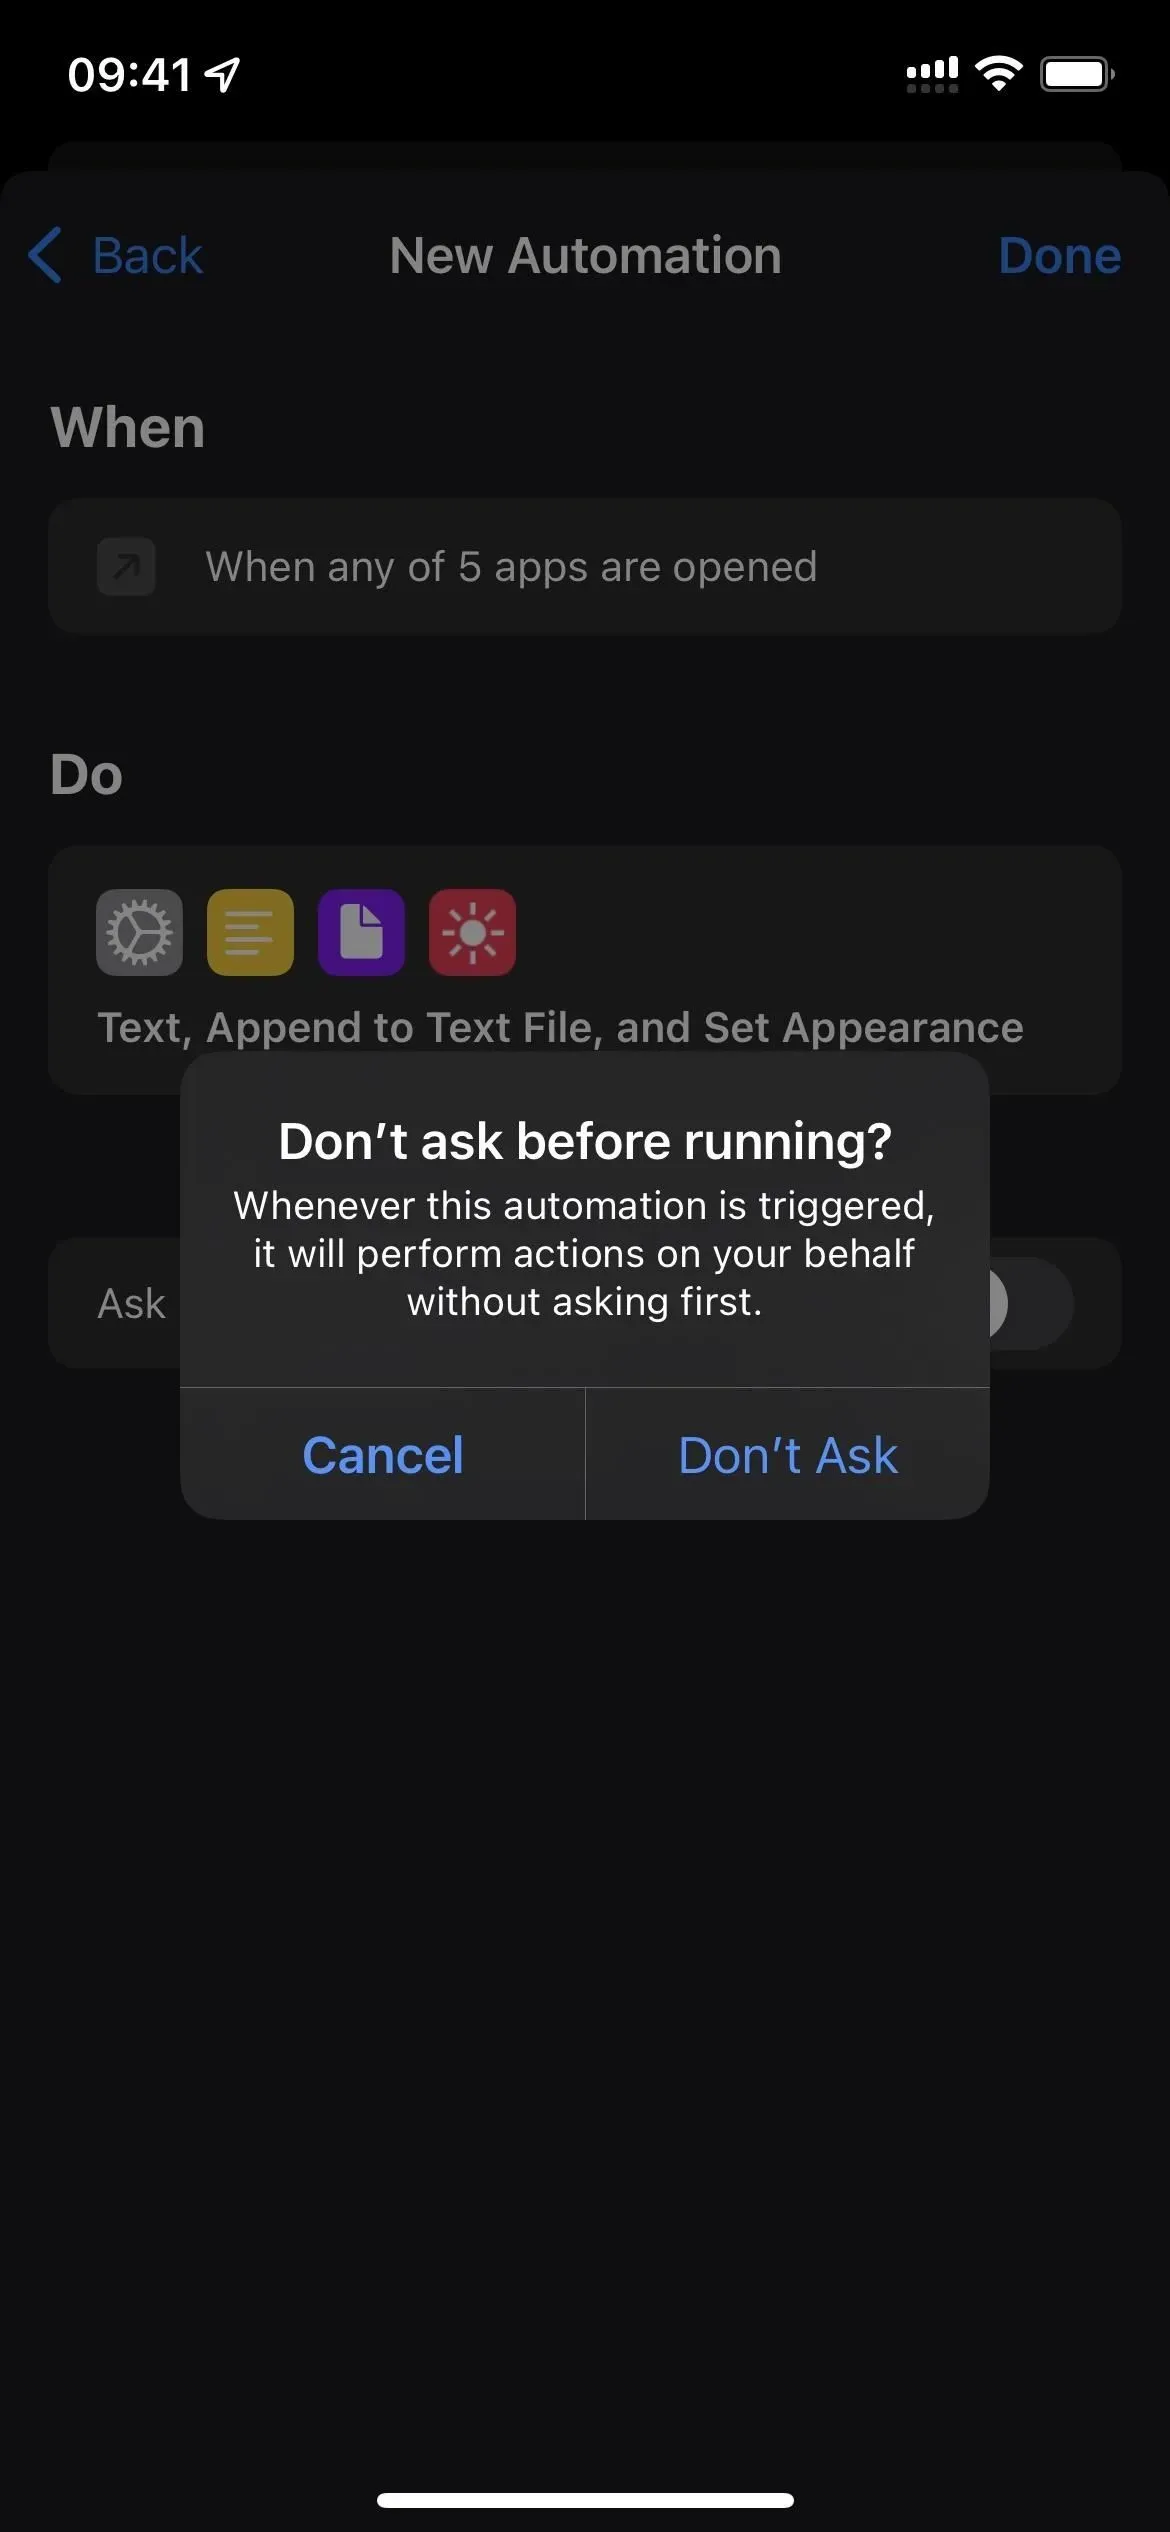
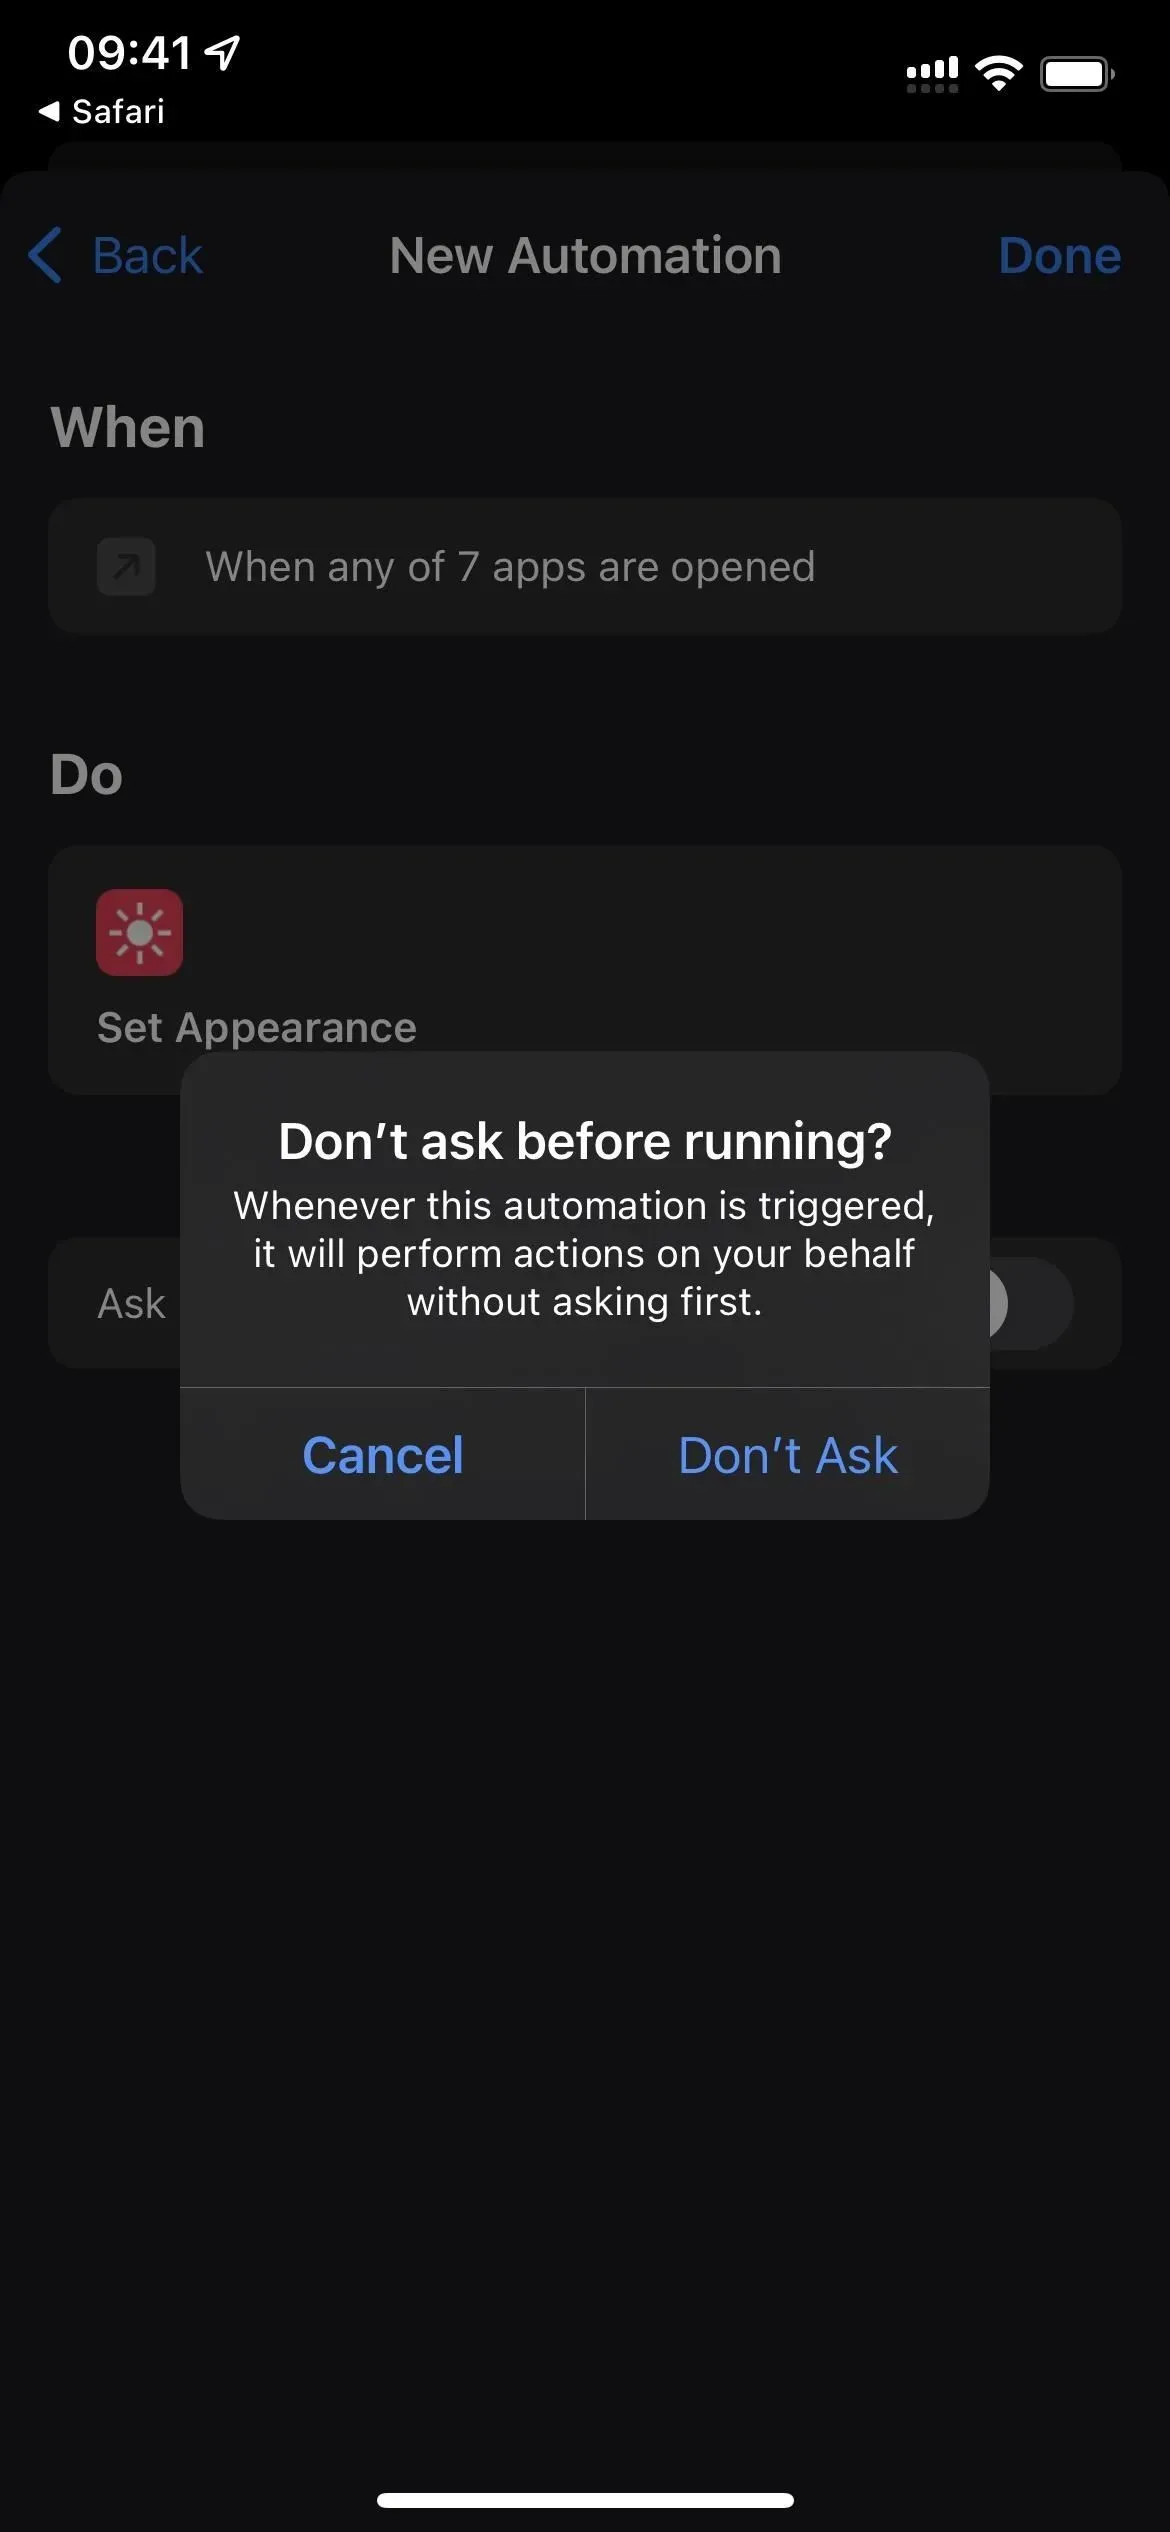
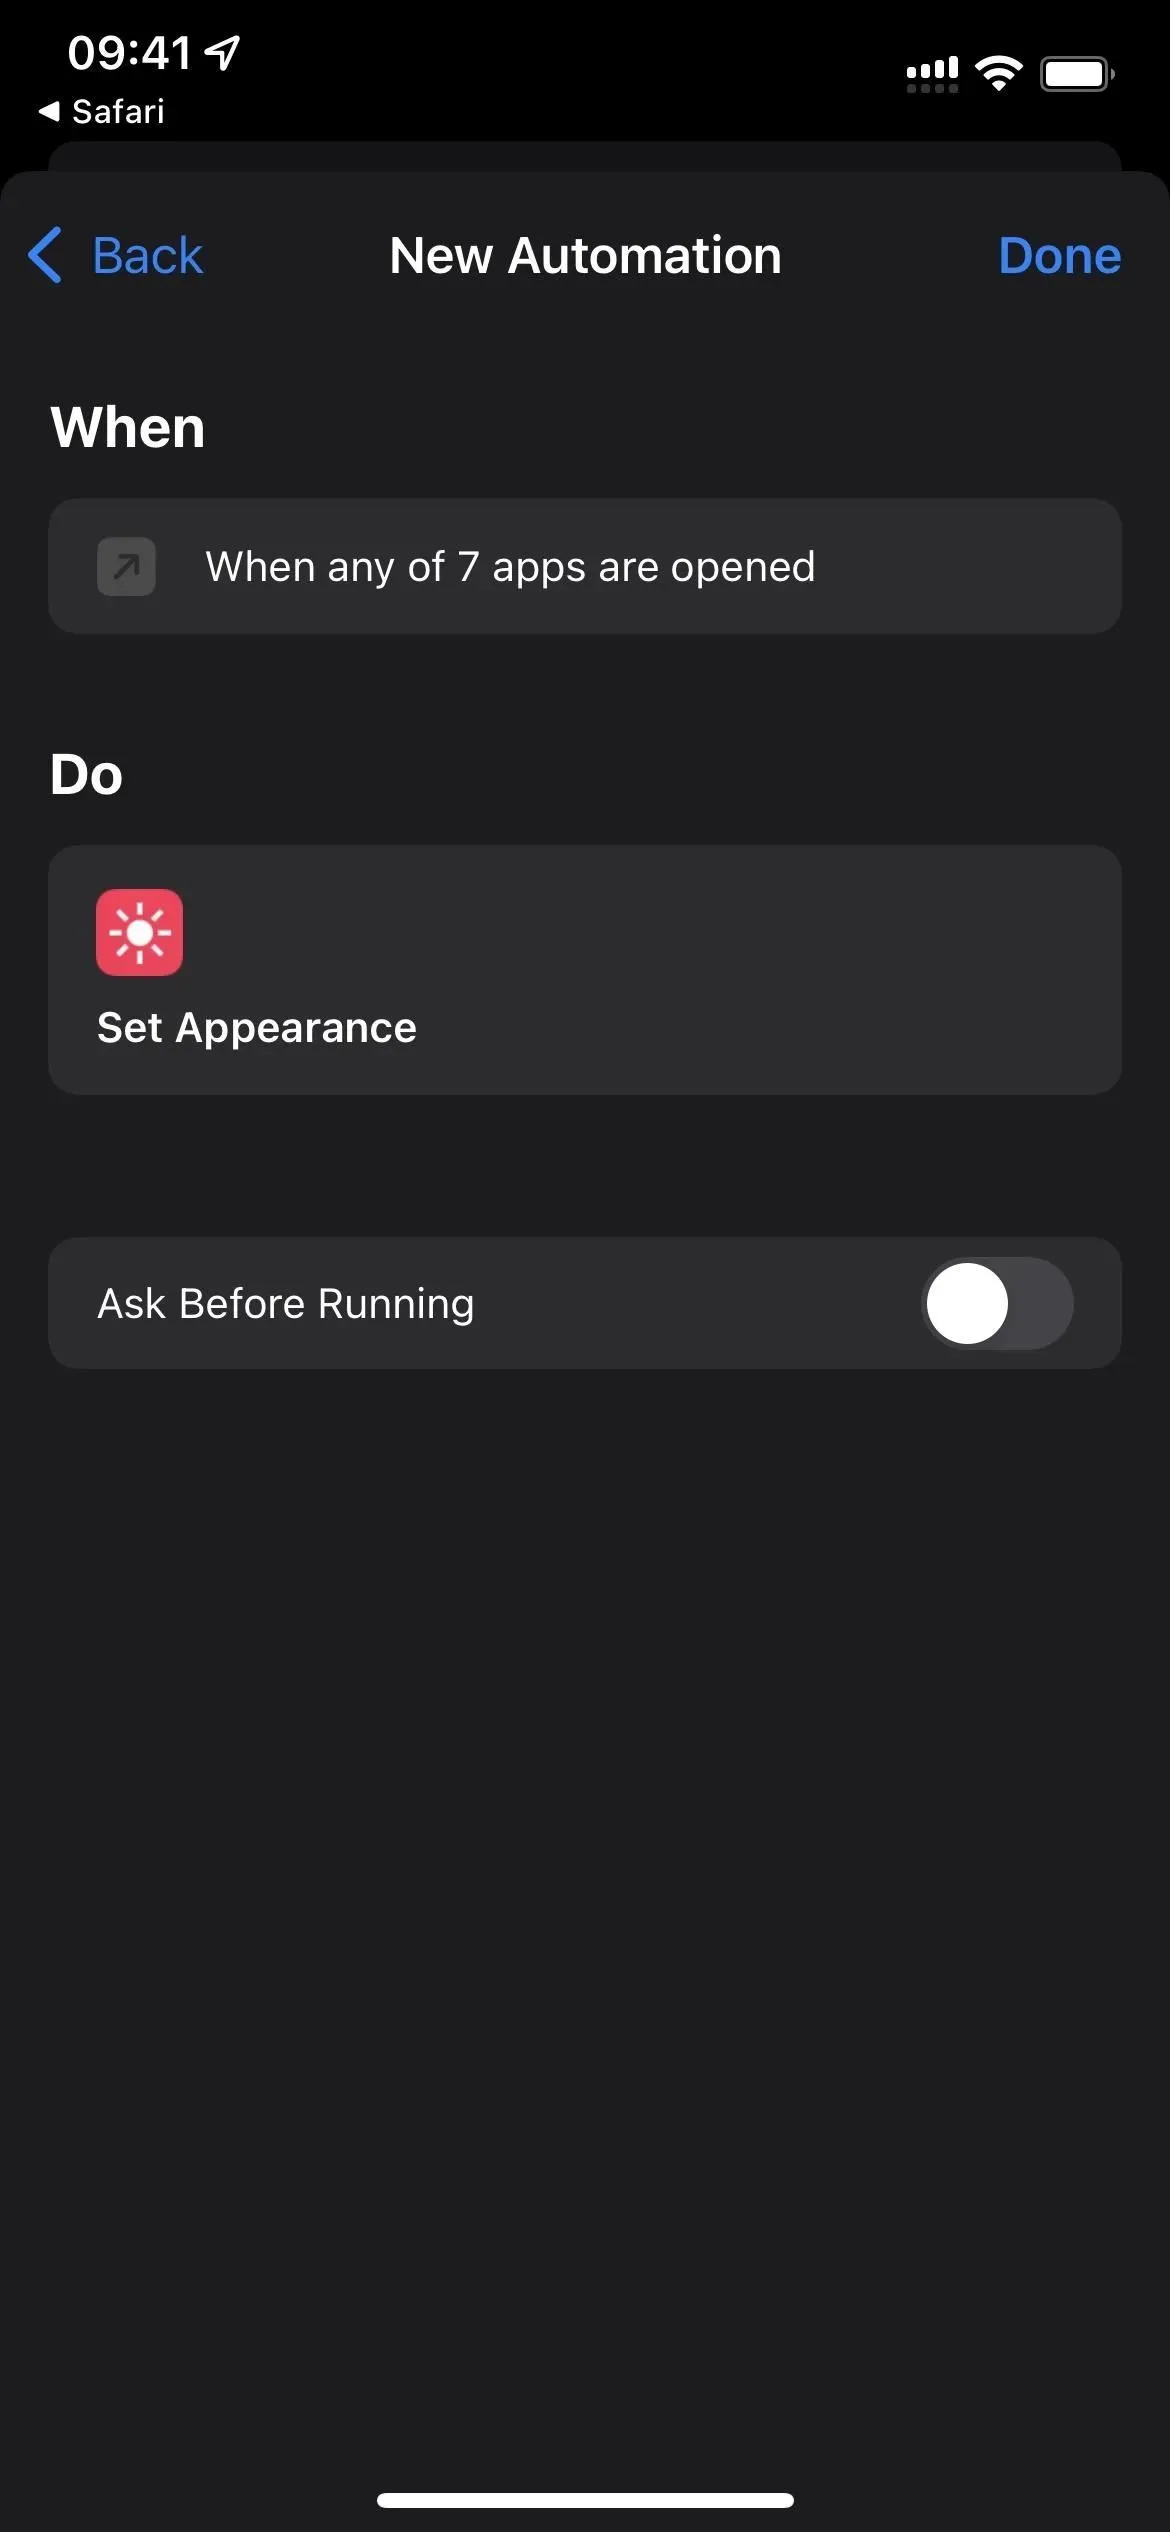
- Disable “Ask before launch”and confirm by clicking “Don’t ask”.
- Click “Done”to finish.
- Optional: Repeat the entire process to create different automations for different applications to use the opposite look and feel.
Step 3: Set apps to revert to the previous view when closed
Now it’s time for the second automation. You will select all the same applications as for the first automation; only this will work when those apps are closed. This automation will also need to read the look and feel that the first automation wrote to the document and then set it as the look and feel for the entire device. This way, when the app closes, your system reverts to whatever dark or light state iOS was in before you opened the app.
- Open the Shortcuts app.
- Launch a new personal automation from the Automation tab.
- Select “Application”as the trigger.
- Click “Select”next to “Application”.
- Review all the apps you selected in the previous automation and click Finish.
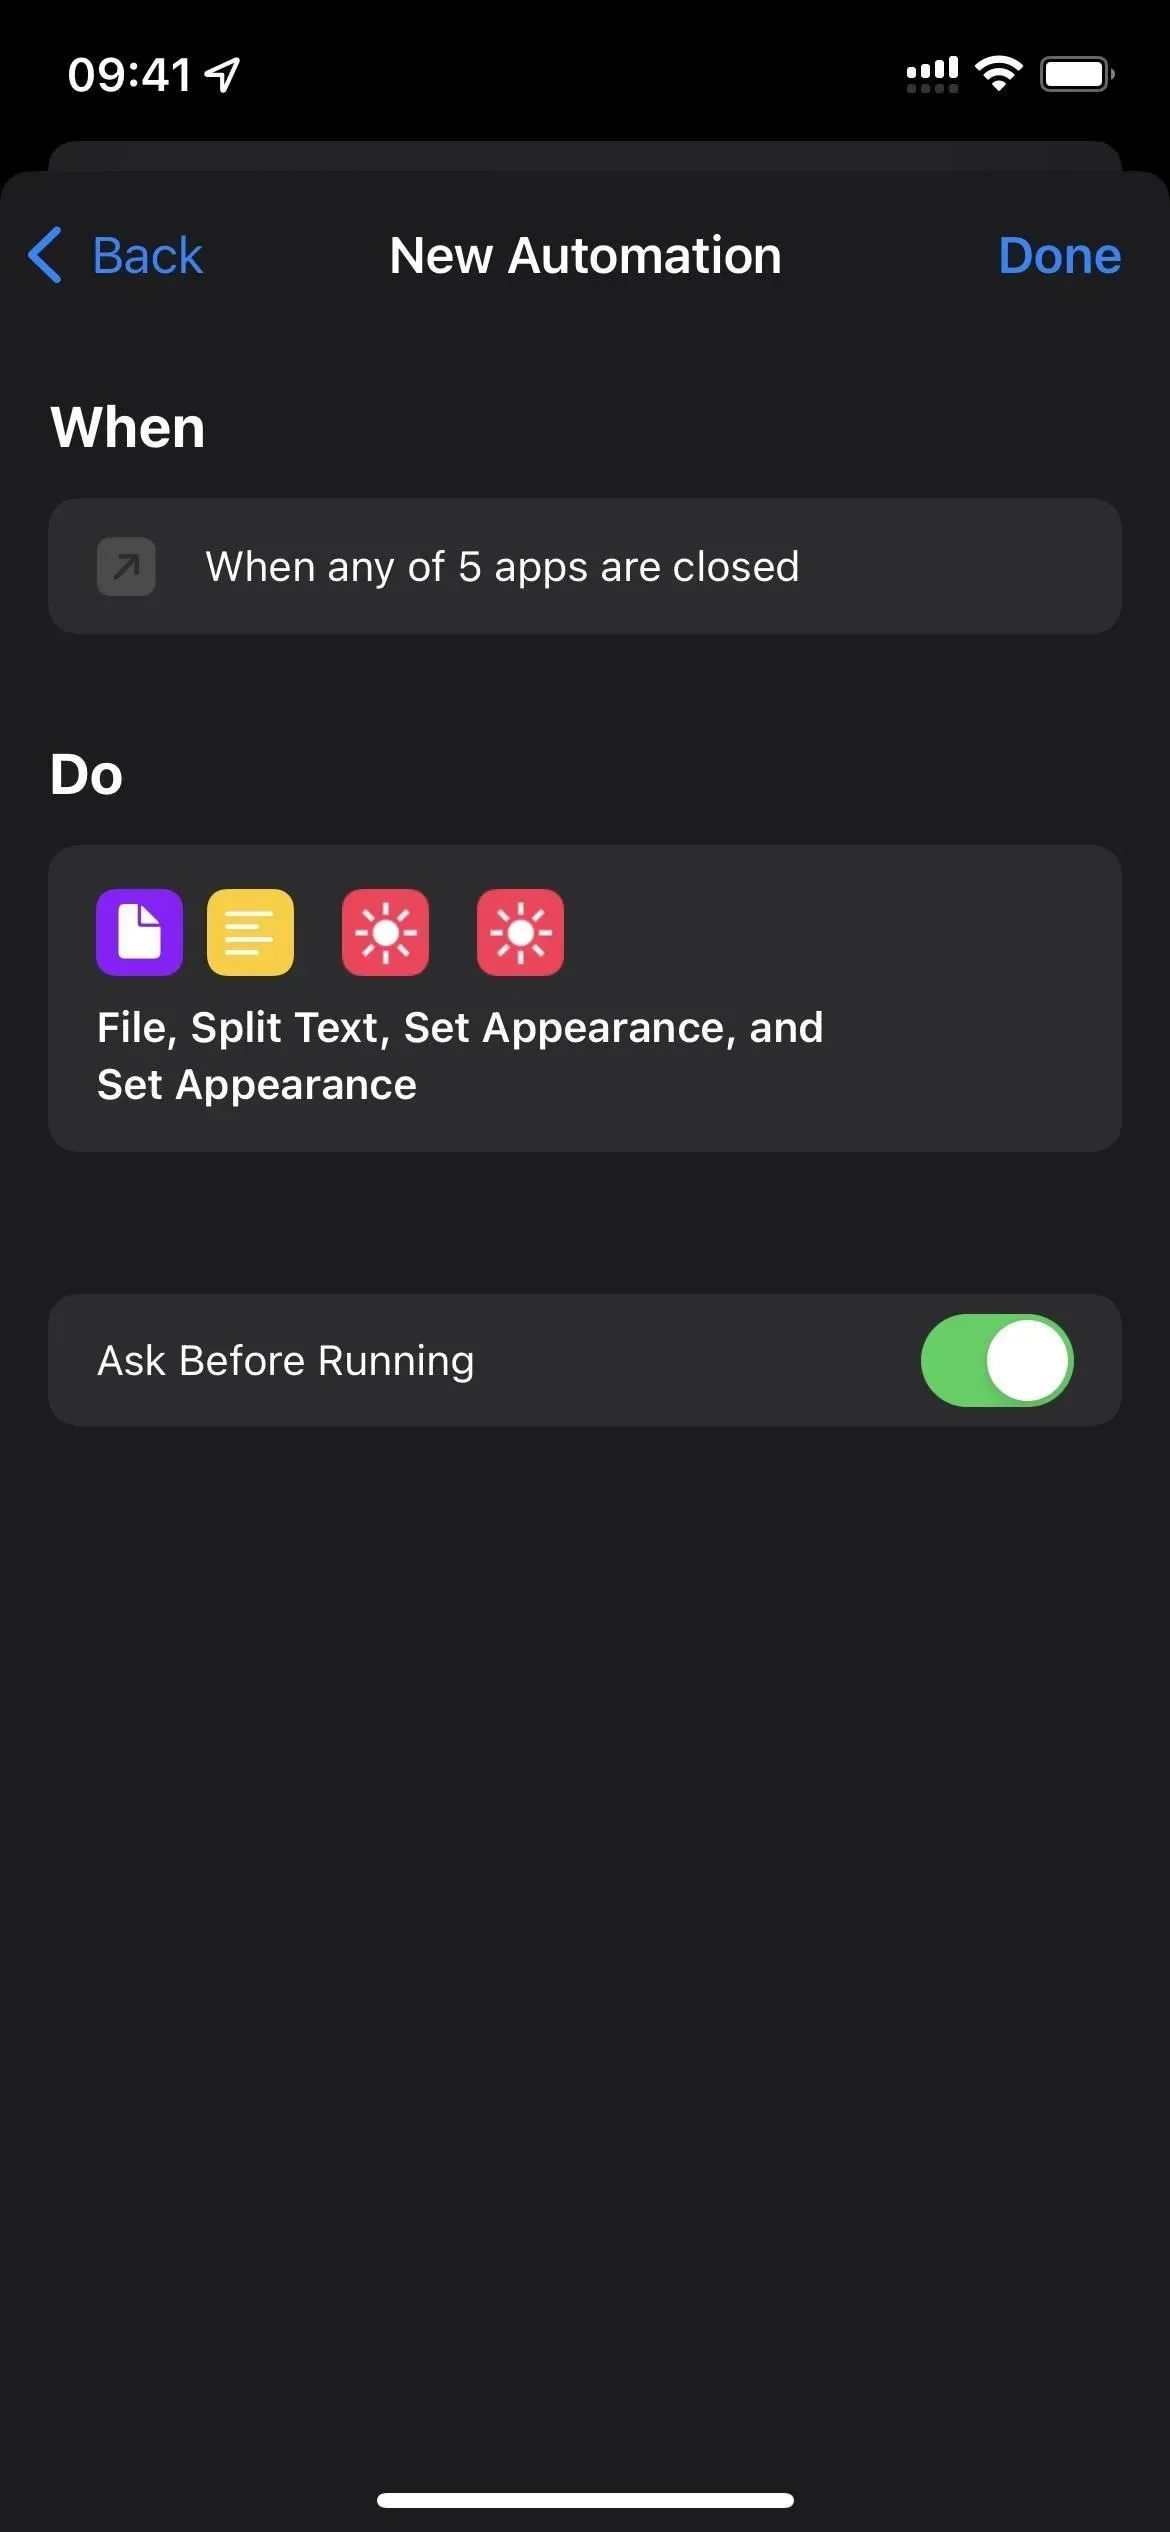
- Make sure the checkbox is “Closed”and not “Opened”.
- Click “Next”to continue.
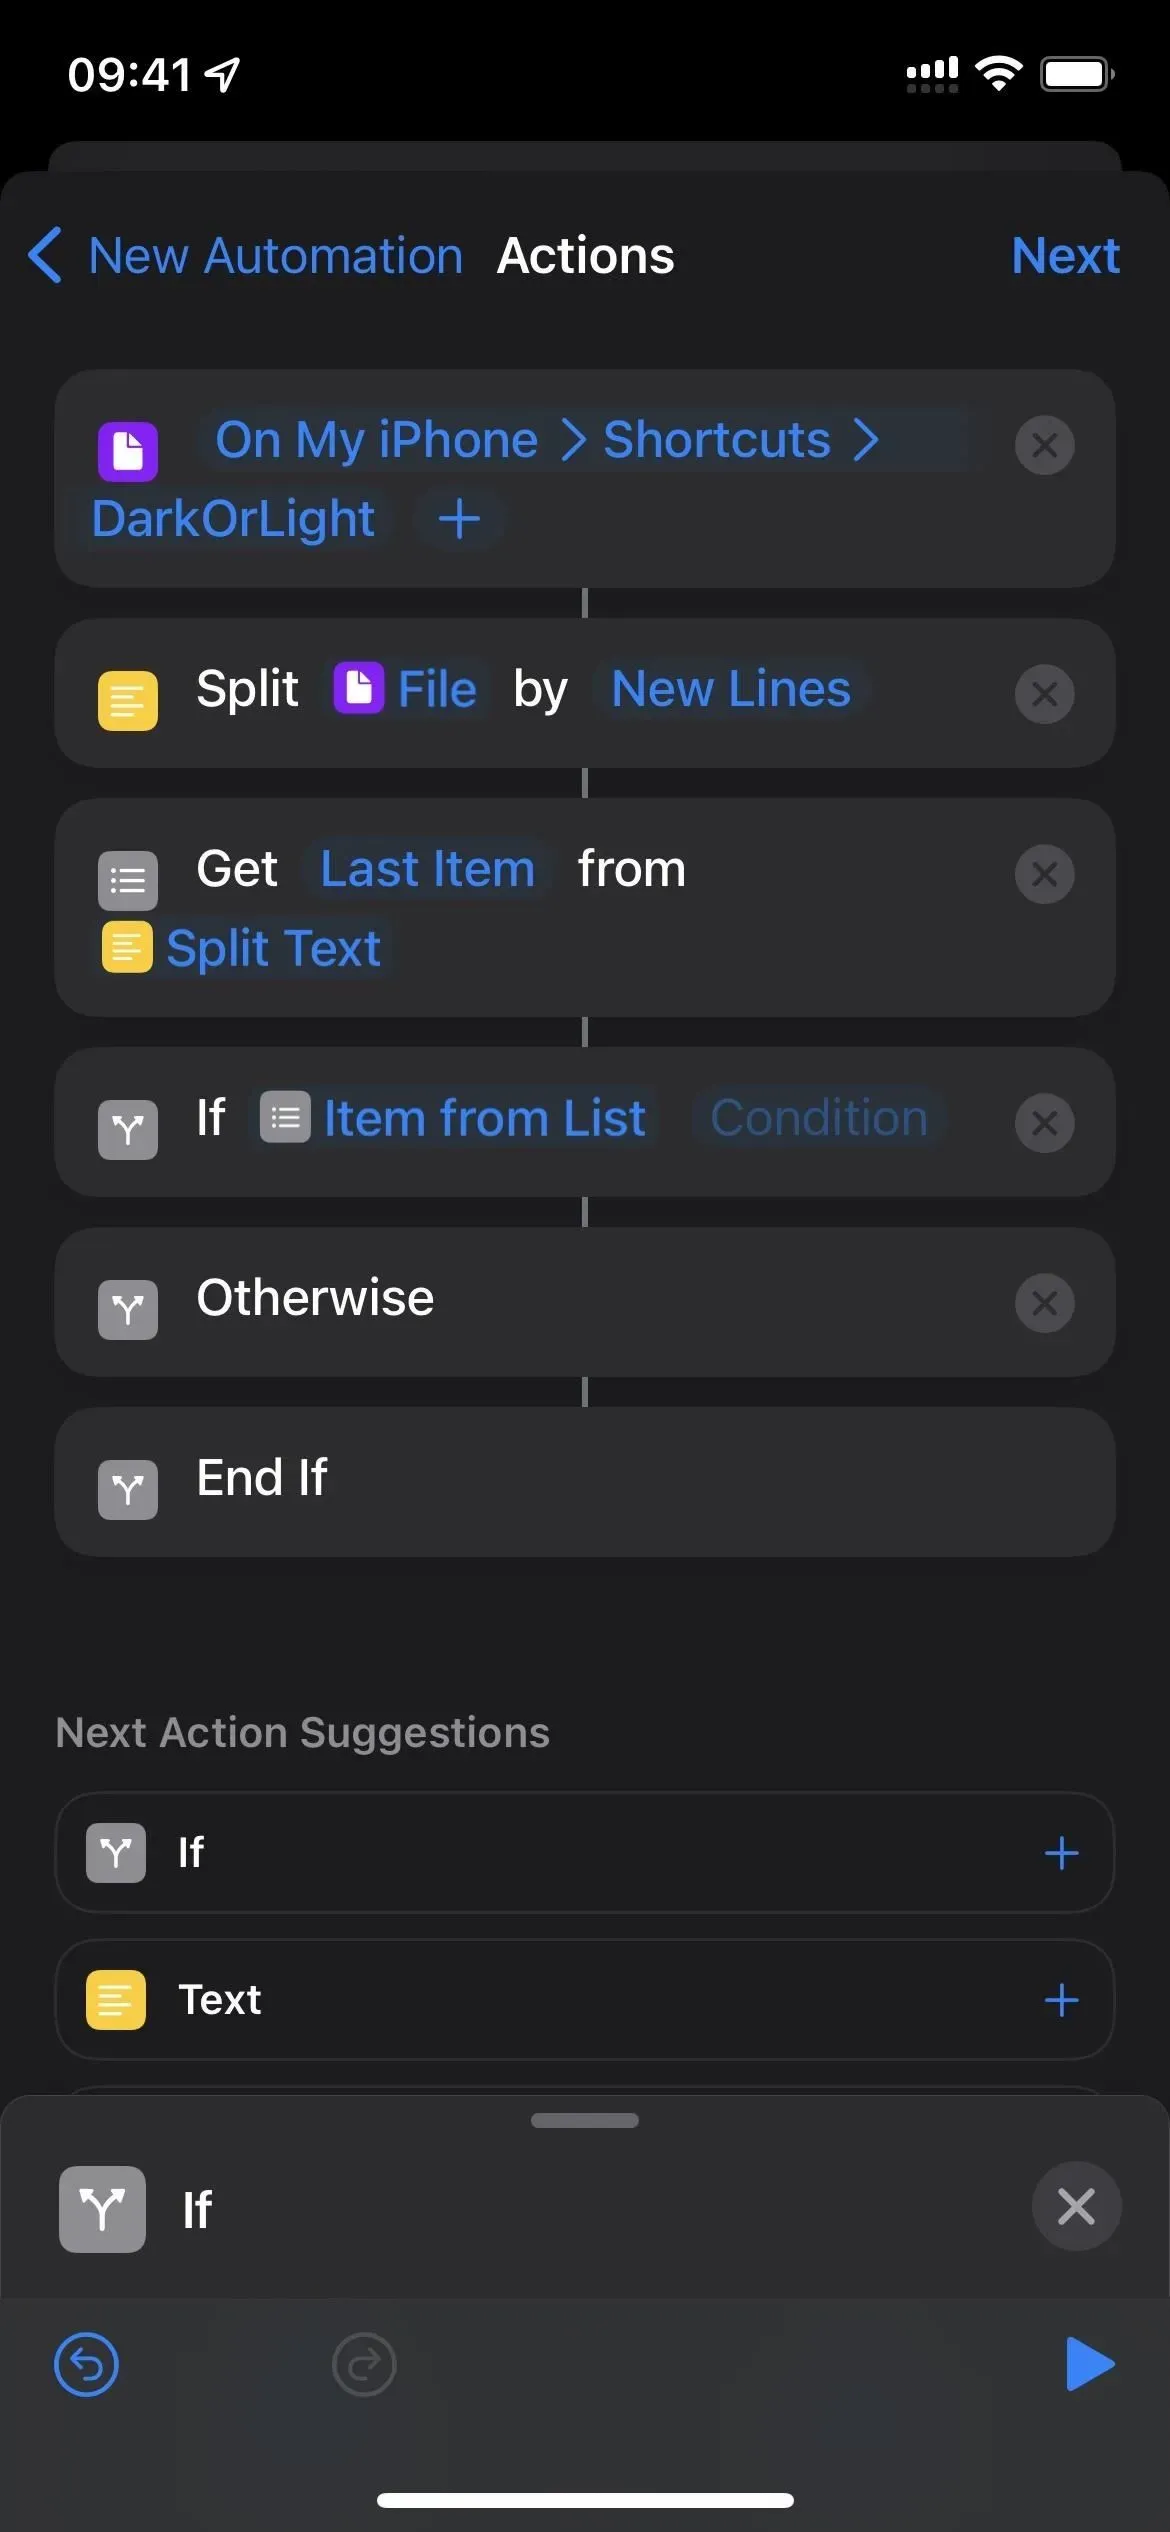
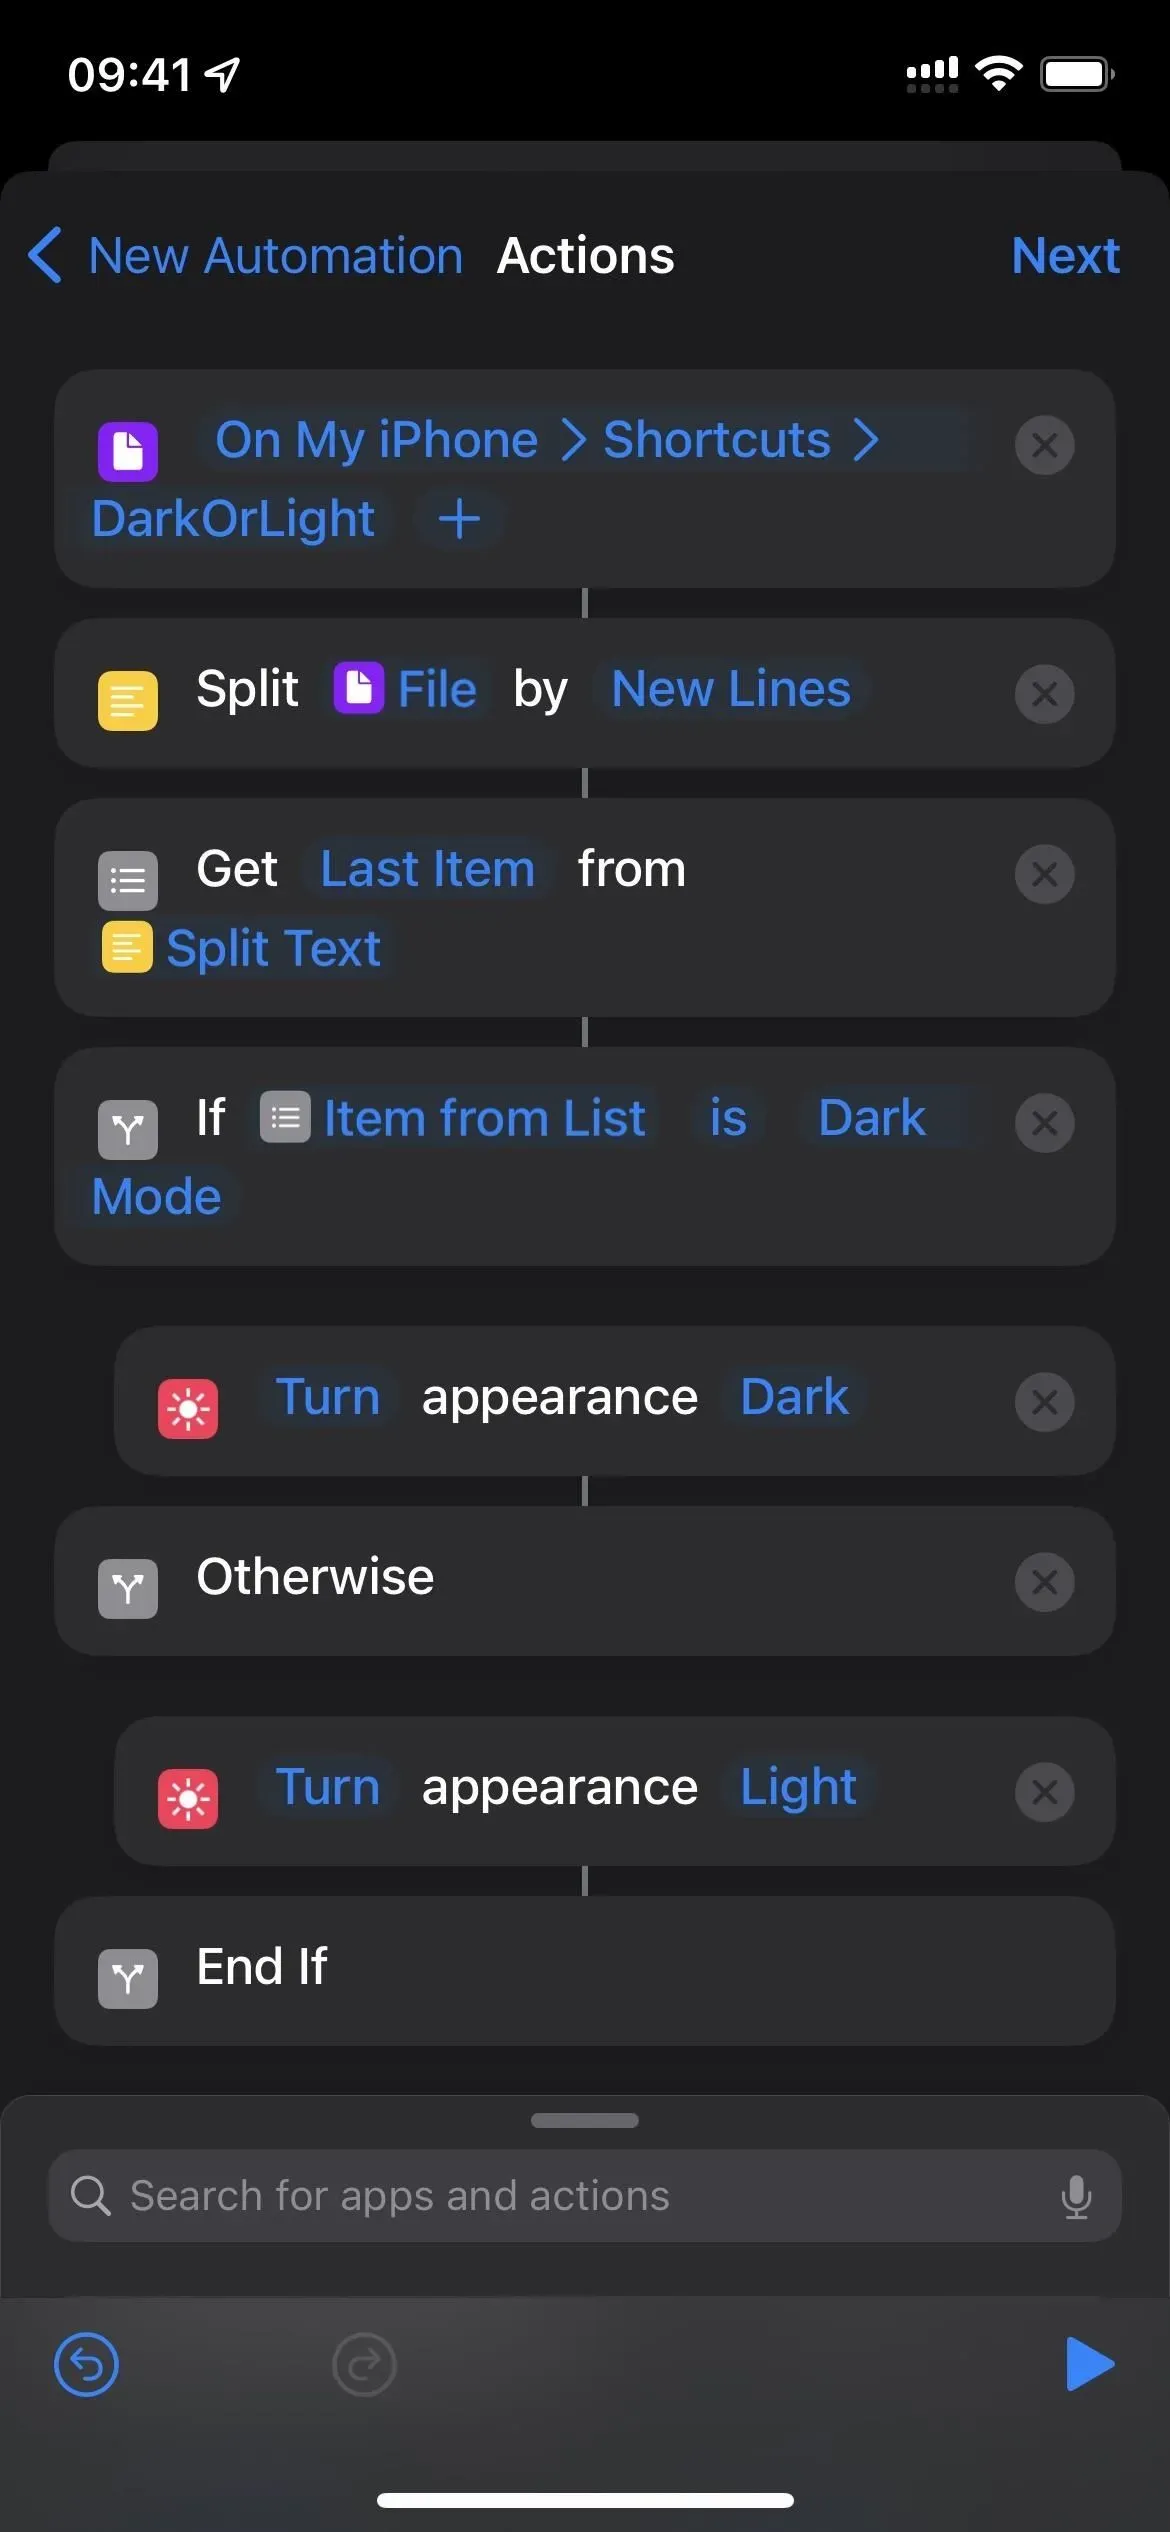
- Add a File action.
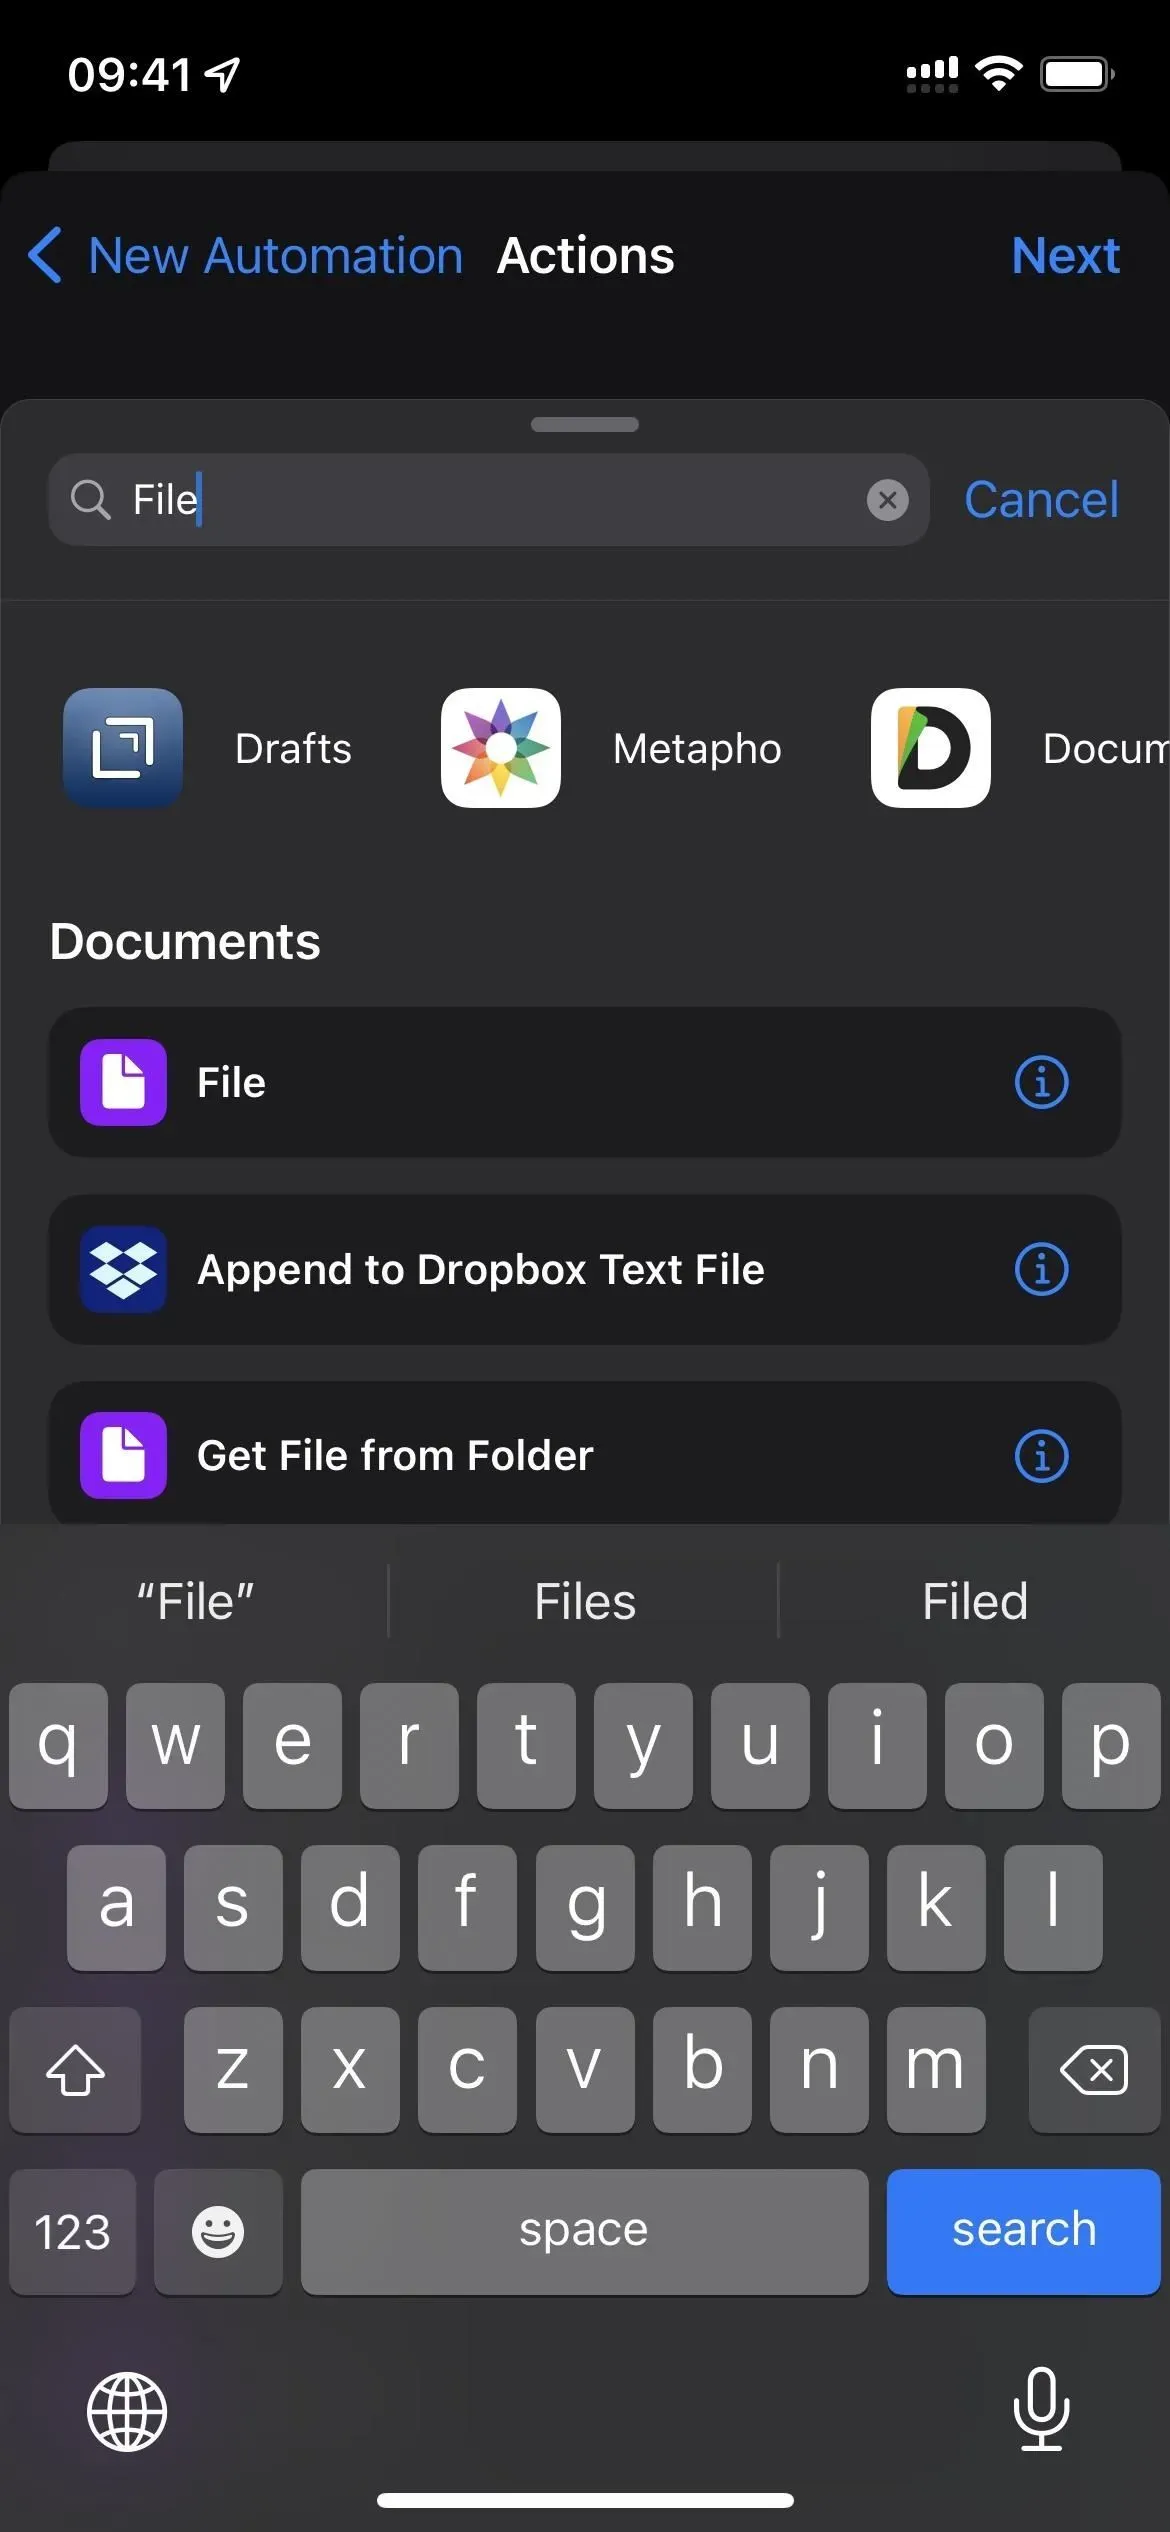

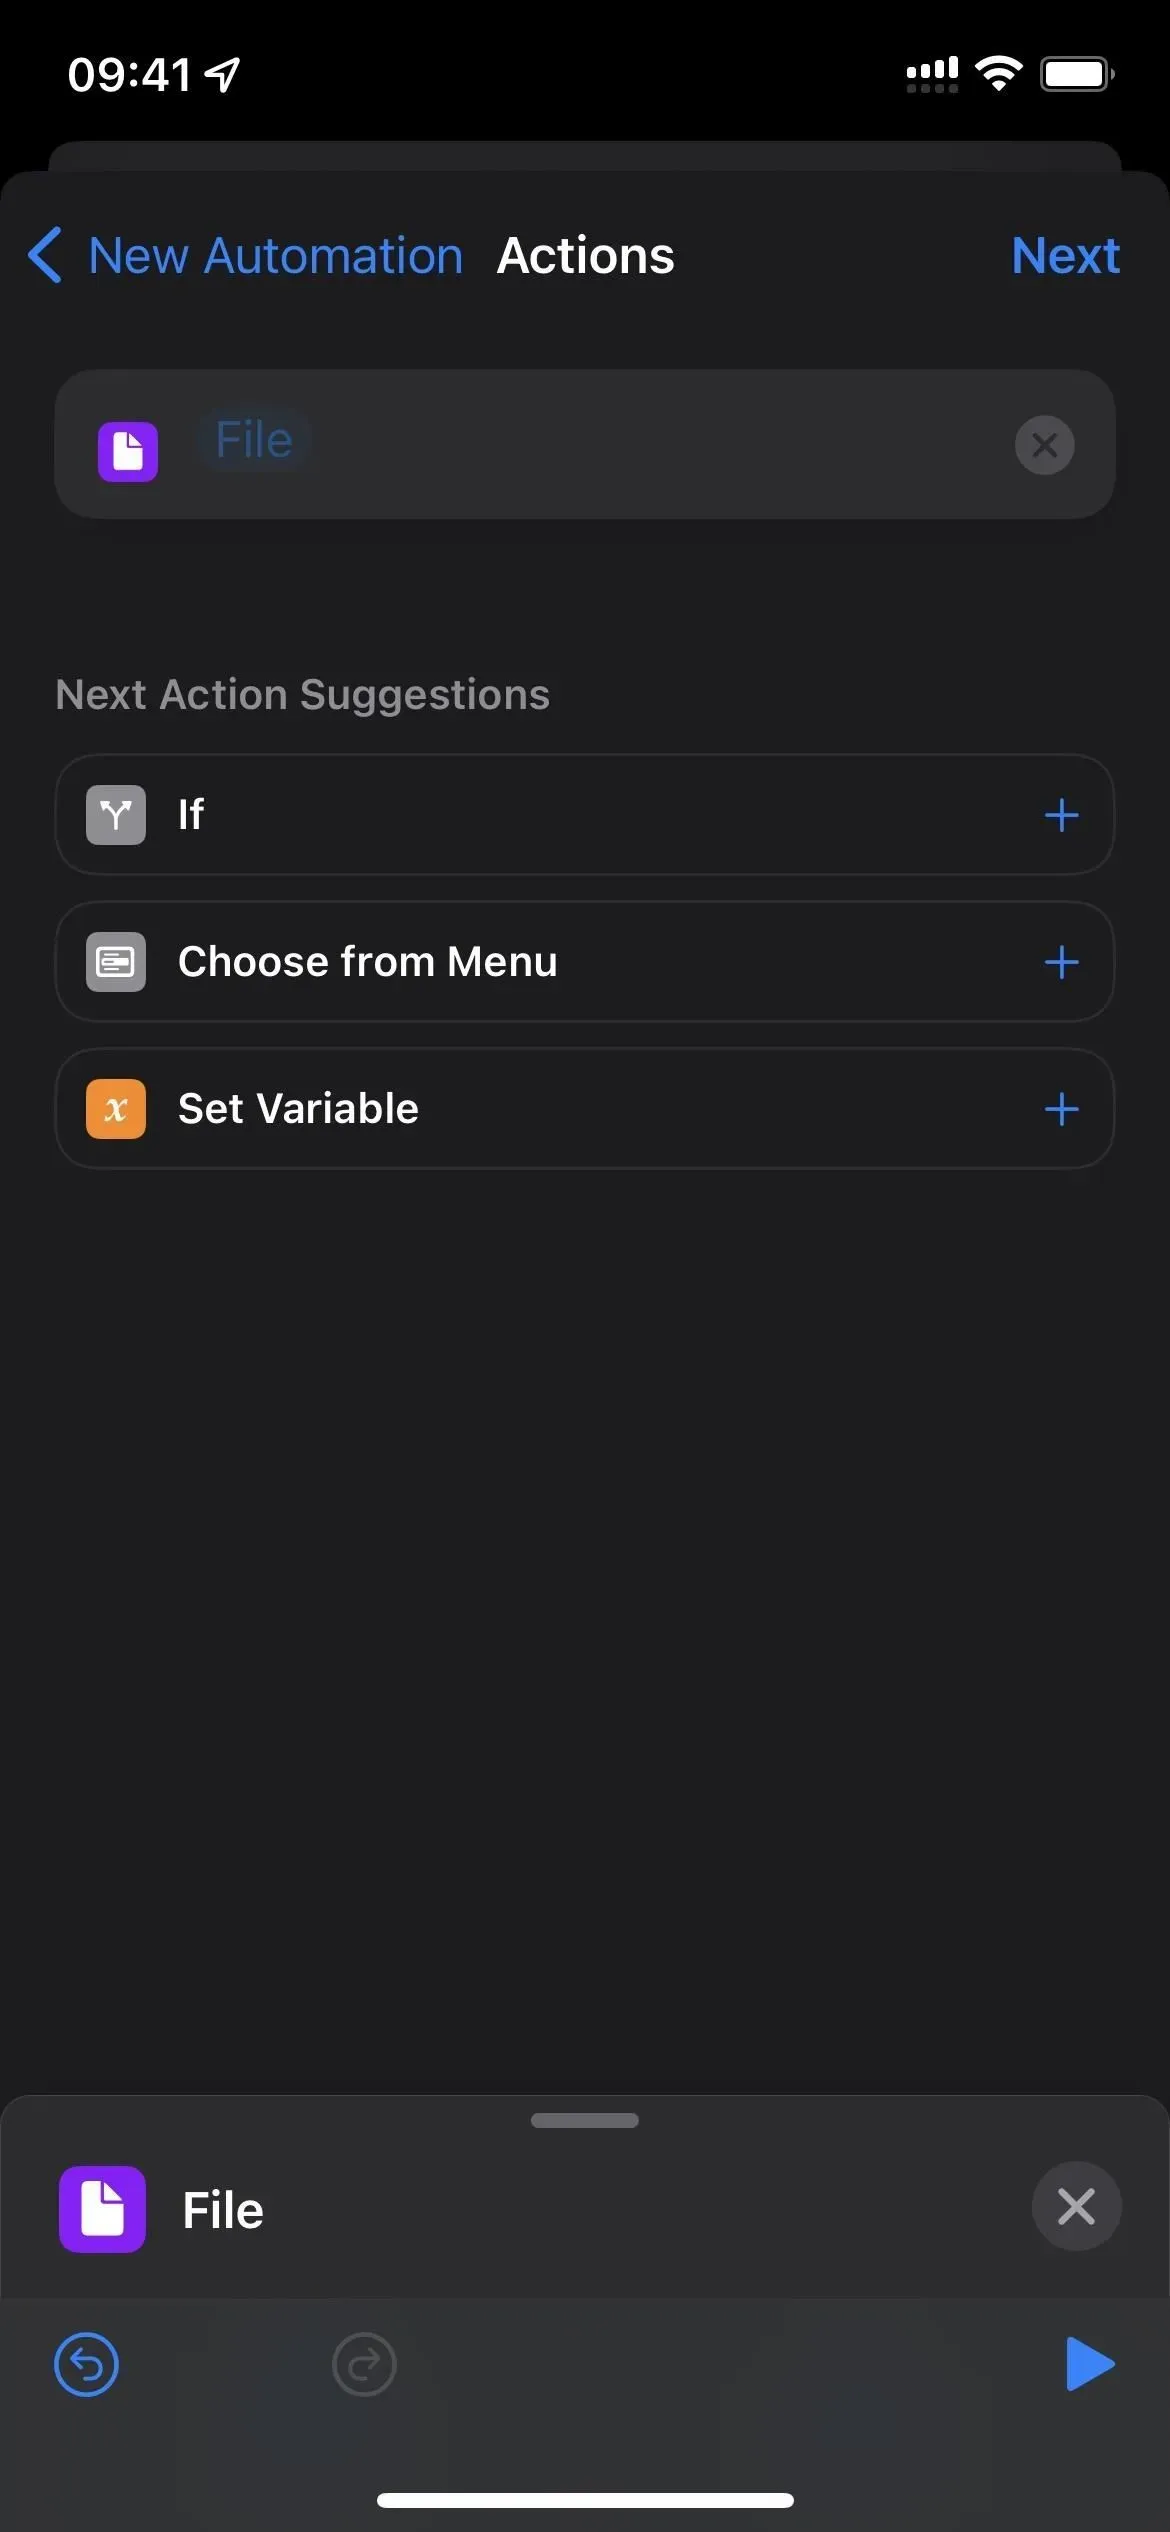
- Click “File”in the “File”box.
- Choose File.

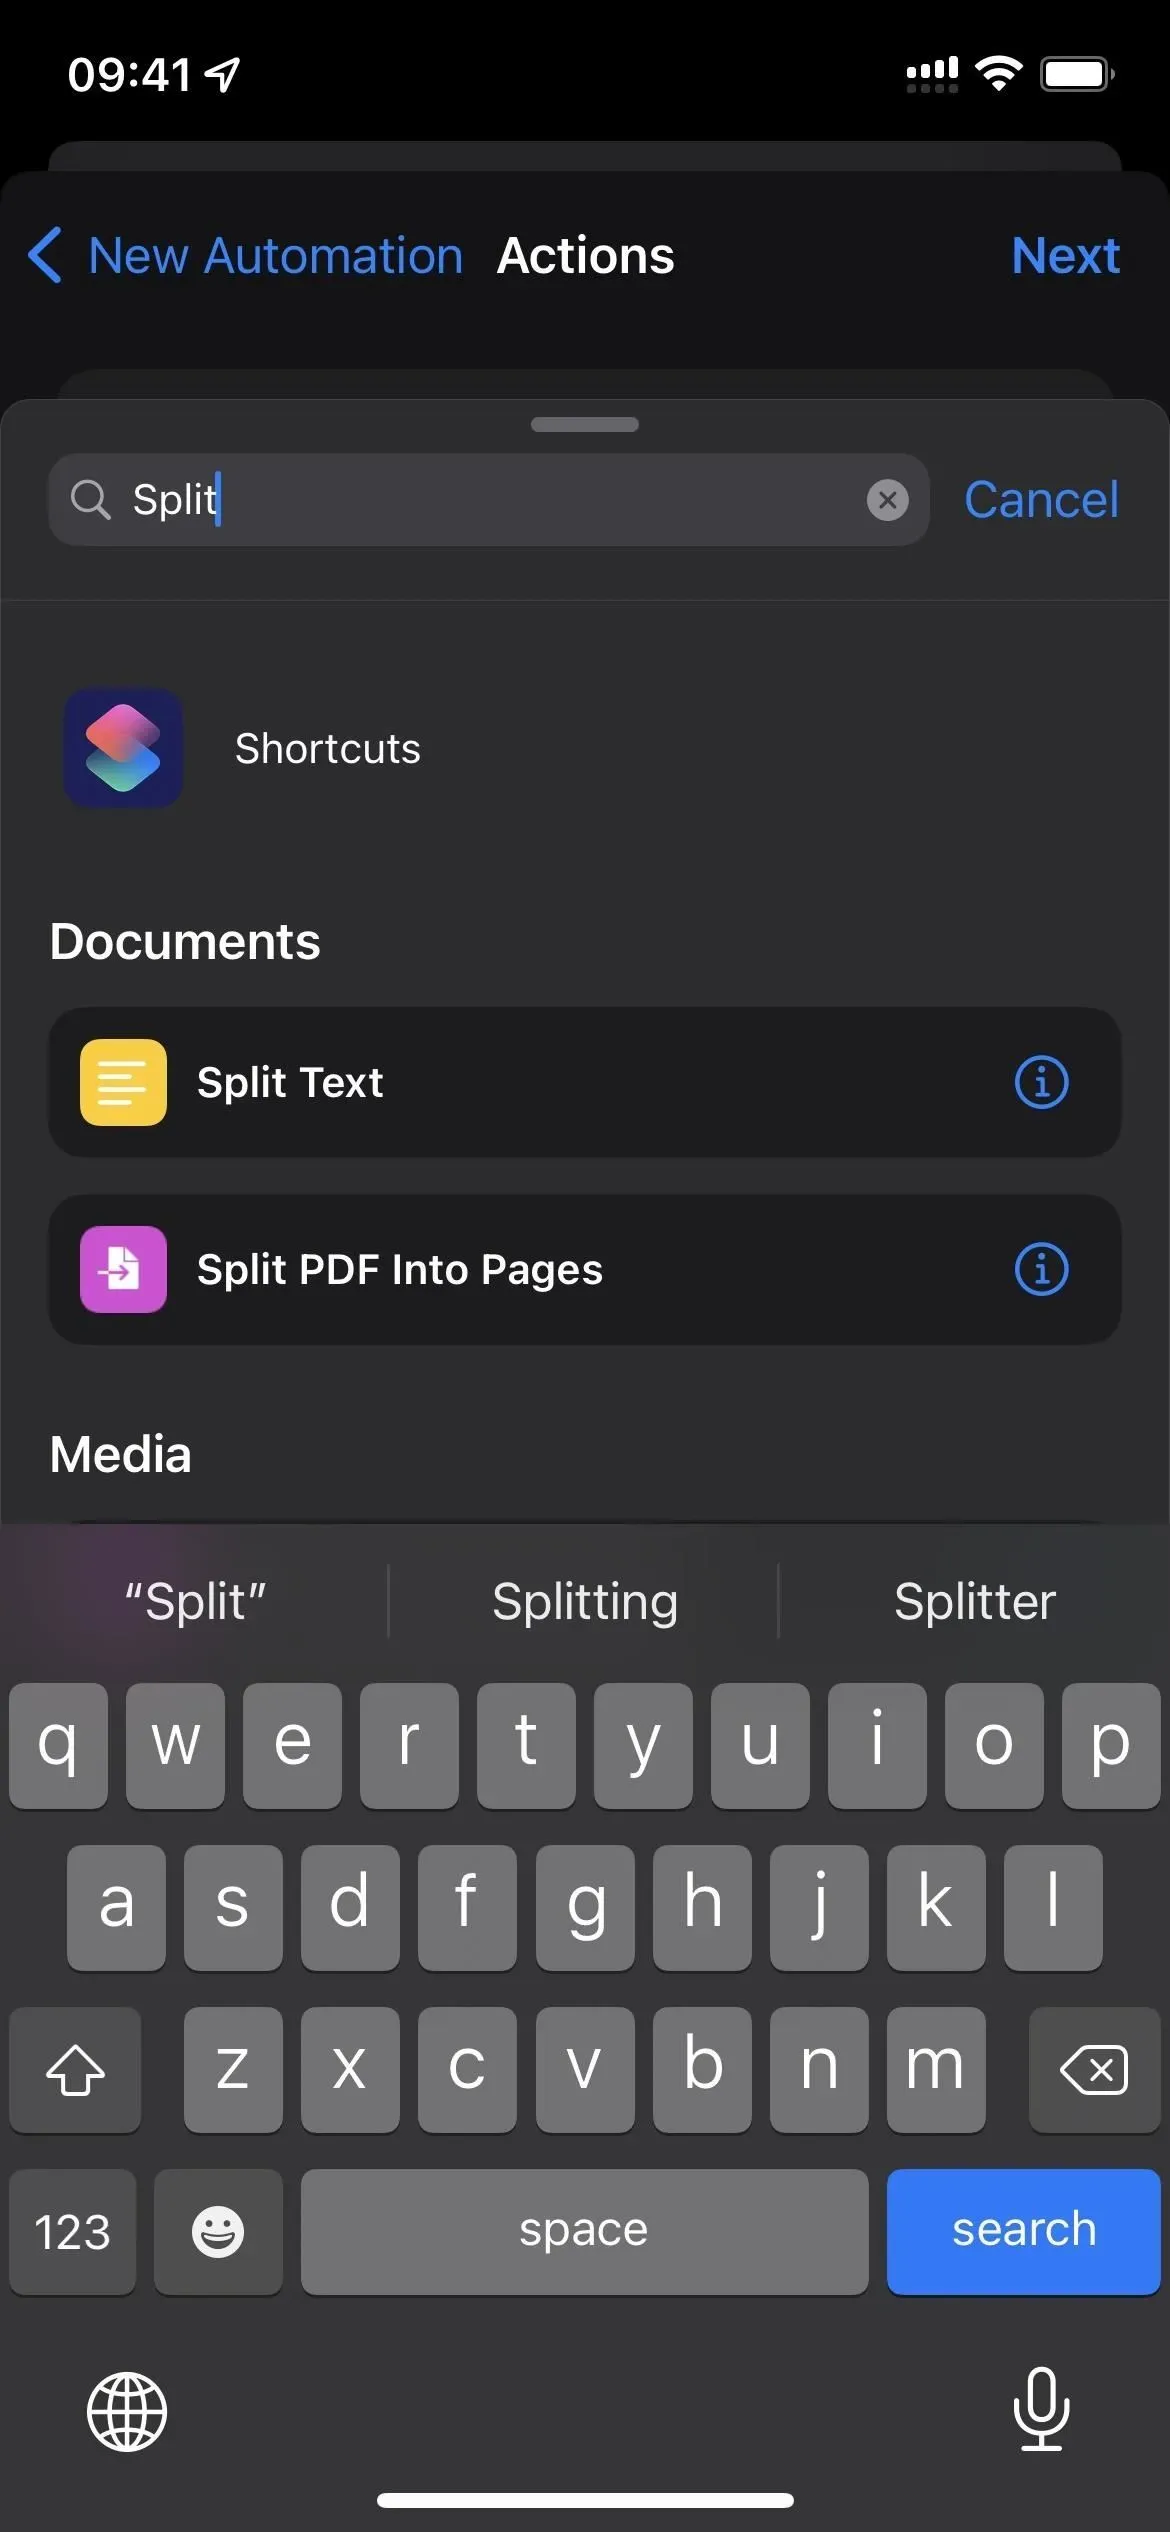
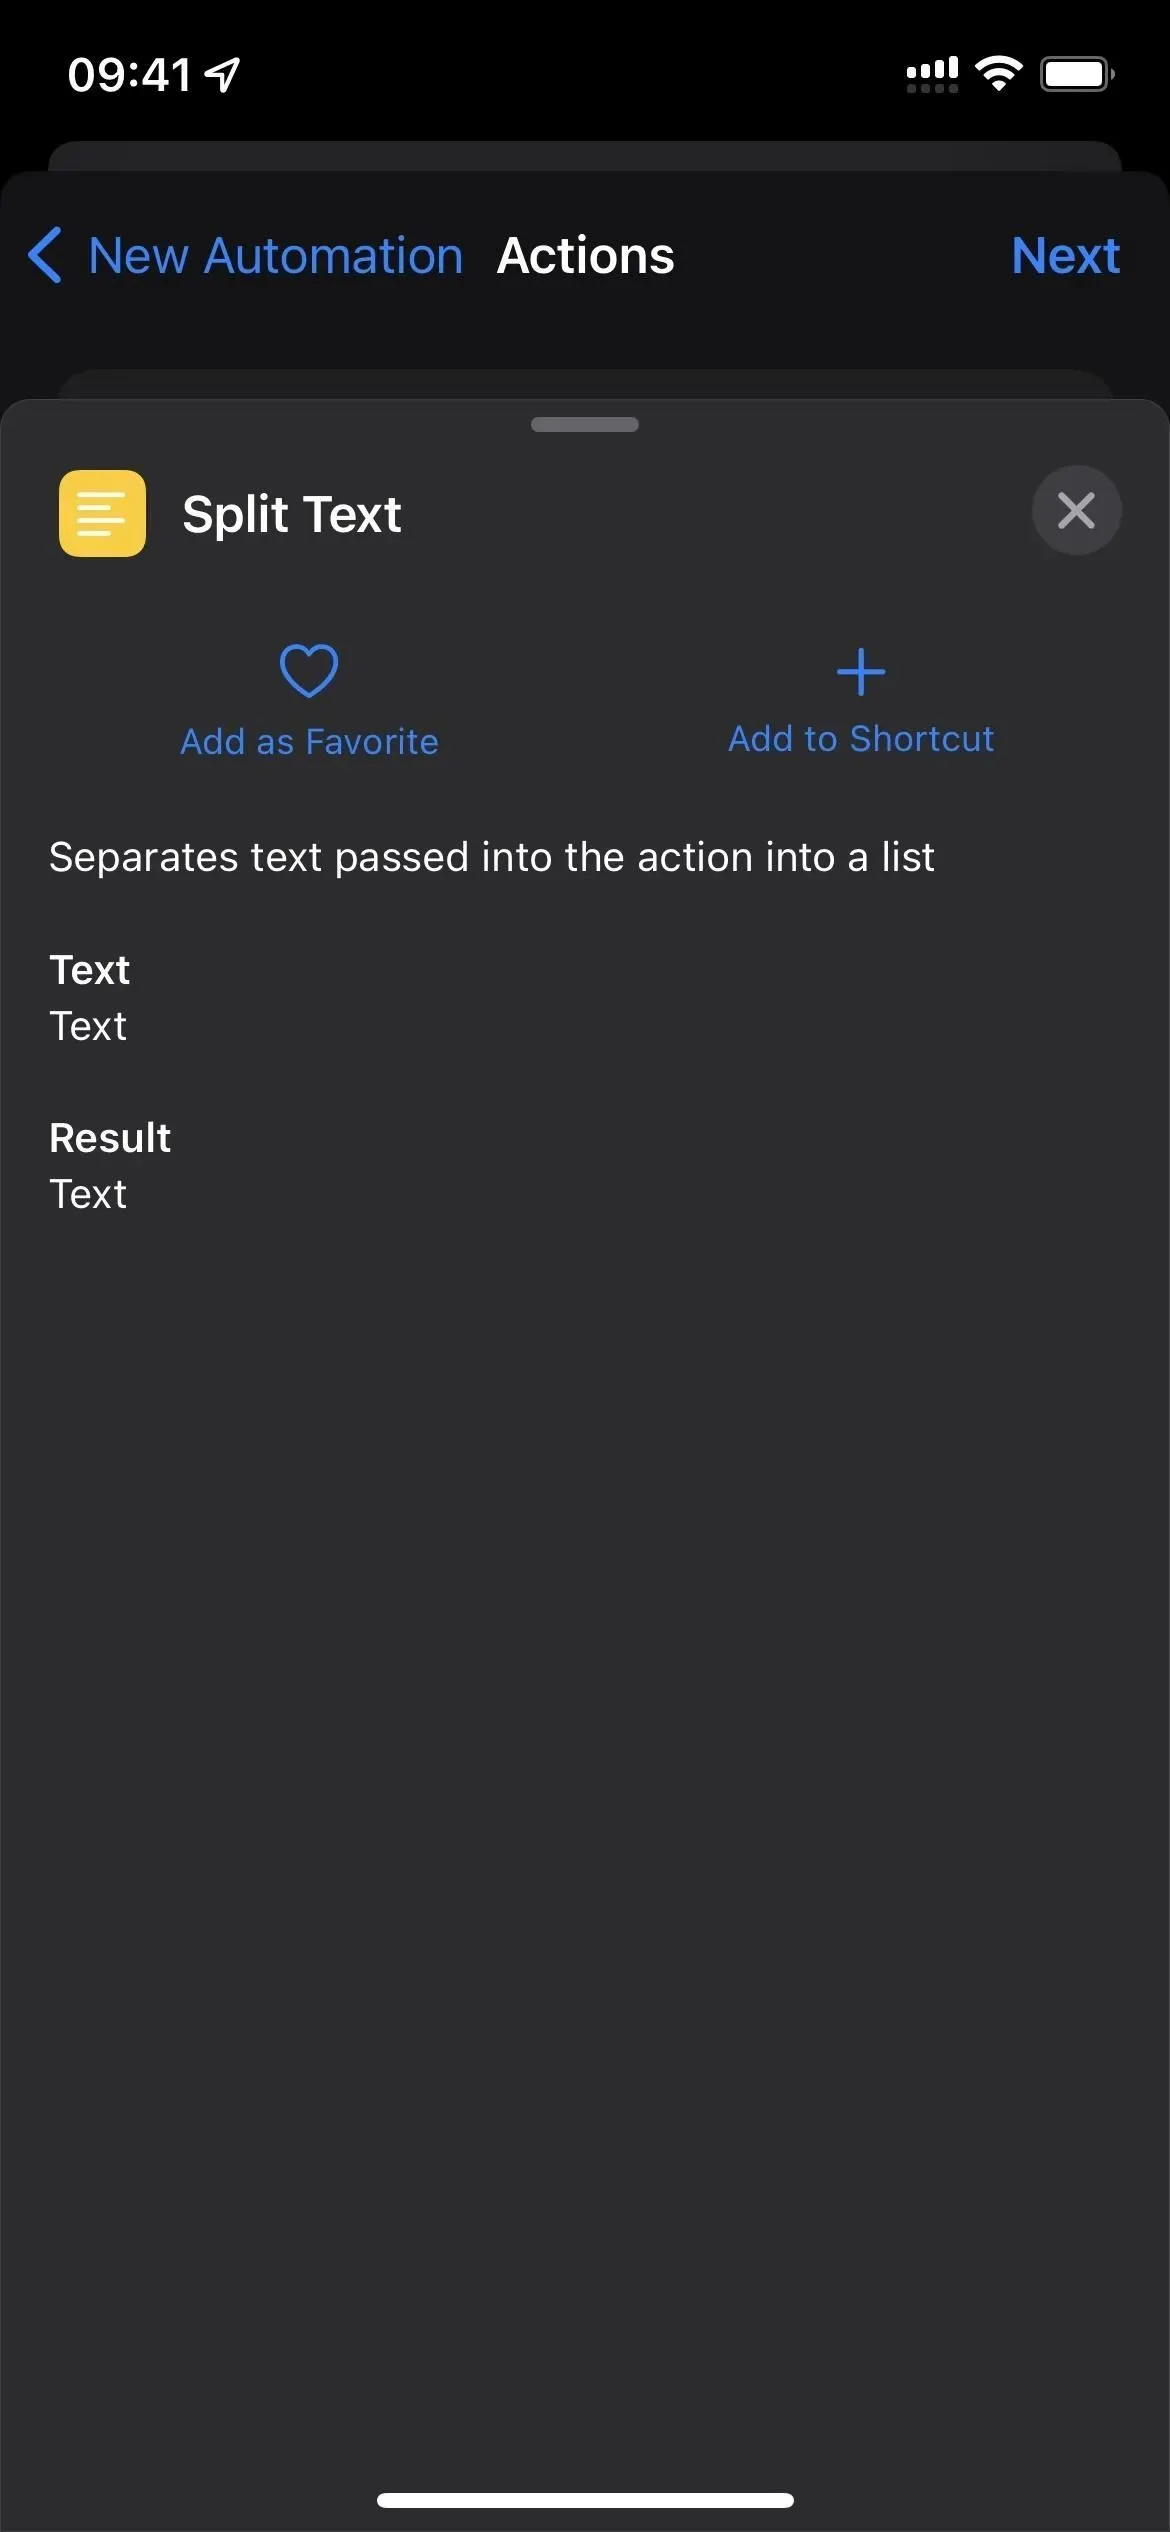
- Add a “Split Text”action below the “File”action field.
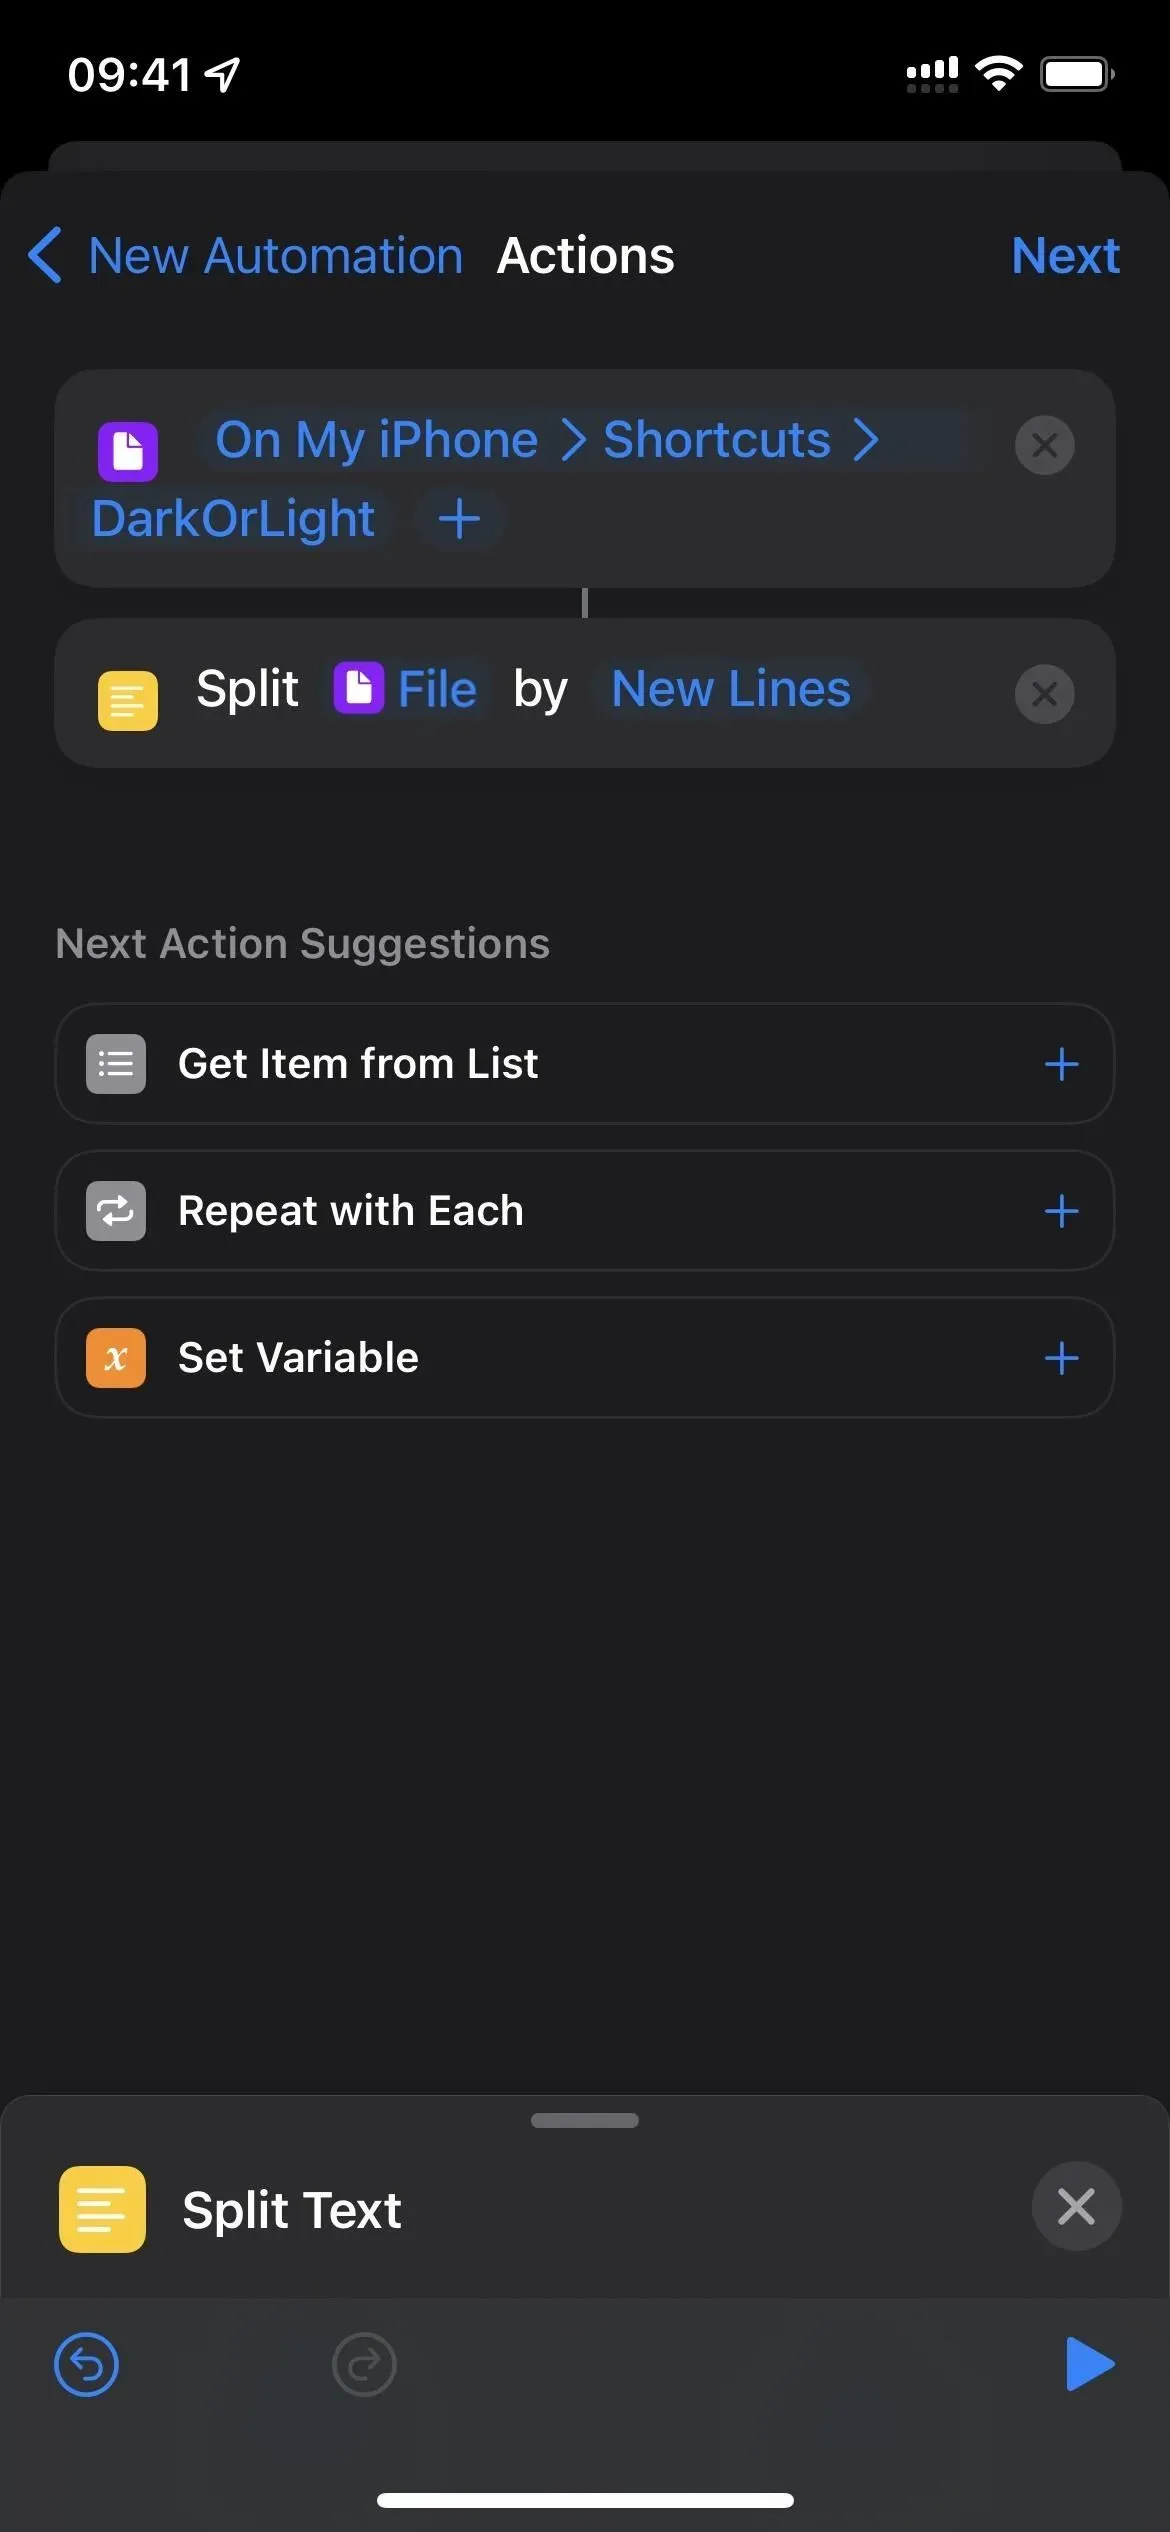
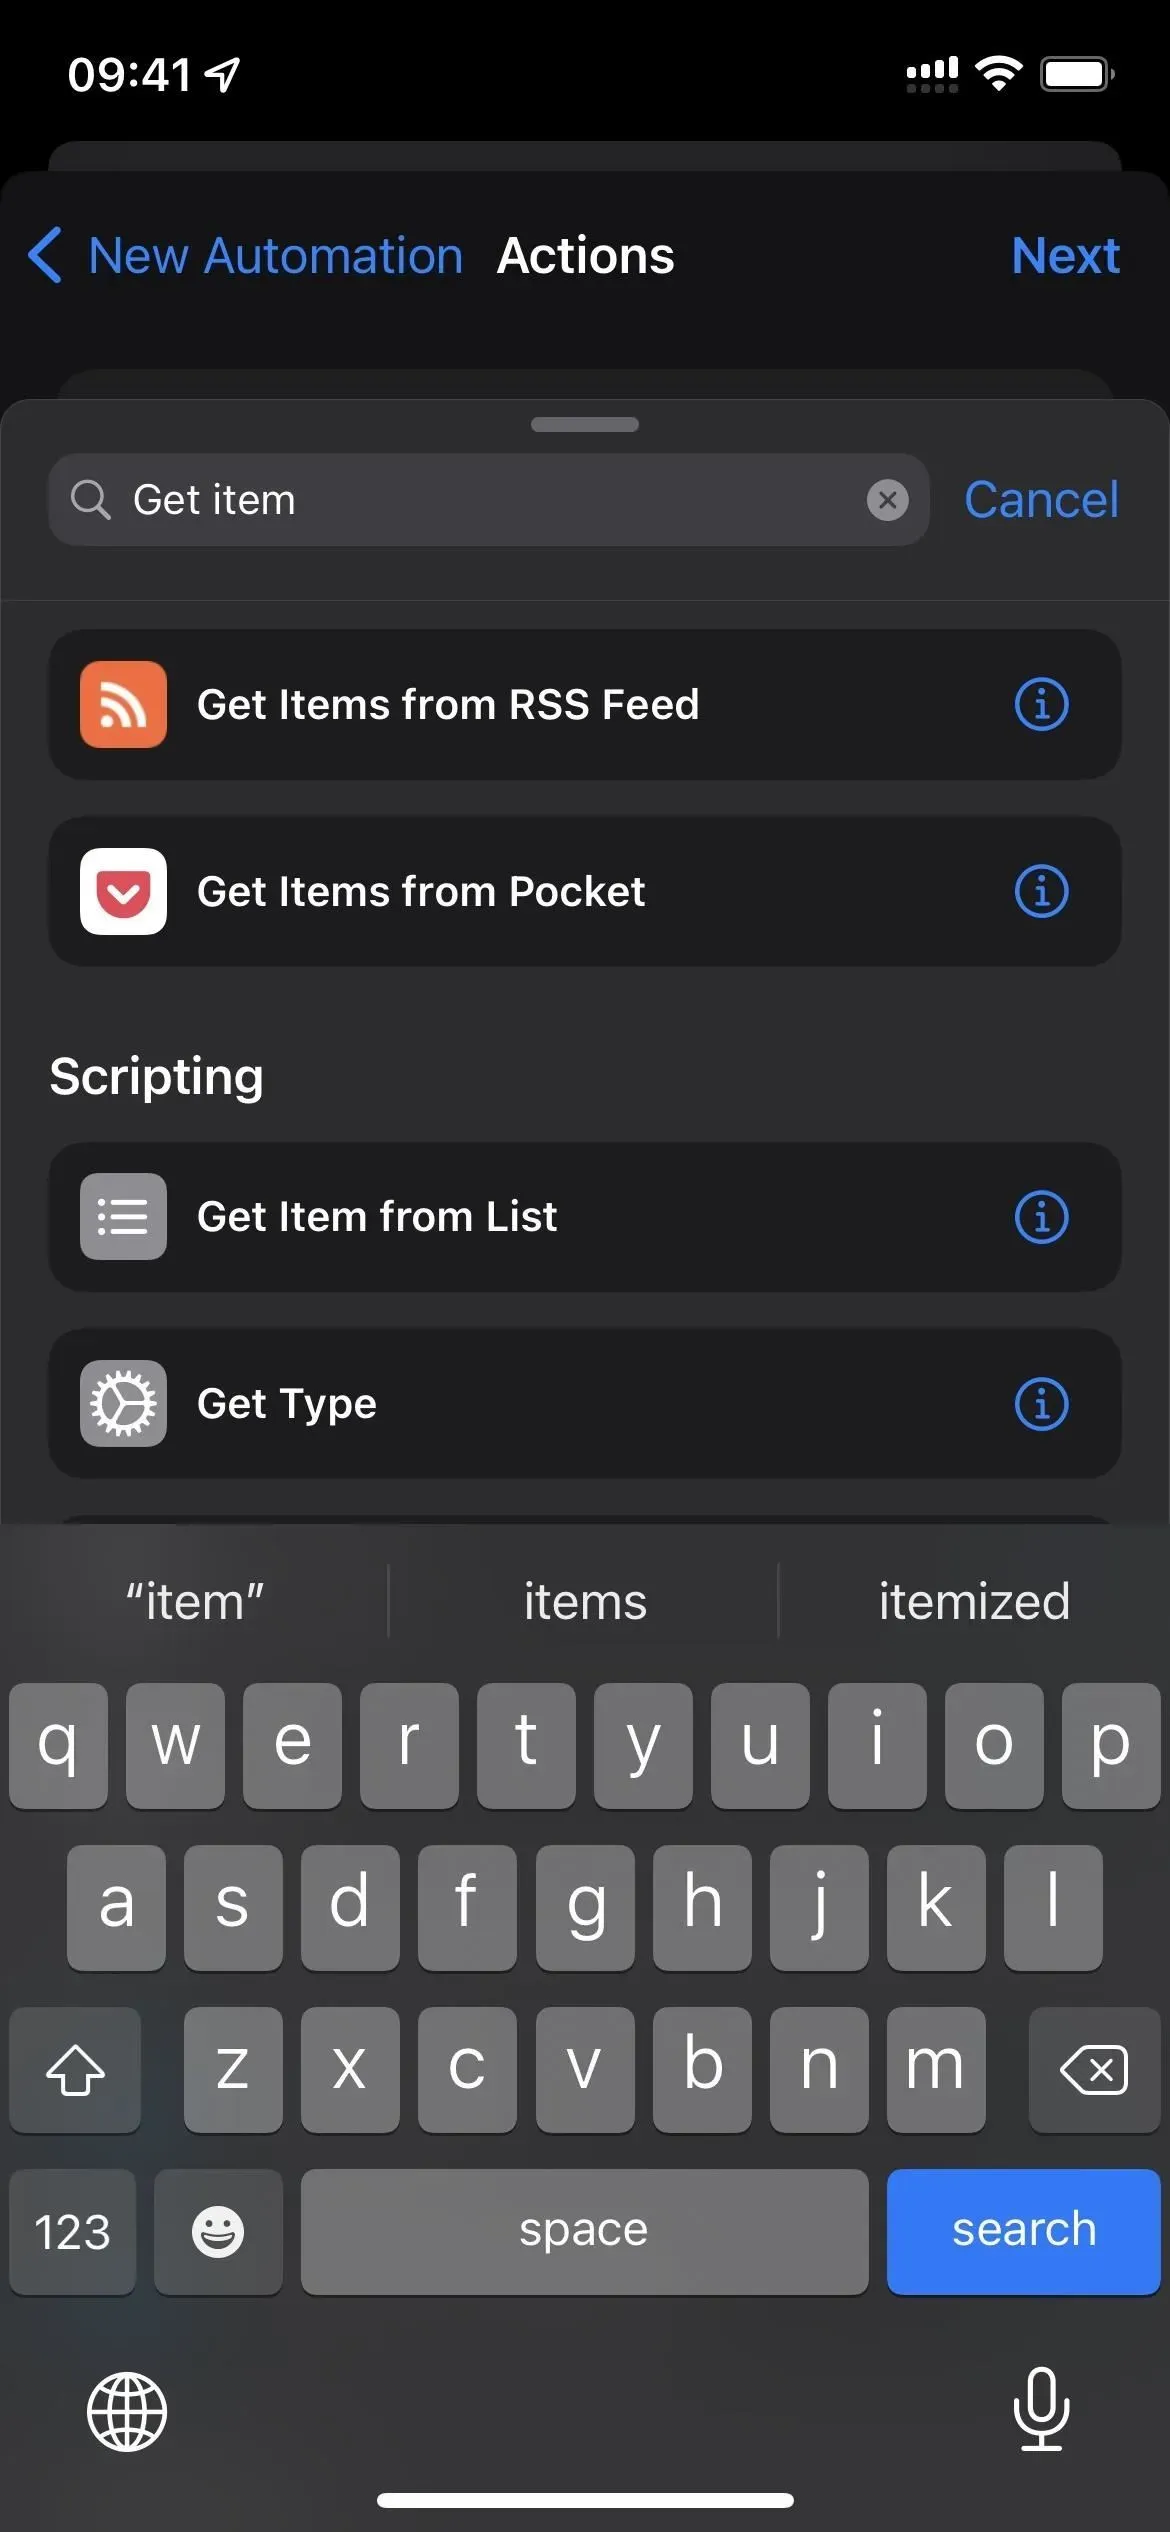
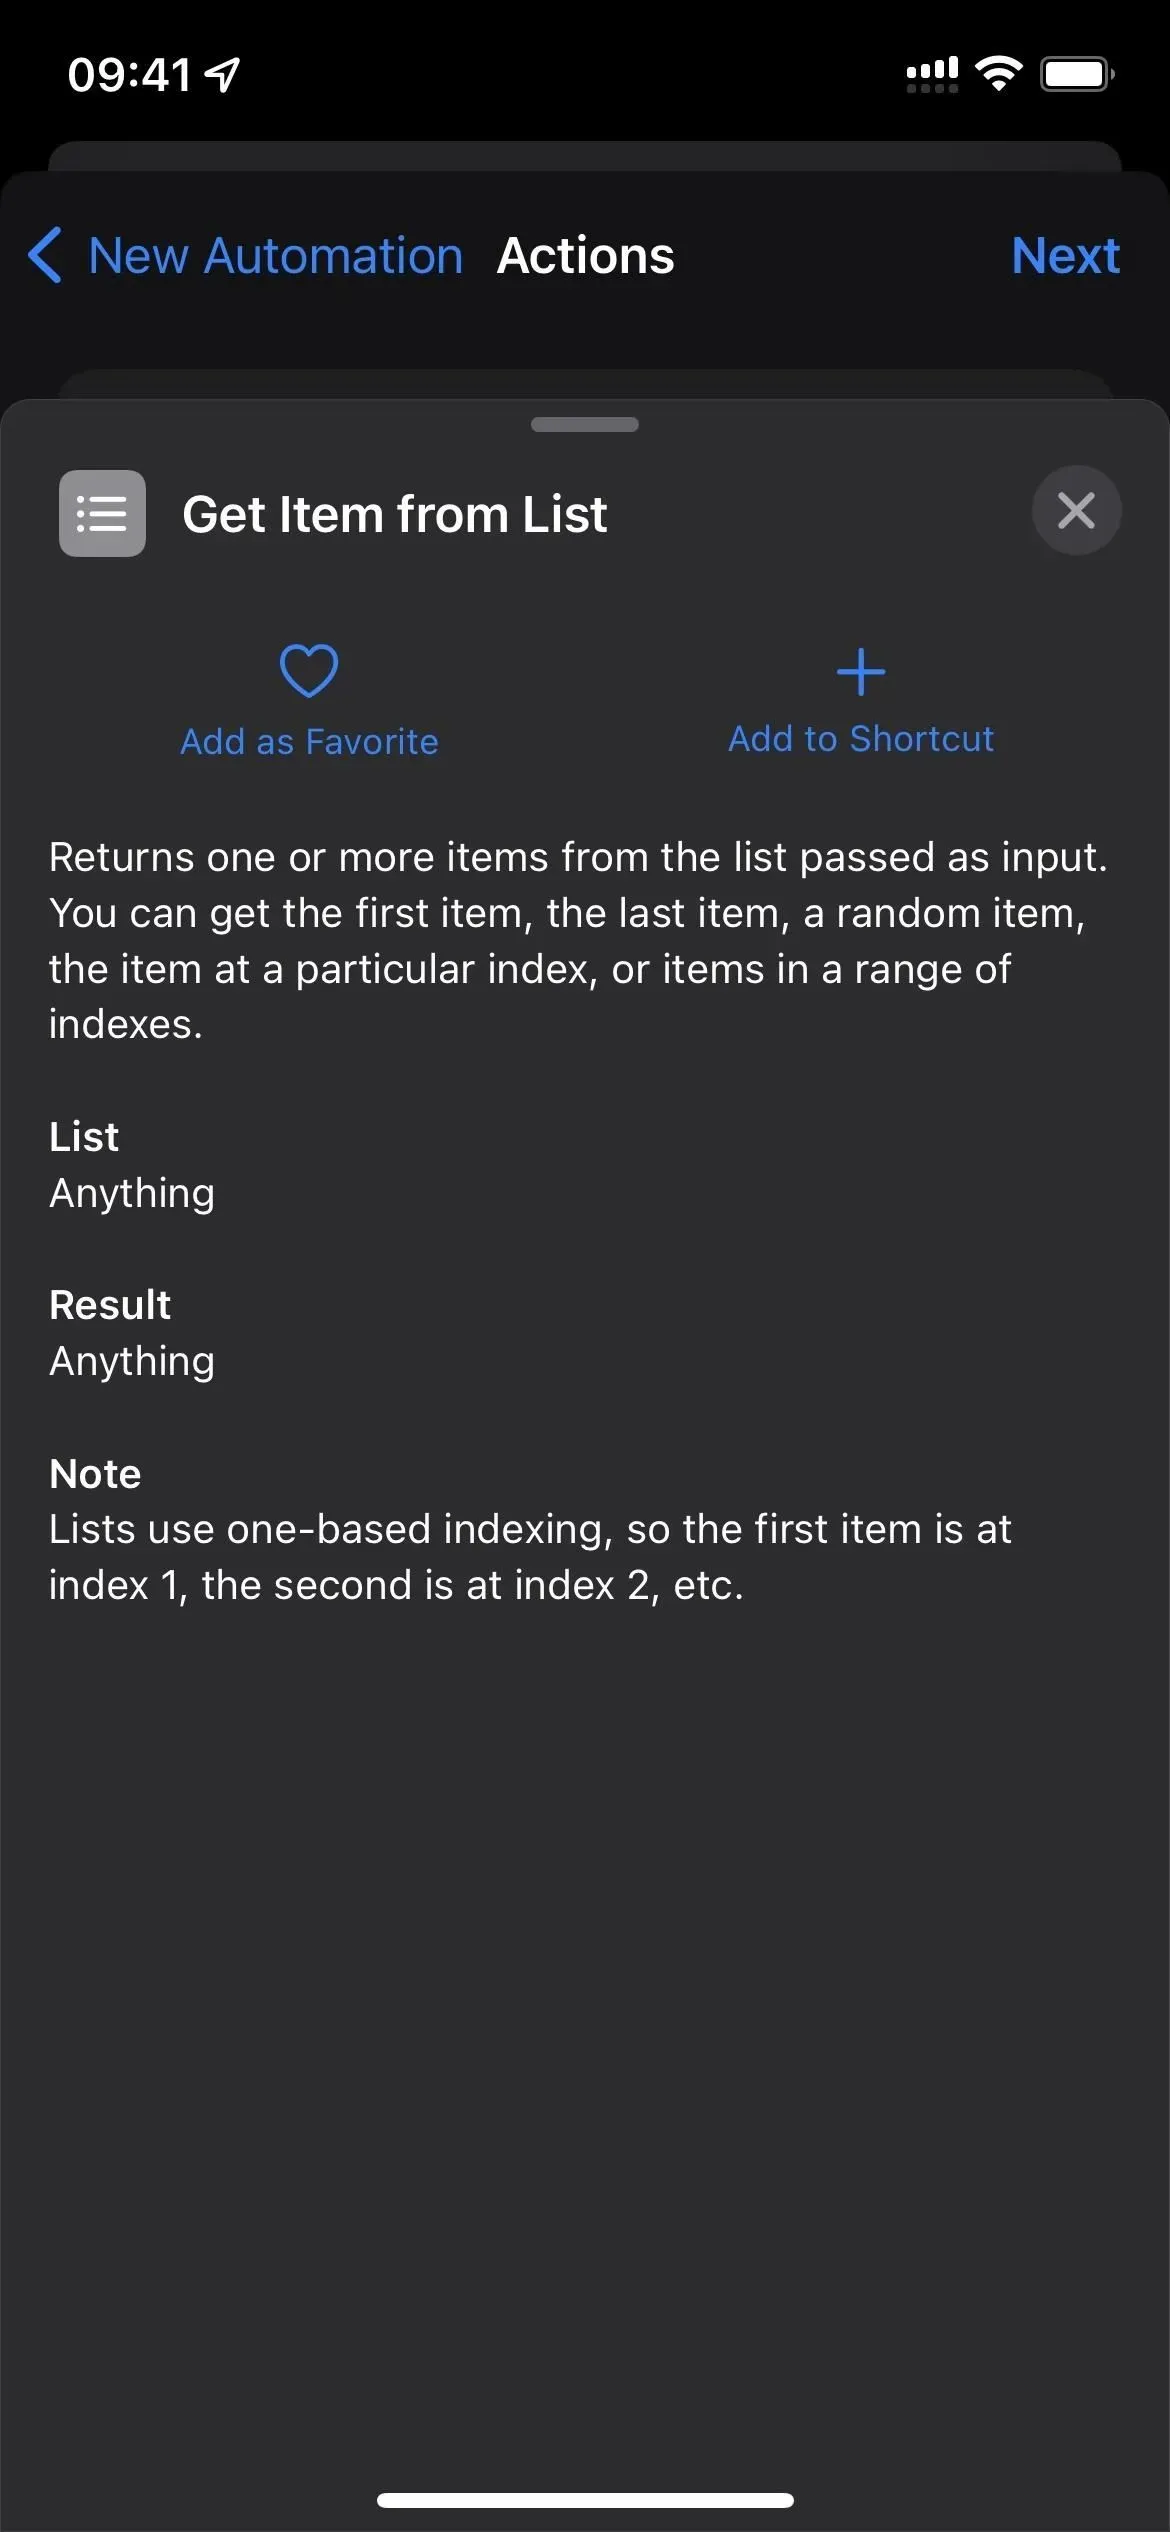
- Add a Get Item From List action below the Split Text action field.

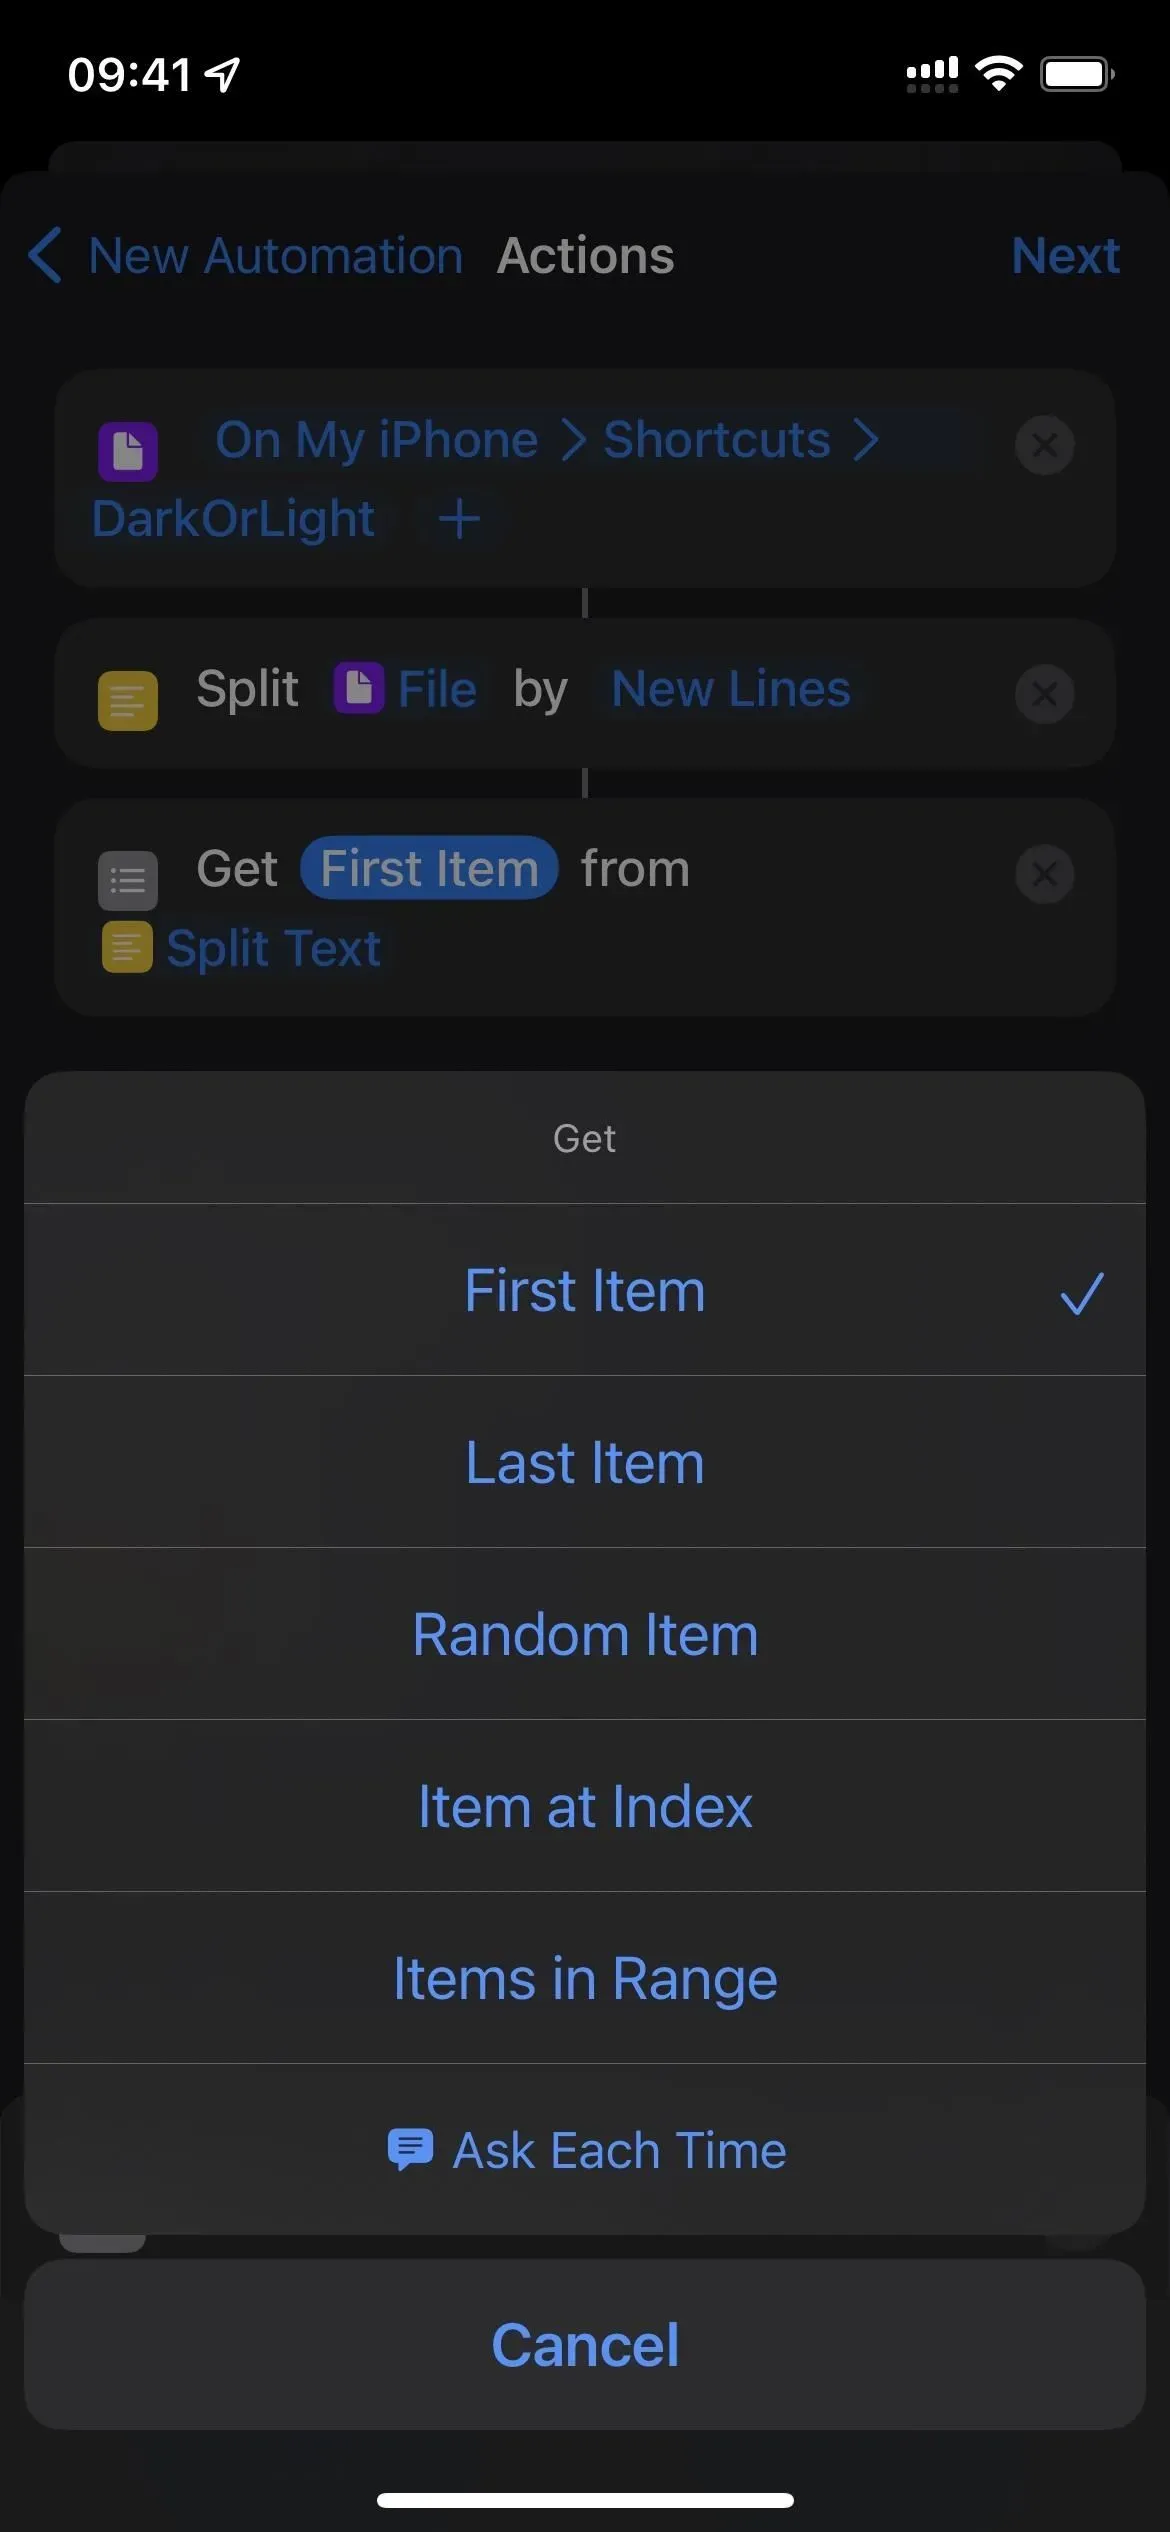
- Click “First Item”in the “Split Text”action box.
- Select “Last Item”from the menu.
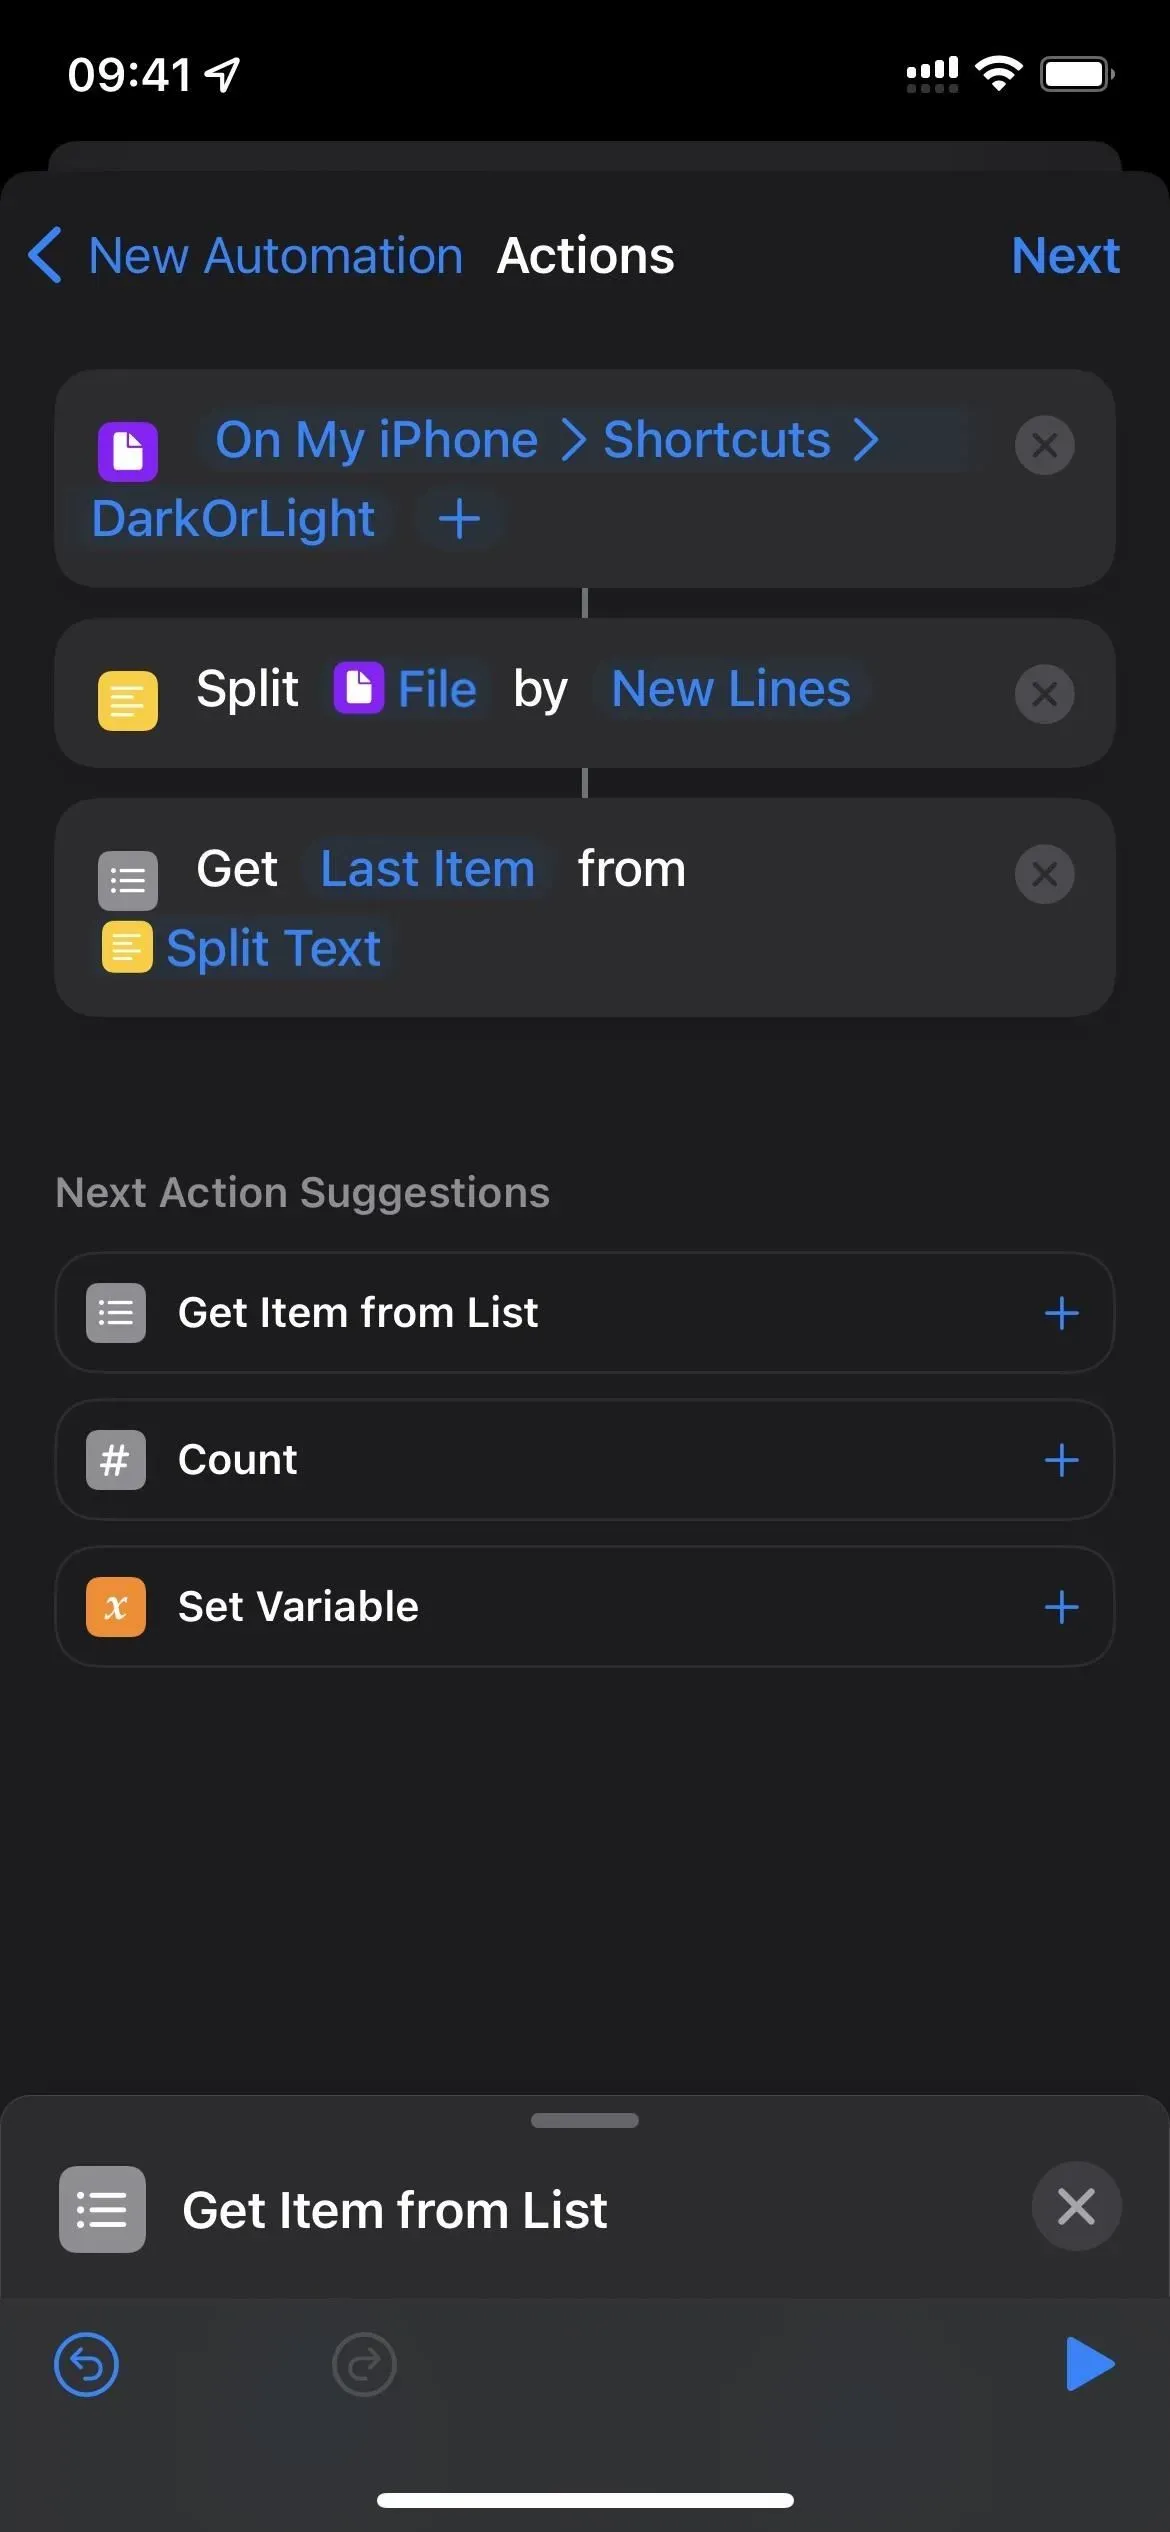
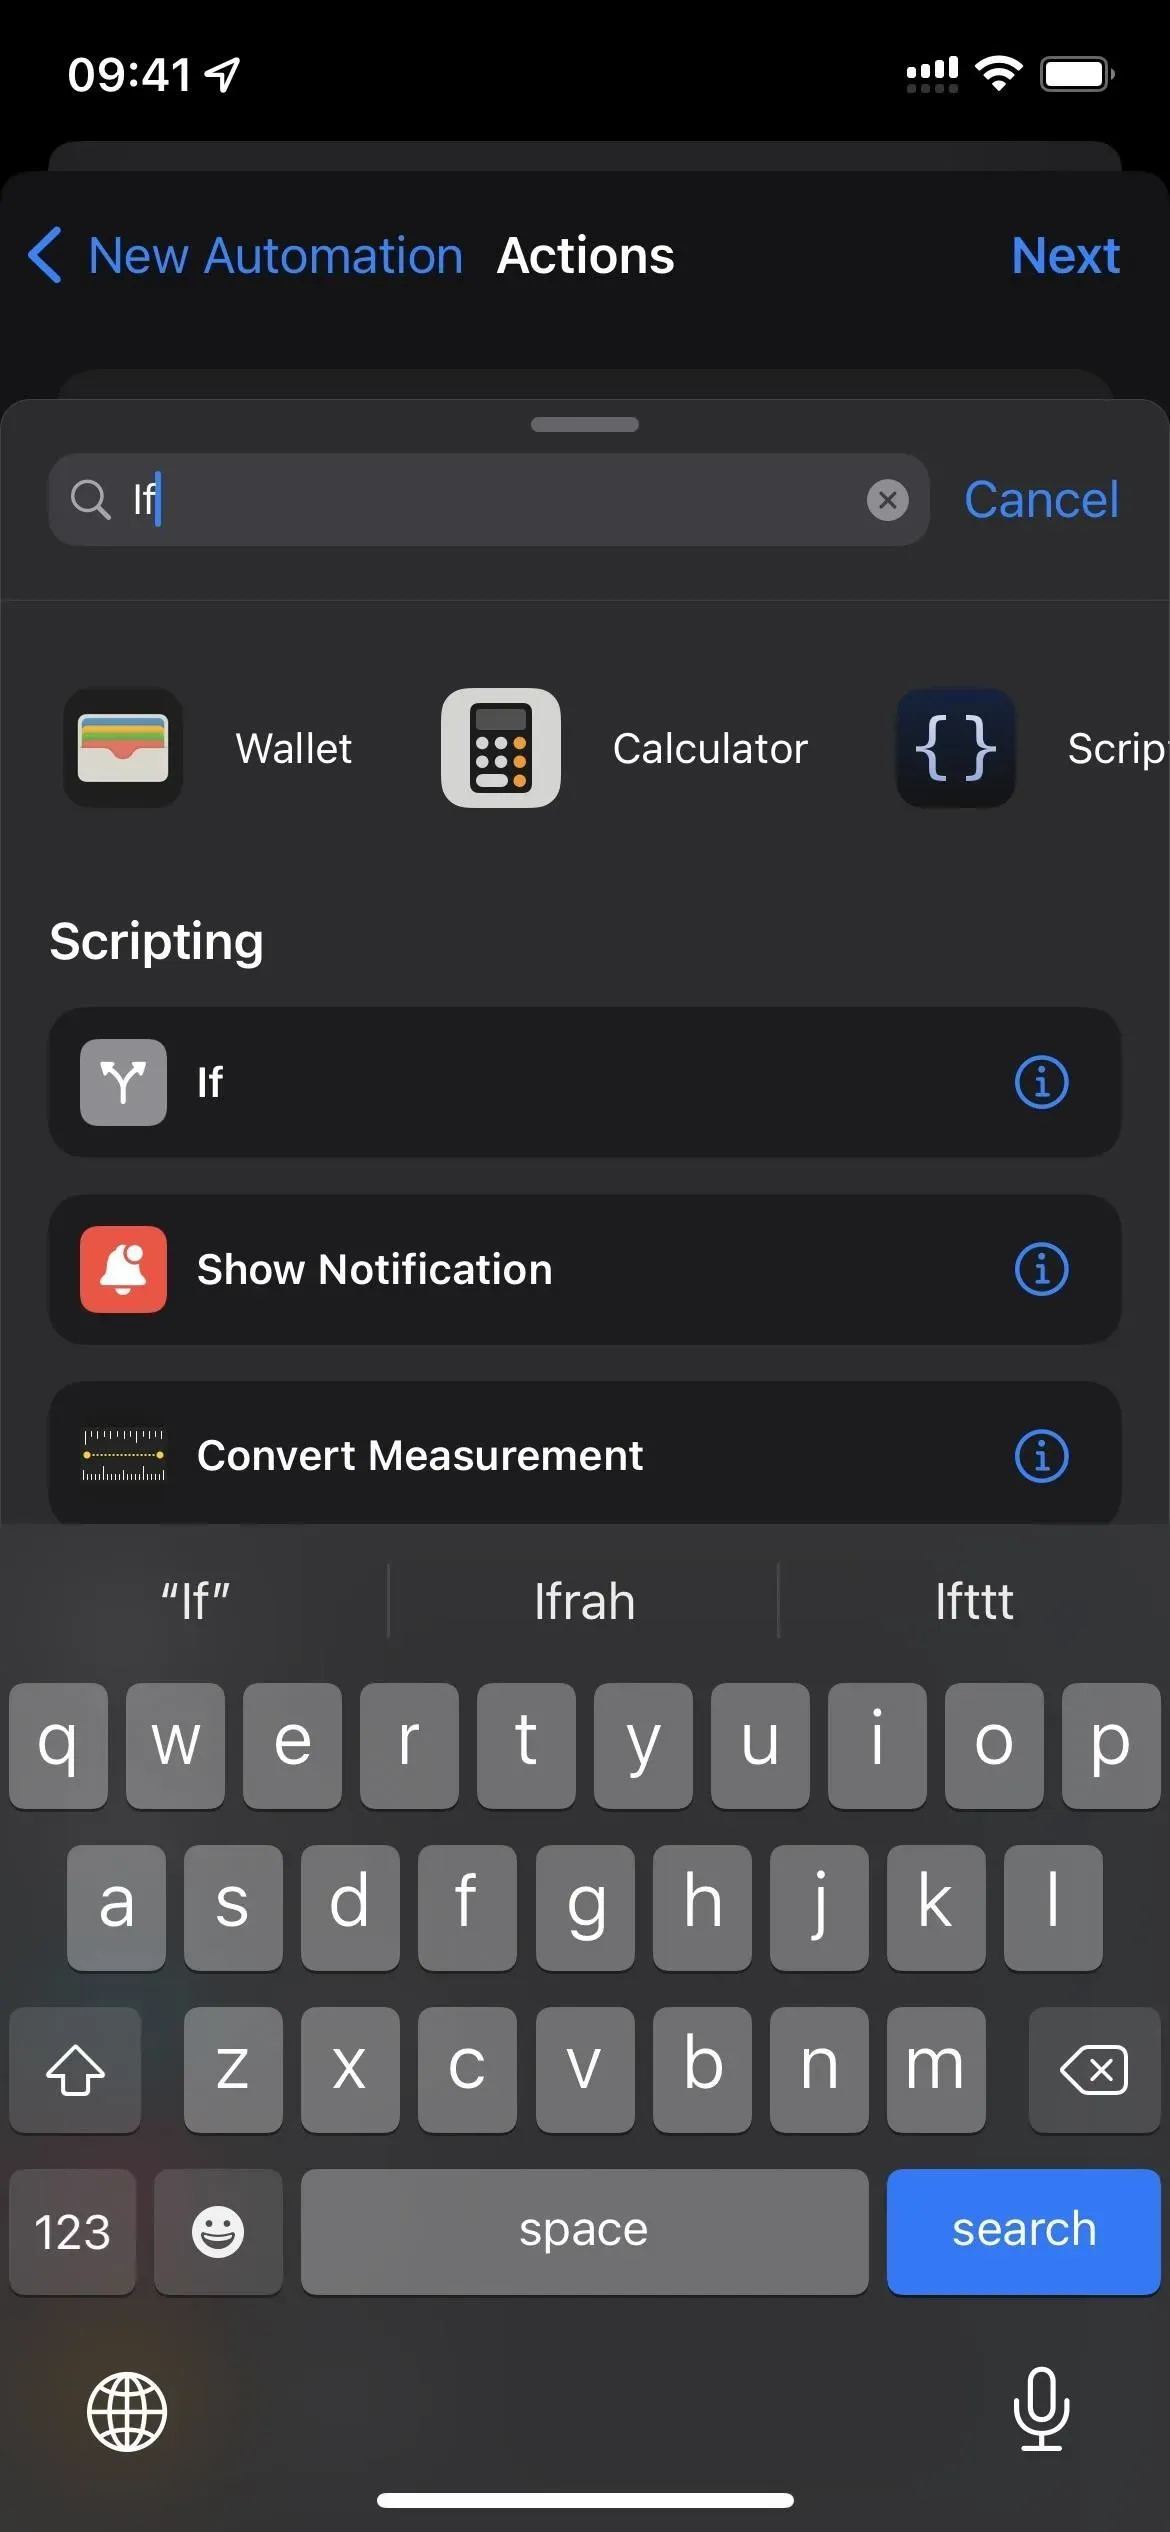
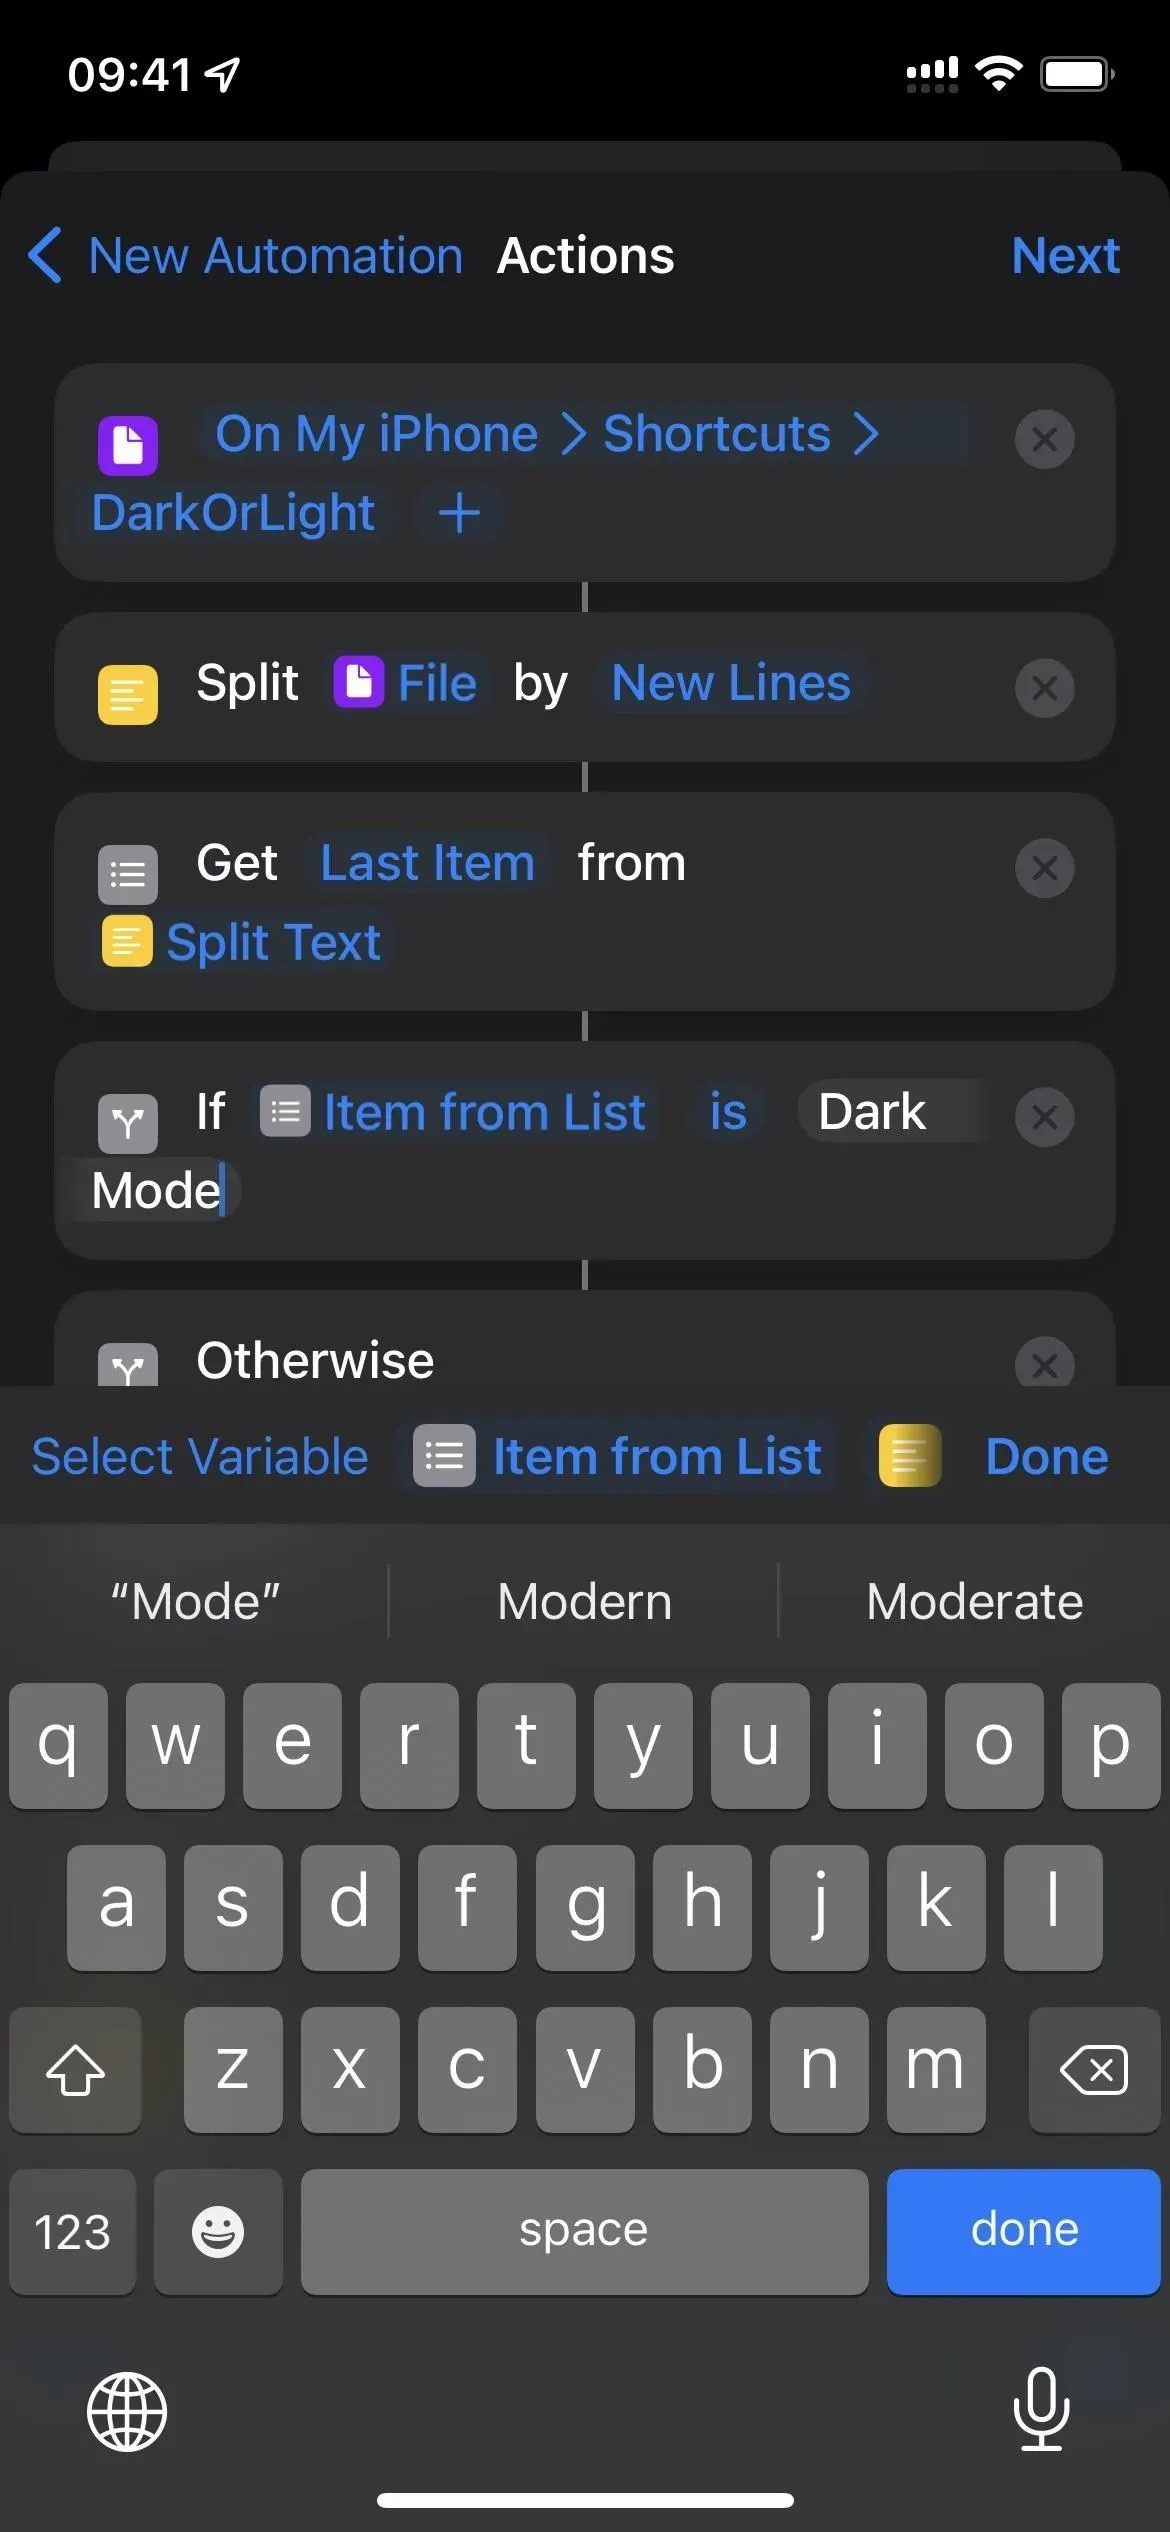
- Add an “If”statement below the “Get item from list”action field.
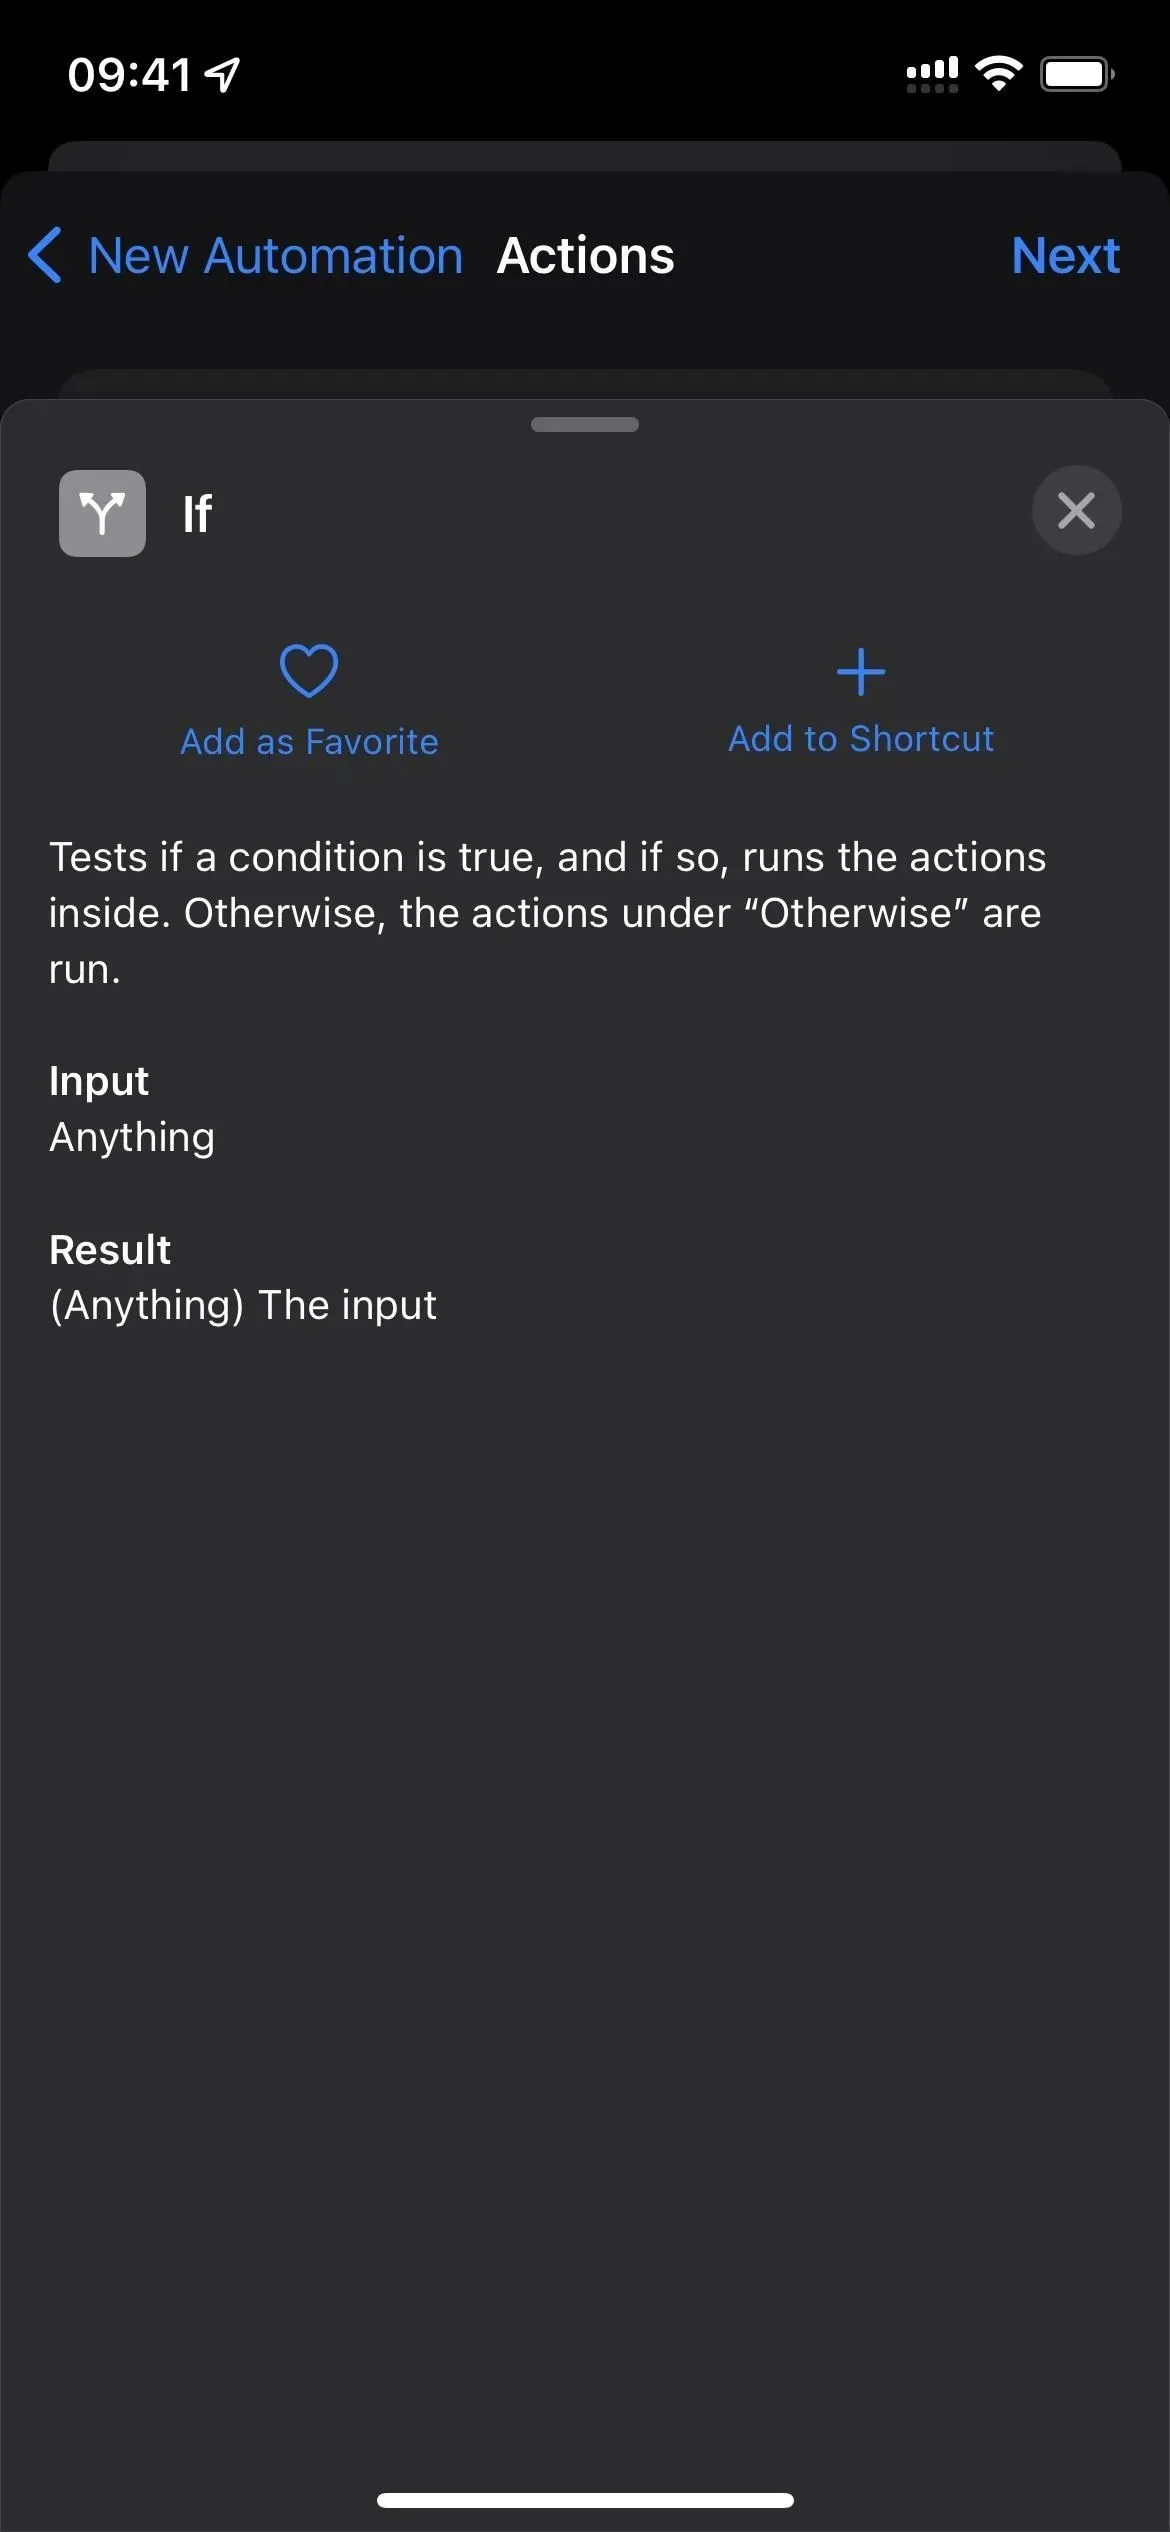
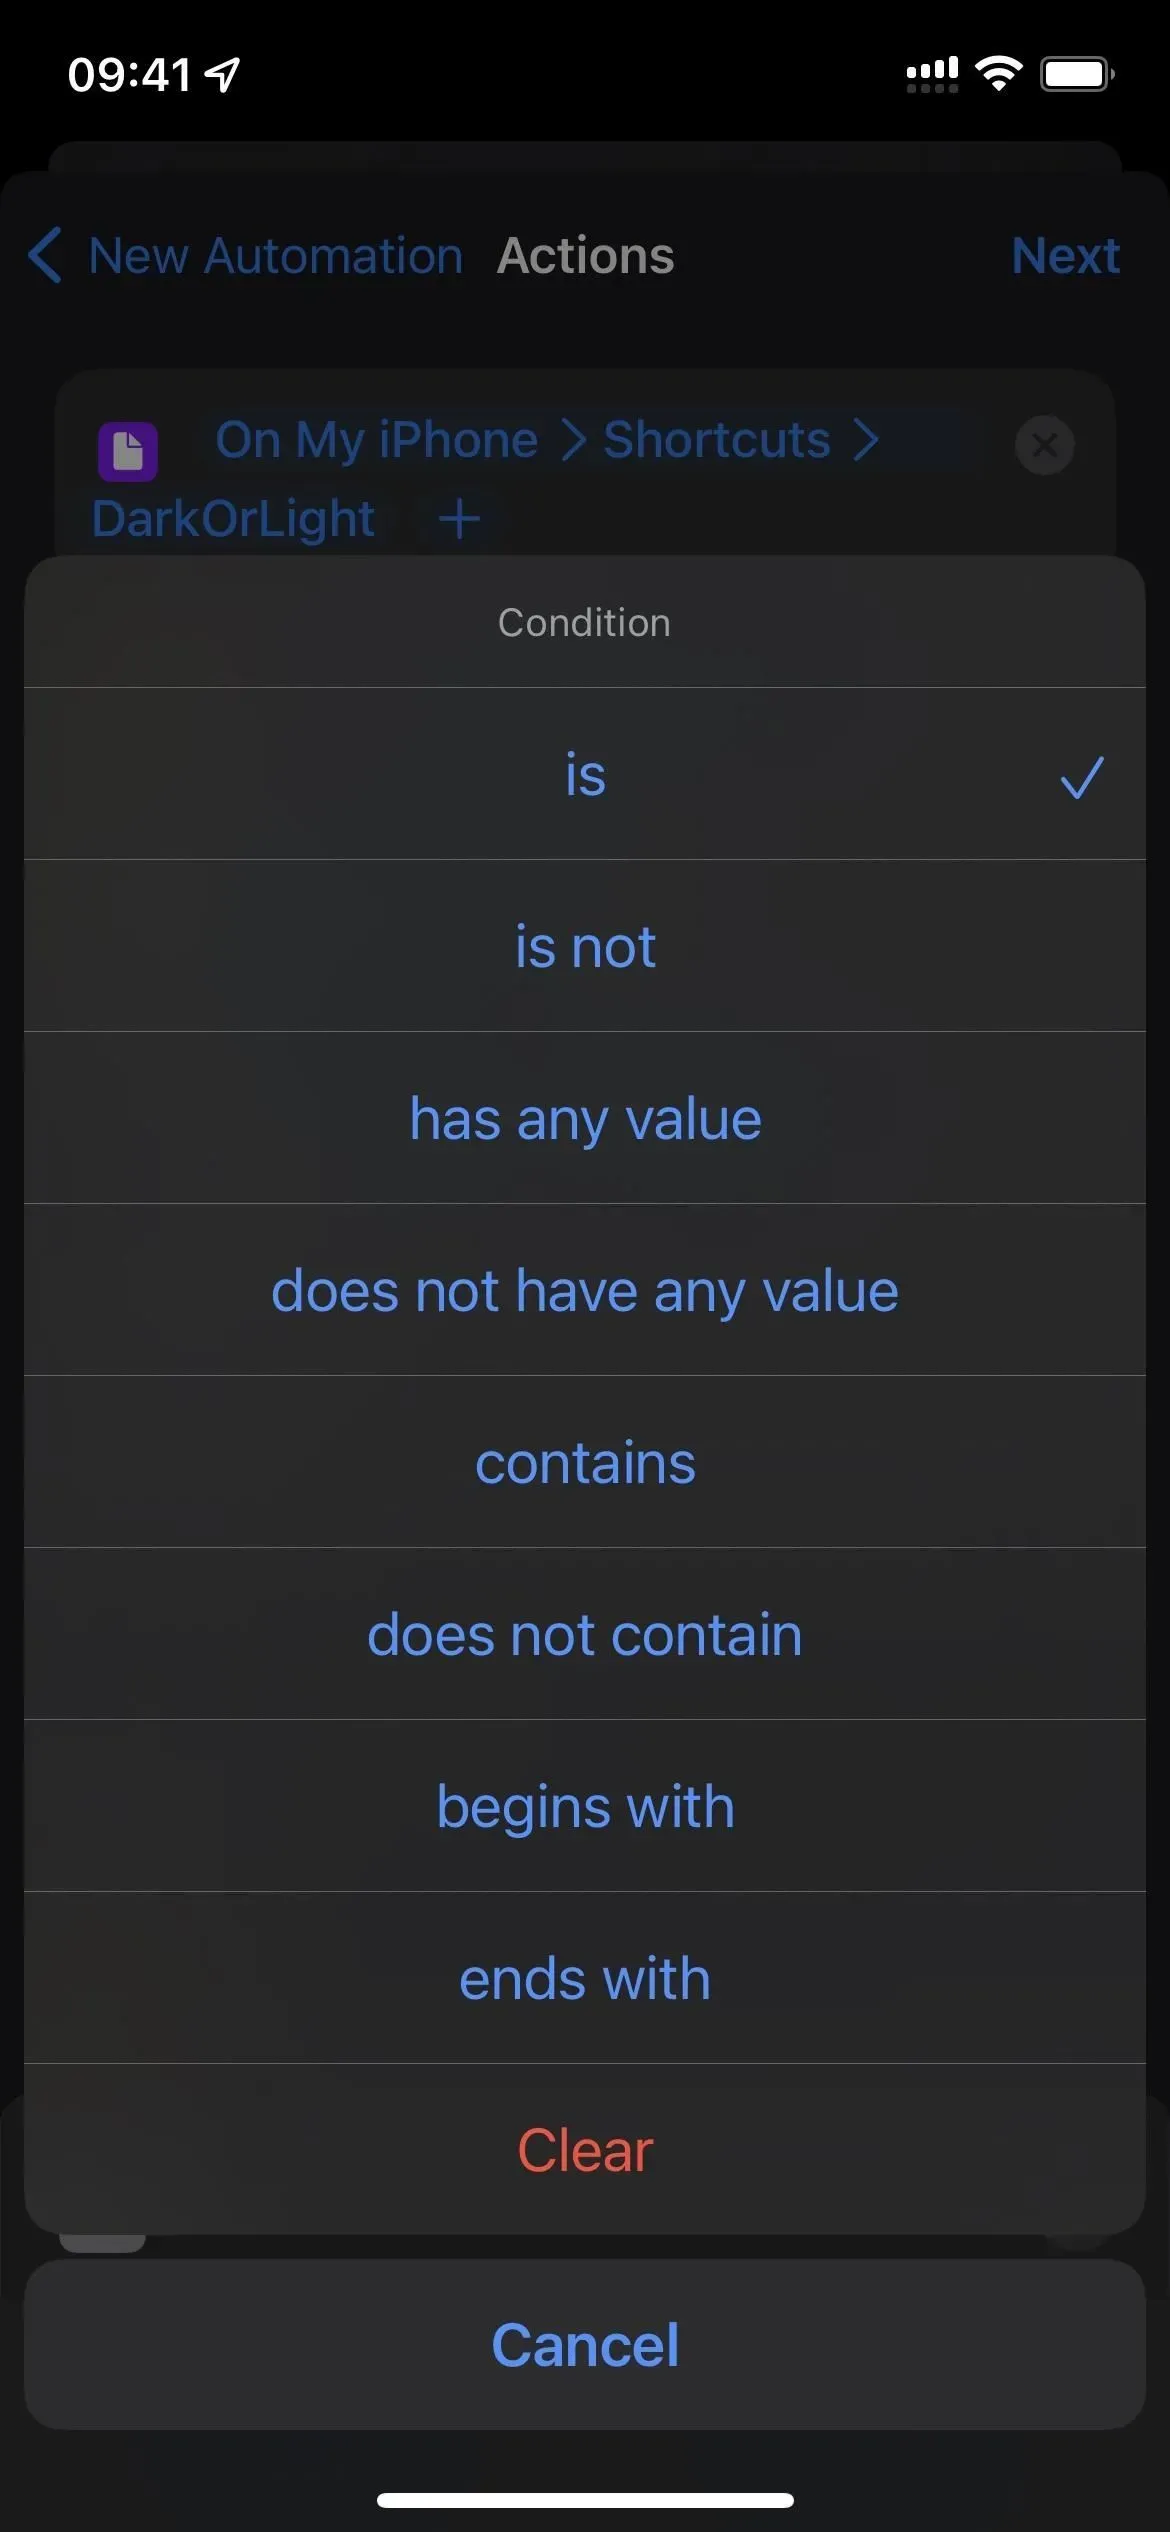
- Click “Condition”in the “If”action field.
- Select “yes”from the menu.
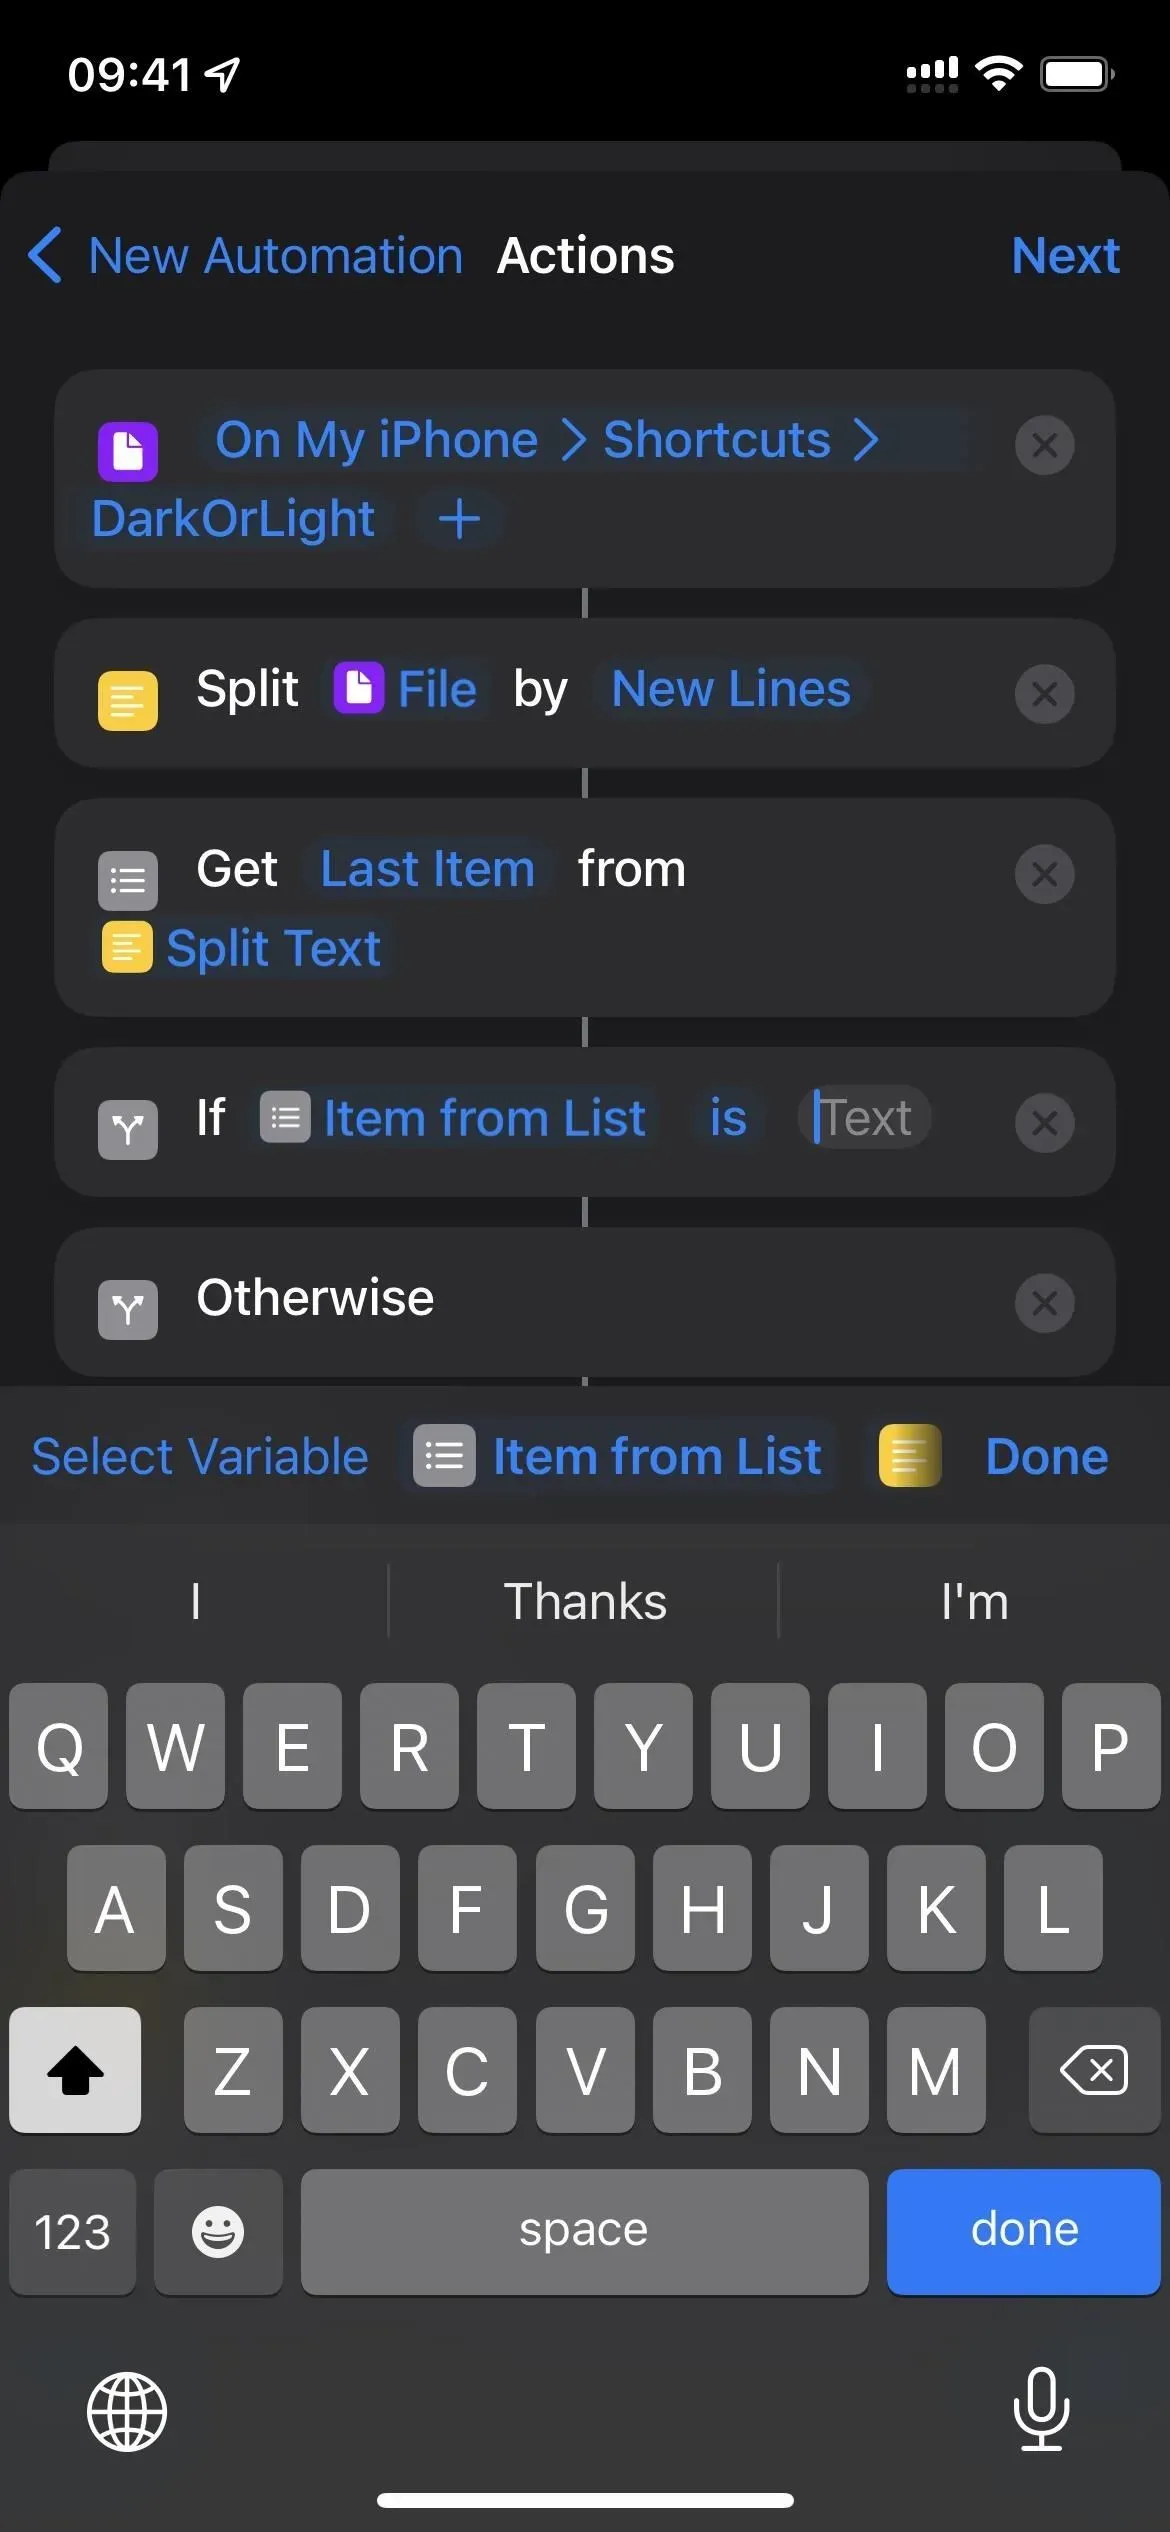
- Click “Text”in the same action box.
- Enter “Dark Mode”and press “Done”on your keyboard.
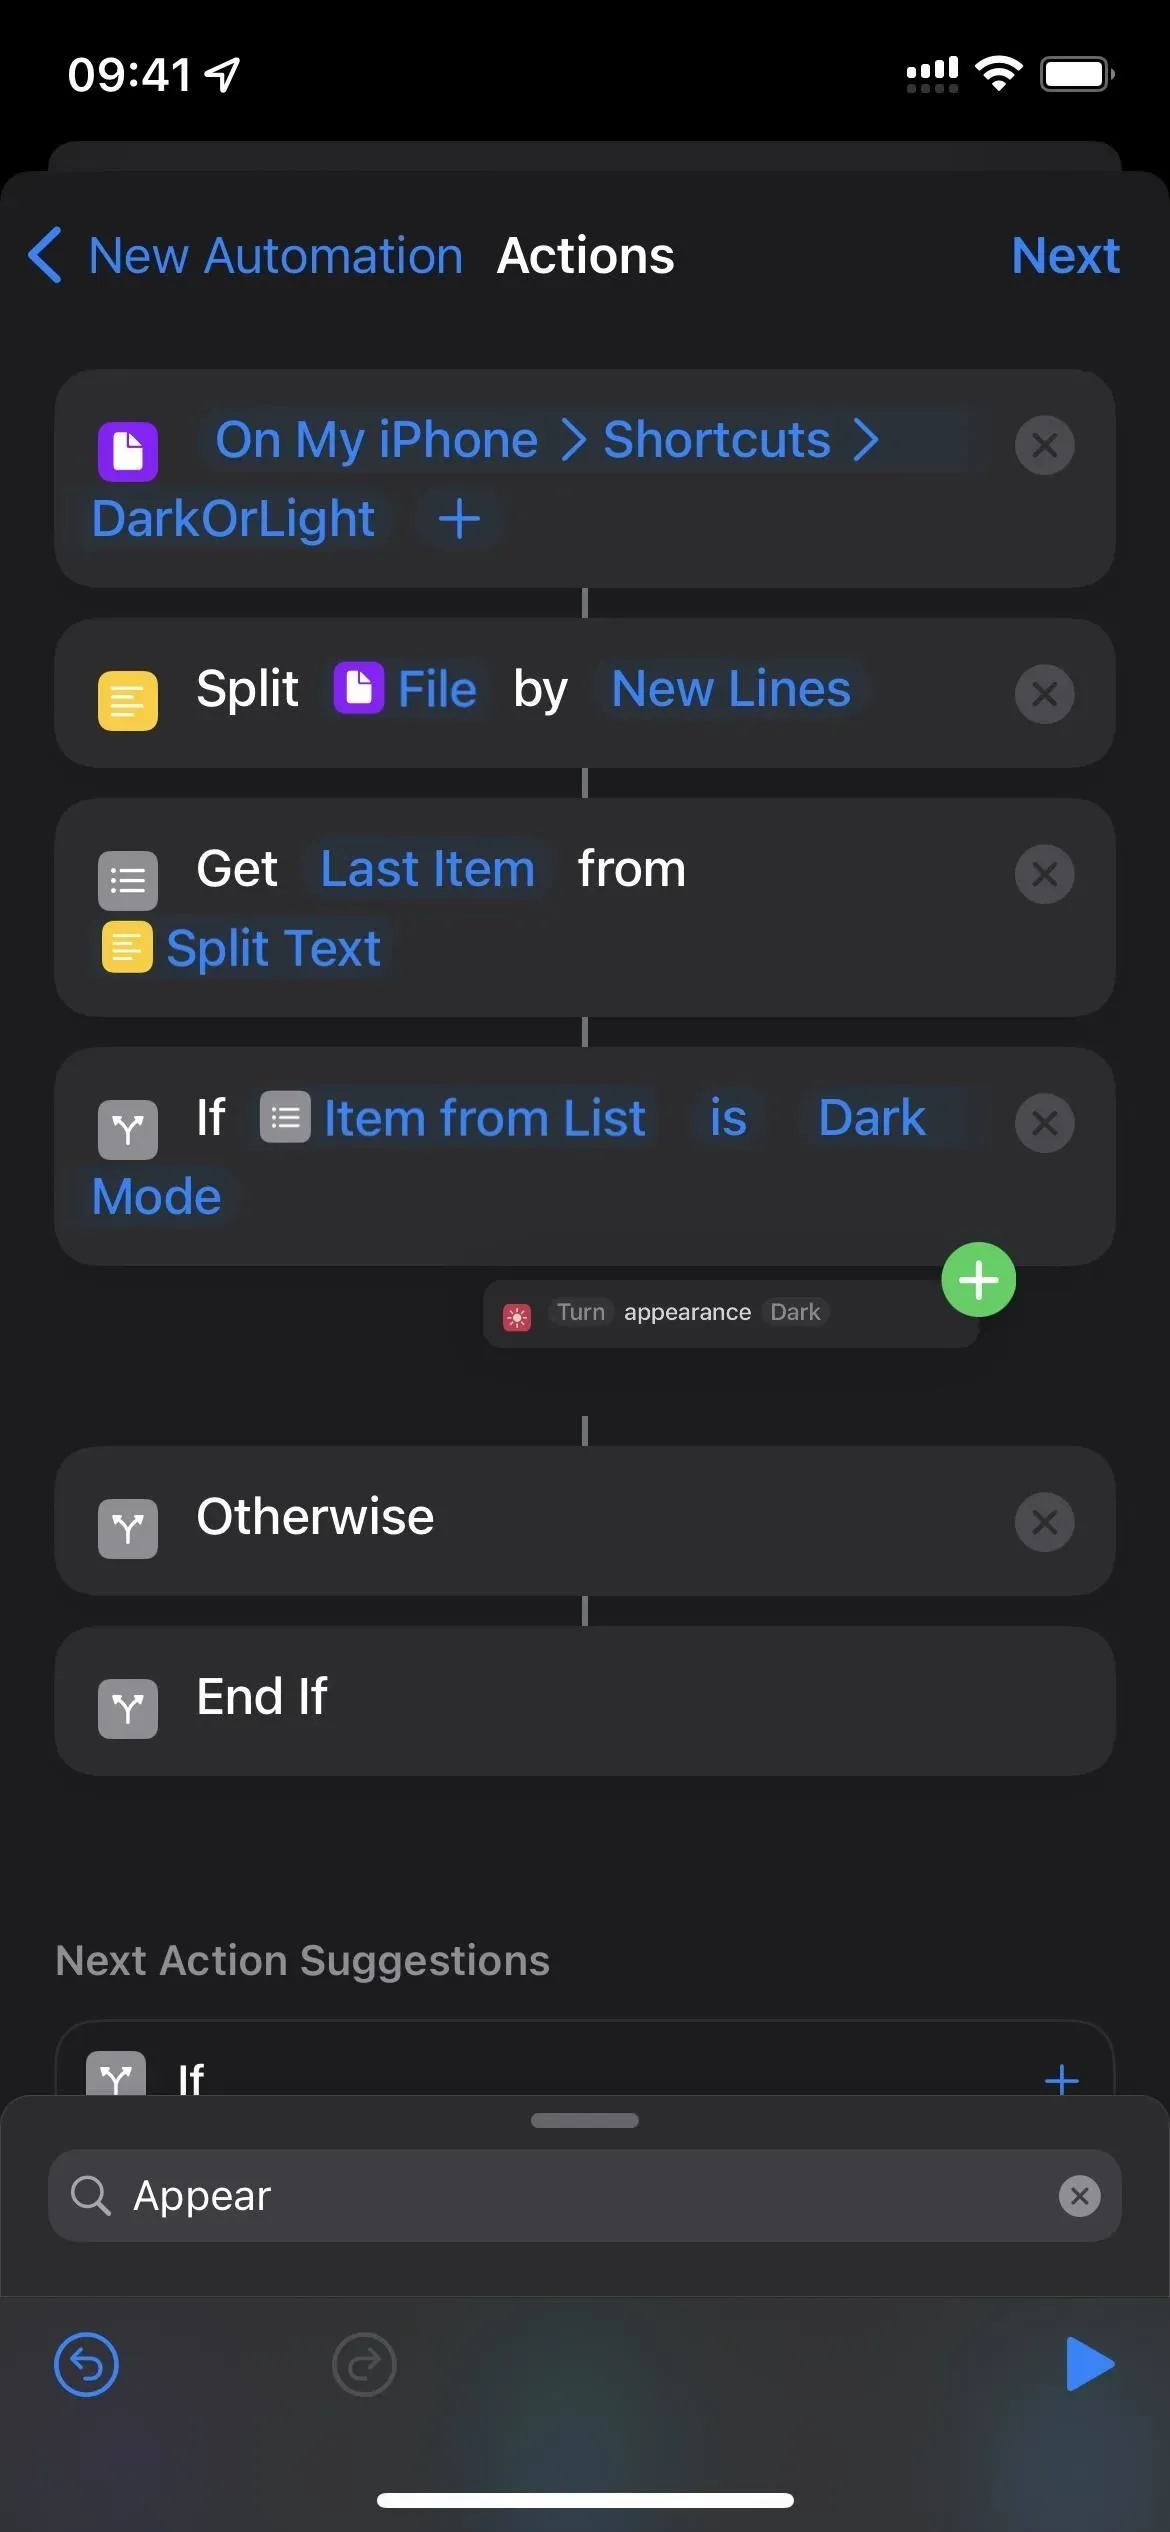
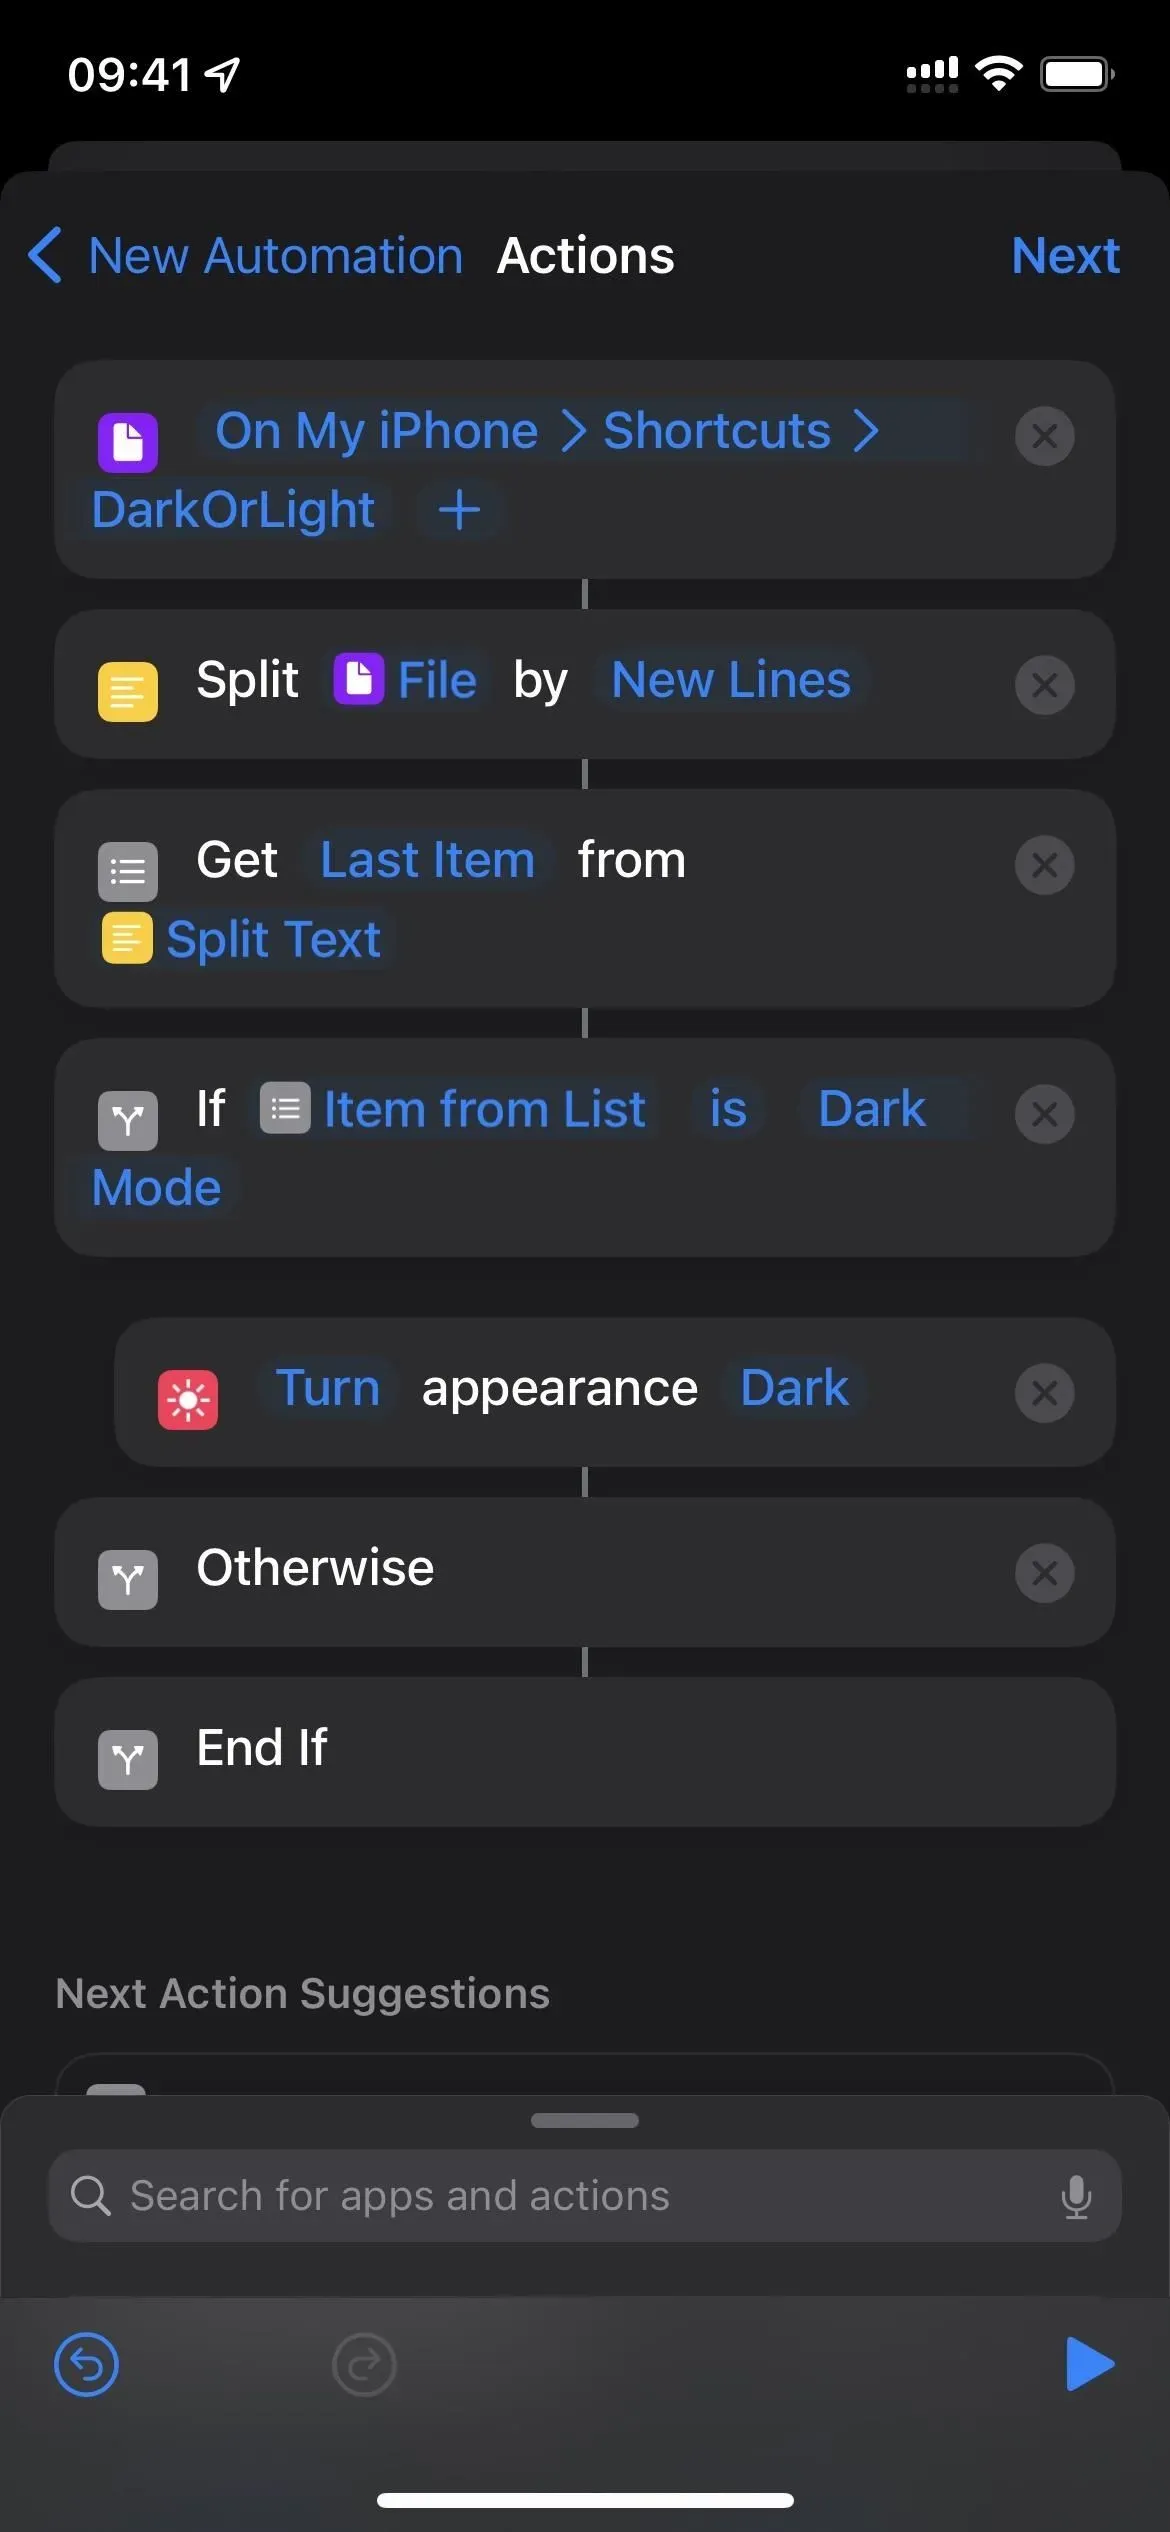
- Drag the Set Appearance action right after the If action field.
- Drag another Set Appearance action right after the Otherwise field.
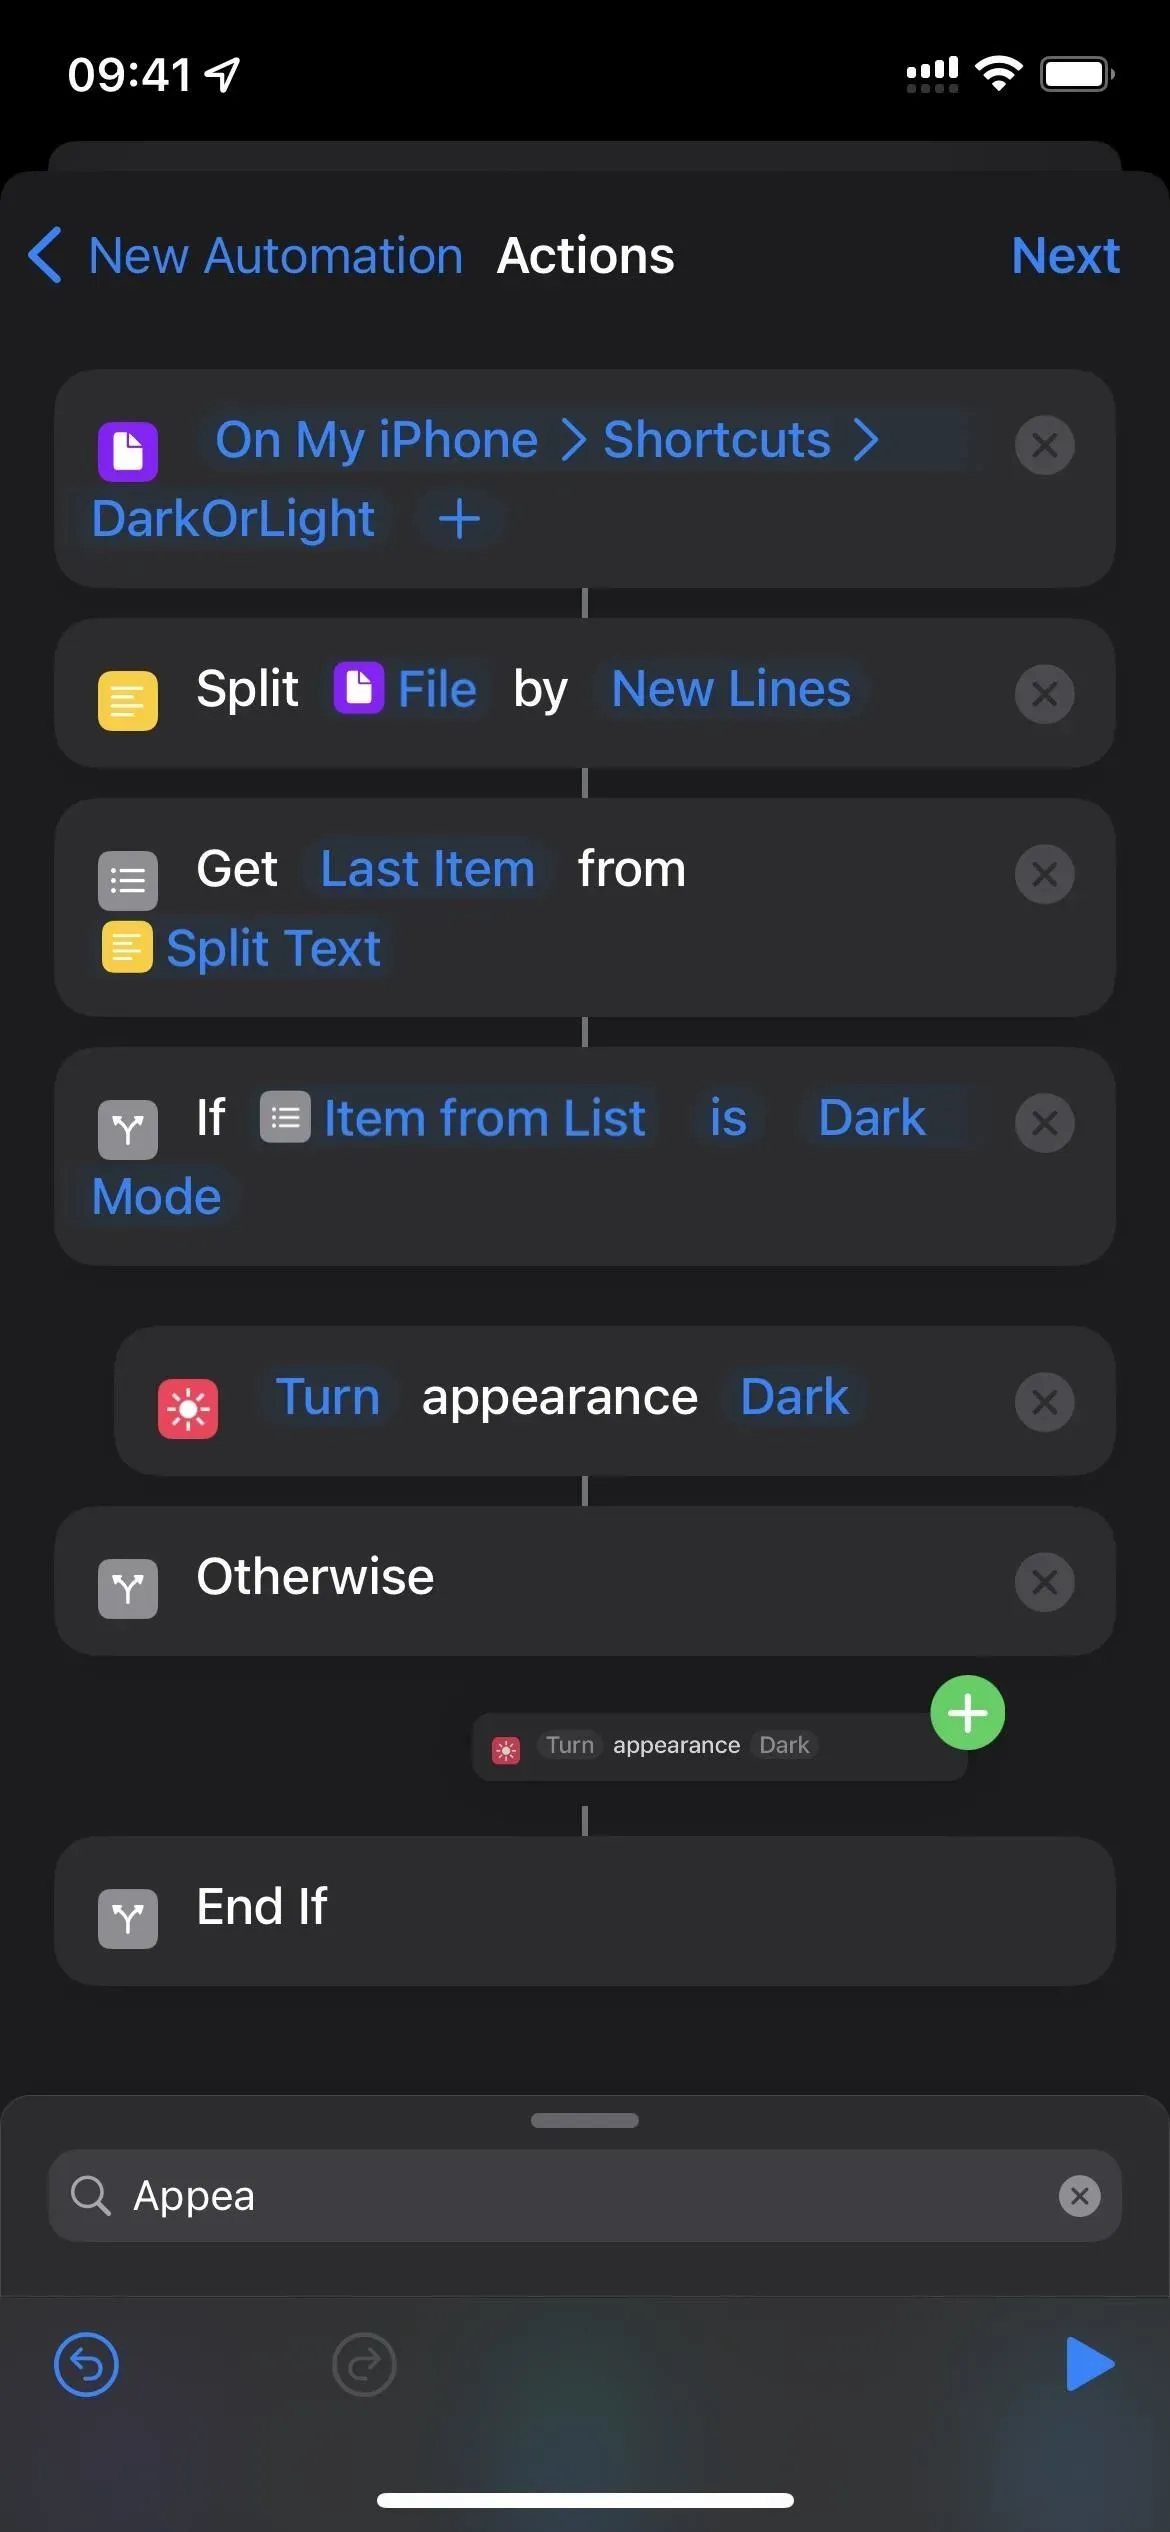
- Click “Dark”in the second “Set Appearance”action box and select “Light”.
- Click “Next”to continue.
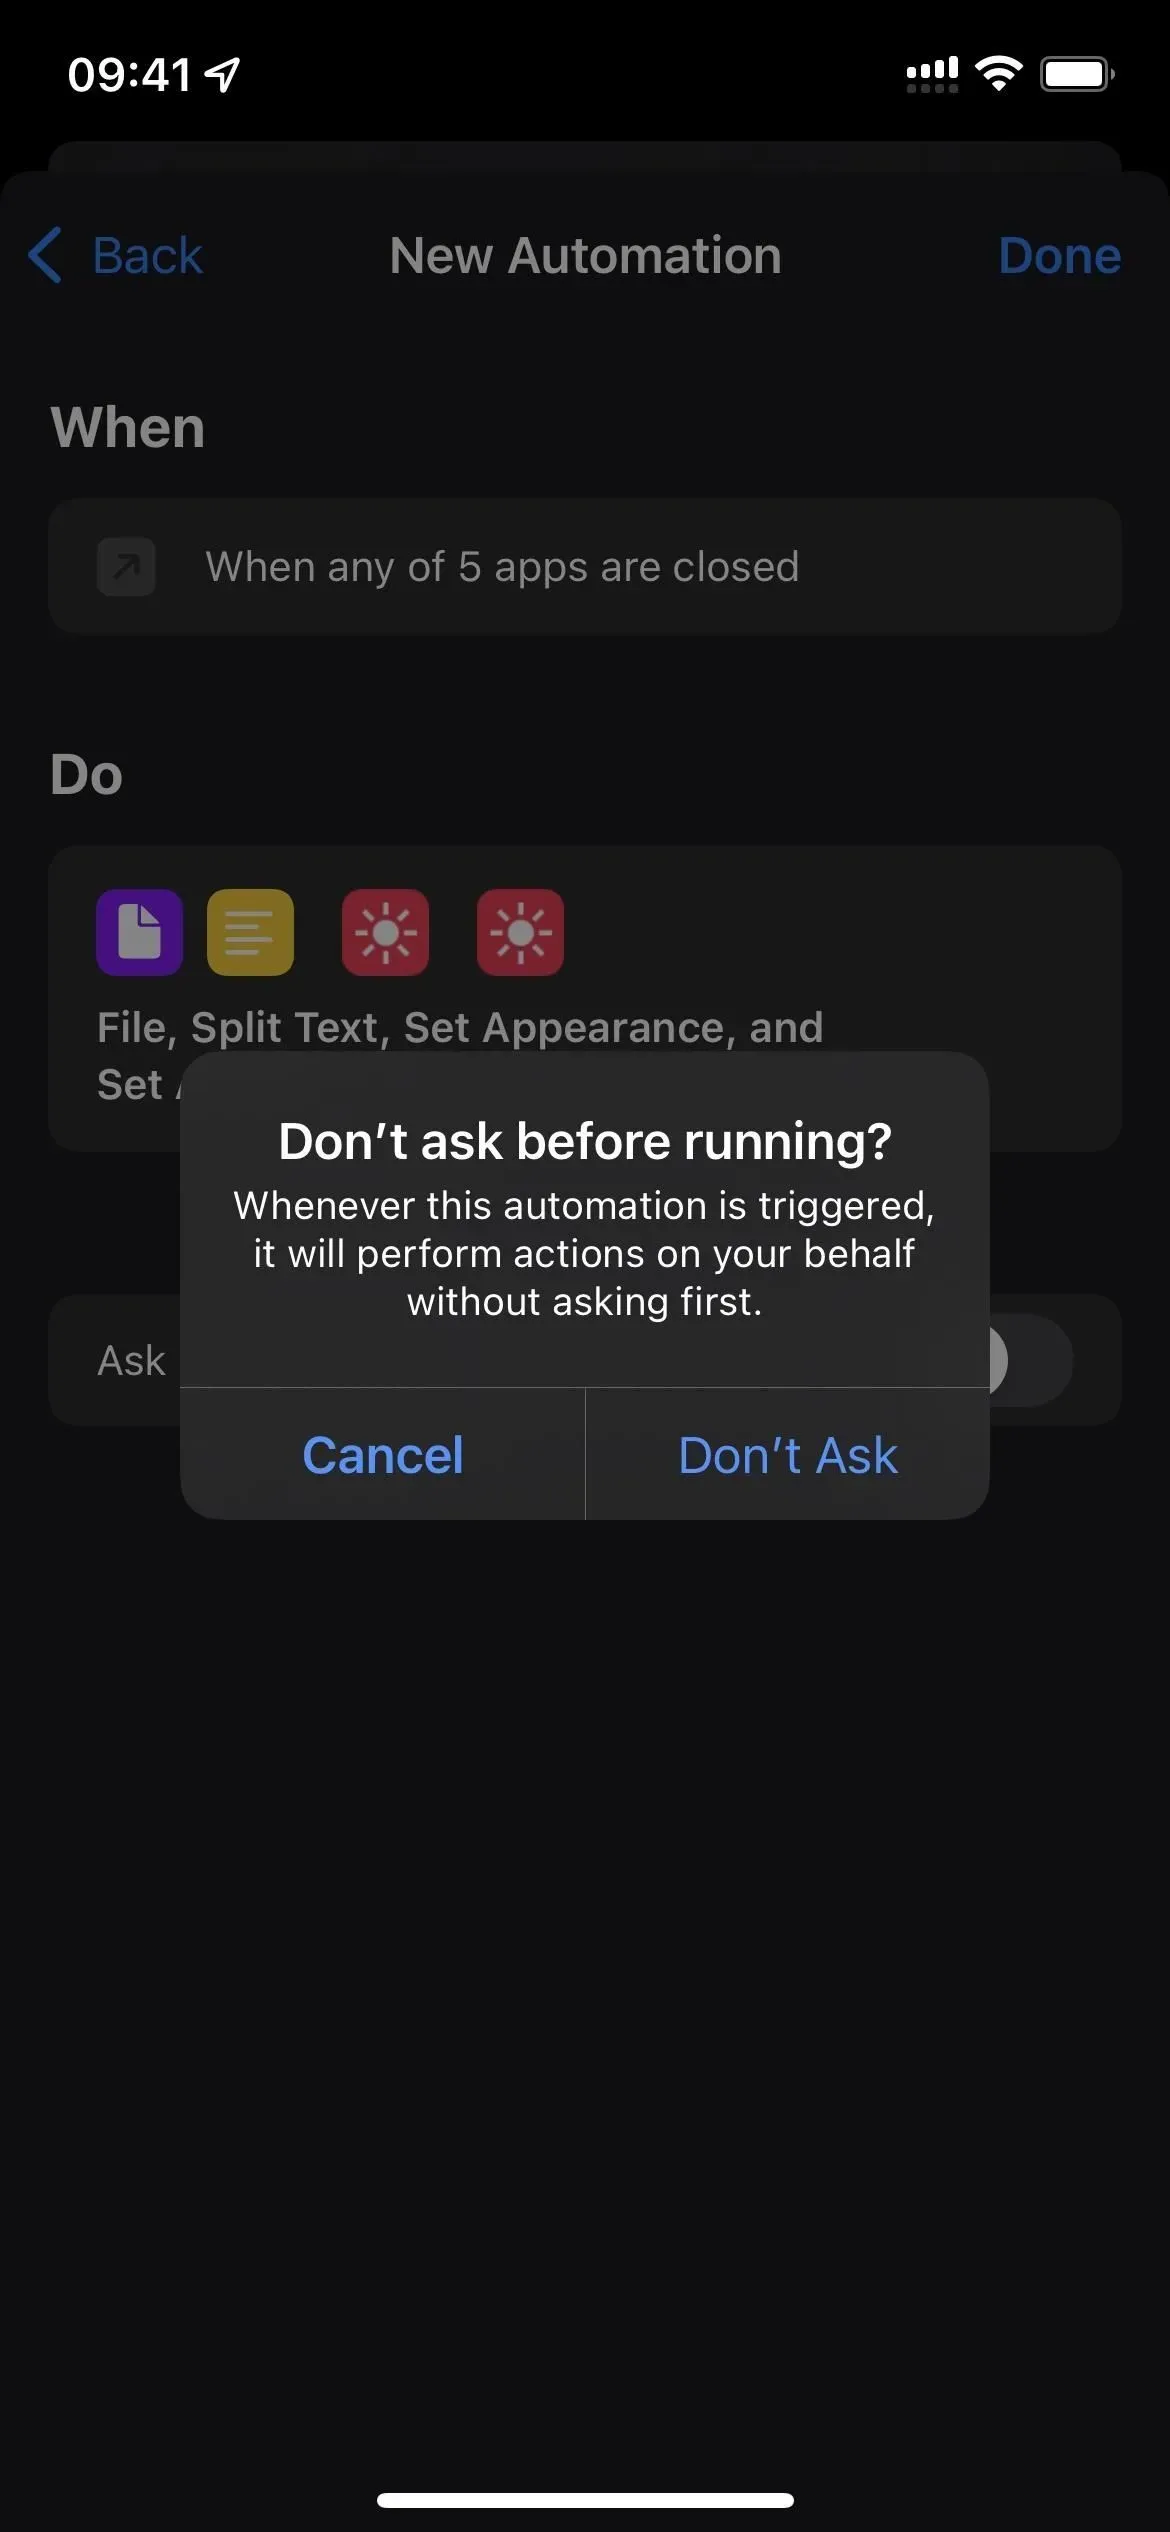
- Disable “Ask before launch”and confirm by clicking “Don’t ask”.
- Click “Done”to finish.
- Optional: If you create separate automations to enable dark mode and light mode for different apps when you open them, you will need to repeat the whole process to work with a different look.
And that’s all there is to it. Now, every time you open one of your selected apps, they turn on dark mode or light mode, depending on what you set up when you first automate. Whenever you close one of the installed apps, iOS reverts to the previously recorded appearance.
Option 3: Create a simple automation to assign appearance to applications
If option 2 above is too complicated, there is an easier way to give applications a specific look and feel, but there are downsides as well, namely:
- When you exit the app, the look you were using before you opened the app is not returned. If the application has an internal override, it’s wise to use that instead.
- A system-wide dark or light mode won’t make much of a difference if you customize the look and feel of all your apps, and it might even confuse you.
If everything is in order, you can create a simpler automation that turns on dark or light mode for all the applications you choose. This way, whenever the assigned app is opened, either dark mode or light mode will be activated regardless of the current system-wide appearance—even if system-wide mode is running on schedule.
If you need more control, you can set up another automation for the opposite look and feel you set up first. So if you just set up the app list in dark mode, set up the app list in light mode as well. Then make sure you set all apps on your iPhone to one or the other. Whenever you close or switch to another app other than the home screen, the next app should switch or keep the current look depending on how it’s configured. There are also disadvantages to this:
- You can’t select “Home”from the list of apps, so the last app you were in will always be displayed.
- If you set all your apps to run in dark mode or light mode, scheduling a system-wide dark mode for the evening (or whenever) is pointless.
- If you want to change the app’s appearance at any given moment, you’ll have to turn dark mode on or off manually.
If it still sounds ok, here are the instructions:
- Open the Shortcuts app.
- Launch a new personal automation from the Automation tab.
- Select “Application”as the trigger.

- Click “Select”next to “Application”.
- Check all the required applications and click Finish.
- Make sure the checkbox is “Open”and not “Closed”.
- Click “Next”to continue.


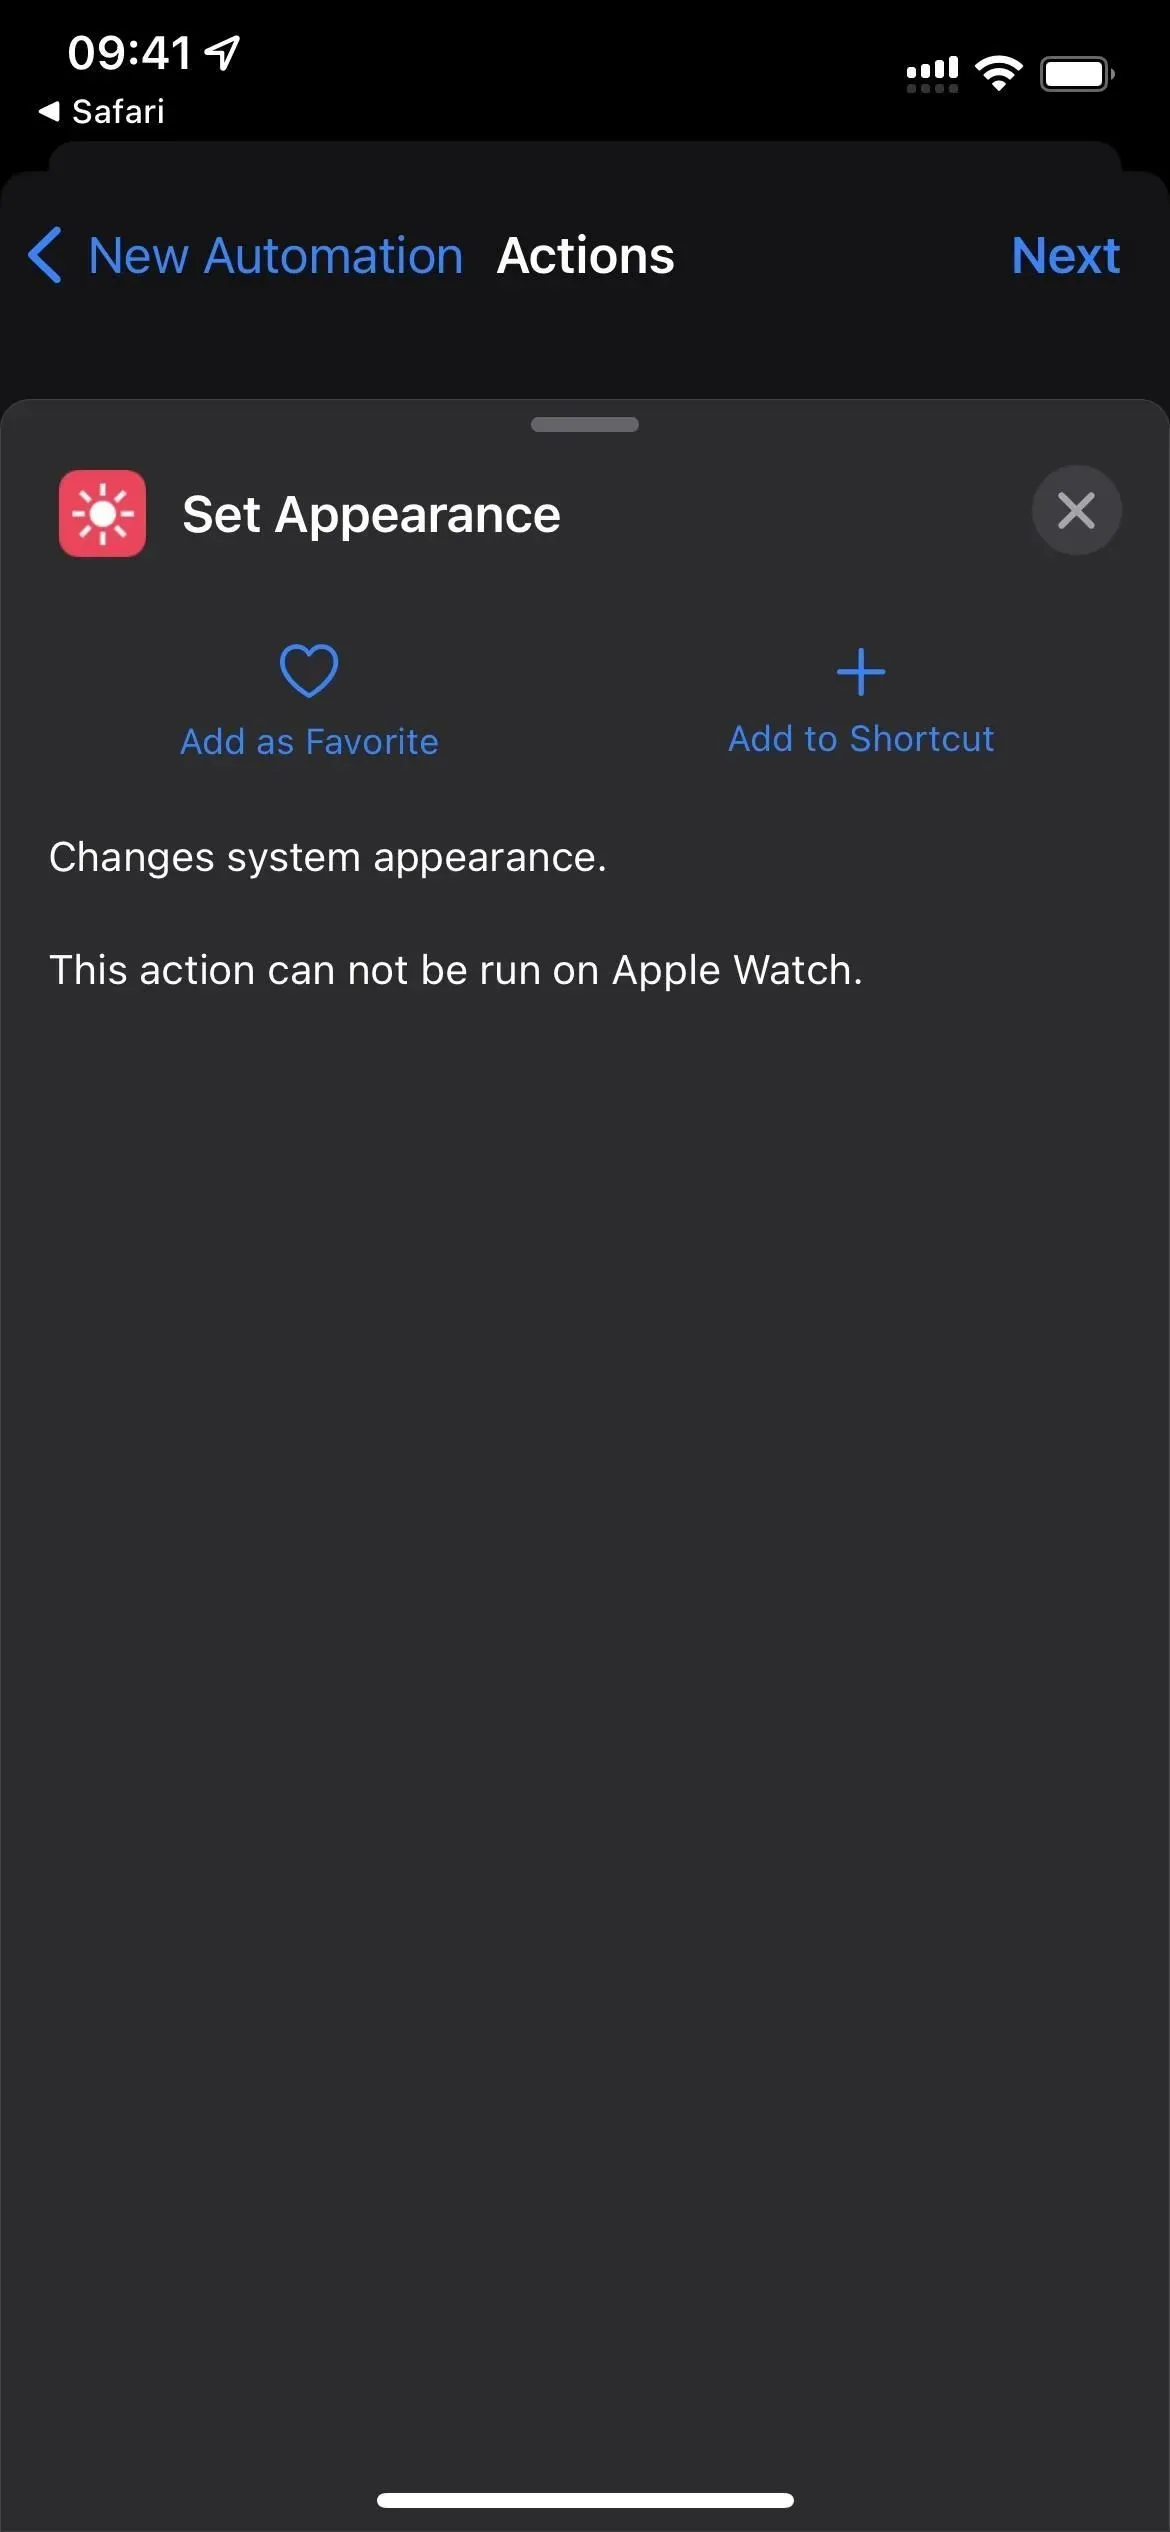
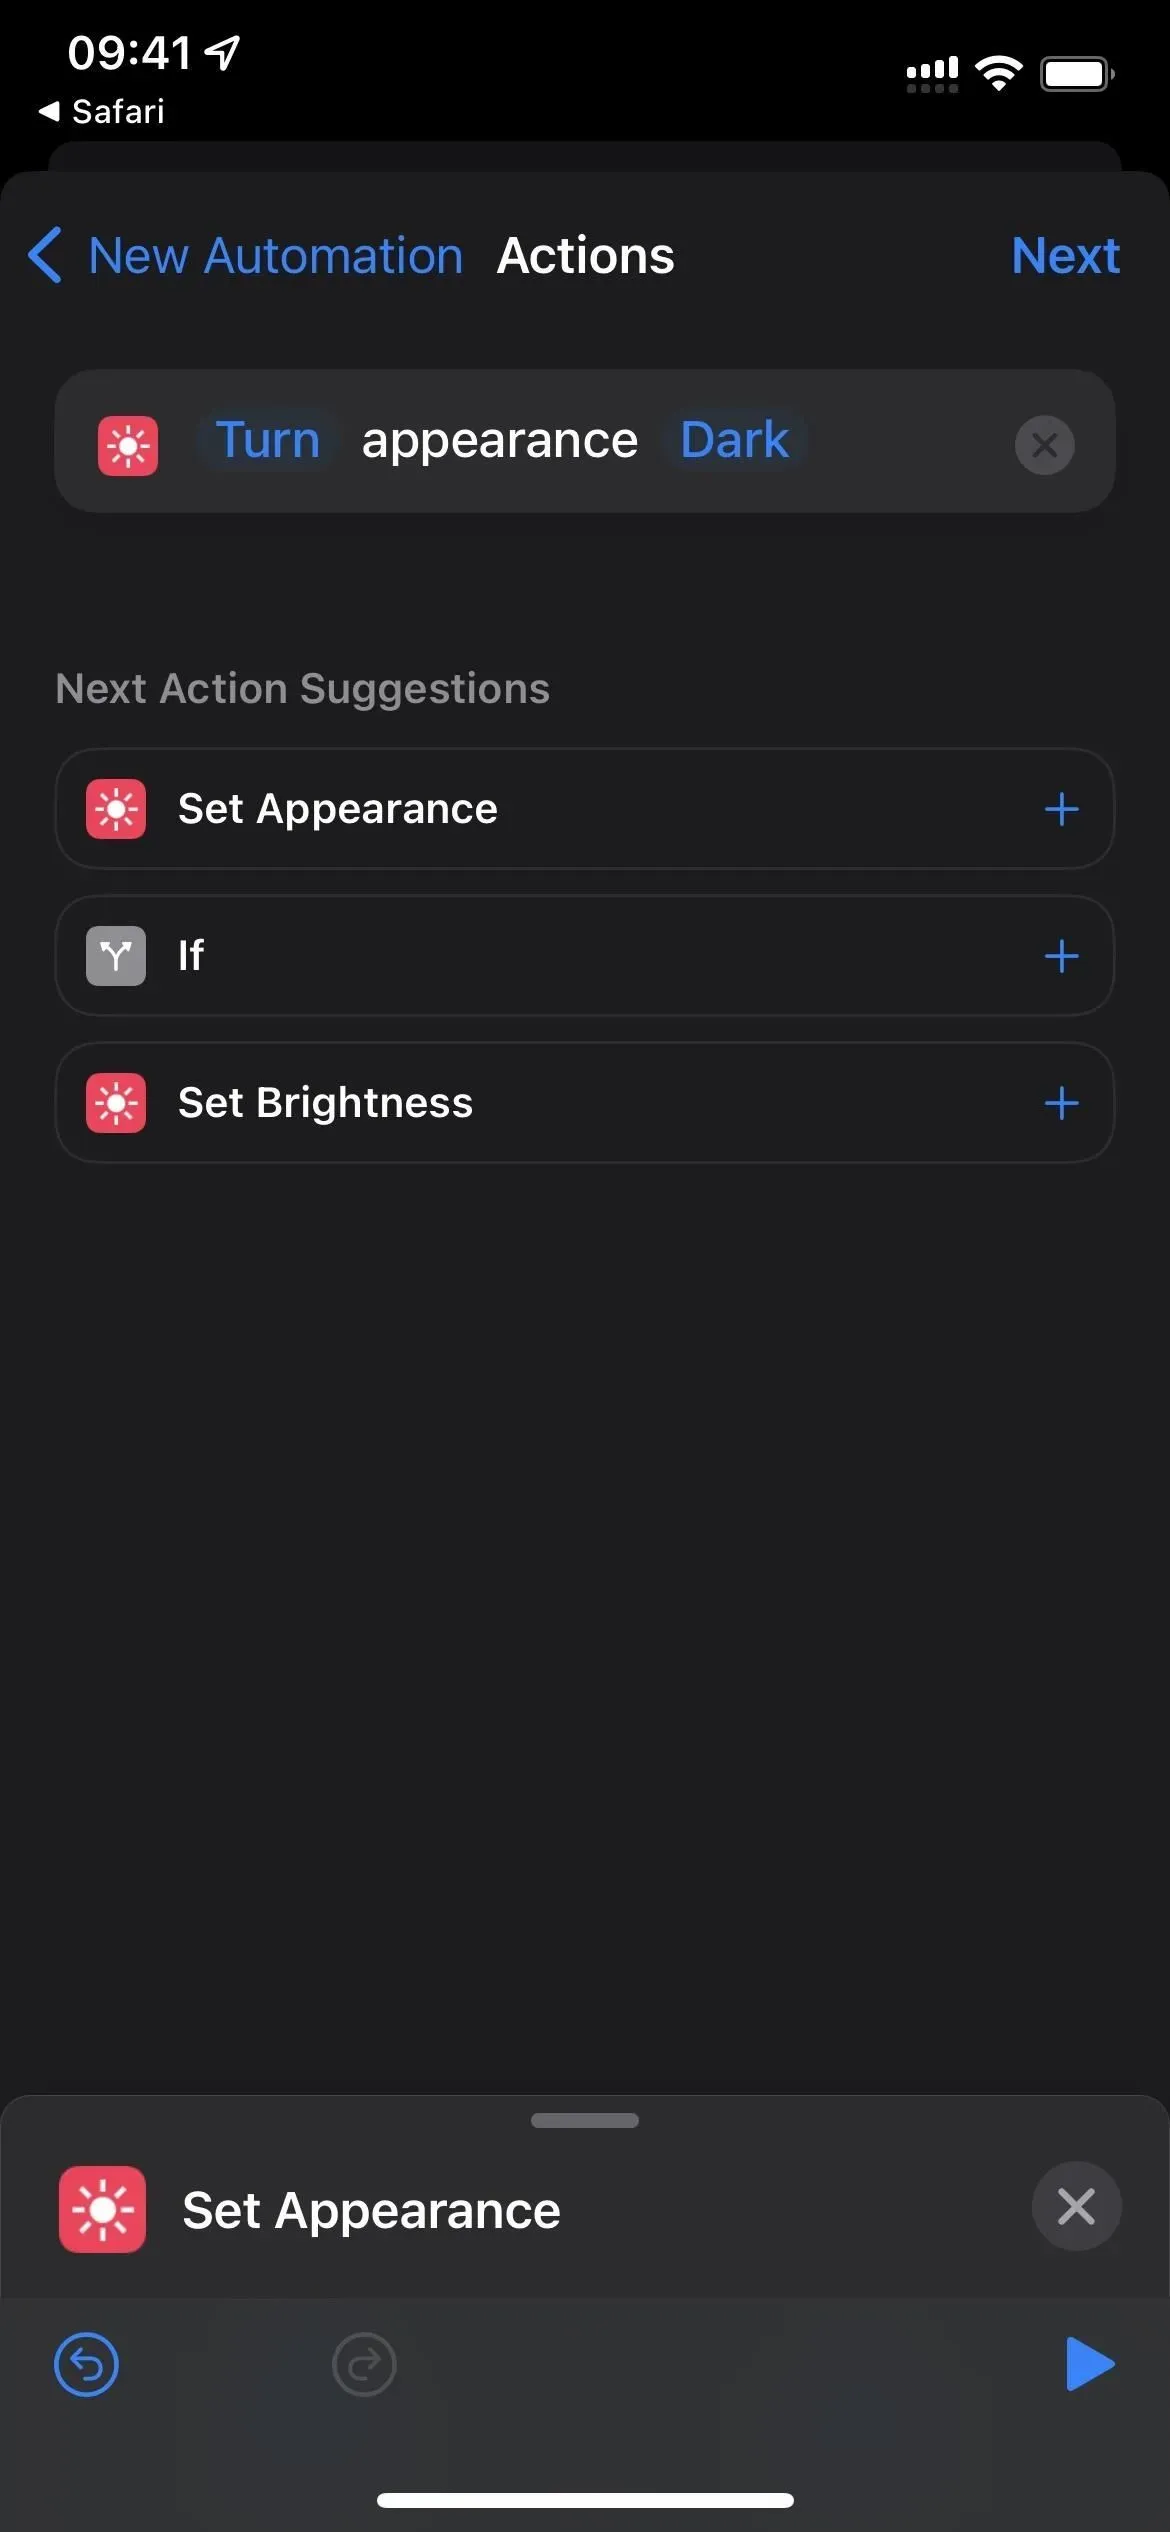
- Add a Set Appearance action.
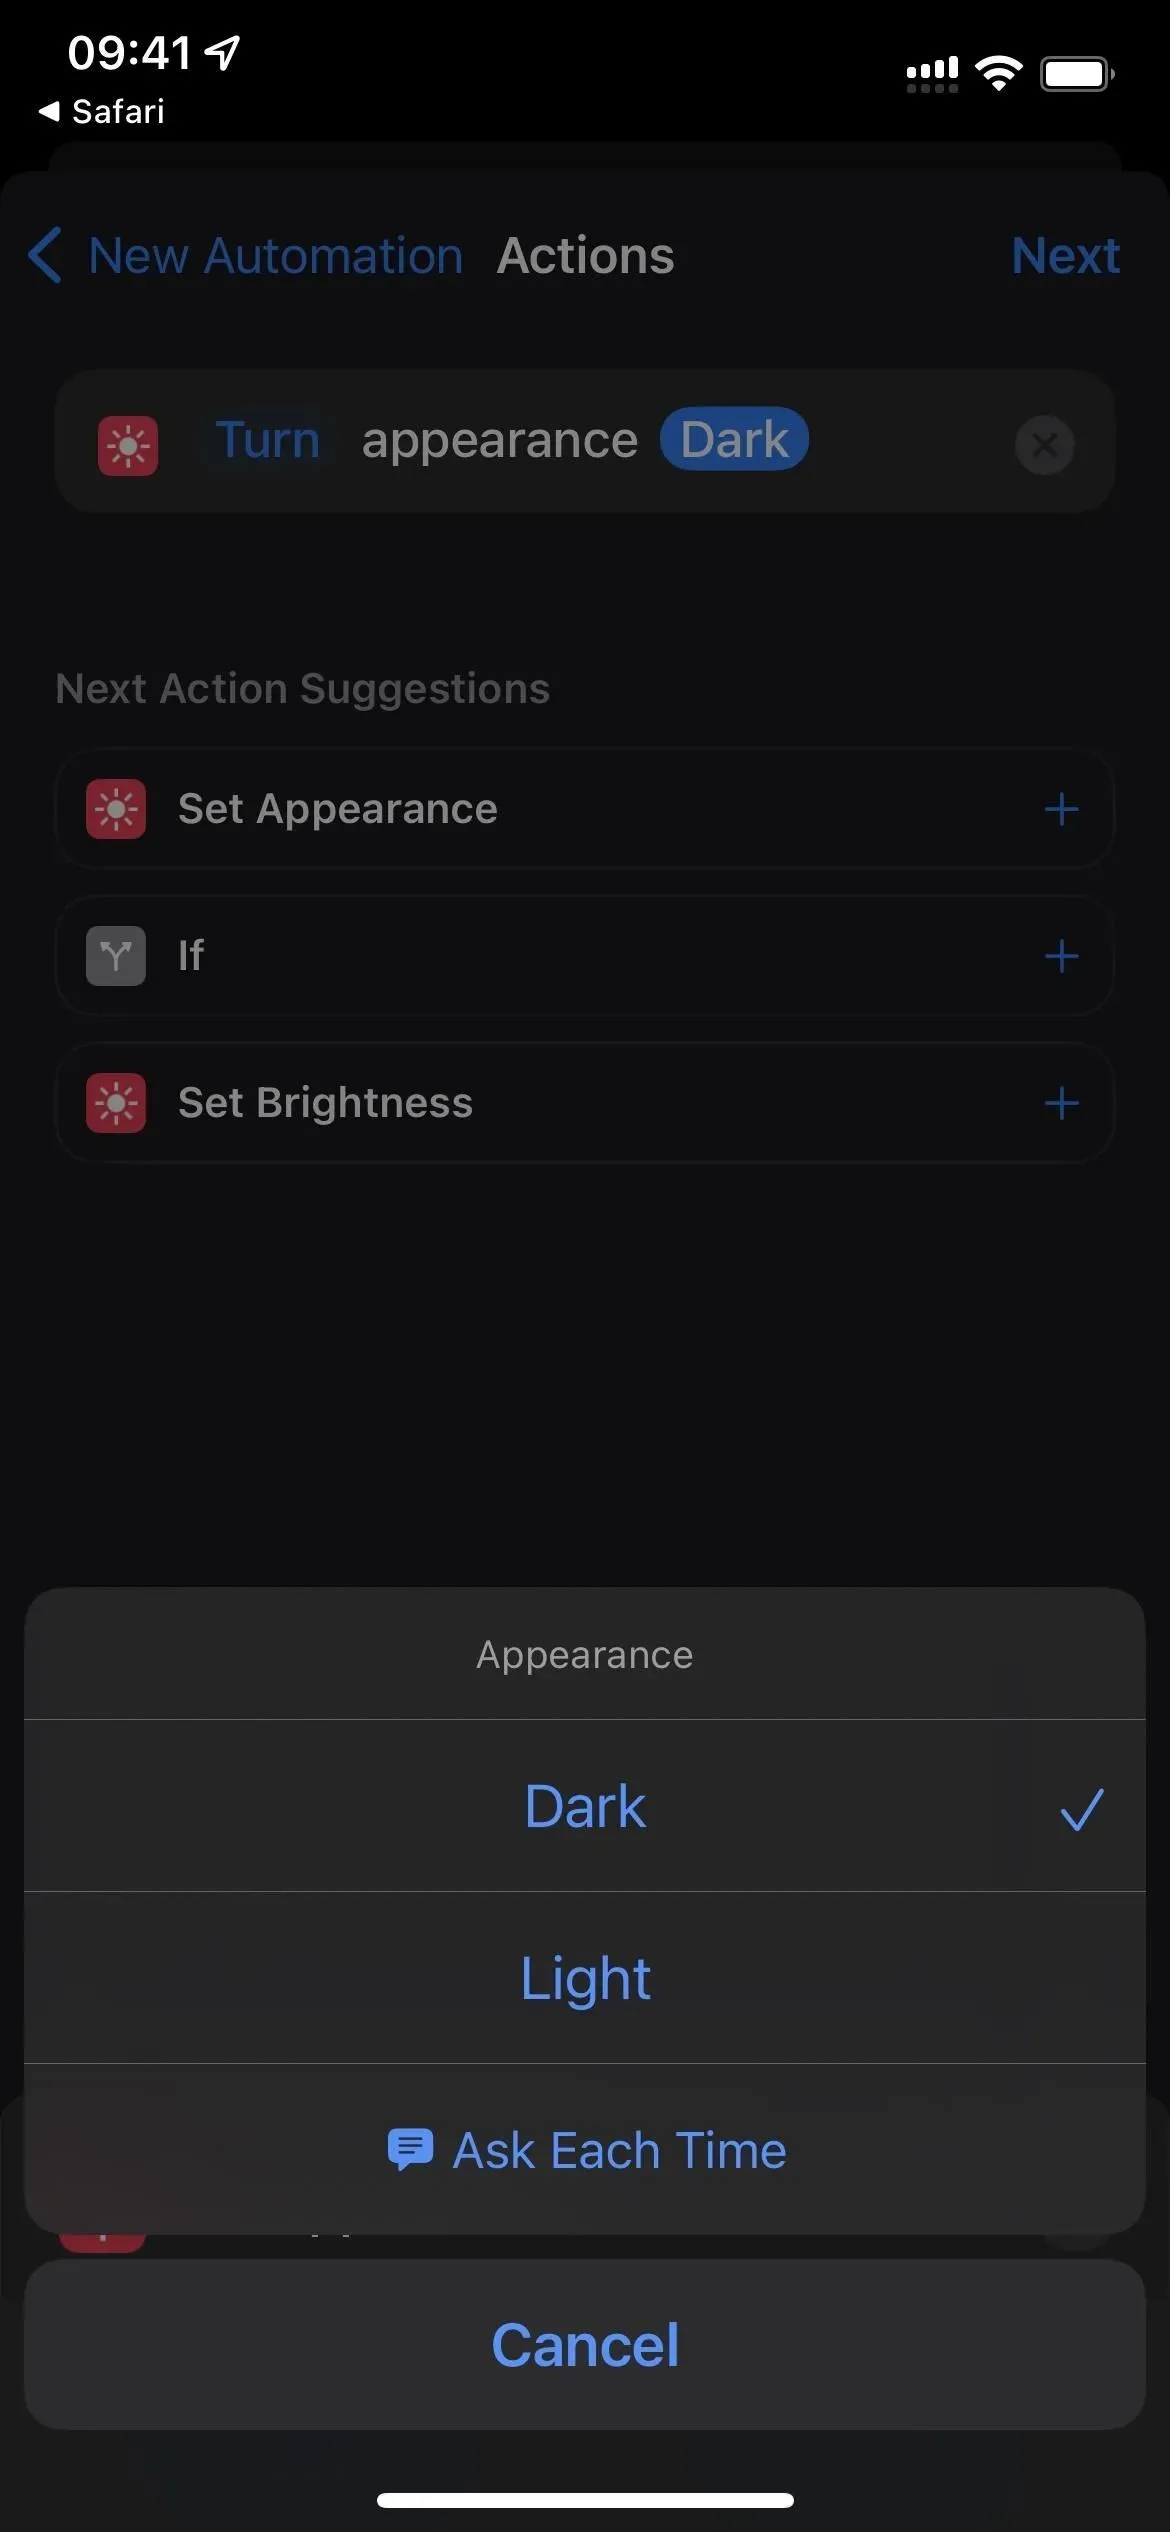
- Skip this part if you want apps to use dark mode. Otherwise, click “Dark”in the action field and select “Light”.
- Click “Next”to continue.
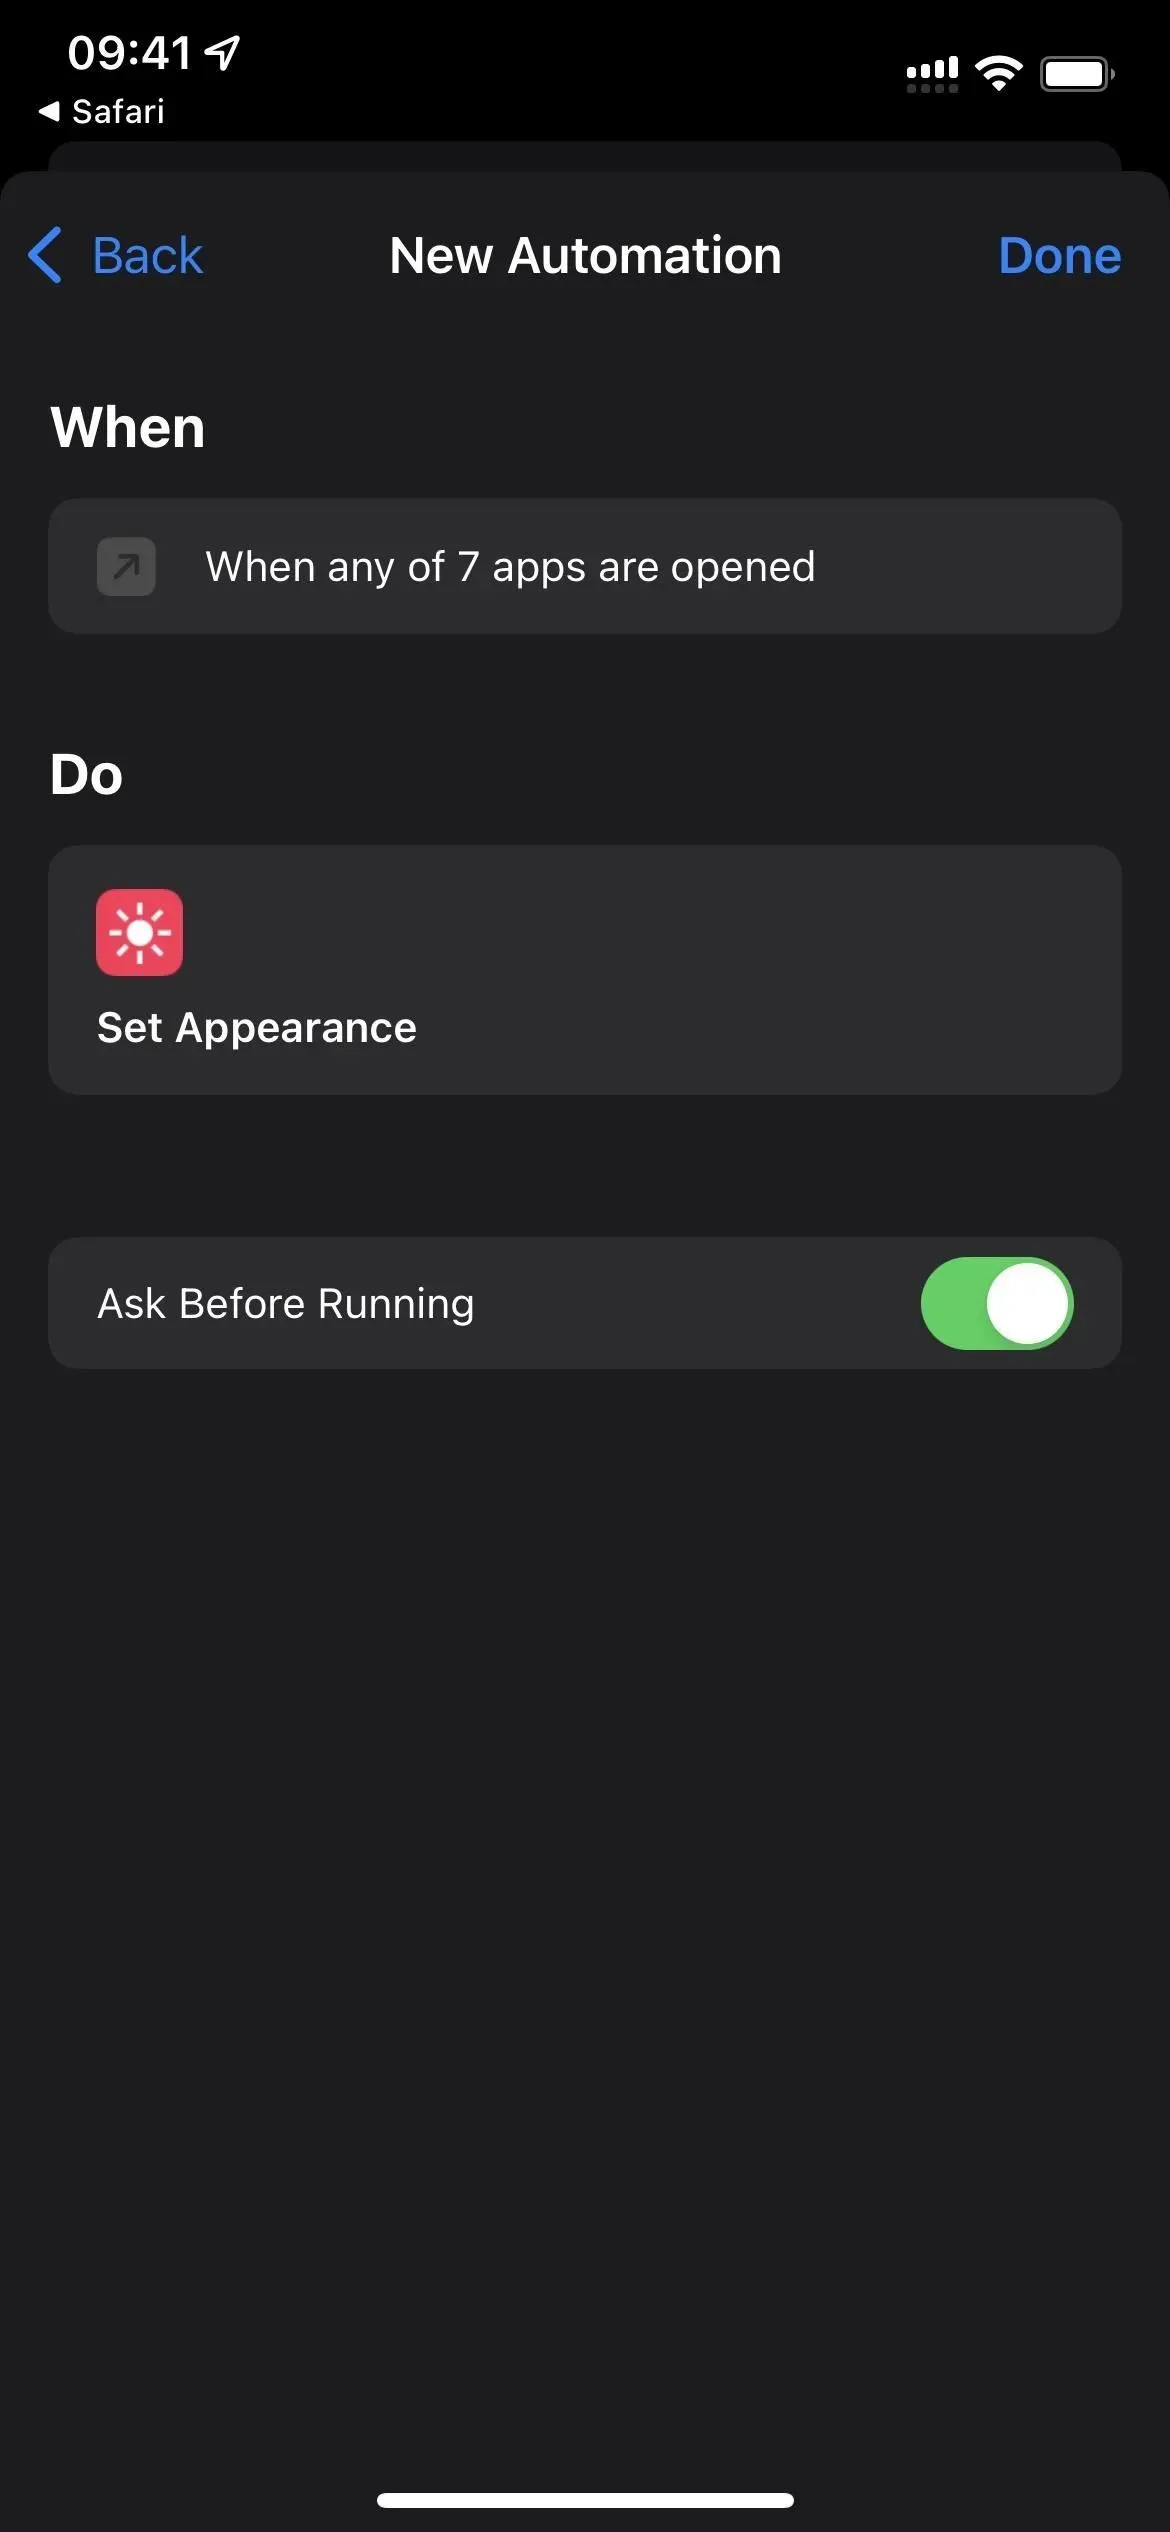
- Disable “Ask before launch”and confirm by clicking “Don’t ask”.
- Click “Done”to finish.
- Optional: Create the same automation again but with the opposite look and feel you just set up and assign the apps you want to it. Alternatively, you can create another automation that prompts you to select “Dark Mode”or “Light Mode”whenever you close the assigned app to make sure it’s always what you want. But if you’re doing all that work, it might be better to just use option 2 above so that it remembers your system-wide selection fully automatically.