

iCloud stores your notes and syncs them wirelessly with all your Apple devices. As a result, the note you create in the Notes app on your iPhone is immediately synced to your other iPhone, iPad, Mac and vice versa.
However, there are situations and some types of notes that you may not want to upload to iCloud and be available everywhere. For example, you might not want to clutter the Notes app on all your devices with some non-essential notes. Or it could be a note with a random shopping list that you only want to have on your iPhone, or a quick sketch that you only want to have on your iPad.
The following describes how to use a local account to take notes on your device. This allows you to keep those notes offline and prevent them from being uploaded to iCloud and synced across all your devices.
How to not upload some notes to iCloud and keep them offline
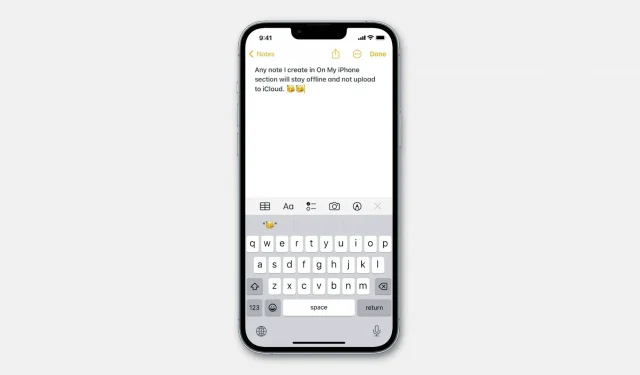
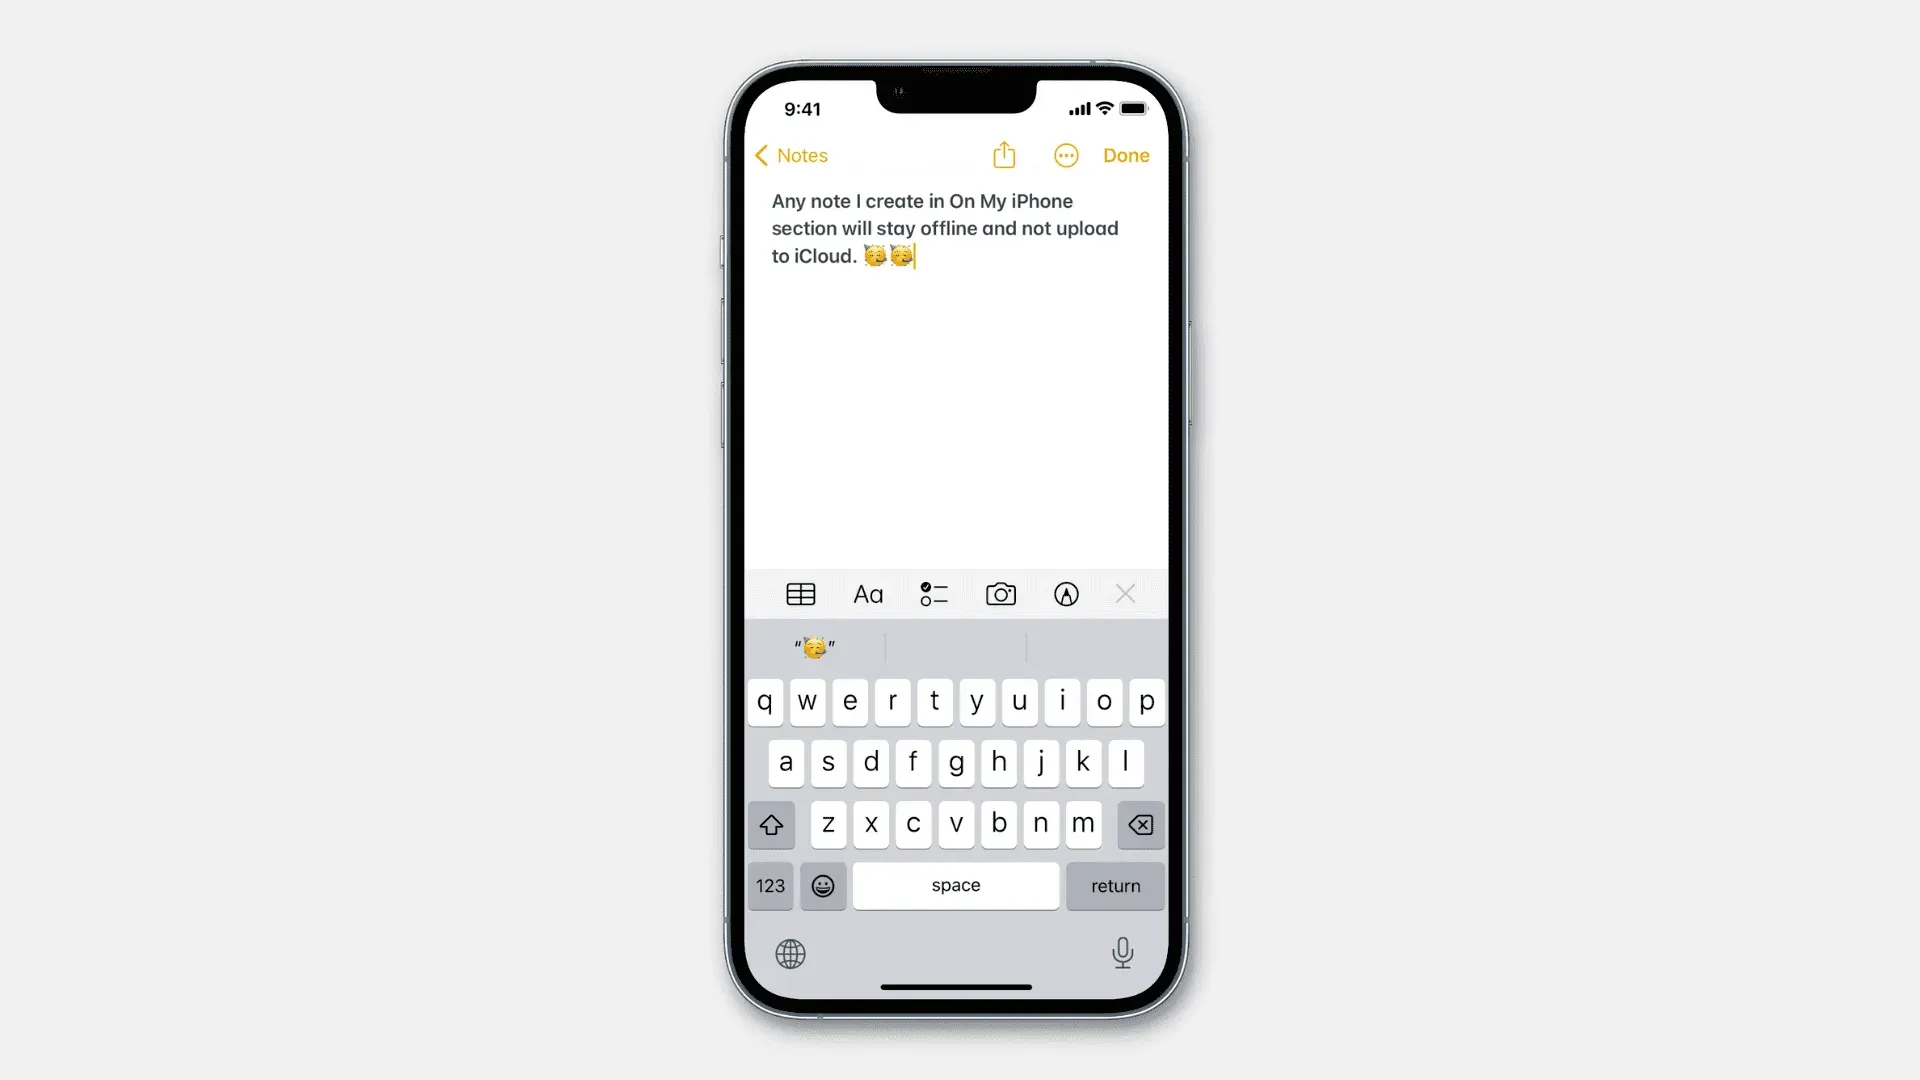
The basics to achieve this are simple. Simply enable the On My iPhone, On My iPad, or On My Mac account on the respective devices. After that, any note you create on those accounts will not sync with your other devices and will only remain on that particular device.
iPhone and iPad
Follow these steps to enable offline notes on iOS:
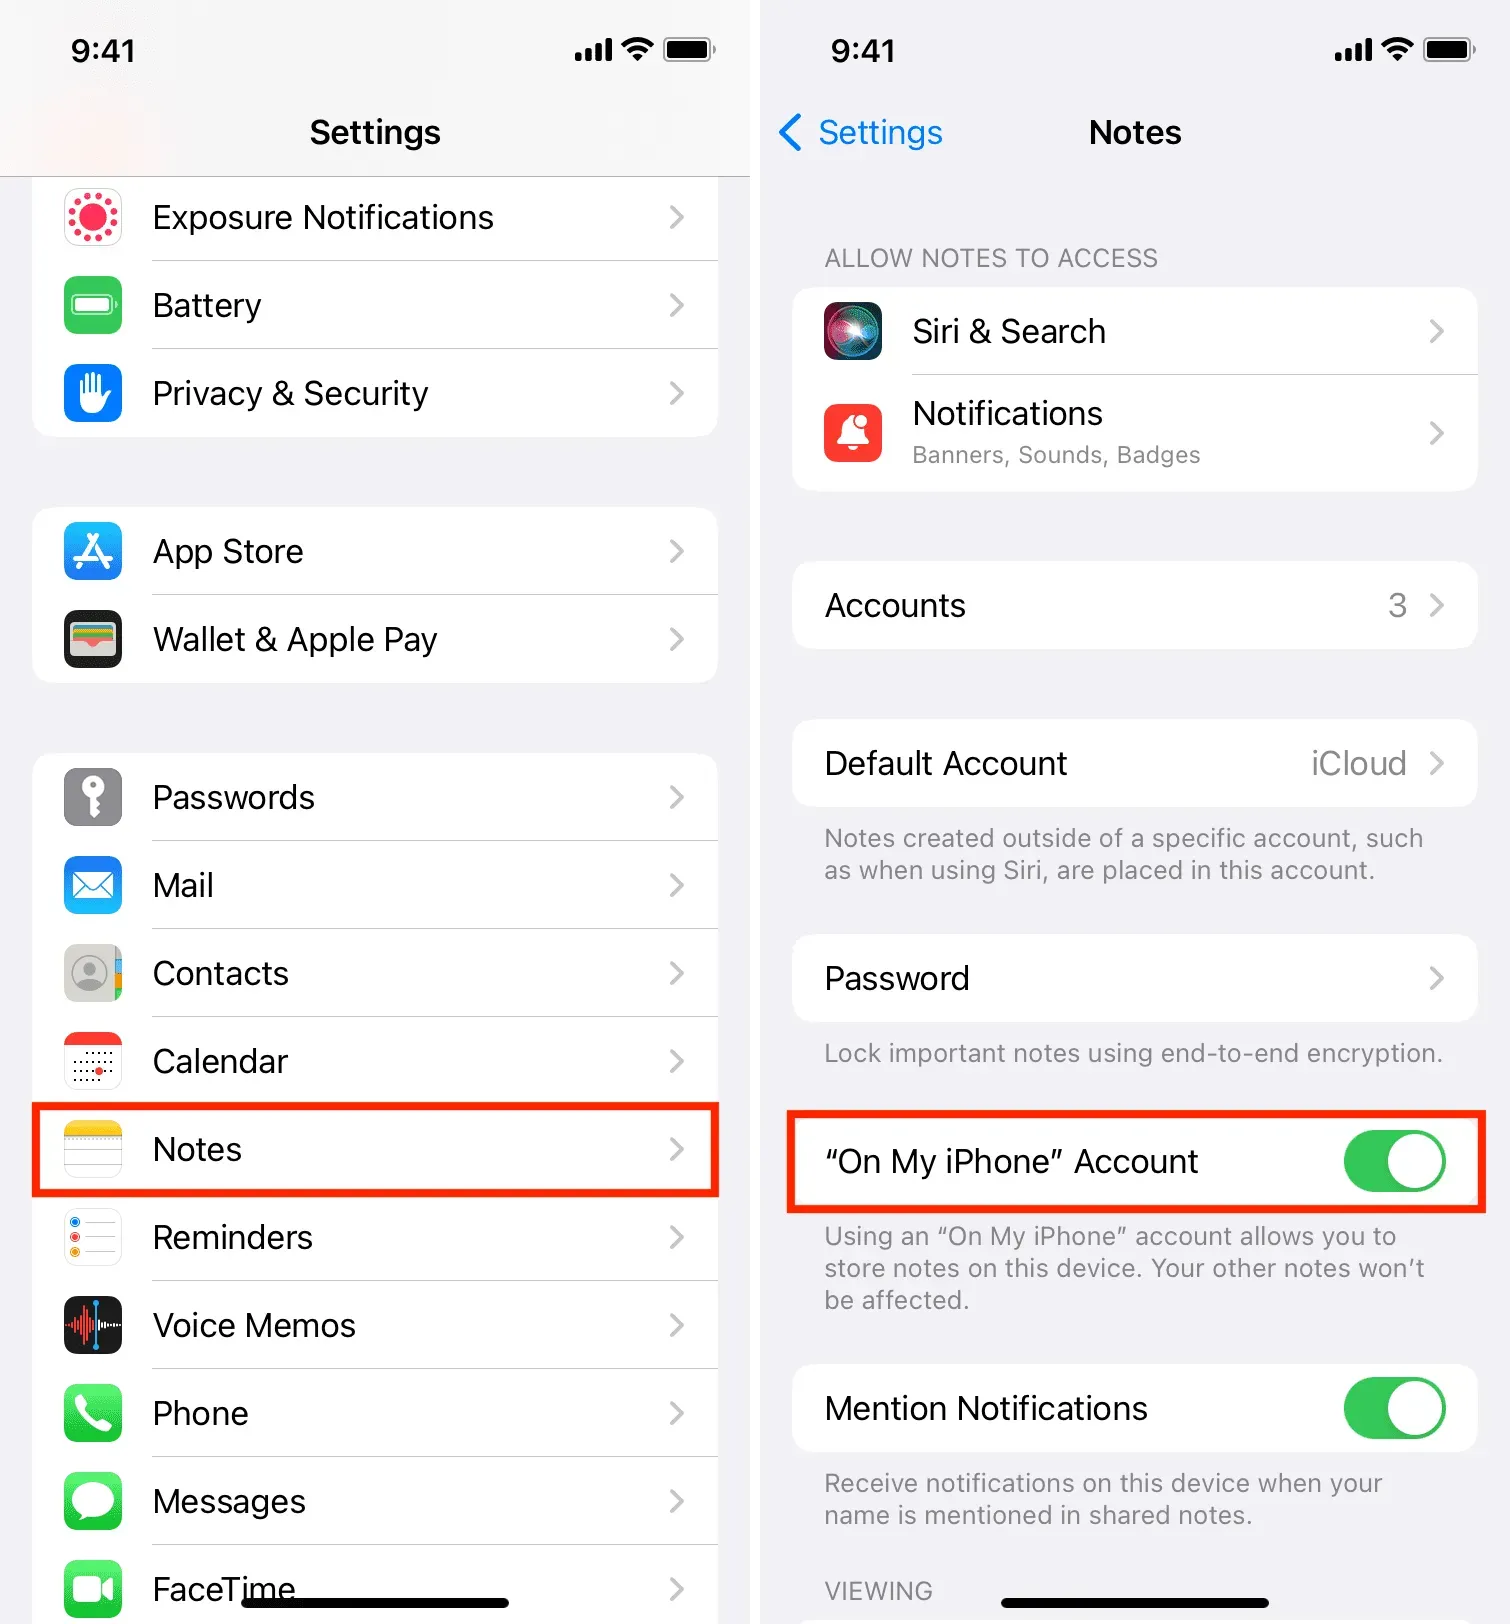
1) Open “Settings”and click “Notes”.
2) Turn on the switch next to the On My iPhone account.
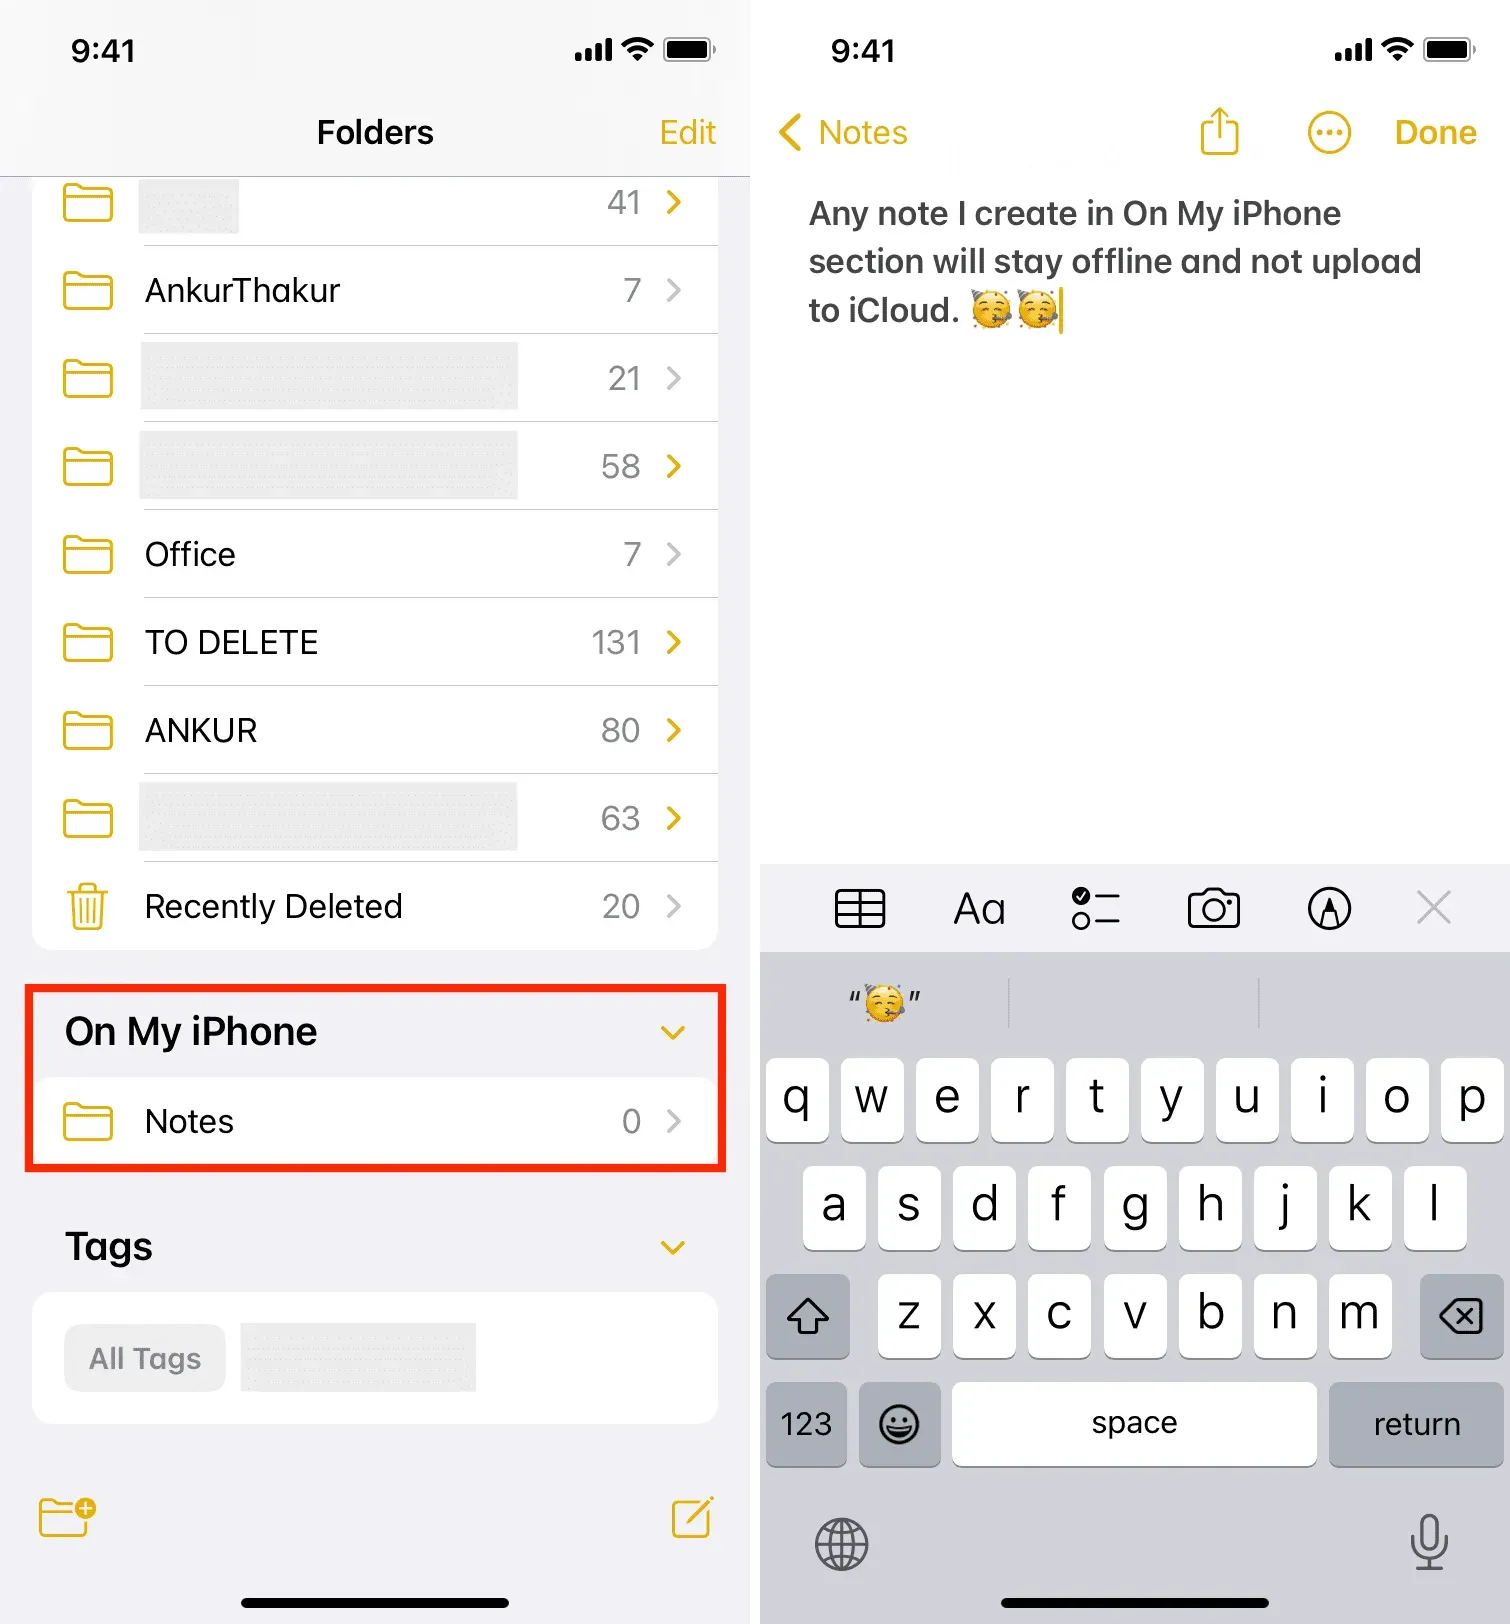
3) Open the Notes app and, if necessary, tap the back button in the top left corner to view all note folders.
4) Scroll down and tap on the tiny arrow (>) next to On My iPhone to expand it.
5) Click “Notes”and from now on, any note you create will not be uploaded to iCloud and will not be available on your other Apple devices.
Mac
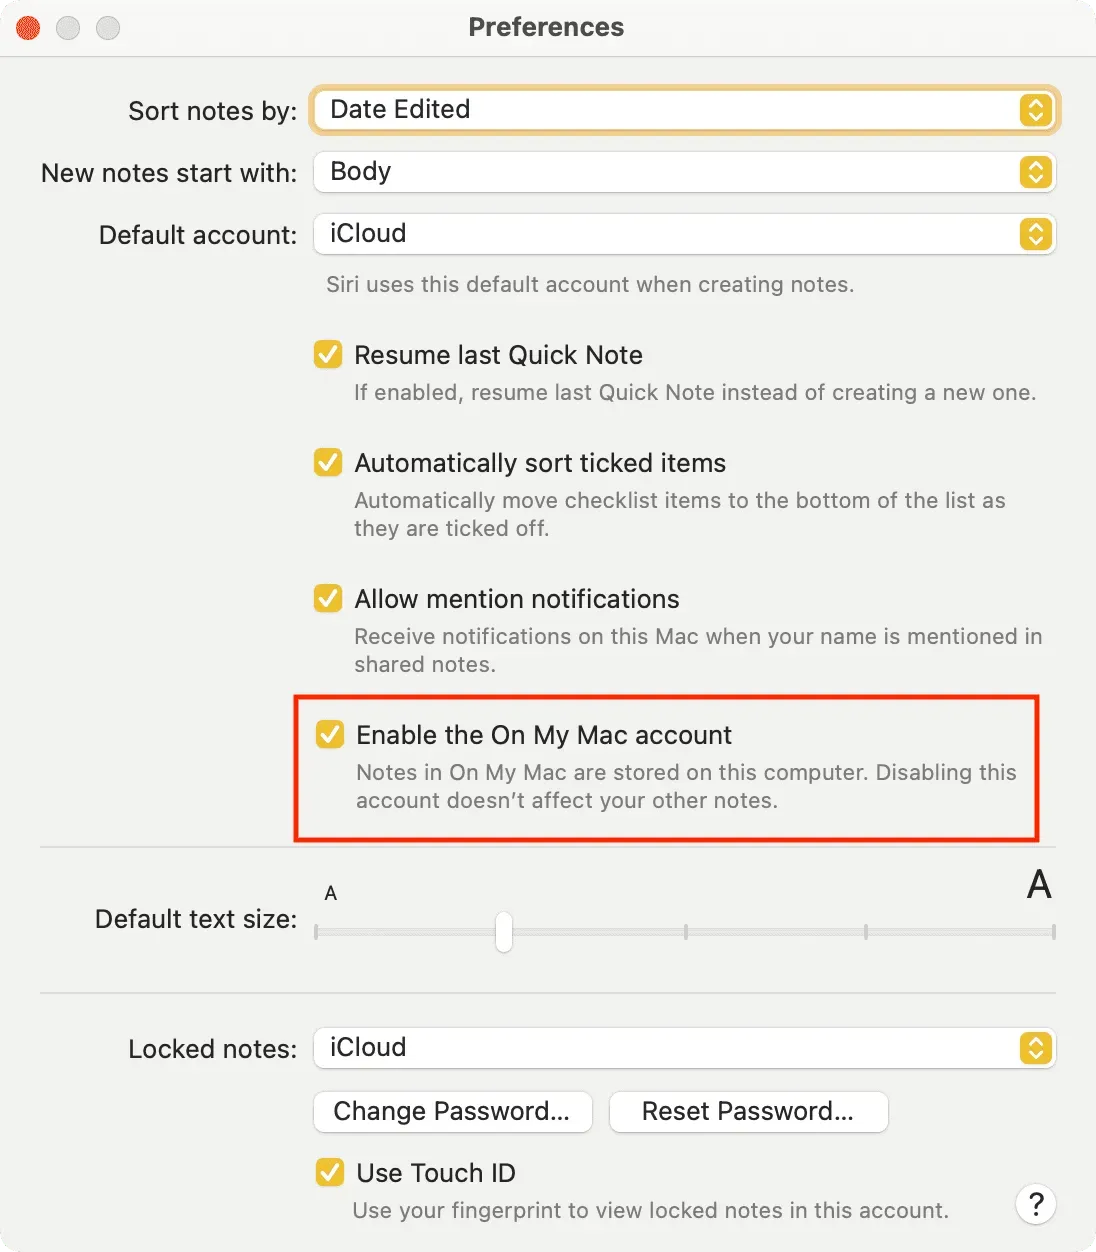
Here’s how to enable offline notes on macOS:
1) Open the Notes application and press the Command + Comma (,) keys to view its settings.
2) Check the “Enable Account On My Mac”checkbox.
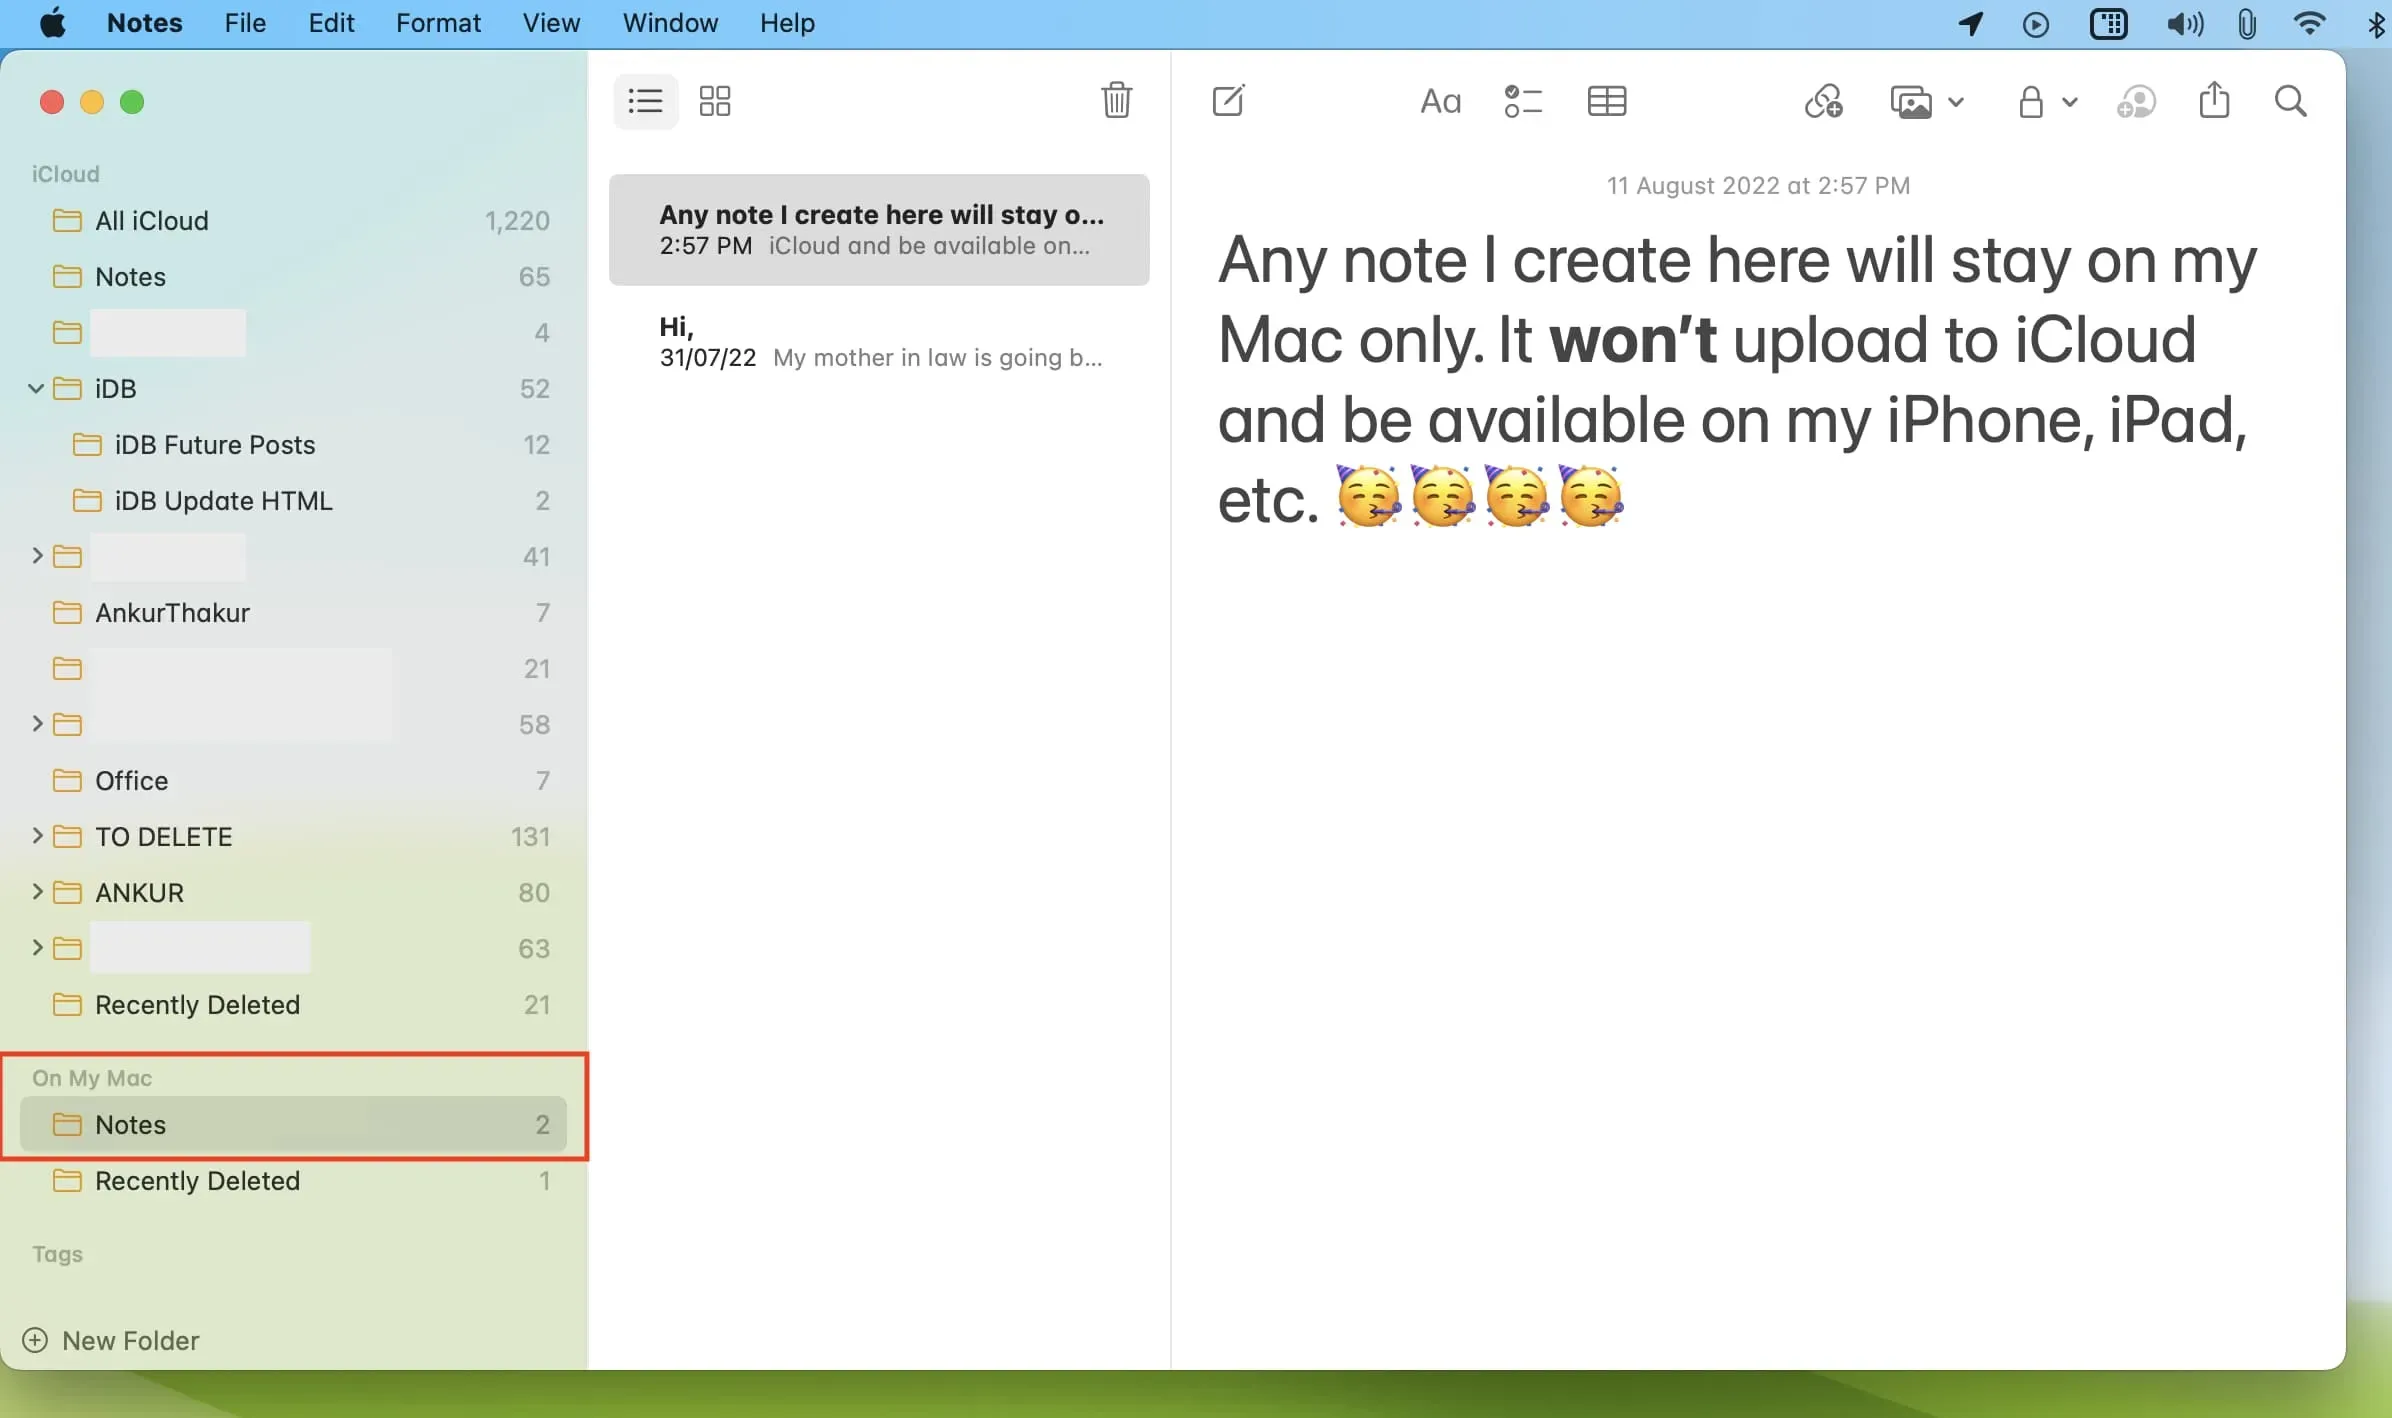
3) Go back to the Notes app, and at the bottom of the left sidebar, you will see the On My Mac section. Hover over it and click the small arrow (>) to open the Notes folder.
4) Click “Notes”and now any note you create here will only remain on your Mac. It doesn’t upload to iCloud.
How to make existing iCloud notes offline
With the steps above, you know what to do in the future when you need to record something that you don’t want to appear on all your devices. Just go to the “On my iPhone/iPad/Mac”section and create a new note there. So simple!
But what about your existing notes that are stored in iCloud and show up on all your Apple devices? Are there specific notes in iCloud that you want to take offline and ensure they’re only saved on one of your devices, such as an iPhone, iPad, or Mac? If yes, we have a solution for you, and it’s easy – just move the note from iCloud to the local account “On my iPhone/iPad/Mac”. Let’s show you how.
iPhone or iPad
Follow these steps to move iCloud notes to a local offline account:
1) Open the Notes app and navigate to the All iCloud folder or another iCloud folder.
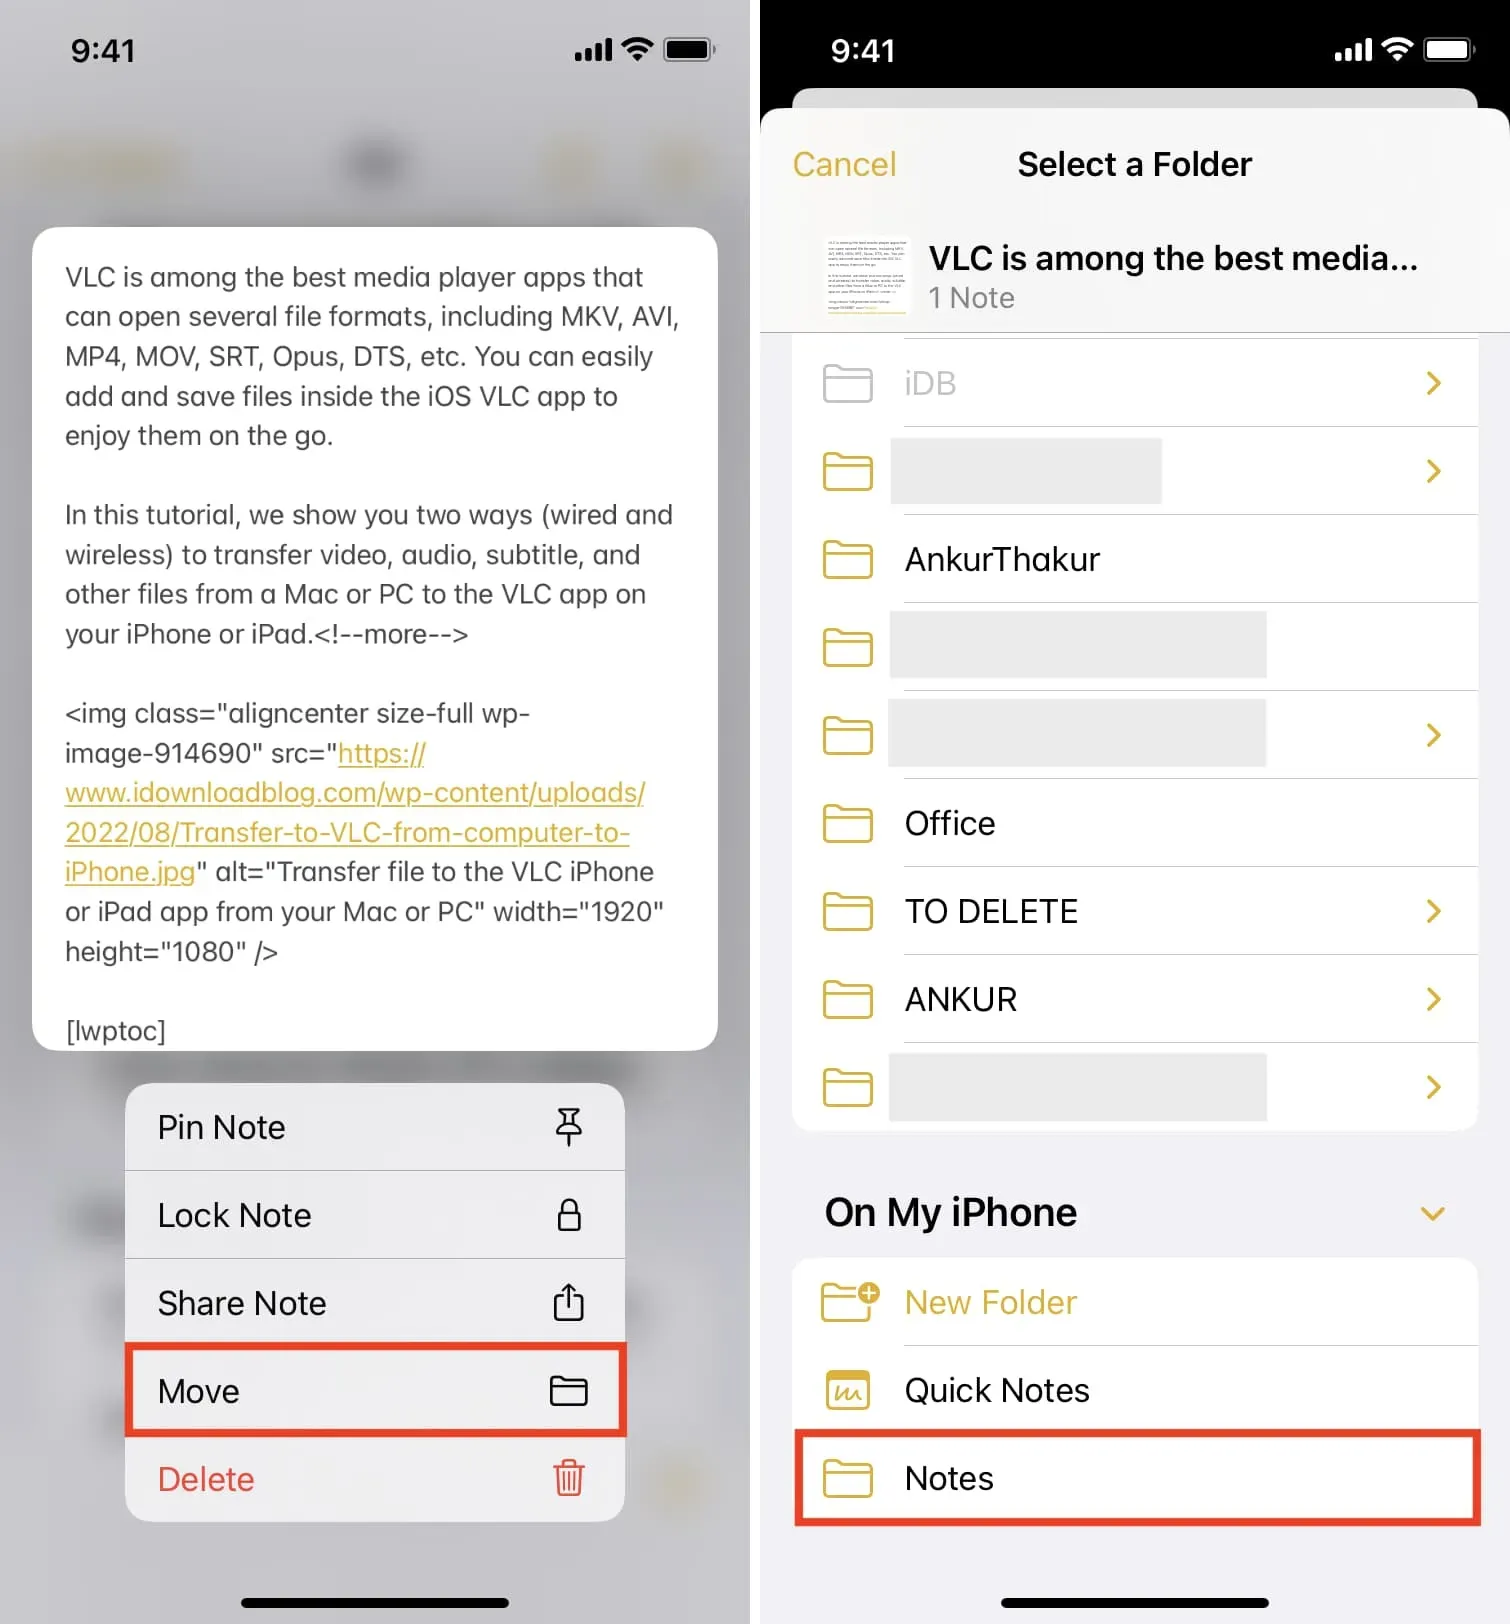
2) Click on the note you want to take offline and click Move.
3) Tap Notes under On My iPhone.
Made! This note is no longer stored in iCloud and is ONLY saved offline on this device. In a moment, this note will disappear from all your other iPhones, iPads, and Macs where it was previously synced and available.
iMac
Use these steps to make iCloud notes online offline and make sure they’re only available on one device, which is this Mac:
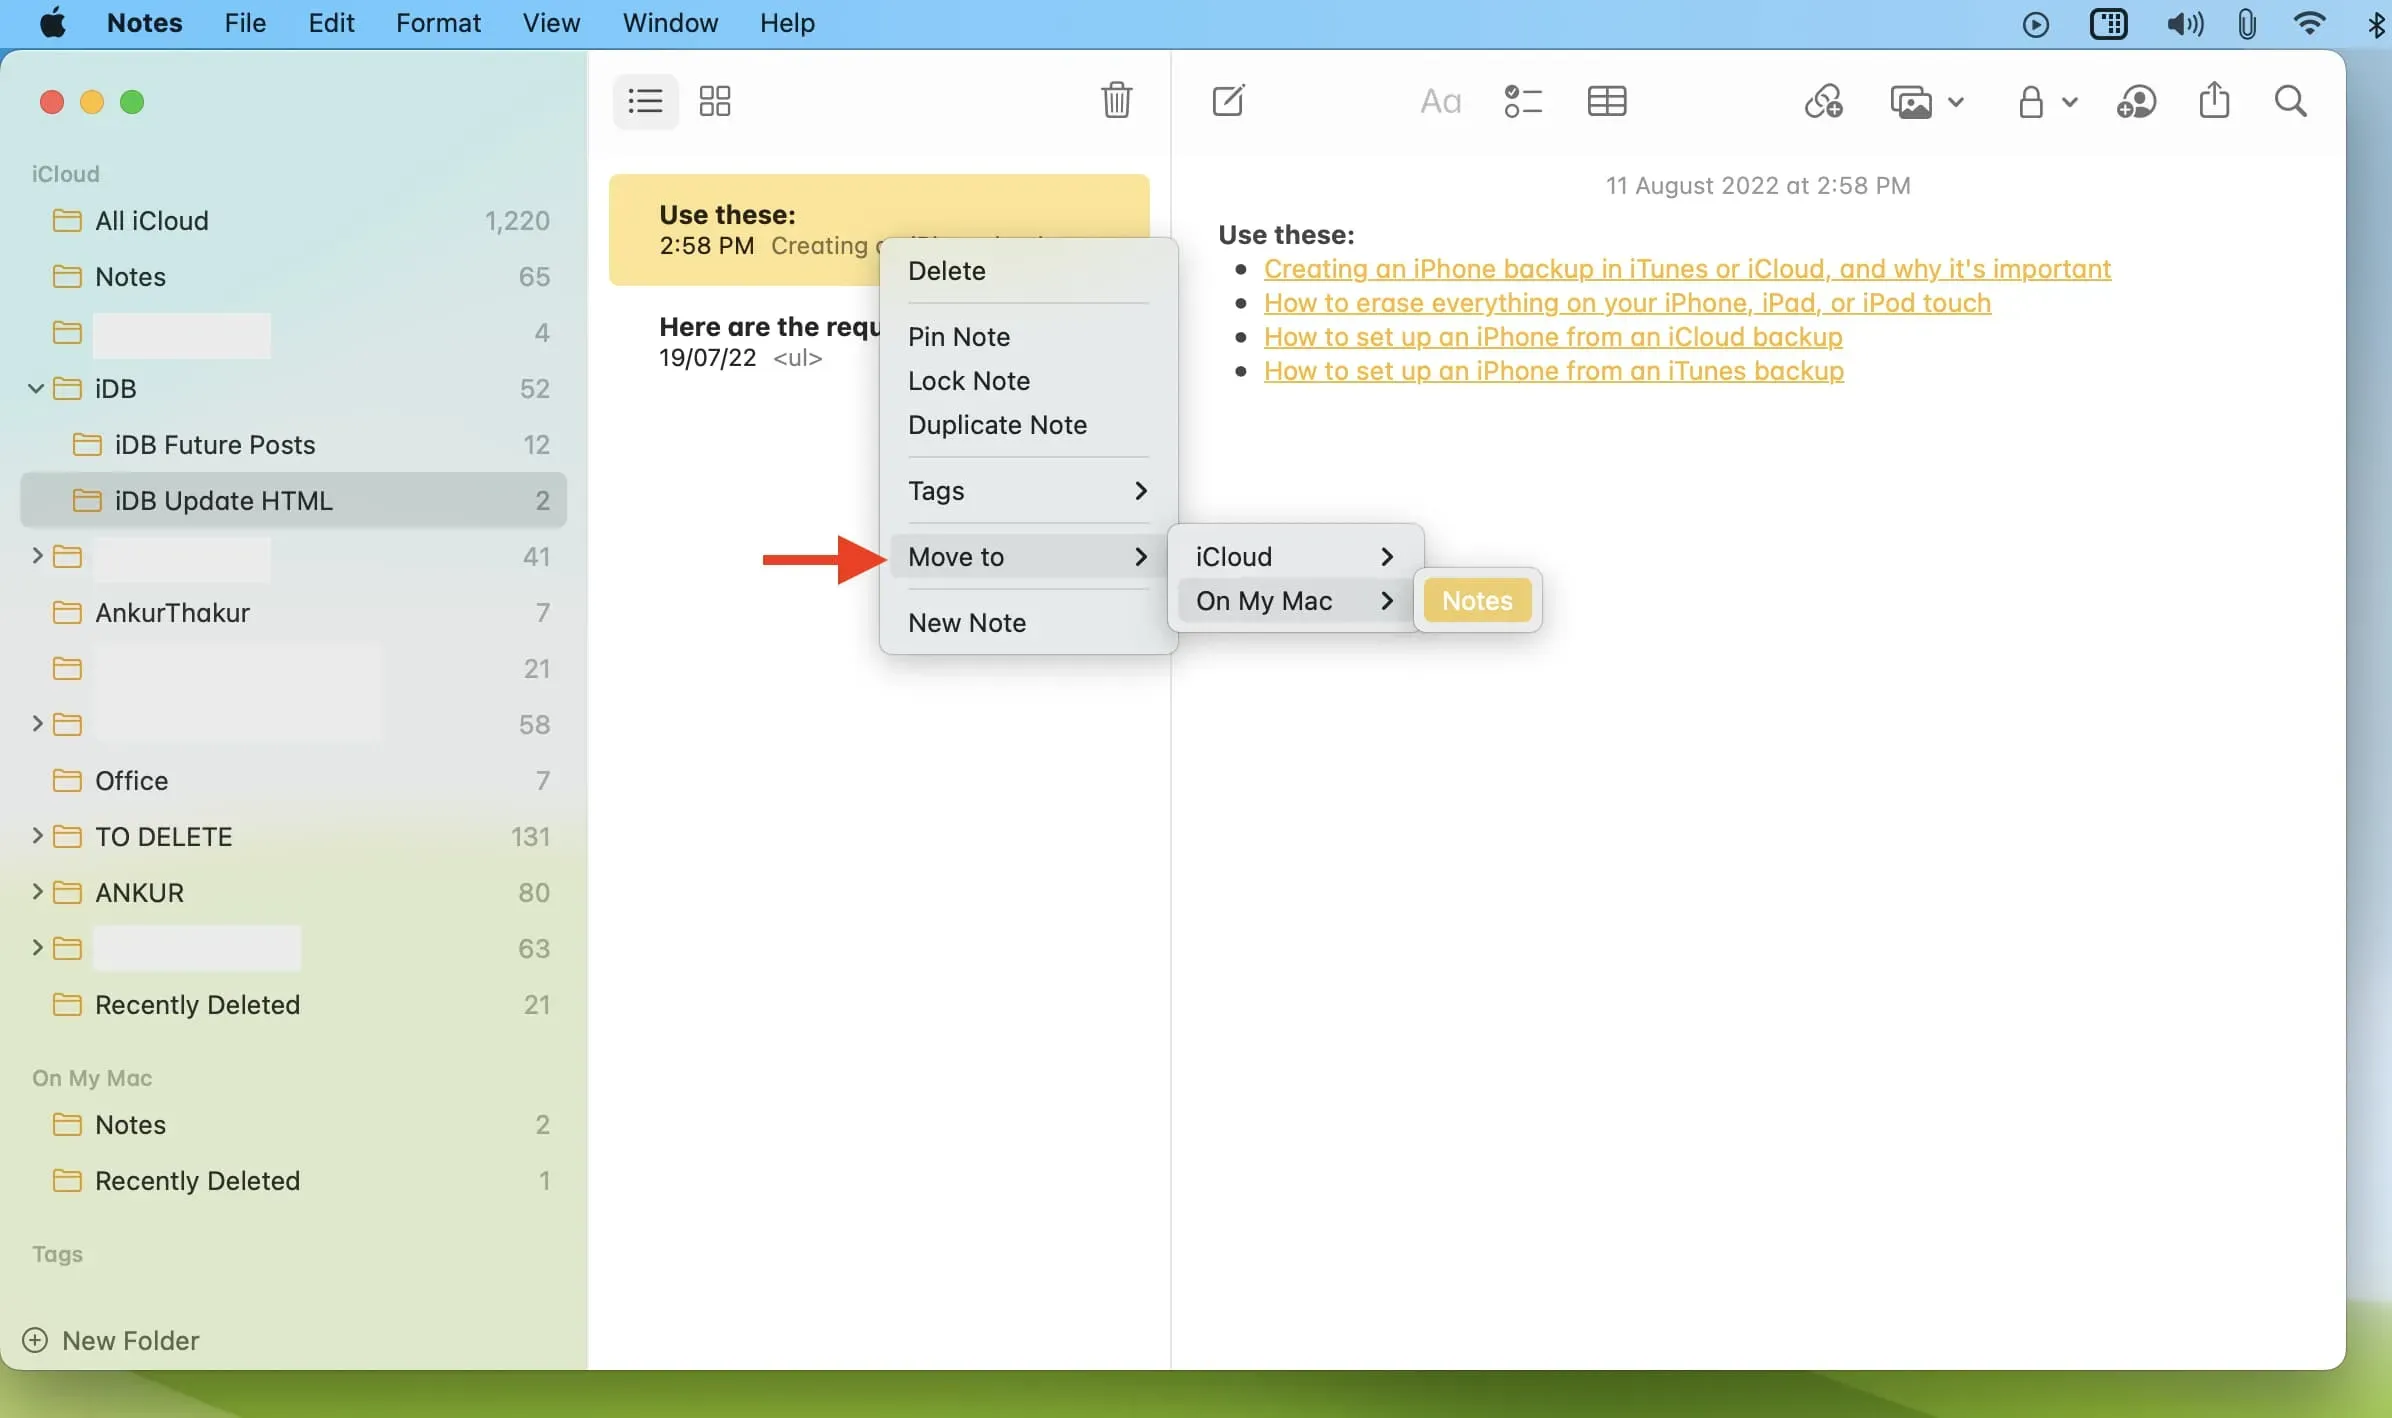
1) Open Notes and go to All iCloud or the appropriate iCloud folder.
2) Drag the iCloud note to the “On My iPhone”notes on the left sidebar.
3) Alternatively, you can Control-click the note, or right-click and choose Move To > On My Mac > Notes.
Now that particular note is no longer in your iCloud, but only on this Mac. Soon this note will disappear from the rest of your Apple devices such as iPhone, iPad or other Mac.