
You just mind your own business and clean the house. You take Roomba, put it on the floor and wait for it to leave.
He hits the wall around the corner and stops. Now you don’t have a floor cleaning robot, but you have a broken robot.
Don’t worry, we’ve put together a quick troubleshooting guide to help you get your Roomba back up and running.
One of the most popular robotic vacuum cleaners on the market is the Roomba. Many people choose to use the Roomba to go about their daily activities while the machine cleans up. Over time, Roomba may experience performance issues.
Why is my Roomba not charging?
If Roomba is not working properly, wipe the charging port with a soft cloth dampened with alcohol.
If it still doesn’t work, replace or reseat the battery and charger, reset Roomba to factory settings, or just leave it alone for an hour before trying again.
While the Roomba is an easy-to-use machine, there are a few things you can do to make cleaning easier.
One of the most common problems that consumers face is Roomba not charging.
If your Roomba won’t charge, what should you do?
To get started, you must first select the Roomba series. Why?
Because the following solution is only compatible with Roombas 500, 600, 700 and 800.
The problem may have occurred during shipping if you have recently purchased a new robot that has not yet been activated.
Check if the battery has moved; if so, just uninstall it and reinstall it to its original location.
The Home Base is required for charging; Plug it in and watch the indicator on this unit until it flashes every 4 seconds or stays on for 4 seconds and then turns off.
How to fix Roomba not charging?
Your Roomba may not charge due to a simple problem with the battery or power cord, or something more serious, such as a hardware problem.
In this section, we will look at the most effective troubleshooting methods to get your robot vacuuming again.
- Clean your charging contacts
- Clean roller wheel
- Reconnect the device to a different outlet
- Remove the battery tab
- Move battery
- Replace battery
- Restart Roomba.
- Resetting the Roomba battery
- Factory reset device
- Move the device to any other room
- Clean up your dock
- Replace dock
- Contact Support
- Try to get a warranty on Roomba
- Charge your Roomba or get paid for a new one
Now let’s dive into the solutions.
Solution 1: Clean the charging contacts
Contact points are metal strips that span the entire length of your gadget. Two are on the underside of the Roomba, and two more are on the underside of the docking station.
These metal strips are responsible for charging and connecting Roomba to the home base.
In fact, it is a conductor of electrical charges.
As a result, if dirt, dust or liquid has accumulated on it, electricity will not go.
On the other hand, cleaning the contact points on the robot dust collector and on its home base guarantees optimal charging.
Simply wipe off any dirt that has collected on it to clean.
Here are some examples:
- Microfiber fabric.
- Rubbing with alcohol on a soft dry towel
- Magic Eraser or wet melamine foam
These items will help remove sticky dirt that is difficult to remove with plain water. In addition, it will not damage the contact points.
IMPORTANT: Before cleaning Roomba’s contact points, unplug it from the power source. This will help you avoid electric shock.
Solution 2: Clean the caster
The wheel is a small unpowered wheel located at the front of the device.
Its role is to keep Roomba at the right height. In addition, there must be enough space under the device to collect debris and dust.
The wheel collects dirt while cleaning Roomba due to its front position.
As debris builds up, it pushes the wheel away from the body, causing it to rise higher.
Roomba’s contact points will not touch the base base if the wheel is raised higher. As a result, the gadget does not charge.
Simply remove particles from the wheel to restore it.
Here’s how to clean it up:
- To remove the wheel from the housing, carefully pull it out of the housing.
- Remove any debris that is left on the wheel. If necessary, wipe it with a clean, damp cloth.
- Replace the wheel in its housing. When it is properly positioned, you should hear a “click”.
Spin the wheel by hand. Even if it barely moves, it still has debris in it. Make sure that the dust collected on it is removed.
Solution 3: Reconnect your device to a different outlet
In rare cases, if Roomba is plugged into a faulty outlet, it will not charge.
“How do I know if the outlet is faulty?”
You can test your outlet to see if it’s turned on if you have an outlet tester.
If that doesn’t work, try plugging the Roomba Home Base into a different outlet. The Home Base LED should be on when the outlet is active.
“I have verified that the outlet is active.”What should I do if my Roomba won’t charge?
This is most likely due to insufficient power from that particular power supply. Maybe he has some kind of electrical problem.
Either move the item to a different outlet or fix the electrical problem on the machine.
Note. You can move the docking station without problems if you wait for Roomba to complete its cleaning cycle first. Roomba will have difficulty docking if you move the dock while cleaning.
Solution 4: Remove the battery tab
Have you recently purchased a Roomba?
Then you may have forgotten to remove the yellow tab from the battery.
Most new gadgets have yellow tabs on the battery. Manufacturers add it to prevent devices from turning on by themselves, especially during shipping.
This tab blocks access to battery contact points.
As a result, if you haven’t erased it yet… As a result, your gadget won’t charge.
If this is your first time using Roomba, follow these steps to remove the pull tab:
- Turn Roomba upside down.
- Find the yellow tab that is still hanging.
- Then just rip it off.
Once uninstalled, your device should charge without issue.
Solution 5: Move the battery
“I’ve already removed the tongue.”But my new Roomba still doesn’t work!”
The battery may have been moved from its original position during shipping.
As you may know, batteries must make full contact with their contact points in order to work properly.
As a consequence, make sure your Roomba’s battery is in the correct position.
Follow these procedures to check and adjust the Roomba battery:
- Turn Roomba upside down.
- Remove the screws from its base.
- Remove the bottom cover.
- Make sure the battery is installed correctly.
- Replace cover.
- And replace the screws.
Note. If you have a Roomba 700 series or higher, simply remove the battery drawer.
Solution 6: Replace the battery
Roomba’s batteries are warranted for one year or more and are designed for two years. However, they will eventually lose power, which is why iRobot offers a replacement.
With the right battery replacement procedure and regular maintenance, you can extend the life and functionality of your robot vacuum cleaner.
Here are some tips to help extend Roomba’s battery life:
- Clean your gadget regularly to prevent hair or dust from accumulating on it.
- During and after charging, store it in a cool, dry place. As a result, you will also have additional cleaning cycles.
- If you use it regularly, you’ll get extra cleaning cycles – as long as it’s charged.
- Before Roomba cleans the room, the lithium-ion batteries must “wake up”.
- Place the base station on a flat surface, plug it in and wait until the LED indicator lights up.
- Place Roomba on the docking station and wait until the base station turns off and the Roomba light starts flashing. It usually takes about 10-15 seconds.
Solution 7 – Restart Roomba
If the contact points and power supply aren’t an issue, it could be the device itself.
Your Roomba may have software issues, but it will be able to fix them. These are computer problems that cause systems to produce incorrect results.
In layman’s terms, software defects can cause your Roomba to stop working or fail and need to be fixed.
If you find that the light is on but the device is not charging, this may be due to a software issue.
“What should I do?”Should I request a replacement? No, not now.
No doubt, software flaws can be inconvenient. However, this can be easily fixed by performing a hard reset or reboot.
Restarting Roomba is easy. However, this will depend on the series.
Restarting Roomba based on its series:
- For s and I series: Press and hold the Clear button for 20 seconds. Wait until the light ring goes out before releasing. This should take about 1.5 minutes.
- For Series 700, 800: Press and hold the Clear button for 10 seconds. Wait until you hear the reset tone before releasing.
Note. Restarting Roomba will delete the software and all temporary data. However, this will not erase your schedule information or smart mapping.
Solution 8 – Reset the Roomba battery
It is not always necessary to restart Roomba. However, the battery in your Roomba.
Resetting the batteries, like resetting the software, returns the machine to its default state. This allows you to improve its performance and work more efficiently.
If you see that your robot vacuum’s battery is draining quickly, you should reset it.
If necessary, you can purchase a replacement. However, resetting the battery will save you money. Not to mention that it increases battery life.
“How can I reset the battery in my robot dust collector?”
Deep charge or 16 hour reset are terms used to describe the battery reset process. Because your squad will need 16 hours of rest.
To reset Roomba 500 and 600 models, follow these steps:
- Turn off the vacuum.
- Remove Roomba from the charging station after turning it off.
- If the battery needs to be replaced, turn it off, insert a new battery and press the CLEAN button.
- Release the button as soon as the green indicator lights up.
- Keep pressing and holding the SPOT and DOCK buttons.
- Hold them for about 10 seconds.
- Release the buttons.
- An audible signal will be heard indicating that the vacuum cleaner is restarting.
- Reconnect the robot to the charger by placing it there, then wait for the green indicator to appear.
- If you are not sure if your robot has restarted, press the CLOCK button.
- If all watch settings have been deleted, you have successfully reset Roomba.
- The robot can perform its duties as soon as you select the date, time and other information.
To reset Roomba 700, 800, 900 and Roomba 960 models, follow these steps:
- Press and hold the CLEAR button for about 10 seconds until the text “rSt”appears on the screen.
- Release the CLEAN button after you see the letters “rSt”.
- When you turn it off, beeps will play to let you know your Roomba has been successfully reset.
- All information was deleted on reset.
- Then let your robot do its duty again by reprogramming your time and date.
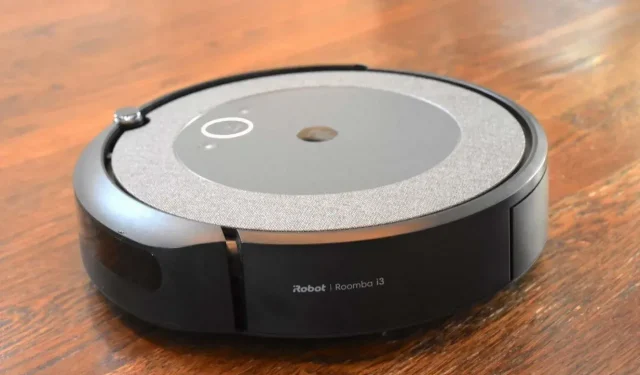
To reset Roomba i3 and i7, follow these steps:
- Press the HOME, SPOT CLEAN and CLEAN buttons at the same time.
- Hold down these three buttons until the white light ring of the CLEAN button lights up. Now release each of the three buttons.
- Let your robot reboot for 20-30 seconds.
- For best results, charge Roomba directly from an electrical outlet. You can use the cord that came with the Home Base.
Solution 9 – Factory reset your device
If restarting the device software or battery does not resolve the issue, the device needs to be reset to factory settings.
Unlike a resume, a factory reset wipes all of your device’s memory and settings.
This entails planning your home and developing a cleaning routine. This is a great method for dealing with memory corruption or charging software bugs.
In other words, it returns your system to its original settings.
If you are sure you want to factory reset your device, please create a backup first.
There are two ways to factory reset Roomba. Using the iRobot Home app or device directly.
Follow these instructions to factory reset Roomba using the iRobot Home app:
- Go to the iRobot Home app.
- Go to “Settings”.
- Select Uninstall/Reset to factory settings.
- Then click on the name of the robot in your division.
It is extremely important to consider your device series when performing a factory reset from the Roomba itself.
The Roomba series defines how to restore factory settings:
For series a and i
For the a and I series, press all three Home, Spot Clean, and Clean buttons at the same time. Hold it in place until white appears in the light ring.
For j-series
For the j-series, first remove the trash can from the device. Then hold the Clear button for 7 seconds. Release when you hear the reset tone. Then complete the procedure by clicking the “Clear”button.
In electronic series
All three Home, Spot Clean, and Cleanup buttons must be pressed at the same time. Hold it for about 20 seconds. Release after that.
For 900 series
All three buttons “Dock”, “Spot Clean”and “Clean”must be pressed at the same time. Hold this position until all button indicators light up.
For 600 and 800 series with Wi-Fi
All three buttons “Dock”, “Spot Clean”and “Clean”must be pressed at the same time. Maintain this position until a beep sounds.
For Roomba combo
Open the cover of the device to find the “Reset”button. Hold the reset button for 10 seconds.
Solution 10 – Move the device to any other room
While this is extremely rare, your Roomba will not charge if the temperature is too high or too low.
You should store your Roomba and House Base at room temperature just like any other electronic item.
If the engine is exposed to very high or low temperatures, it may not operate properly.
In this case, Roomba will display an error code on the screen until the problem is resolved. The only solution is to move the device to a cooler room.
Note. Wait at least one hour before returning it to base.
Solution 11 – Clean your dock
Sometimes Roomba won’t charge due to problems with the charging mechanism. The gadget is not charging, and the error number indicates that it is connected, but not charging.
One possible explanation is the accumulation of dirt on the charging connectors. This disables the connection between the ports and the outlet, preventing your vacuum cleaner from charging.
To fix this problem, consider cleaning your dock regularly.
Turn Roomba upside down and separate it from the wheels to clean the charging ports. Then clean the metal connections with a swab dipped in rubbing alcohol.
Once the metal is dry, firmly insert the plug into the socket; if it doesn’t fit against the wall, try turning it until it clicks into place.
Solution 12 – Replace the charging dock
The docking station, like the battery, can be replaced if problems occur. If cleaning the dock doesn’t help, consider purchasing a new dock.
If you have a warranty, iRobot will repair the dock within a week. You can also search the open market for the right one for your Roomba.
Solution 13 – Contact customer support
If Roomba has a problem, the troubleshooting light will flash.
The number of flashes corresponds to the error code. There are many such problem codes, the most common being error code 8, and you can learn more about them using the iRobot app on your phone or PC.
If you need code clarification or general assistance with Roomba, please call iRobot Customer Service at 1-877-855-8593. More contact information is available on their website.
Solution 14: Try to get a warranty on Roomba
If none of the options resolve your charging issues, you may have a faulty Roomba.
If your product is still under warranty, you can contact iRobot directly to request a replacement or repair.
However, after the warranty period has expired, you may be required to pay additional fees to iRobot or any third party service provider to resolve any issues with the internal circuit.
Let the experts take over once you’ve exhausted your troubleshooting options.
Solution 15: Charge your Roomba or get charged for a new one
The Roomba battery can be restarted and run a few more cleaning cycles if you know it is low and needs to be replaced.
Simply put, this entails using a fully charged battery to start a Lithium-Ion battery, and is discouraged by manufacturers.
Although it won’t be as efficient, the robot will be able to work for a few more days.
Using 14-gauge copper wire, connect the discharged battery to the fully charged battery through the appropriate connectors. Attach them with adhesive tape and hold for about two minutes.
Remove the battery now, then insert it into Roomba. It should start charging.
Also, pay attention to the blinking charger lights when troubleshooting. For example, a flashing red light indicates that the battery is excessively hot.
Flashing red and green lights also indicate that the battery is not properly installed in the battery compartment. The iRobot app has more information about the codes.
Can the battery in Roomba be replaced?
Of course you can! There are many Roomba battery replacement options currently available on the market. But not all batteries are the same; in fact, some of them can shorten your robot’s lifespan.
The original battery can last for several cycles with good maintenance before it needs to be replaced.
You can increase battery life and make sure your Roomba is always running at peak performance by following the tips in the list of battery maintenance tips below:
- Use only iRobot batteries.
- Use Roomba more often; Since the robot is powered by a rechargeable battery, frequent use will result in longer cleaning cycles.
- If you don’t have a home base, you can plug Roomba into a charger to keep it constantly charged. Keep Roomba connected to the network when not in use.
- Charge Roomba and keep it cool and dry.
- To prevent hair or debris from blocking your device, always clean it.
- Check your Roomba as soon as you find it is working harder than usual. Leave it alone if you don’t want the battery to die.
How long will the Roomba battery last?
If you want to extend the life of your Roomba, you need to purchase the appropriate battery.
I have used the iRobot Roomba replacement battery from genstattu.com and I highly recommend it based on my personal experience. I recently bought this item and you know what? I used it for the first time for about two hours.
But now, when everything has calmed down, it lasts about an hour, about the same as my previous battery. Also, make sure the air filter is clean.
Roomba’s battery can last hundreds of cleaning cycles if care is taken. Be sure to remove the battery tab before charging the robot.
After buying Roomba, I advise you to charge it for the night. The charging process usually takes at least two hours.
The home base light is on but the robot is still not charging
Clean your gadget quickly.
Make sure there is no debris or dirt inside as this can cause dust to build up on the charging ports on both the Home Base and Roomba.
If you come across it, remove it from the charging ports by wiping it with a clean, dry cloth. I suggest using a melamine foam sponge to inspect it quickly.
If nothing is found, Roomba should be removed from the home base. After that, turn it over and separate it from the wheel.
If there is too much dirt inside the roller, the robot will not be able to reach the charging ports.
Inspect the caster for accumulated debris. As soon as the wreckage is found, make the necessary repairs!
Conclusion
Both cleaning performance and battery life can affect the overall longevity of your robot vacuum cleaner. Luckily, keeping your bot’s battery in top condition isn’t that hard.
You can extend the life of your Roomba and get the most out of it by cleaning the charging station and any vents on its back of debris. This will help prevent premature failure of your robot.
FAQ
How do I know if my Roomba is charging?
To determine if the battery is charging, look at the LED indication on the CLEAN button. Solid red means the battery is low. Flashing yellow light: Charging in progress. Green: Charging completed. rapidly pulsing with amber light.
How do you know if your Roomba needs a new battery?
As soon as the battery in Roomba begins to drain too quickly, it should be replaced. The Roomba battery should be replaced immediately if the battery indicator does not turn on or if the machine itself runs out of power. Replace the Roomba battery if: Compared to normal use, the battery drains very quickly, in about a few minutes. After Roomba leaves the dock, it can only work for 15-20 minutes. battery. If the device still won’t charge despite many solutions.
Does the light on the Roomba base stay on while charging?
Roomba’s base light blinks for about four seconds to conserve power and then turns off completely.