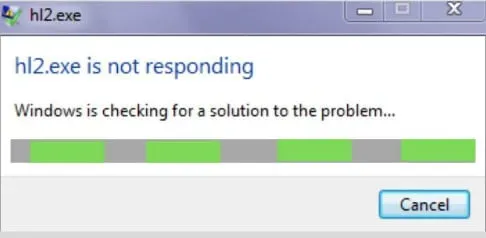

Windows 10 is known to have issues with older games, mostly due to outdated engines that are no longer supported by developers. This kind of problem is quite common in Half-Life 2 game. Users usually encounter this error which causes the game to crash, spoiling the overall experience of the game.
Have you encountered the hl2.exe application error recently? Well, don’t worry, this article will tell you how to fix and avoid this problem in the future.
Troubleshooting Solutions Hl2.Exe Has Stopped Working Error
- Restart your computer
- Manually update GPU drivers
- Use Driverfix to automatically update your drivers
- Run the game file as administrator
- Check Directx Version Compatibility
- Disable background processes
- Temporarily disable third-party antivirus
- Use the Steam client to check game files
- Reinstall Half Life 2
- Change Gmod in Steam
- Remove Gmod from Steam
- Change monitor refresh rate
- Restore AMD Drivers
- Prevent data execution
What causes the “HI2.exe has stopped working”error?
There are many reasons why your Hl2.exe might stop working. However, there are a few things that are usually the cause of this error, such as:
Outdated GPU drivers
If you have older GPU drivers installed on your computer, you may experience difficulty running Half-Life 2 as the drivers may not be compatible with the game.
Update frequency
If your monitor’s refresh rate is set incorrectly, this can cause issues with the game launching. The FPS of your game depends on the refresh rate of your monitor.
Antivirus
Sometimes your PC’s antivirus interferes with certain components of the game, which can lead to Hl2.exe error.
Missing Permissions
It is also possible that your computer lacks some of the permissions required to run the game.
Incompatible system requirements
Some people may also encounter the issue if their computer hardware is incompatible with the game. This means that the computer does not have the minimum specifications to run the game.
You can see the minimum system requirements for Half-Life 2 by visiting their official website and looking at the Minimum System Requirements section.
Note. If you have incompatible system requirements, the fixes below will not work. The only thing you can do is update your PC specs in order to run the game.
1. Restart your computer
The Hl2.exe error can sometimes occur due to some kind of temporary error in your computer window. These temporary issues can be resolved by restarting your computer. So, restart your computer and restart the game to check if it works. You can move on to the next solution on our list if it doesn’t.
2. Update your GPU drivers manually.
If you have a newer graphics card driver installed on your computer, this may cause problems in the game. You can try manually reverting to an older version to see if that fixes the issue.
However, you must remember that the Windows Update feature allows Windows 10 to update drivers automatically. So be sure to disable this feature before following these steps:
- First, open the Start menu, search for “View advanced system settings”and press Enter.
- Now go to the Hardware tab and select the Device Installation Options option at the bottom.
- Select No from the pop-up menu and click Save Changes.
- Now find Device Manager in the start menu and press enter. Expand the Display Adapters option in the Device Manager window.
- Then right-click on your GPU and select the Remove Disk option.
- After that go to the website of your GPU manufacturer like Nvidia/AMD and download their display drivers.
- Once the download is complete, install these files and download the appropriate graphics driver.
- Restart your computer and open the game. If the game still crashes, please download an older version of the display graphics driver that is compatible with Half-Life 2.
3. Use Driverfix to automatically update your drivers
An easier way to fix these driver issues is to install a driver update tool called DriverFix. Here are the steps to follow for this method.
- Download and install the software.
- After the installation process is complete, launch the software and click the “Scan”button. (The software will take a few minutes to scan and locate faulty drivers on your computer)
- When the scanning process is complete, select the ones you need to fix and give the software some time to download and install the latest files.
- Restart your computer and restart Half-Life 2 to see if the issue is resolved.
4. Run the game file as an administrator.
Running the game as an administrator will resolve the issue if the error occurs due to lack of permissions. To successfully proceed with this method, follow these steps:
- Go to the game’s installation folder and find the executable file with the extension. exe.
- Now right-click on the file and select the Properties option.
- Click the Compatibility tab and then the Compatibility Mode section and check Run this program in the Compatibility Mode box.
- After that, select the Windows version from the drop-down list specified in the game’s system requirements.
- Also, check the “Run this program as an administrator”box at the bottom of the compatibility tab.
- Click “Apply”and then click the “OK”button.
- Restart your PC and relaunch the game to check if the Hl2.exe error is resolved.
5. Check Directx Version Compatibility
Your version of DirectX may also be causing this issue. Half-life 2 is more compatible with the old version of DirectX than the new one. You can check your version of DirectX by following the steps given below:
- Open the Run dialog box on your computer by holding Windows + R, then type the command
dxdiagin the search box and click OK. - You will see the DirectX Diagnostic Tool window. This window will list your main system specifications, and at the bottom of the list you can see the version of DirectX installed on your computer.
- The installed version must be DirectX 9; if another version is installed, you need to download the DirectX 9 version and install it following the on-screen instructions.
- Now launch the game to see if the issue is resolved.
6. Disable background processes
If there are too many applications and software running in the background, they can take up system resources and cause the game to crash.
Restricting apps from running in the background can resolve this error. Here are the steps you need to follow to disable applications running in the background:
- Open Task Manager by holding Alt + Ctrl + Del.
- Click the Processes tab which will show you a list of all the tasks that are currently running in the background.
- To disable a task, right-click them individually and select the Disable option.
- Restart your computer and then restart the game.
7. Temporarily disable third-party antivirus
Some antivirus software detects Half-Life 2 files that are harmful to your computer and prevents them from working. To prevent the antivirus from interfering with the game files, you can perform the following options:
Pause Protection
- To pause protection and disable your antivirus, click the “Show hidden icon”option in the right corner of your taskbar and find your antivirus.
- Now right-click on it and select the Pause Protection or Disable Antivirus option. (The option may differ depending on the antivirus you are using)
- A warning window will appear; click OK.
Add file/folder to exclusion list
- Go to the “Show hidden icons”option in the right corner of the taskbar, find your antivirus and right-click it.
- Click on the “Settings”option and then select the “Advanced Settings”option.
- Go to the “Exceptions”option and add a link to the Half-Life 2 installation folder to the list of exceptions.
- Click Save to save these settings and then exit the antivirus.
8. Use the Steam client to check game files.
Game files can sometimes get corrupted or removed by antivirus, which leads to this error. However, you can use the Steam client to verify these game files. You can follow the steps below to restore game files using the Steam client.
- Double-click the Steam icon on the desktop screen to open the Steam service.
- Go to the Game Library section and right-click on the game.
- Now select the “Properties”option.
- Locate the “Local Files”tab and select “Verify Integrity of Game Cache”at the bottom of the list.
- The Steam client will verify the integrity of the affected game files.
This process will take some time. Once completed, you can restart the game to check if the issue is resolved. If not, you can move on to the next step.
9. Reinstall Half-Life 2
You may need to reinstall the game if the Steam client is unable to resolve the issue. Follow the steps below to successfully reinstall Half-life 2:
- Open Steam by clicking on its desktop icon.
- Go to the “Library”tab, right-click on the game and select “Delete”.
- Locate the game installation folder and delete any remaining files (if any).
- Reinstall the game from the Steam Library to see if the issue is resolved.
10. Change Gmod in Steam
- Click on the Steam icon to open its application and go to the “Library”option.
- Locate Gmod and right-click it, then select the Properties option.
- A new window will appear; navigate to the “Set Launch Options”button at the bottom and click it.
- After the window appears in front of you, enter –
dxlevel 80in this field and click OK. - Now restart the game and hopefully the error will be fixed.
11. Remove Gmod from Steam
For some people, removing Gmod from Steam also fixed the issue. Therefore, if any of the methods mentioned above did not work for you, you can try this method by doing the following:
Method 1:
- Open the Steam app and go to the Library tab.
- Now locate Gmod, right-click it and select the Properties option.
- After that, select the “Verify Integrity of Game Cache”option from the “Local Files”tab.
If this method doesn’t work, you can move on to the second method below.
Method 2:
- Open the Steam app and go to the Library tab.
- Find Gmod and right click on it.
- Now select the “Properties”option.
- Click the Local Files tab and browse the files there.
- Now go to the previous folder and remove Gmod.
- Once this is done, remove Gmod from the Steam menu.
- Restart your computer after you have completed all the steps and check if the error is resolved.
12. Change monitor refresh rate
Sometimes changing the refresh rate of the monitor can also solve the problem. To do this, you need to follow these steps:
- Open the Start Menu, type “Display Settings”in the search bar, and press the “Enter”button.
- Now find Advanced Display Settings and click on it; Here you can see the refresh rate of your monitor.
- Now go to Steam, right click on the game icon and look for “Launch Options”.
- A box will appear in front of you; enter -refresh XX in this field and click OK.
Note. XX means the refresh rate of your monitor in hertz. So if your monitor refresh rate is 1920 x 1080, you need to type -refresh 60. (1920 x 1080 = 60Hz)
- Restart the game now and check if the issue is now resolved. If not, you can try the next solution.
13. Restore AMD Drivers
Some users have found that reverting to older display drivers solved the problem. After testing various versions of the display drivers, version 15.11.1 from 2015 proved to be the most compatible with the game compared to newer versions.
As such, people who reverted to this version of the display drivers reported no issues with the game. Here are the steps you need to follow to revert to a previous AMD driver version:
- Open Device Manager.
- Now right-click on the AMD driver and select Properties.
- Click the Driver tab and select Roll Back Driver to revert to a previously installed driver.
14. Data Execution Prevention
The data execution feature in Windows can sometimes interfere with game files and prevent them from working properly.
Data Execution Prevention can sometimes help resolve this issue. To prevent data from executing on your computer, you can follow these steps:
- Open the Start menu and search for “View advanced system settings”in the search box.
- You will see a window with system properties. Go to the Advanced tab and click on Settings in the Performance menu.
- The performance options window will open. Select the Data Execution Prevention tab and click Turn on DEP for all programs and services except those I select.
- After that, click the Add button at the bottom of the Performance Options window.
- Now locate the Steam.exe file located in the following directory and then add the file below to the exclusion list:
C:\Program Files\Steam
- Select the Add option again, and then locate and add the HI2.exe file to the same exclusion list.
- Restart your computer and then restart the game and chances are the HI2.exe error would have been fixed by now.
Conclusion
Hl2.exe error can occur for several reasons, which are sometimes difficult to resolve. However, if you stick to the solutions mentioned in the article, you should hopefully be able to fix the problem yourself.
If the solutions don’t work for you, try to double check your computer specification and system requirements, because if your computer doesn’t meet the system requirements, neither solution will work.
FAQ
Why are all source games Hl2 Exe?
Source uses source codes in all of its games. However, this engine was originally created for Half-life 2, so it became popular as Hl2.exe.
Is Half-Life 2 source code?
Yes! Half-Life 2 is the original game because it was created using Valve’s Source engine, which was also created at the same time as the game was created.
How to fix setup exe?
– Press Windows + R to open Run and type cleanmgr.exe. – Select the C drive to clean up and check the box to delete temporary files. – Then restart your computer and run the installer again.
Why won’t the EXE file open?
If the EXE file does not open, it may be due to corrupted registry settings or some third party product (or viruses) that may change the default configuration for running EXE files.