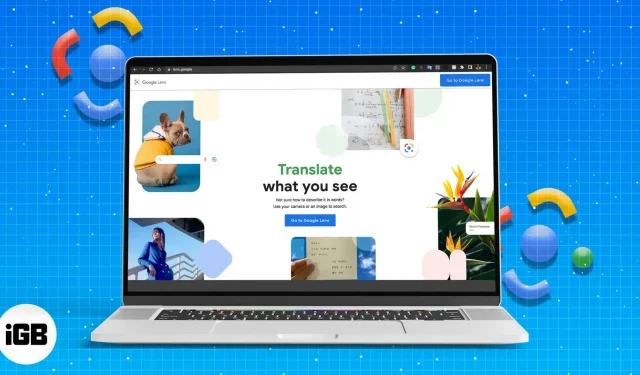

Google Lens is a tool based on object recognition technology that allows users to perform many actions on images, including reverse searching for anything you see in front of you or on the web.
While Android and iOS users enjoy the app’s functionality, it has no counterpart for Windows and Mac. Don’t worry – there are several ways to use Google Lens on your Mac. Let me share some of them with you!
- What is Google Lens?
- How to use Google Lens in Chrome on Mac
- How to use Google Lens in Safari or other browsers
- Different Ways to Make the Most of Google Lens
What is Google Lens?
Google Lens is an AI toolkit that recognizes any type of image and extracts information to help you take action.
It is best known for its reverse image search, which helps you search the web for things you can’t describe in words, like a beautiful bag that caught your eye or an item you’ve seen but don’t know the name of.
How to use Google Lens in Chrome on Mac
Like other great Google features, Google Lens is built into Google Chrome. So all you have to do is download Google Chrome for your Mac if you haven’t already.
Unlike before, when you had to enable it from Google Chrome’s experimental features, Google Lens is now already part of Chrome OS. Just make sure you have the latest version of Google Chrome installed.
Note. Unlike the mobile version, Google Lens for desktop doesn’t have a camera feature. You cannot use your Mac’s camera to scan the environment in real time. The workaround is to take a photo and then upload it (more on that later).
If you’re a Chrome user, you might find our list of 36 Chrome for Mac tips and tricks helpful.
How to use Google Lens in Safari or other browsers
If you’re interested in Google Lens but don’t fancy using Google Chrome, don’t worry, you can still use this tool in Safari or another browser. Cunning? Google pictures. Once there, you can interact with Google Lens in several ways.
Paste Image URL
If you find the image online, just click on the camera icon → click “Insert image link”and paste the image URL into the search box. Wait for Google Images to do its job. It should show you:
- Possible related image searches.
- All web pages with related images.
- visually similar images.
If you’re getting the error “The URL doesn’t belong to an image, or the image isn’t public”, make sure you’re getting the correct image address. For this:
- Go to a web page.
- Control-click the image → select Copy Image Address.
- Paste this into the Insert Image link field.
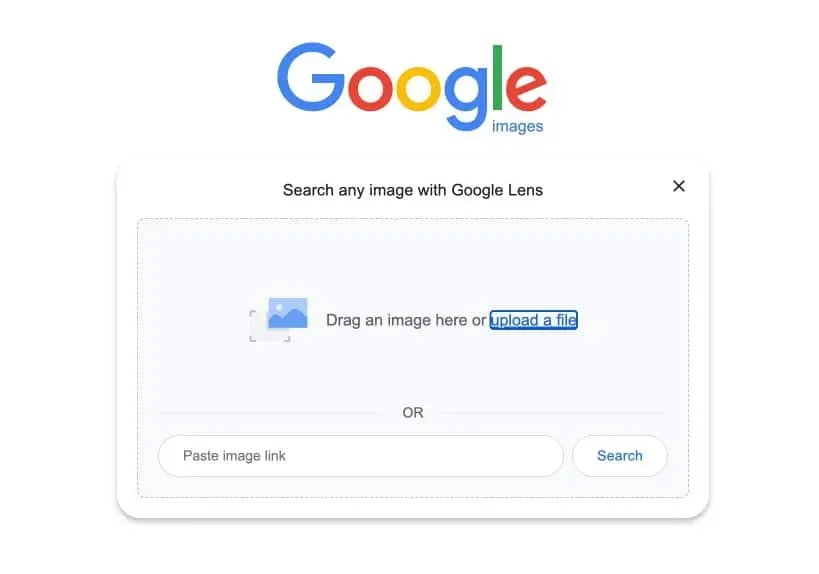
Upload file
This option is useful if you already have an image that you want to find on your device. Because Google Lens on a computer doesn’t allow you to use your device’s camera in real time, you can simply take a snapshot of the image you want to find and upload it to Google Images. Do it:
- Select the Upload File tab.
- Click “Choose File”→ select a file on your device → click “Upload”.
Drag
You also have the option to drag and drop your image directly into Google Images. Drag the image into the box and release it as soon as you see the Drop image here.
If your main search engine is Google, you’ll find that Google Lens is integrated into it. Now let me discuss the different ways to use this tool!
Different Ways to Make the Most of Google Lens
Google Lens offers a number of features that make browsing the web more intuitive and convenient. Here’s how you can get the most out of Google Lens on your computer.
Make more accurate image searches
If you’re doing an image search, there may be times when the image you’re looking for is part of a larger image. Google Lens allows you to perform more precise searches by highlighting the elements it finds in the original image. Here’s how it works:
- Do a normal Google search. Click “Images”to view only image results.
- Select an image. A sidebar will appear with the image you selected.
- Click the Google Lens icon. A rectangular selection outline will appear. Click anywhere in the image to focus the selector on different areas. Or adjust the outline of the selection with the cursor. After that, below the picture you will see the results of loading Google Lens.
Note. The features mentioned below are built into Google Chrome and may not work in Safari or other browsers.
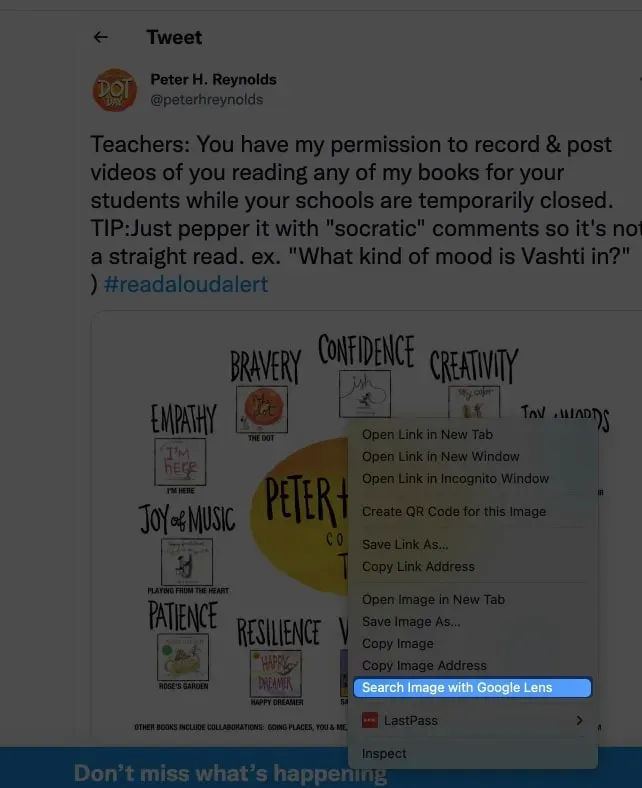
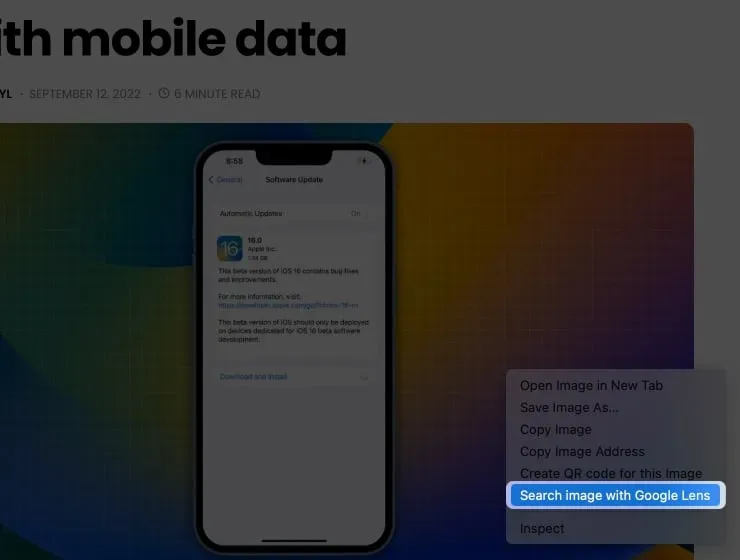
Search for images you see on a web page
Most of the time we find what interests us when we browse a web page. In this case, you do not need to open a new window or tab to search Google Images. Instead, do the following:
- Control-click the image → click Search Image with Google Lens.
- The Google Lens interface will open. If necessary, adjust the outline of the selection to make your search more precise.
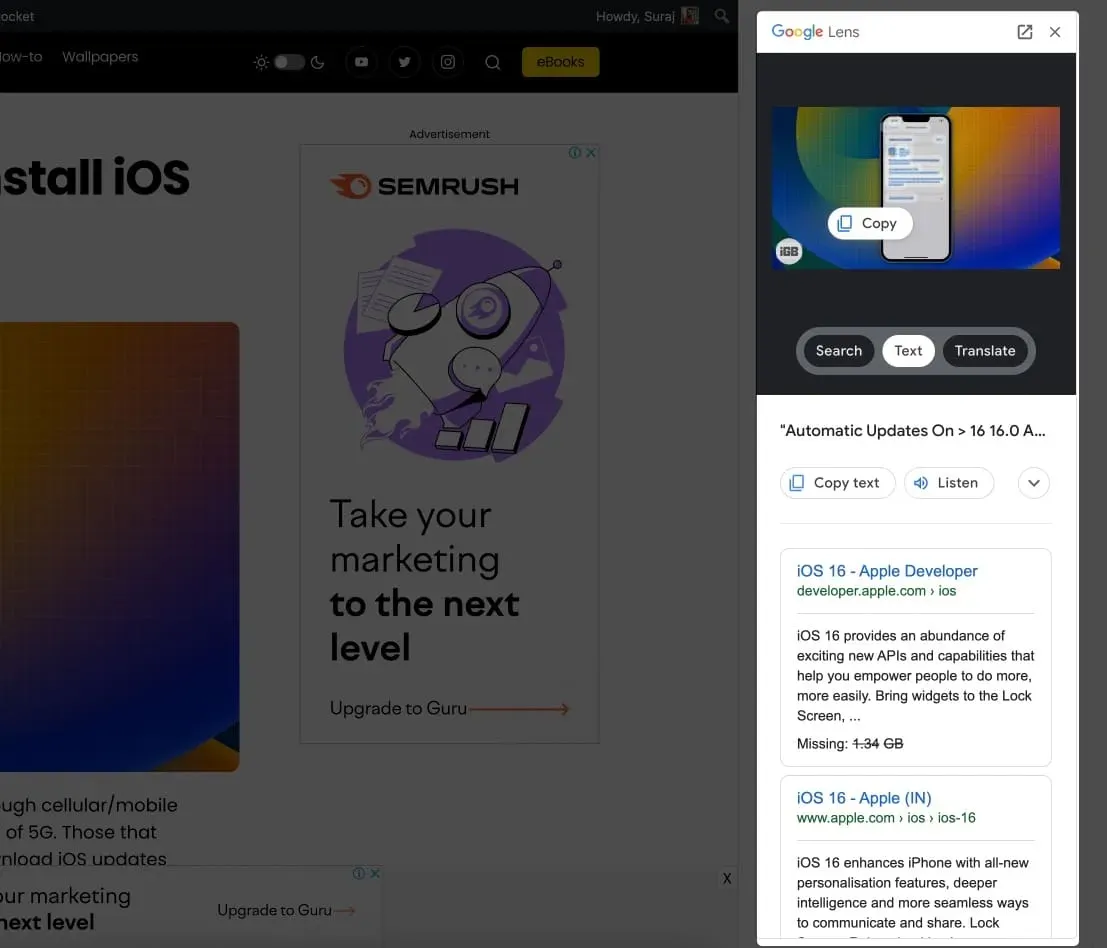
Selecting and copying text from images
Google Lens also has an OCR processor similar to Apple’s Live Text feature. This basically recognizes the text in the image and allows you to extract it. This can be useful when the text you want to copy is in an image format, such as a screenshot or an image containing text.
Simply Control-click the image → select Search Image Using Google Lens. Often Google Lens automatically detects text and highlights it. From here, simply copy the text directly from the image → Copy.
If it doesn’t happen automatically, click the Text option → click the Select All Text button if you want to copy all the text in the image. If not, select the desired text → Copy text.
You can also do more things with text. Click the down arrow to expand the selection and do one of the following:
- Listen: Listen to text dictated by your device.
- Search: Search for the selected text.
- Translate: This will redirect you to Google Translate and allow you to translate the text into another language.
You can also use Google Lens if you have an image whose text you want to extract. Just go to Google Images → upload an image → highlight the text you want to copy → Copy.
Translate selected text from images
As mentioned above, you can also translate selected text from images. Let’s say you’re browsing the Internet and you come across a picture with text that you don’t understand. You can use Google Lens to translate an image found on the web.
Just Control-click it → select Search Image with Google Lens → select Translate → select the language you want to translate the source text into. You will see how Google Lens changes the text on the image.
You can also take a photo of the image you need to translate and upload it to Google Lens using your Mac.
Again, these features are built into Google Chrome. But don’t worry – if you have Live Text enabled on your device, you can directly translate text into images and do more, including extracting text from videos with Live Text!
We also wrote an article that you can read if you want to know more about the Live Text vs. Google Lens comparison.
Completion…
Google Lens is a powerful feature that makes browsing the web more intuitive and natural. While its full features are better appreciated on mobile phones, Mac users can do a lot to get the most out of Google Lens.
And you? Why are you using Google Lens? Are there any hacks you would like to share? Feel free to share them in the comments below!