
You can create folders in the Apple Notes app to organize your notes, tasks, sketches, and notes. In iOS 16, iPadOS 16, and macOS Ventura, you can also create smart folders based on certain conditions. Any note that meets these conditions will automatically appear in this smart folder.
Smart folders are a great way to organize your notes and make them accessible based on tags, date created, date edited, shared, mentions, checklists, attachments, folders, quick notes, pinned notes, and locked notes.
In this guide, we’ll show you how to create and use smart folders in the Notes app on iPhone, iPad, and Mac.
Create a smart folder in the Notes app for iPhone or iPad.
1) Open the Notes app and go to the Folders screen.
2) Tap the new folder icon at the bottom. If you’re using both iCloud and On My iPhone accounts, you’ll be prompted to select one of them.

3) Give your folder any name you want and click “Make to Smart Folder”.
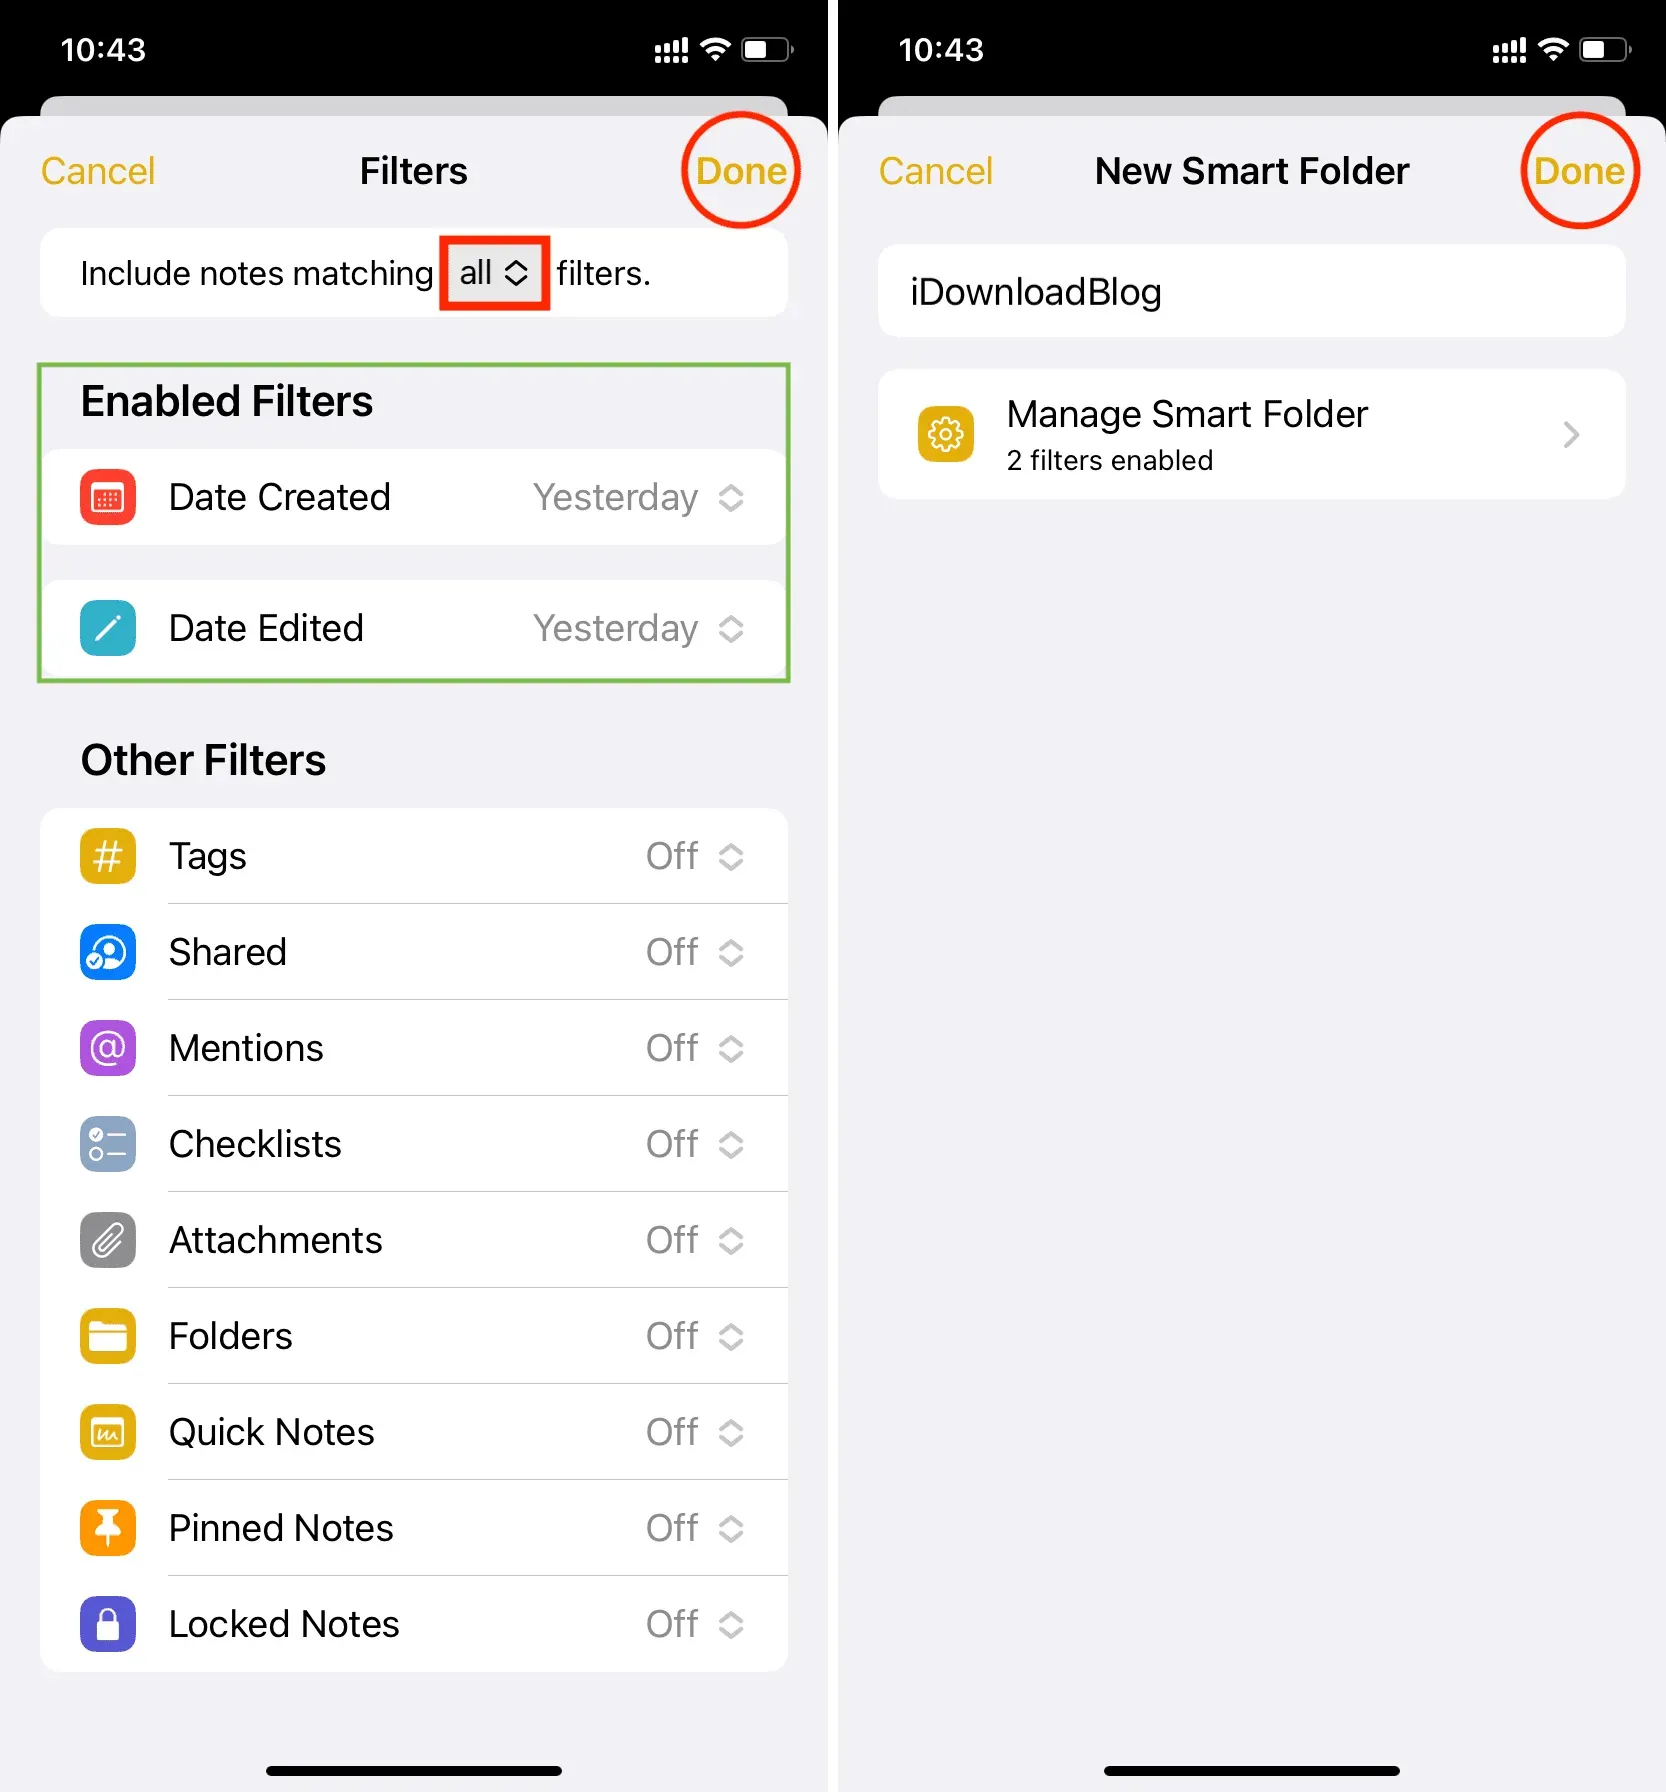
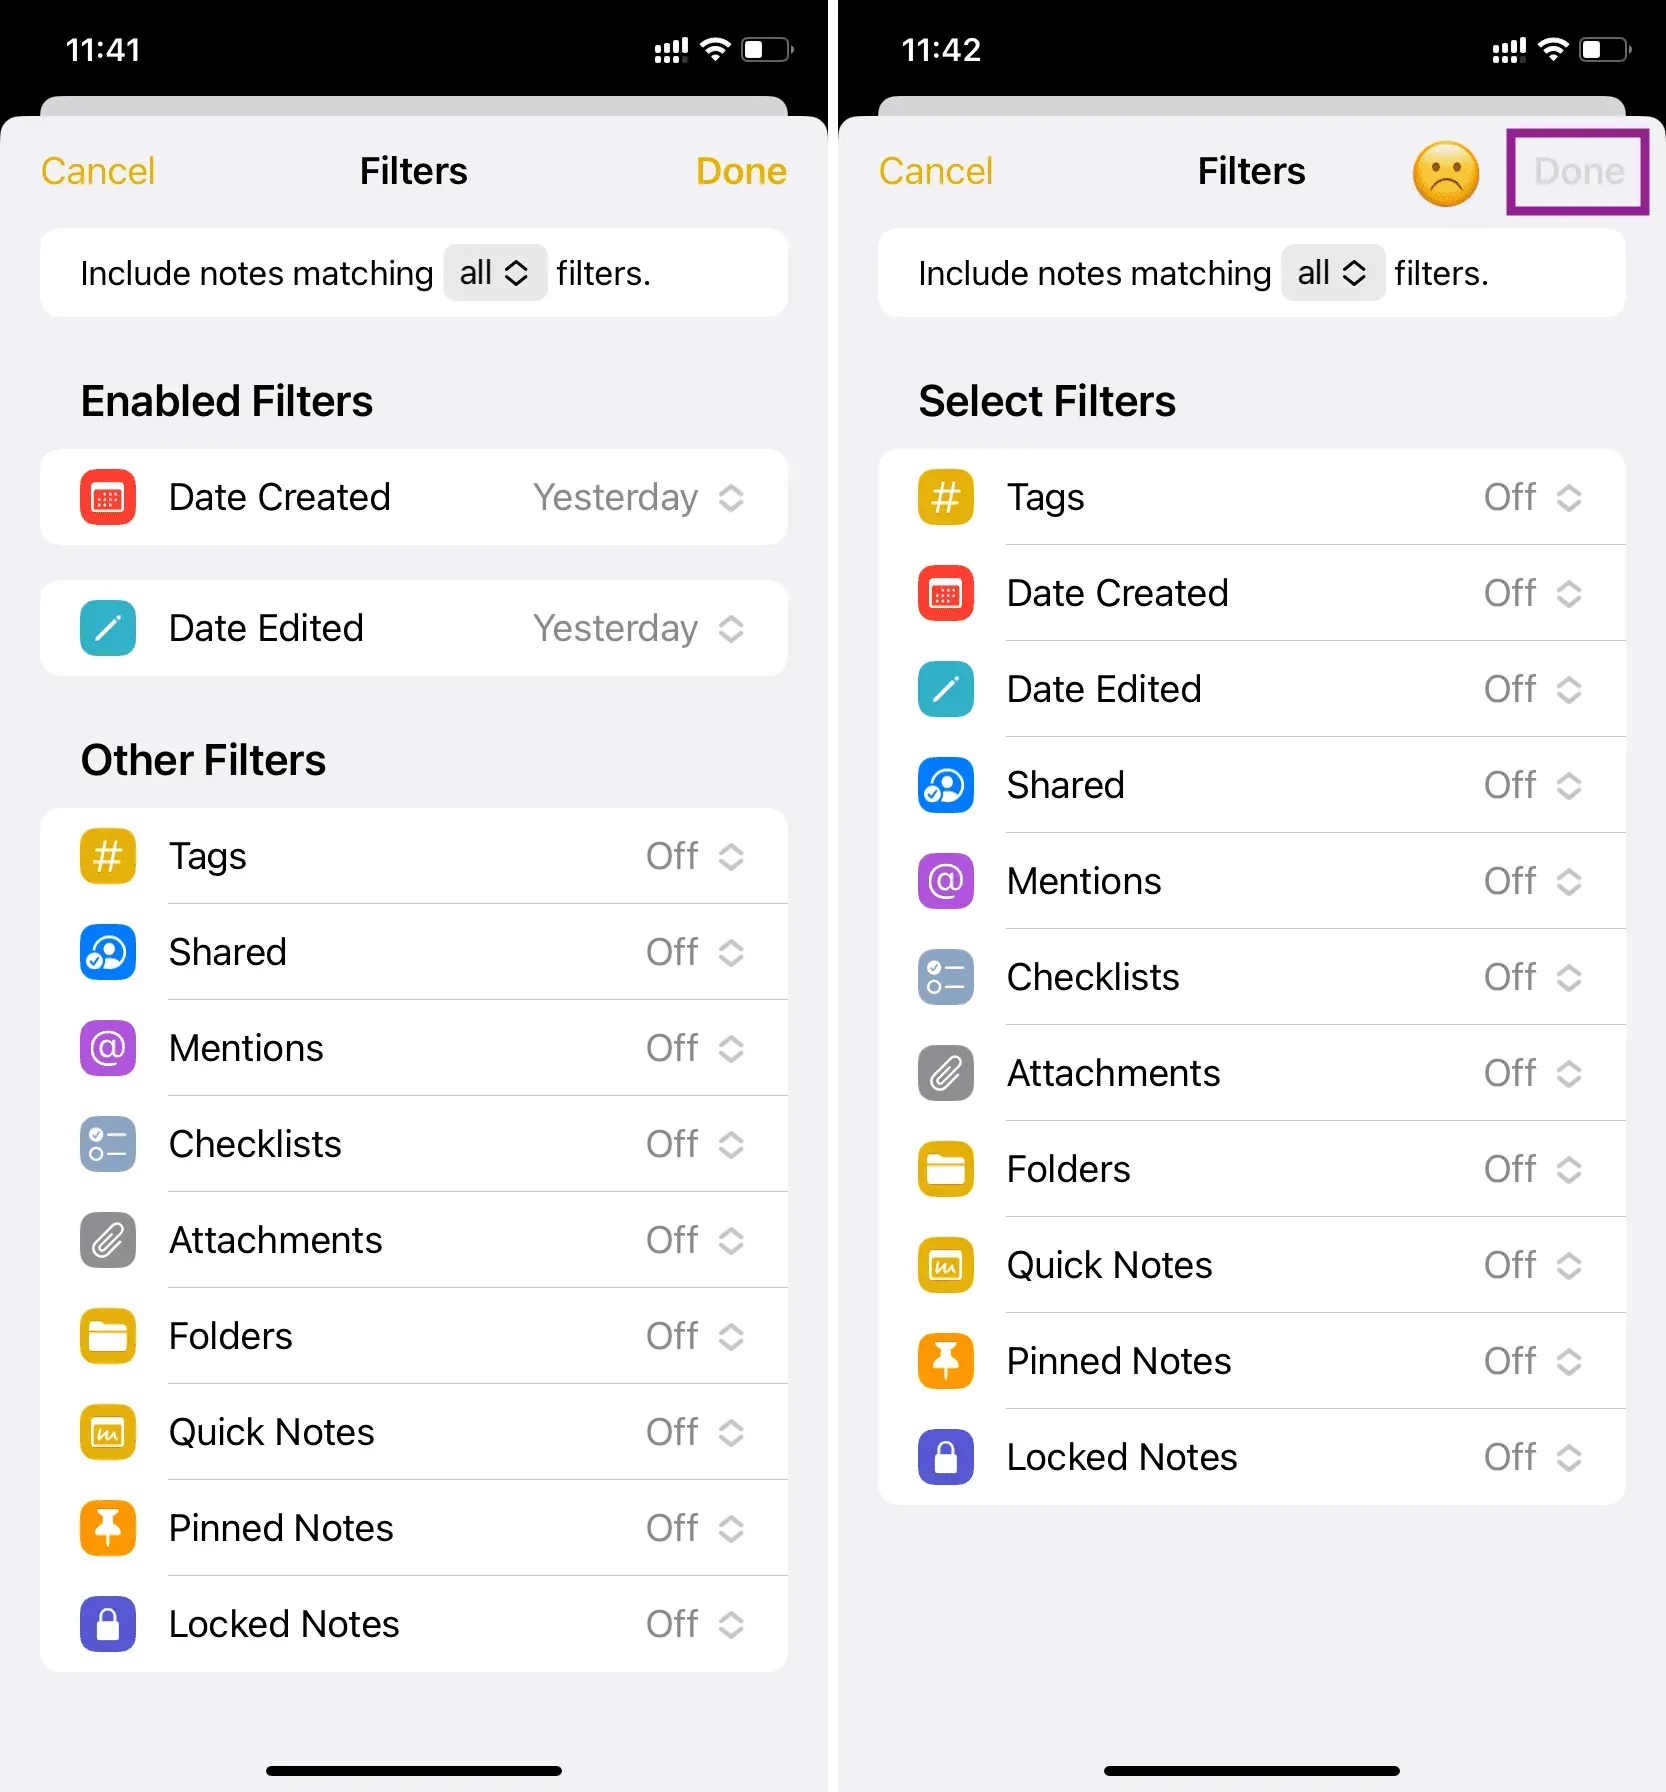
4) You will see several filters like tags, date created, date edited and so on. Click on the one you need and select the condition of that filter.
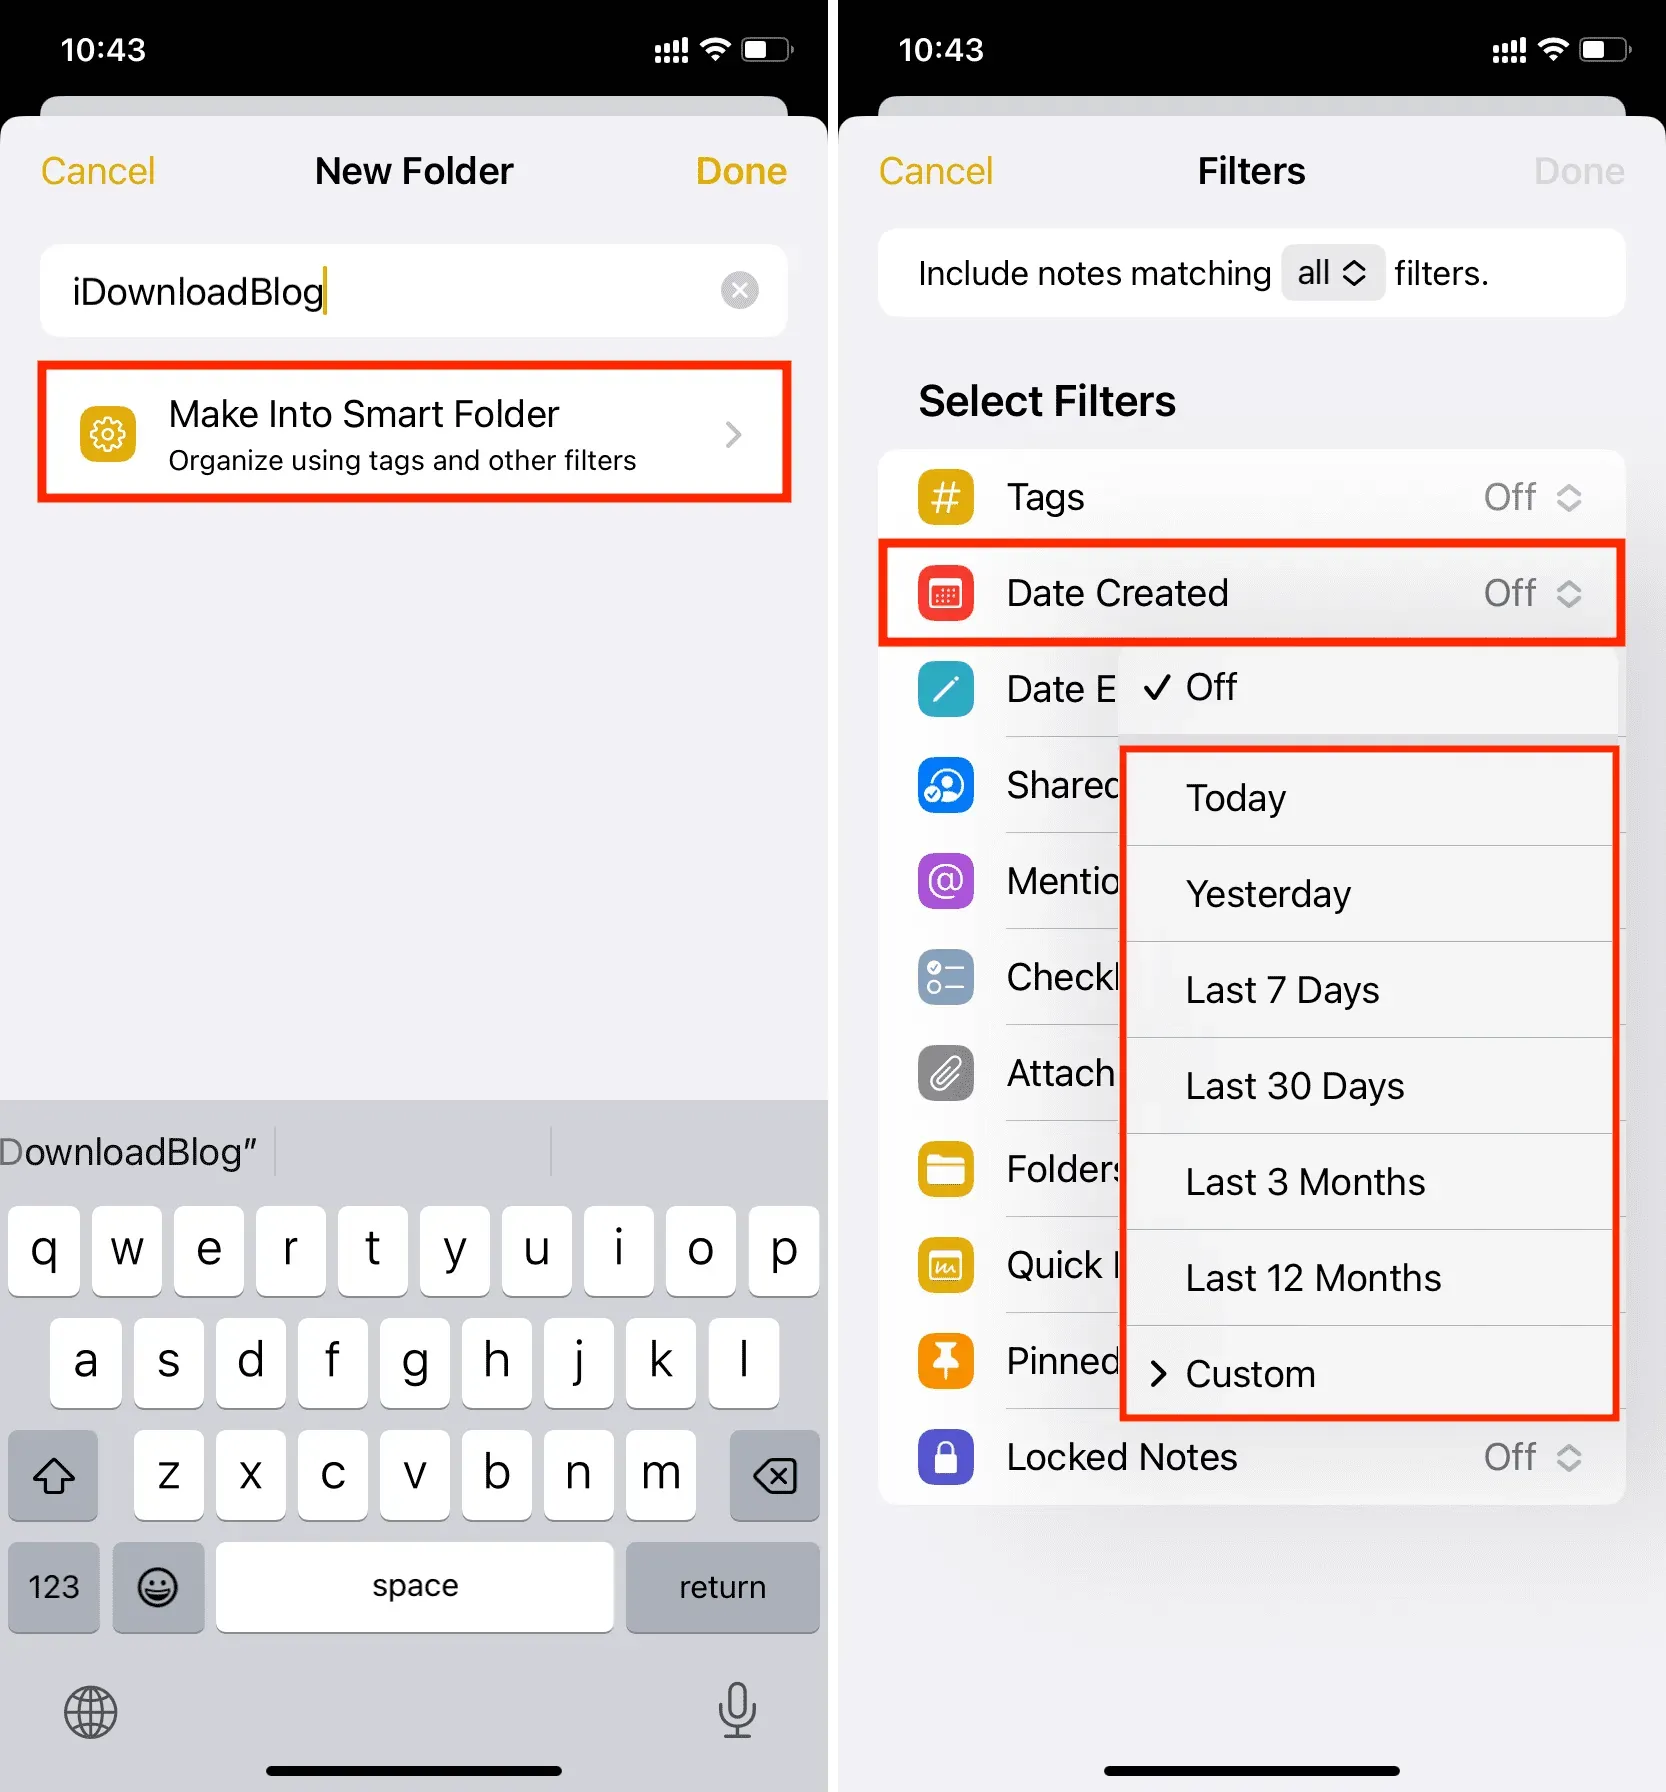
5) Once you’ve set the filter, it will move up under the new “Filters Enabled”heading. You can click “Finish”and create a smart folder using only one selected filter.
Or, if you want to add more filters, you can do so by tapping more filters from the bottom. If you select more than one filter, you can also include notes that match all of the selected filters or any filter.
6) When everything is set up, click “Finish”to create and save this smart folder.
That’s all! You have successfully added a new smart folder to the Notes app. All notes matching the specified conditions will automatically appear in this folder. If the note no longer matches the filters you have set, it will automatically disappear from this Smart Folder.
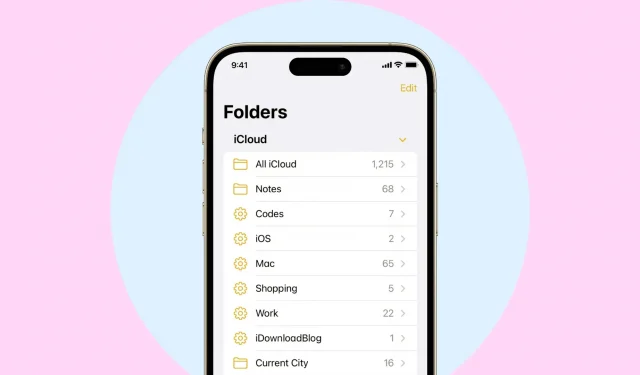
You will see your Smart Folders on the same screen as the Standard Folders. Smart folders have a gear icon.

Can I manually add notes to a Smart Folder?
Notes inside smart folders are added or removed automatically based on filters. You cannot manually add notes to or remove notes from a Smart Folder until you edit the note and get rid of the options that make a particular note qualify for that Smart Folder.
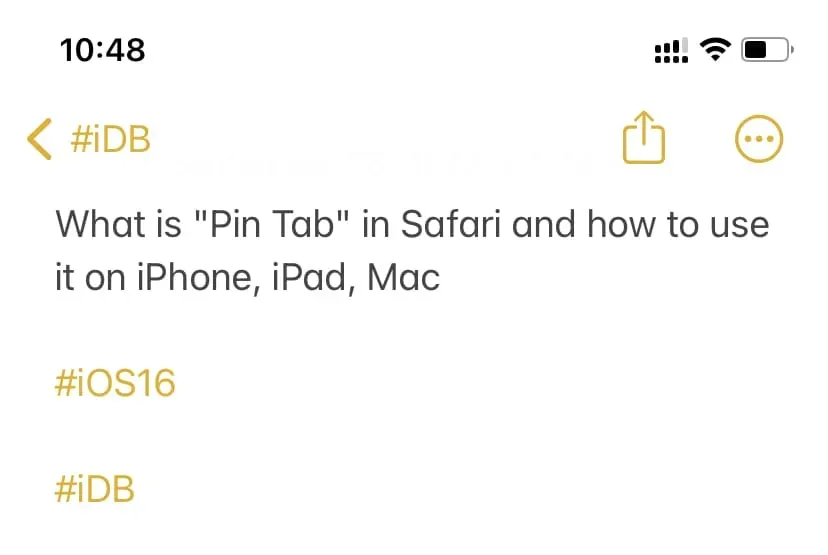
For example, I have a smart folder that automatically lists all notes tagged with #iDB. If I want to remove a note from this smart folder, I will have to edit this note and remove the #iDB tag from there. Once this is done, this note will no longer be part of the smart folder.
Edit smart folder
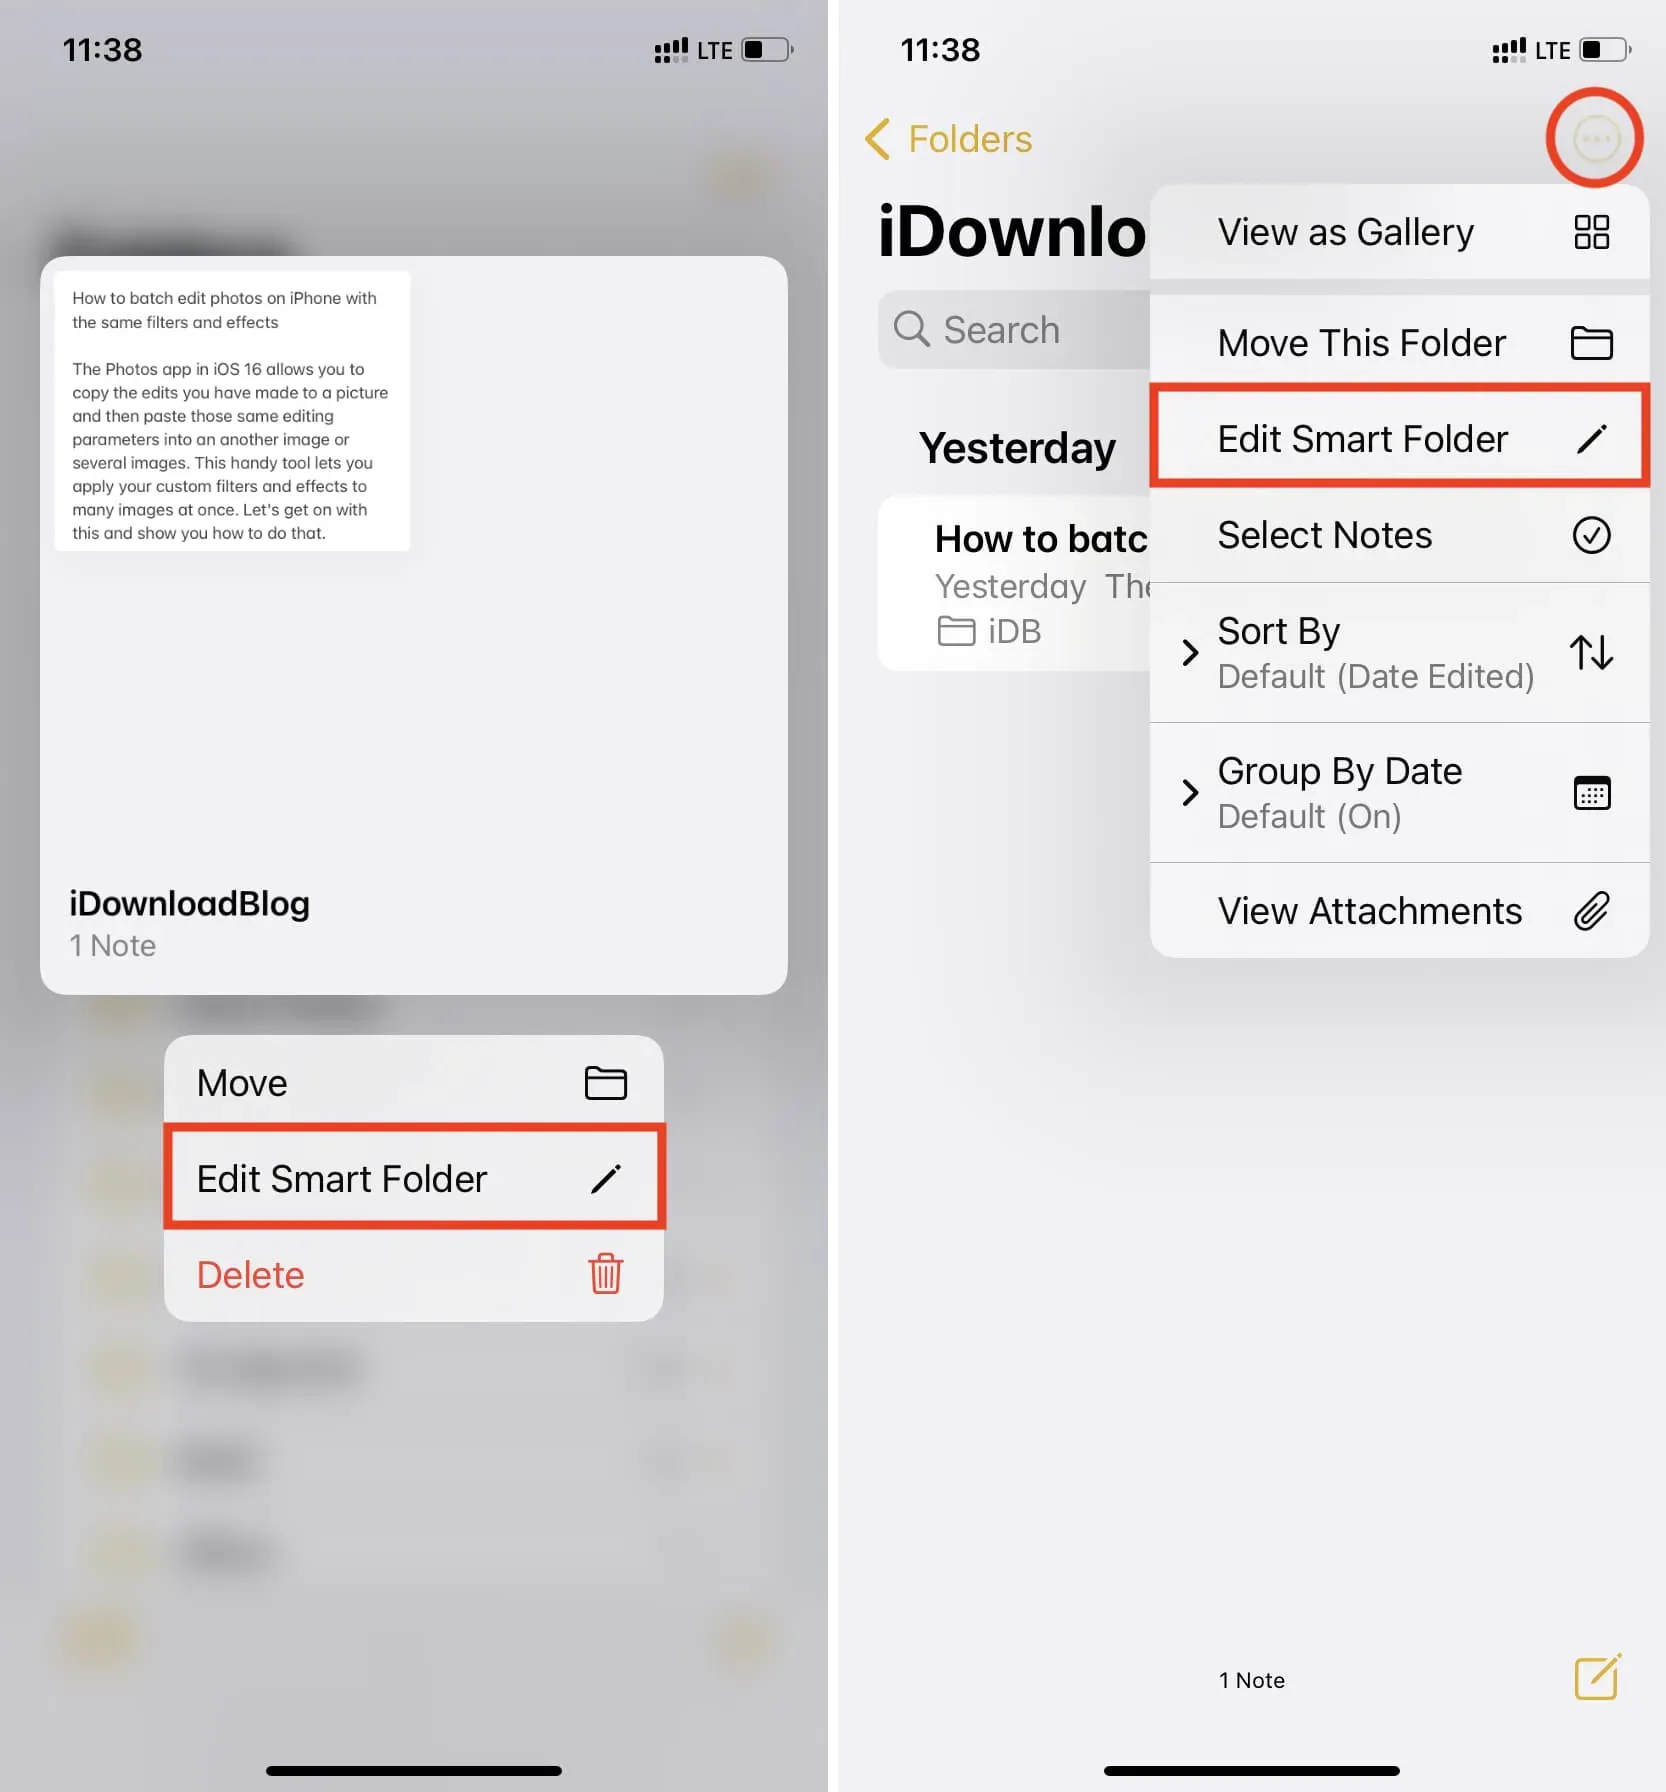
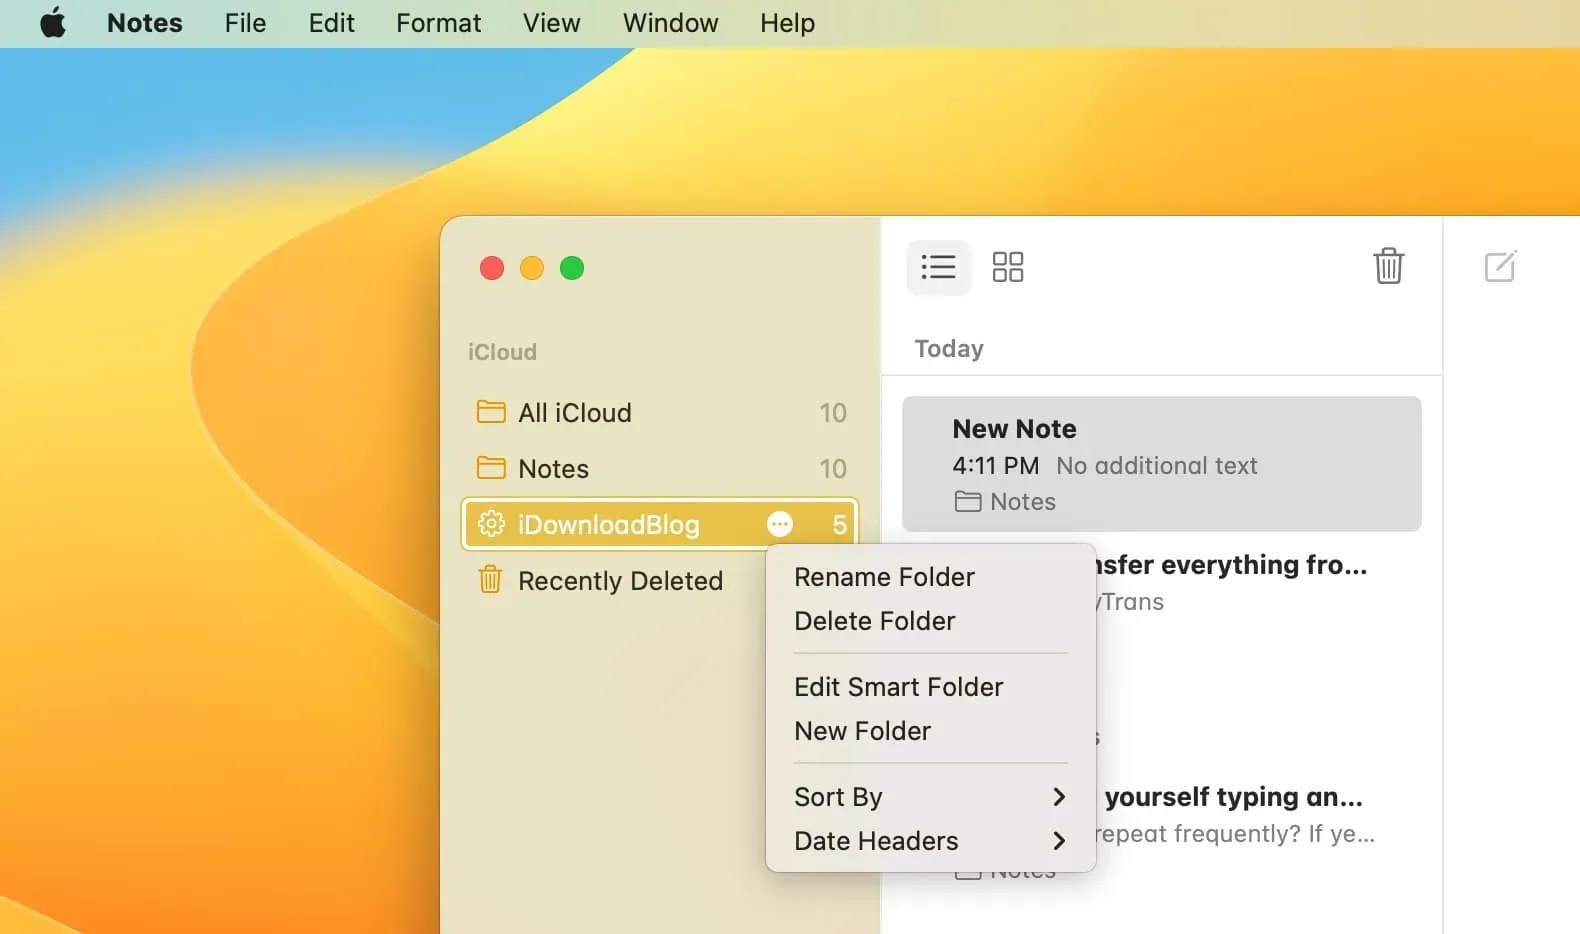
Want to rename a smart folder or change filters? Press and hold a Smart Folder and select Edit Smart Folder.
Alternatively, you can also go to the Smart Folder, click the “More”button, and select “Edit Smart Folder”.
Move Smart Folder
You can move a smart folder from iCloud online storage to an offline On My iPhone account, and vice versa. But just like normal folders, you can’t move a smart folder from iCloud or On My iPhone to added Google or Microsoft accounts.
It’s important to note that moving a smart folder from iCloud to On My iPhone doesn’t move notes inside that folder. It just moves an empty folder.
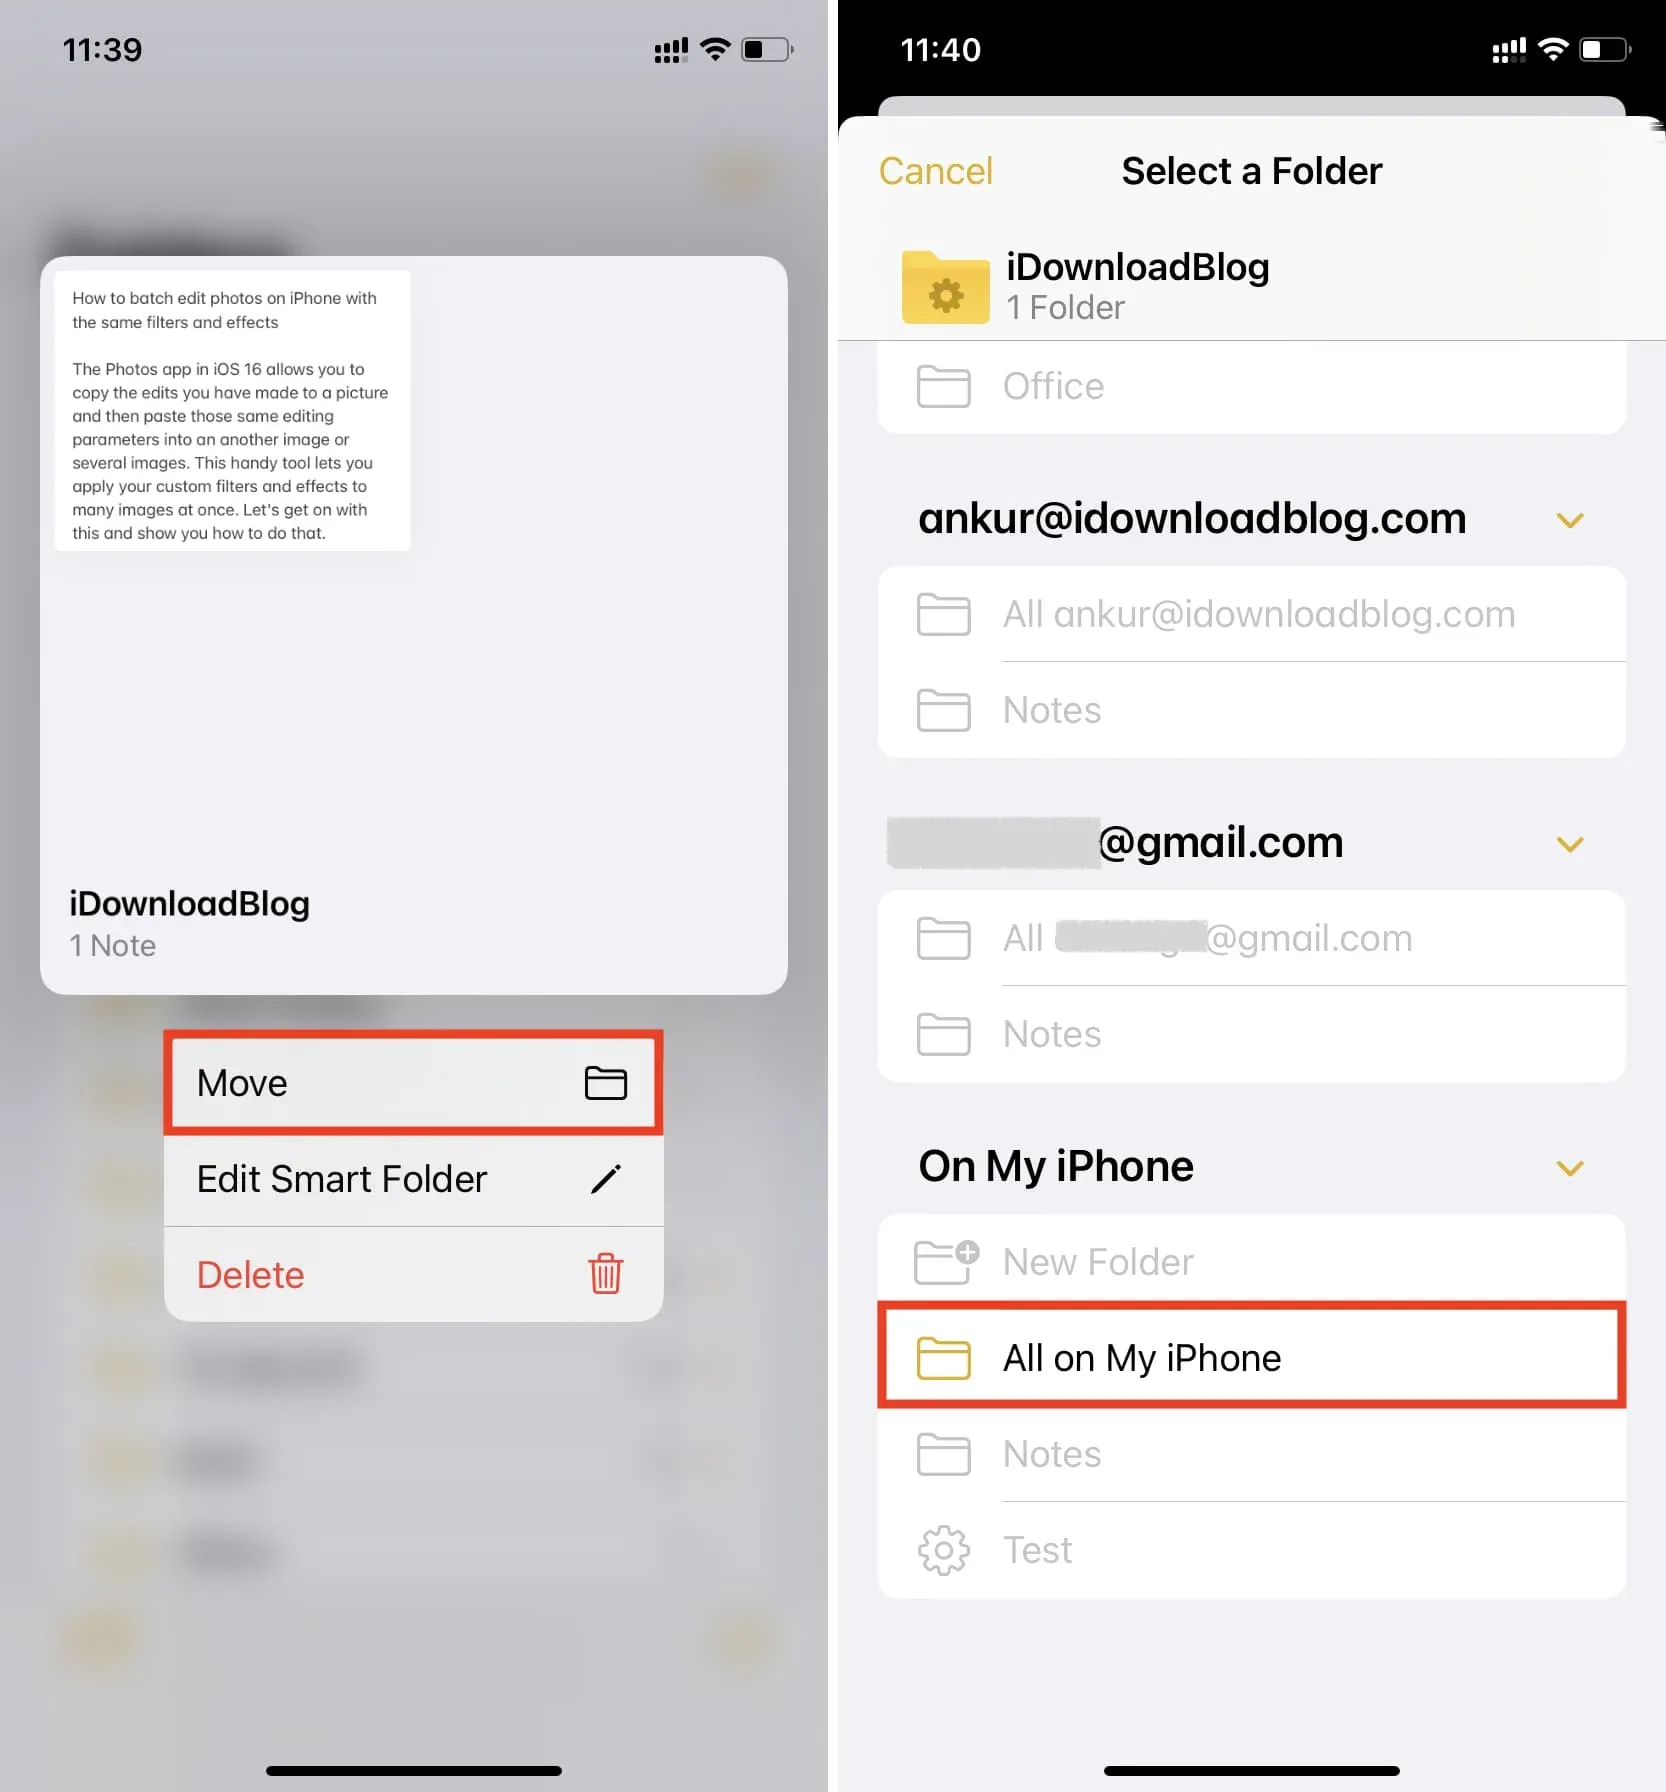
To move a Smart Folder, press and hold it, then select Move. Then tap Everyone on My iPhone (or All iCloud).
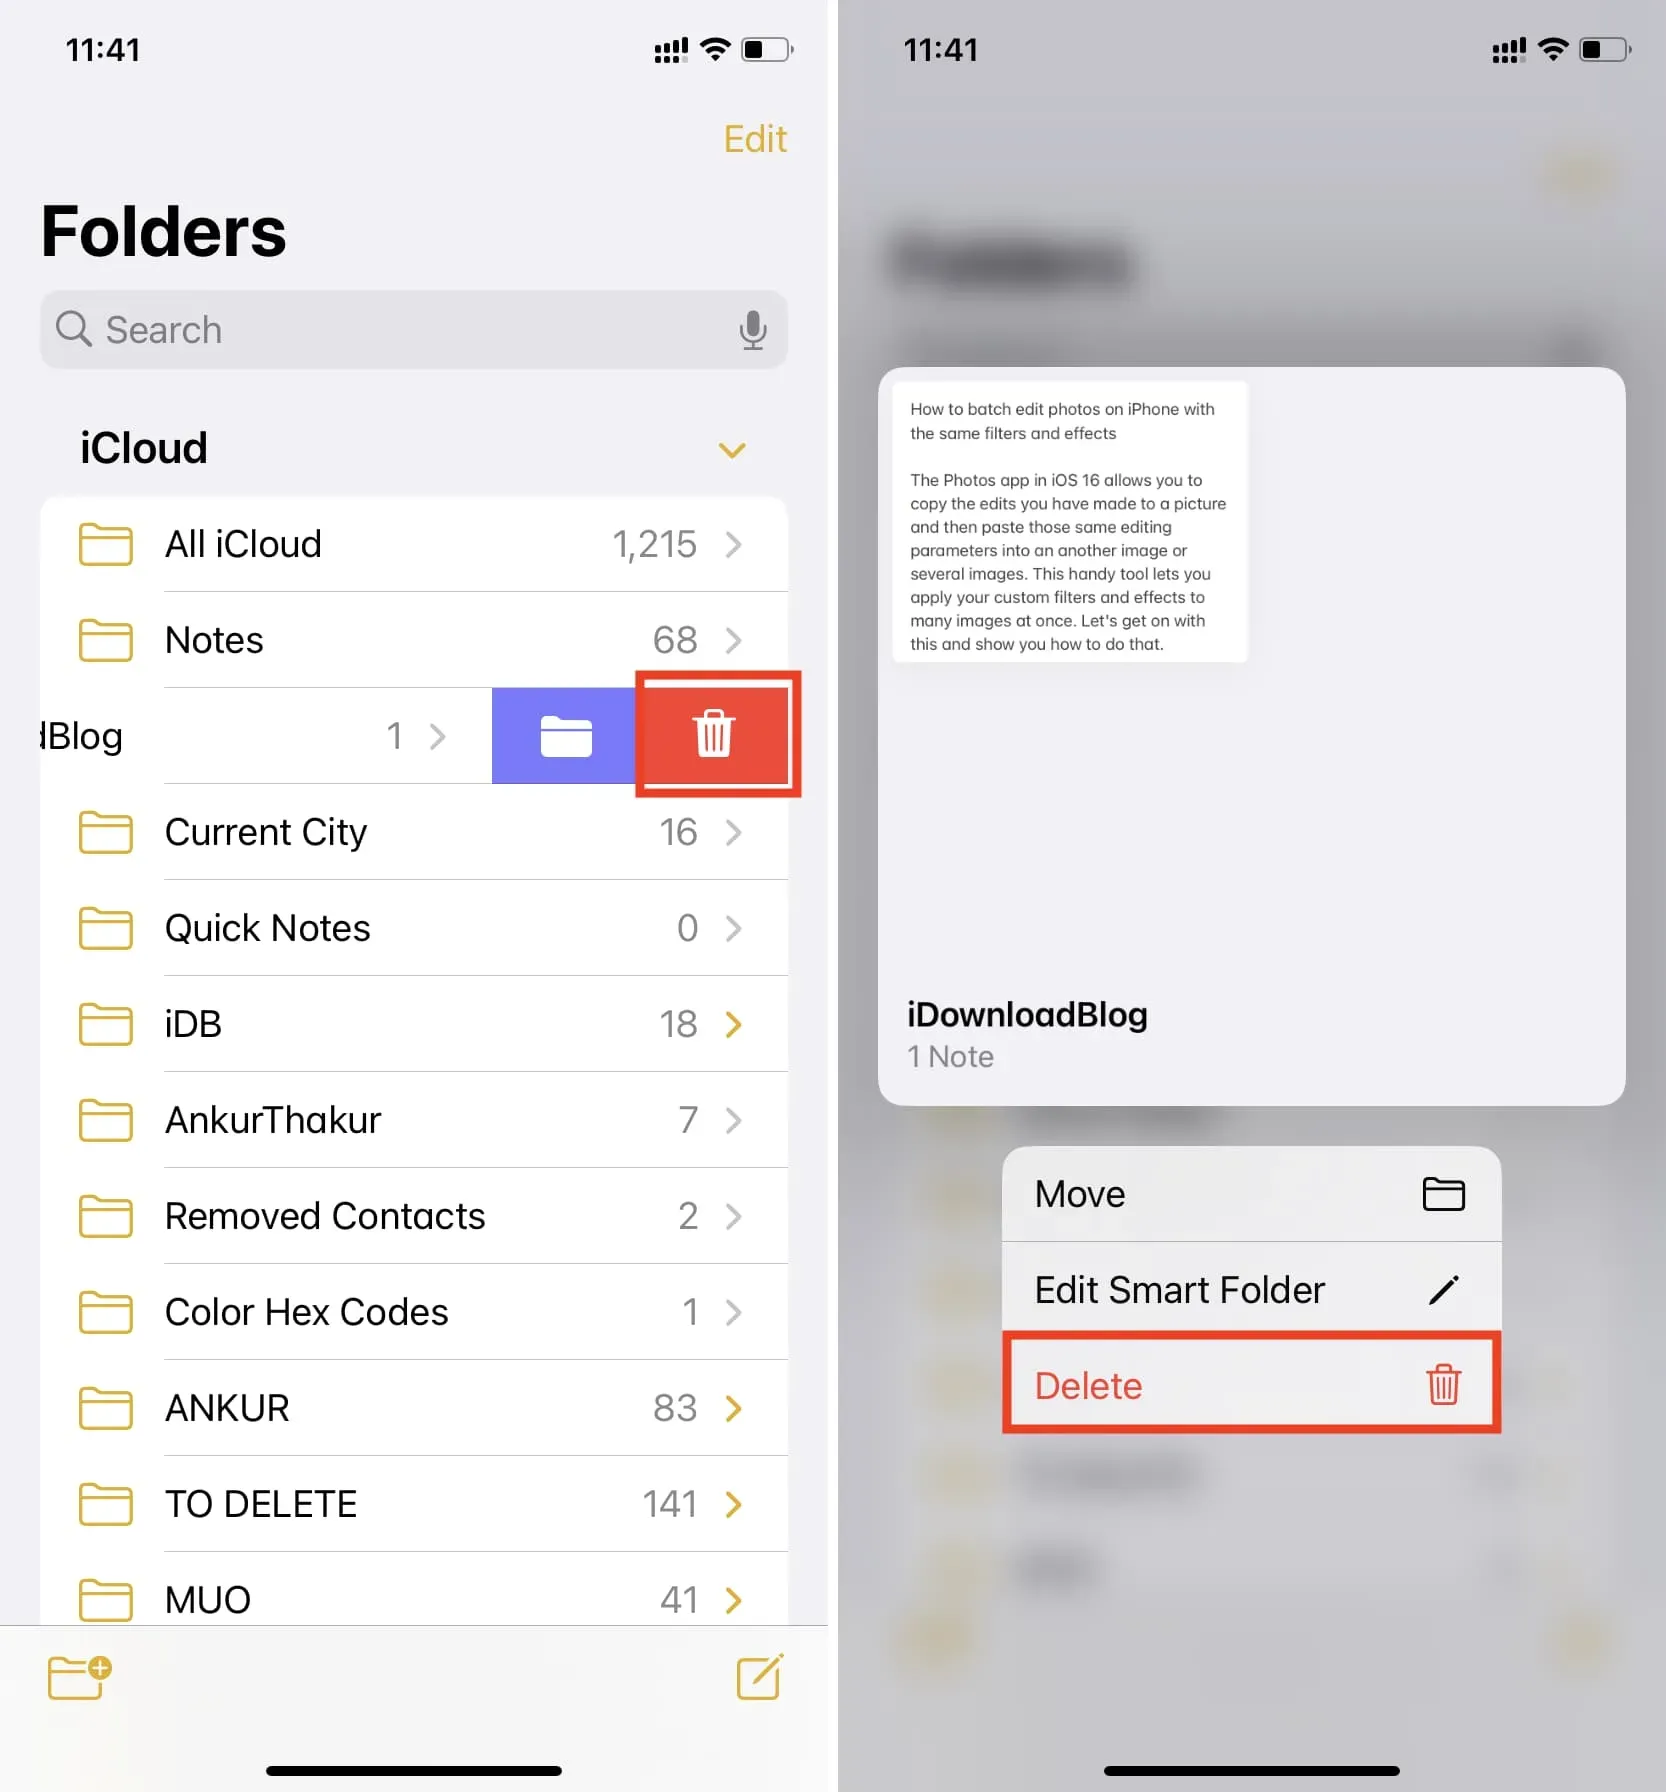
Delete smart folder
Go to the Folders screen of the Notes app. From here, swipe left on the smart folder name and tap the delete icon.
You can also press and hold the folder name and select Delete.
Can I convert a smart folder to a normal notes folder?
You cannot do this. If you go to edit a Smart Folder and remove all of its filters, the Done button to save these new changes no longer works. So you can’t convert a smart folder to a non-smart folder. But you can always delete the smart folder and create a new default folder in the Notes app.
Add Smart Folders to Notes on Mac
After installing macOS Ventura, follow these steps to create a smart folder in the Notes app:
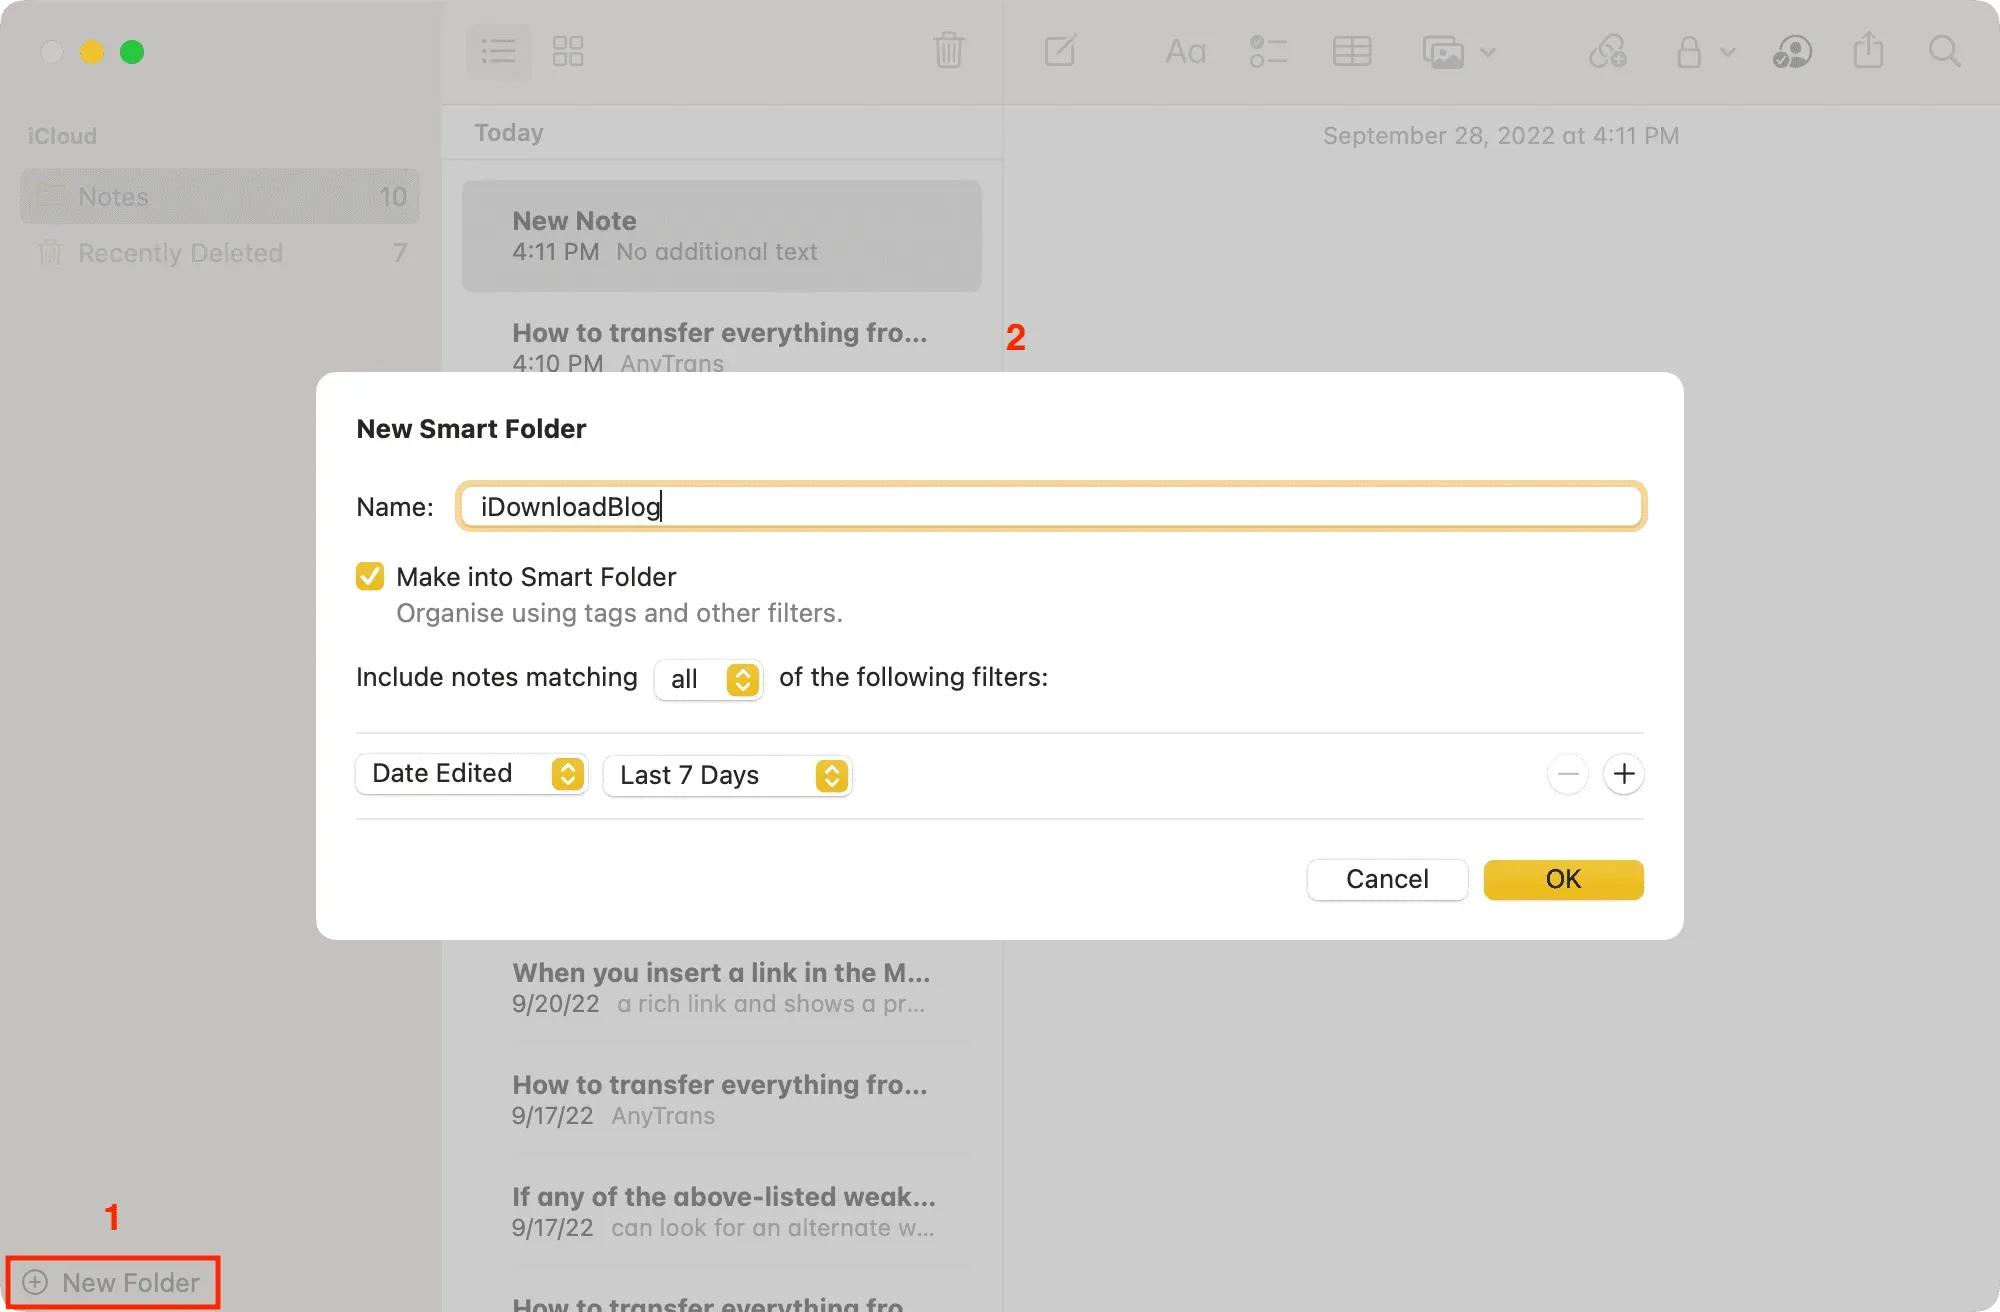
1) Open the Notes app and tap New Folder in the bottom left corner.
2) Give your folder a name and check “Make to smart folder”.
3) Select a filter from the drop down menu and set it according to your preference.
4) Finally, click “OK”to create a smart folder in the Notes app on Mac.
Smart folder management
Hover over the smart folder name and click the More icon (three dots inside a circle). Alternatively, you can right-click or Control-click once on a smart folder name to open a menu. From here, select an option to rename, delete, or edit the folder.
Using search and smart folders in the Notes app
Here’s how you can use Smart Folders on your iPhone, iPad, and Mac. This is a great addition to better organize your notes automatically.
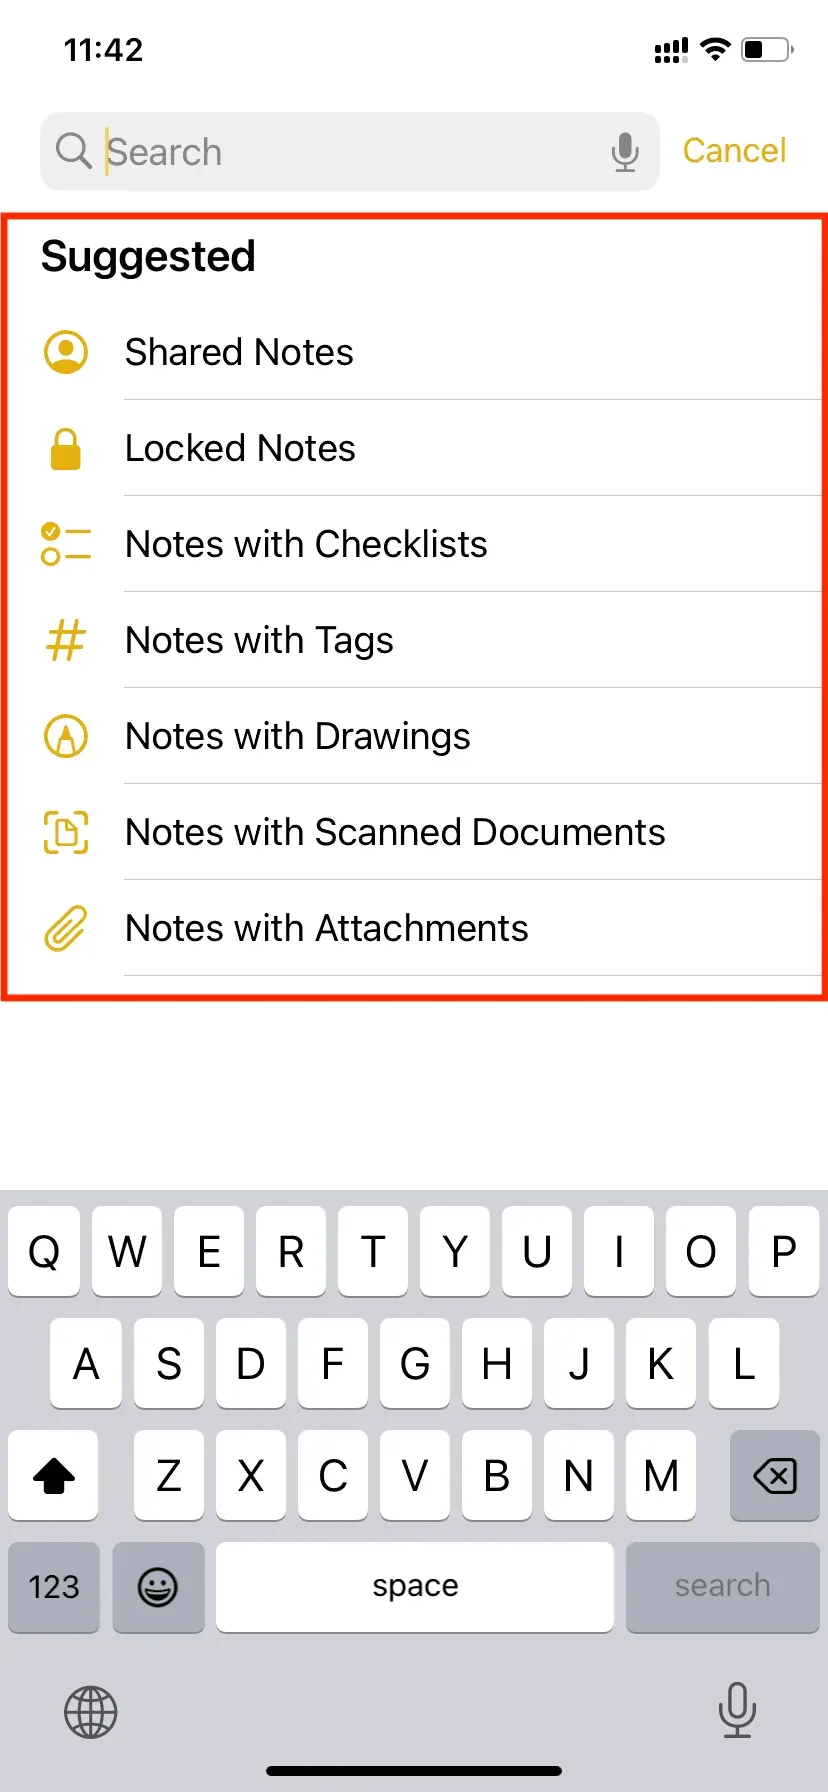
Apart from smart folders, the search bar in the Notes app is also powerful. When you tap the search bar, it automatically offers you the option to view all shared notes, locked notes, checklist notes, drawing notes, and more. You can use them or have a smart folder that puts all such notes in one place.