
For gamers, the auto-update features are a boon. But they can soon become annoying when updates become frequent. Also, some people prefer to have full control over their storage.
For such people, turning on the automatic update feature may cause problems. An update that supports game interruption can be annoying when you’re in the middle of a game.
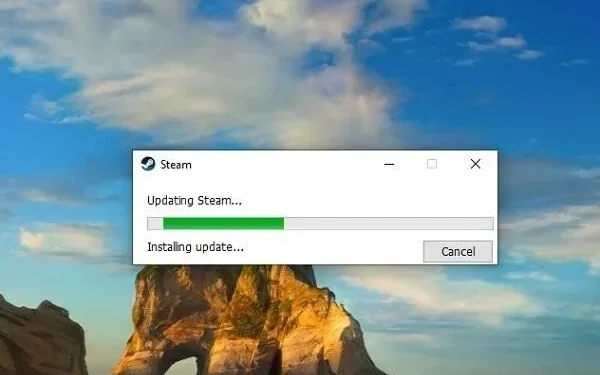
Similarly, Steam has a feature that updates the game by default. It only requires an active internet connection.
While the auto-refresh feature is intended for the convenience of gamers, it is a nuisance for others. People with limited data connection despise this feature and are looking for ways to turn off automatic Steam updates.
So, if you find yourself in a similar situation, look no further. In the guide below, you will find ways to turn off Steam’s auto-update feature.
Solutions to Disable Automatic Steam Updates
- Enable update during startup
- Change Update Settings on Steam
- Set time limits for auto-updates
- Limit bandwidth for downloads
- Edit game manifests
- Disable Steam Auto Start
- Disable auto-updates
- Use Steam Offline
1. Enable the “Update at startup”option.
This method will work for you if limited data doesn’t bother you. This will not stop Steam from updating automatically, but will force it to update only when the game is launched.
Enabling this option will prevent updates during gameplay. So, to force Steam to update the game only at startup, you need:
- Launch Steam on your device.
- From the menu at the top of the Steam hub, open the game library.
- Once you are in the library, you will see various games. Find the game you want to change the settings for. Right click it. A drop-down menu will appear.
- Select the “Properties”option.
- A window will appear on the screen. Now, in the tabs indicated at the top, select “Updates”.
- From the Automatic Updates drop-down menu, select the option to only update this game when it starts.
Once you have selected the above option, you can close the properties window. Auto-updates in the middle of the game should stop. Remember that updates will only happen when the game is launched.
2. Change your update settings in Steam.
The update settings on Steam give you three different options. You can select one of them to change updates for the selected game. This section will help you understand what each of them does.
So, as before. To change your update settings on Steam, you must follow the same steps. After that, in the “Properties”window, open the “Updates”tab. Click Automatic Updates. The following three options will appear on the screen. Choose any of them:
But what do they mean? Let’s get a look:
- “Always update this game”: This option will allow Steam to automatically update the game.
- “Update this game only at startup”: This setting will force Steam to update the game at startup time.
- High Priority: This setting gives preference to the game you choose to receive updates.
- To prevent updates while playing, select Update this game only at startup.
- Select the High Priority option to prioritize updates to your game.
- Select the “Always update this game”option to enable automatic updates.
3. Set time limits for auto-updates
Updating games consumes a lot of data. As a result, you may experience a slow internet connection. This can be frustrating for those who experience it during work hours.
The scheduling time will force Steam to only run updates at the scheduled time. To set automatic update time limits, you need to follow these steps:
- Launch the Steam client on your device.
- Select the Steam option in the top left corner.
- A drop-down menu will appear. Click “Settings”in this menu.
- Open the Downloads tab on the left side.
- In the Download Limits section, you can schedule updates.
- Select “Auto update games only between”to set the time. Then use the dropdown menu to select your hours.
Follow the options and set the time according to your preference. Remember a few things:
- The time will work with your computer’s clock. This will not work with the Steam clock.
- It would be helpful if you also had your computer turned on and connected to the Internet. Otherwise, updates will not be performed.
4. Limit bandwidth for downloads
This method is suitable for those who have limited data plans and who are looking for a way not to run out of data. All you have to do is limit the bandwidth settings for downloads.
This will not exhaust your data for background downloads. You can set the internet speed and data usage that you can allow Steam.
Once Steam reaches the limit, background operations such as auto-updates will stop. This method also helps to put an end to the lag or delay in Internet-related activities.
To limit bandwidth, you need to do the following:
- Follow the same steps as above to get to the Download Limit section.
- After that, check the “limit bandwidth to”box instead of the time option.
- Once you check it, the box below will become active so you can enter numbers.
- Remember that you must enter the value in KB/s (kilobytes per second).
- Thus, about 1000 kbps is converted to 1 MB. If you are confused, enter a unit of measure. Then click “Apply”and you will see what speed is listed above.
- After you submit your application, click OK. After that, you can exit the settings.
Remember, this is for those who don’t want updates to take all the speed. If you are playing games and updates are happening, you can use this method.
5. Edit Game Manifests
If other methods of disabling auto-updates do not work for you, you can try this one. All properties of Steam games are usually stored in the manifest file.
If your Steam client settings are not working for you, you can try this manual approach to editing game manifests. This will help disable auto-updates. To do this, follow these steps:
- Launch File Explorer on your PC. Then find the directory where you have the Steam library. Then open the Steam Applications folder.
- Next, in Steam.apps, navigate to the Download or Download option. There should be game files in there that you want to edit.
- Right-click the game whose settings you want to change.
- A small context menu will appear. Select “Open with”from it.
- Select the desired editor. In this case, take Notepad++ and click OK.
- Find the AutoUpdateBehaviour attribute and set its value to 1.
- Save your changes before closing Notepad.
Make sure you have applications that allow you to edit files to complete the above method. Notepad++ and FNR are common applications with which you can make these changes.
To edit more than one Steam Game Manifest using Notepad++, you need to follow these steps:
- If you don’t have Notepad++ yet, download it.
- Open the Steam Applications folder.
- Highlight the files with the “appmanifest”prefix. Files with this prefix are game manifest files.
- Once selected, right-click on them.
- A small context menu will appear. Select the “Edit with Notepad++”option.
- Highlight the text “AutoUpdateBehaviour””0”. Copy the selected text.
- Open Notepad++ and press Ctrl+H to open the Find and Replace window.
- Paste the copied text “AutoUpdateBehaviour””0″into the “Find”text box.
- Paste the copied text “AutoUpdateBehaviour””0″into the “Replace Text”box again. But this time the value changes from 0 to 1. The text of the “Replace”field should look like “AutoUpdateBehaviour””1”.
- Select the Replace All option to replace the above text in all open documents.
- Click Yes to confirm the action if a confirmation dialog box appears.
- Close Notepad++ search and the Find and Replace dialog box.
- Before closing Notepad++, save your documents or press Ctrl+Shift+S.
To edit more than one Steam Game Manifest using FNR, you need to follow these steps:
- Download and install FNR if you don’t already have it.
- Launch the application.
- Specify a directory on Steamapps.
- Uncheck “Include Subdirectories”.
- In the file mask, enter:
appmanifest“.acf”. - In the “Find”field, enter “
AutoUpdateBehaviour“”0”. Make sure the value and attribute have two tabs. Or you can copy this text from any manifest file to avoid errors. - In the replacement field, enter “AutoUpdateBehaviour””1”. Again, make sure there are two tab spaces between the value and the attribute.
- Select the “Replace”option to make the change.
6. Disable Steam Auto Start
This method does not disable automatic updates, but it does restrict Steam from running. Simply put, when you open your computer, Steam starts up by itself. Due to its active state, it tends to download available updates.
Therefore, the best way to stop downloading Steam updates is to prevent it from running. To do this, you will need to follow the following steps:
- Open the Steam client on your device.
- Click on the Steam option in the top right corner and select “Settings”from the context menu.
- On the left side of the settings, select the “Interface”tab.
- Uncheck “Launch Steam when my computer starts”.
- Save your changes and click Exit.
Following the steps above will prevent Steam from launching. As a result, it will not run in the background.
7. Disable auto-updates
You can change some initial attributes to disable automatic updates for the Steam client. Be sure to only run this method if other methods fail. This method consists of two advanced steps:
1. Add launch arguments for the Steam shortcut:
- Navigate to the Steam icon on your desktop and right-click it.
- A drop-down menu will appear. Select the “Properties”option in it.
- Navigate to the target field.
- Add the following statement to it: noverifyfiles -nobootstrapupdate -skipinitialbootstrap -norepairfiles -overriedpackageurl
- Don’t forget to add it next to the already written content. Do not delete content. Otherwise, the shortcut will not start and will not work.
2. The second step is to block Steam from auto-updates:
- Press the Windows key and search for Notepad.
- Find “Notepad”in the results and click it to open it.
- Add the following statement:
BootStrapperInhibitAll=Enable
- Save the file as Steam.cfg in your Steam installation folder.
- Once you’ve completed these steps, Steam’s automatic updates should stop.
8. Use Steam Offline
This is more like a temporary solution to your problem. You can avoid automatic updates on Steam by using it offline. But know that as soon as you go online, it will start updating the games.
Also, you won’t be able to access Steam’s online features after enabling offline mode. So, if going offline serves your purpose, you can follow these steps to do so:
- The Steam client will notify you with a dialog when it cannot connect to the network. The dialog box will contain the message “Failed to connect to the Steam network”.
- To enter offline mode and launch Steam, select the “Run offline”option.
If you are online and want to switch to offline mode, follow these steps:
- On the top menu bar, click on the Steam option. The menu will appear.
- Select “Go Offline”from the menu.
- Select “Restart”offline. This will activate offline mode.
Conclusion – disable game updates on Steam
So, these are the various methods by which you can disable auto-updates in Steam. Some of the methods are workarounds that can help you control the timing of auto-updates.
You should try all of the above methods until you find one that works for you. Some methods should work exactly.
If you can’t turn off updates, you can limit your bandwidth or schedule updates. You should seek professional help to fix your problem if nothing works.
FAQ – How to turn off automatic game updates
How to change automatic updates in Steam?
Steam offers its users three types of automatic update options. To change auto-update settings, open the game’s library in Steam. Navigate to the game, the settings you want to change, right click on it and select “Properties”. Open the Updates tab and select Automatic Updates. Choose from any of the three options that appear according to your preference. You should select “Update this game only at startup”if you want to prevent background updates.
How do I schedule updates on Steam?
You can set time limits for auto-updates if you don’t want daily updates. To do this, open the Steam option in the top left corner of Steam. Select “Settings”from the drop-down menu. On the left side, click on the “Downloads”tab. In the Download Limits section, you can change the auto-update time. Schedule updates according to your preference.
Why isn’t Steam updating automatically?
Due to the disabled “High Priority”option, Steam does not automatically update some games. You can change it by going to your game library on Steam and right-clicking on your preferred game. Select “Properties”from the context menu, and then select “Updates”again. In the Automatic Updates section, you will see three options. Switch the existing option to high priority.
How do you use the automatic update schedule on Steam?
If you want your games to be automatically updated on Steam, go to the Steam Games Library. Right-click the game whose settings you want to change. Select the Properties option from the small drop-down menu. Open the Updates tab and select Automatic Updates. You will now see three options, of which you can only enable one. Switch the setting to “Always update this game.”Completing these steps will activate the automatic update of the selected game.