
This game is a continuation of the famous Splatoon series released by Nintendo. This game has been introduced to the players with many new features. Beyond that, there are some returning features that players are already aware of. The Photo Mode feature, which was not available in the Splatoon 3 beta, is now available after its global release. The Switch has a dedicated “Screenshot”button that can be taken using the square key on the left side of the controller. However, the photo mode in Splatoon 3 is more detailed, as it allows you to give photos an extra touch. Learn how to take pictures in Splatoon 3 using photo mode with our guide.
How to take pictures in Splatoon 3
Here’s how to take a picture of your character in Splatoon 3 in easy ways:
- Start the game and press the button – on the controller.
- In addition, this will activate the photo mode in Splatoon 3.
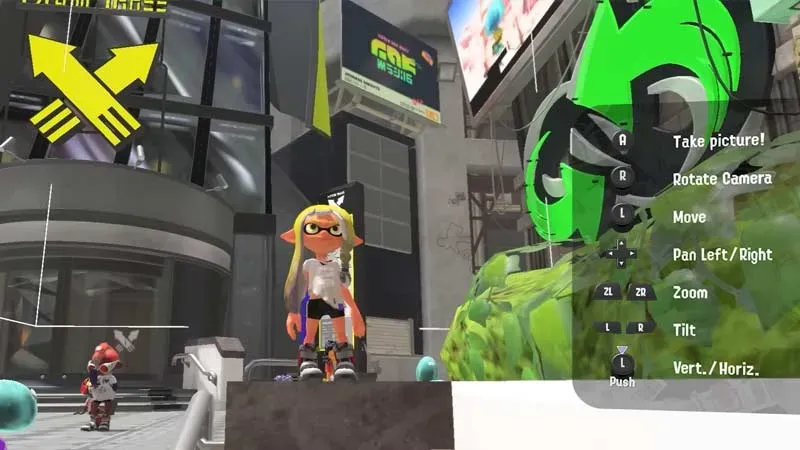
- From there, you will notice all the features available to use in Photo Mode.
- Take a photo by pressing the A key in Splatoon 3.
- Also, the right stick will rotate the camera, the left stick will move the camera, and the ZL and ZR buttons will zoom in and out.
- Also, use the D-pad to pan left or right. After that, use the L and R keys to tilt the camera.
- After that, pressing the + button on the controller will open a new window called Set.
- With this, you can set the timer to 3 or 10 seconds. Use this function if you want to take a photo while performing an action.
- Also, you can add a filter to your image and show details like date, place name, alias, etc.
- When finished, press the – button again to exit photo mode.
Here’s how to take pictures in Splatoon 3 using photo mode.