

All AirPods, AirPods Pro and AirPods Max have automatic ear or head detection. Because of this, when you take one or both AirPods out of your ear, it automatically stops media playback on your iPhone, iPad, Mac, or Apple Watch.
If you don’t like it, we’ll show you how to disable this feature. After that, music, videos, or podcasts won’t stop even if you take one AirPod out of your ear.
How Auto Play and Pause AirPods Work
All AirPods have a custom chip for Apple’s W or H-series headphones, optical or skin sensors, and a motion-detection accelerometer. Using them, AirPods can tell when they’re in your ears and when they’re out.
The skin detection sensors on the new AirPods are an improvement over optical sensors. With optical sensors, your AirPod can get confused and resume playback even if you keep it in your pockets or drawers. With skin detection sensors, your new AirPods can tell exactly if the AirPods are in your ear or not; and using this, it can pause playback when removed, or resume when it is reinserted into the ear.
Benefits of Automatic Ear Detection
Save battery power. Automatic ear detection is designed to save battery by pausing playback when your AirPods are not in your ears. See: 12 Tips for Extending AirPods Battery Life.
Convenience: When someone tries to talk to you, you can simply pull out one AirPod and it will pause the media transfer. You don’t have to fiddle with pressing a button on your iPhone or connected device. And when you put your AirPod back in your ear, the previously playing song or video will resume.
But after using AirPods since their launch, I can agree that there are times when you just don’t want the music to stop when you take one out.
How to disable ear detection in AirPods
It is enough to disable it on any of your devices. For example, if you turn off automatic ear detection on your iPhone, it will also turn off on your MacBook.
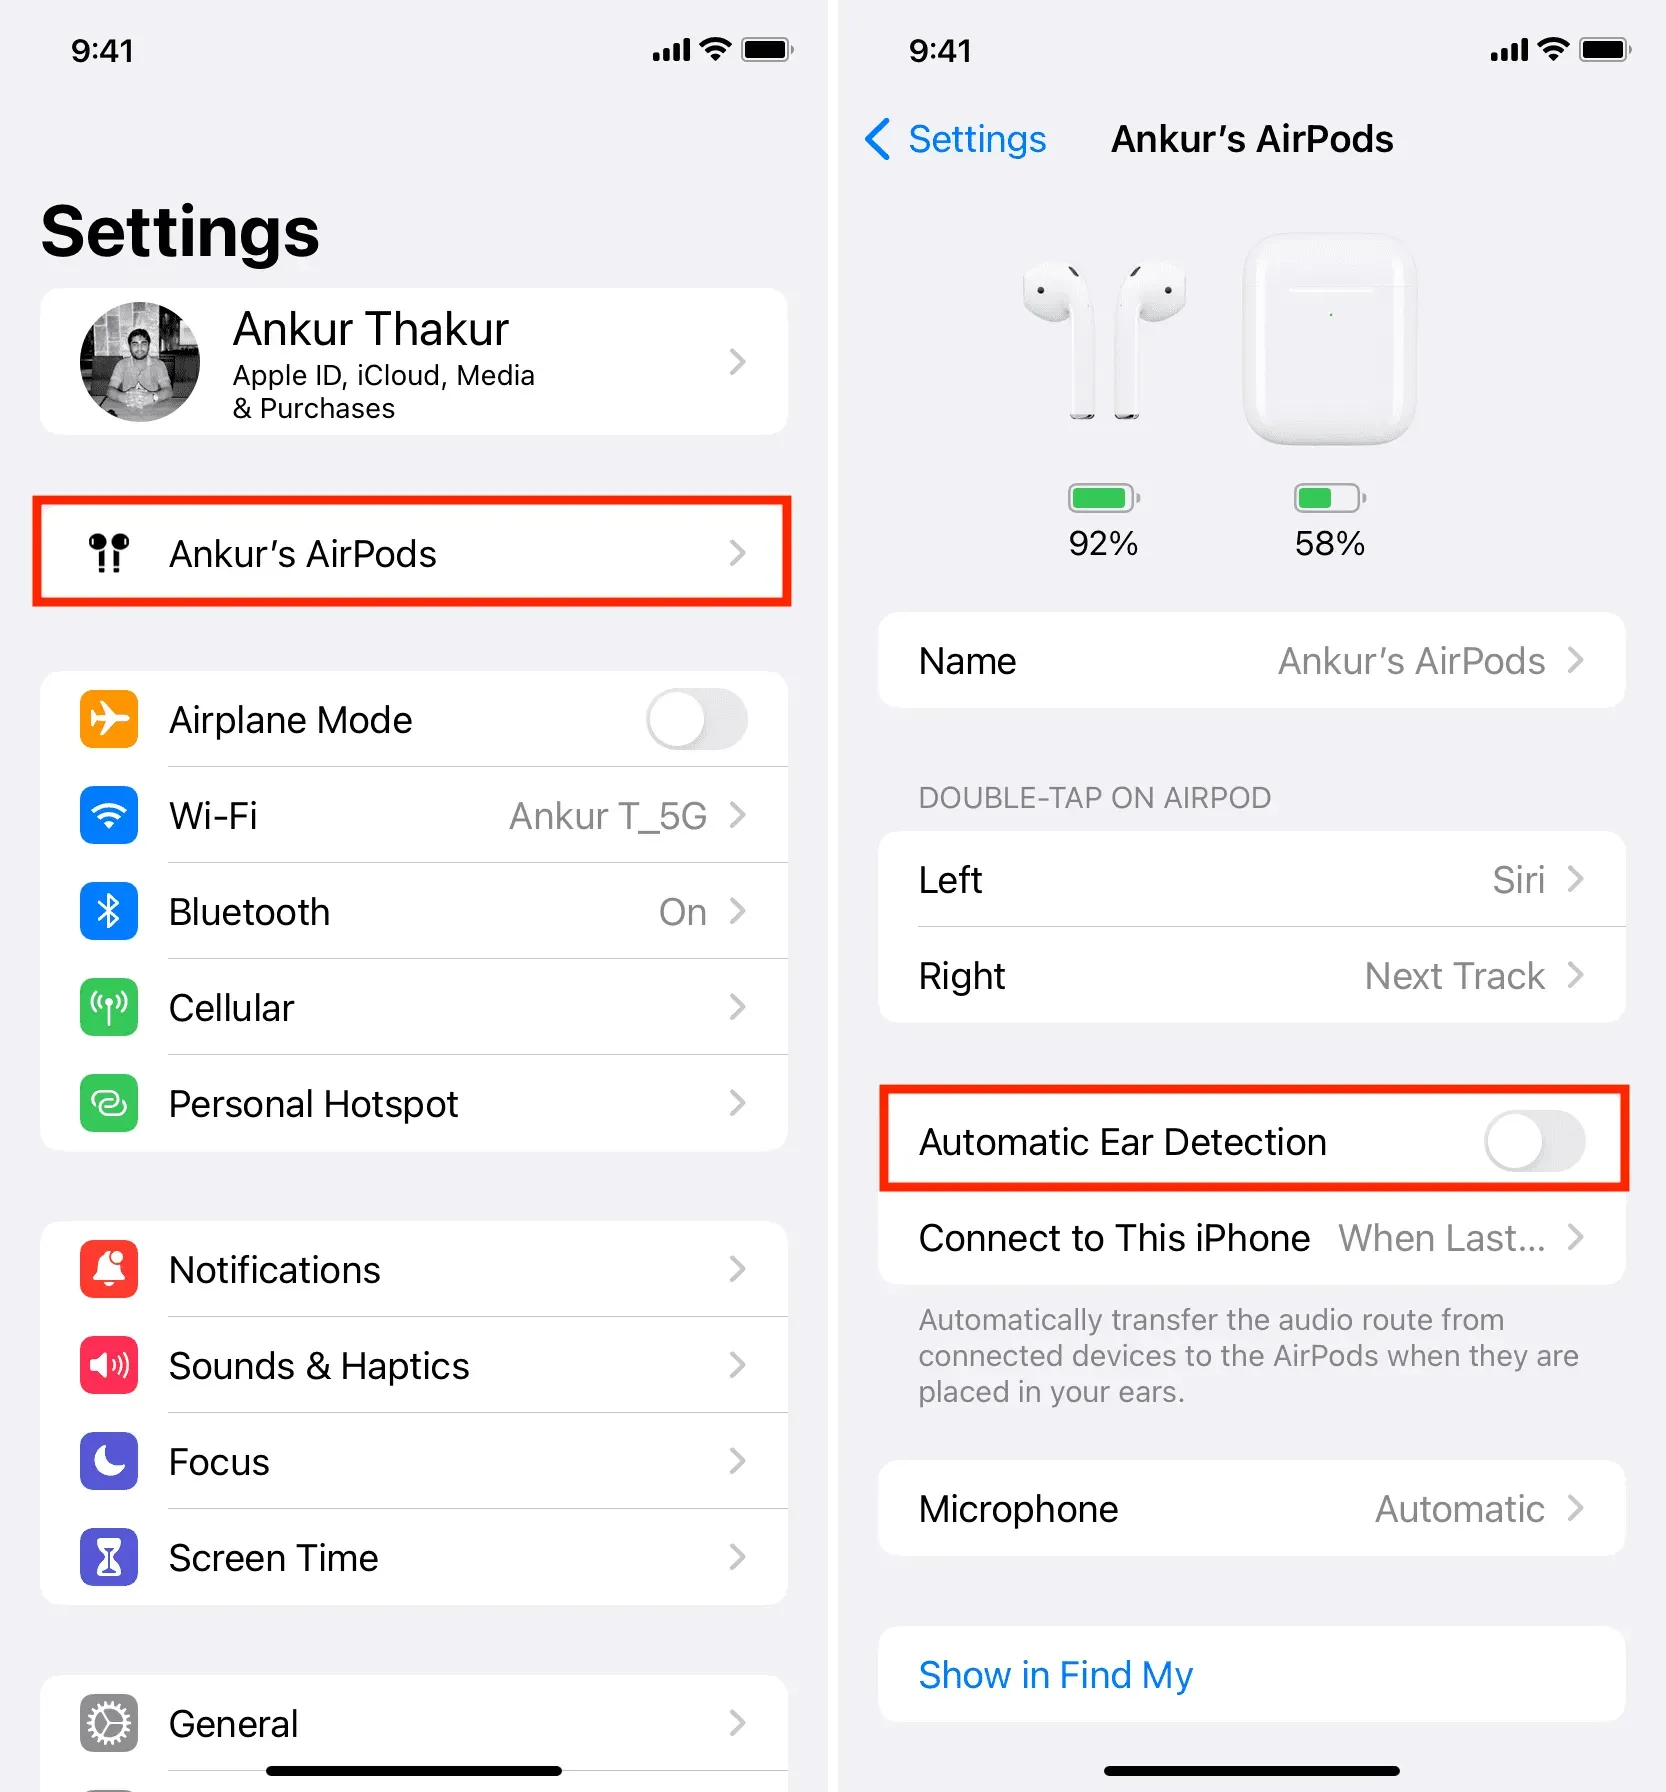
On iPhone or iPad
- Make sure your AirPods, AirPods Pro, or AirPods Max are connected to your iPhone or iPad.
- Open the Settings app and tap your AirPods on top. If you don’t see it, tap Bluetooth, then tap the info button ⓘ next to the name of your AirPods.
- Disable automatic ear detection. For AirPods Max, turn off automatic head detection.
That’s all. From now on, your AirPods will no longer pause music when you take one (or both) out of your ear.
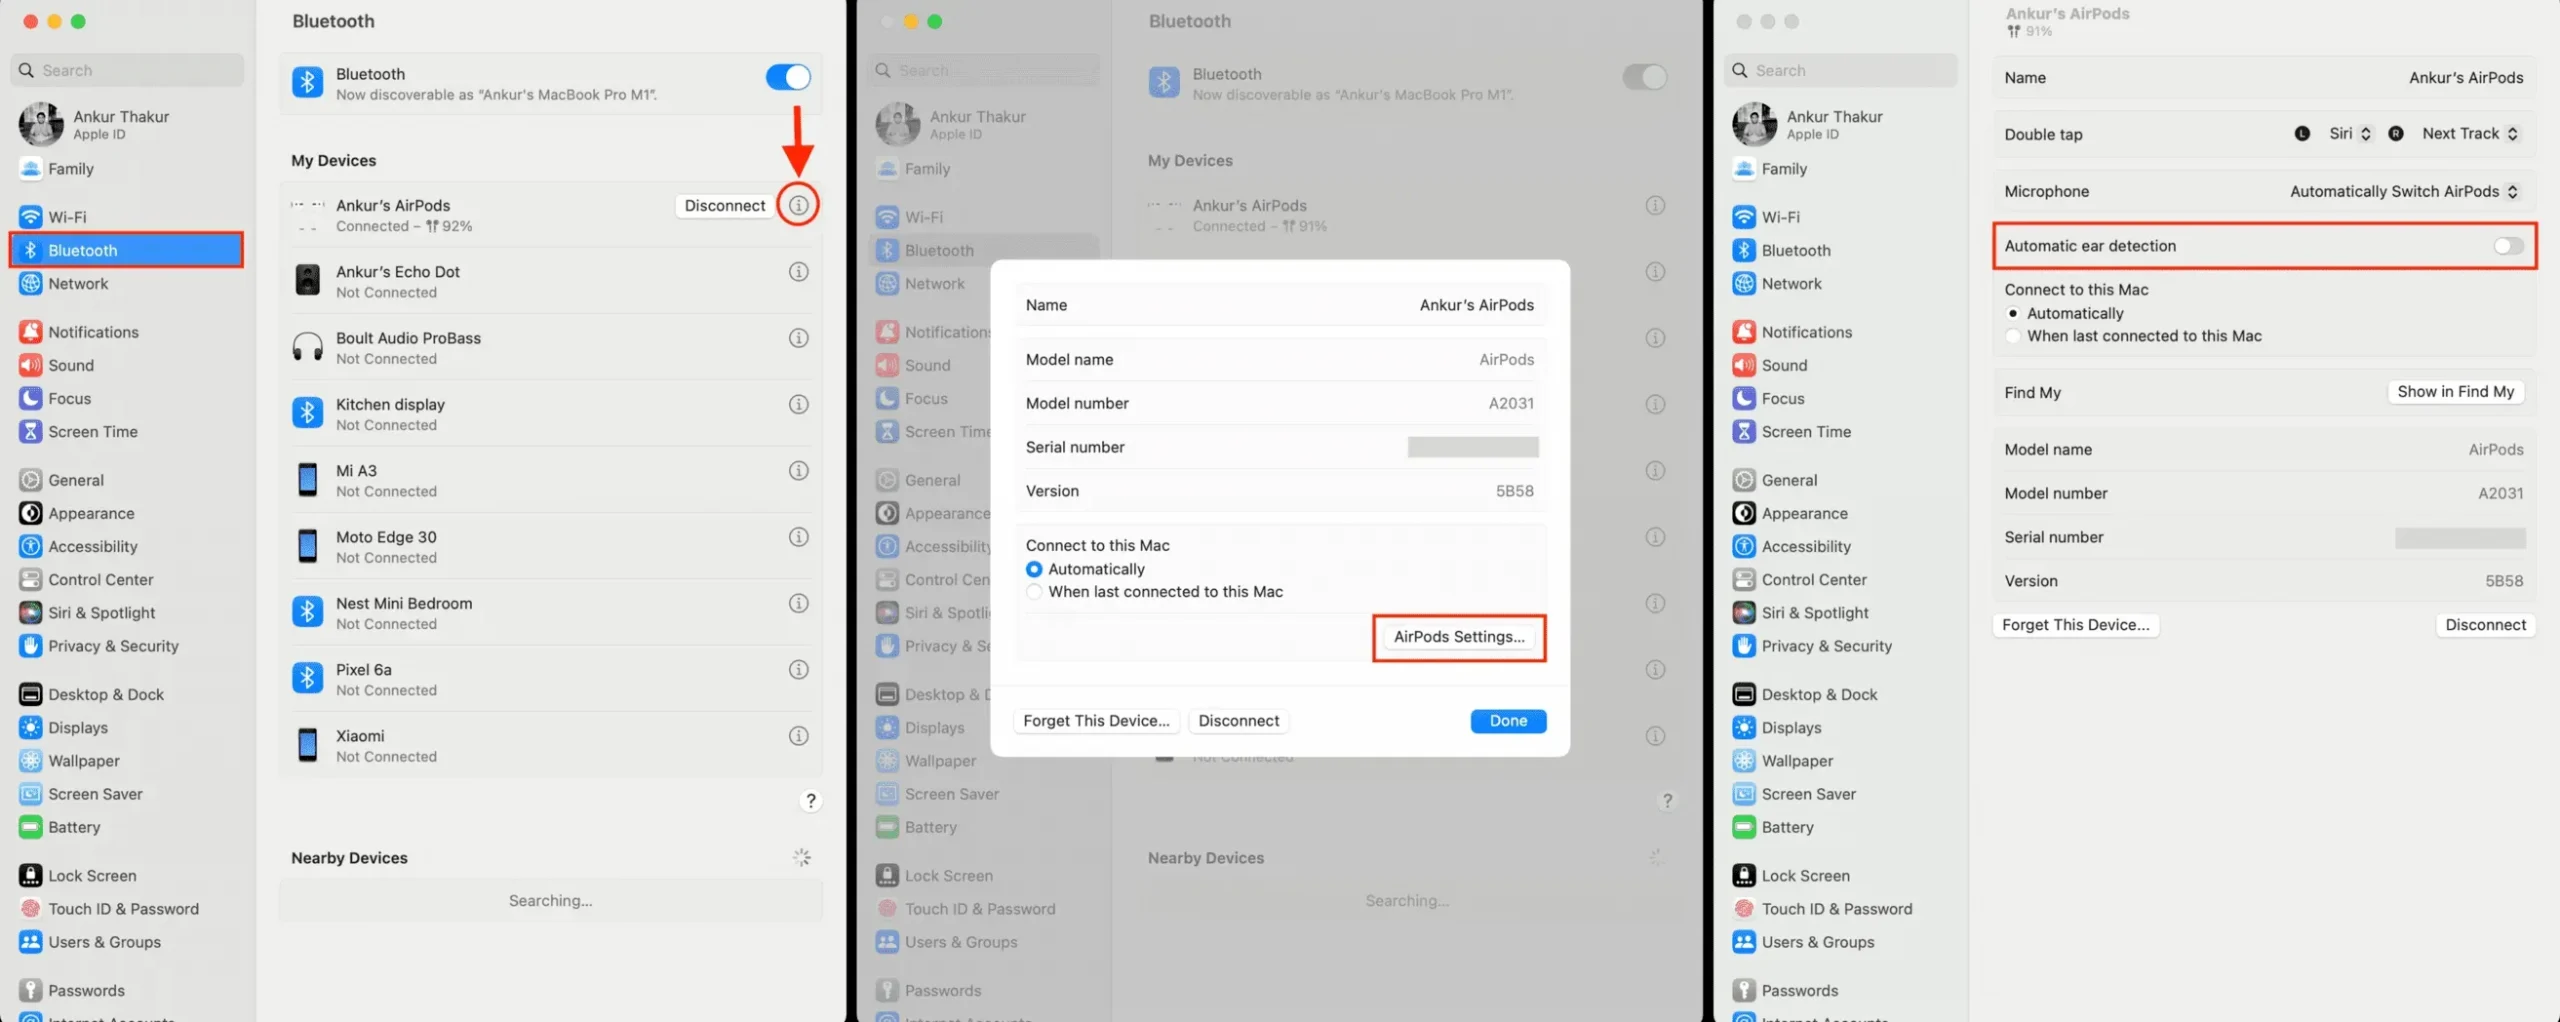
On Mac
- Make sure AirPods are connected to your Mac.
- Click the Apple icon () and choose System Preferences or System Preferences.
- Select Bluetooth.
- Click the info icon ⓘ next to your AirPods name.
- Click AirPods Settings.
- Turn off the switch for automatic ear detection.
If you ever want to enable automatic ear detection, follow the same steps as above and turn on its toggle.