
Windows runs dozens of processes in the background to give you a fast and smooth experience. But since many processes run in the background, are they all safe? If you are worried about what the SearchApp.exe process is or if this process is taking up most of your CPU and RAM, read this guide to see if it is safe. And if not, how to fix or disable it.
What is SearchApp.exe?
SearchApp.exe is a Microsoft Windows process used for the search function on the taskbar and start menu. In past builds of Windows, this process was integrated with Cortana and was named SearchUI.exe.
So, whenever you use the search function on the taskbar or start menu, this process is started and you get search results.
Is the SearchApp.exe process a virus?
If it is a real Microsoft SearchApp.exe process, it is harmless. As explained, it handles search queries made by the user.
But hackers usually name their viruses, worms, and trojans as trusted processes to avoid detection by antivirus and antimalware programs.
Therefore, it is possible that malicious malware or a virus can masquerade as SearchApp.exe and corrupt your data or system files.
How can I tell if SearchApp.exe is harmless or a virus?
- Check the location of the SearchApp.exe folder
- Make sure its digital signatures are from Microsoft
- Use Command Prompt (CMD) to verify the digital signature of SearchApp.exe
- Check the resources it consumes
1. Check the location of the SearchApp.exe folder.
The first thing you should check to determine if the SearchApp.exe process running in your Windows 10 or 11 is a standard Windows process or if its location is a virus.
The correct location of the Microsoft SearchApp.exe process is:
This PC > Local Disk C > Windows > SystemApps > Microsoft.Windows.Search_cw5n1h2txyewy
The chances that this file is harmless are high if it is in the correct location. But if you find that the location of SearchApp.exe is any other folder, such as “This PC”> “Local Disk C”> “Program Files”, then it is most likely a virus or malware.
Here is how to check the location of the search process:
- Right-click the taskbar and select Task Manager, or press the Ctrl + Shift + Esc buttons at the same time.
- When Task Manager opens, type “Search”. This will take you to the “Search”process.
- Double-click Search to open its processes. His process is also called “Search”.
- Right-click it and select “Open File Location”.
- If it is a genuine Microsoft file, its location will be shown in the image. If the location is different, it could be a virus.
2. Make sure the digital signatures are from Microsoft
Most legitimate files and programs are digitally signed. This allows Windows to easily discover trusted files. Similarly, Microsoft includes its digital signature on all of its files and programs. You can check the properties of the search application to see if it has a Microsoft signature or not. Use these steps:
- Open File Explorer and navigate to This PC > Local Disk C > Windows > SystemApps > Microsoft.Windows.Search_cw5n1h2txyewy.
- Or right-click the taskbar and select Task Manager. Then type “search”in the task manager. Double click it to open its process. Right-click the process and select “Open File Location”.
- Find “SearchApp.exe”, right-click it and select “Properties”.
- Go to the “Digital Signature”tab.
- Find out if it has a Microsoft Windows signature.
- If yes, then it is an open file. If not, it could be a virus or malware.
3. Use the command line (CMD) to verify the digital signature of SearchApp.exe.
Some files do not have the properties option. Also, if you don’t see the Digital Signature tab in the file properties window, you can use this method to verify the digital signature of SearchApp.exe or any other application (exe file).
- Open a web browser and follow the link to the sigcheck file on the Microsoft website.
- Download the file.
- Open the file. Right-click sigcheck.exe and select Copy.
- Now open the location of the SearchApp.exe file (This PC > Local Disk C > Windows > SystemApps > Microsoft.Windows.Search_cw5n1h2txyewy)
- Right-click the window and select “Paste”to paste the sigcheck.exe file into the SearchApp.exe folder. It may ask for admin permission to paste.
- After that, click on the folder location line at the top, enter.
cmd‘ and press enter.
- A command line window will open.
- Type or copy and paste sigcheck.exe SearchApp.
exeAnd hit enter. - It can open the license agreement; click Agree.
- You will then see the digital signature of the SearchApp.exe file.
- The publisher must be Microsoft Windows and the company must be Microsoft Corporation.
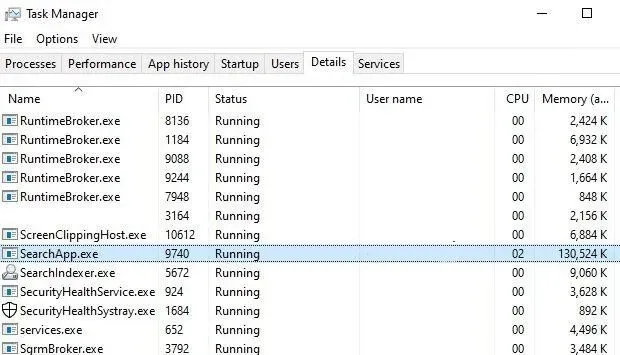
4. Check the resources it consumes
When search is used in the taskbar, Start menu, or File Explorer, the SearchApp.exe process uses some resources to process the search.
But if you notice that this process is using more than 50% of your system resources, even if you are not looking for anything, the file could be a virus, malware, coin miner, or something malicious.
Some malicious files directly damage your data, while others only use your system resources to perform their tasks, such as cryptocurrency mining. What’s more, in many cases, your antivirus crashes, won’t open, and won’t respond.
- Right-click the taskbar and select Task Manager.
- In Task Manager, type “Search”.
- This will take you to the “Search”process flow.
- Check the resources it uses. If they are less than or equal to zero, the file is fine, but if the resource usage is high or more than 50%, it could be a malicious file or a corrupted SearchApp.exe process.
How to disable SearchApp.exe?
If you suspect that SearchApp.exe is a virus, you have the option to disable it. But keep in mind that the search functions in the taskbar, start menu, and file explorer will not be usable after the process is disabled. Use these methods:
- Delete the SearchApp.exe folder (temporary method)
- Remove it using the command line (permanent method)
1. Delete the SearchApp.exe folder (temporary method)
If you only want to check what happens when you disable or delete the SearchApp.exe process, use this temporary method. It is also useful for fixing any minor process-related errors.
When you’re done, SearchApp.exe will be disabled for the existing session. However, it will be enabled automatically when you restart Windows.
Follow below to complete the required steps:
- Right-click the taskbar or start menu and select Task Manager from the list.
- When it opens, type “Search”.
- You will be taken to the “Search”branch. Double click to open its process. His process is also called “Search”.
- Right-click it and select “Open File Location”.
- Leave the folder open and return to the Task Manager window.
- Right-click the Search process again and select End Task.
- Wait. The process will reappear. End it again.
- Keep doing this until the process disappears altogether.
- Now go to the folder that contains the process we opened. Right-click the selected folder and select Delete.
- It will ask for administrator permission to delete the file. If you are an administrator, click Yes. If not, select an administrator account and enter its password to allow the operation.
- After deleting, go to the trash and delete the folder from there.
- The search process will be disabled unless you turn off or restart your computer.
2. Remove it using the command line (permanent method)
You can permanently delete the SearchApp.exe file and its components, which will also disable the search function in your Windows. Continue only if you are sure that the SearchApp process is a virus or is using a lot of CPU and RAM resources. Once you have made your decision, duplicate the following steps:
- Open the start menu, type. cmd”and select “Run as administrator”.
- If your search is unresponsive or disabled, go to This PC > Local Disk C > Windows > system32. Find cmd.exe. Right-click it and select “Run as administrator”.
- Copy and paste this command and press Enter:
cd %windir%\SystemApps - After that, open Task Manager and type “Search”to find the search process. Keep it open.
- At the command prompt, copy-paste
taskkill /f /im SearchApp.exeand press Enter. - This will end the search process, but will start again after a few seconds. Keep typing the above command until you stop seeing the search process in the task manager.
- Once you are sure the search process is complete, copy and paste this command and press Enter:
-
move Microsoft.Windows.Search_cw5n1h2txyewy Microsoft.Windows.Search_cw5n1h2txyewy.old - This will permanently disable search processes in your Windows.
How to Fix SearchApp.exe Errors and High Resource Usage
If you want to keep the search function and are looking for a way to fix SerchApp.exe, try the following solutions:
- Delete search registry entries
- Fix Search Crashes by Resetting Windows Search with PowerShell
- Disable search indexing
- Perform a DISM Scan and an SFC Scan to Repair Windows System Files
- Run the Search and Indexing Troubleshooter.
- Rebuild search index
- Run a full system scan with antivirus
- Update Windows
1. Remove search registry entries
A corrupted search registry is a common cause of SearchApp.exe error messages and high CPU usage. If you delete the registry, it will automatically create a new registry that is required for the search function to work properly. But before deleting, we will save the registry in case we need to use it later.
Use these steps to save the search registry and then remove the real registry using the registry editor:
- Press Windows key + R, type.”
regedit‘ and press enter. - The Registry Editor will open.
- In the space below the menu bar, copy and paste this command and press Enter:
HKEY_CURRENT_USER\SOFTWARE\Microsoft\Windows\CurrentVersion\Search - Right-click “Search”in the left pane and select “Export”.
- Save the registry anywhere.
- After that, right-click “Search”again and select “Delete”.
- Select “Yes”if prompted.
- Restart your computer.
- Then click search on the taskbar and search for something. It won’t give any results. Do a search a few times and it will start working.
2. Fix search failures by resetting Windows Search via PowerShell.
If your Windows search function crashes, stops responding, or uses a lot of resources, reset it using Windows PowerShell.
- Download the PowerShell script to reset Windows Search.
- Right-click the file and select “Run with PowerShell”.
- This will open Windows PowerShell. It will ask you to confirm the execution policy change. Type
Yand press enter. (If you receive an error message, follow the instructions in the next section to fix this error before continuing.)
- It will ask for administrator permission. Click Yes.
- The reset process will begin. It will take some time.
- When it’s done, you’ll see “Press any key to continue.”
- Restart your computer.
- Check the search function.
If you confirm the execution policy change and see an error, follow these steps to fix it, and then repeat the steps above.
- Press Windows key + R, type.”
powershell‘ and press enter. - Copy and paste this command into PowerShell:
-
Set-ExecutionPolicy -Scope CurrentUser -ExecutionPolicy Unrestricted - It will ask if you want to perform an execution policy change. Type Y and press Enter.
- After the policy change process is complete, close PowerShell.
- Now follow the steps shown in the previous section to reset Windows Search.
- When this is done, we will restrict the scripts in PowerShell by copying this command:
-
Set-ExecutionPolicy -Scope CurrentUser -ExecutionPolicy Restricted - Type
Yand press enter.
3. Disable search indexing
The Windows Search feature indexes selected folders and subfolders to display search results faster. But it also works in the background to index selected folders. If you have indexed many folders, indexing can be resource intensive. So, disable indexing for most folders.
- Open the start menu, type.
indexing options,’ and open the app or go to Settings > Search > Windows Search > Advanced Search Indexer Settings. - In the new window, click Edit to select and deselect indexed locations.
- Clear all checkboxes at the top and click OK.
- Restart your computer.
Searching in File Explorer after doing this may take longer because indexing is disabled.
4. Perform a DISM scan and an SFC scan to repair Windows system files.
When Windows system files get corrupted, they show unexpected errors and some features won’t work properly. The reasons why SearchApp.exe uses CPU resources or shows errors may be corrupted system files. Try to repair them by running a DISM scan and an SFC scan.
Both of these scans restore system files. But DISM (Deployment Image Servicing and Management) scanning uses Windows updates to find new replacements for corrupted files, while SFC (System File Checker) scans and repairs files by finding the cached file on the system.
Follow these steps to run these scans:
- Open File Explorer and navigate to This PC > Local Disk C > Windows > system32.
- Right click on cmd and select “Run as administrator”.
- Copy-paste
DISM.exe /Online /Cleanup-image /Restorehealthand hit enter. - When the scan and repair is complete, run an SFC scan by copying this command and pressing the enter key.
sfc /scannow - This will scan your system and find the correct replacement for corrupted files.
- After the process is complete, restart your PC.
5. Run the Search and Indexing Troubleshooter.
Windows comes with various troubleshooters for various features. These troubleshooters can diagnose, detect, and fix many problems. So, to fix problems with SearchApp.exe, run the Search and Indexing Troubleshooter.
- Click the Start button to open the Start menu and go to Settings.
- Select Update & Security.
- Select Troubleshoot.
- Click “Advanced Troubleshooters”.
- Scroll down and select Search and Indexing. Then click the “Run the troubleshooter”button.
- This will open a troubleshooter that will detect problems. He may also ask you what you want to fix. Follow the instructions and fix search issues.
6. Rebuild the search index
In method 3, we disabled indexing. But it also slows down search results when searching in File Explorer. If you don’t want to disable it, try rebuilding your search index.
Instead of shutting down, it only removes the search index and rebuilds it. This is useful if the index is corrupted. You will get rid of the corrupted search index and recreate it.
- Open the Start menu and go to Settings.
- Navigate to Search > Windows Search.
- Scroll down and select Advanced Search Indexer Settings.
- In the new Indexing Options window, click Advanced.
- Next to Remove and Rebuild Index, select Rebuild.
- Wait for the restore process to complete.
- Restart your computer.
7. Run a full system scan with antivirus
Perform a full system scan of your computer with an antivirus to detect and clean (or remove) viruses and malware. You can use any proven antivirus. If you don’t have an antivirus installed, use the Windows Defender Antivirus that comes preinstalled with Windows.
- Open Windows Security by clicking the shield icon in the notification area at the far right end of the taskbar. If it’s not visible, click the arrow and select the shield icon.
- When Windows Security opens, select Virus & Threat Protection.
- In the Current Threats section, click Scan Options.
- Select “Full Scan”and click the “Scan”button.
- This can take a long time, so start scanning after you’ve completed your day’s work.
8. Update Windows
Windows updates fix issues and issues with various features. Thus, you can also try updating Windows to fix SearchApp.exe problems.
- Open the Start menu and go to Settings.
- Select Update & Security.
- Click the “Check for Updates”button.
- Some updates take a while to download and may require you to restart your computer.
How to enable SearchApp.exe in Windows 10 and 11?
The steps to enable the search feature are simple, but don’t try to do it right after disabling the search feature. If you want to enable it after the disable process, please reboot first.
- Since the search feature is disabled, we need to launch Command Prompt from File Explorer. Go to This PC > Local Disk C > Windows > system32.
- Right-click “cmd”or “cmd.exe”and select “Run as administrator”.
- Copy and paste this command and press Enter:
cd %windir%\SystemApps - Then copy and paste the following command and press Enter:
-
move Microsoft.Windows.Search_cw5n1h2txyewy.old Microsoft.Windows.Search_cw5n1h2txyewy - To make sure the search feature is enabled, click the search icon on the taskbar and search for something. It will return the results.
Conclusion
SearchApp.exe is the Microsoft Windows process for Windows Search features. It allows you to search using the search option on the taskbar, via the start menu, and in File Explorer. If SearchApp.exe is using a high percentage of CPU and RAM, check its location, run an antivirus scan, and disable it.
FAQ
Is SearchApp Exe malware?
In 99% of cases, SearchApp exe is not malware. This is the Windows process that handles the Windows Search feature. If this bothers you, scan your local C drive or the drive where Windows is installed with a trusted antivirus.
Why is the Exe search application suspended?
Usually, suspending SearchApp Exe is not a problem; rather, it is the normal behavior of an application when it is not processing searches. If you see SearchApp Exe suspended in the task manager, leave the task manager open and search for something using the taskbar search. If it works, you’re fine, but if it doesn’t, update Windows, disable your antivirus, and run the Search and Indexing Troubleshooter.
Is it safe to disable SearchApp Exe?
SearchApp exe is an important Windows process used to search for anything on the system. If you turn it off, the search feature will be disabled. You should disable SearchApp exe only if you are sure it is a virus.
Should I uninstall SearchApp Exe?
Search App exe is a Windows system process for search-related tasks. It is not recommended to remove it. But if you suspect it’s a virus, check its location. If the location is “This PC”> “Local Disk C”> “Windows”> “SystemApps”> “Microsoft.Windows.Search_cw5n1h2txyewy”it is an open file. But if it’s in a different location, it’s a virus.