
WSAPPX is a background process that runs as part of the Windows Store and Microsoft Universal App Platform on your Windows 11/10/8 PC. It’s used to install, update, and uninstall Store apps, so once you’ve installed all the updates, you won’t need it. However, you may encounter scenarios where this procedure uses a lot of disk, processor, or memory.
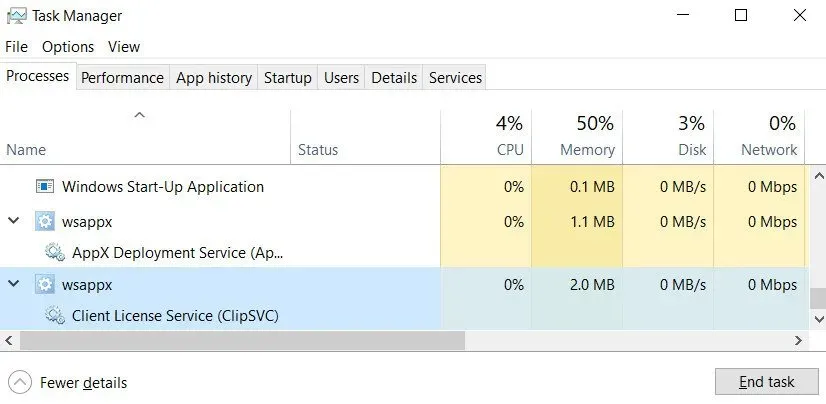
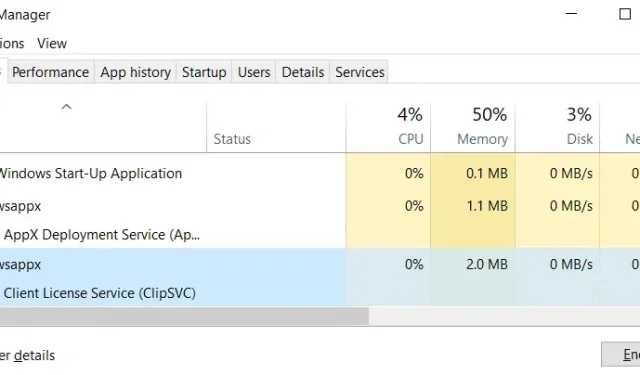
However, you may find that wsappx uses a lot of disk space, CPU, and even memory in Task Manager, as shown below.
When you watch wsappx consume a lot of your CPU or disk space, you may notice that wsappx(2) or wsappx(3) do the same thing. In Windows 10, you should fix wsappx high disk and CPU usage to speed up your computer.
What is wsappx? Is wsappx a virus?
WSAPPX is the Windows mechanism for installing, uninstalling, and managing universal apps through the Microsoft Store. This process will not work on Windows 7 and earlier because these universal/modern apps did not exist.
Using Ctrl + Shift + Esc to launch Task Manager, you can find it. If necessary, click “More Information”to expand the window to full size, then select the “Processes”tab and scroll to the base to find it.
- When you expand the process in Task Manager, you will notice two sub-processes.
- WSService or Windows Store Service is a sub-process in Windows 8.
- ClipSVC, short for Client License Service, is almost the equivalent operation in Windows 10.
This is not a virus, but legitimate software used by the Microsoft Store to distribute and license apps. If you’re not sure, check with your security software.
What do Wsappx and AppXSVC processes do?
ClipSVC and WSService offer Microsoft Store support, according to their listings in the Services panel. These applications handle licensing. Store apps won’t work if you disable them. They are designed to protect Microsoft Store apps from piracy.
AppXSVC is an application deployment tool. This means that it runs every time someone installs, uninstalls, or updates the Store app. It takes its name from the appx deployment service file extension for Store apps. On the other hand, traditional desktop software usually runs from an EXE executable.
To download the software on PC, you can get the appx deployment service files from anywhere, such as Android apps (with APK file extension). However, if you are not careful, this can put you at risk of malware infection. All of these subprocesses run under the main WSAPPX process. You will notice an increase in its usage when one of them is active.
Why does Wsappx use system resources?
To solve wxappx’s high disk or CPU usage, you must first understand why wxappx is taking up so much space. Here are the reasons:
- When you get an application or install an update, Wsappx consumes additional resources as they are required for the installation process.
- Background app updates can cause wsappx to use a lot of CPU or disk space.
- When you use the Microsoft Store, Wsappx activates and uses CPU, disk, and other resources.
- Traditional desktop software installation consumes a lot of resources, including a lot of CPU and disk space.
Methods to Fix Wsappx High Disk Usage in Windows 11/10
- Increasing virtual memory
- Change Appxsvc Value in Registry
- Disable Windows Store
- Update device driver
- Troubleshooting in Clean Boot State
- Run a disk check
- Check for viruses
- Disable Superfetch and Windows Search
1. Increase virtual memory
You may need to increase the amount of virtual memory. You can do it like this:
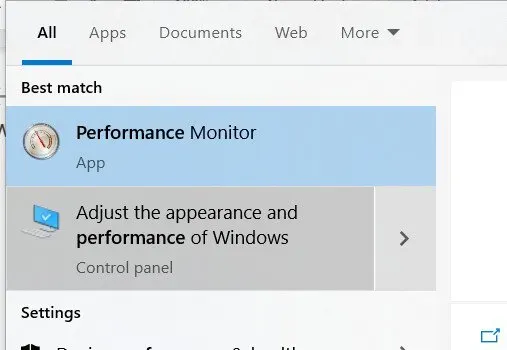
- Type “Performance”in the search box, press “Enter”and select “Adjust the appearance and performance of Windows.”
- Under Virtual Memory, on the Advanced tab, click Change.
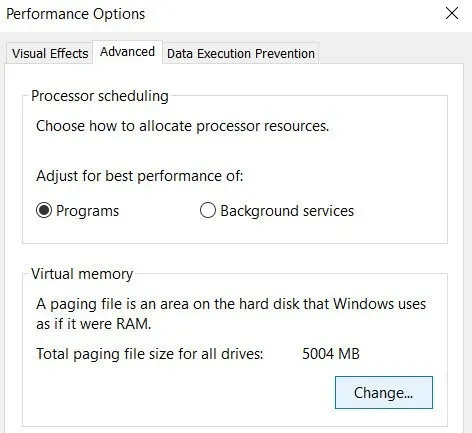
- Select the OS drive and click “Custom Size”after unchecking “Automatically control paging file size for all drives”.
- Click “Custom Size”after selecting the drive where the OS is installed.
- Set the original size to the same number of megabytes as your RAM and the maximum size to double the original size.
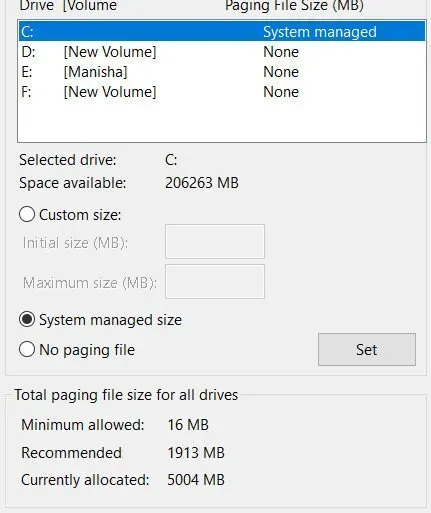
- To save your changes, click Install and OK.
- After that, restart your computer. You can see if this helps solve the high CPU usage issue.
2. Change the Appxsvc value in the registry
Changing the value of AppxSvs in the registry seems to be another way to fix the problem of high CPU usage or high wsappx disk usage.
- On your computer, launch the Registry Editor.
- Navigate to the path: HKEY_LOCAL_MACHINE\SYSTEM\ControlSet001\Services\AppXSvc.
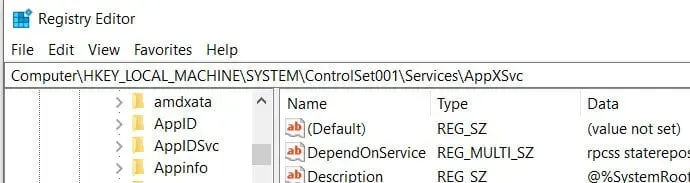
- Change the Start value in the right pane to “4”after finding the key.
- To save changes and exit the registry, click OK.
- After doing that, restart your computer to see if the issue is resolved.
3. Disable Windows Store
The Windows Store is one of the most common causes of wsappx high CPU usage issue. Using the Local Group Policy Editor and the Registry Editor window, you can successfully stop the Windows Store.
Using the Local Group Policy Editor
- Click OK after pressing the Windows logo key + R and typing gpedit.msc.
- Navigate to Computer Configuration under Local Computer Policy.
- Expand Windows Components and double-click Store to launch Administrative Templates.
- Click “Edit Policy Setting”after selecting “Disable Store App”.
- Set the status to Enabled. To save and exit, click Apply and OK.
- After following the instructions above, restart your computer to see if the tool worked.
- If this option does not resolve the high disk usage issue, continue with the solutions listed below.
Using the Registry Editor
- The Windows Registry Editor window is a professional-grade program that allows administrators to manage applications and change settings on Windows computers.
- Any erroneous operation can have disastrous consequences. I recommend that you be careful when disabling the Windows Store in order to resolve wsappx’s excessive disk usage.
- To open the Registry Editor, type regedit in the search field and press Enter. Select “Yes”to open it.
- HKEY_LOCAL_MACHINE\SOFTWARE\Policies\Microsoft\WindowsStore.
- Create a new DWORD value named “RemoveWindowsStore”in Windows Store keys and set the value to “1”.
- Exit the registry after saving the changes. You can then restart the Windows service.
- Third-party apps and Windows Store programs won’t be able to be installed or updated if you disable the Windows Store.
- If you want to allow the Windows Store to install and update, use one of the two options recommended above.
4. Update the device driver
- Type device manager in the search box on the taskbar, then select it.
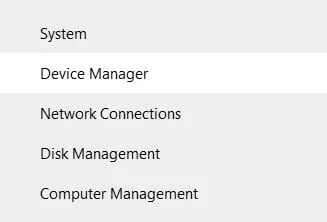
- Select a category to display device names, then right-click (or press and hold) the device you want to update.
- Select Update driver software automatically.
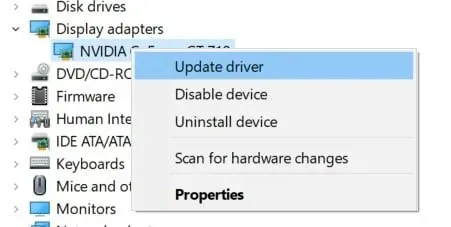
- Select Update Drivers.
- If Windows cannot find a new driver, go to the device manufacturer’s website and follow the instructions.
5. Troubleshooting in Clean Boot State
You can try performing a clean boot to fix the wsappx high CPU usage issue. This will limit Windows to just a few key drivers for setting up and running applications.
This will help you to manually fix the problem of high CPU or wsappx disk usage:
- To open the system configuration utility, type MSConfig in the search field and press Enter.
- Select “Selective startup”on the “General”tab, then select the “Load system services”and “Use original boot configuration”checkboxes.

- Click “OK”to continue.
- Select Hide All Microsoft Services from the Services menu and click Disable All.
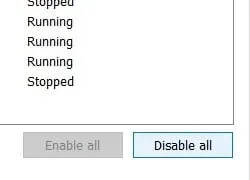
- To save changes, click Apply and OK.
- When you restart your computer, Windows will perform a clean boot.
- You can go back to the first step and uncheck “Load system services”, then save and restart your computer.
6. Run a disk check
Using the command line
Here are the steps to execute it from the command line:
- Open the Start Menu by logging into Windows 10 and pressing the key.
- Select “Search”and type cmd.
- Select “Run as administrator”from the list of results by right-clicking Command Prompt.
- Type the following command into the command prompt when it appears:
- chkdsk C:/f/x/r
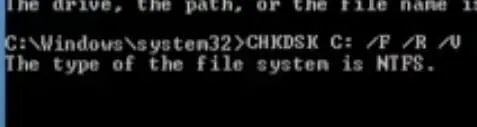
- The /f command will attempt to fix any problems it finds. The /r option will detect bad sectors and restore any readable information. The /x option will dismount the volume you are about to scan before the tool starts scanning. If you are using drive C:.
- When your computer restarts, type Y to start scanning. If this is the problem, close Command Prompt and restart your computer.
Check disk from my computer
- To open Computer (My Computer), double-click it.
- Right-click on the drive you want to check and select “Properties”.
- Select Check under Error Checking on the Tools tab after clicking Properties.
- To start scanning, click Scan Disk.
- During the scan, you can continue to use the drive. If errors are found, you can choose whether to correct them or not.
- The utility will report results based on the results of the scan.
7. Check for viruses
Most people don’t know that viruses or malware infection can create this problem in some circumstances. If you haven’t already done so, run a full system scan with your antivirus application.
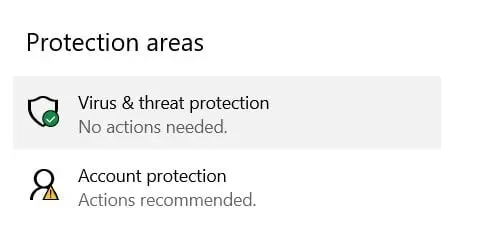
- Type “Windows Security”into the Start menu. When the Windows Security icon appears, click it.
- Click “Virus & Threat Protection”in the sidebar.
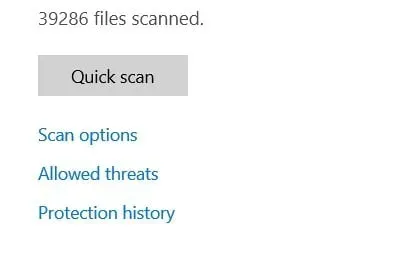
- By clicking the “Quick Scan”button from here, you can perform a quick scan. If you haven’t scanned in a while, you might want to do so. Click “Scan Options”just below the “Current Threats”heading.
- You will find a list of four different types of scans that you can run on your computer with Microsoft Defender under the Scan Options menu.
- Start with a full scan if you’ve never used Defender before, or if your machine is acting weird and you’re concerned about an obvious threat.
- Click the “Scan Now”button after selecting the radio button next to “Full Scan”.
- A full system scan will begin with a progress bar displayed by Windows Security.
- You will see the results after the scan is completed. You will receive a notification saying “No current threats”if everything goes well.
- If the scan did find malware, you’ll see a notification that says “Threats found”with a list of infected files below it.
- Click the “Start Actions”button to remove the threats.
- Microsoft Defender will remove threats immediately when you select “Start Actions”.
- Look under the scan results and select “Protection History”to learn more about the removed threats.
8. Disable Superfetch and Windows Search
While disabling Superfetch and Windows search will help you overcome excessive wsappx CPU usage, you should know that Superfetch is a vital Windows service for fetching data for your programs.
- To open the Run window, press the Windows key + R.
- Then, to access the service application, type services.msc and click OK.
- Scroll down and double click Superfetch Services to view its properties.
- Select “Disabled”from the drop-down list under “Startup Type”.
- Select “OK”after clicking “Apply”.
- Return to the list of services and double-click Box Search after closing the Superfetch properties window.
- Select “Disabled”from the drop-down list under “Startup Type”.
- If the service status is running, click the Stop button. If the service is currently running, click Stop. wsappx
- Select “OK”after clicking “Apply”.
- Check if the appx deployment service is allowed after restarting the computer.
How to disable store app updates?
- Turning off automatic updates for Microsoft Store apps is very simple.
- Open the Microsoft Store by writing “store”in the start menu.
- Select “Settings”from the three-dot icon in the top right corner.
- Toggle the “Update apps automatically”slider to the “Off”position in settings.
- This will prevent future app updates unless you initiate them.
- Press the Menu button again and select Downloads and Updates to check for updates.
- Click the Get Updates button and install as needed to check for updates.
Conclusion
Users encounter this problem regularly and get annoyed by 100% CPU usage or excessive disk usage regardless of Windows 10 version or build.
Especially for users with low RAM on their computers. “Wsappx”is partly to blame for this problem. Now you know the Wsappx process and how to disable it in order to completely fix Windows problems.
FAQ
Can I terminate Wsappx?
Is it possible to stop the WSAPPX process? WSAPPX is a vital system process for Windows. Attempting to close it via Task Manager warns you that doing so may cause Windows to become unstable and close. When WSAPPX starts and exits, you have no authority over it.
What happens if I disable Wsappx?
Third-party Windows Store apps may be installed or updated when the Windows Store is disabled. If someone tries to use the Windows Store app right now, the notification “Windows Store is not available on this PC” will appear on the screen. For more information, contact your system administrator.
Is wsappx malware?
No. It is actually a component of the Windows operating system. If your computer is infected with malware or viruses, you can protect it with Windows Defender or third-party antivirus software.
What does wsapp mean?
Wsappx is a background process that runs as part of the Windows Store and Microsoft Universal App Platform on your Windows 10/8 PC. On Windows 10, wsappx mainly includes two background services, the AppX Deployment Service (AppXSVC) and the Client Access License Service (ClipSVC).