


Dota 2 is an online multiplayer battle arena game that has a variety of heroes that can be used to destroy opponents. Play PvP and PvE lobbies to progress further in the game. However, the main goal is to destroy the base structure of the enemy, known as the Ancient One. In multiplayer games like Dota, a good username helps you stand out in the lobby from other players. Luckily, this game provides full customization of our profile options. It is also possible to change the username along with the avatar. Here is our guide detailing the steps to change your name in Dota 2.
How to change the name in DOTA 2
DOTA 2 is a free-to-play game played daily by millions of active players with thousands of hours of play time. Changing your username is not that difficult and requires a few simple steps. However, here is our guide that provides the steps to change the name:
Change name in Dota 2 using in-game settings
The in-game settings offer many customizable options. However, change your name by following these simple steps:
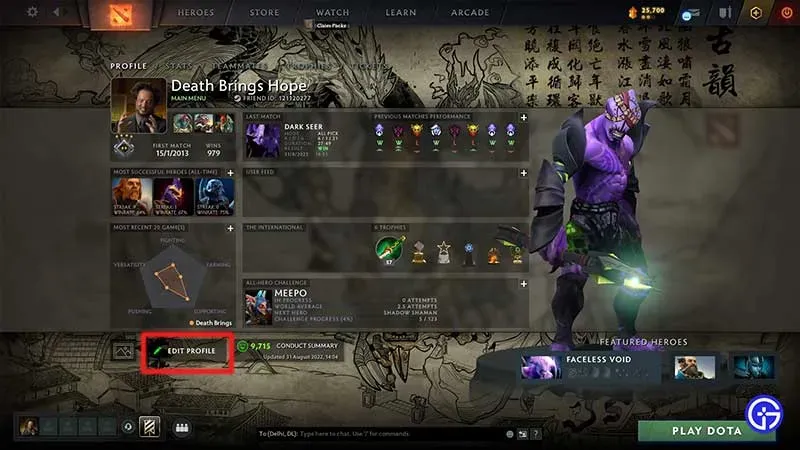
- On the main menu screen, tap on your profile on the top left side of the screen. You will notice a lot of updated things on this tab.
- Next, click on the “Edit Profile”option to start changing the name.
- Next to your avatar, click on the name bar and change your username to whatever you want.
- Later, click “Save Changes”to apply the settings.
Changing your username using Steam
For those who play this game through the Steam client, this option is much easier and more convenient. Use these steps to change your in-game name:
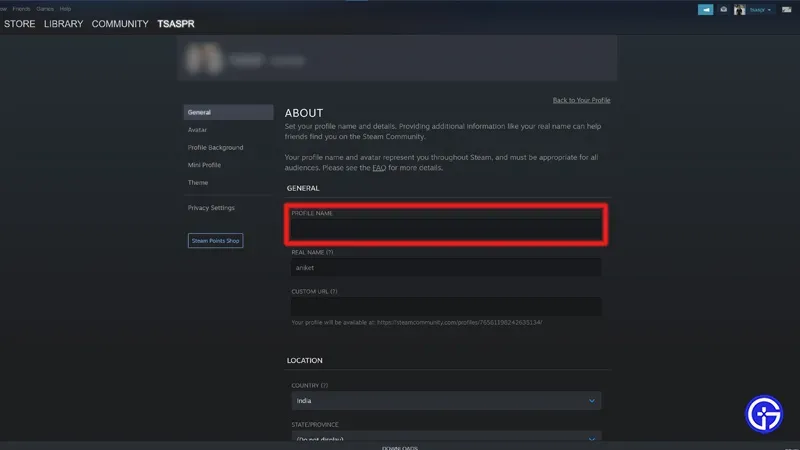
- Open the Steam client and click on your username at the top of the screen.
- Later, click on the “Edit Profile”option.
- Click “Profile Username”and enter your desired nickname.
- After that, scroll down and click the “Save”button for these settings to take effect.
This is how you change your username in DOTA 2. If you found this article helpful, be sure to check out our other DOTA 2 guides.