

Learn how to edit vertical videos in iMovie on your Mac, iPhone, or iPad without adding black bars to make sure they look fantastic in portrait mode. If you want to upload your videos to platforms like Instagram, TikTok, YouTube Shorts, etc., this is especially useful.
iMovie is made to create 16:9 aspect ratio videos that look great when viewed in landscape position on TVs, computers, and mobile devices.
You might want to edit vertical movies you record on your iPhone and export the finished project as a single file with the same vertical aspect ratio, though, given the development of vertical content promoted by TikTok, Snapchat, YouTube Shorts, Instagram, and other platforms.
We’ll assist you in making that using iMovie for iOS and macOS.
Use iMovie for Mac to remove black bars from videos
There are two simple methods for doing this, both of which are detailed below
App Preview mode usage
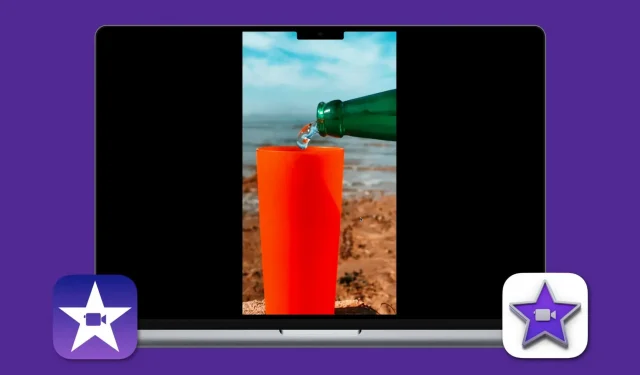
A little-known function in iMovie called App Preview enables app creators to make video previews that will be displayed alongside their products in the App Store. The fastest and simplest way to edit vertical videos on your Mac without black bars is by far this function.
1) Choose File > New App Preview from the top menu bar of iMovie.

2) Include your vertical videos in the timeline for editing.
3) Change it as you see fit. Additionally, you can select a text-adding option by clicking Titles in the top menu.
4) To export the video as an MP4 file in 1080 x 1920 HD resolution, select App Preview from the sharing menu in the top right corner of the screen, or select the usual Export File option.

Working with vertical videos using App Preview in iMovie on Mac.
Another approach rotates the video, exports it, and then rotates it once more
1) Start an iMovie project on your Mac, and then add vertical videos to the editing timeline.
2) In the lower editing timeline, select a vertical video; the selected video will have a yellow border. To select all vertical videos in the timeline, click them while holding down the Command key.

3) In the preview section, click the crop icon in the upper-right corner.
4) Continue by pressing the rotate button, and all of the vertical videos will be turned. Click the tiny blue tick icon after that.

5) Possible modifications include trimming the individual rotating segments and adding voiceover, music, and sound effects.
Just keep in mind that adding text to titles, which cannot be rotated and appear in landscape orientation, will cause them to be offset from your vertical videos. You should utilize iOS applications like InShot to add text to vertical movies. Alternatively, when publishing the video to a social media platform, add text directly using the app’s built-in tools.
6) After everything is finished, click the share icon to export and save the file.

7) Press the space bar on your keyboard after selecting the file and saving it to a Finder folder. By doing this, a popup player will play the video. To turn the movie vertical, click the rotate button from here.

When you press the space bar one more time, the changes will be saved.

Vertical video after editing on Mac
Your vertical video is now available. It won’t have black bars on the sides when you play it on your iPhone or AirDrop it there. Both saving it and sharing it on social media are options.

With iMovie for iPhone or iPad, you can make videos without black bars
Unfortunately, there isn’t a simple solution to make a vertical movie with iMovie for iPhone and iPad without black bars. Instead, you will need to pass through a few hoops in order to finish the task.
Similar to the second technique described above, the primary idea behind working with vertical videos in iMovie on iOS is the same. The video only needs to be rotated once in the iMovie editing timeline, then edited as you’d like, exported, and then rotated back to vertical orientation:
1) Launch iMovie on your iPhone or iPad, select Movie under Start New Project.
2) Click Make Movie after choosing your vertical videos.
You will notice the empty black bars on the left and right edges of the film on the top preview screen once the vertical videos have been imported to iMovie. We need to get rid of this.

3) Touch a video to choose it from the timeline. Place two fingers on the top preview now, and then counterclockwise rotate them (anticlockwise). A white, curved arrow icon denoting rotation will appear. If you can’t see this arrow, try again.


4) Choose more vertical clips in your iMovie timeline and rotate them using the instructions above.
5) Optional: If necessary, trim, add sound, alter playback speed, and make additional editing changes.
6) In order to export this film into the well-known Pictures app, select Done > share icon > Save Video.

7) Launch this video on the Pictures app. Then select Edit.
8) To make this video vertical once more, choose the crop tool icon and select the rotate option.
9) Tap Done to save it in the end.

You are prepared to share your vertically edited movie on your preferred social media network!

Playing vertical video on iPhone
Remove the vertical black bars from a video already in existence
You might also edit your video in iMovie as usual and export it as a separate strategy. You can remove the blank black bars from the landscape movie using the Photos app on your Mac, iPhone, or iPad.
On Mac
1) Launch the Pictures app and play the video. Launching the Photos app and dragging the video from Finder into its window is the simplest method.
2) On the Pictures app, double-click the video and select Edit.
3) Choose the Crop category.
4) To remove the black area, position the pointer on the crop tool’s left and right boundaries and drag.
5) To save the video without the unsightly black bars, click Done at the end.

Simply drag this edited video out of the Photos app and drop it over the Desktop or a folder to return it to a Finder folder.
On iPhone or iPad
1) Open the video by tapping it inside the Pictures app.
2) Click Edit.
3) To eliminate the black bars from the left and right sides of the movie, now tap the crop icon and modify the cropping zone.

4) To save the video in vertical orientation without the extra black bars, select Done at the end.

iOS substitute for iMovie
Finally, you may combine vertical video segments, add text, and perform numerous other adjustments on your iPhone or iPad using the InShot Video Editor app. The app is fantastic overall, free, and simple to use.