You can use the search feature in Windows 11 to look for programs, files, and folders on your computer. Windows search, however, may slow down with time and may not be as quick as it was when you initially bought your computer.
So why does this occur? Your computer’s file storage grows over time, making it challenging for Windows 11’s search engine to locate a specific file amidst all the clutter.
How to Speed Up and Improve Windows 11 Search
You don’t want your PC to search the file slowly or fail to find the file you’re looking for. You modify a few PC settings to speed up and improve the accuracy of Windows 11’s search. Read on to learn more.
Restart PC
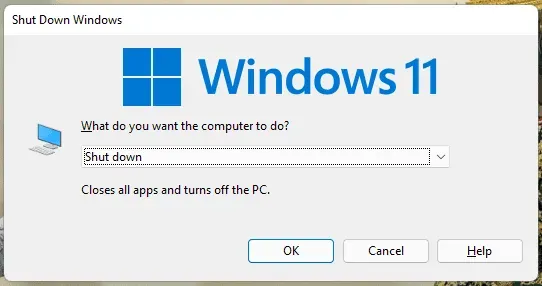
Many people choose to leave their computers running instead of shutting them down. This is particularly true for laptop users who just close the lid before opening it to resume using it. Performance will deteriorate if your computer hasn’t been rebooted in a while.
You should restart your computer if Windows 11 search is running slowly and you can’t find the file or app you’re looking for. After doing this, your computer will be free of all temporary files and you shouldn’t experience this problem again.
Update Windows
You could experience these problems with Windows 11 search if your Windows is not updated to the most recent version. To resolve this problem, we advise you to update Windows to the most recent version. The procedures are listed below:
- Open the Settings on your PC by pressing the Windows + I key combo.
- Click on the Windows Update on the left sidebar.
- Now on the right side, click on the Check for Updates button.
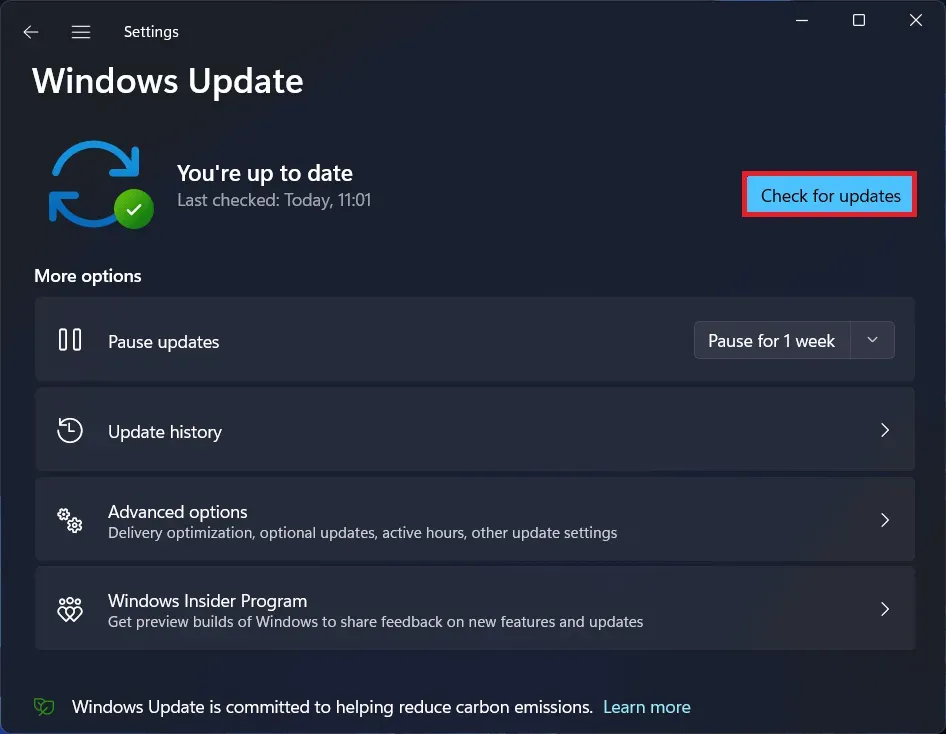
- Install all the updates listed here on the Settings app.
- Once all the updates are installed, restart your PC to apply the changes.
Launch Windows Search Service again
Restarting the Windows Search Service might help Windows 11 search run more quickly and accurately. You can accomplish this by taking the actions listed below:
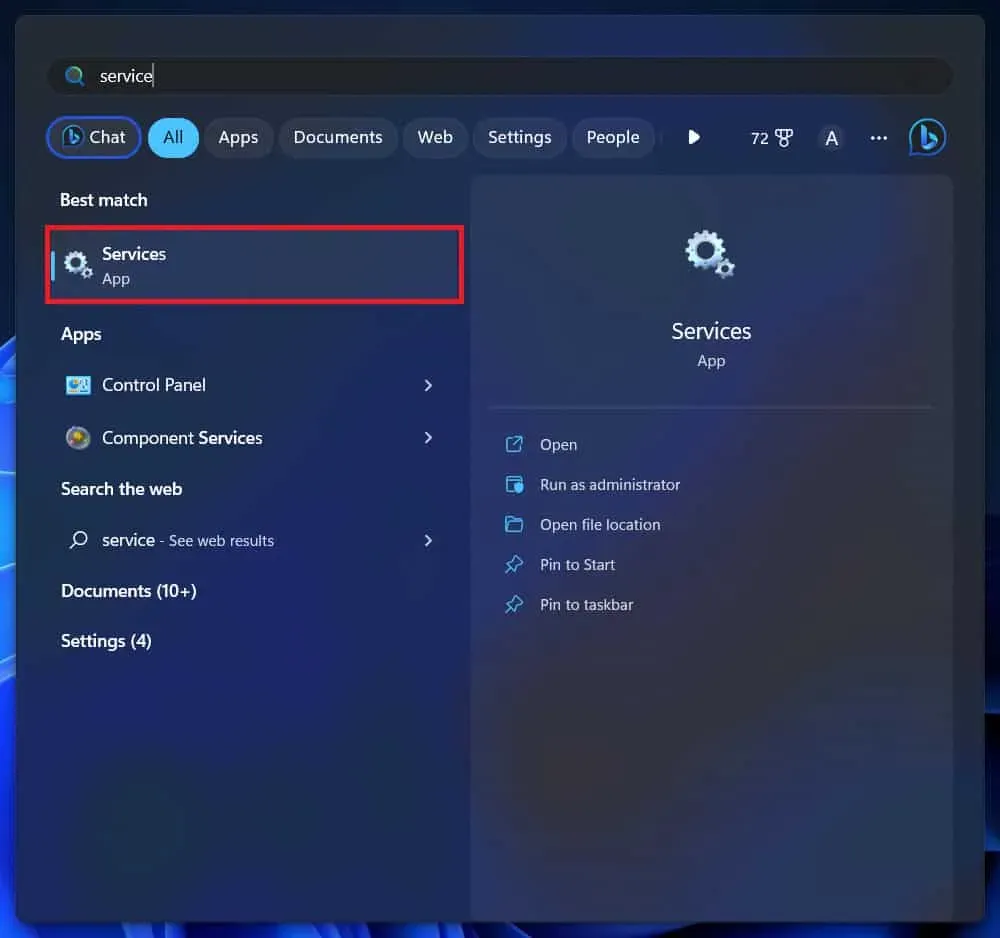
- Press the Windows key, and then in the Start Menu, type Services. Press Enter to open Services.
- In the Services window, search for Windows Search. Right-click on this service, then click on Restart to restart the service.
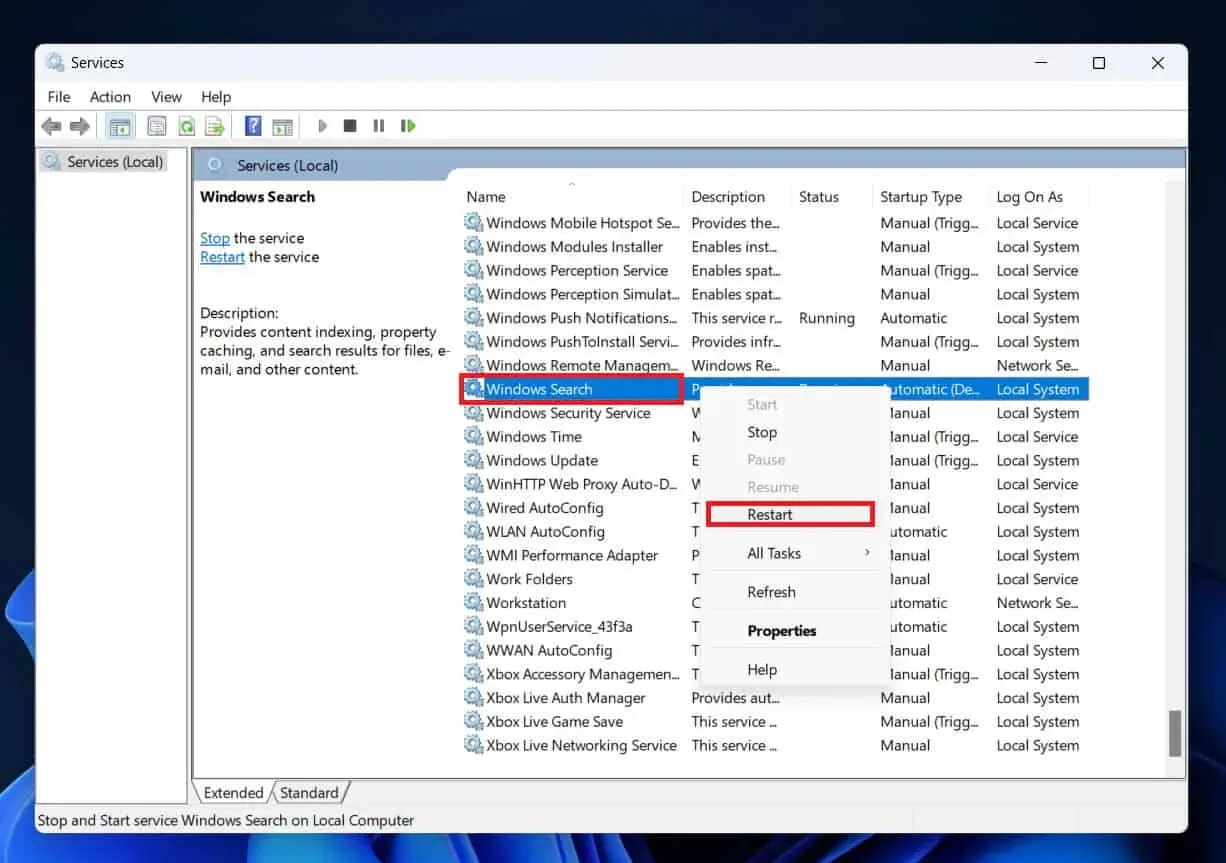
- Close the Services window, and the issue will be fixed.
Disable Web Search
- Click on the Start Icon to open the Start Menu.
- Click on the search bar here, type Regedit, and then click on the first option that appears to open Registry Editor.
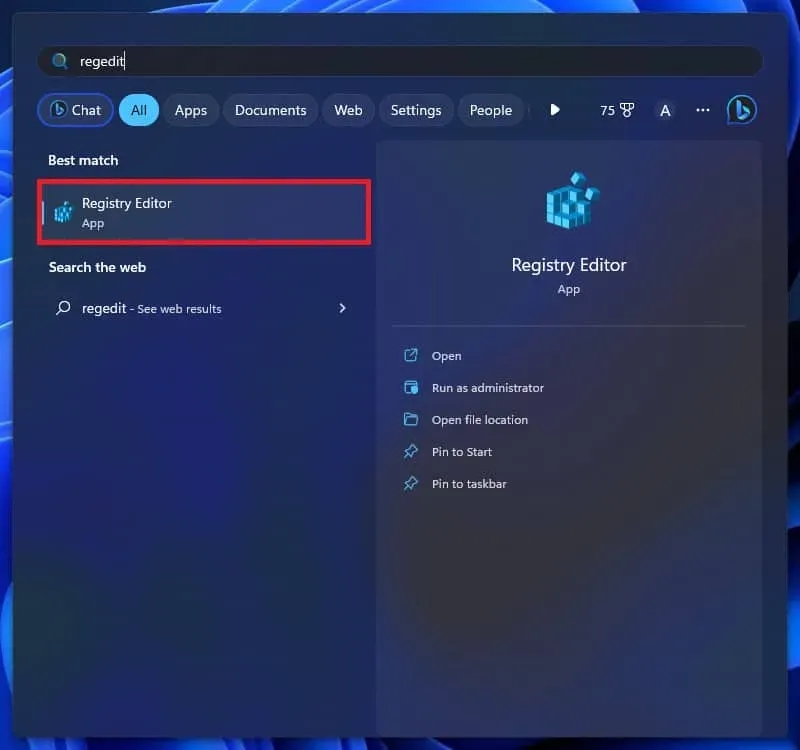
- In the Registry Editor, navigate to the following address-
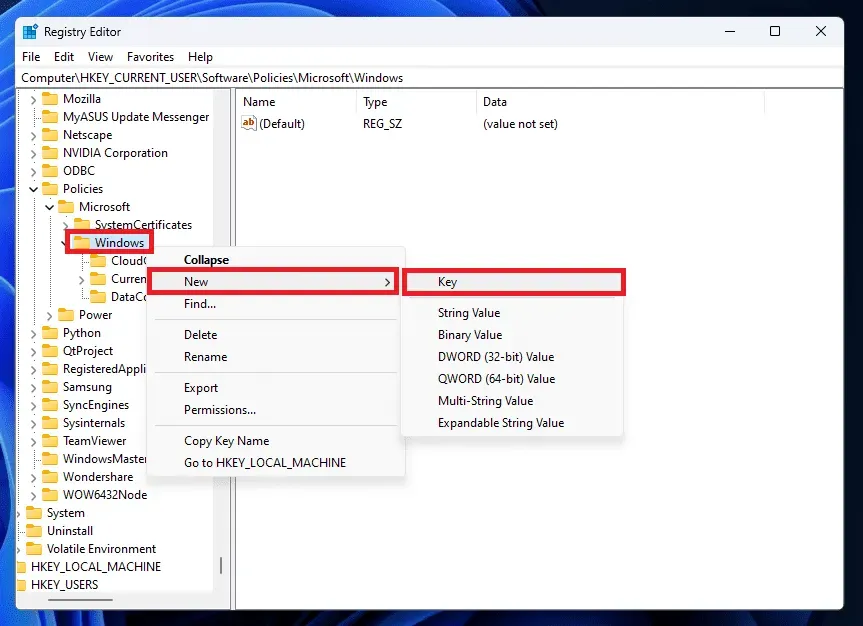
- Computer\HKEY_CURRENT_USER\Software\Policies\Microsoft\Windows
- On the left pane, right-click on Windows. From the context menu that opens up, hover over New and click on Key.
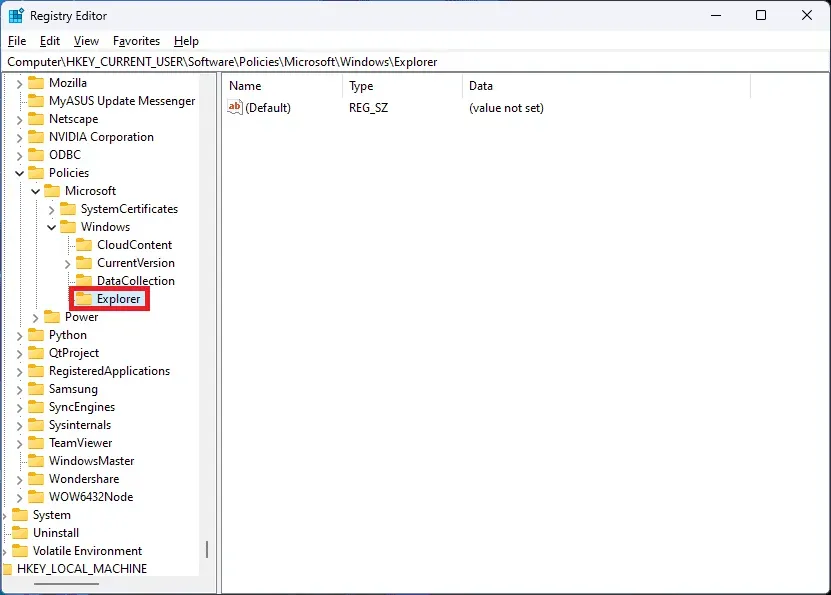
- Name the new key you created as Explorer.
- Now on the left sidebar, click on Explorer to open it.
- On the right pane, right-click on the empty space, click on New, and then on DWORD (32-bit) Value.
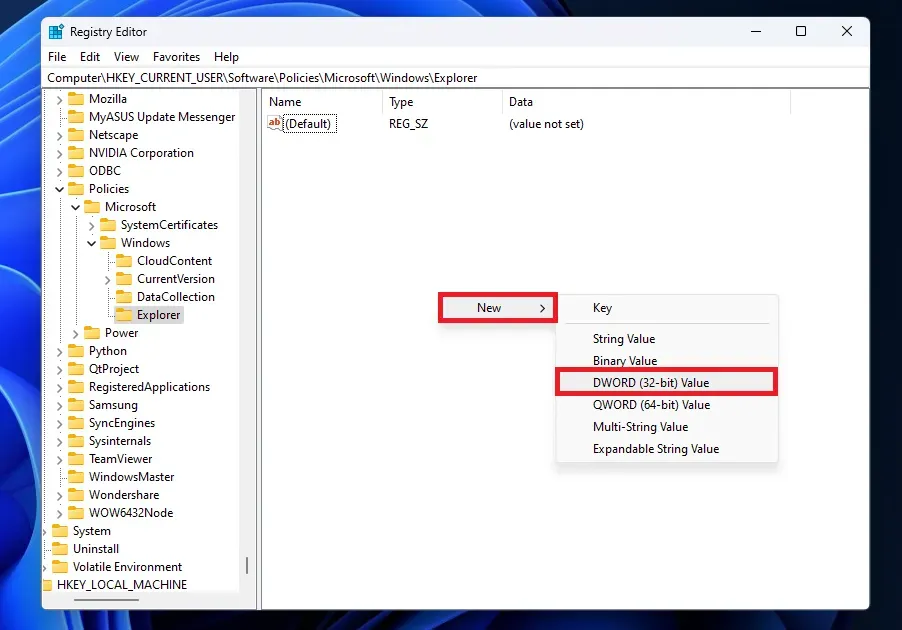
- Rename the new DWORD to DisableSearchBoxSuggestions.
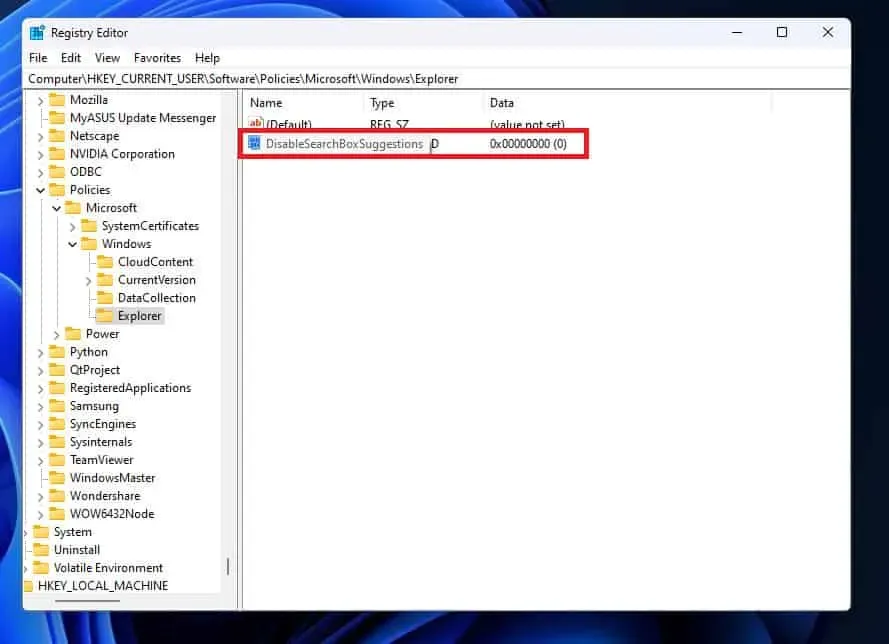
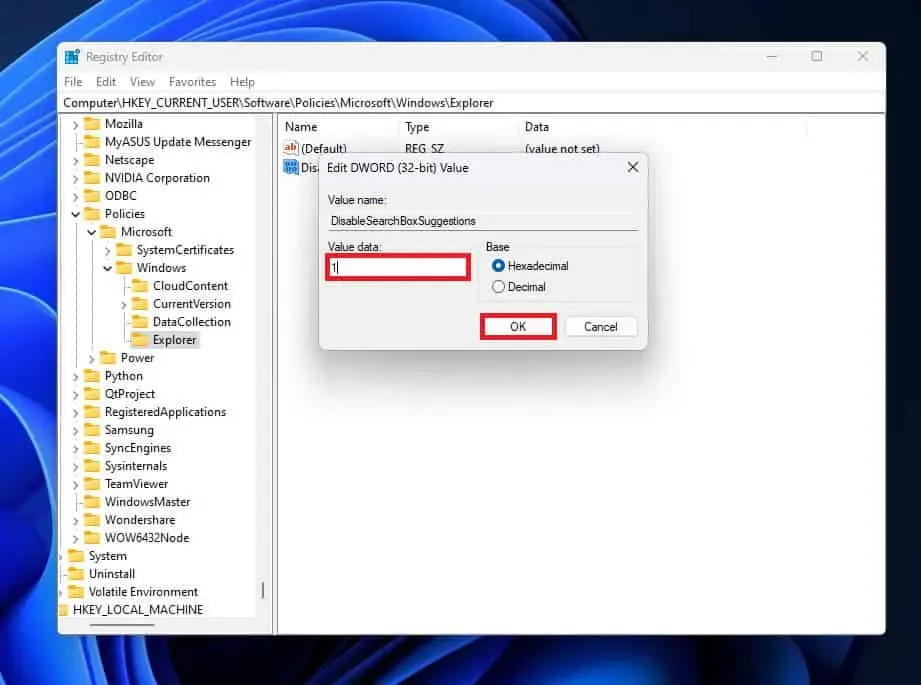
- Double-click on this new DWORD you created to edit it.
- Set the Value Data to 1 and then click on OK.
Activate the Search and Indexing Troubleshooter
Any problem you could encounter on your computer has a troubleshooter in Windows. Use the Search and Indexing troubleshooter to address your performance issue if you notice that Windows 11 search is sluggish. To do this, adhere to the instructions listed below:
- Firstly, open the Settings app on your PC. You can do so by pressing Windows + I key combo.
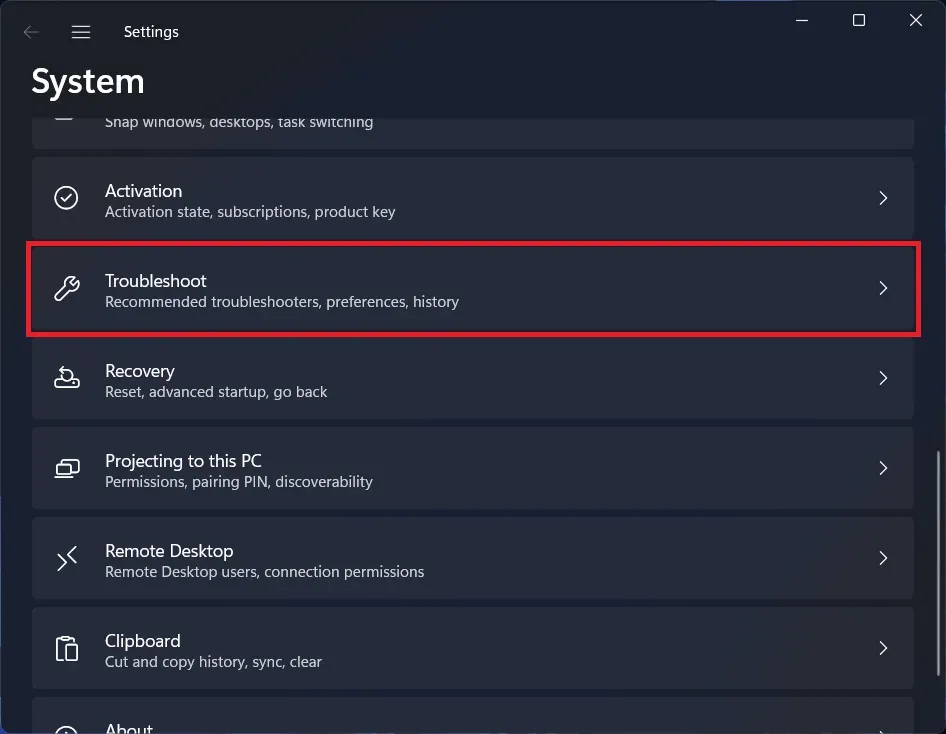
- You will be on the System tab by default. Here on the left sidebar, click on Troubleshoot.
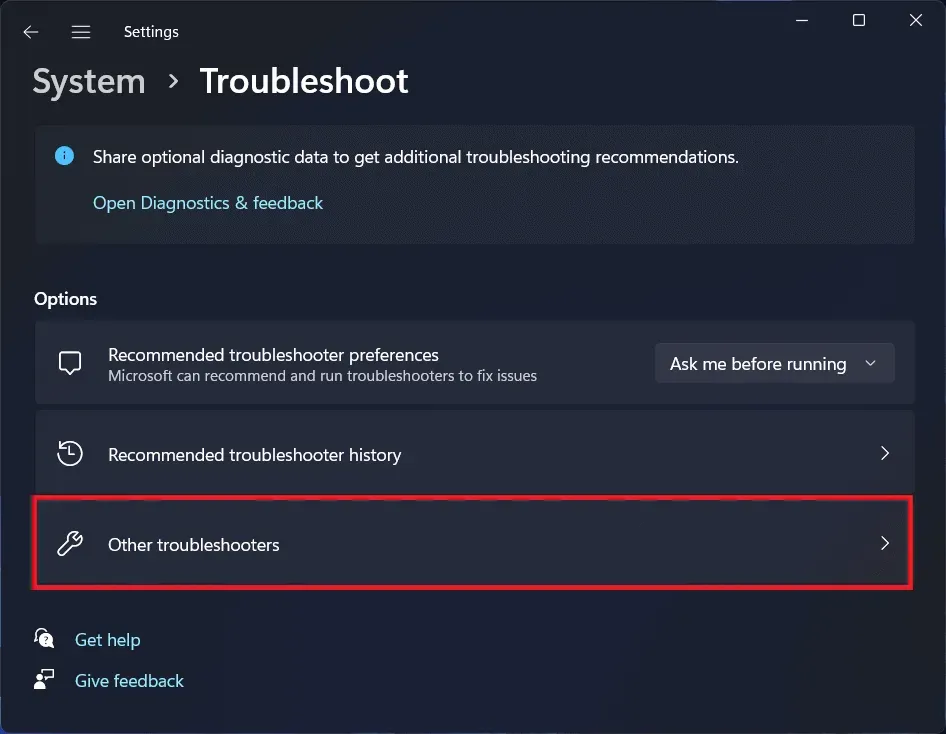
- Next, click on Other Troubleshooters.
- Search for Search and Indexing and click the Run button next to it.
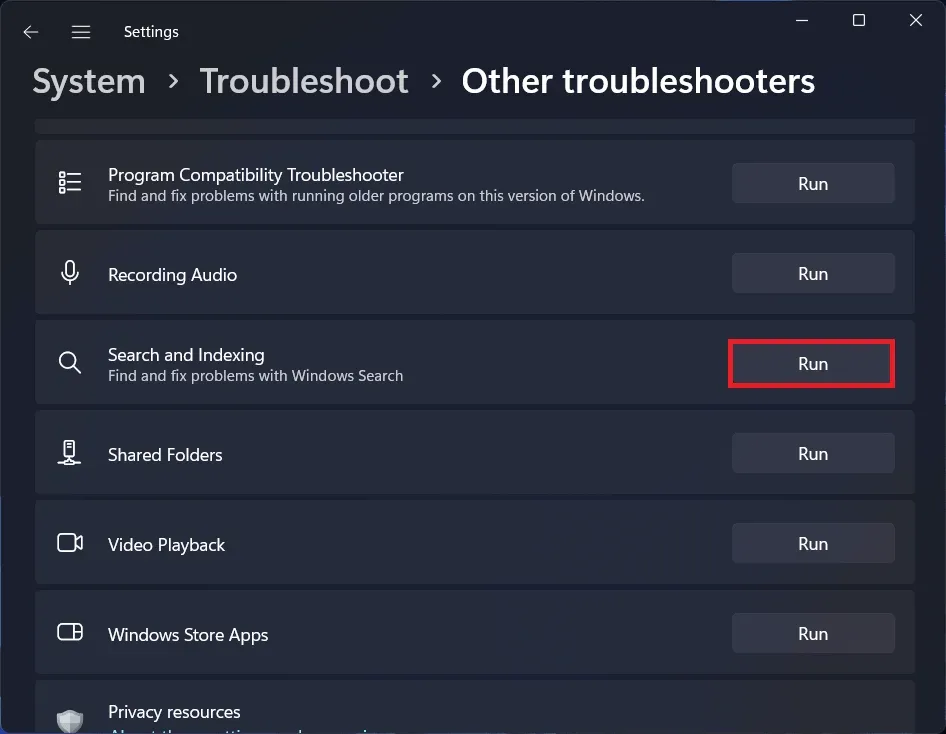
- Now, follow the on-screen instruction to run the troubleshooter.
Tweak Indexing Options
Making changes to the indexing parameters is another approach. Windows search will function more slowly the more files it indexes. By following the instructions below, you can speed up Windows 11 Search by changing indexing choices and less files being indexed.
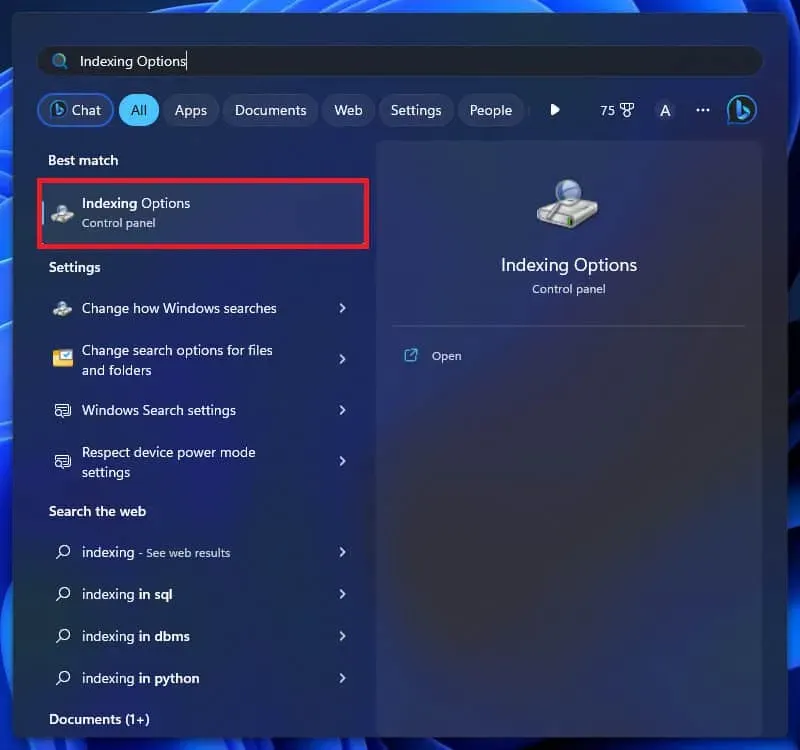
- Press Windows key on your keyboard, and then in the Start Menu, search for Indexing Options. Press Enter to open it.
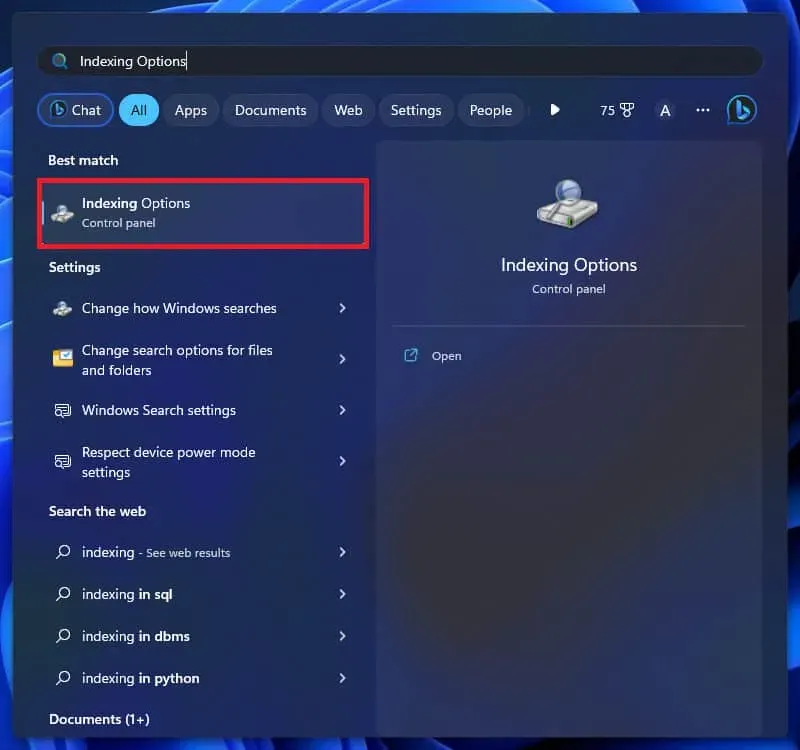
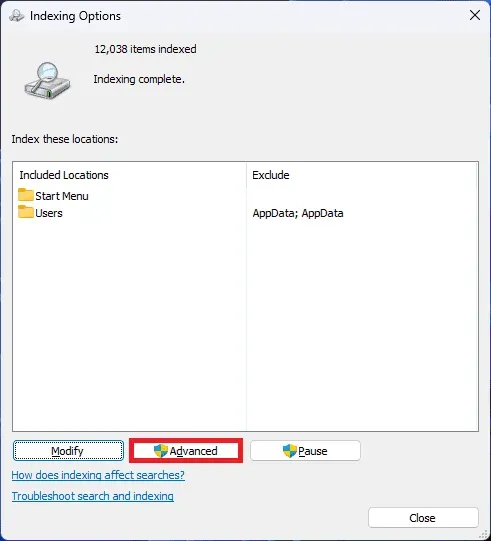
- In the pop-up window, click on Modify option.
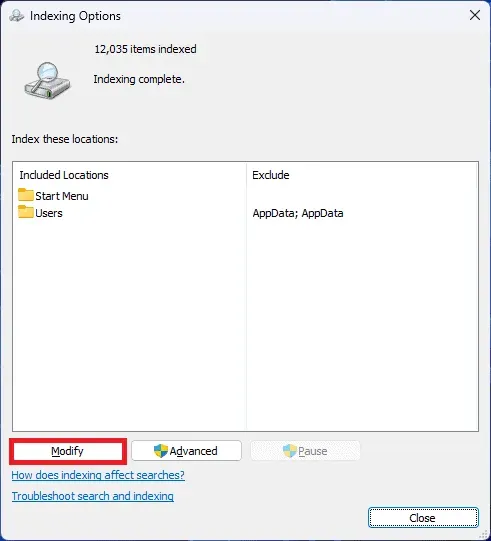
- Uncheck all the locations you don’t want to include in the search indexing.
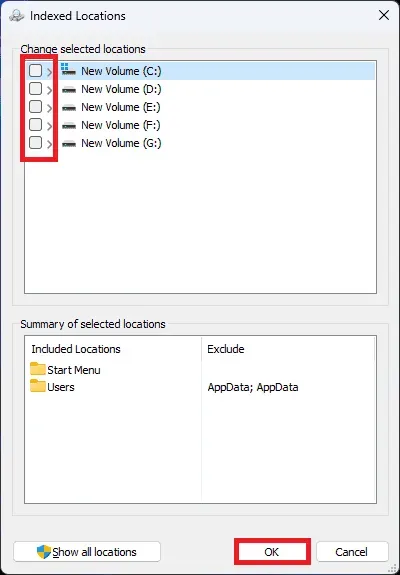
- Once done, click on OK to save the changes.
You will notice that your search is now quicker and more accurate because the places you unchecked are no longer part of the search database.
Rebuild Search Index
Finally, you need to rebuild the search index if nothing else works to fix the problem. Windows Search may be performing slowly due to a search index issue, which can be resolved by rebuilding the search index. You can accomplish this by taking the following actions:
- Open the Start Menu by pressing Windows key. Here, search for the Indexing Options; click on the first option that appears to open it.
- Now, click on the Advanced option in the window that opens up.
- In the Advanced Options window, click on Rebuild to rebuild the search index.
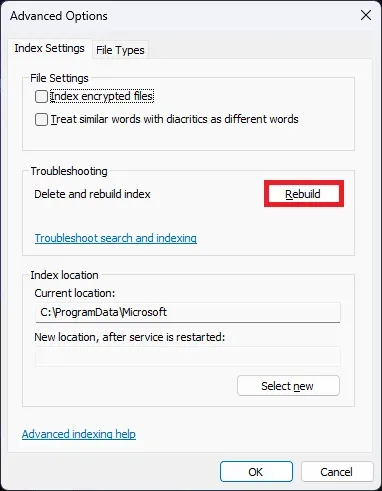
- Wait for the process to complete, and then restart your PC. This will most probably fix the issue.
Conclusion
This post is for you if you notice that Windows searches take longer and want to know how to speed it up. You can speed up and improve the accuracy of Windows 11’s search in the ways we’ve listed below. Although we sincerely hope that this post resolves your problem, if any of the following procedures do not work for you, please let us know in the comments area.


