Automatically connecting to a saved Wi-Fi network saves time. However, it may be annoying when your device keeps auto-joining known Wi-Fi without permission. Also, this can raise security threats if you’re on the move and your device connects to public networks. Fortunately, you can stop automatically connecting to Wi-Fi, so your devices never connect to a network without your permission. In this blog, I will share how to stop Wi-Fi auto-join on your iPhone, iPad, and Mac.
- Why must you stop your iPhone from automatically connecting to Wi-Fi networks?
- How to turn off Wi-Fi auto-join on iPhone or iPad
- How to forget Wi-Fi network on iPhone or iPad
- How to disable Wi-Fi Auto-Join on Mac
- How to forget Wi-Fi network on Mac
Why must you stop your iPhone from automatically connecting to Wi-Fi networks?
- Public networks are less secure than private ones and can autorun scripts or malware without the user’s knowledge. Therefore, the auto-join Wi-Fi feature can lead to vulnerabilities in the system, posing risks of attacks and hacking attempts.
- While moving around, your device may try to join multiple networks or constantly switch between Wi-Fi. So, it will not have a stable internet connection.
- The auto-join Wi-Fi feature can interfere with your cellular connection.
- Your device may automatically reconnect to a known network, but the Wi-Fi may not have active internet access. So, your online activities will get interrupted.
Therefore, you must disable auto-connecting to saved Wi-Fi networks to maintain a secure network. Additionally, manually selecting trusted networks reduces threats to sensitive information such as financial transactions, personal data, or other confidential information.
How to turn off Wi-Fi auto-join on iPhone or iPad
- Launch Settings → Select Wi-Fi.
- Tap the info icon next to the saved network.
- Now, toggle off Auto-Join.
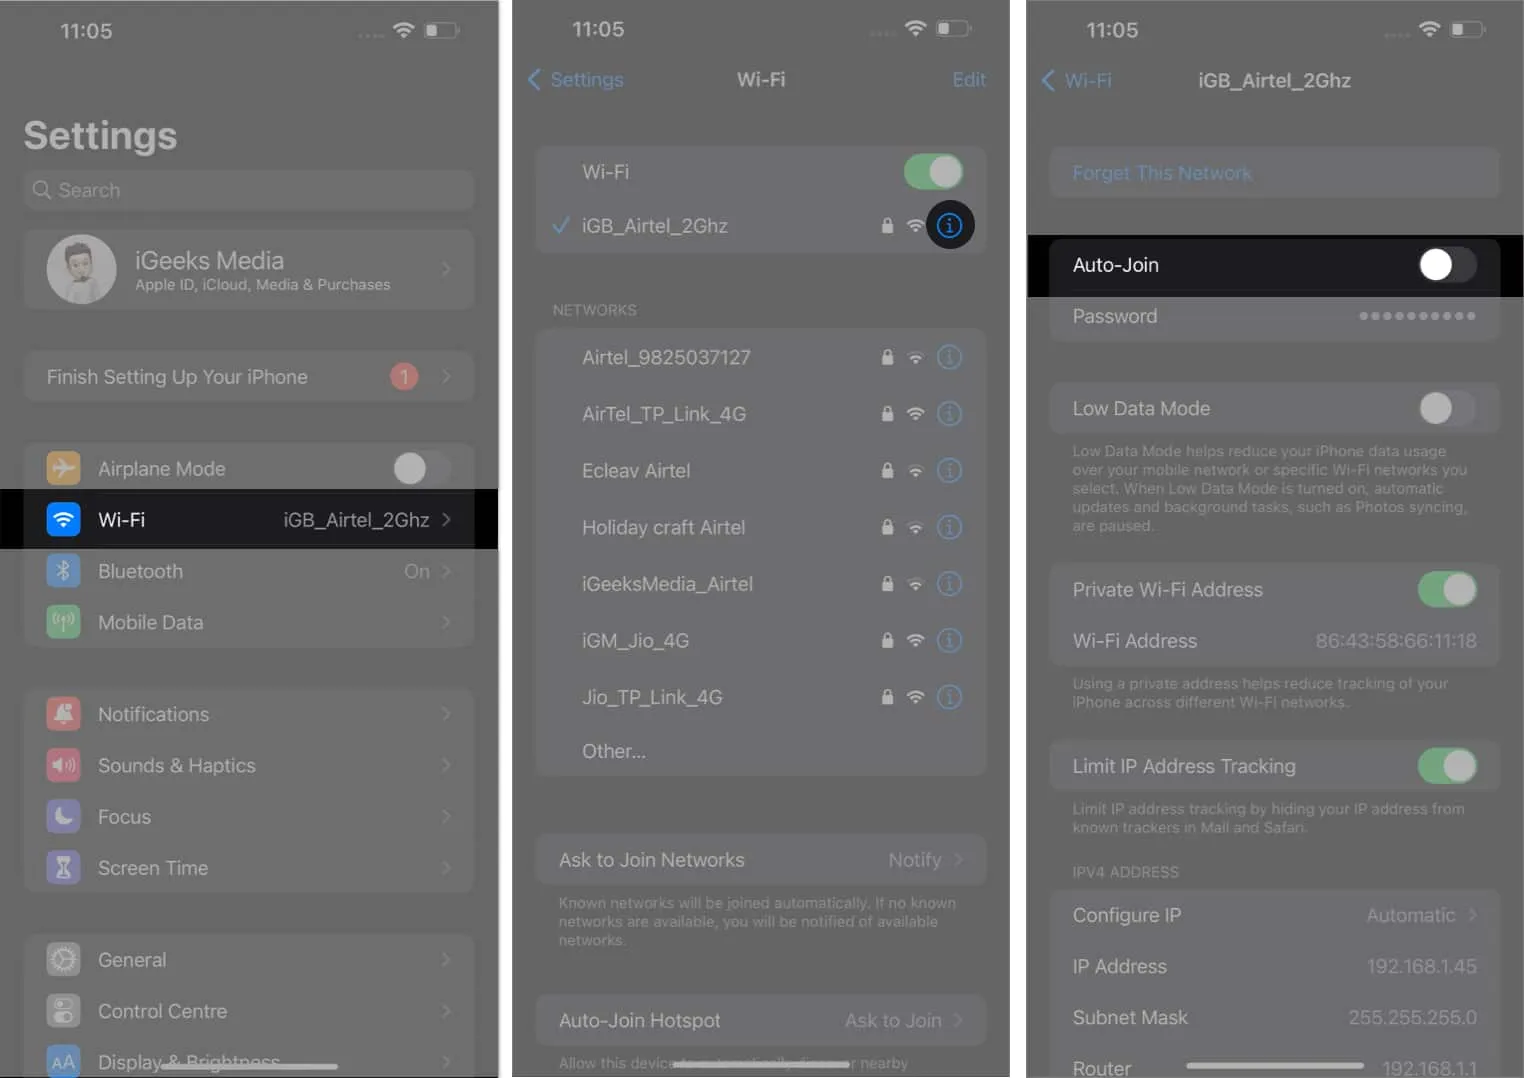
The process does not require you to stay connected to the network; you can disable the automatic network connection as long as it is saved. Besides, you must delete the saved public networks to prevent automatic Wi-Fi connections.
How to forget Wi-Fi network on iPhone or iPad
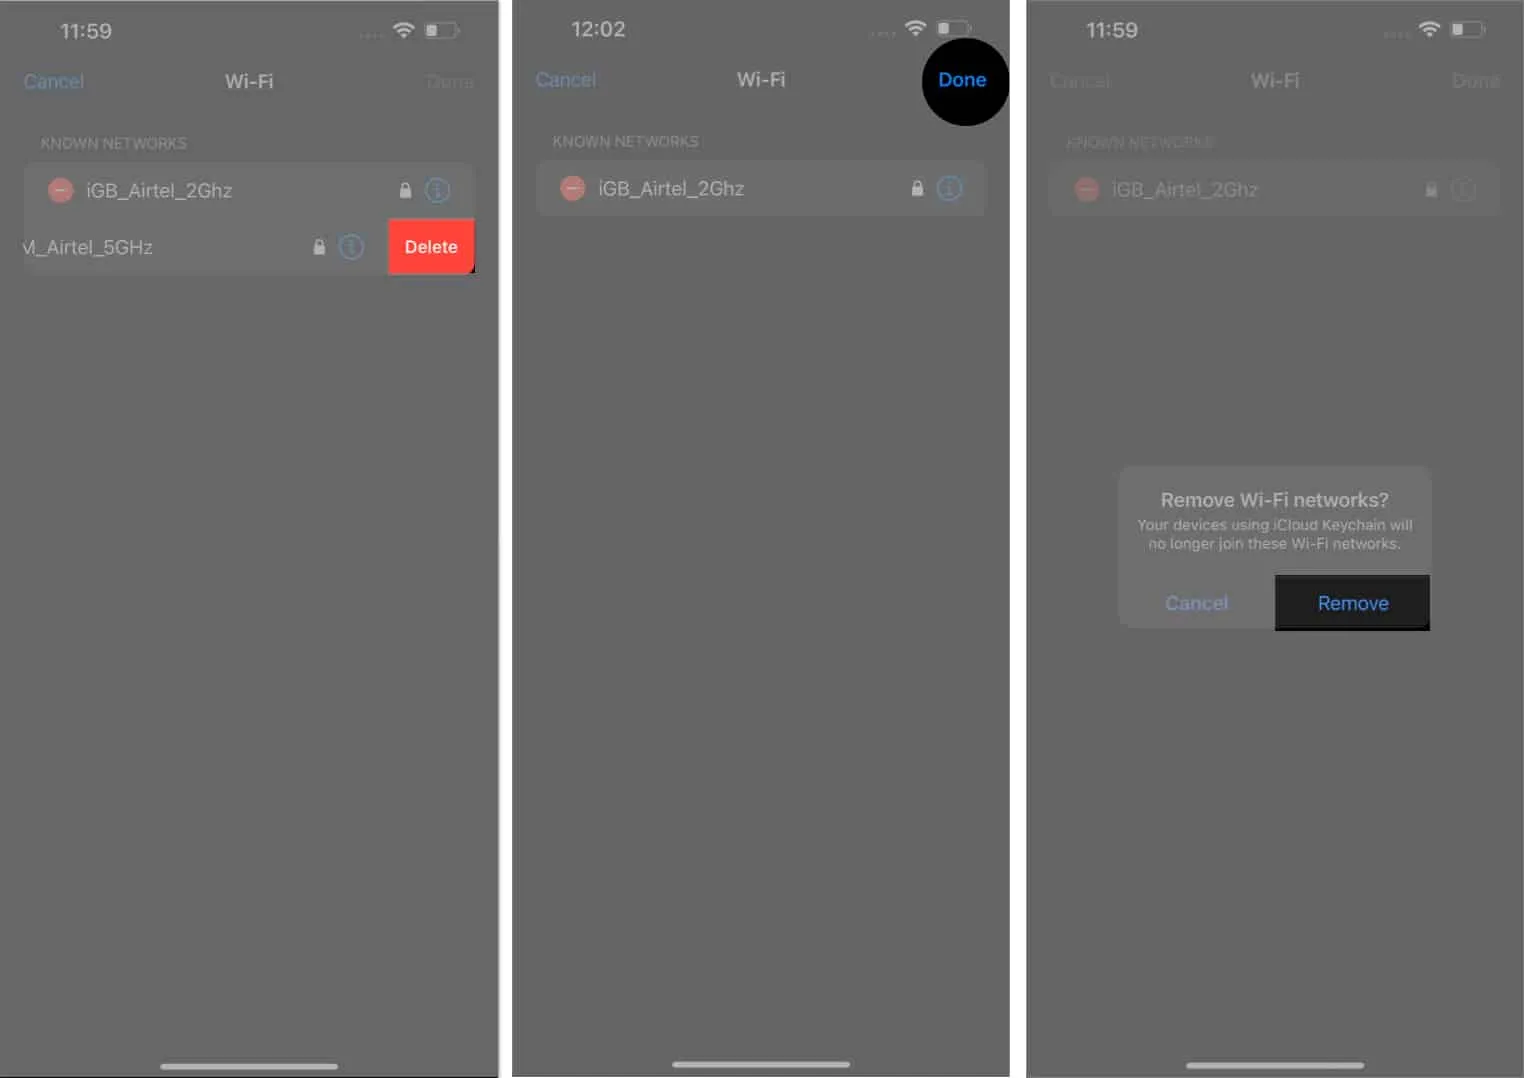
- Open Settings → Navigate to Wi-Fi → Edit.
- Enter the passcode of your device to proceed.
- Tap the minus (-) icon next to the network.
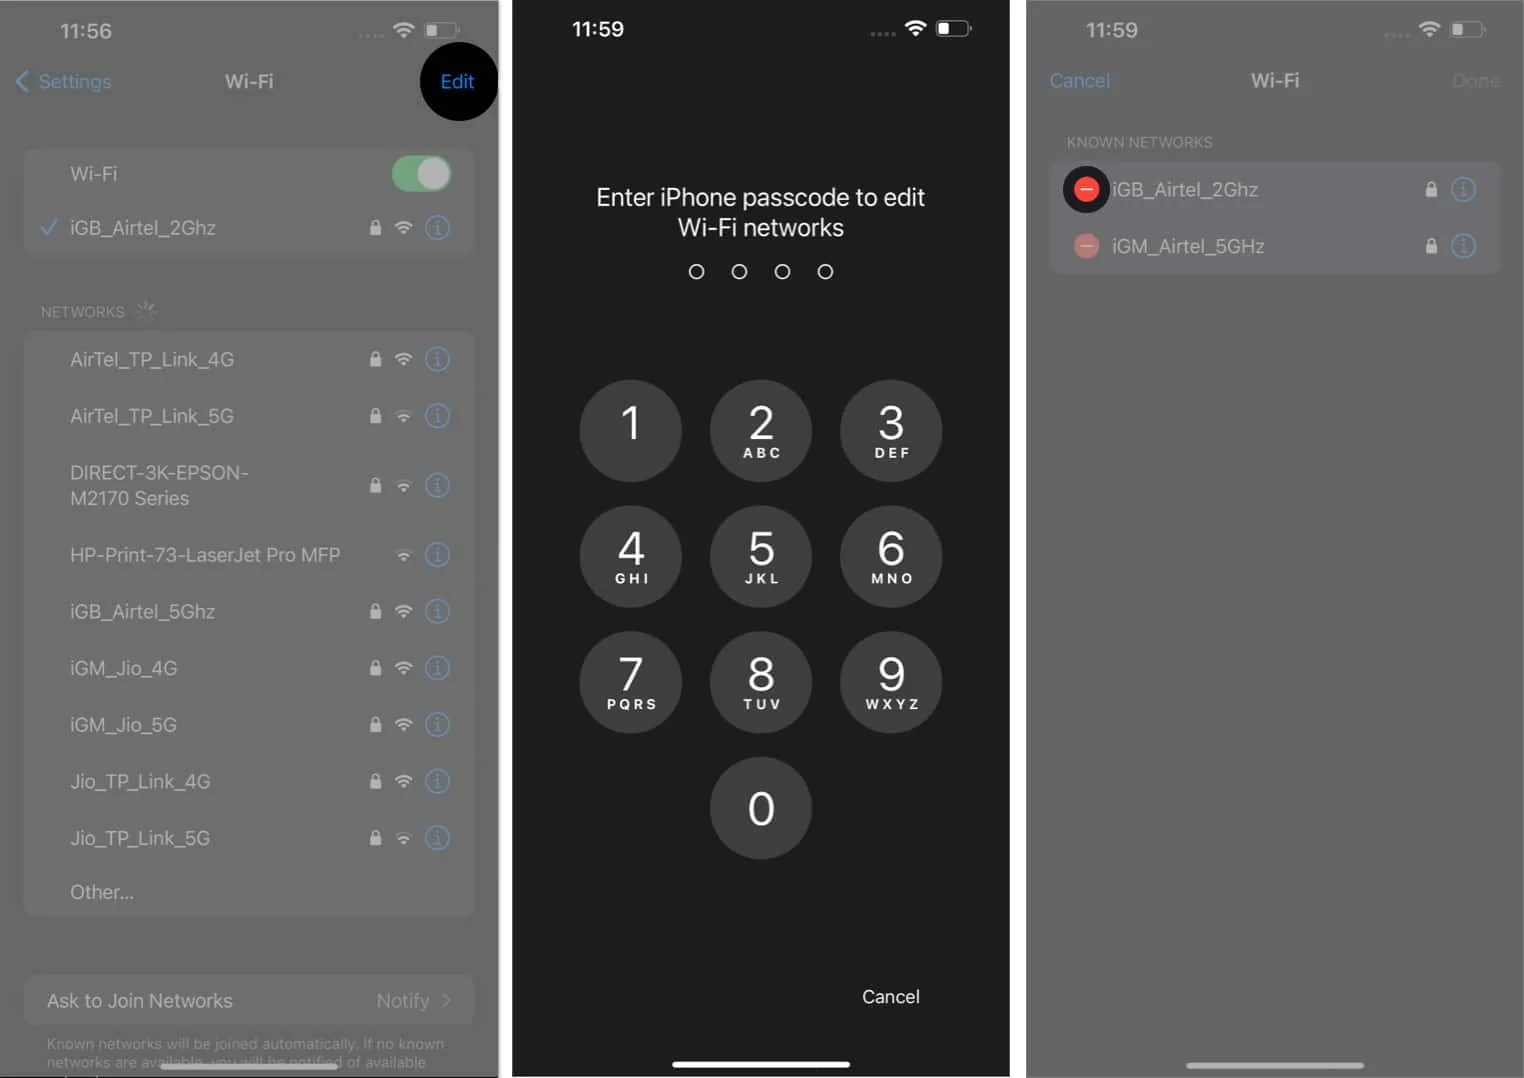
- Hit Delete → Done → Select Remove when prompted.
How to disable Wi-Fi Auto-Join on Mac
Now that you know how to stop Wi-Fi from auto-connecting on your iPhone, you must do the same on your Mac. Follow the steps below.
Ventura and later
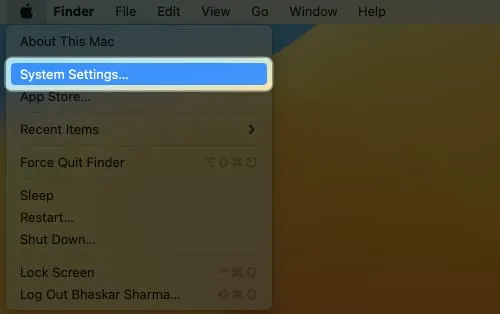
- Click the Apple logo () → System Settings.
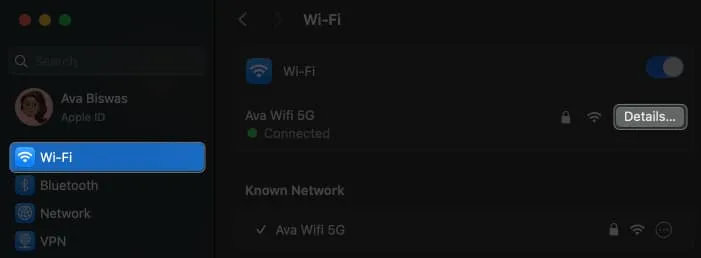
- Navigate to the Wi-Fi → Press Details for the network you’re connected to.
- Now, toggle off Automatically join this network → Click OK.
Enter your Mac password if prompted.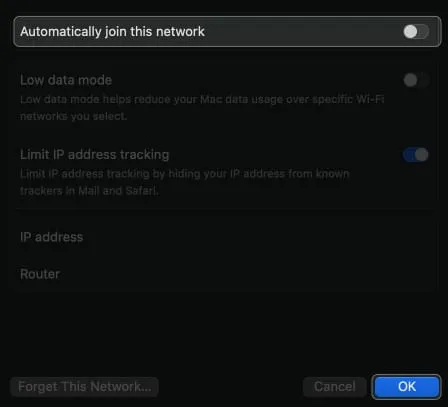
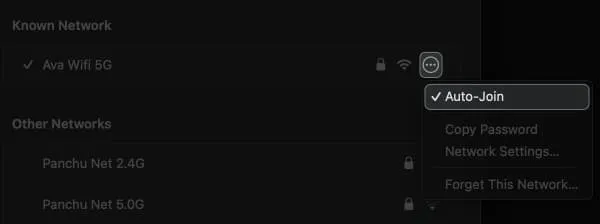
- If you’re not connected to the network and still want to stop Wi-Fi auto-connect, click the three-dot icon next to the network and uncheck Auto-Join.
Monterey and earlier
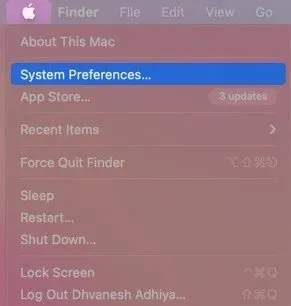
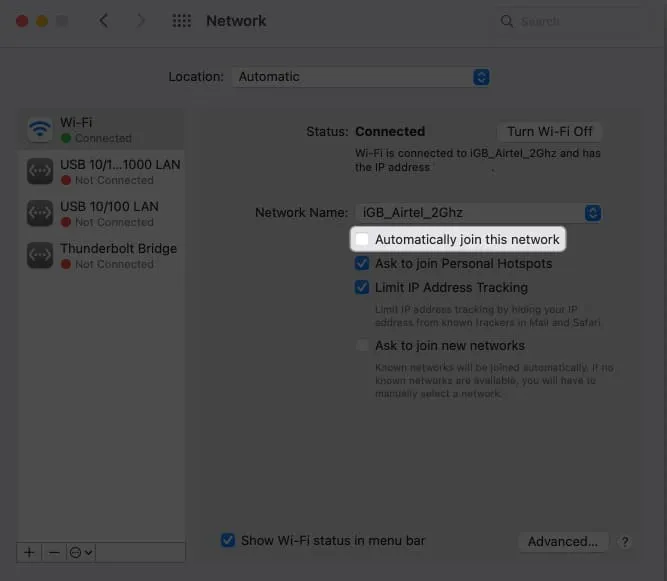
- Click the Apple logo ()→ System Preferences.
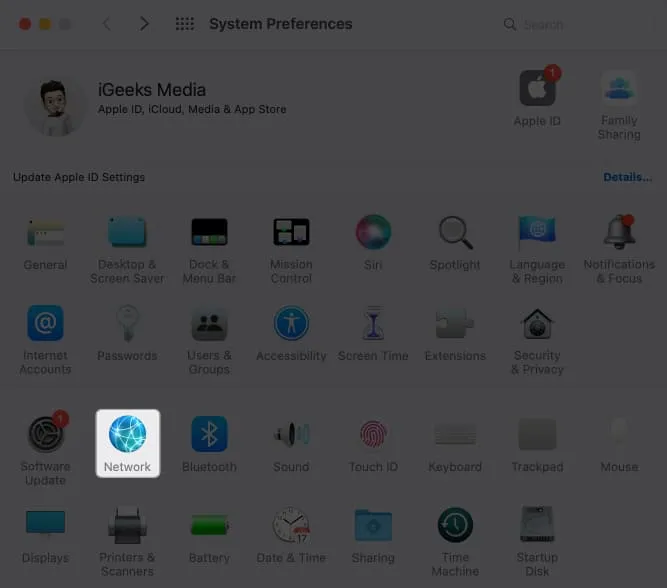
- Access Network from the menu.
- Select the network from the drop-down menu.
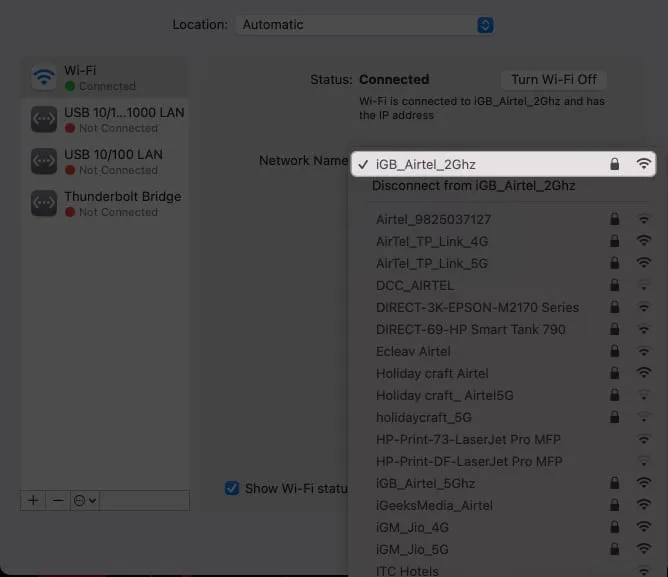
- Uncheck Automatically join this network.
How to forget Wi-Fi network on Mac
Alternatively, you can avoid the threat of cyberattacks or data breaches by removing open networks from your Mac.
Ventura and later
- Navigate to the Apple logo () → System Settings.
- Go to Wi-Fi → Click Details next to the connected network.
- Press Forget This Network.
If you’re not connected to the network, click the three-dot icon and press Forget This Network.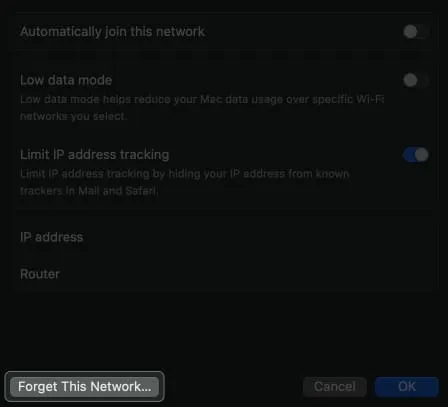
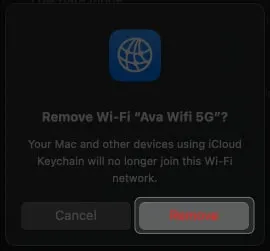
- Hit Remove when prompted.
Monterey and earlier
- Click Apple logo ()→ System Preferences→ Network.
- Select Advanced.
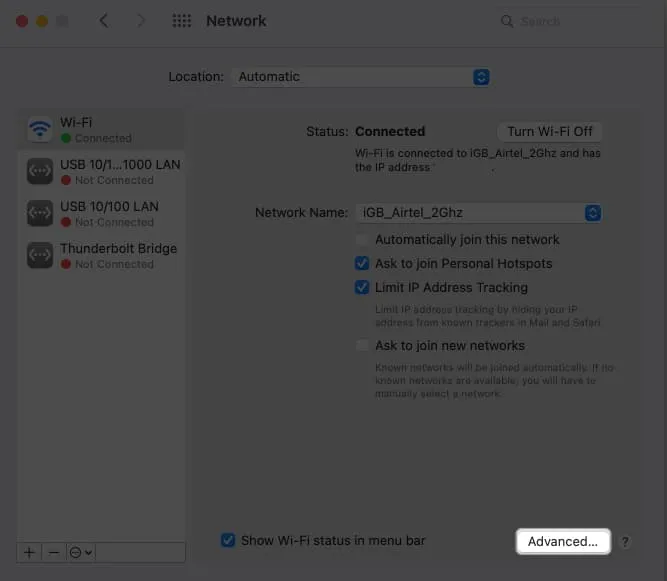
- Select the network you prefer to remove → Hit the minus (-) icon.
Additionally, disable auto-connect for other saved networks by unchecking Auto-Join.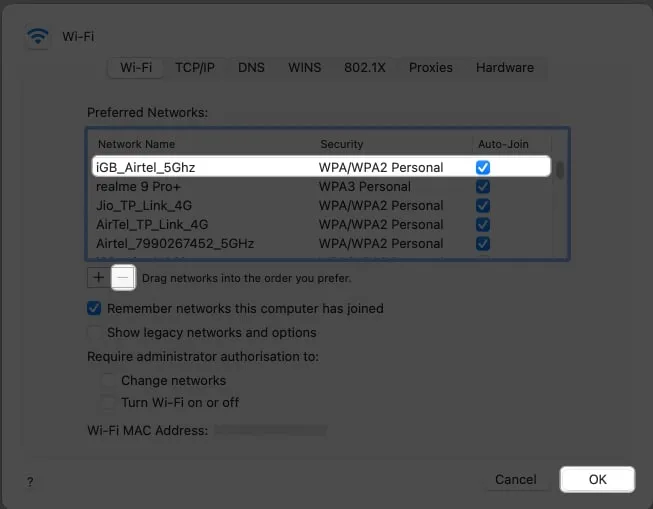
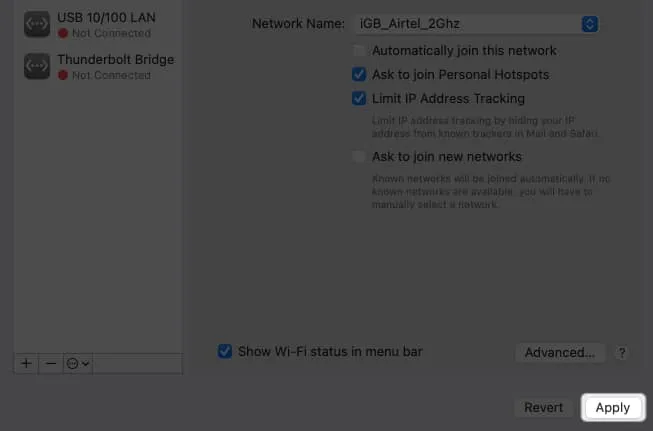
- Hit OK → Apply.
FAQs
Will disabling auto-connecting to saved networks affect the performance or speed of my device’s internet connection?
The speed on the internet varies concerning the capacity of the network you’re connected to. Disabling auto-connect for any network will not affect your device by any means.
How can I protect my personal data when using public Wi-Fi hotspots?
When you connect to a public network, use a VPN to protect your activities.
How do I ensure that my device only connects to trusted and secure Wi-Fi networks?
There is no way you can identify a safe public network. So, for a better and more secure experience, I recommend using cellular networks or Wi-Fi assist feature on your iPhone or iPad instead of open Wi-Fi.
Save yourself!
The automatically connect to Wi-Fi networks feature is convenient yet dangerous, as your device may pair with an unsecured network. So, you should take the necessary precautions to avoid becoming a victim. You may reset your network settings if you face issues disabling the auto-join Wi-Fi feature.
