


When using a Windows PC, you will encounter several errors. The keyboard not working is one of the errors that several Windows 10 users are facing. This error is a lot of inconvenience as almost every task on the PC requires a keyboard to perform.
Thus, here we have covered some of the best methods that you can use to fix the keyboard not working error on Windows 10.
Fix Windows 10 keyboard stopped typing and working 2021
There are several reasons why this error occurs on your PC. Start following the methods listed below and work your way down the list until the error is fixed.
Method 1: Some basic checks.
Before getting into the technical methods, let’s do some basic checks to make sure your keyboard is in working order.
1. Check the keyboard or connecting cables for any physical damage. If there is any damage, contact a specialist.
2. Connect the keyboard to other USB ports on your PC and check if the error persists.
3. If you have a wireless keyboard, check if it has enough power and if the wireless adapter is properly connected. If necessary, replace the batteries in the wireless keyboard.
4. If all of the above items are checked, try using the keyboard on another Windows 10 PC. If your keyboard works fine on another PC, start following the methods listed below.
Method 2: Disable the filter keys.
Several Windows 10 users have reported that the “Keyboard not working” error gets resolved when disabling the filter keys. To do this, follow the steps listed below.
Step 1. Click the Start icon located at the bottom left corner of the desktop and click Settings to open it.
Step 2. Here, click on the Ease of Access option in the grid.
Step 3. Now click “Keyboard”on the left side of the window.
Step 4: On the Keyboard tab, find the Use Filter Keys section and turn off its toggle.
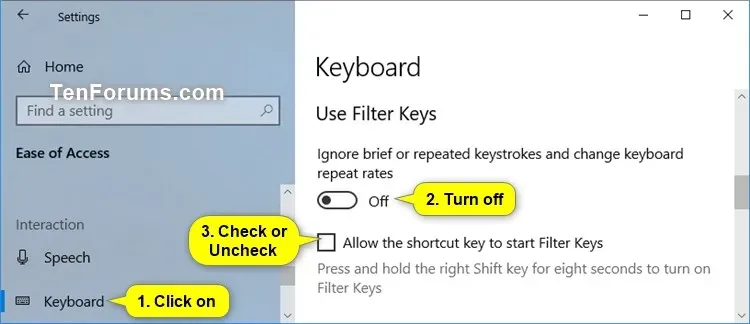
Photo Credit: TenForums
Now check if your keyboard starts working on Windows 10 PC. If not, move on to the next method.
Method 3: Reinstall and update your keyboard drivers.
The Keyboard Not Working error often occurs due to outdated keyboard drivers. Follow the steps listed below to reinstall updated keyboard drivers on your Windows 10 PC.
Step 1: Launch Device Manager on Windows 10 PC.
Step 2: Expand Keyboards by clicking the arrow next to it.
Step 3: Right-click on the keyboard driver and select “Uninstall device”from the drop-down list.
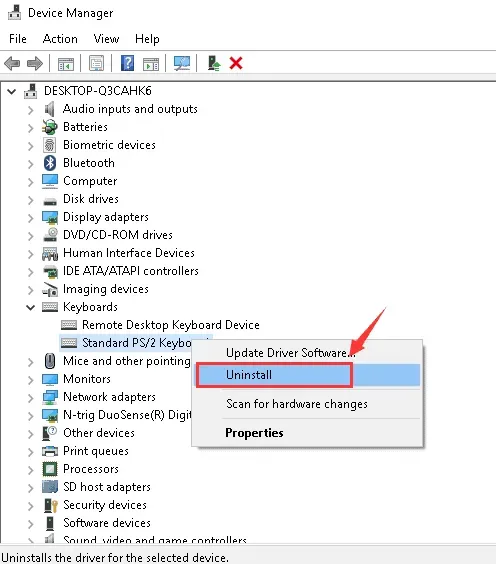
Step 4: Now restart your computer. The keyboard driver will be installed automatically.
Now check if the “keyboard not working”error is fixed. If not, try manually updating your keyboard driver.
To manually update the keyboard drivers, follow step 1 and step 2 from the method above.
Then select the Update Driver option from the drop-down list in step 3. Your computer will ask for permission to automatically search for updated driver software.
Allow this request, and then follow the instructions on the screen. Your computer must be able to access the Internet to update keyboard drivers automatically.
Method 4: Disable the “Allow the computer to turn off this device to save power”option.
In Windows 10, there is an option in the power management settings that allows you to turn off peripherals such as the keyboard. Follow the steps listed below to disable this option.
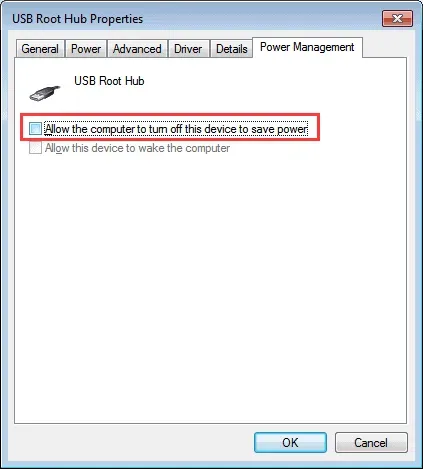
Step 1: Launch Device Manager on Windows 10 PC.
Step 2: Expand “Universal Serial Bus Controller”by clicking the arrow next to it.
Step 3: Double-click the USB drive that the keyboard is connected to. The properties window will open.
Step 4: Here, go to the Power Management tab and uncheck “Allow the computer to turn off this device to save power and restart your computer”.
The Keyboard Not Working error should be fixed on your Windows 10 PC. If not, move on to the next method.
Method 5: Disable Fast Startup.
Several Windows 10 users have reported that disabling Fast Startup can fix the error that causes the keyboard not to work. Follow the steps listed below to complete this method.
Step 1: Launch the Control Panel on your Windows PC.
Step 2. Find and click Hardware and Sound >> Power Options.
Step 3. Click on the “Choose what the power buttons do”option located on the left pane of this window.
Step 4: In the new window, find and click on the Change settings that are currently unavailable link.
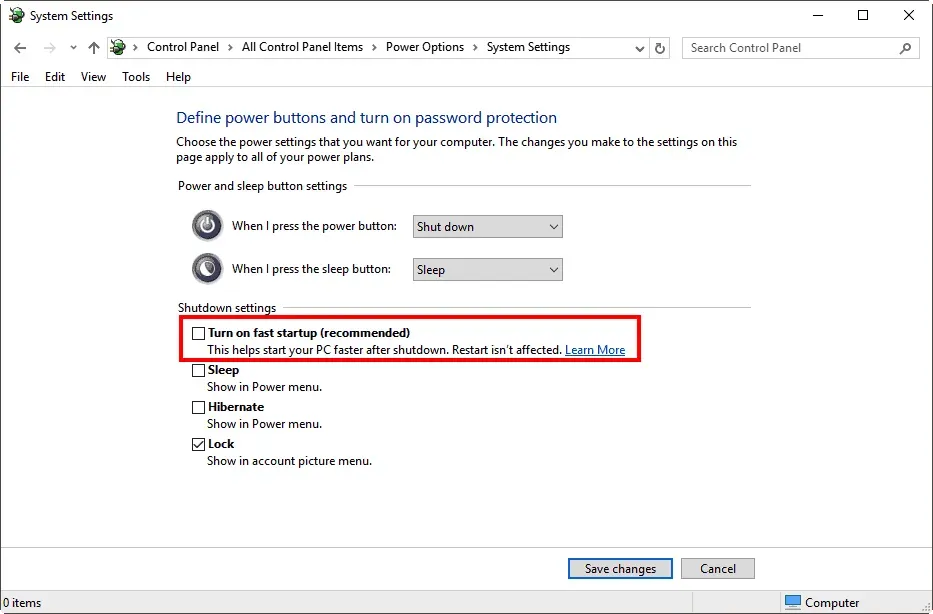
Step 5: Now uncheck “Enable Fast Startup”and click on “Save Changes”.
Now restart your device and check if your keyboard starts working normally.
Method 6: Use the Keyboard troubleshooter.
If none of the methods above were able to fix the Keyboard Not Working error on your Windows 10 PC, try using the built-in troubleshooter.
Step 1. Click the Start icon located at the bottom left corner of the desktop and click Settings to open it.
Step 2: Find and click “Find and fix keyboard problems”. You can use the on-screen keyboard to enter it into the search bar.
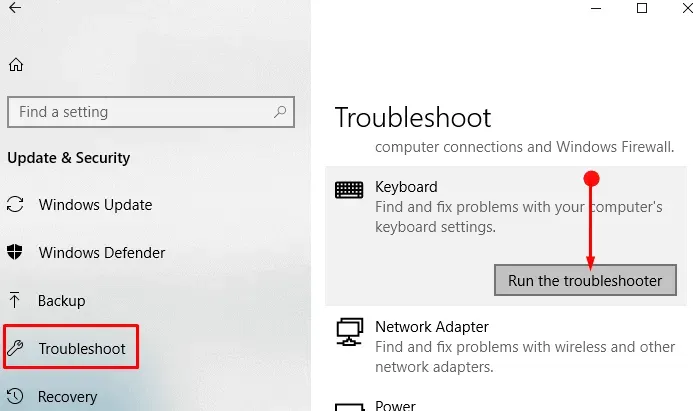
Step 3: Click the Next button to run the Keyboard Troubleshooter.
Step 4: Any possible issue causing keyboard not working on your Windows 10 PC will be identified.
Follow the instructions on the screen to fix the identified issues and thus fix the “keyboard not working”error.
Conclusion:
These are some of the most useful methods that you can follow to fix the keyboard not working error on your Windows 10 PC. If none of the above methods worked, you can replace your keyboard or see a professional. If we missed something, or if you have any questions about this post, feel free to ask them in the comments section.