


Windows Defender is the first layer of security for a Windows PC. Windows Defender can be quite useful software that protects your software from viruses and malware. But what if Windows Defender is not running on your computer? Many users have reported that Windows Defender is not working on Windows 11. This can be a very serious issue if not resolved quickly. If you are also faced with this problem, then this article will help you with this.
Fix Windows Defender Not Working on Windows 11
In this article, we will discuss how you can fix Windows Defender not working on Windows 11.
Restart the Security Center service.
The very first thing you can try is to restart the Security Center service. To restart the Security Center service, follow these steps:
- Press the key combination Windows + R to open the Run dialog box. In the Run dialog box, type services.msc and press Enter.
- The Services app will open . Here, find the Security Center .
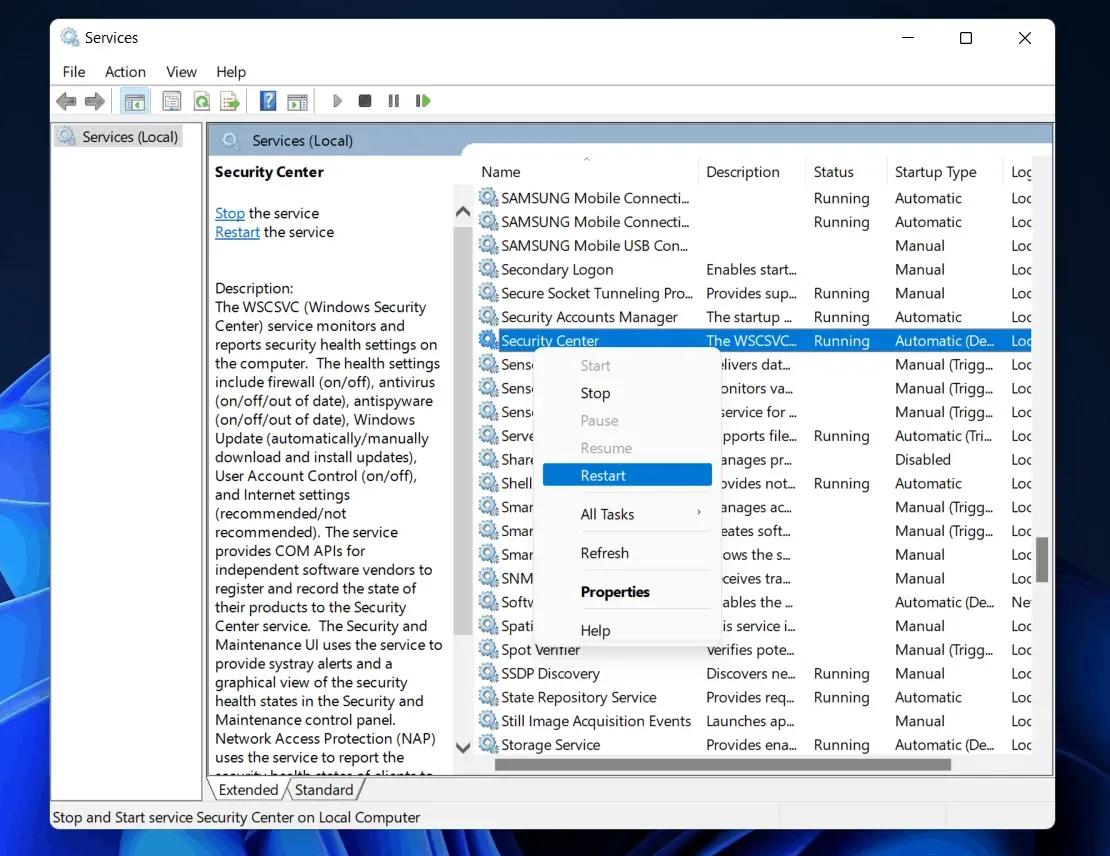
- Select a service. Right click on it and then click Restart.
Update Windows to the latest build
The next thing you can do is update Windows. You may encounter this problem due to errors in your operating system, which can be fixed by updating Windows. To update Windows, follow these steps:
- Open your PC settings by pressing Windows key + I.
- Navigate to Windows Update from the left sidebar in Settings.
- Here, click “Check for Updates”to start checking for updates.
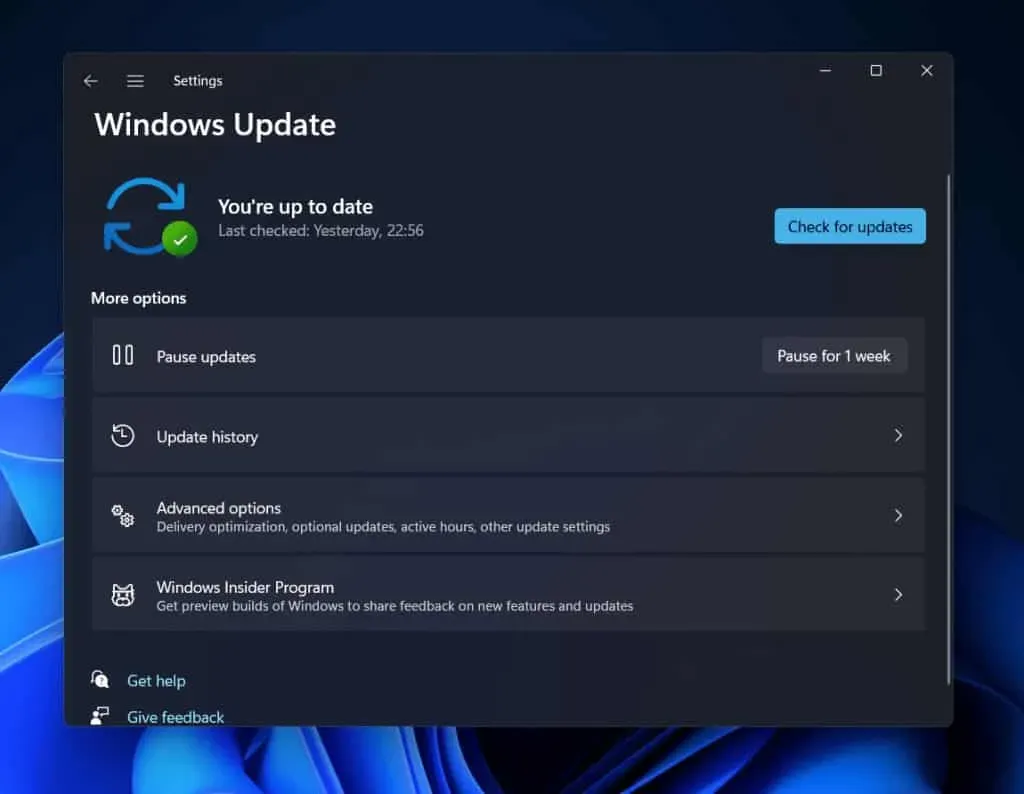
- Now download and install all updates. After updating your computer, restart it to fix the problem you’re experiencing.
Run SFC Scan
If restarting the Security Center service and updating Windows didn’t fix Windows Defender not working on Windows 11, you can try running an SFC scan. An SFC scan fixes any corrupted system files that might also be causing the issue. To run an SFC scan, follow these steps:
- From the Start menu , search for CMD. From the search results, select Command Prompt, right-click it, and select Run as administrator.
- At the command prompt, type sfc /scannow and press Enter to run the command.
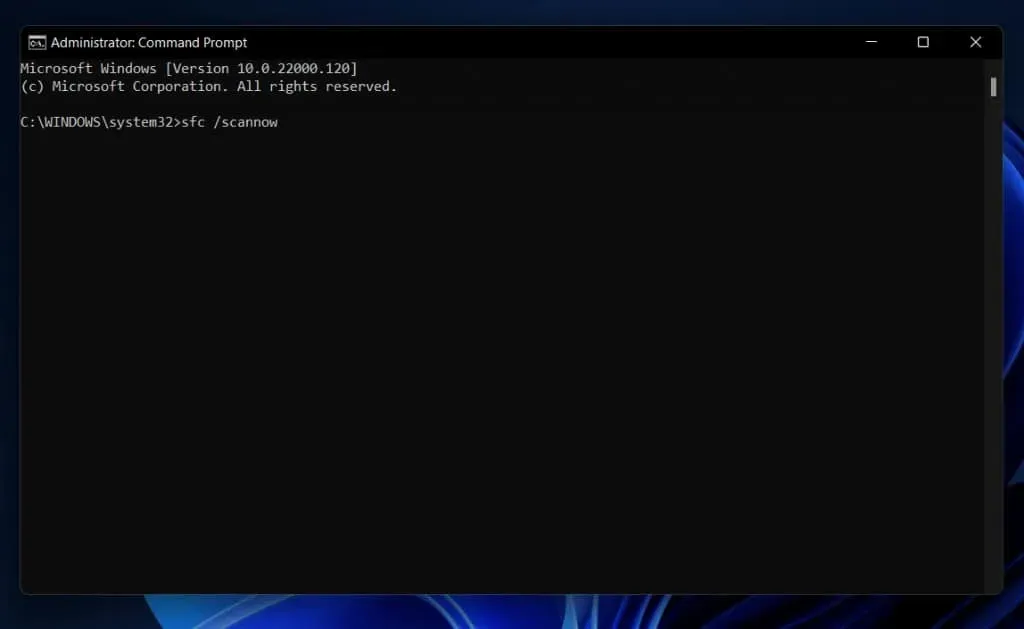
- Wait for the command prompt to do its job and don’t close the terminal until then.
- Once the process is complete, close Command Prompt and restart your computer.
Check if Windows Defender is running. If Windows Defender is not working on Windows 11, you should proceed to the next step.
Do a quick clean boot
Third-party services and startup programs can also interrupt Windows and cause the problem. These services can interfere with Windows, resulting in Windows Defender not working properly. You can try performing a clean boot and then check if the issue is still there. To perform a clean boot, follow these steps:
- Open the Run dialog box on your PC. You can do this by pressing the key combination Windows + R.
- In the Run dialog box, type msconfig and press Enter to open System Configuration on your PC.
- Click the Services tab in System Configuration.
- Here, check the Hide all Microsoft services box . After that, click “Disable all”to disable all services except Microsoft services.
- Now go to the Startup tab and click on Open Task Manager.
- You will be taken to the Startup tab in Task Manager .
- Here, select programs individually and then click “Disable”to disable the application.
- After you have disabled all programs at startup, restart your PC.
Changing registry settings
If you are still facing the issue with Windows Defender even after trying all the fixes above, then you should try changing your registry settings. Make the following registry settings changes to fix Windows Defender not working on Windows 11:
- Open the Start menu by clicking the Start icon on the taskbar.
- From the Start menu , search for Registry Editor and open it.
- Now in the Registry Editor go to the following address:
Computer\HKEY_LOCAL_MACHINE\SOFTWARE\Policies\Microsoft\Windows Defender
- Now on the right side find DisableAntiSpyware and double click it to edit it.
- If the key is not present, then on the left sidebar, right-click Windows Defender. Click” New”and then select the DWORD (32-bit) value. Save the name of the new key you created as DisableAntiSpyware.
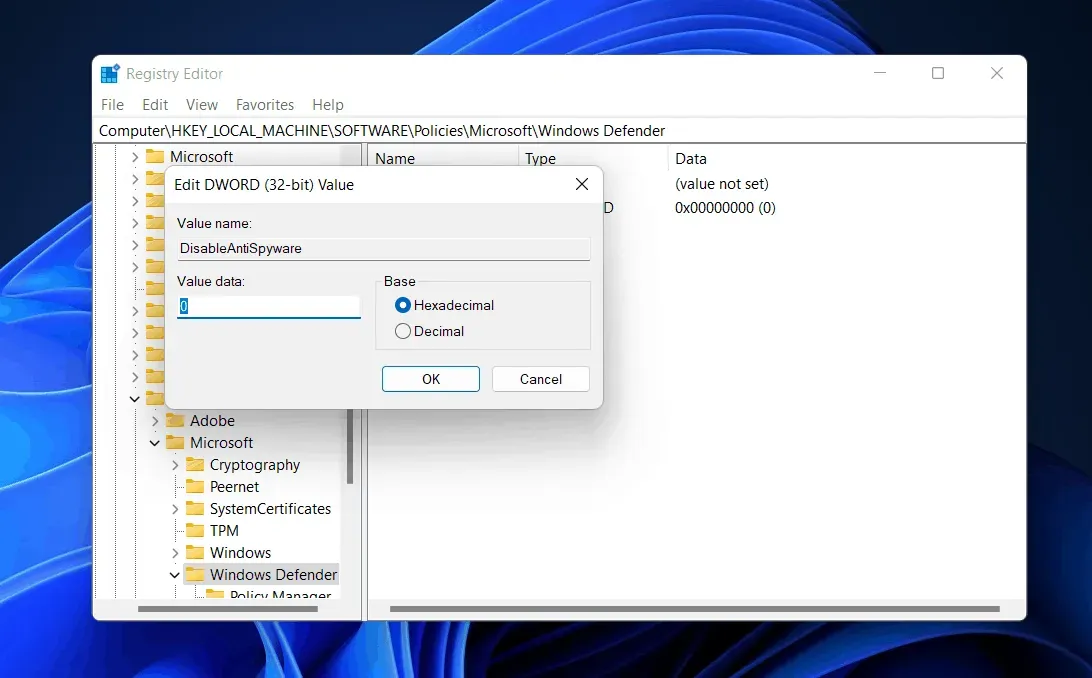
- Double click this key and change its value to 0 and then click OK.
Conclusion
If Windows Defender is not working on Windows 11, you can follow the steps above to fix the issue. Along with Windows Defender, you should also install any third-party antivirus or antivirus program on your computer for added security. We hope this article helped you fix the Windows Defender not working issue in Windows 11.