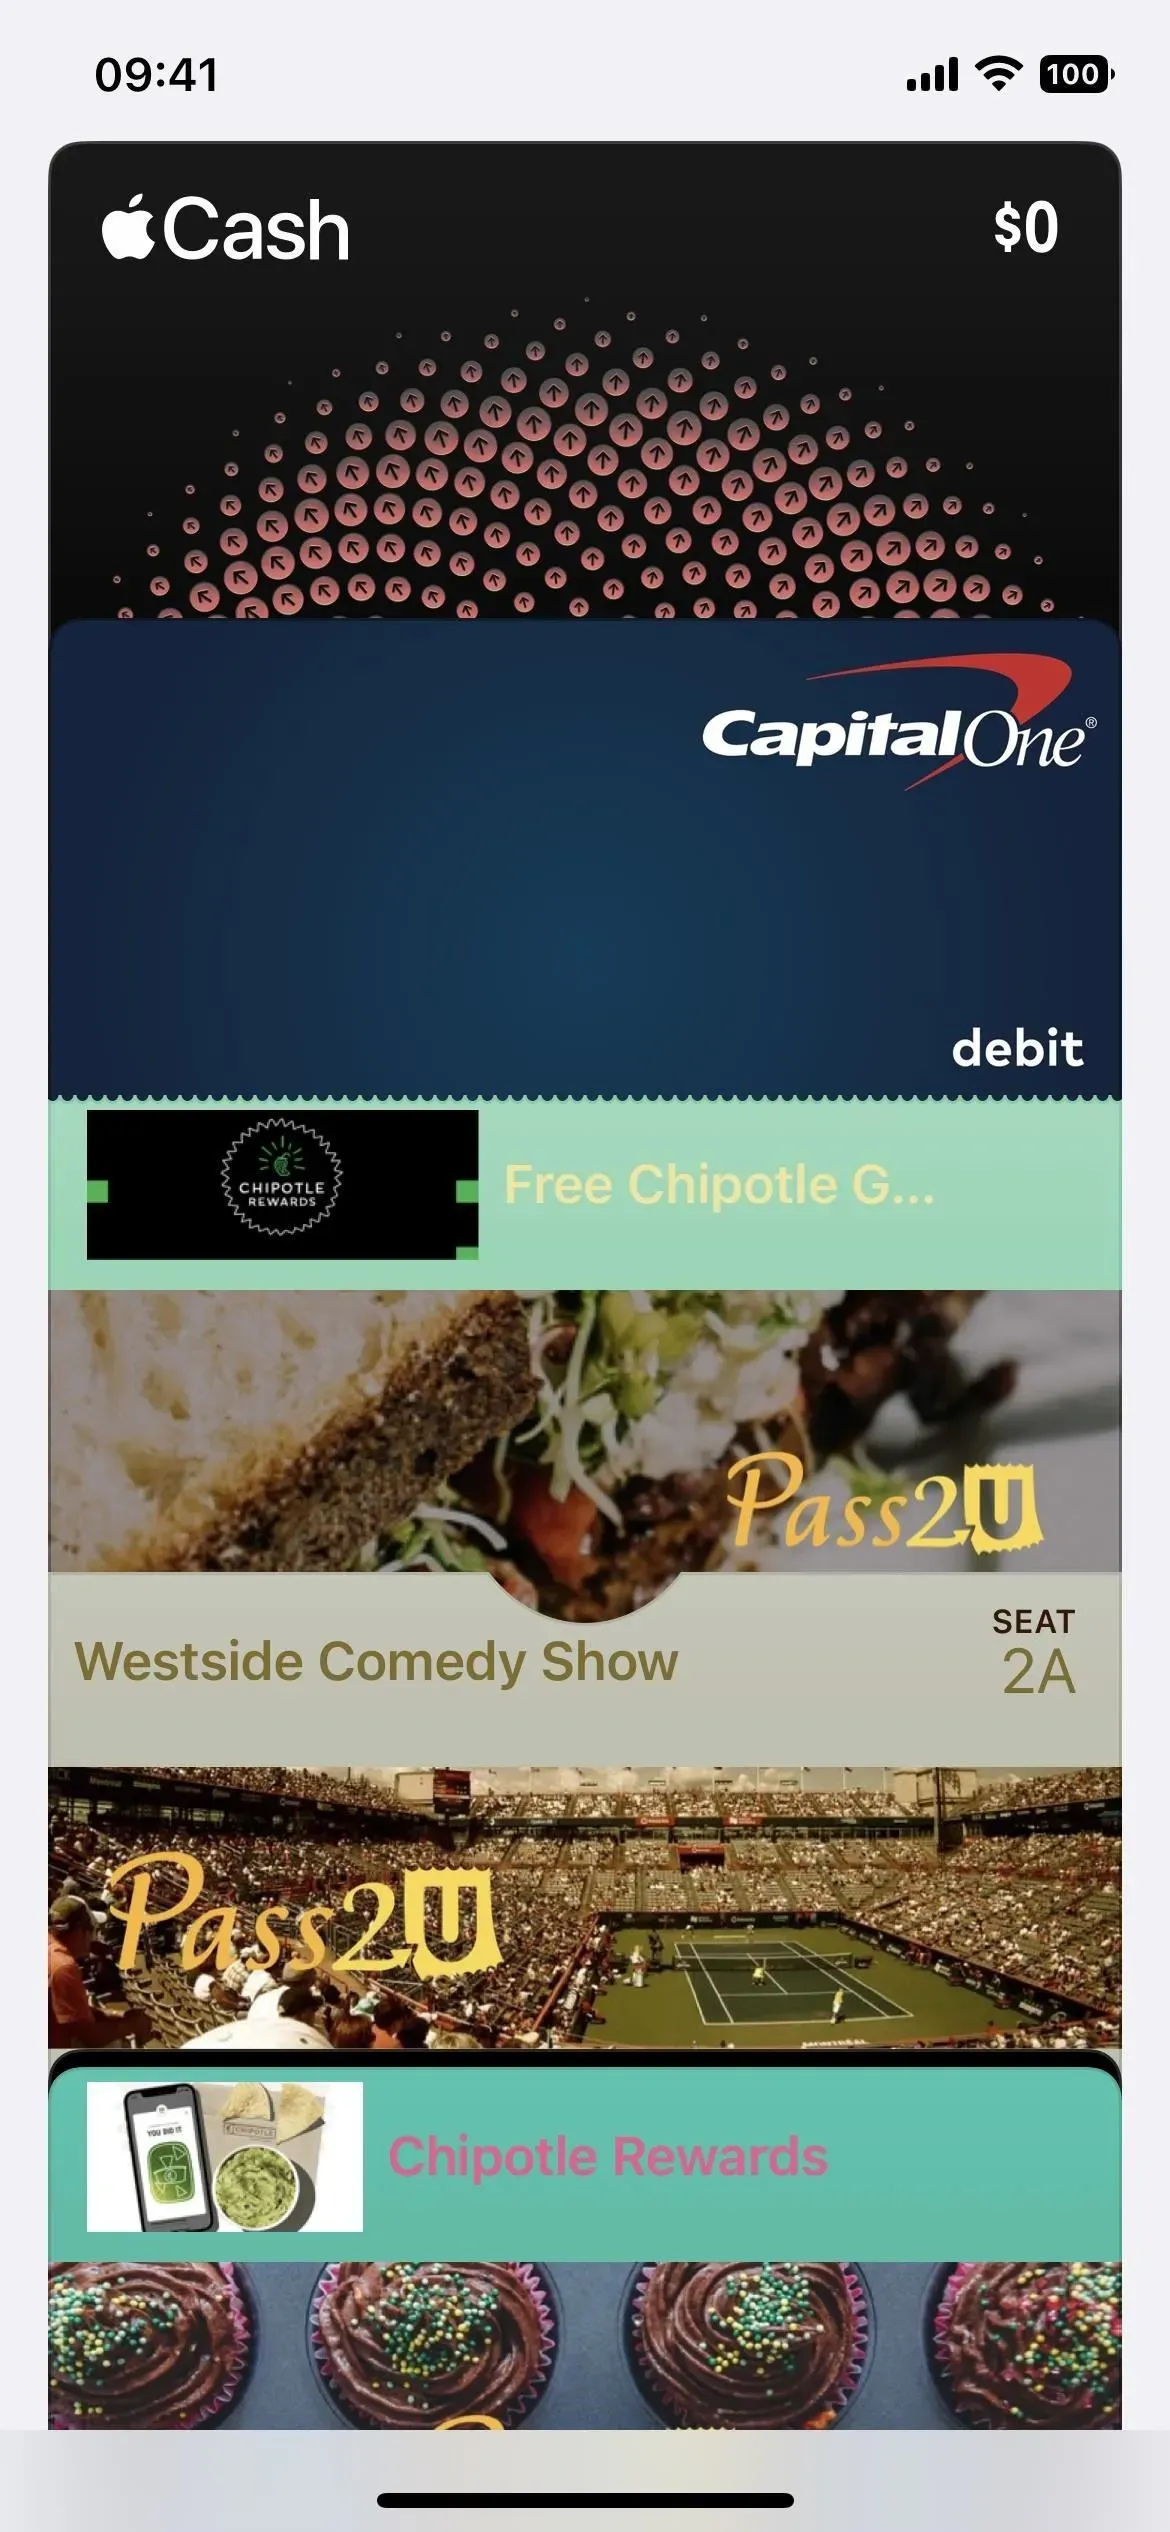

The Apple Wallet app lets you store boarding passes, concert tickets, gym memberships, vaccination cards, movie stubs, rewards cards, insurance information, student ID cards, and more in one place on your iPhone. To do this, just double-click the Home button or the Side button. to access them. Unfortunately, many maps and passes are not officially supported, but that doesn’t mean you can’t add them.
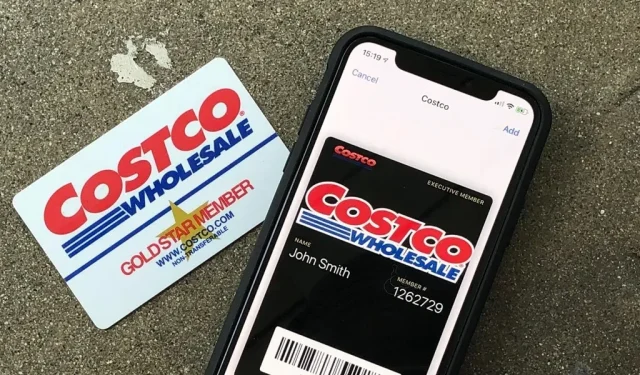
Despite being ten years old, many apps resist adding support for the Wallet app, such as Costco, Target, and Whole Foods. To see these passes, you must unlock your iPhone, open the app, sign in (if you’re not signed in), and find your scan reward code. It’s pretty annoying if you’re only using the app to display your barcode.
Some apps in the App Store mention Wallet support, but that doesn’t mean they will do what you want. This may allow you to add a loyalty card, but not a payment or gift card. Or it might let you add a store credit card, but not a loyalty card or gift card. It may not be possible to pinpoint exactly what wallet “support”it offers.
Instead of dealing with all these issues, you can use Pass2U Wallet to add unsupported cards and passes to Apple Wallet on iOS.
Step 1: Install Pass2U Wallet
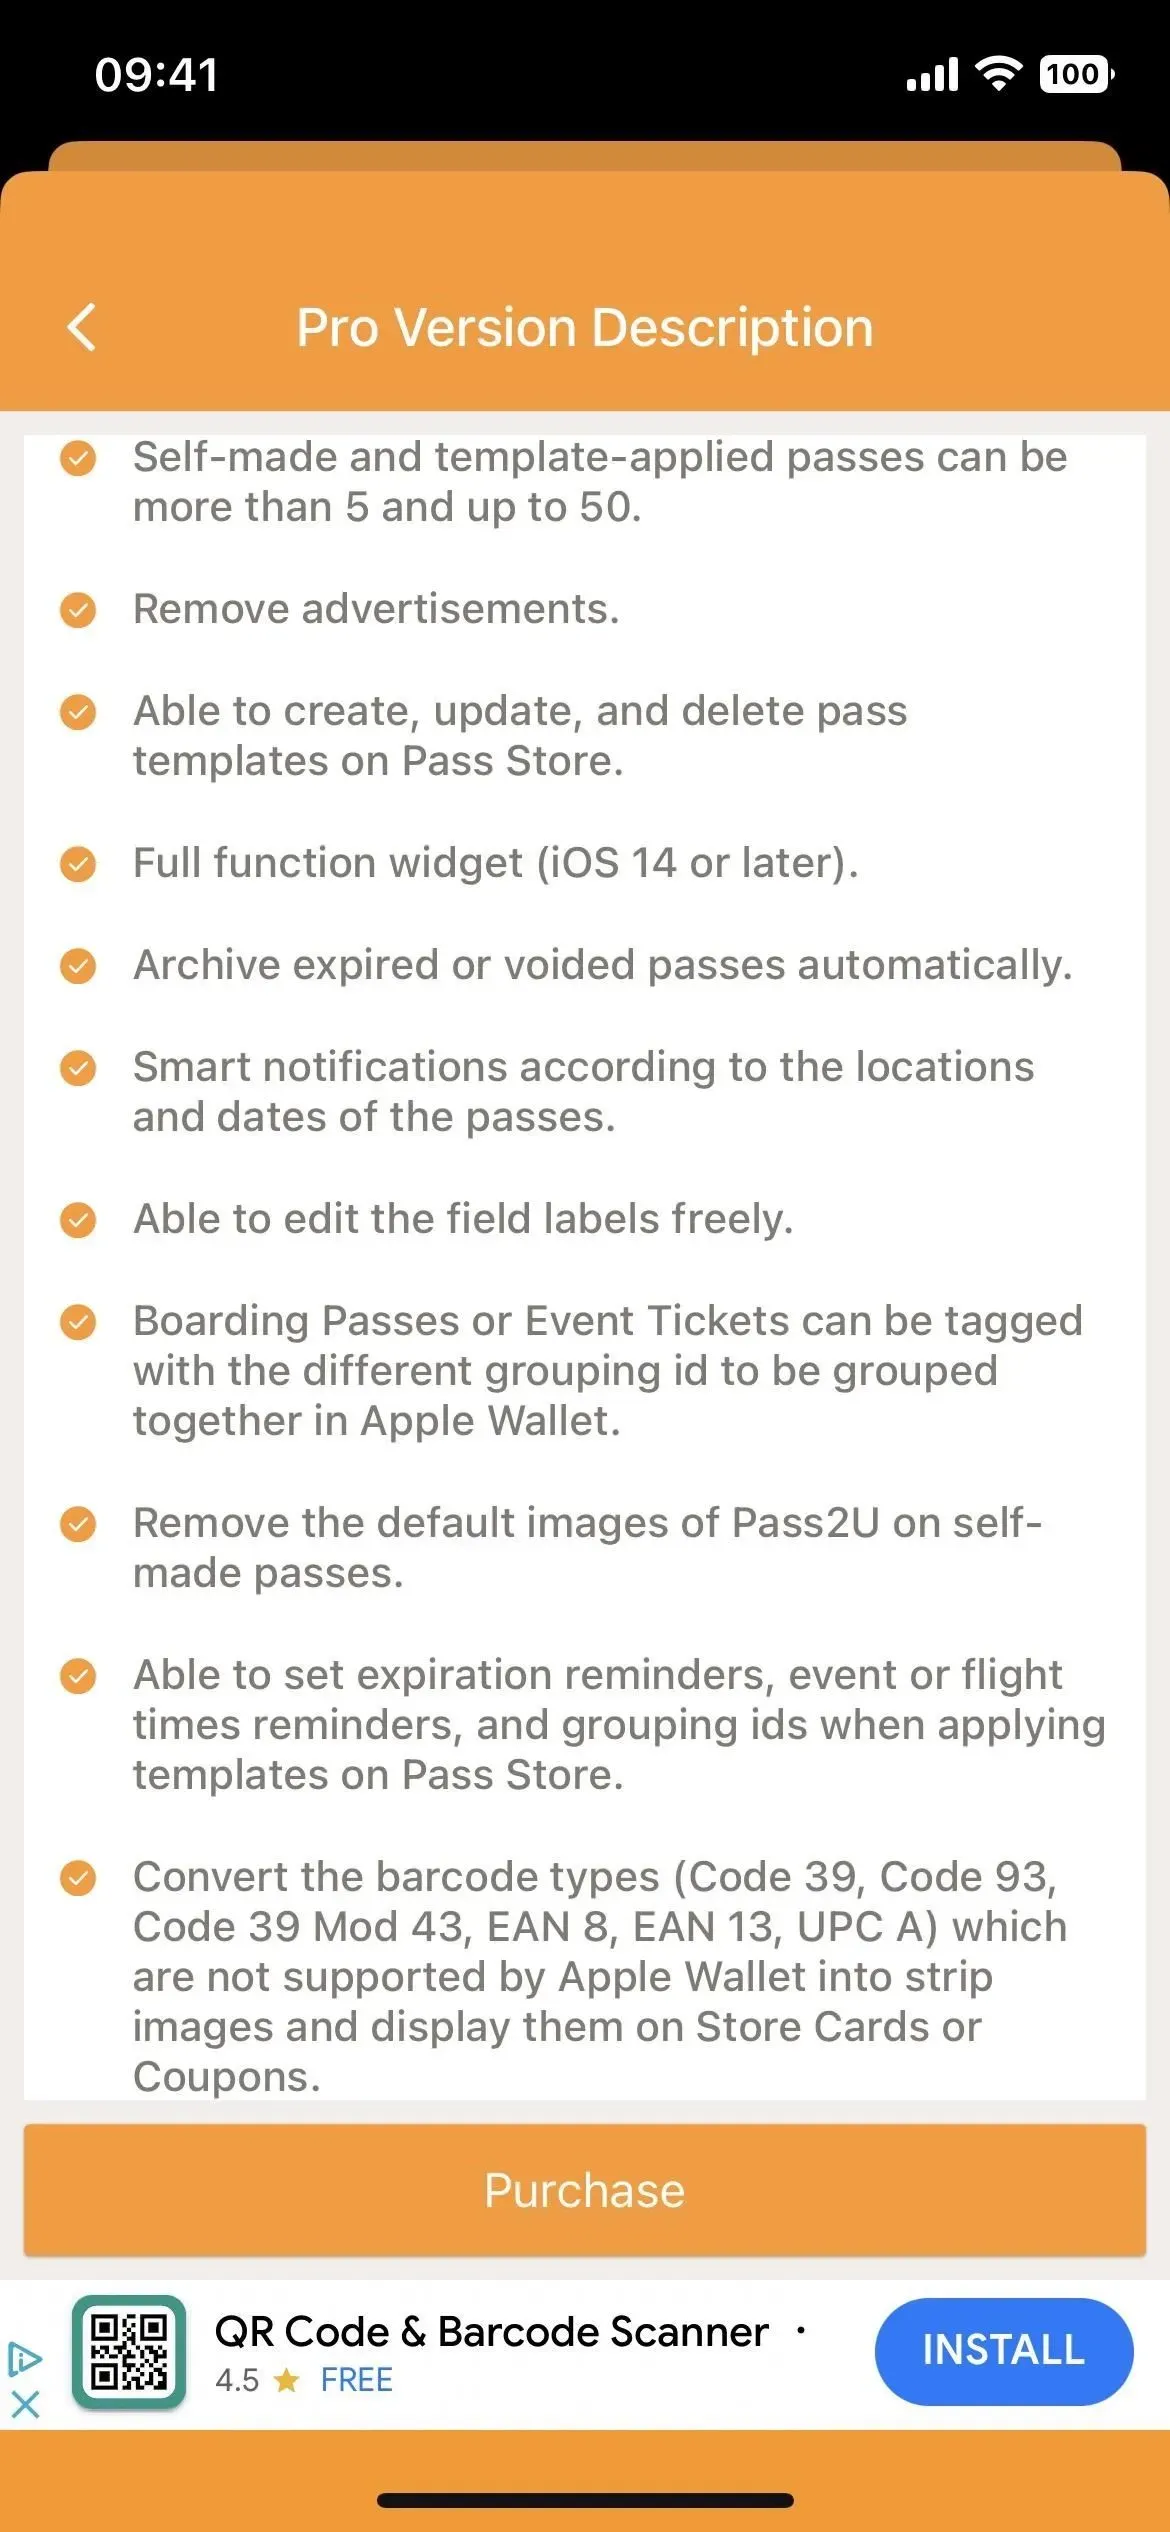
Start by installing the MicroMacro Mobile Pass2U Wallet app from the App Store. It requires iOS 12.0 or later, and the pro version is available as a $1.99 in-app purchase that removes ads, makes passes public, lets you edit field labels, gives you access to a widget, and more. For this guide, you only need the free version.
- App Store Link: Pass2U Wallet – Cards/Coupons (Free)

Step 2: Double check for supported apps (optional)
Now that you’ve installed the app, find your unsupported physical and network cards, or cards you want to add to Apple Wallet. Before you add it, it’s a good idea to first check if the app supports Apple Wallet, because you can use that instead. If that’s the only reason you want to install the app, Pass2U Wallet might be easier.
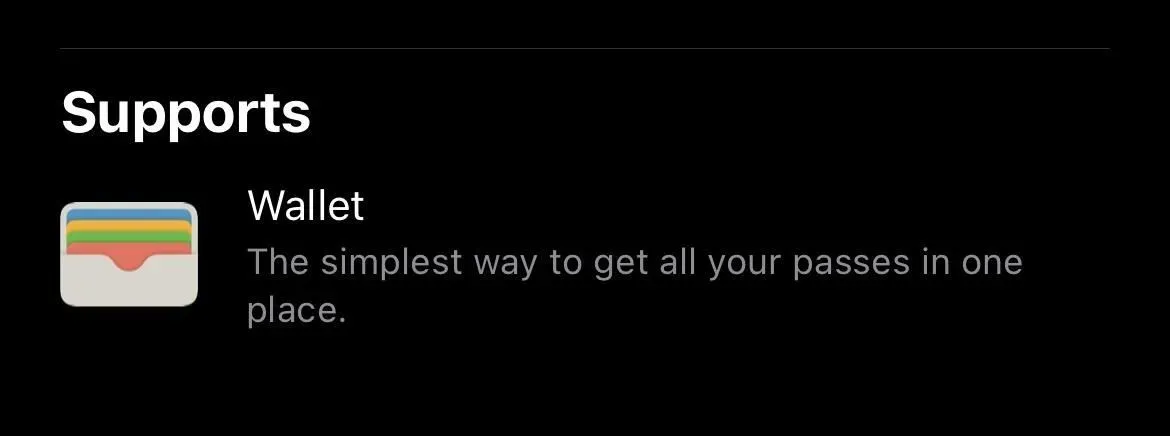
In iOS 15 and iOS 16, you can visit the Apple Apps for Wallet collection in the App Store to see a list of highlighted apps that support Wallet, but it won’t show you all the apps. When browsing the App Store, you can see if an app supports Apple Wallet if it’s listed in the Support section at the bottom of the app’s page.
You can add boarding passes, travel passes, concert tickets, gym memberships, vaccination cards, movie stubs, bonus cards, insurance information, student ID cards, and digital car, home, office, and hotel keys.
If you don’t see Wallet support for the app you want, try visiting the company’s website in Safari, sign in to your account, and look for any “Add to Apple Wallet”links. You don’t need an app to add maps and passes, but most of the time you’ll never know it because it’s hidden in the app’s online settings.
You can also add cards and passes to Wallet from links in emails (Mail) and text messages or iMessages (Messages), from AirDrop sharing, from a notification after using Apple Pay at a merchant, or by scanning a QR code or barcode. code using the camera or Code Scanner.
Step 3: Add Unsupported Cards or Cards to Pass2U Wallet.
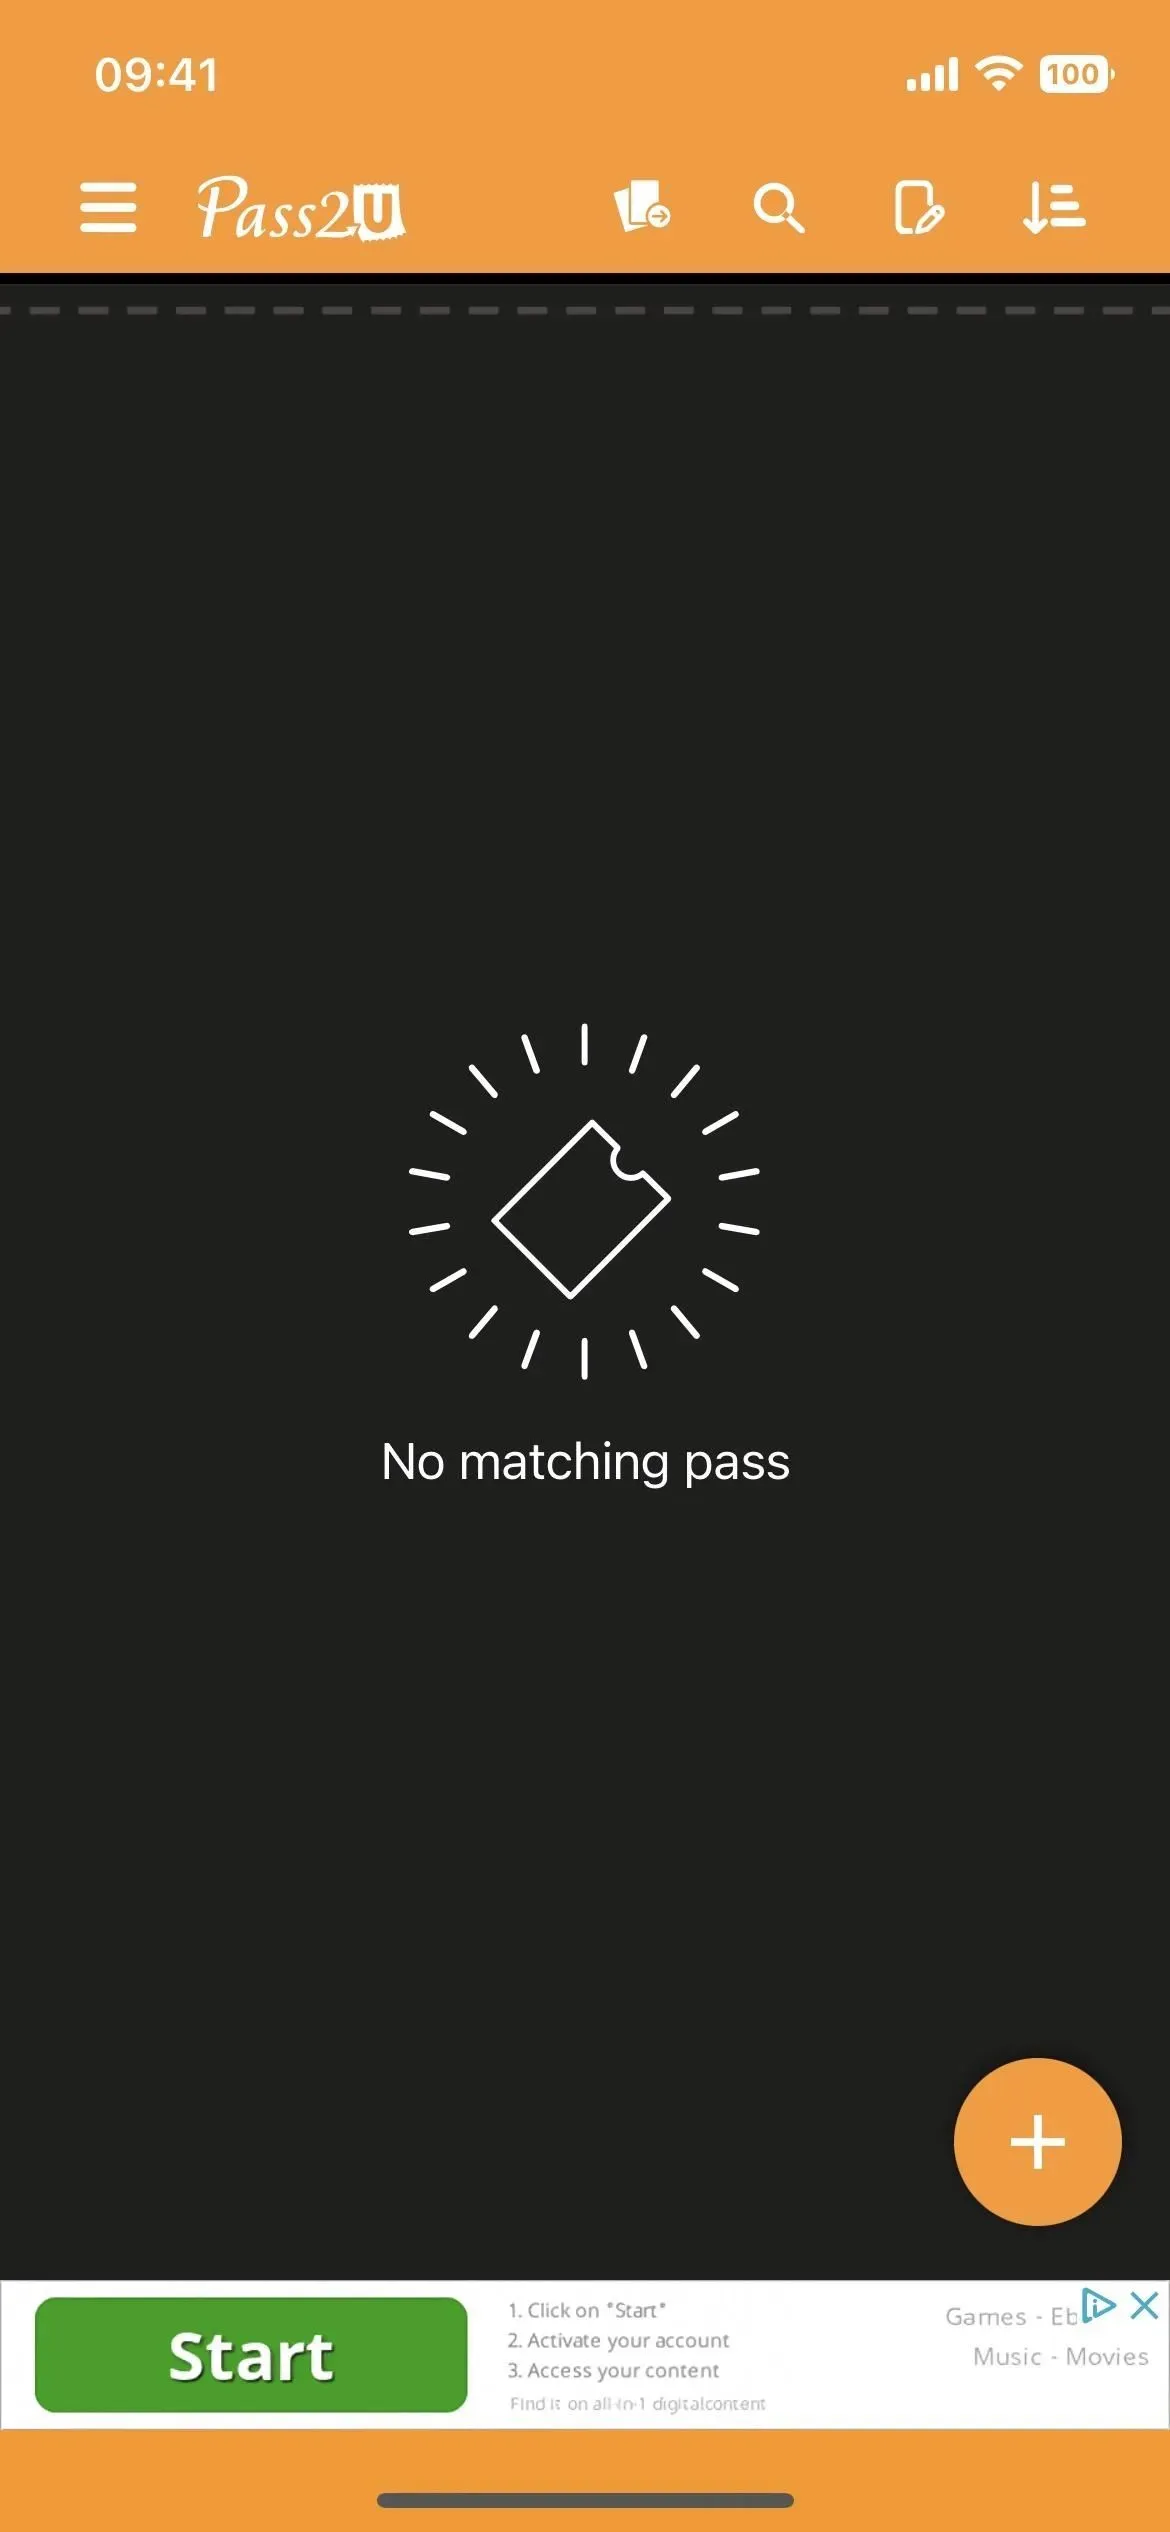
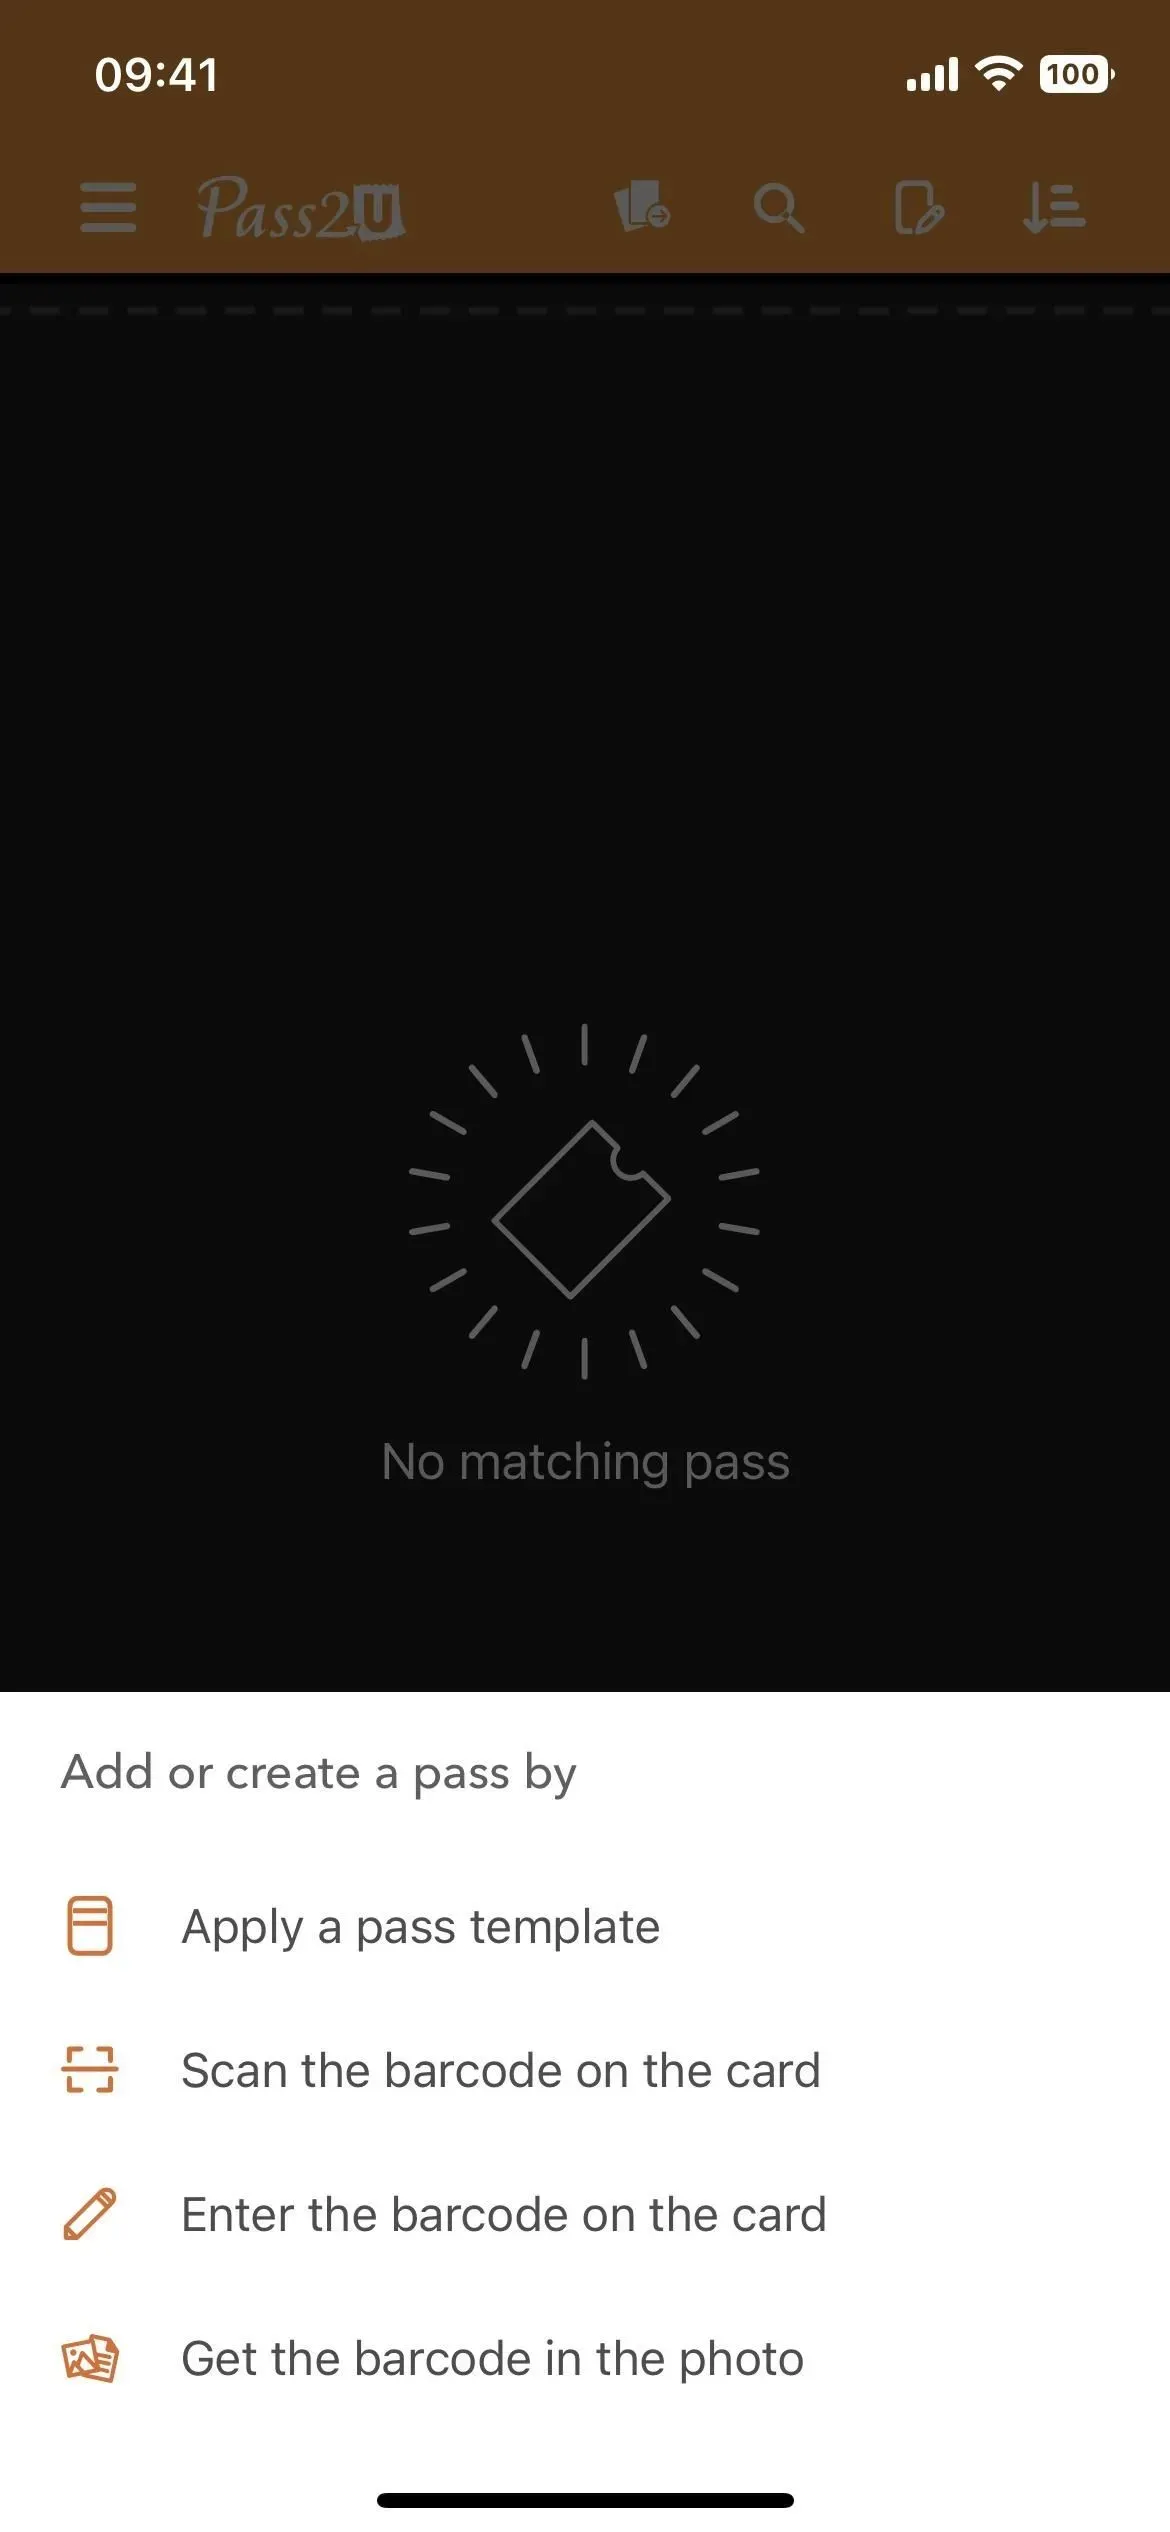
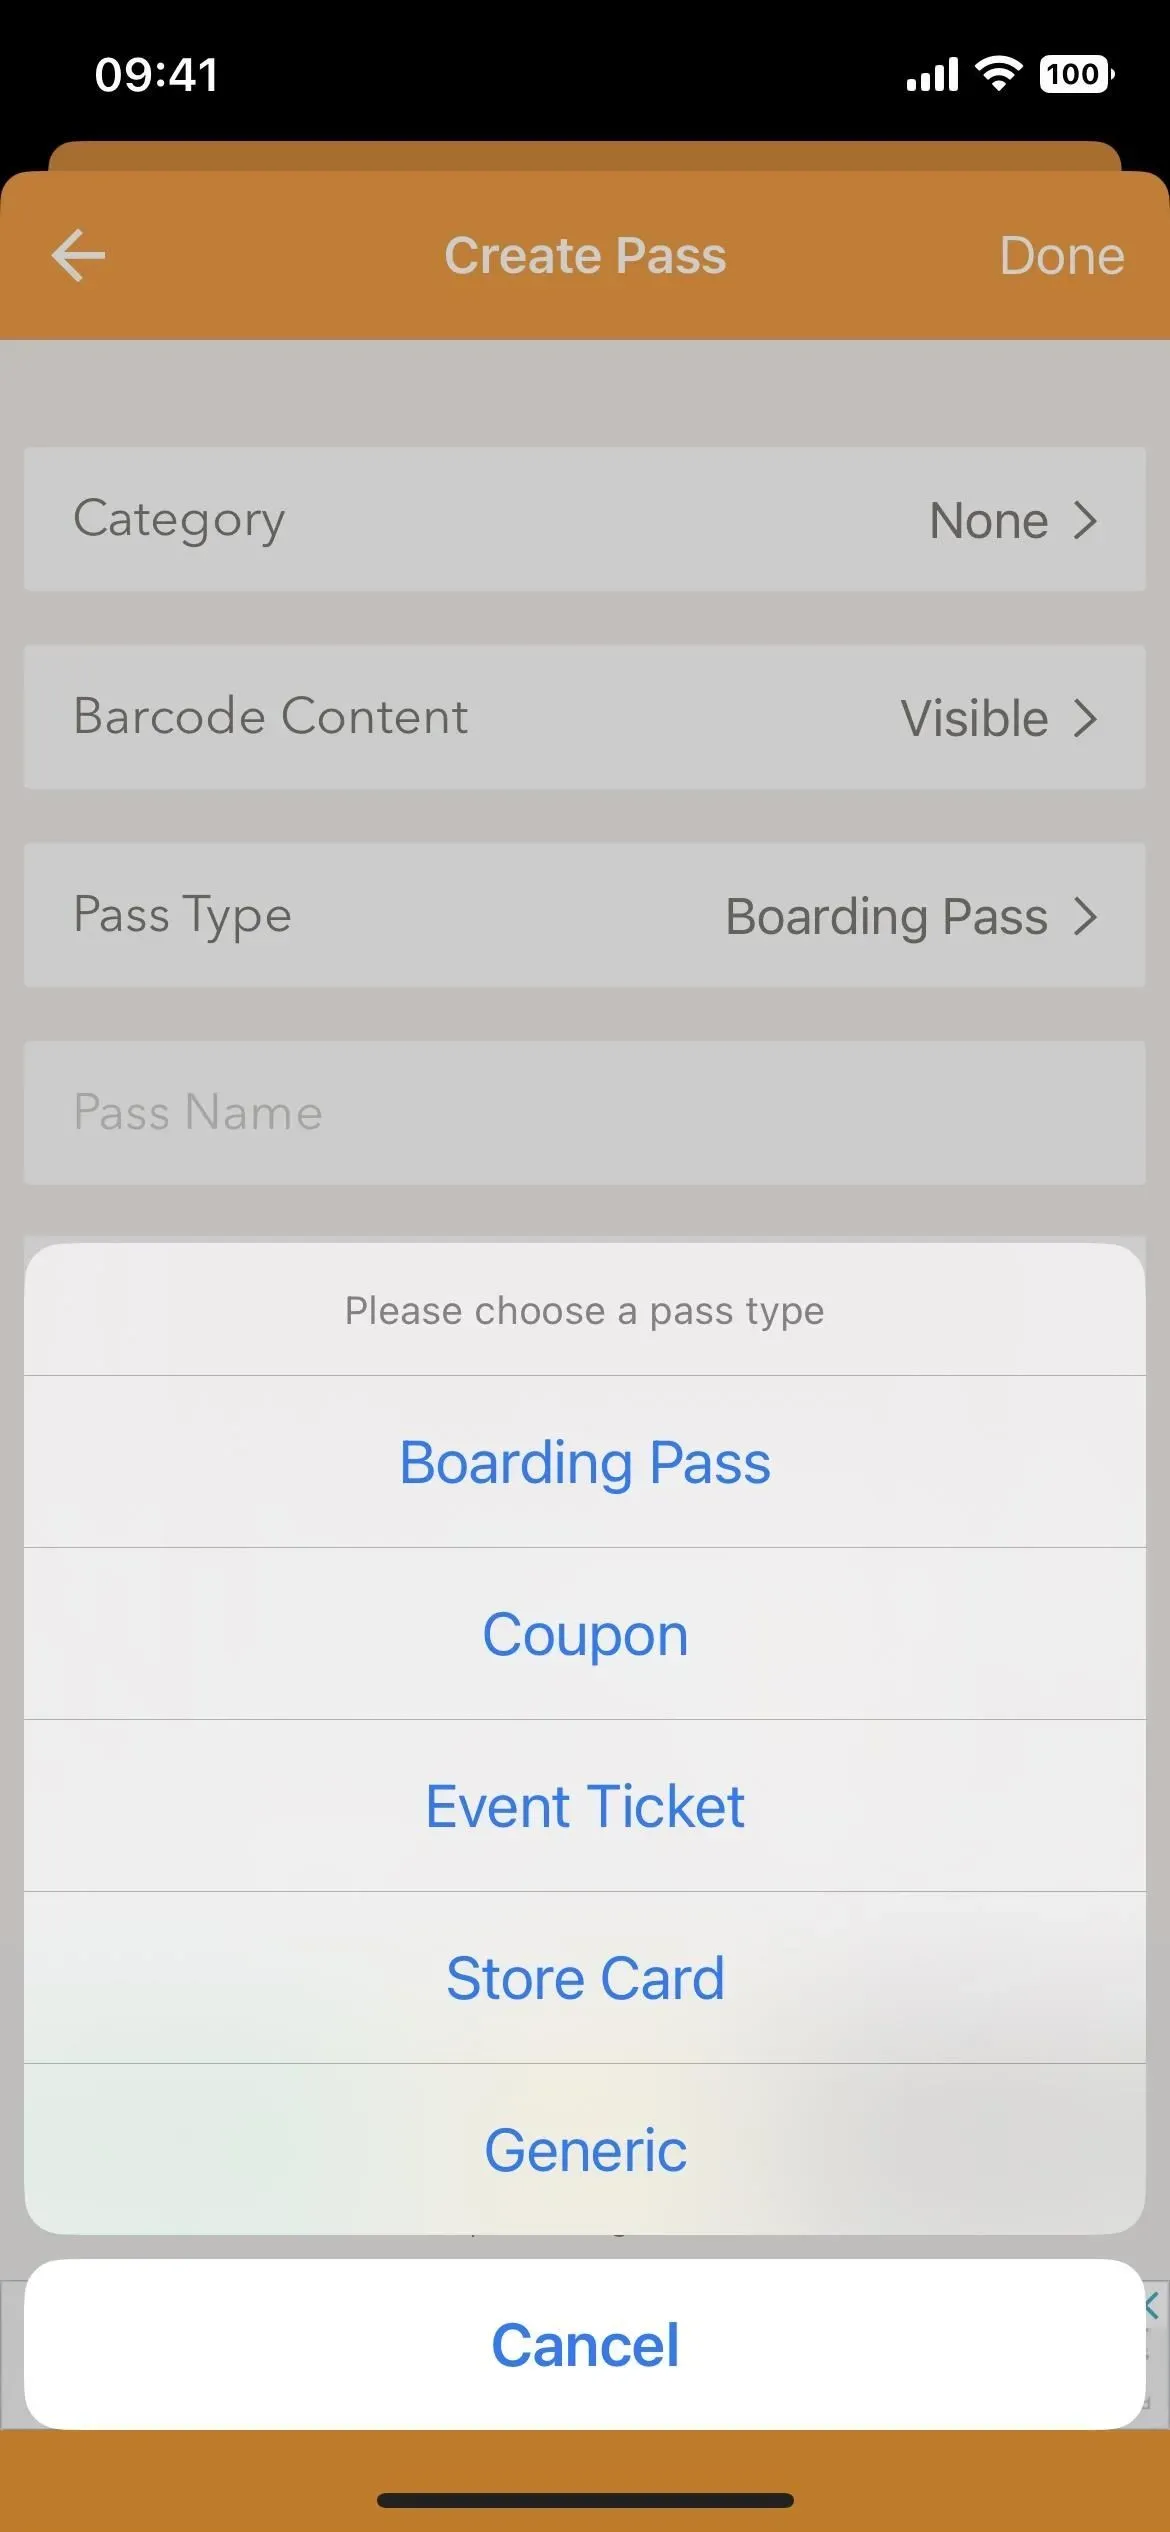
If your cards or passes are indeed not supported (or you don’t want to take the time to find out), open the Pass2U Wallet on your iPhone and click “Get Started Now”to get started. To add a pass – you can add a boarding pass, coupon, event ticket, store loyalty card, or universal pass – tap the plus (+) sign in the bottom right corner, then select one of the following options, which I discuss in detail below.
- Apply Pass Template
- Scan barcode on the card
- Enter the barcode on the card
- Get a barcode on a photo
Option 1: Apply a pass template
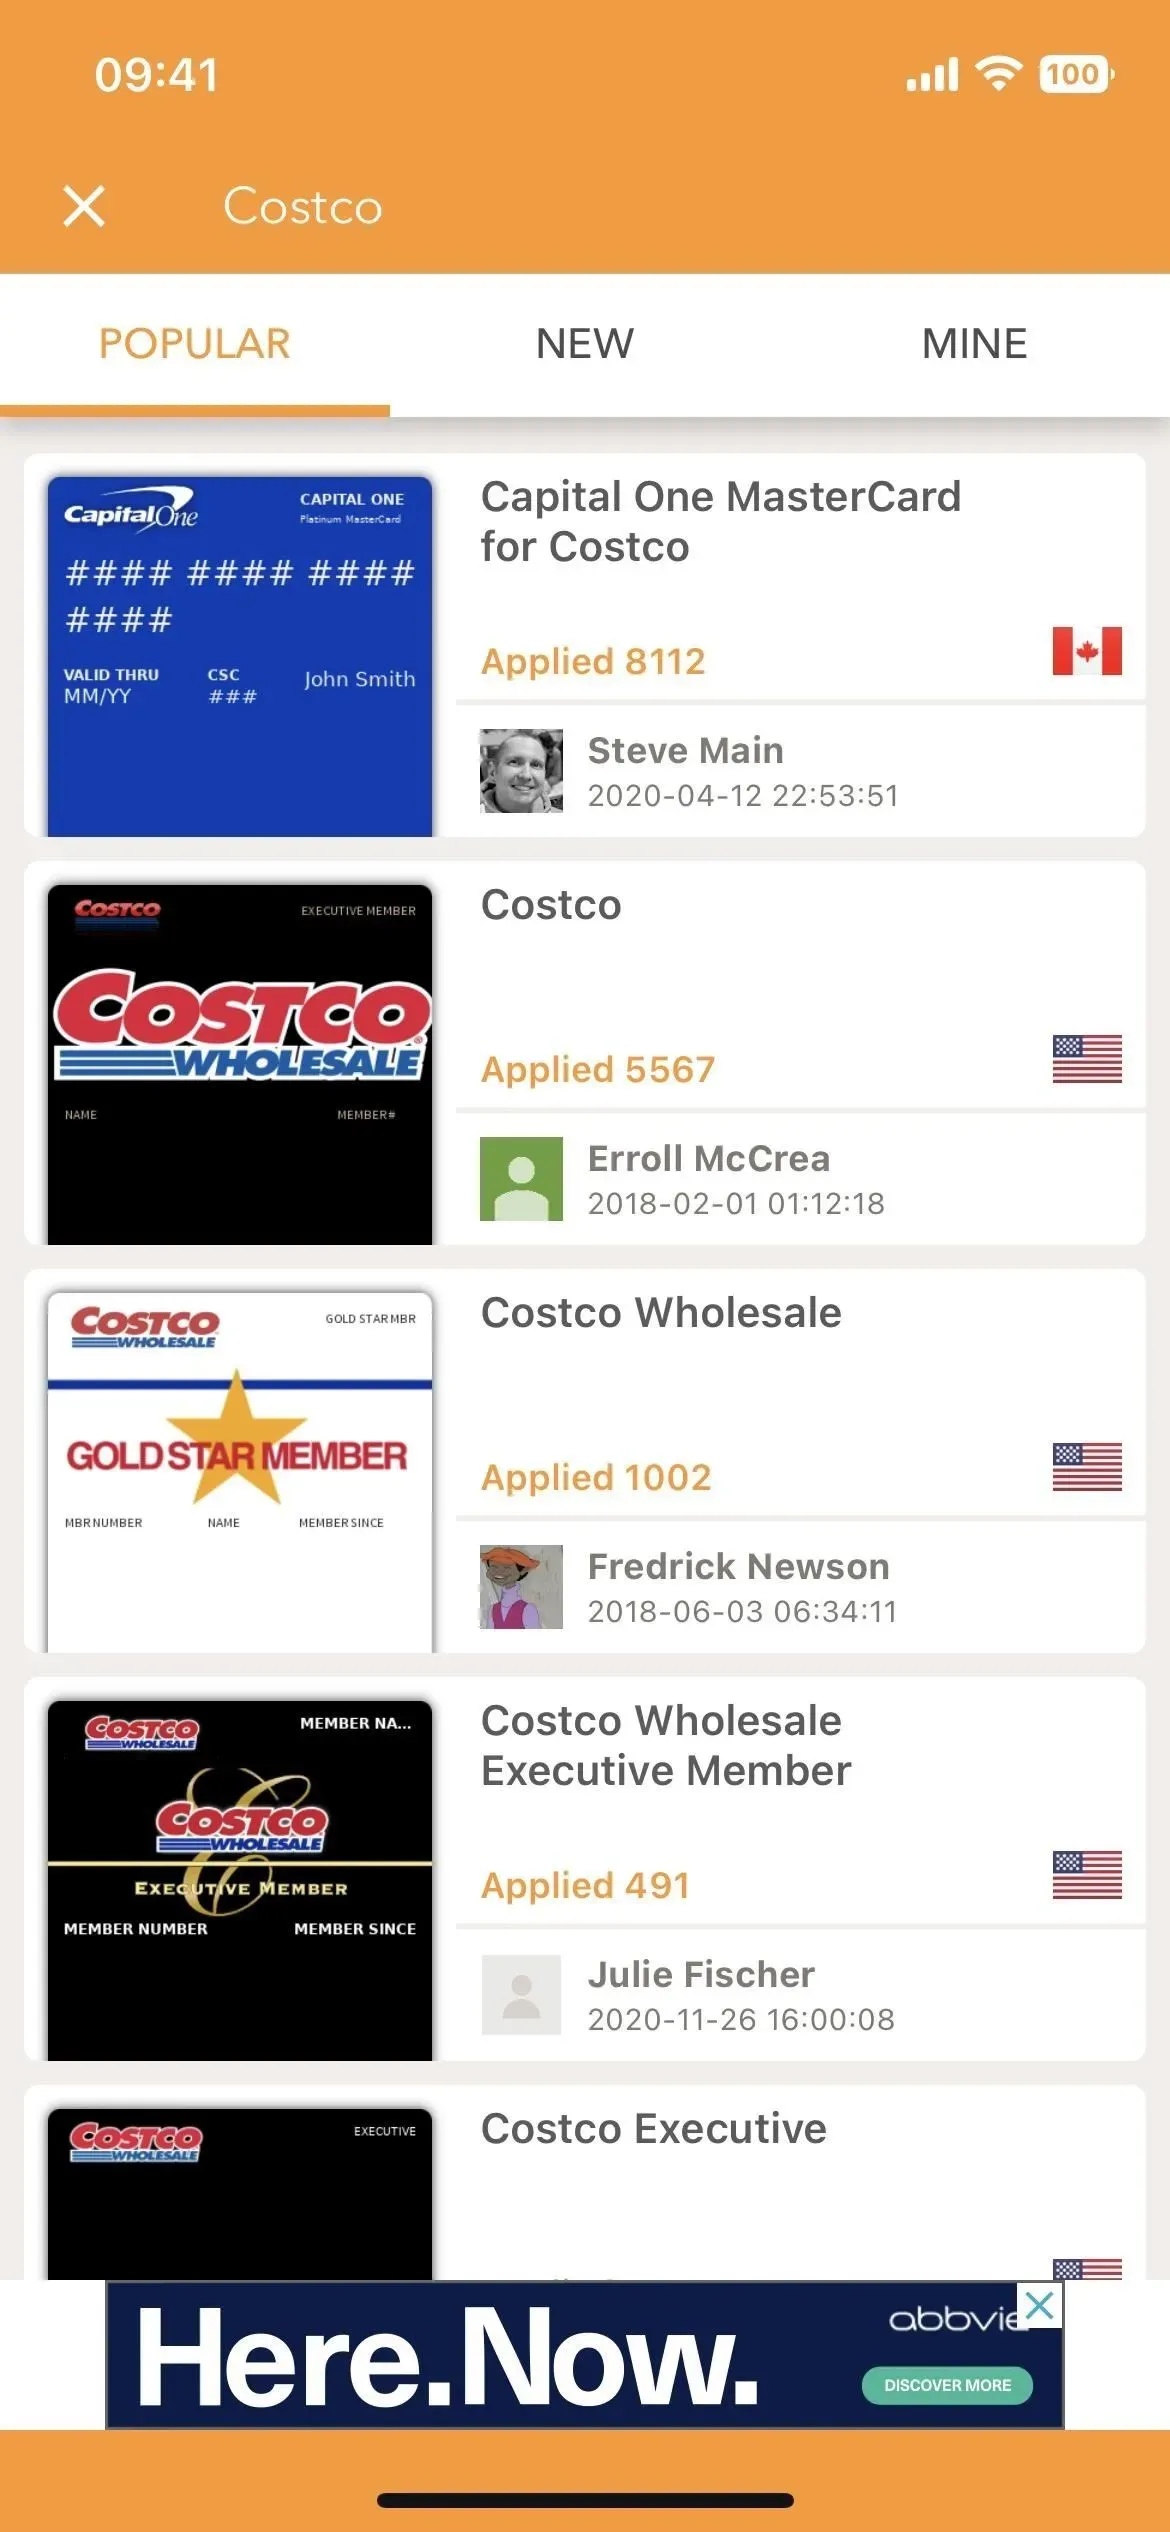
The first option allows you to select an existing card or pass template created by other Pass2U wallet users. In addition to clicking “Apply Pass Template”, you can open the menu at the top left and visit the “Pass Store”to view existing templates.
The templates are sorted by popular, new and created by you. You can use the search tool in each section to find a specific template. When you find and select the desired template, click “Apply”in the upper right corner.
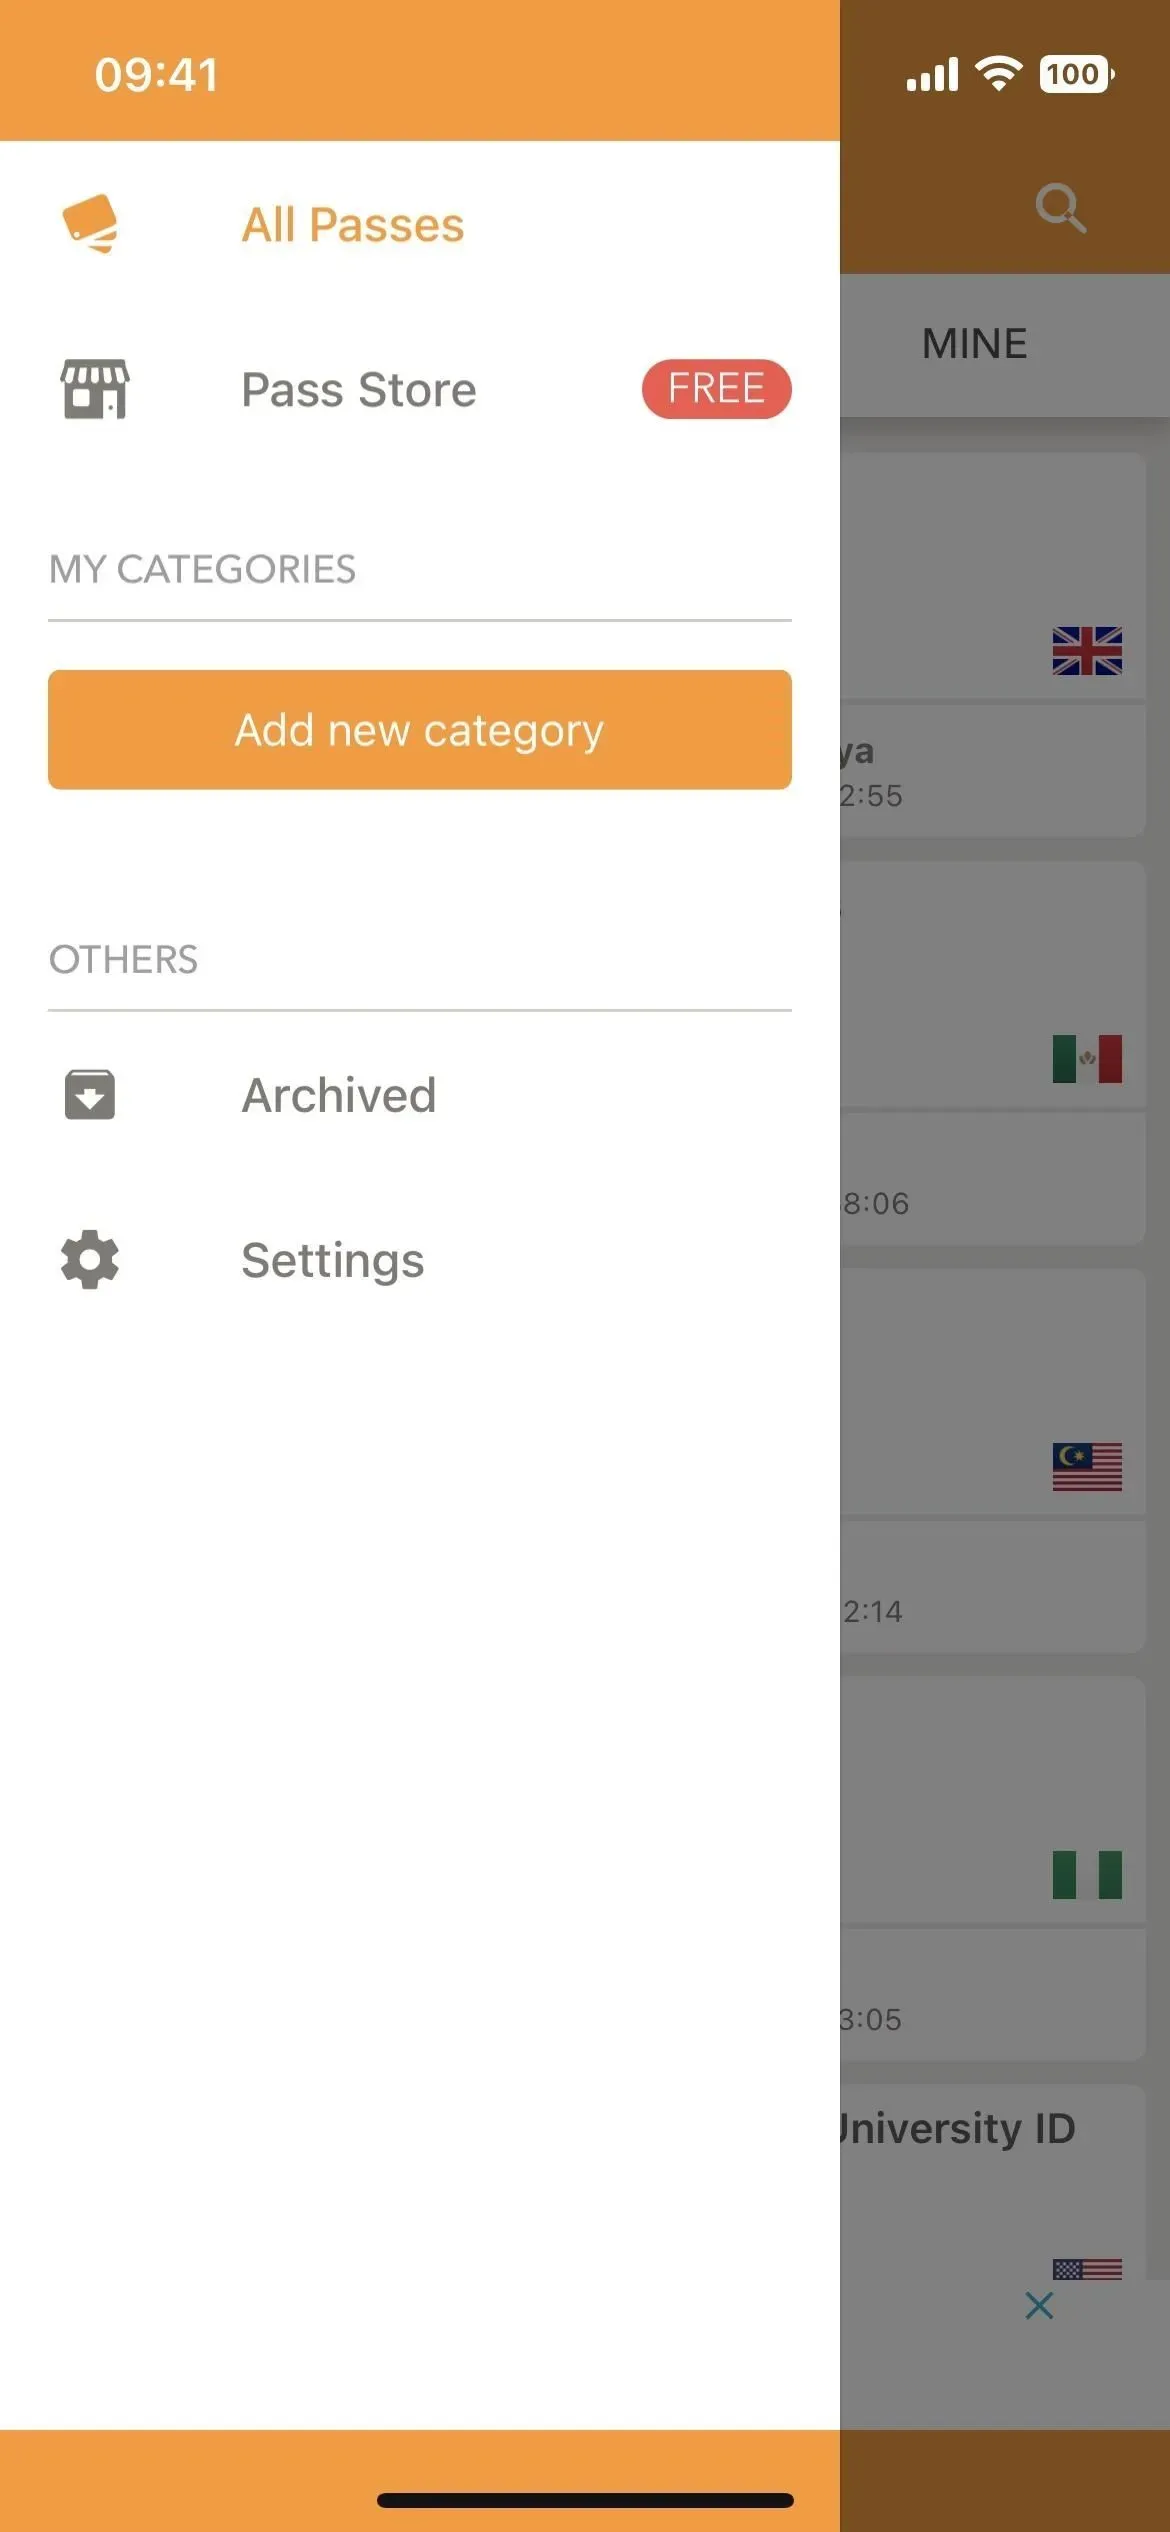

It will ask you to create a Pass2U wallet account and you must do so if you want to use the template. You don’t need an account to use the other three options below. If you create an account, you can register with your email address and password or through Facebook, Google or Apple.
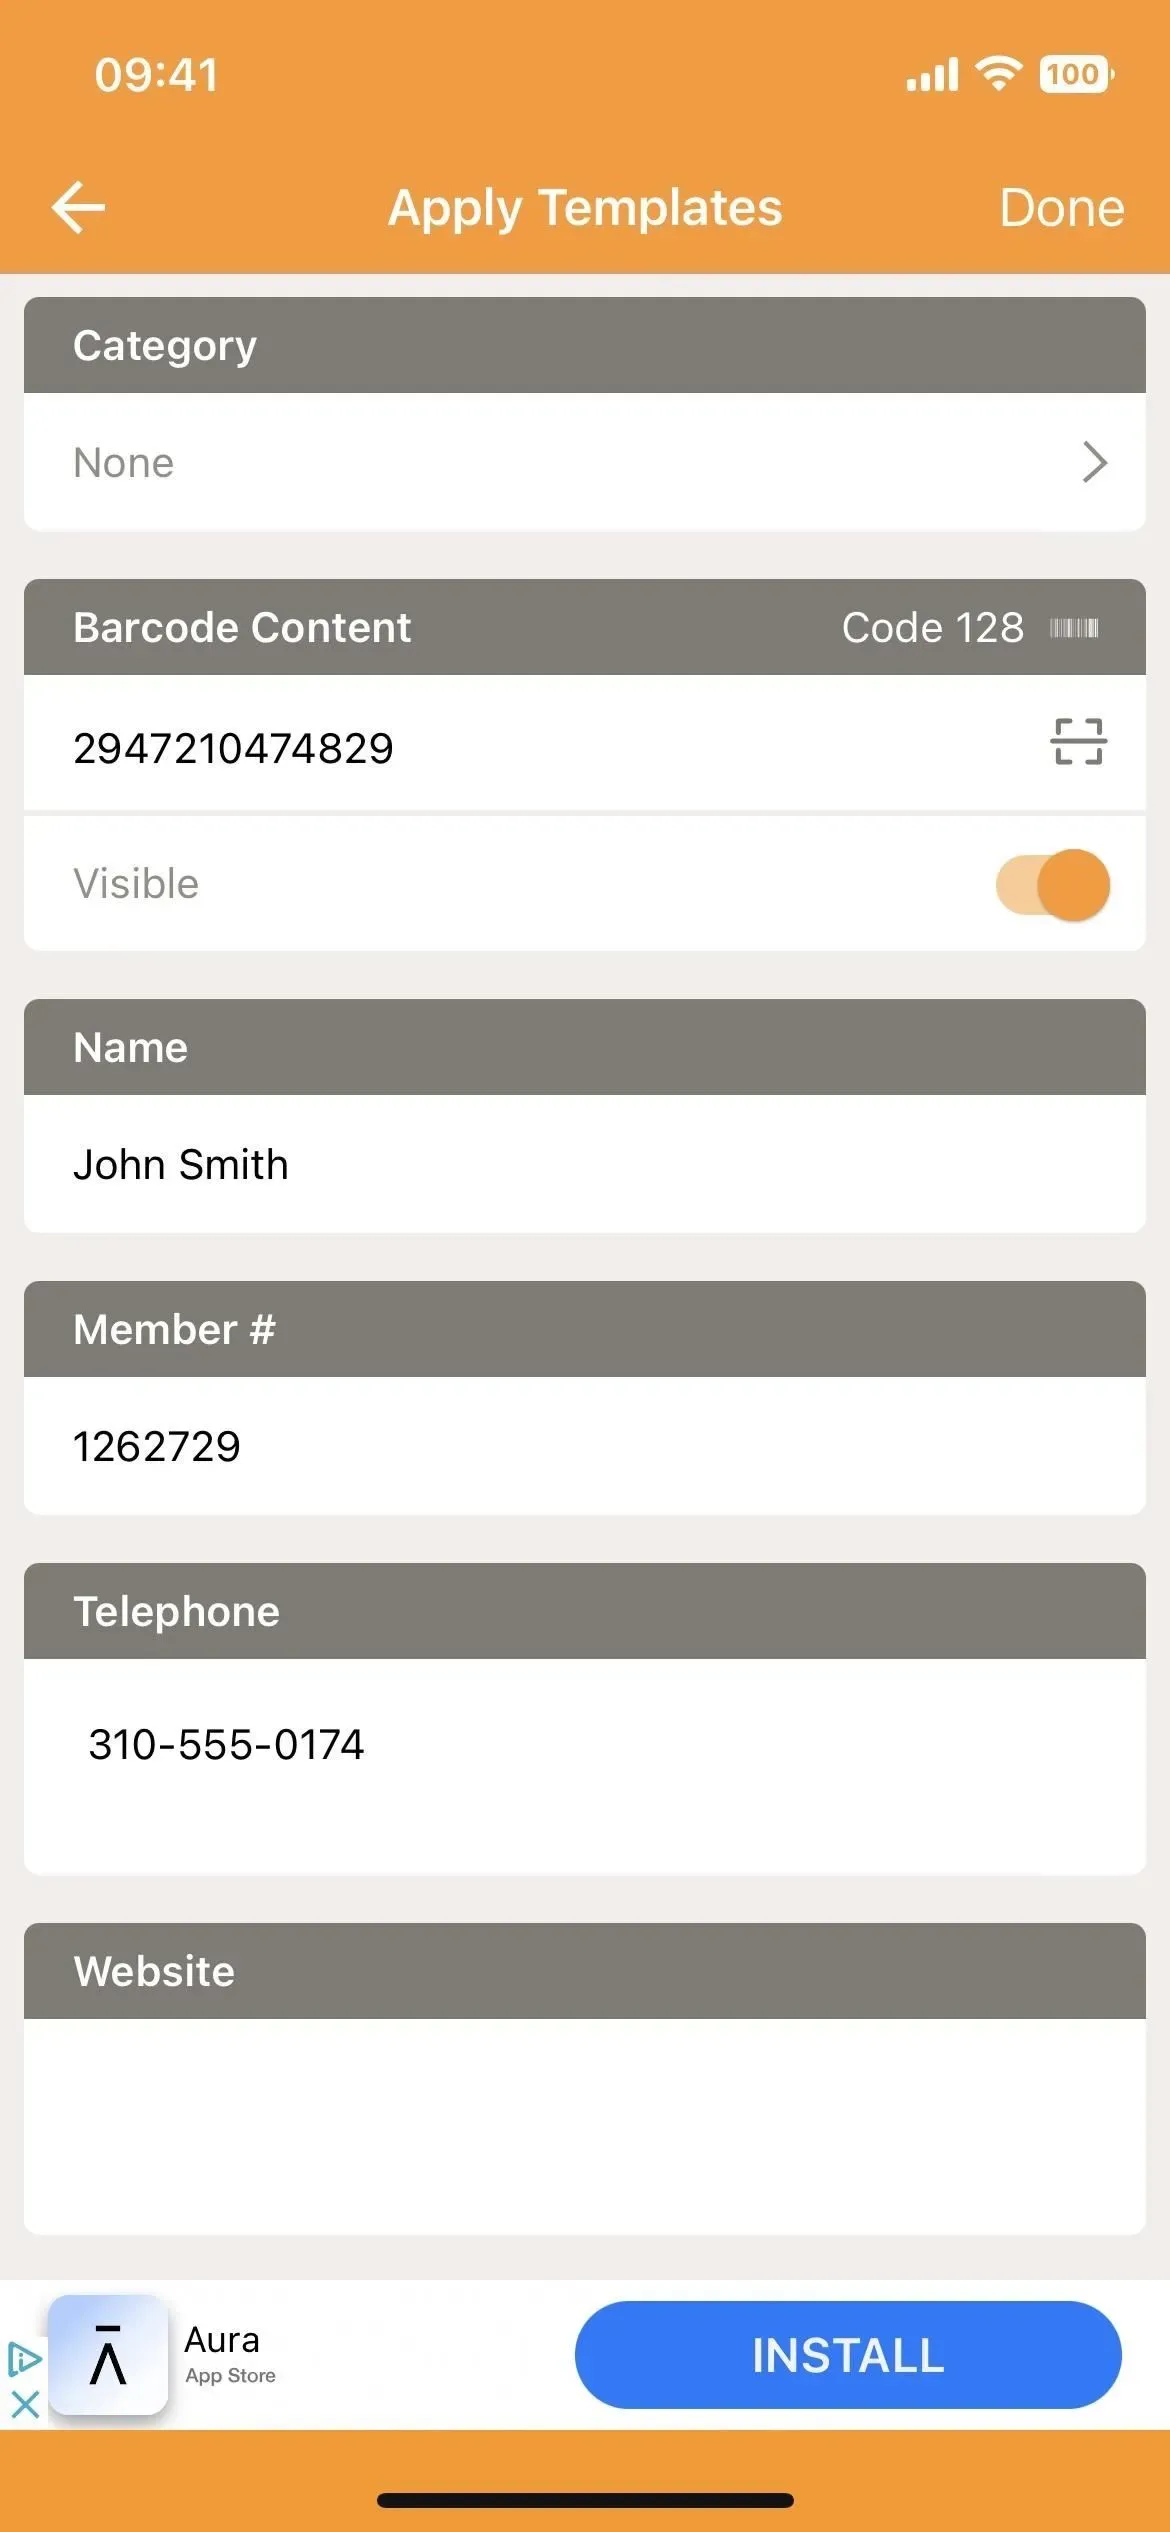
After you sign in to your account and apply the template, you may be required to fill in information such as your name, membership number, phone, website, membership, etc., depending on the type of card or pass. Of course, the most important part is the barcode, which you can enter or scan with your camera.
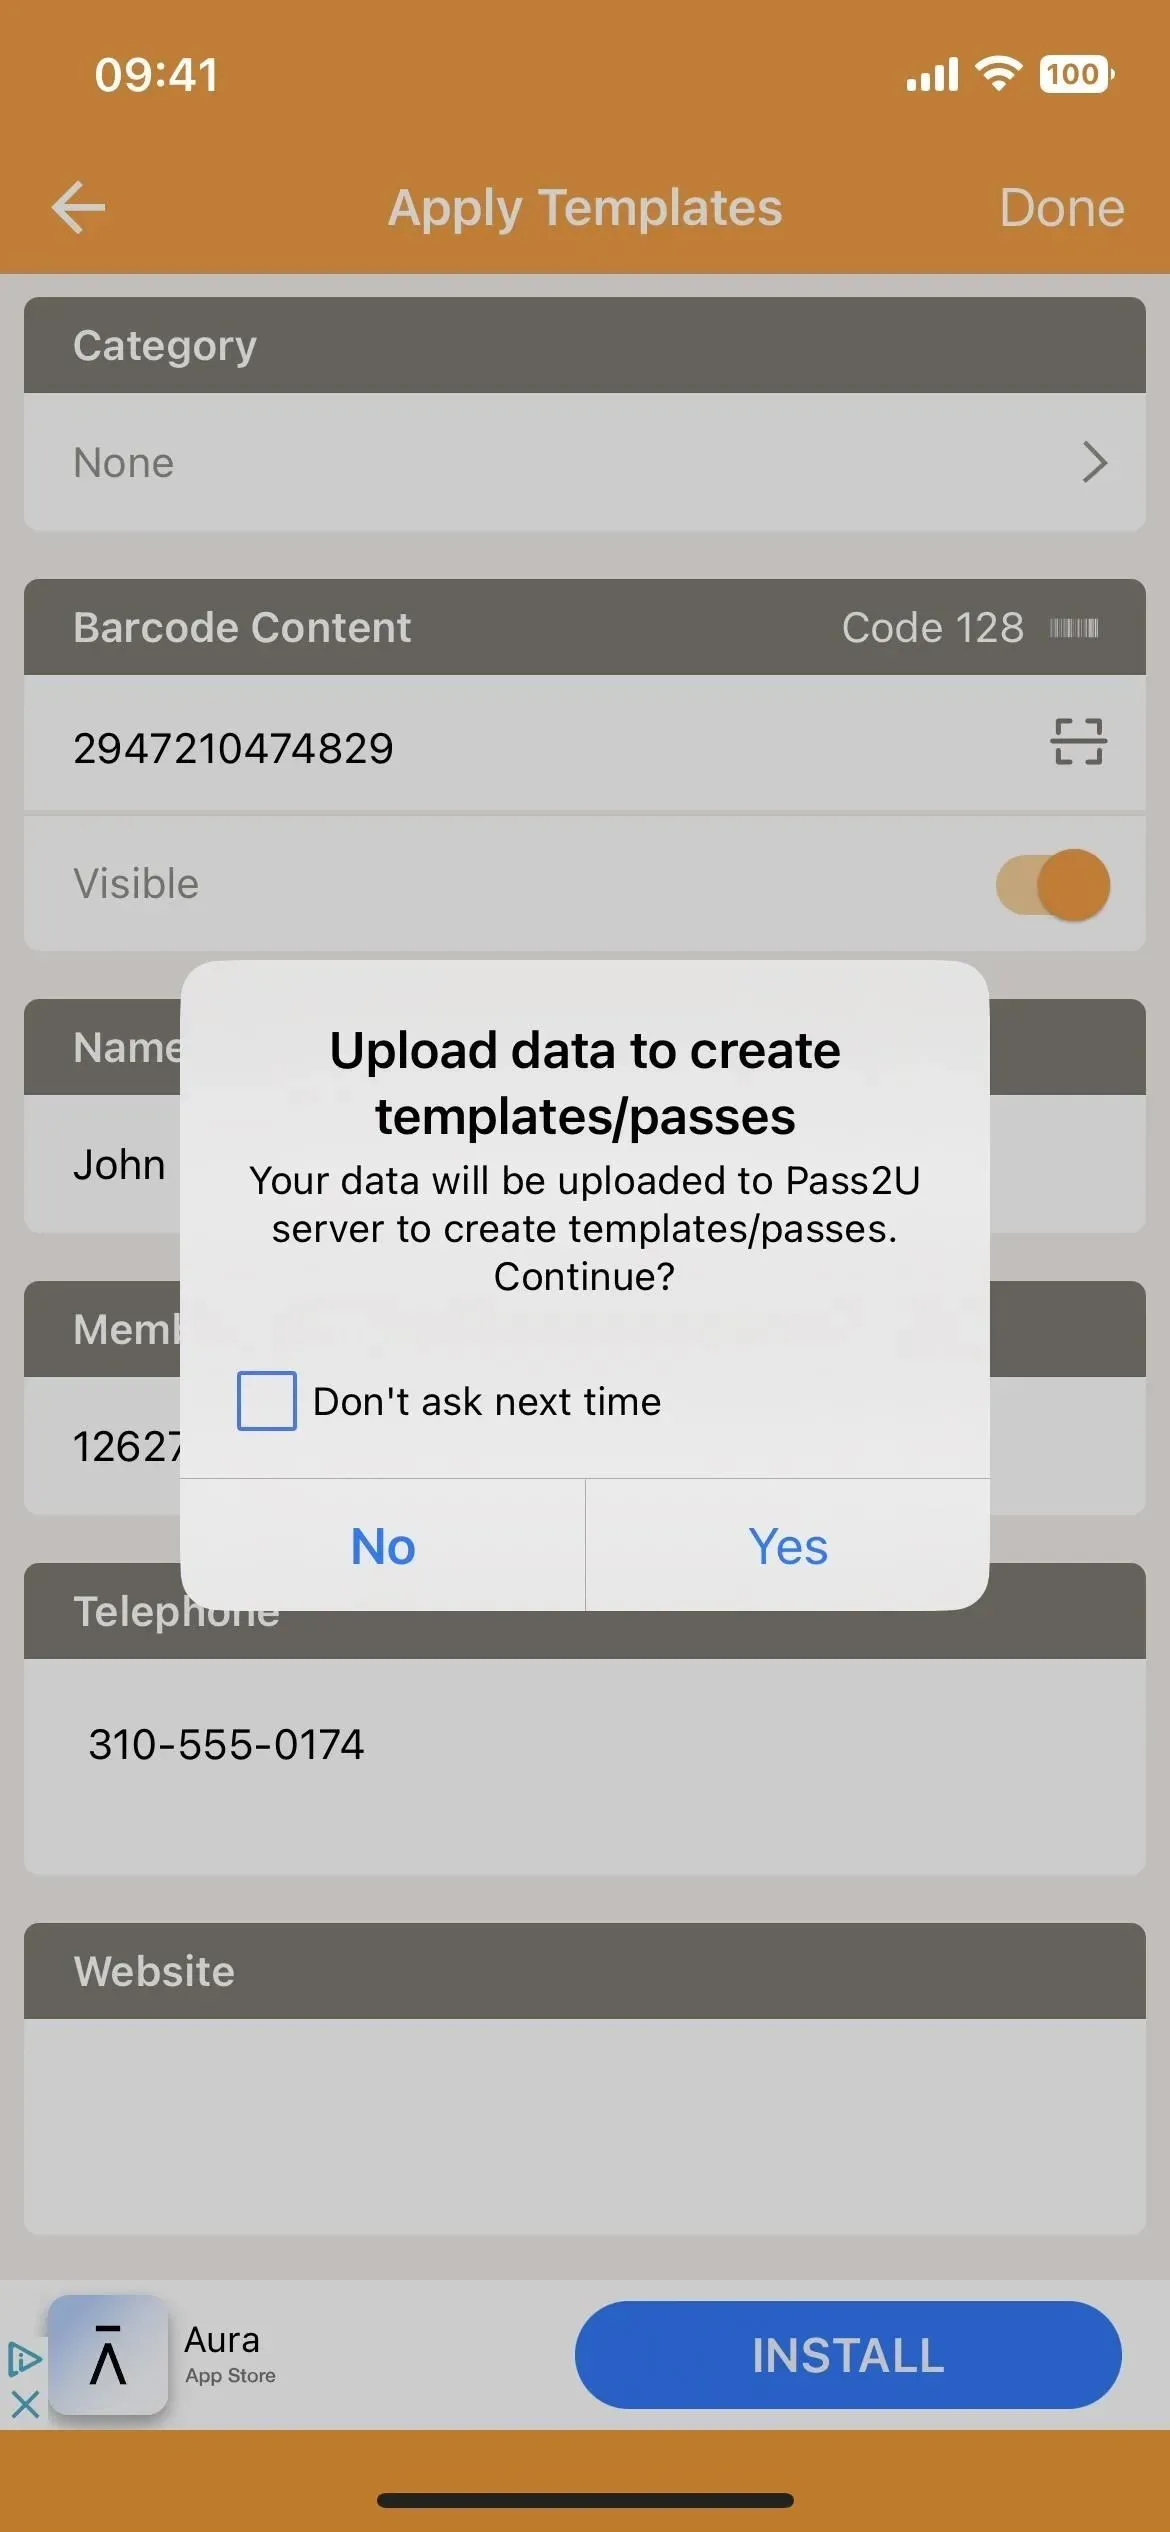
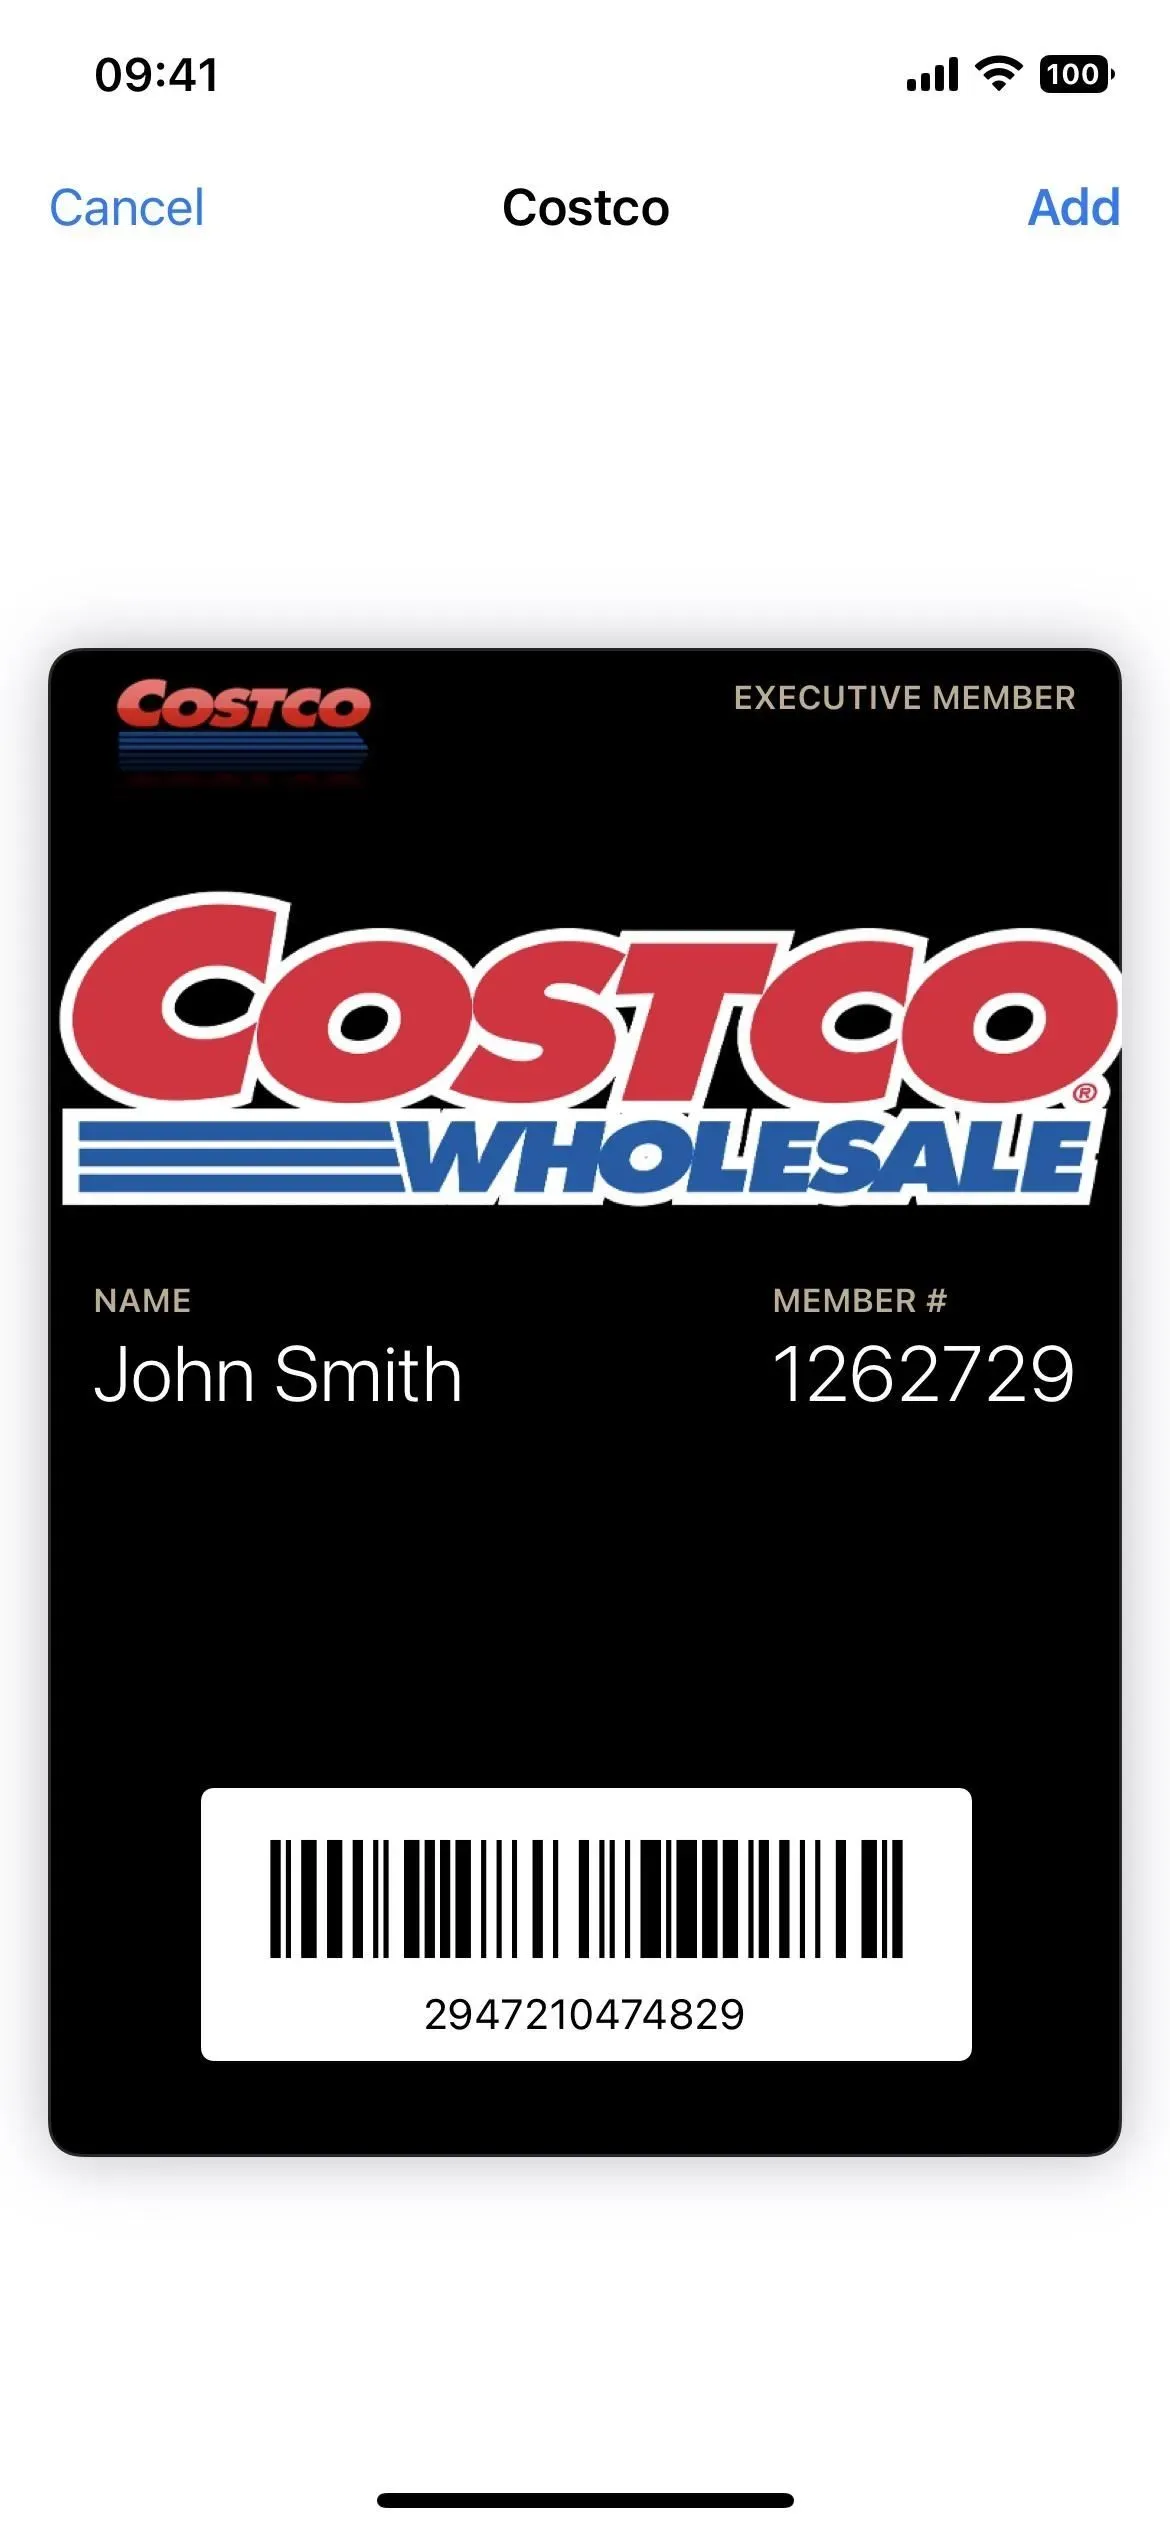
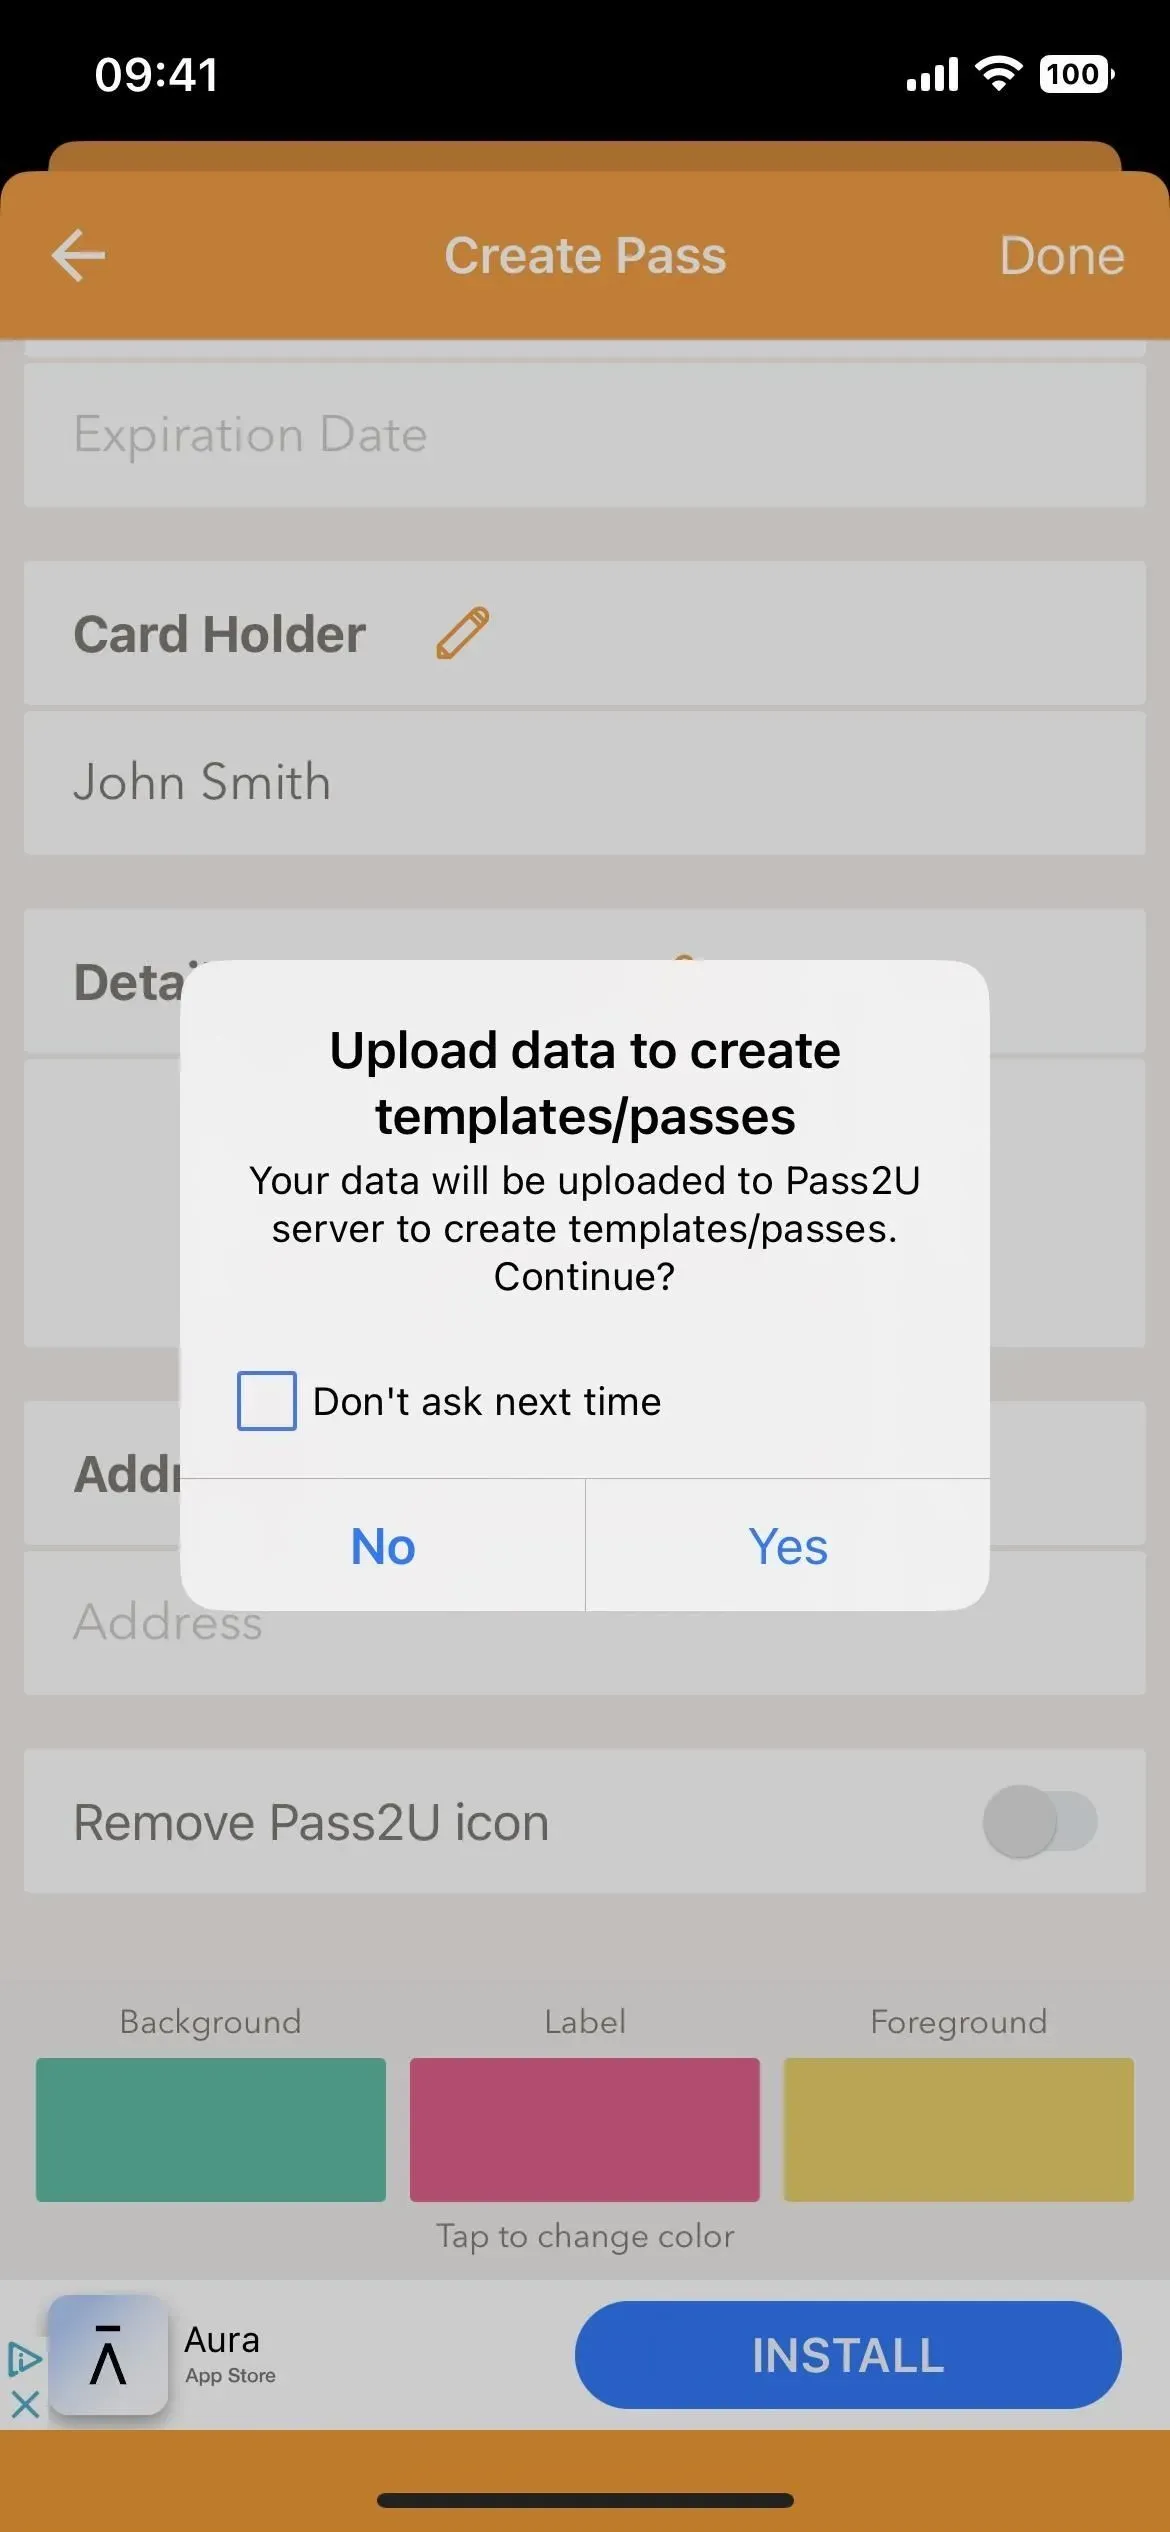
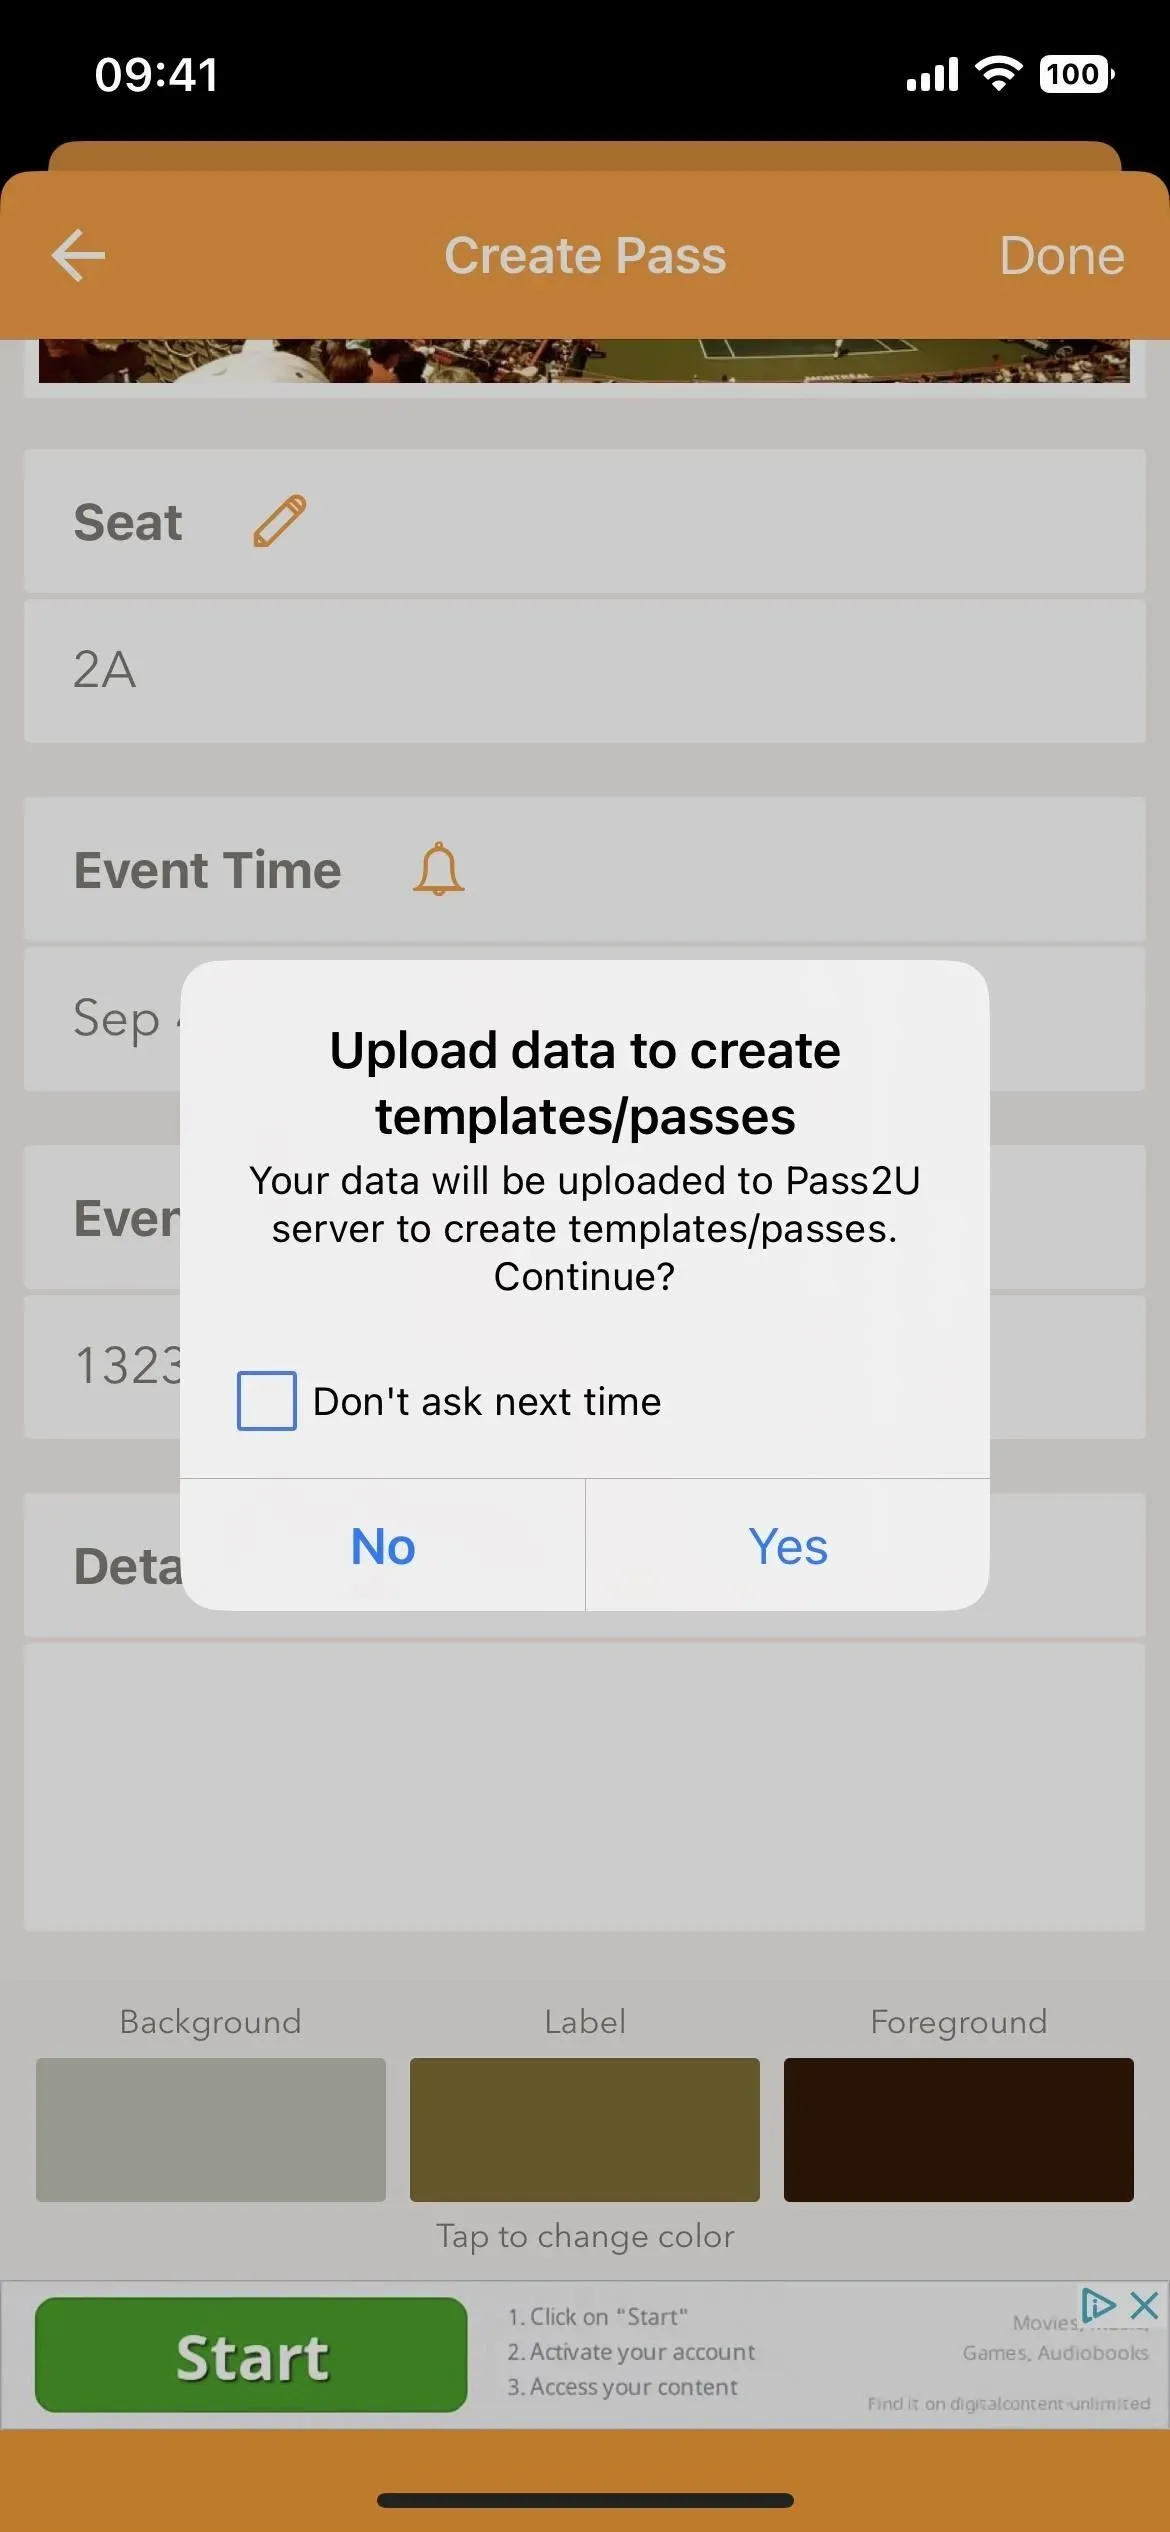
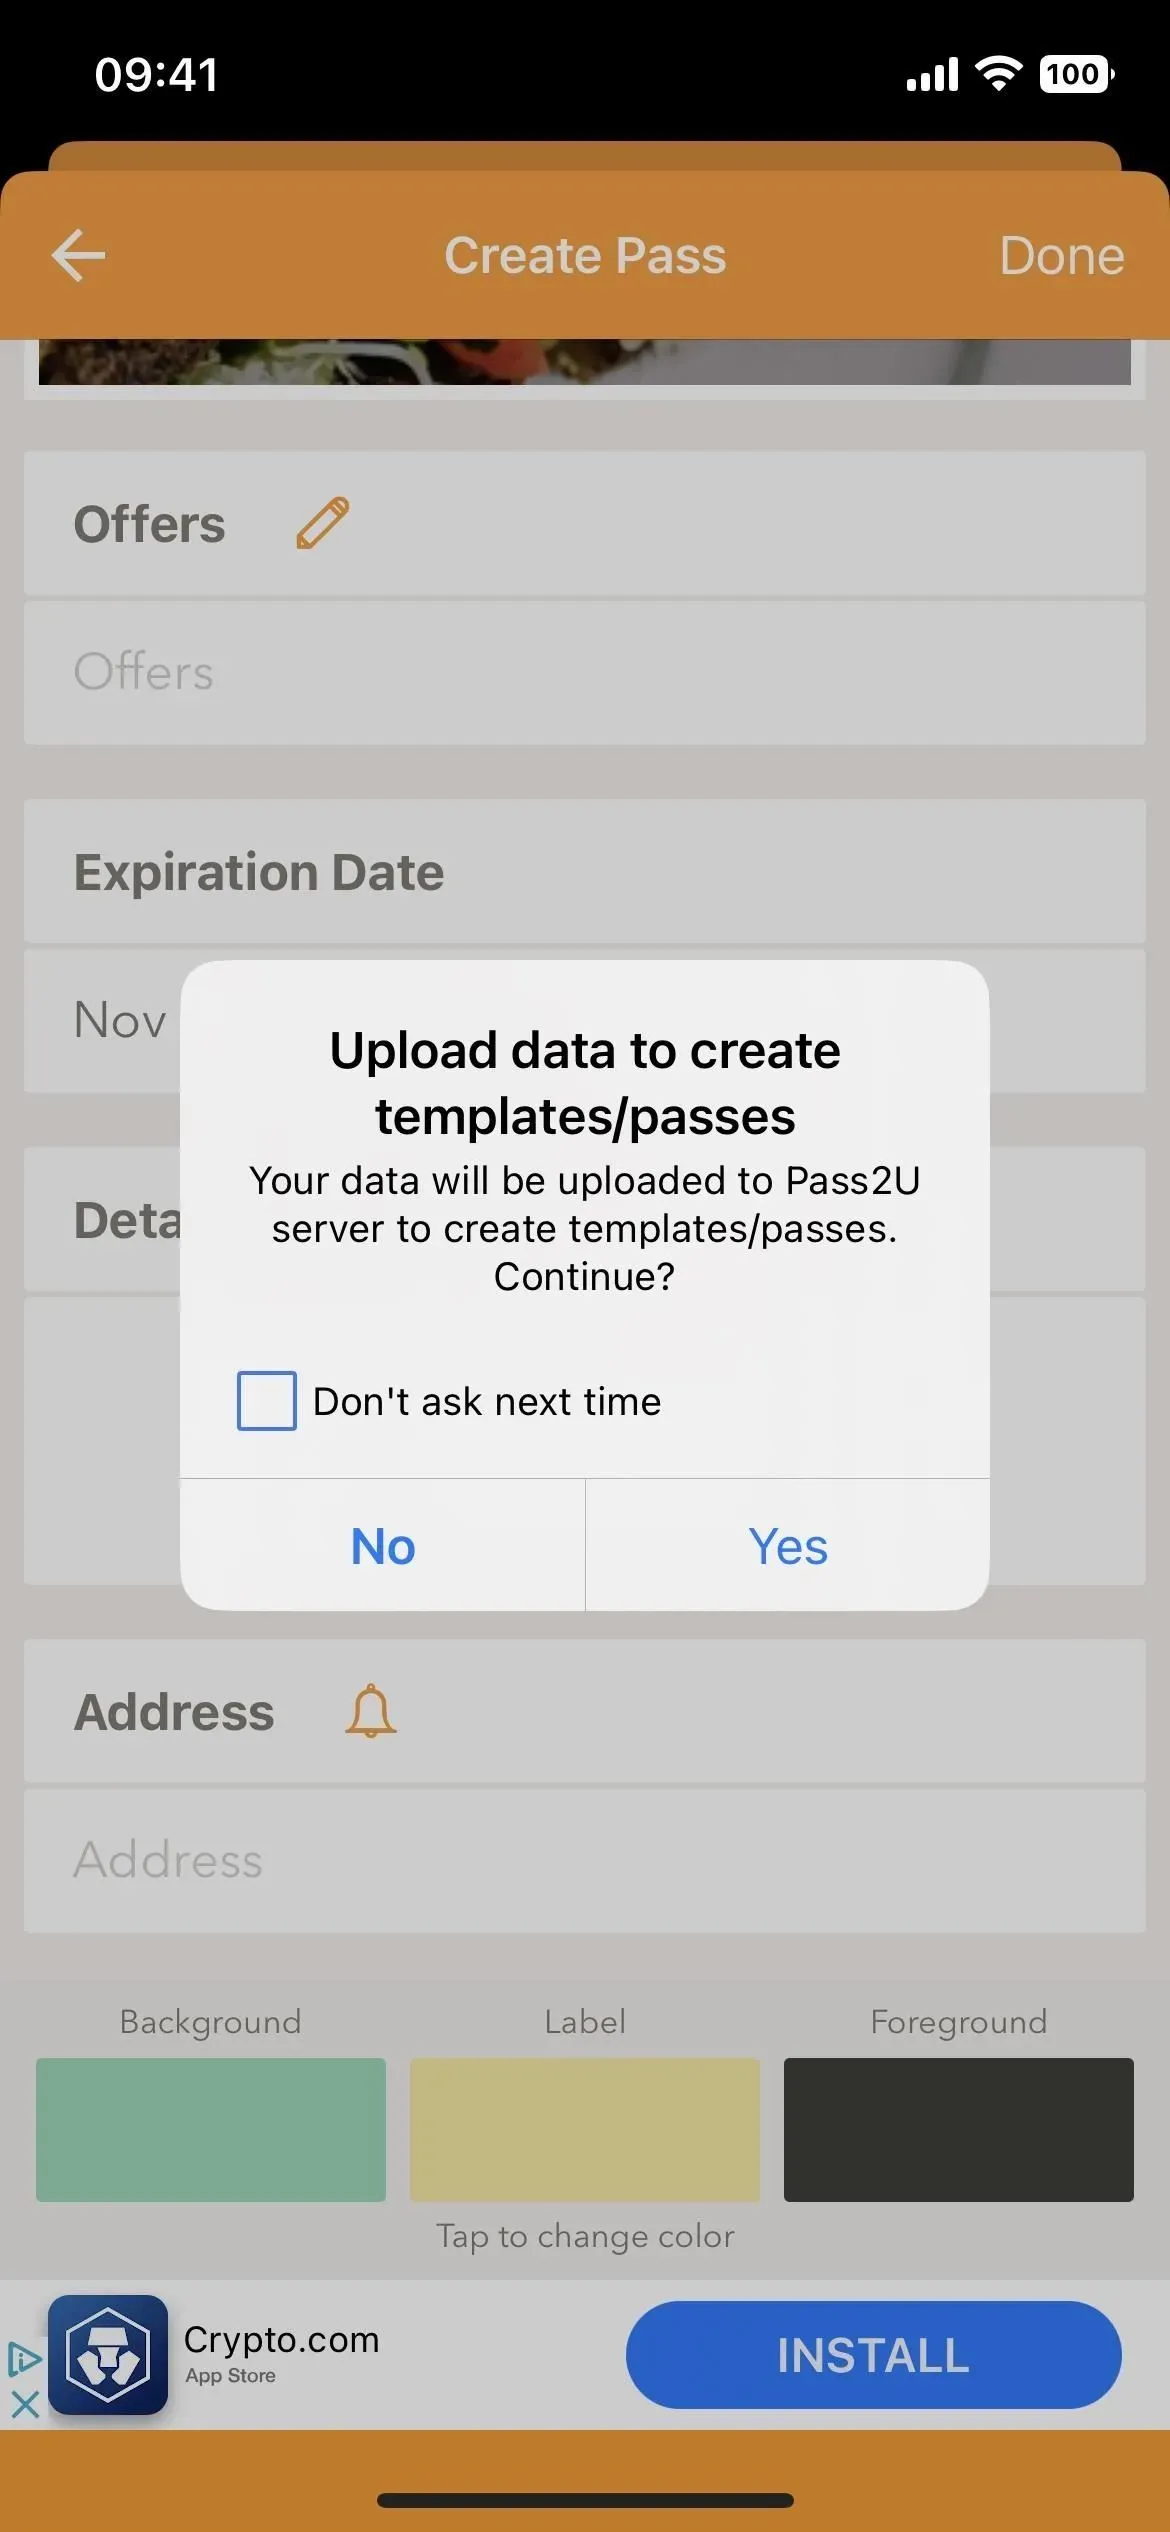
Click “Done”to create your pass and it should ask you if you want to upload the data to create the template and the pass it requires for the pass, so click “Yes”.

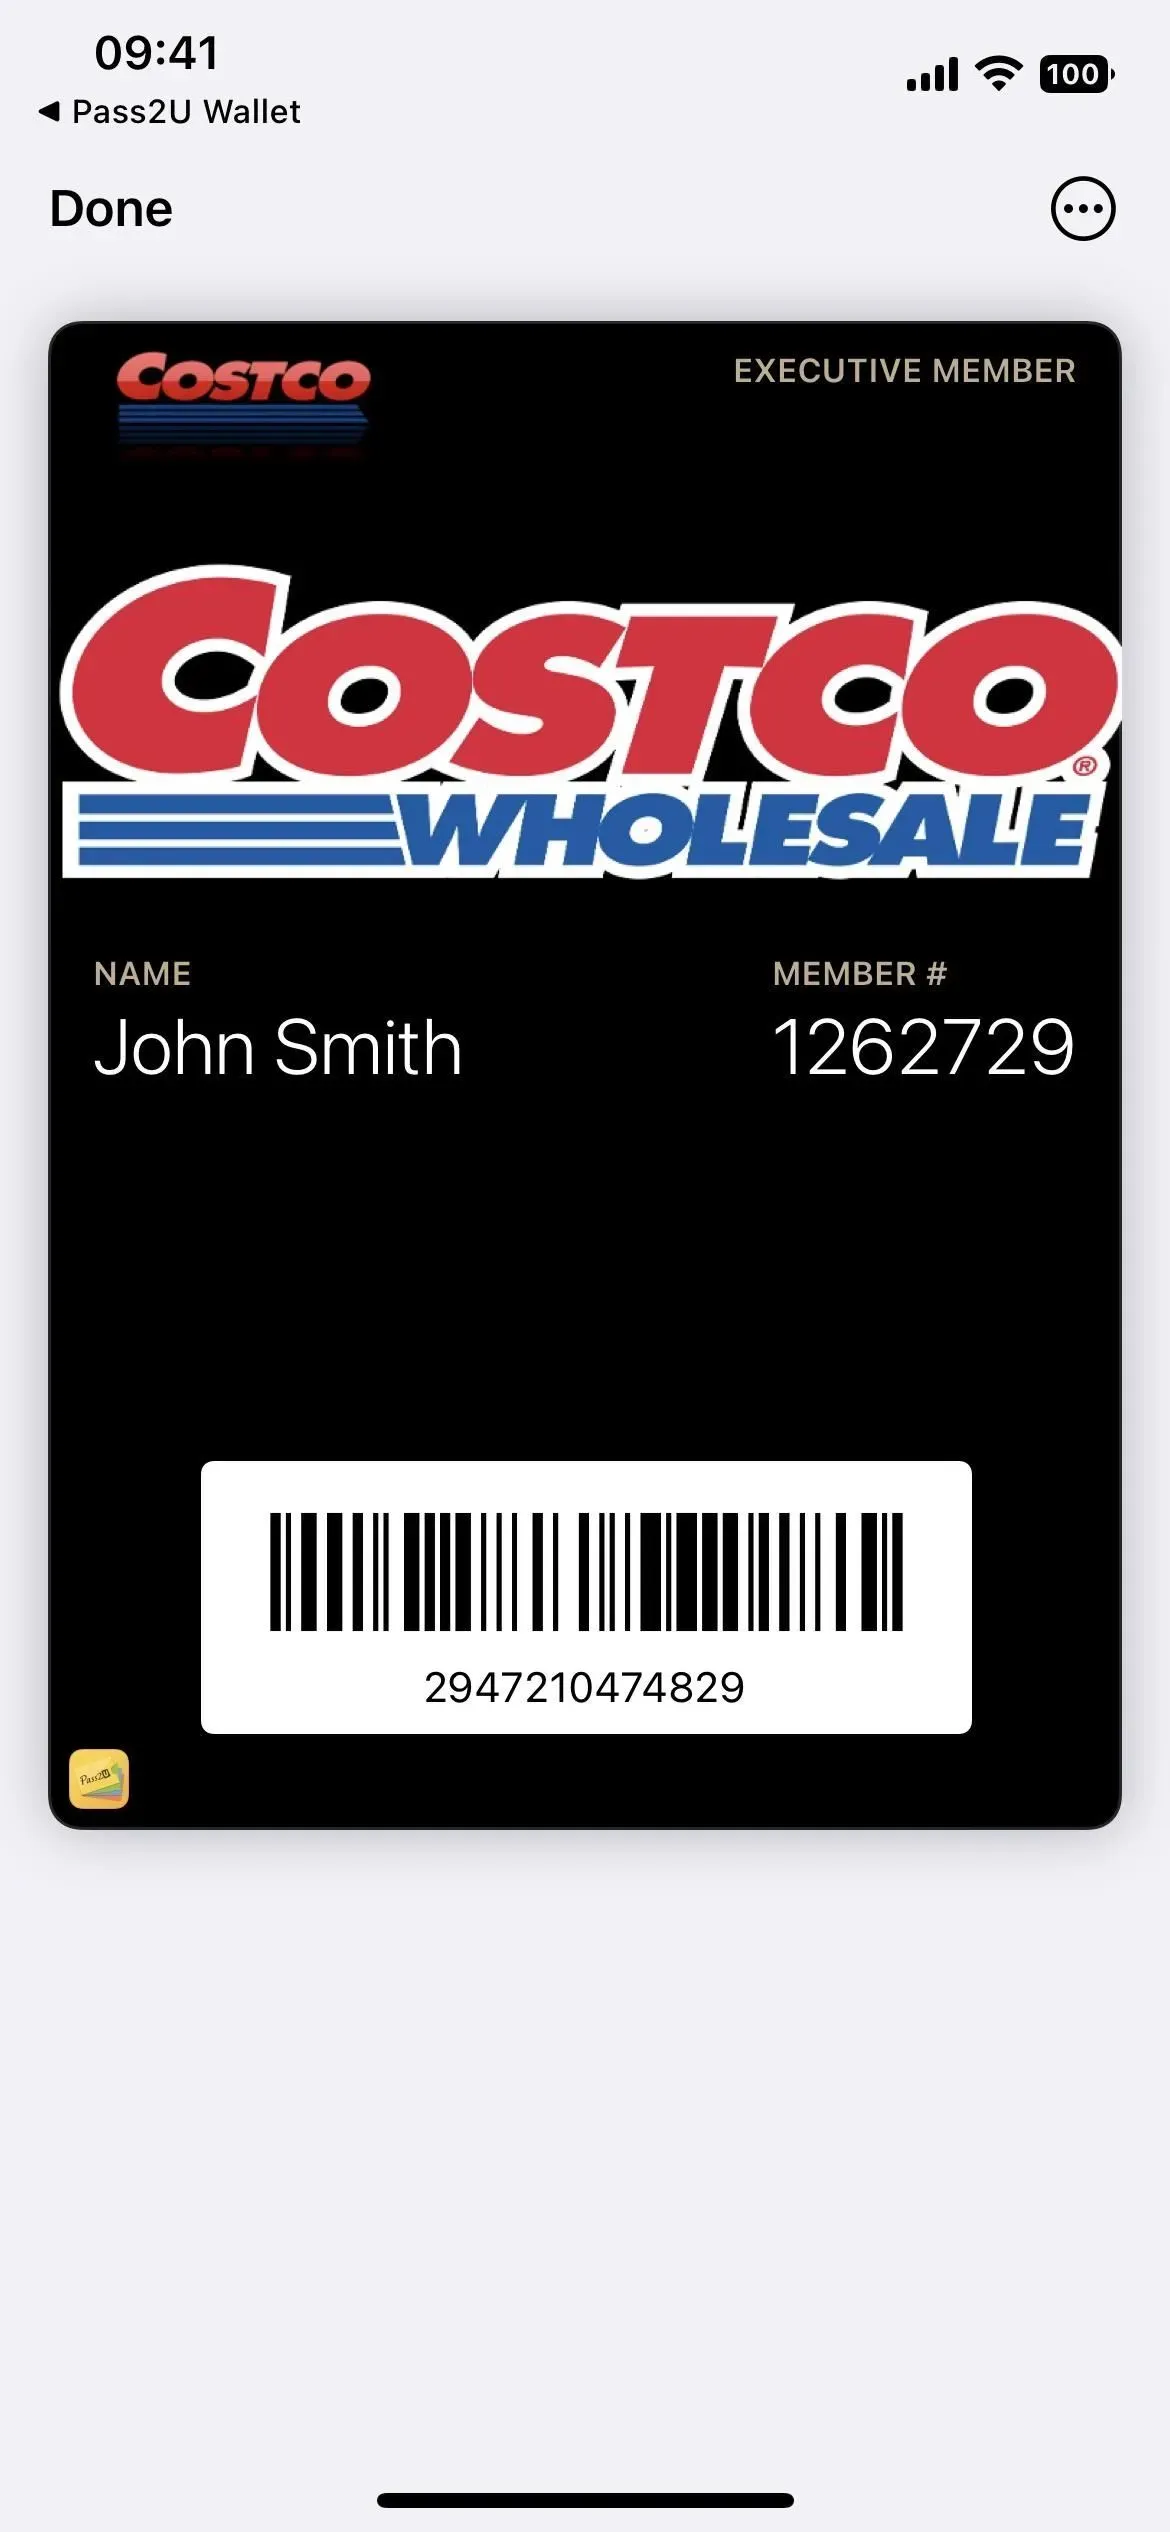
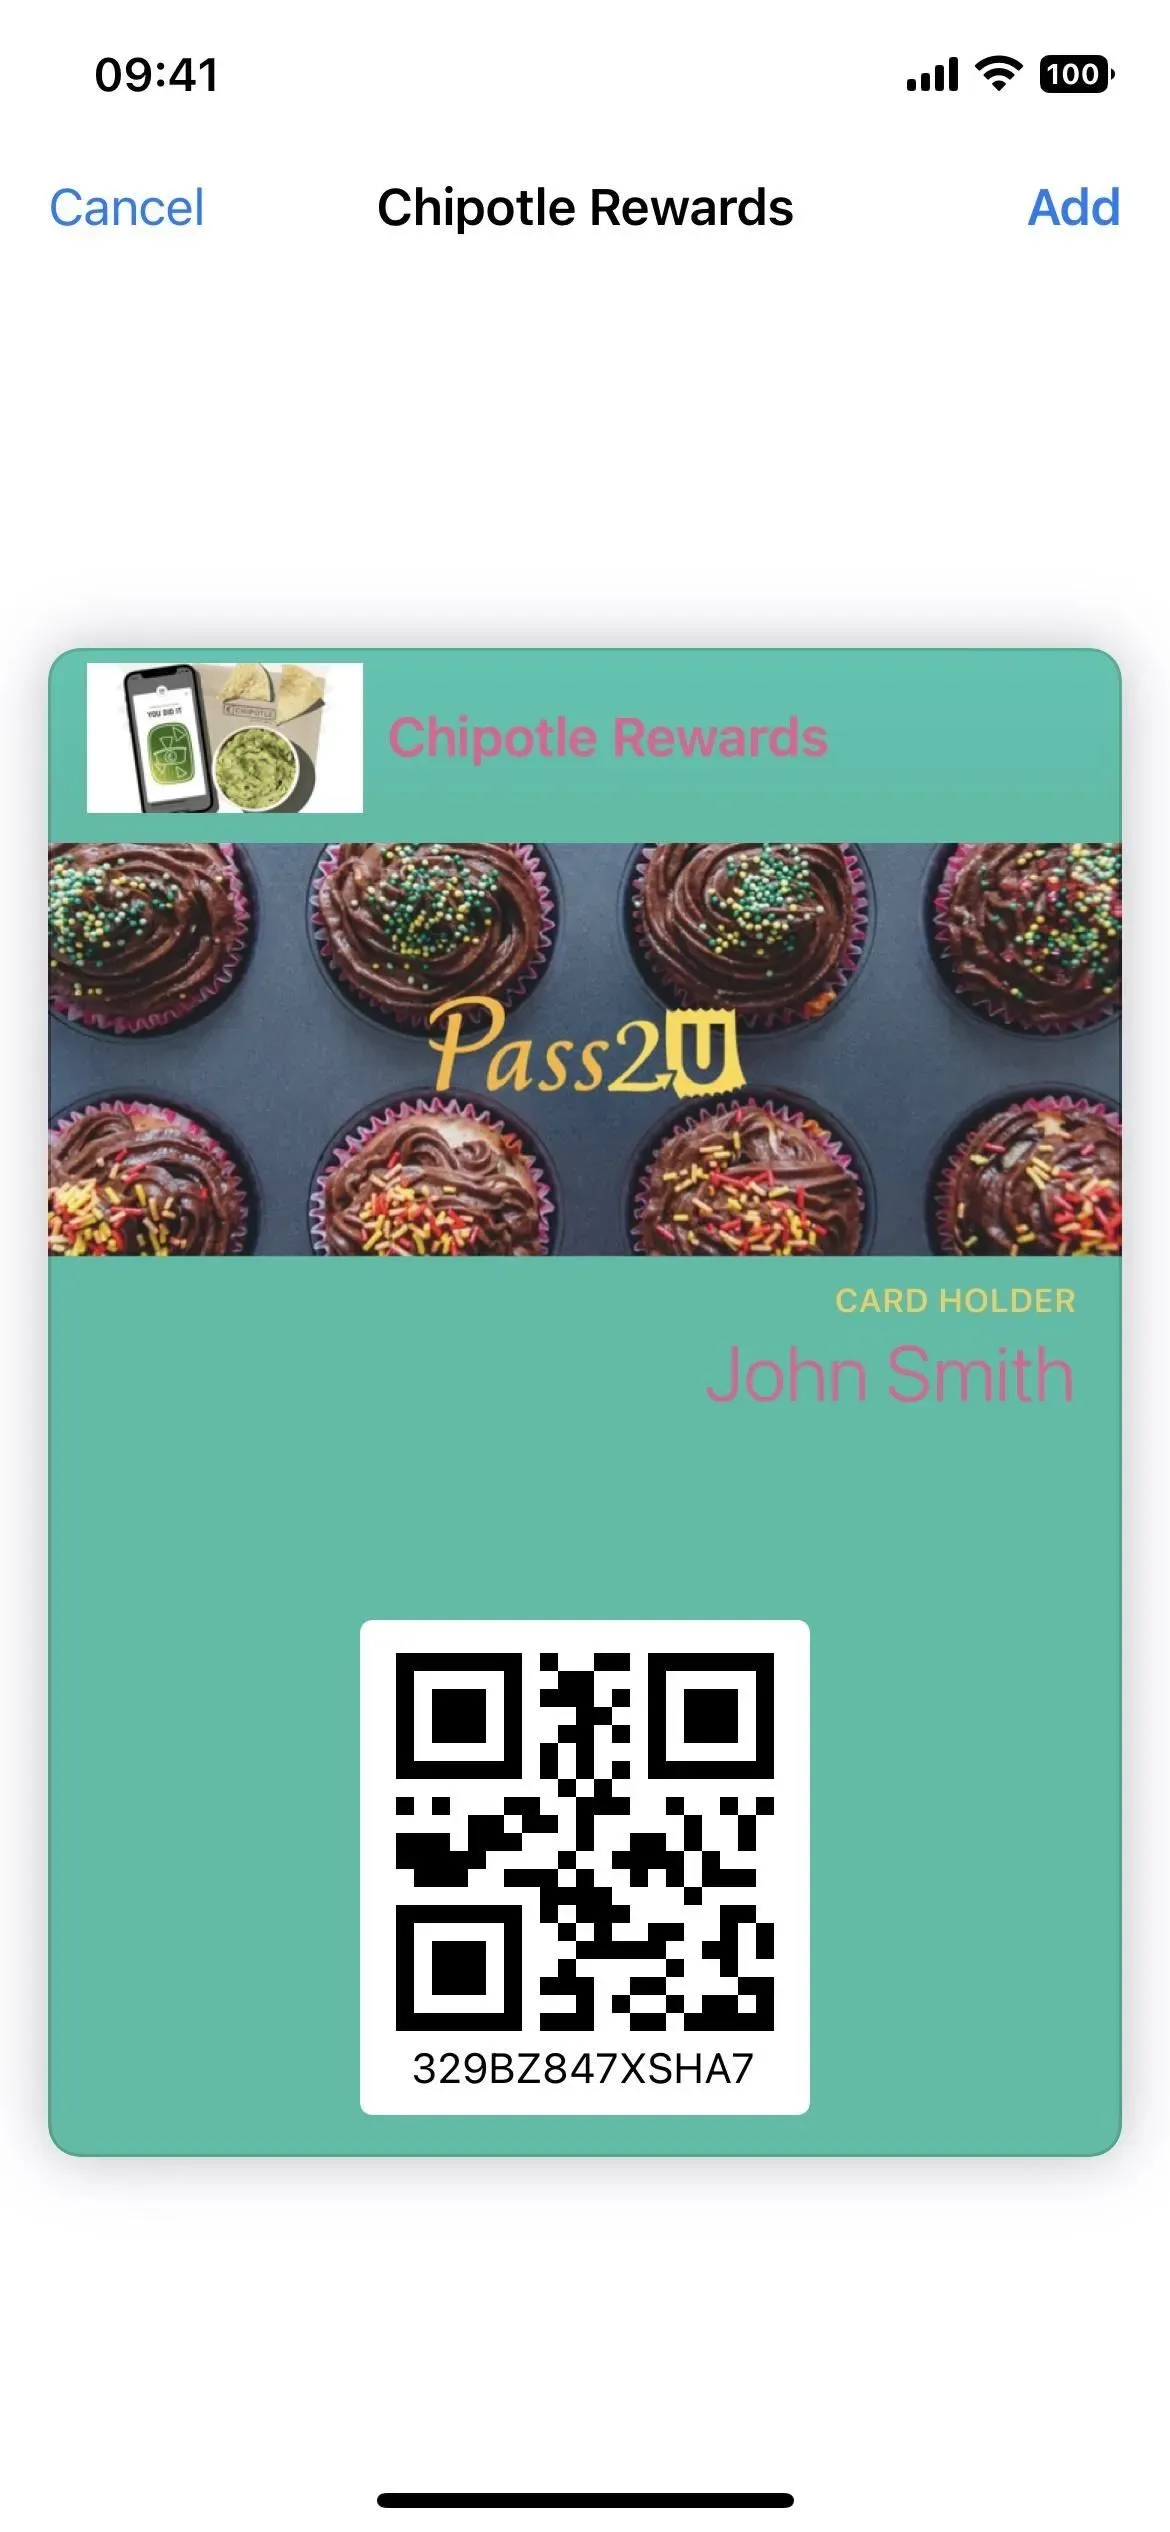
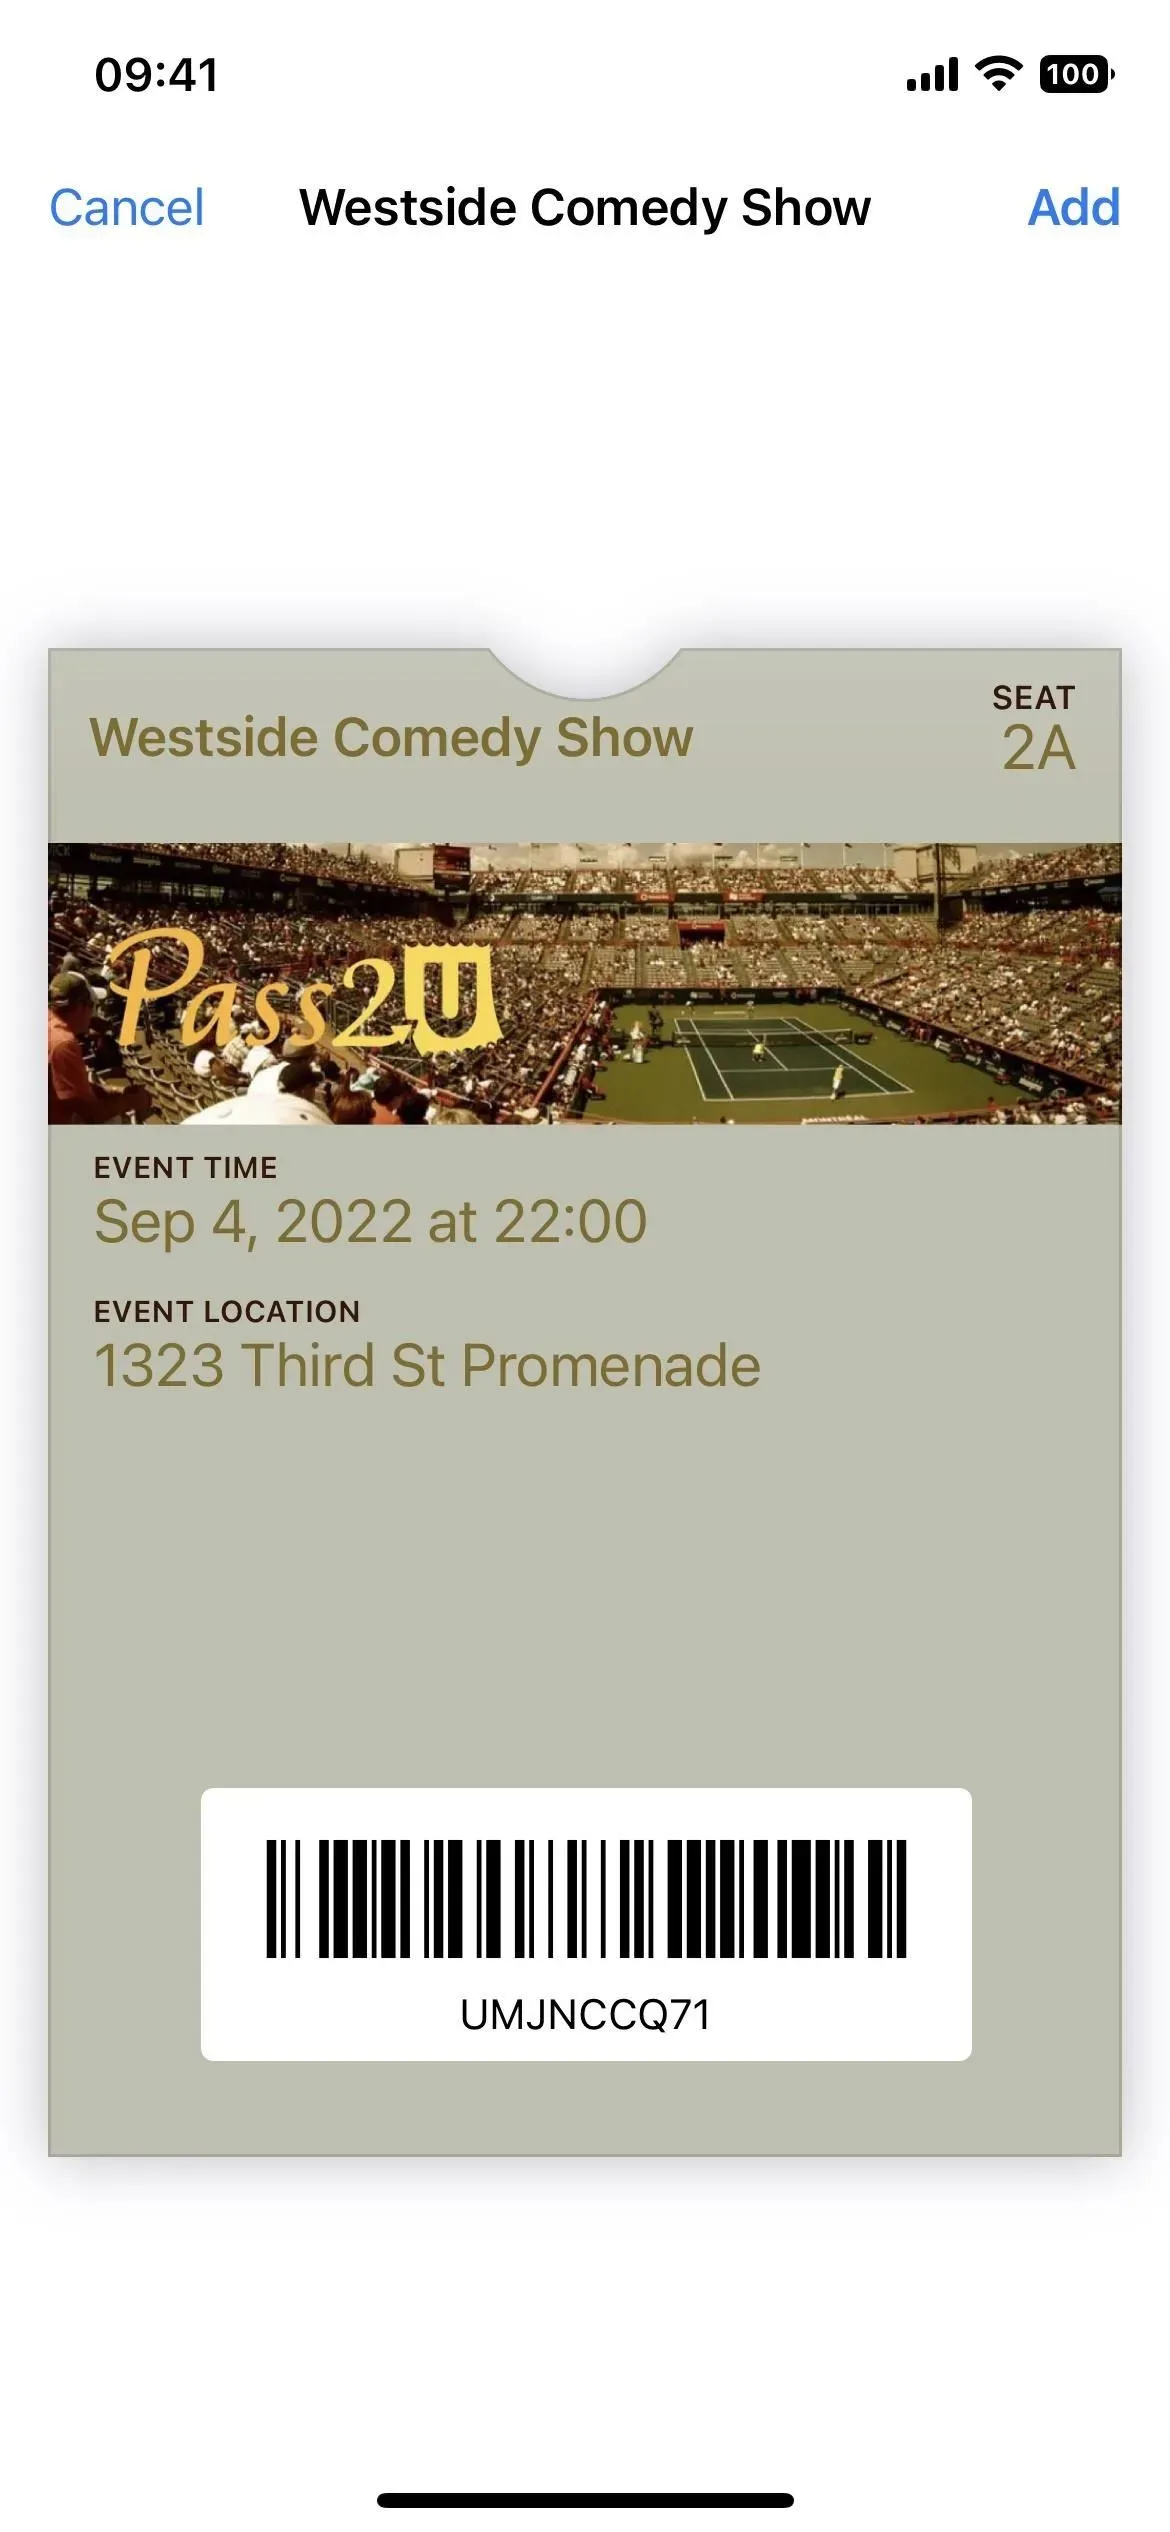
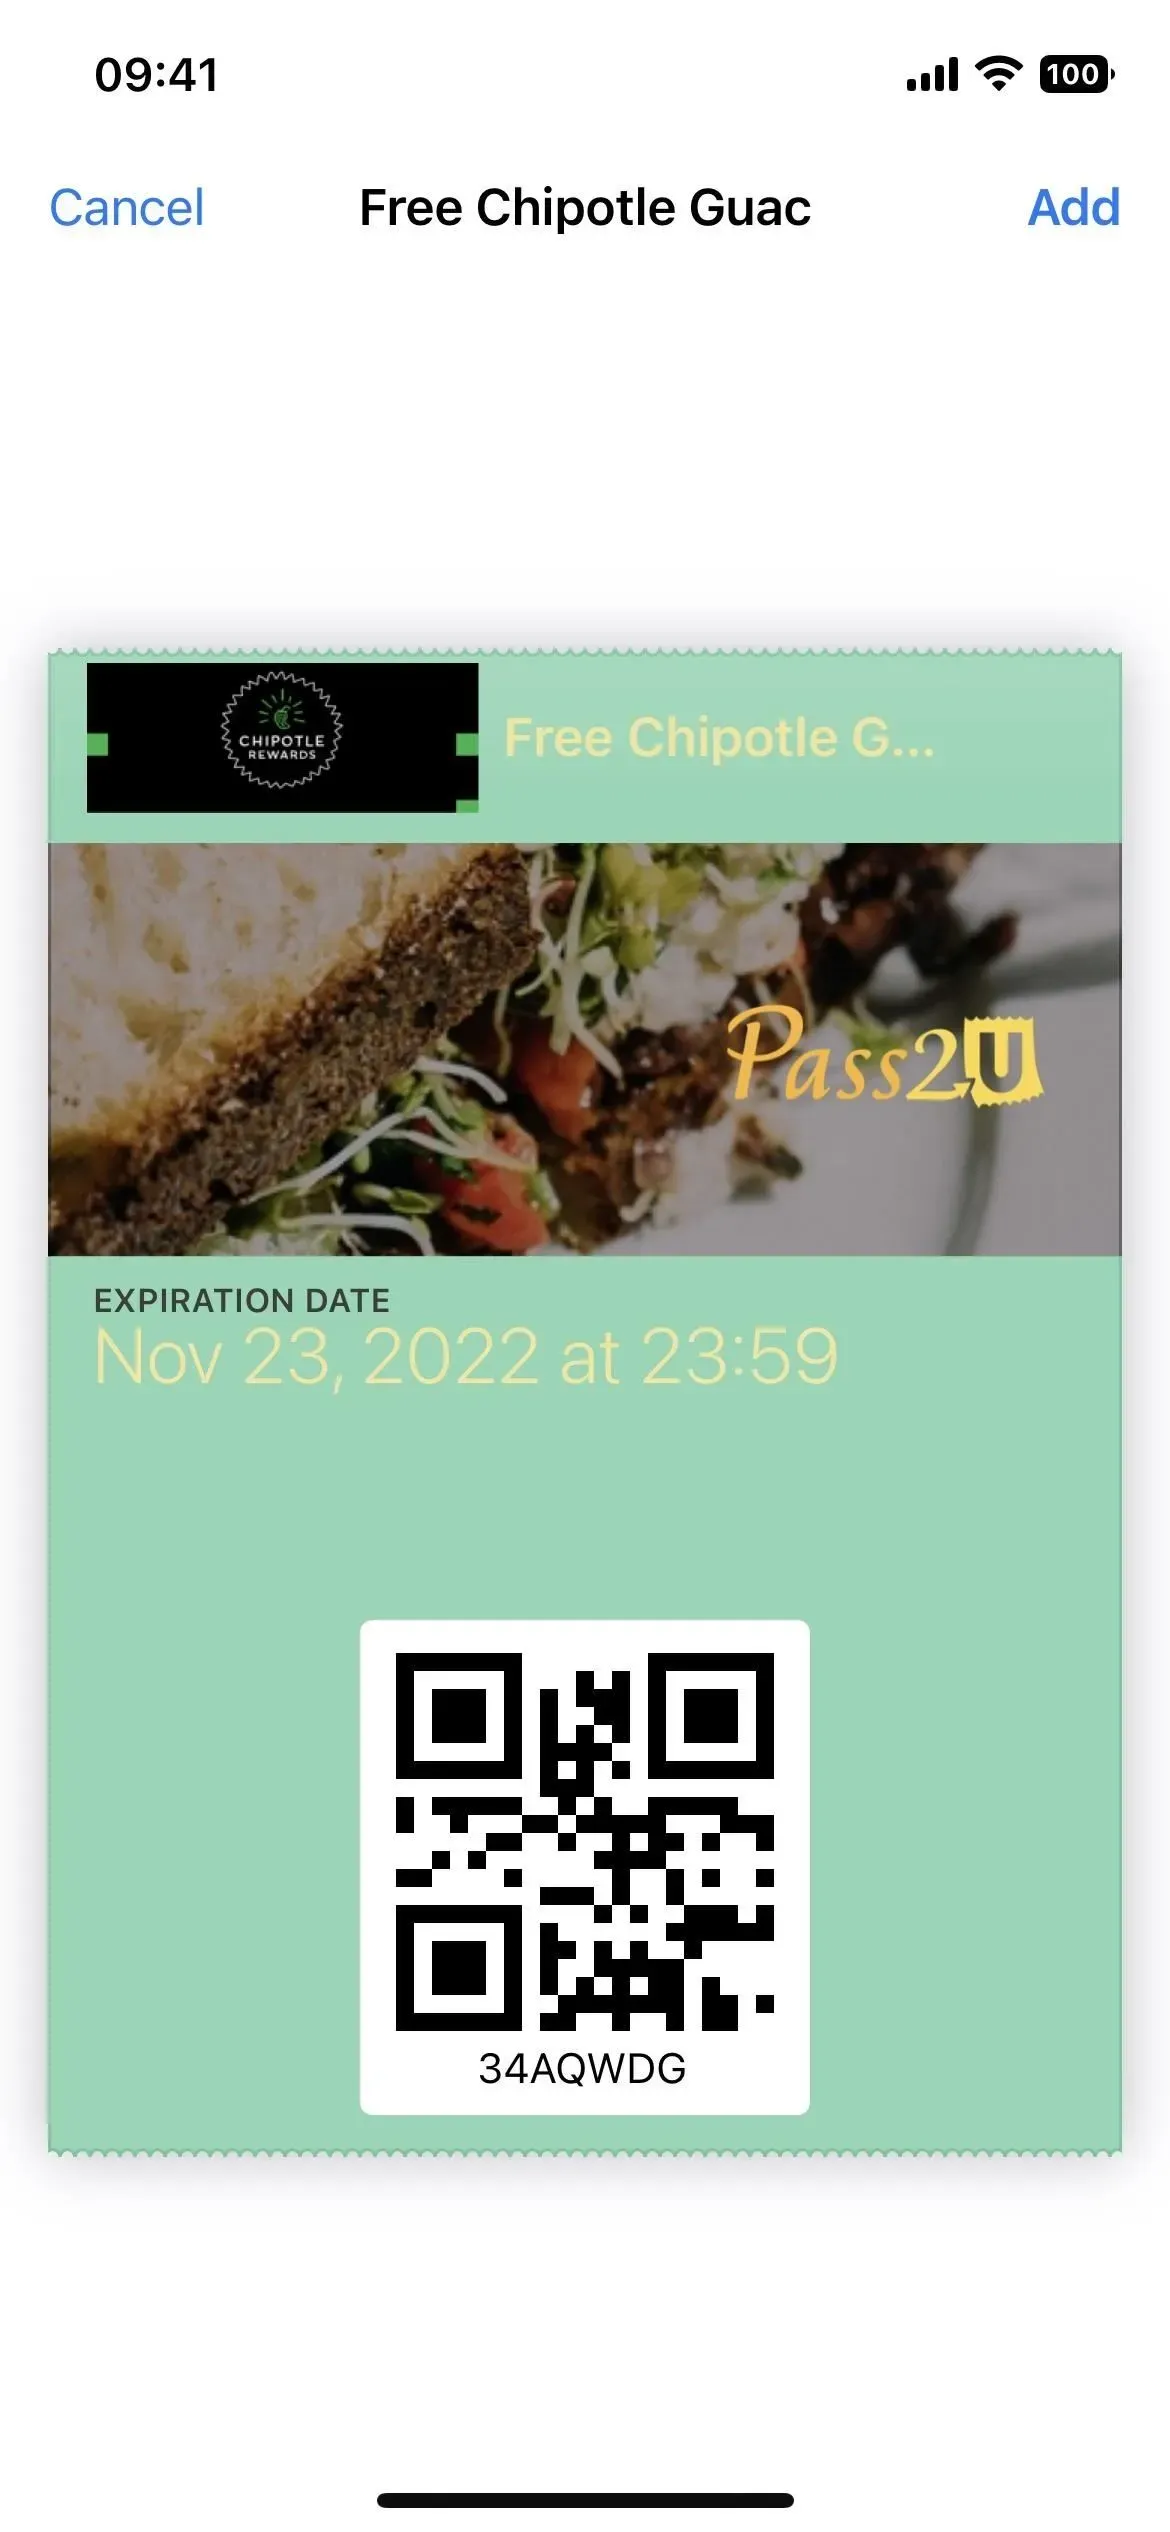
It will show you a preview of your wallet card; click “Add”to add it. It will be instantly available in Apple Wallet and you can find it in your Pass2U pass list. When you click on it in Pass2U, the card will open in Apple Wallet.
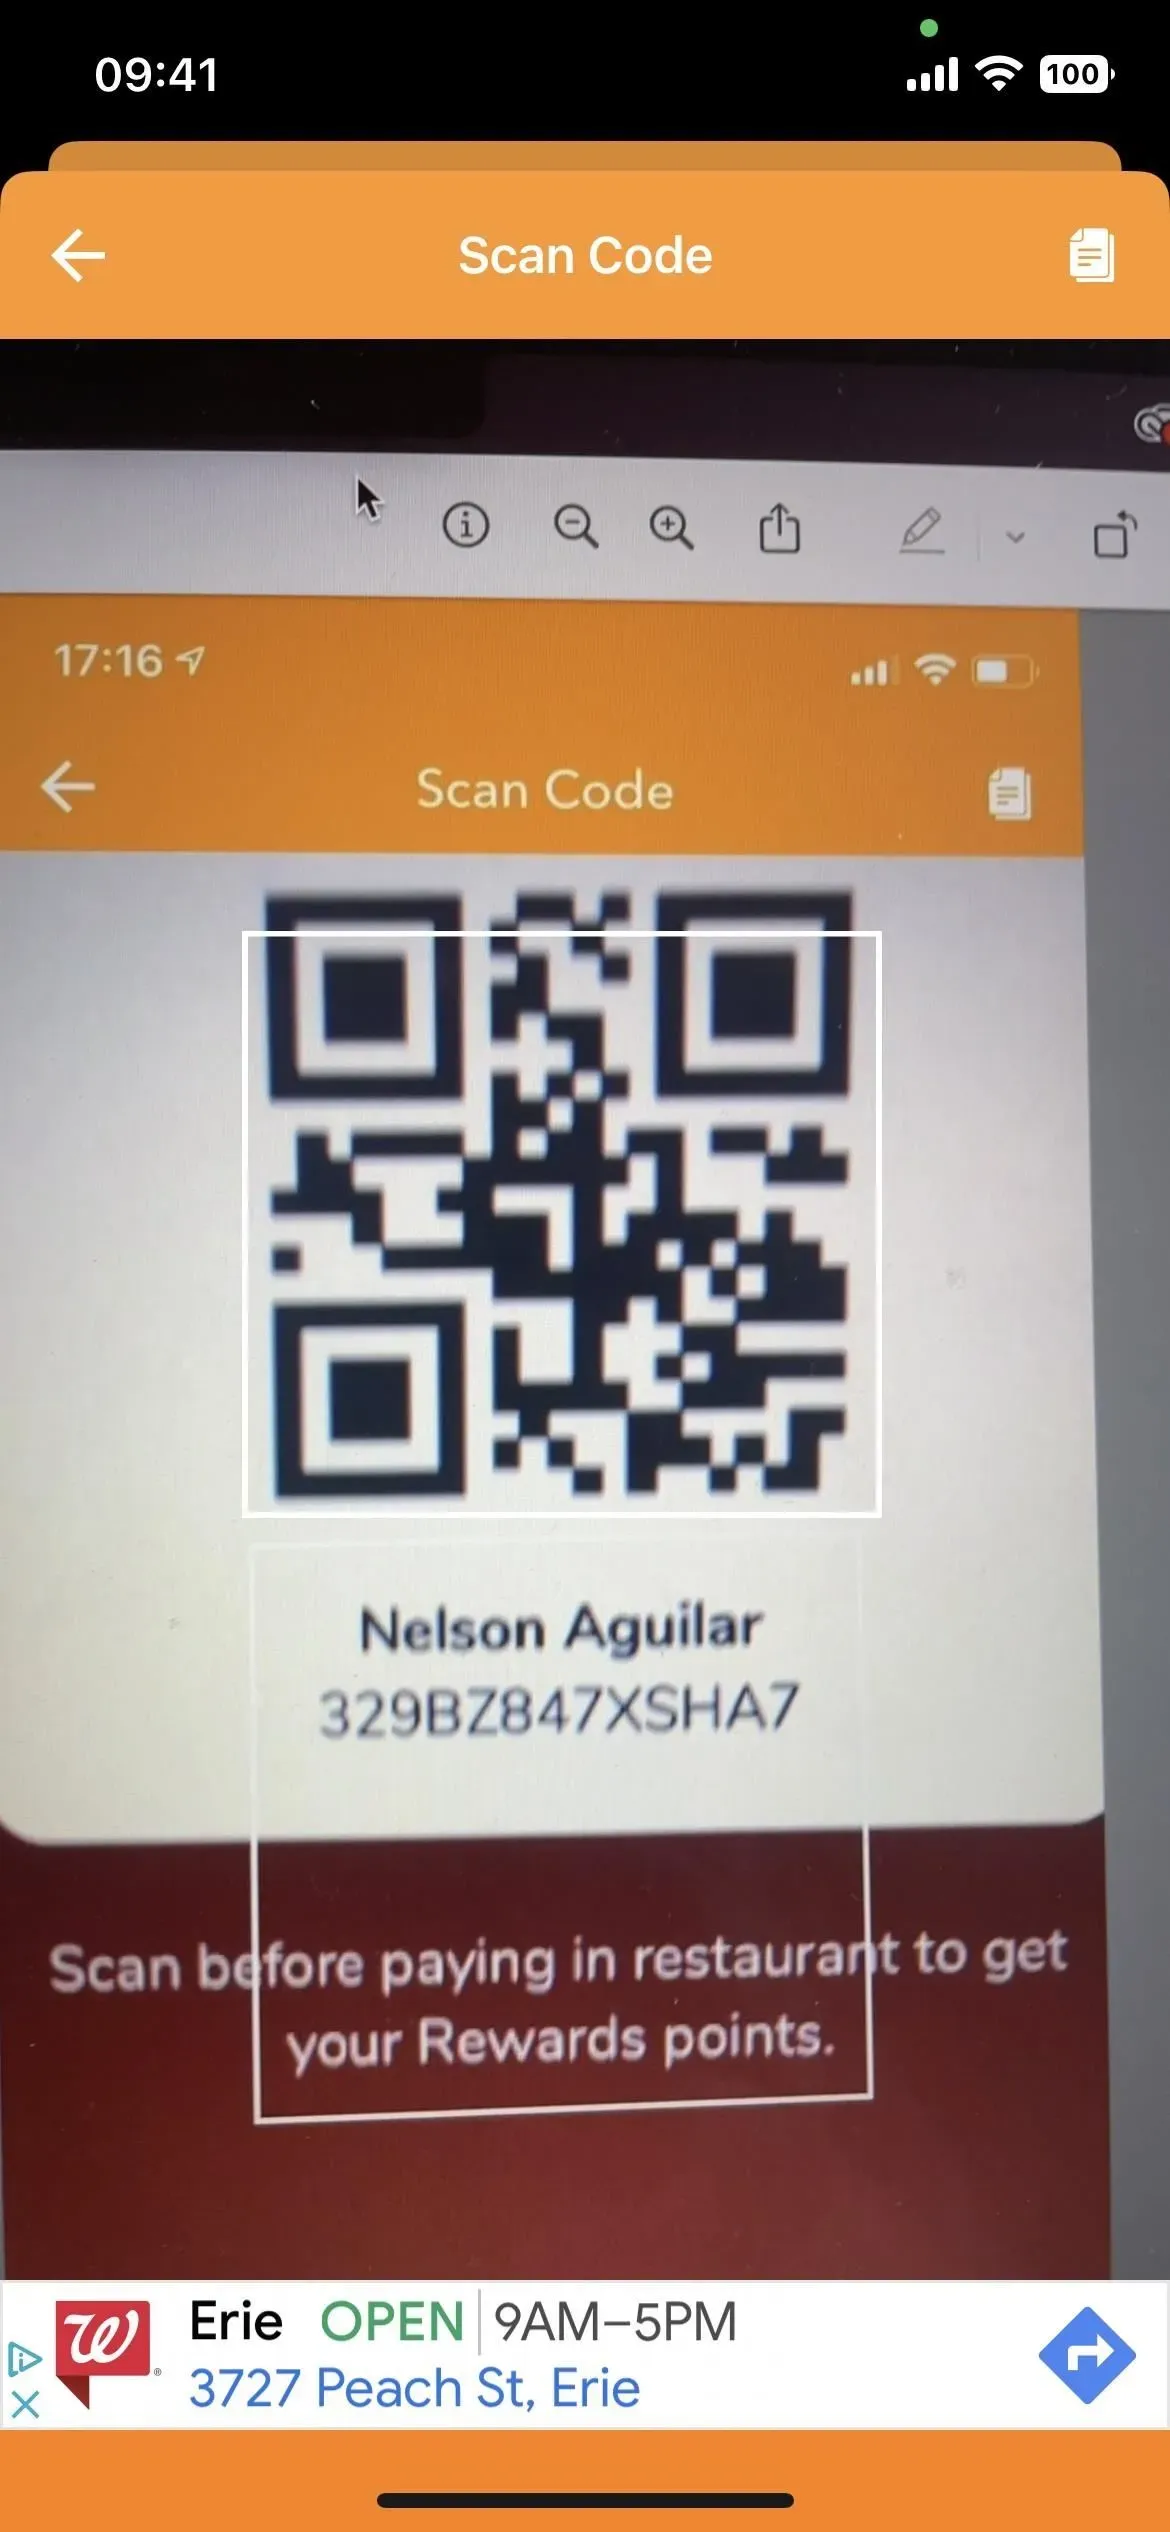
Option 2: Scan the barcode on the card
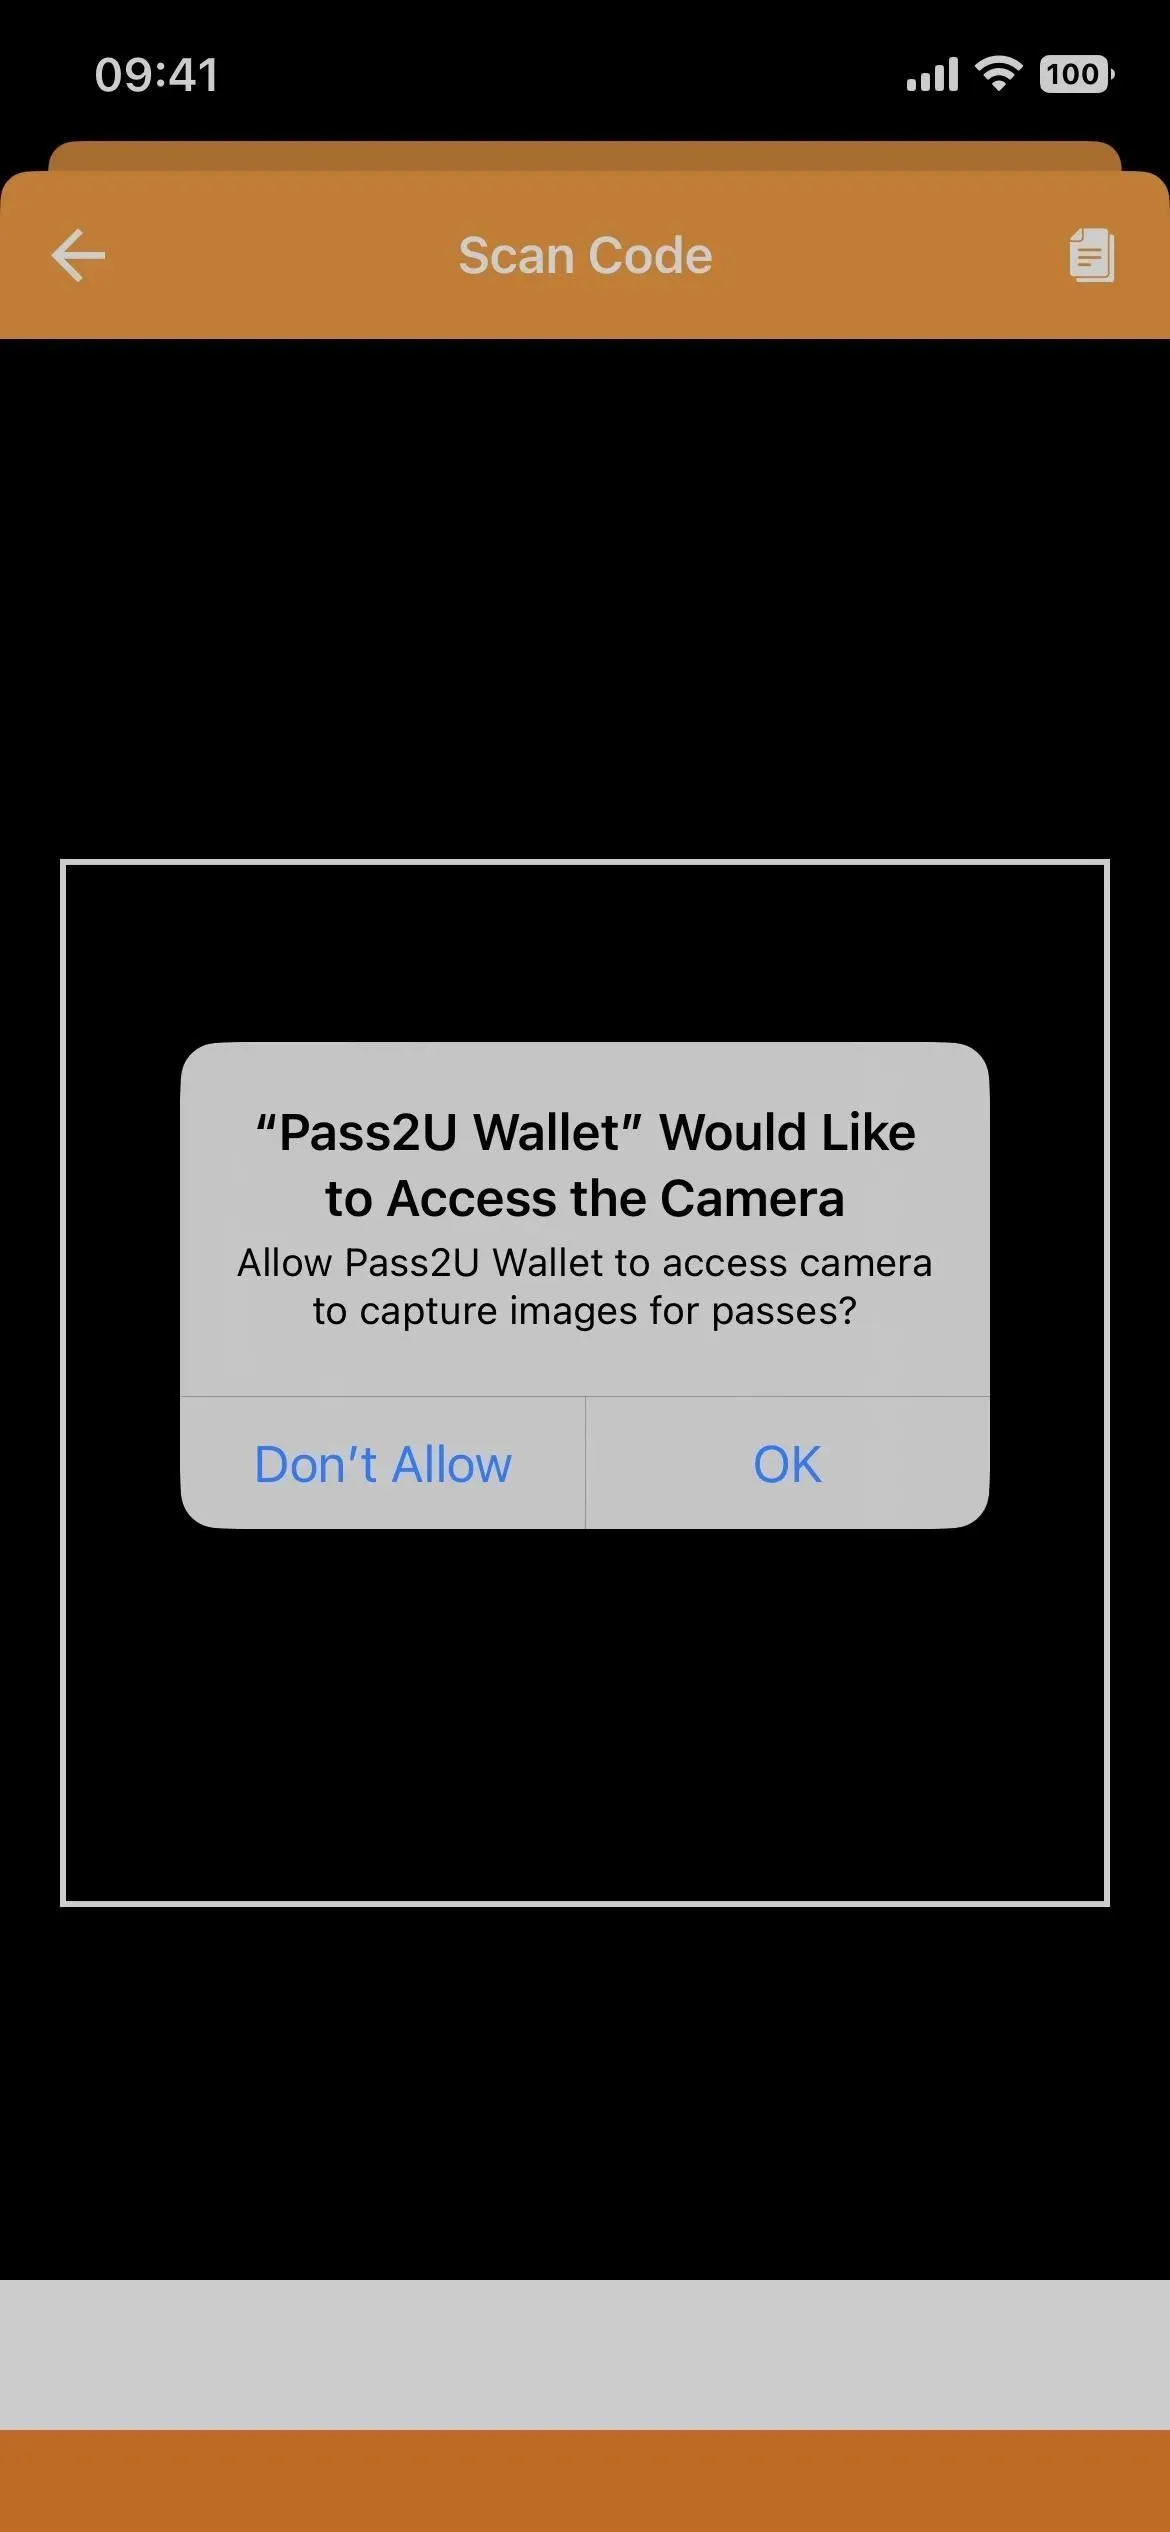
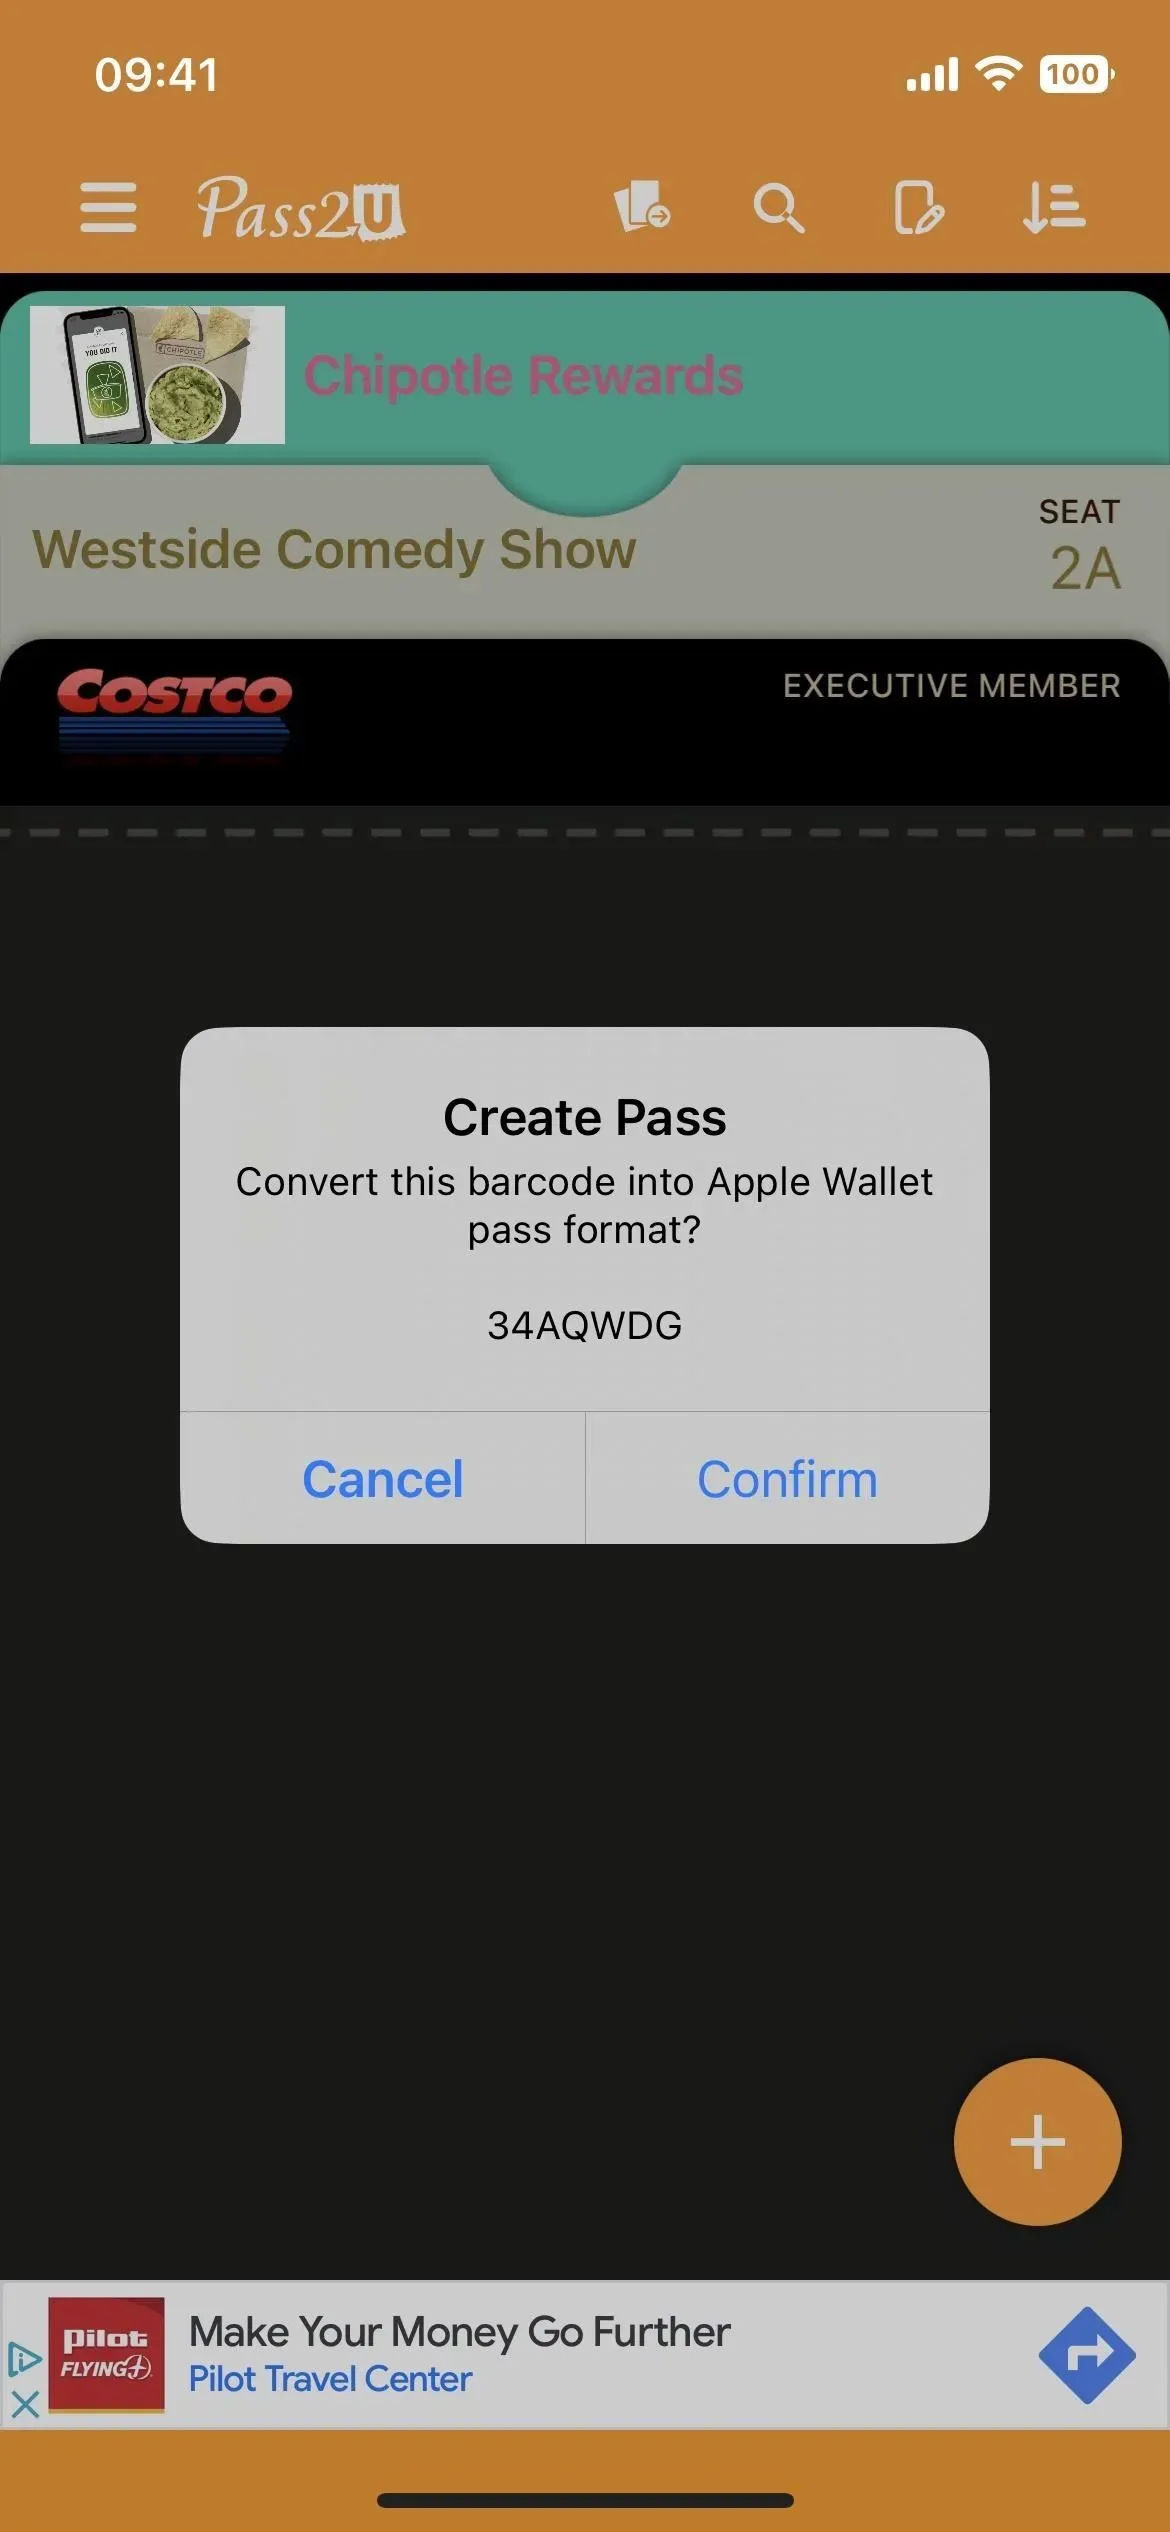
If the card or pass you want to add doesn’t have an existing template, you can use your iPhone’s camera and scan a barcode from a physical or online source. The application can only scan 1D barcodes (code 128) or 2D barcodes (QR code, Aztec code and PDF417). Allow him access to your camera, then scan the code. If successful, a pop-up window will appear asking if you want to convert the barcode to the Apple Wallet pass format; click OK.
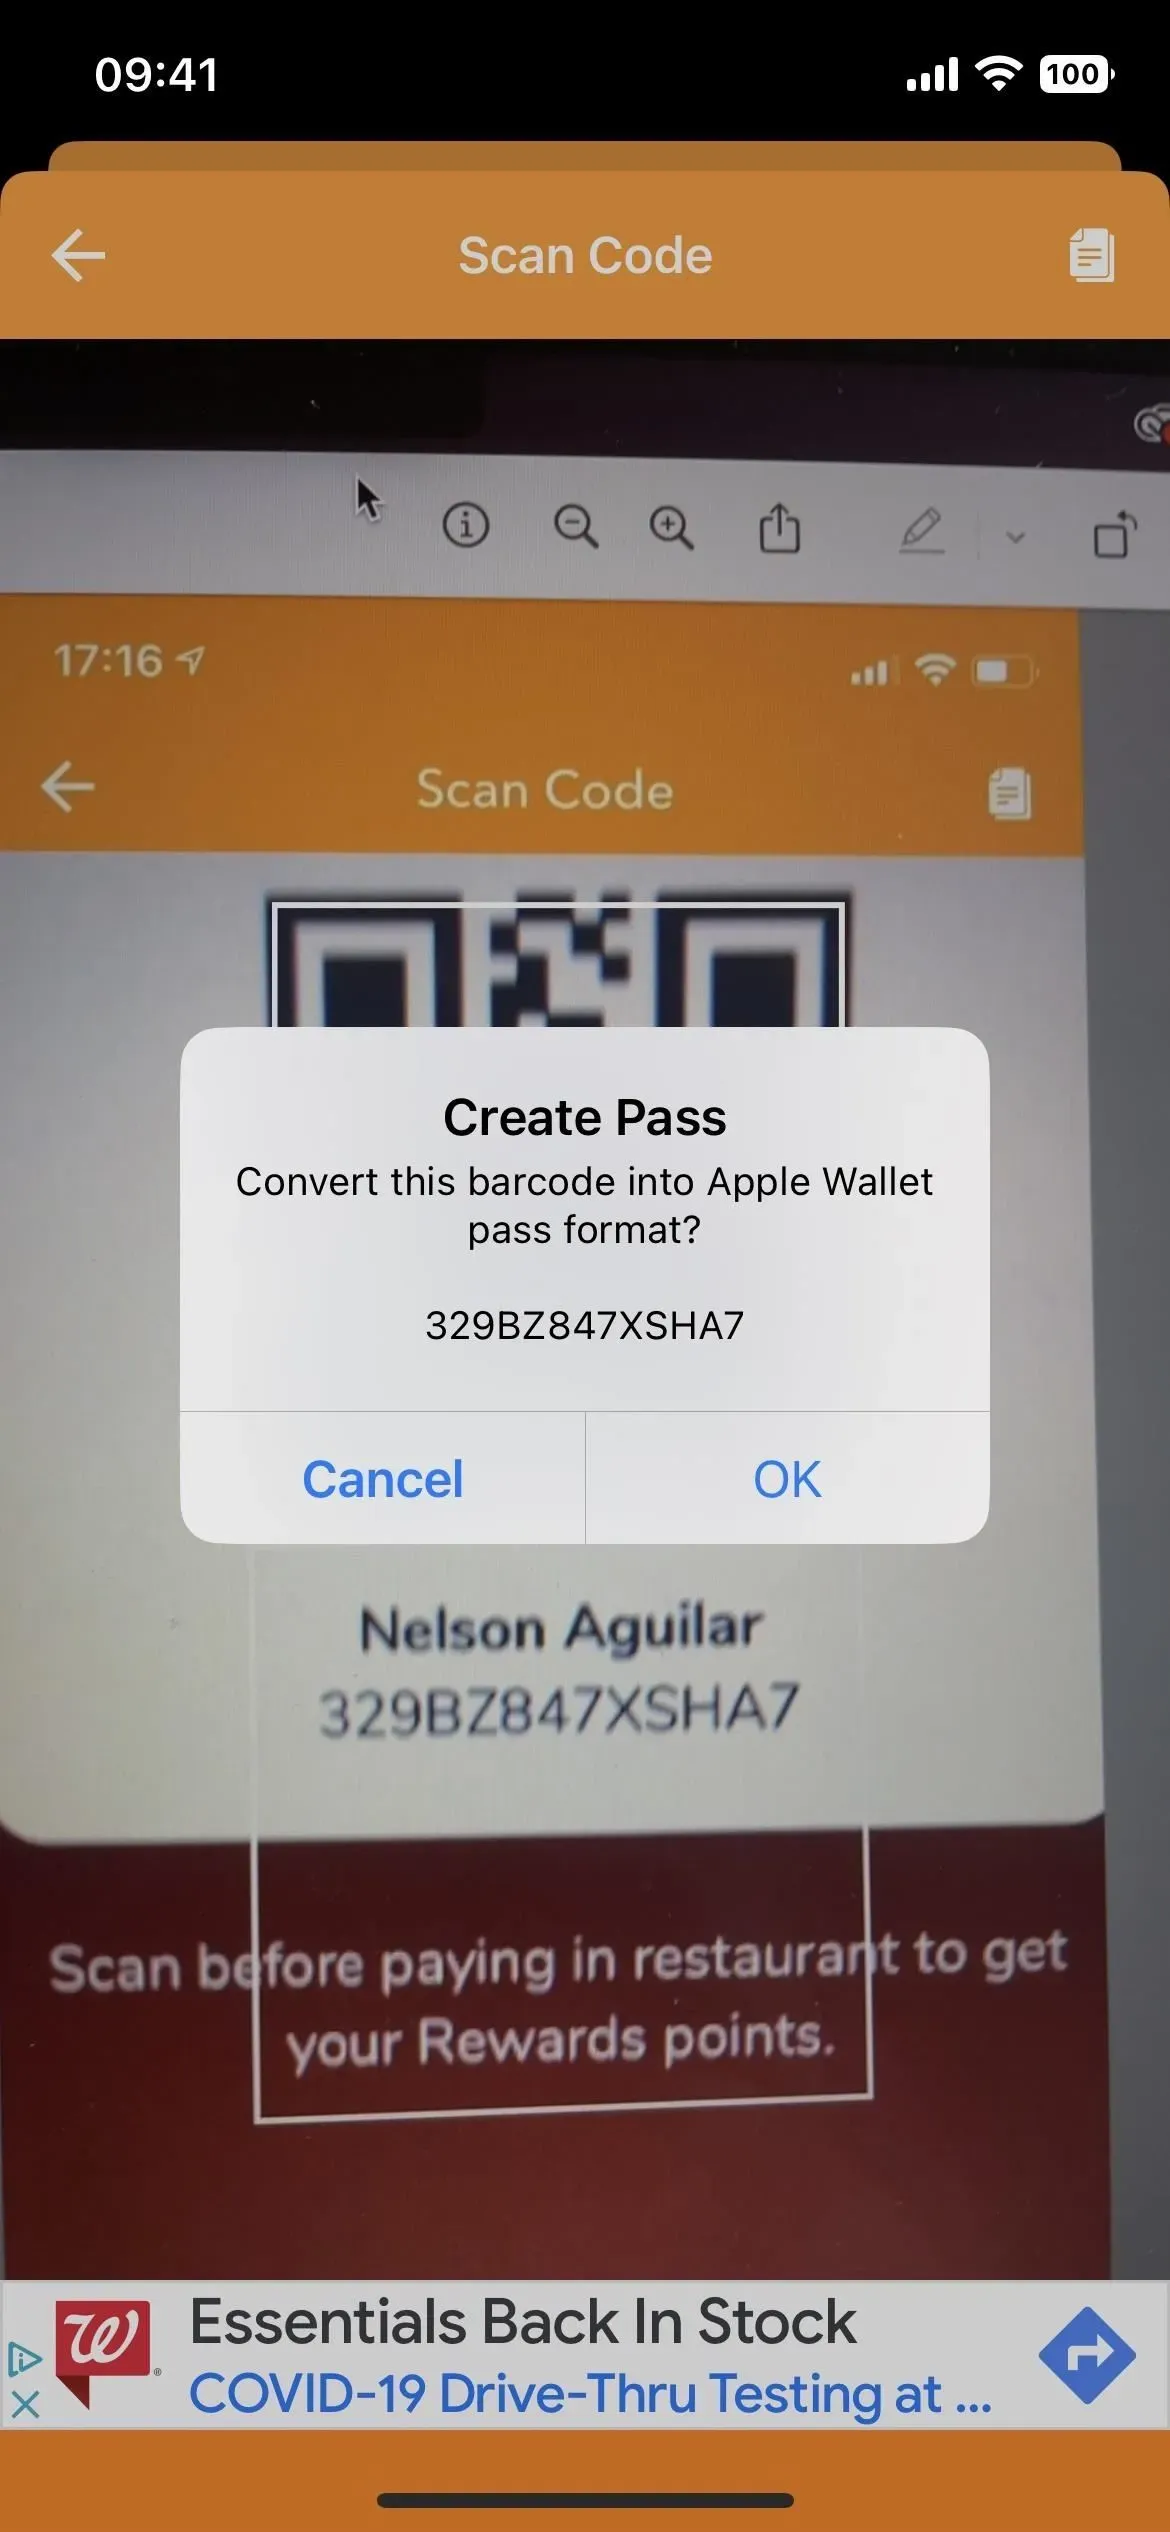
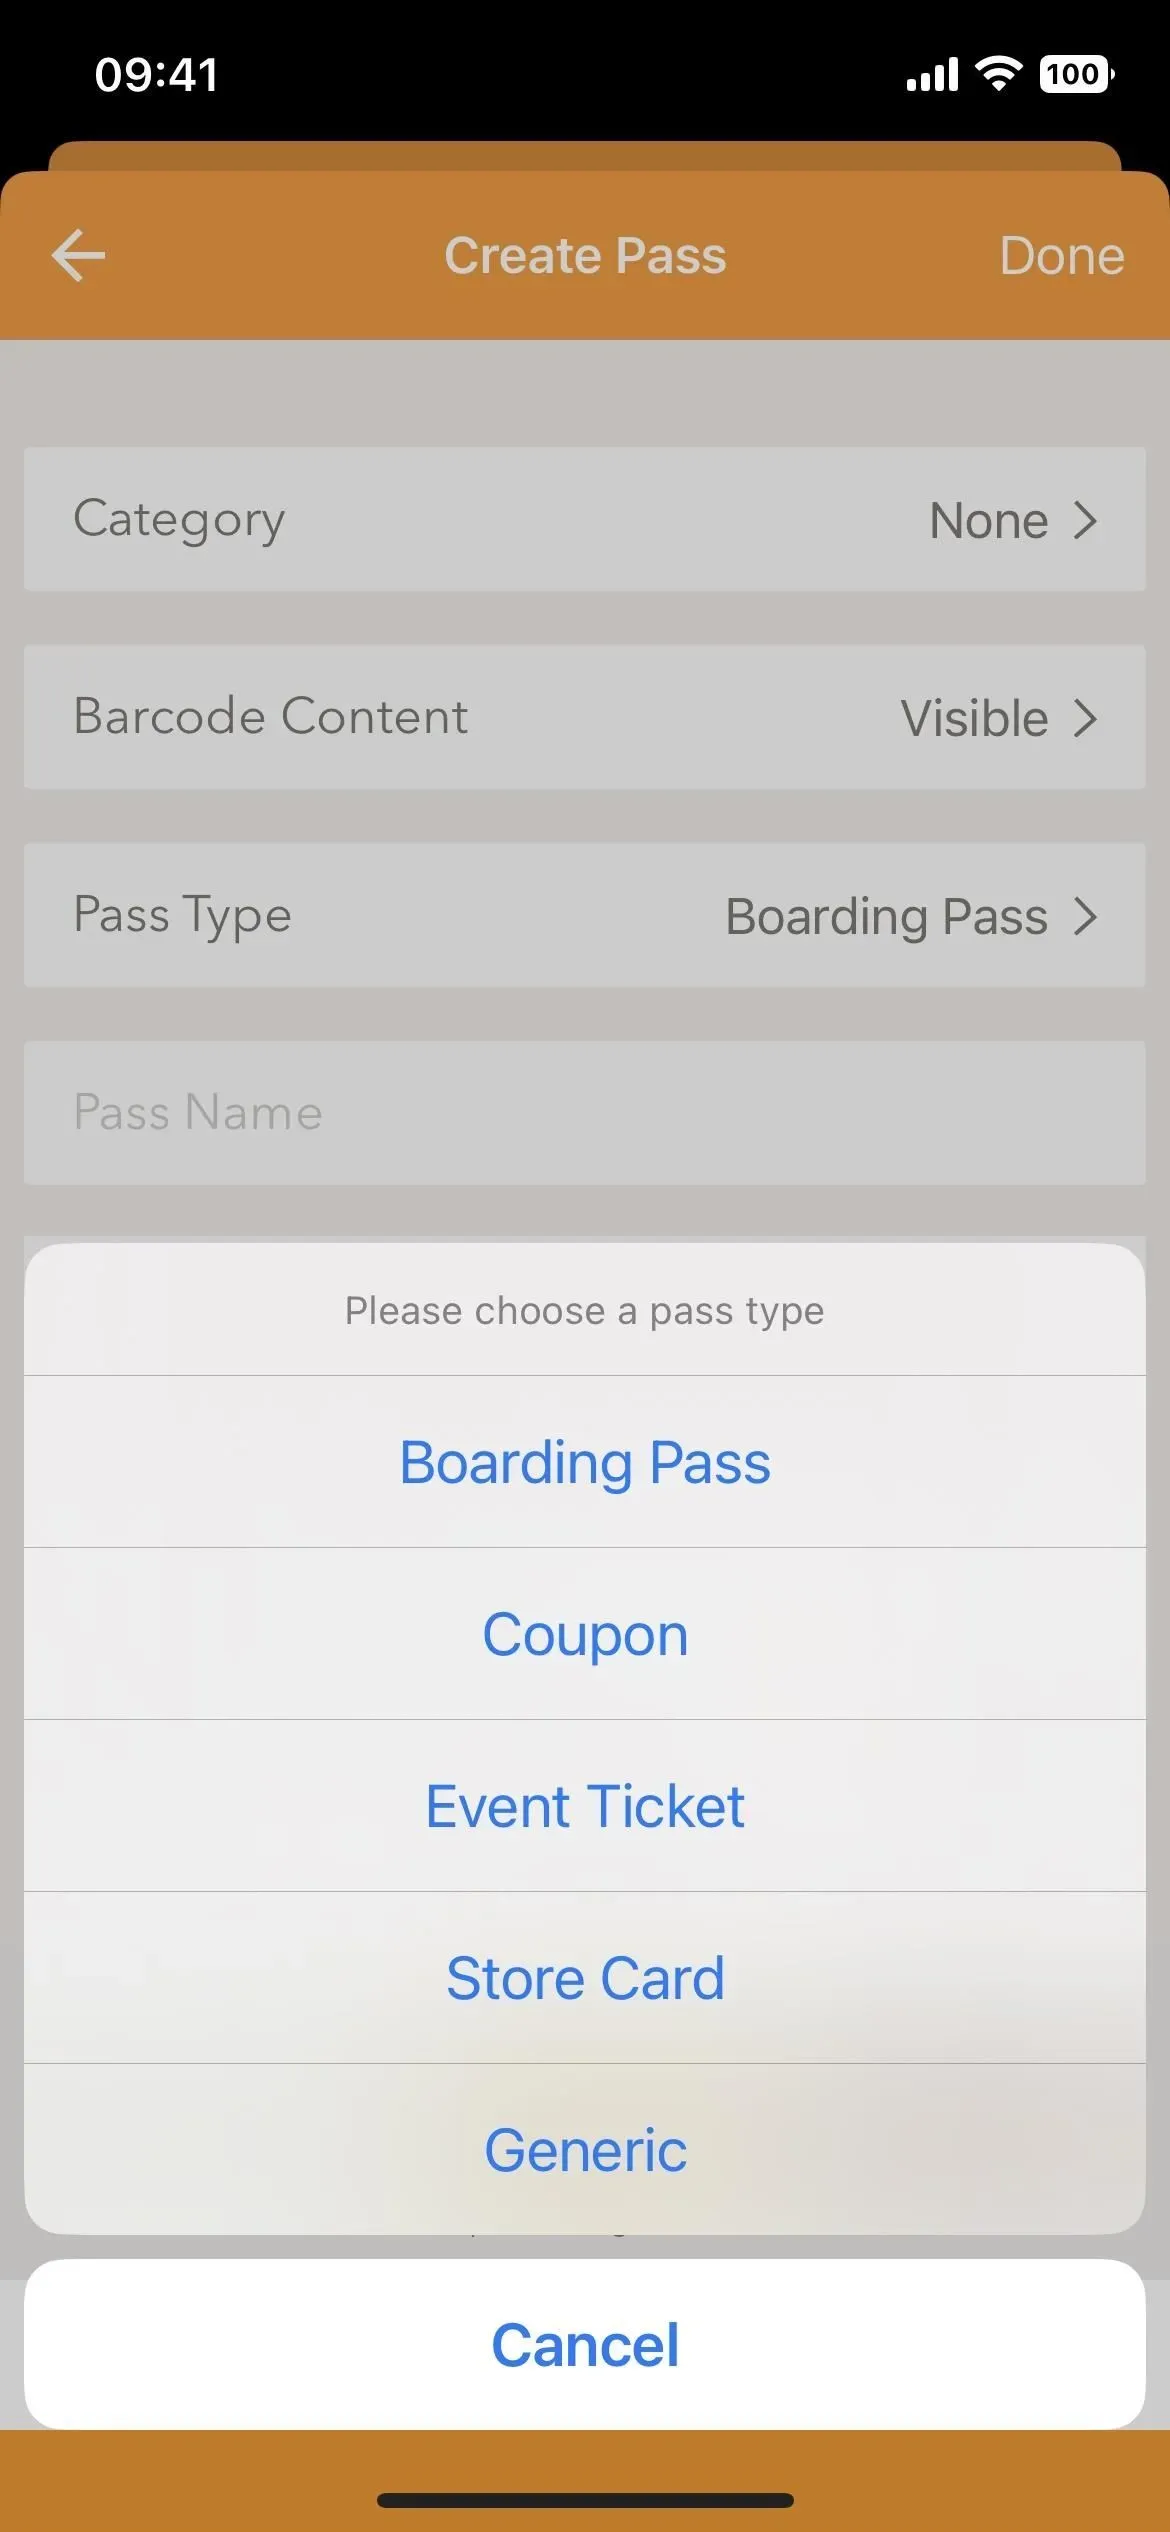
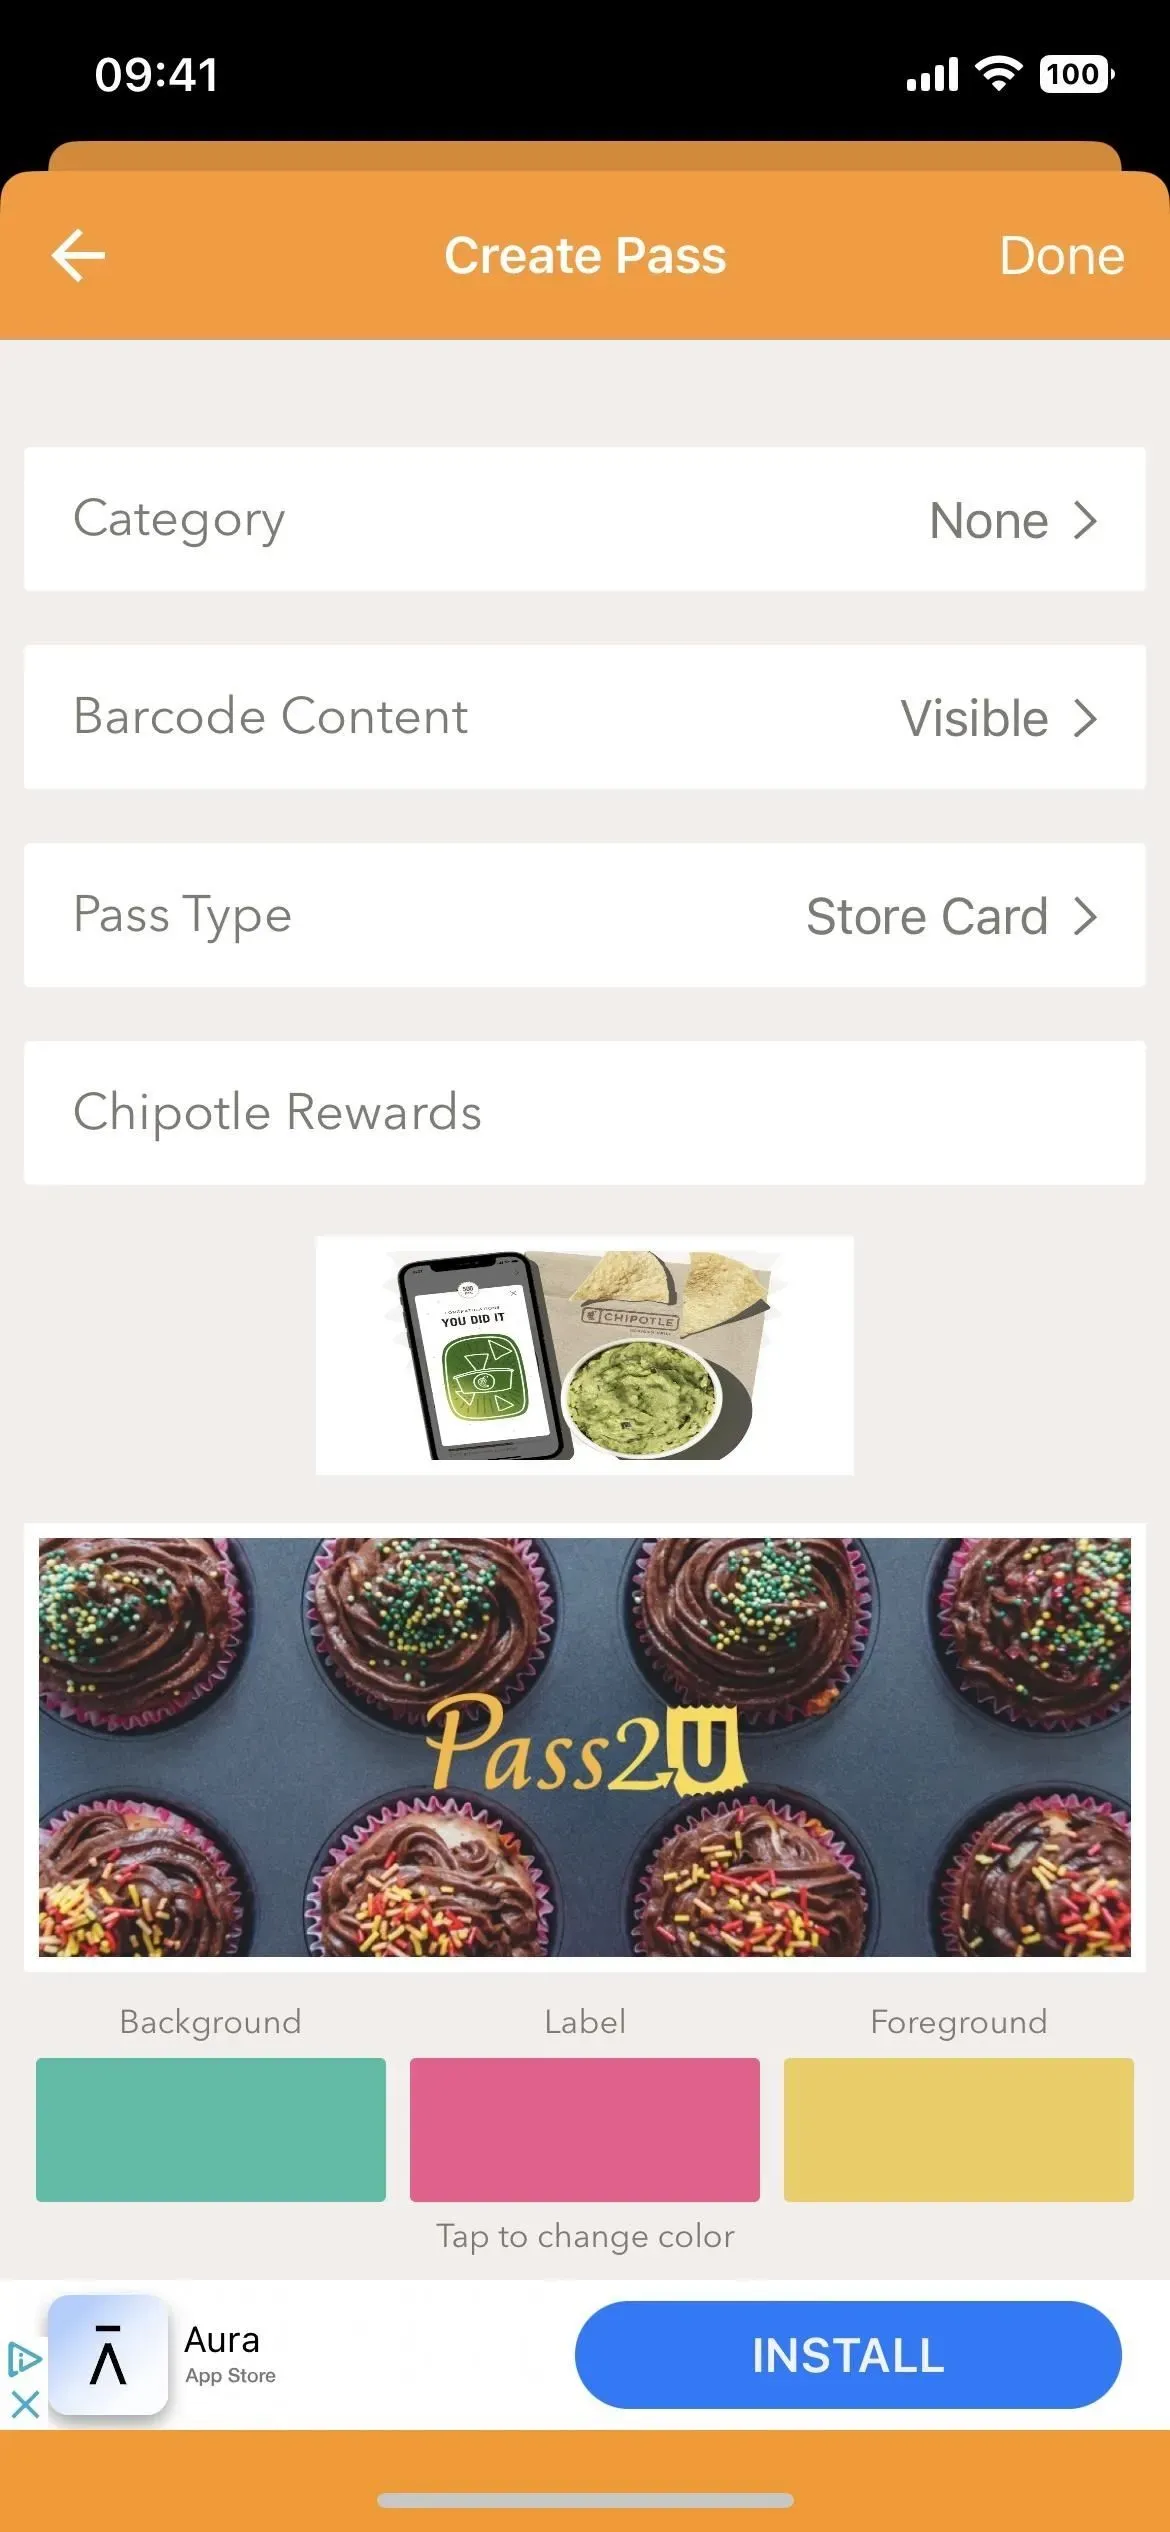
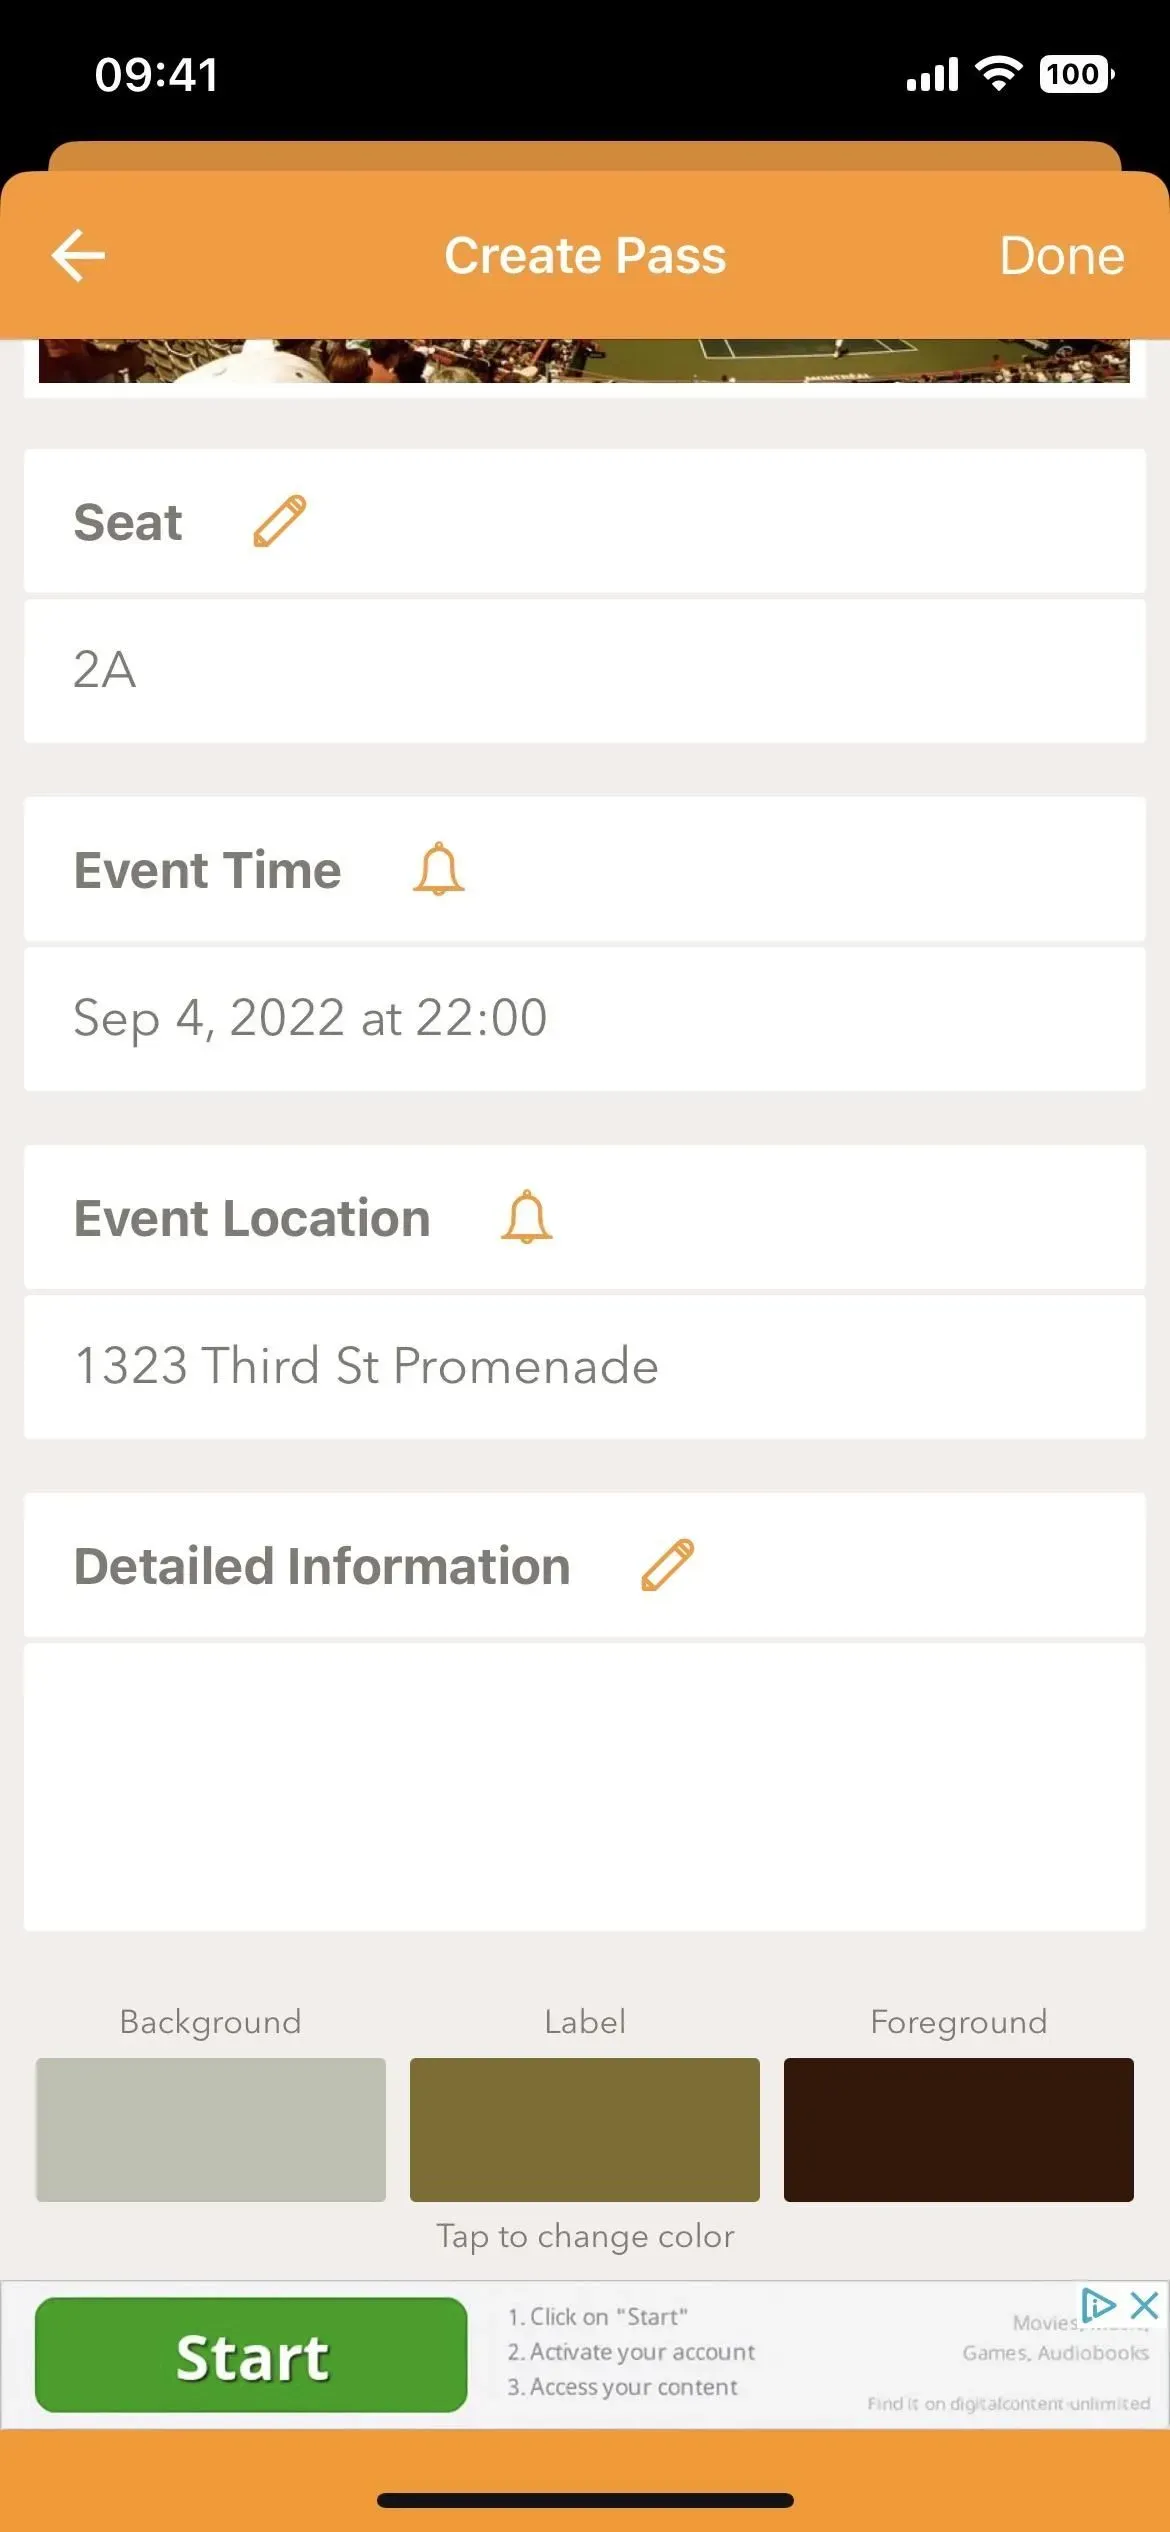
Select the type of pass (I have a store card) and enter a name for the pass. For the store card, you can also add your name, logo, address, and description. When you add a location, a map will appear where you can enter an address or pin its location. You can even change the color of the pass.
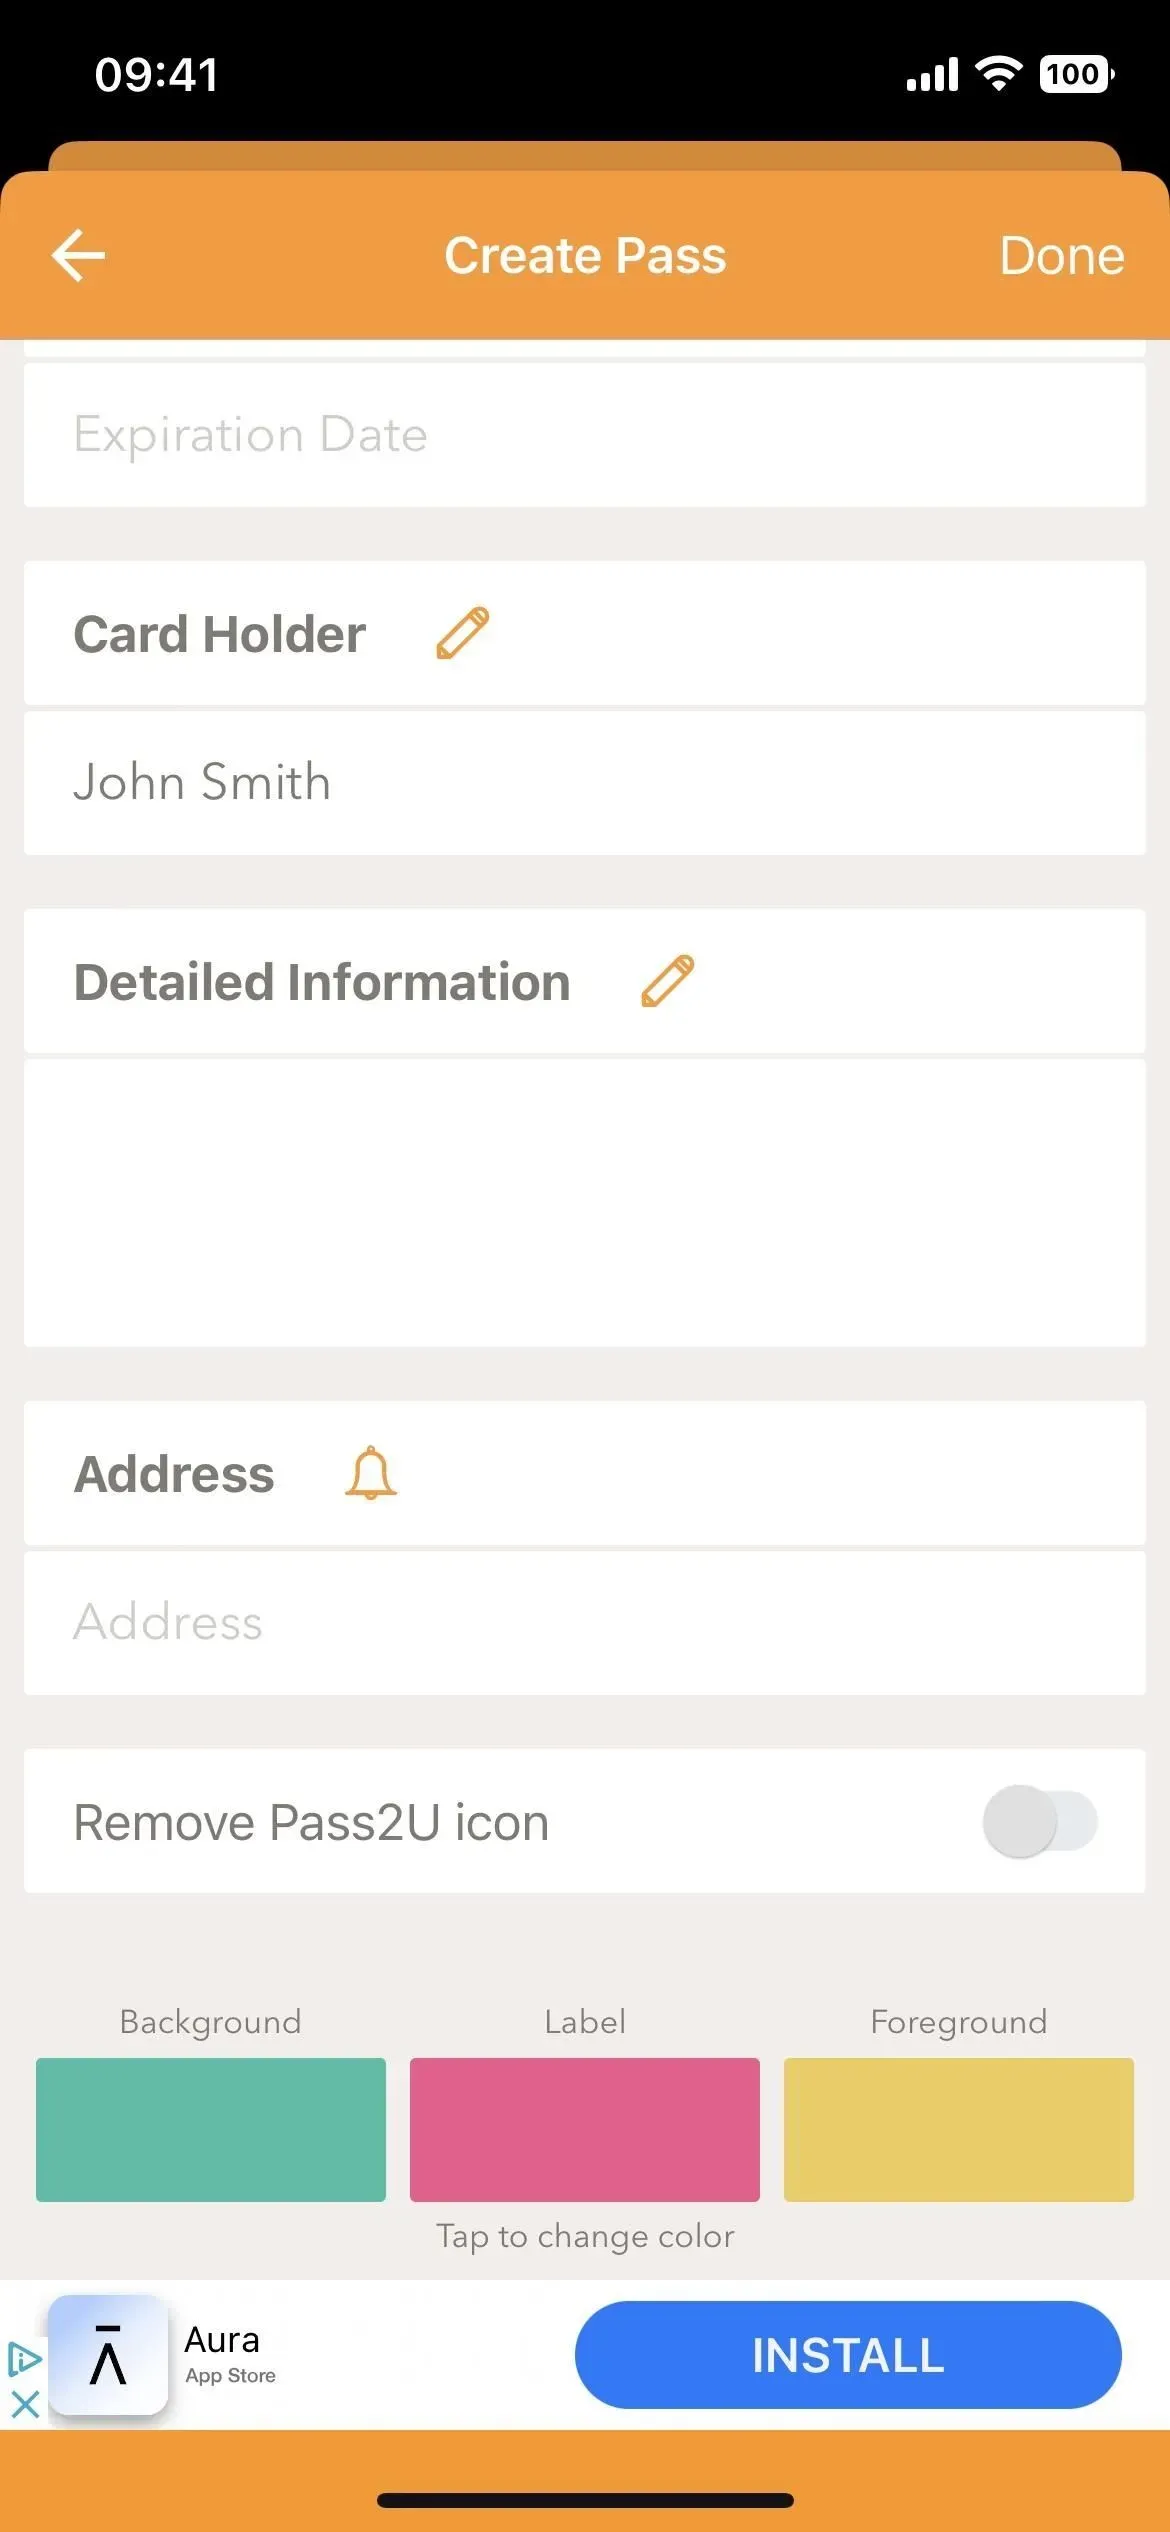
Click “Done”to create your pass and it should ask you if you want to upload the data to create the template and the pass it requires for the pass, so click “Yes”.
It will show you a preview of your wallet card; click “Add”to add it. It will be instantly available in Apple Wallet and you can find it in your Pass2U pass list. When you click on it in Pass2U, the card will open in Apple Wallet.
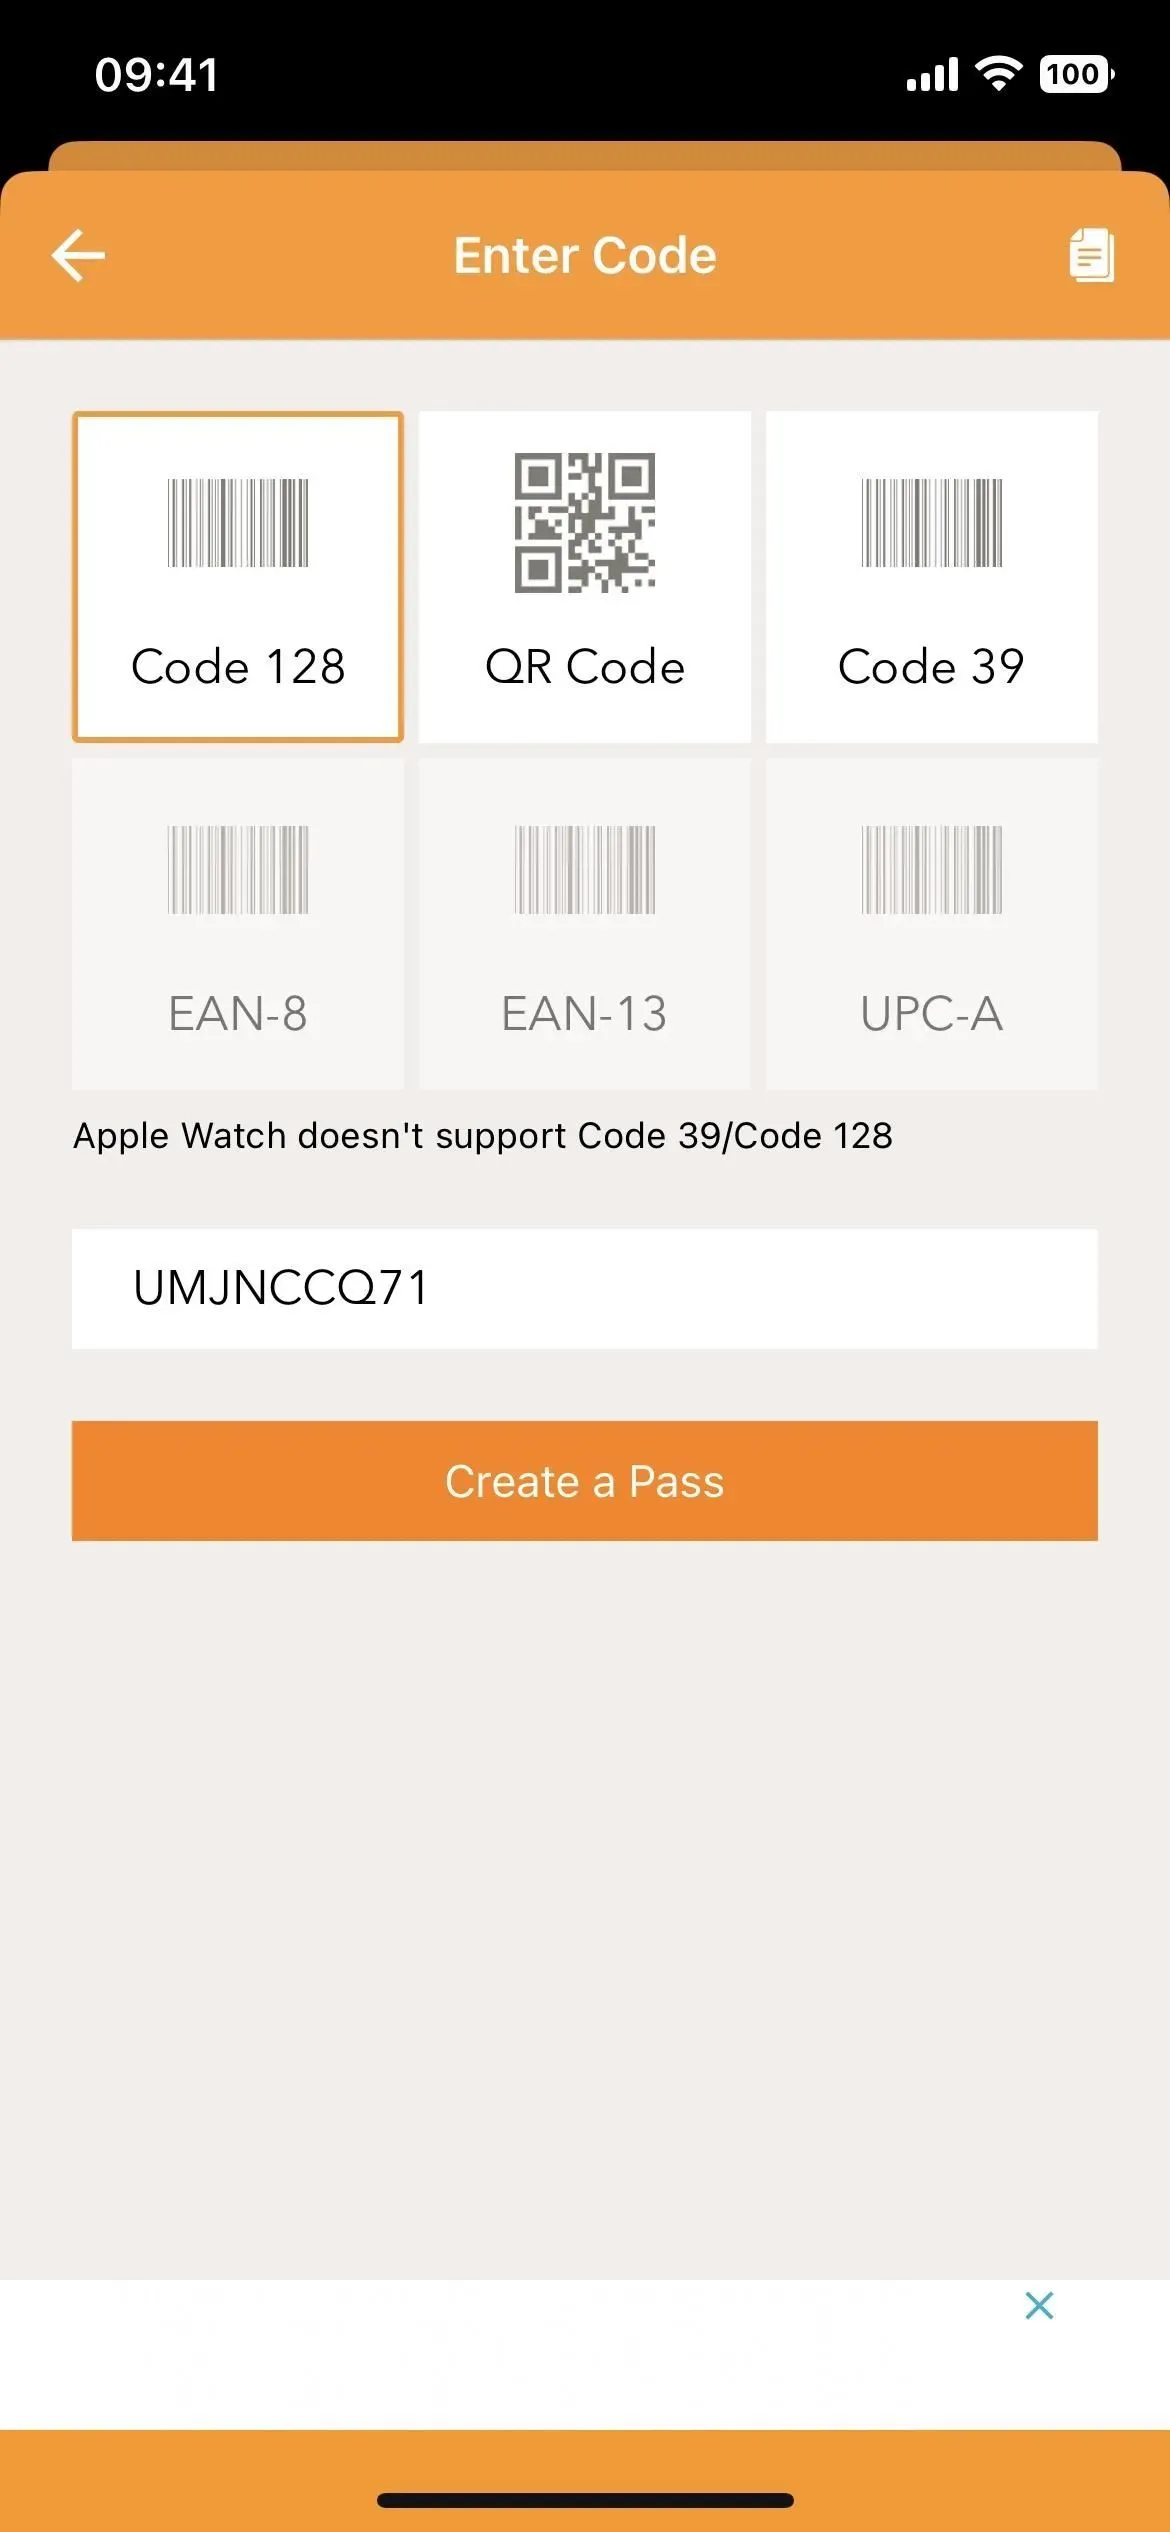
Option 3: enter the barcode on the card
If you are unable to scan a barcode for any reason, use this option to manually select the type of barcode you wish to add and enter the number below the barcode on your physical or online card or pass.
Select the correct type of barcode: Code 128 (the most common barcodes), QR Code or Code 39. Enter the code number and click Create Pass. Select the type of pass (I have an event ticket) and enter a name for the pass.
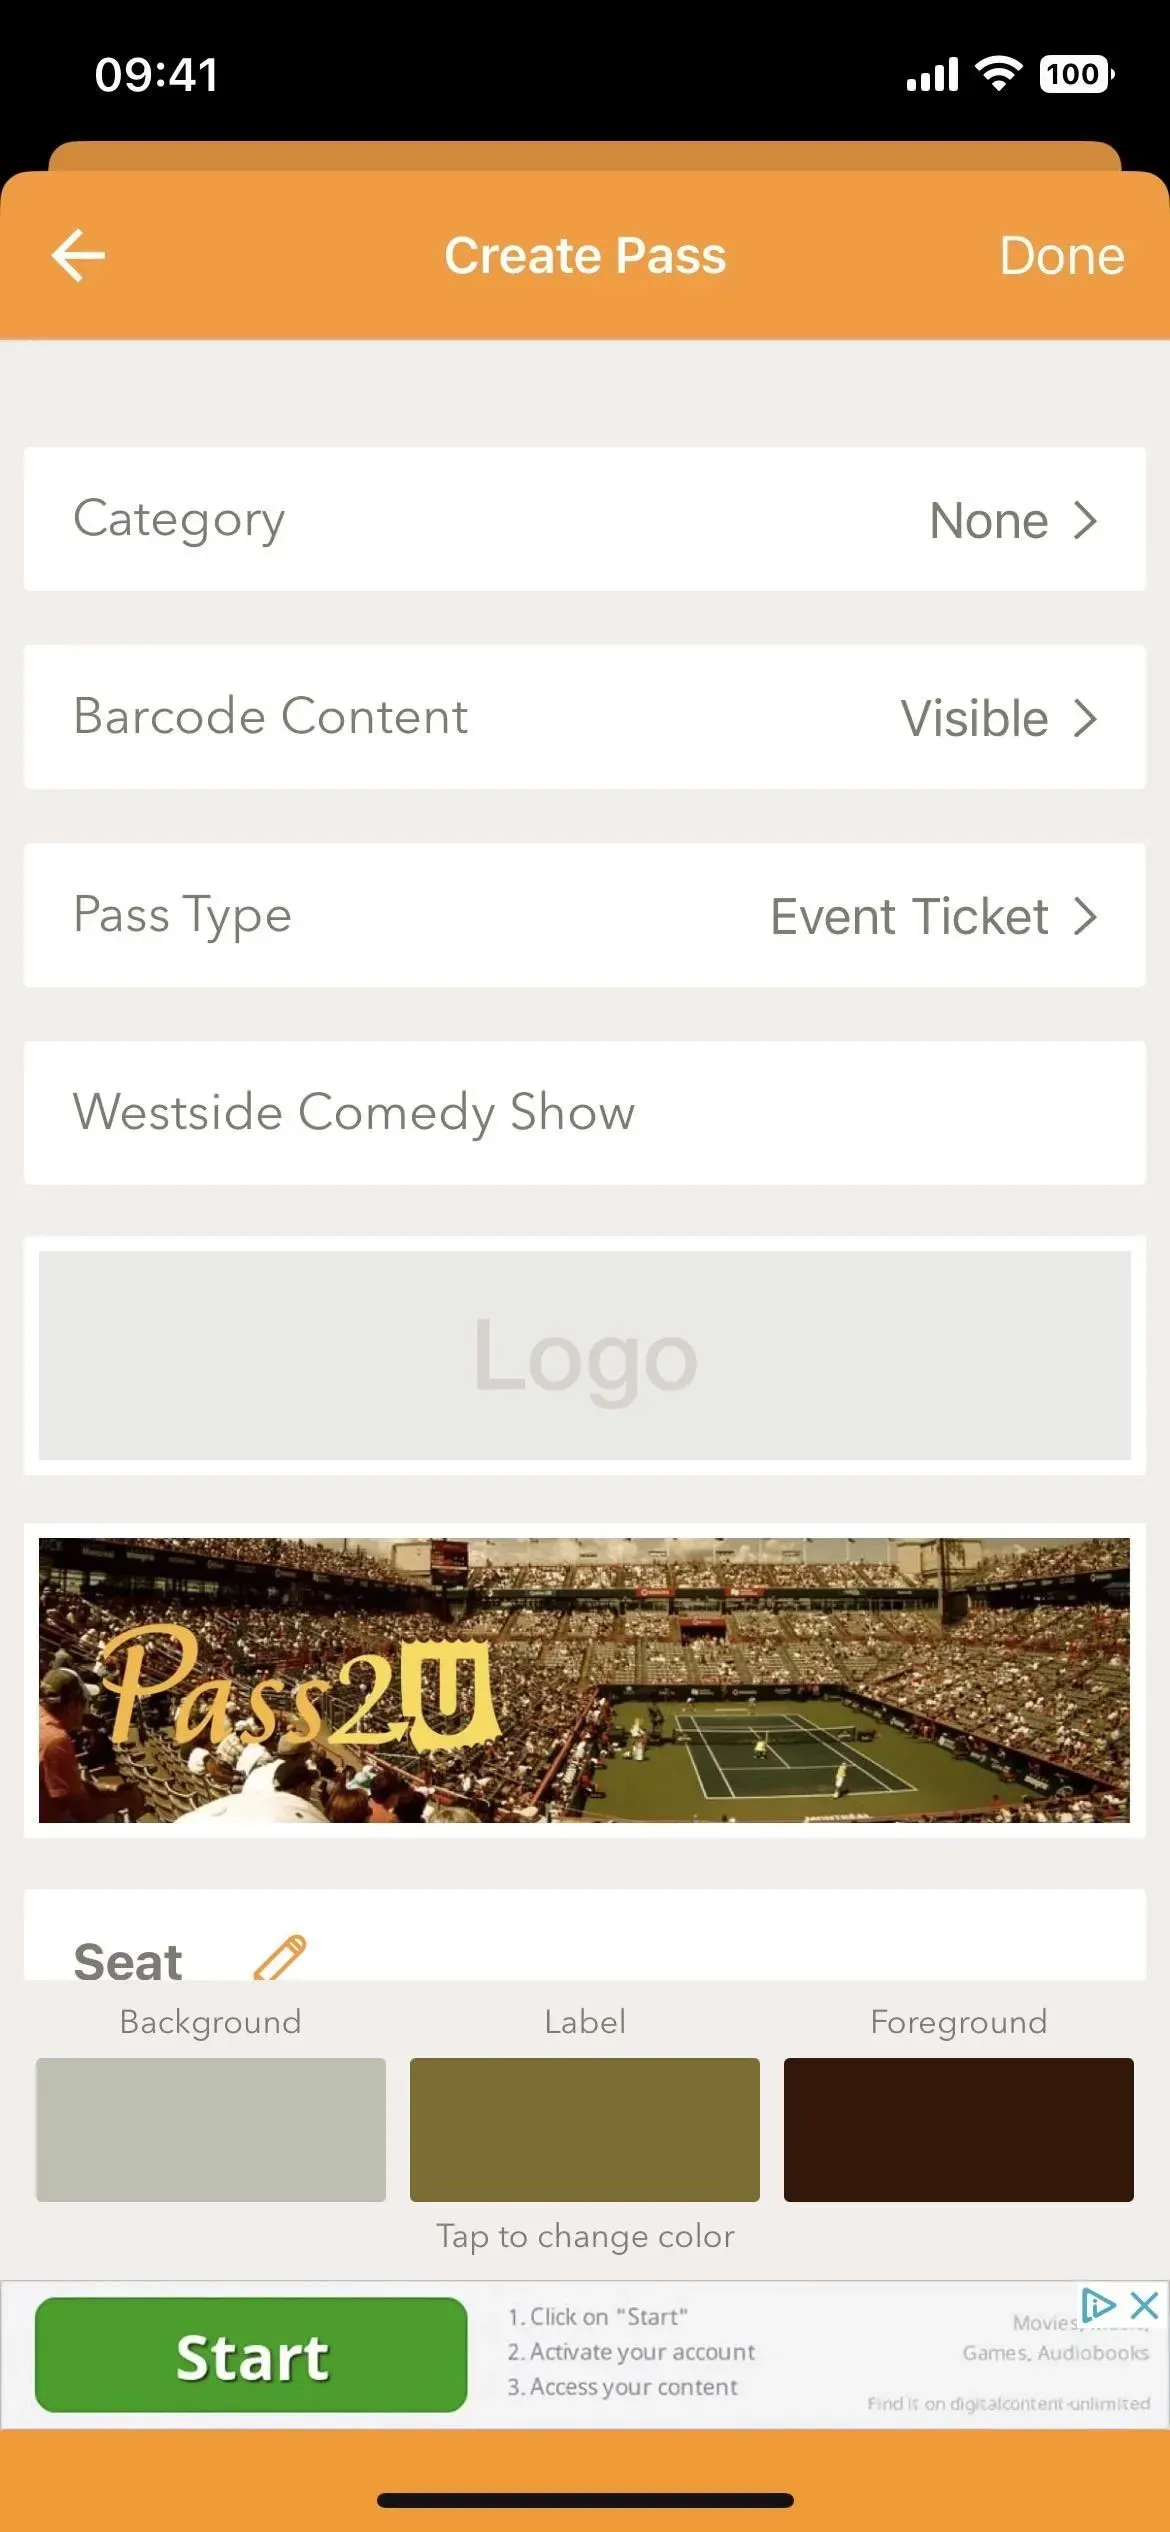
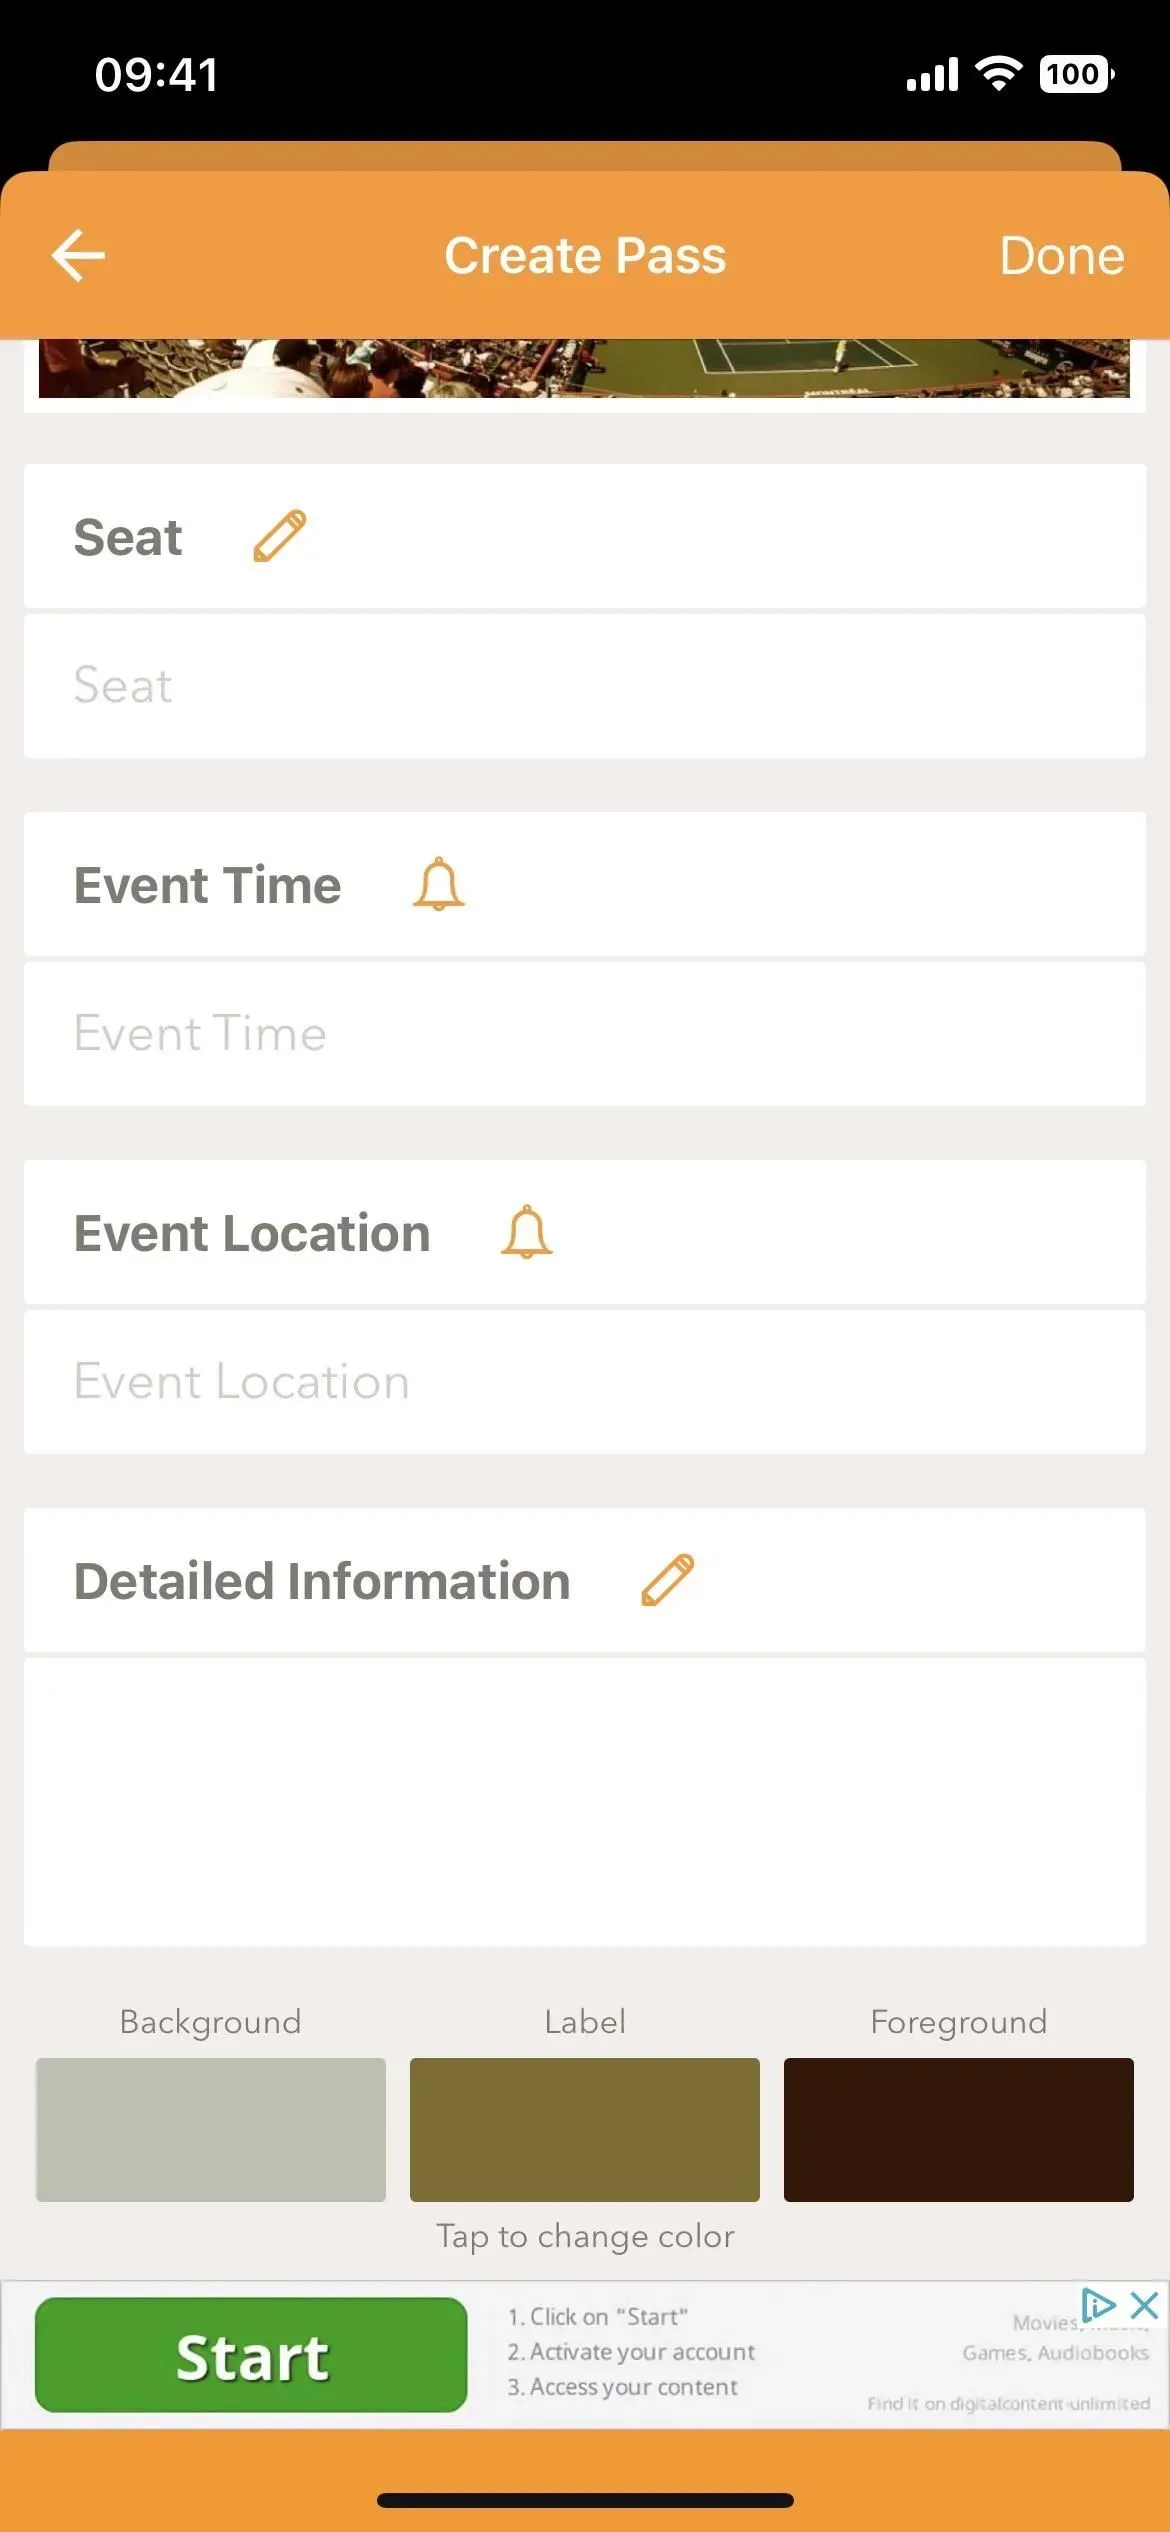
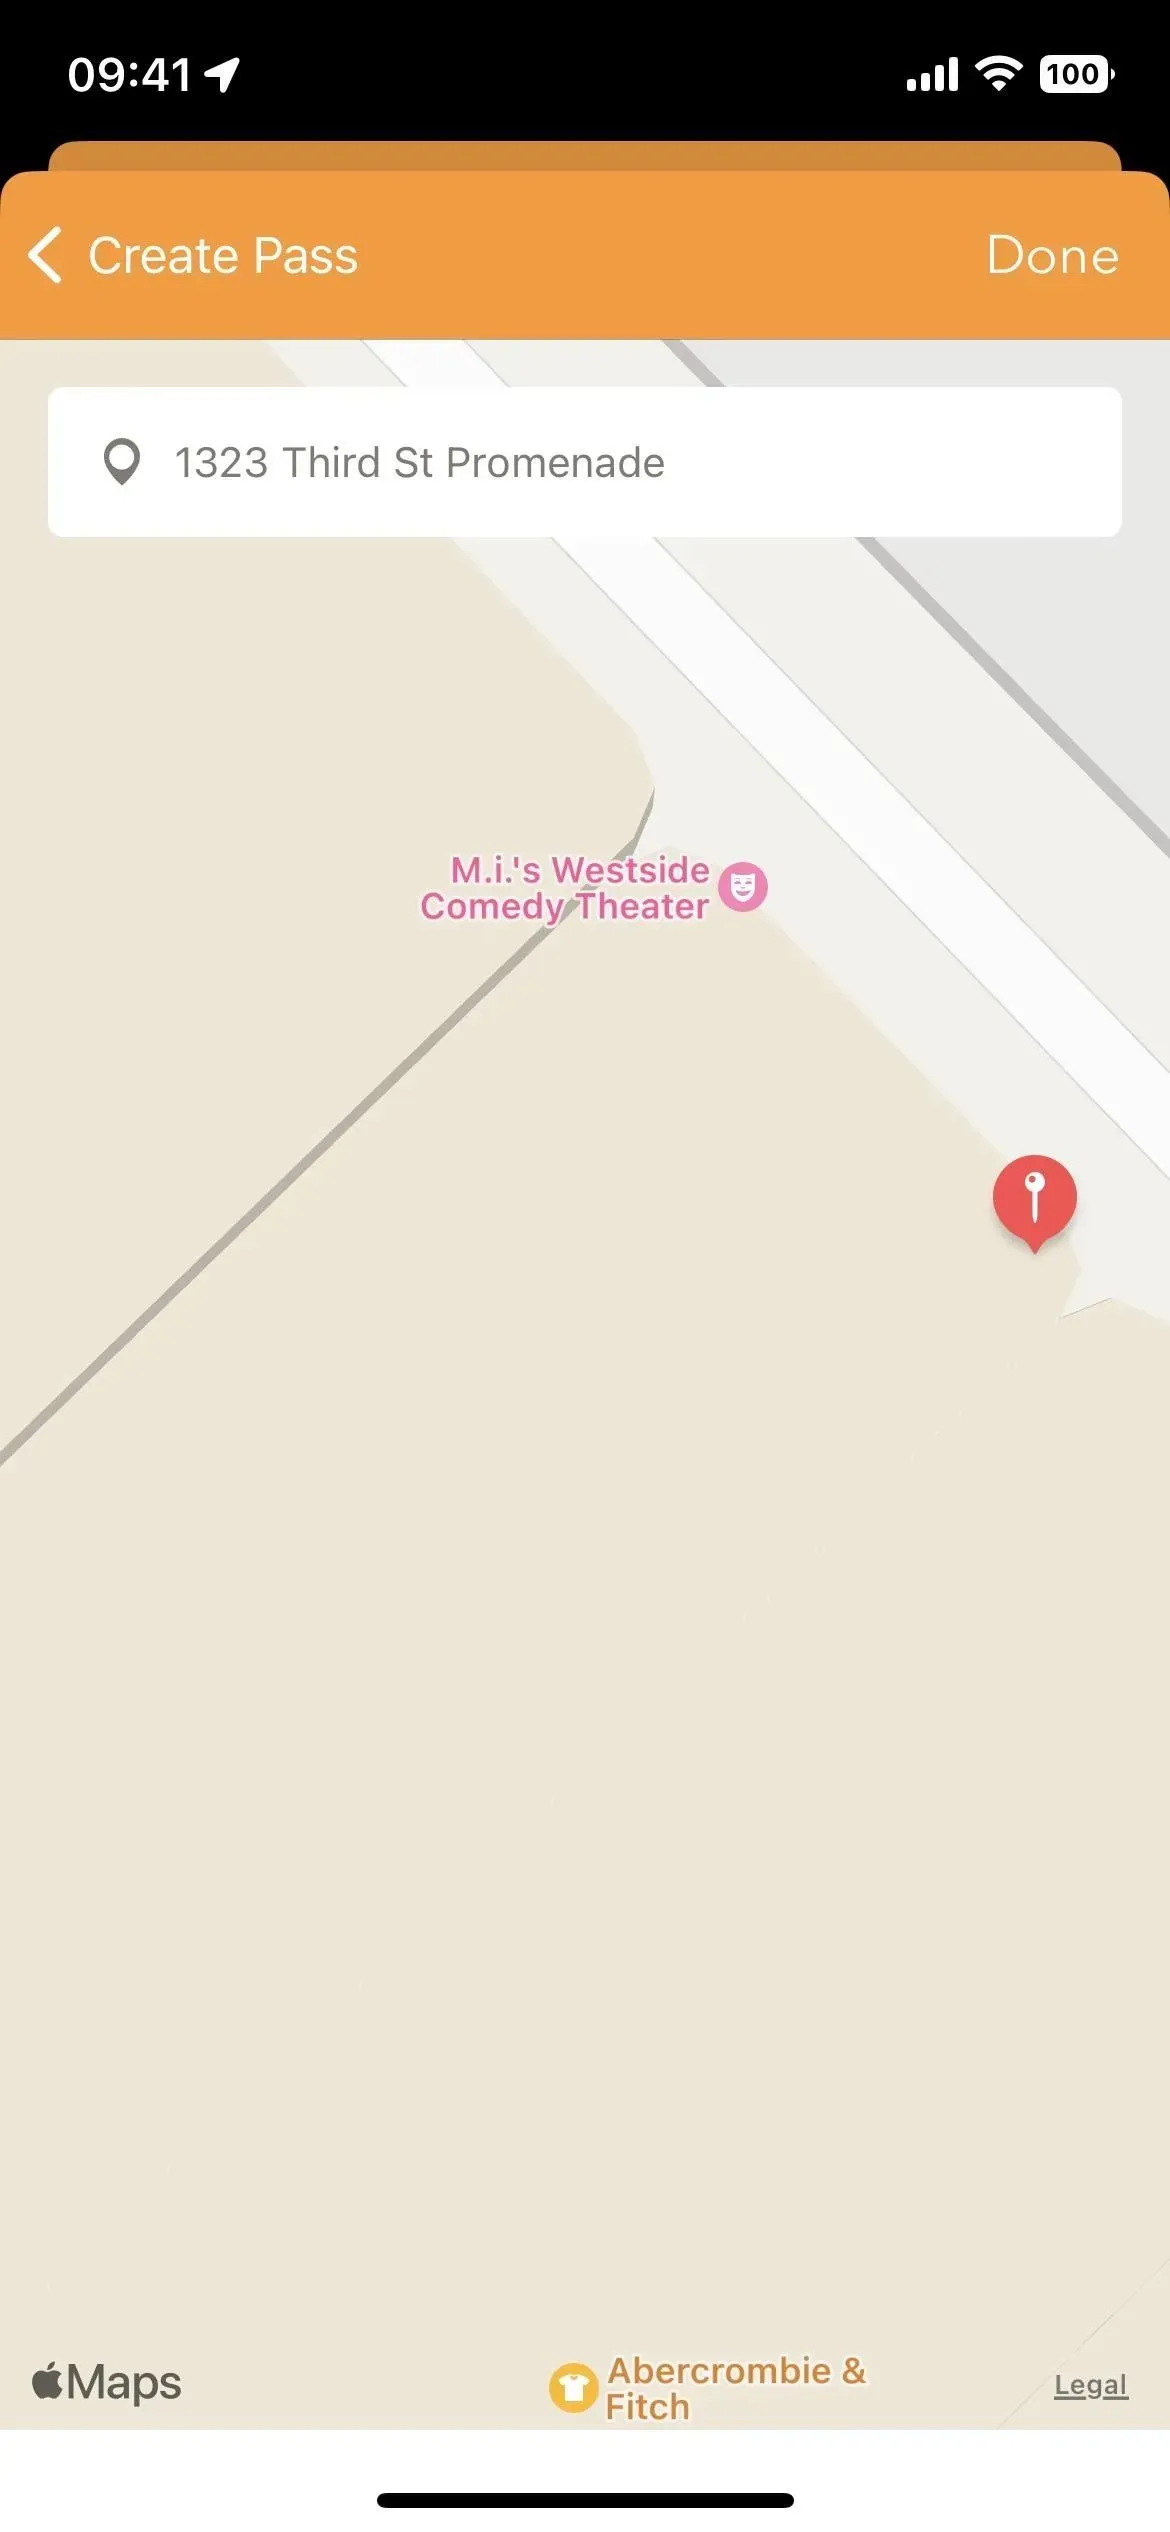
For an event, you can also add a logo, place, time, place, and other information. When you add a location, a map will appear where you can enter an address or pin its location. The address will be displayed on your badge as a convenient reminder.
Click “Done”to create your pass and it should ask you if you want to upload the data to create the template and the pass it requires for the pass, so click “Yes”.
It will show you a preview of your wallet card; click “Add”to add it. It will be instantly available in Apple Wallet and you can find it in your Pass2U pass list. When you click on it in Pass2U, the card will open in Apple Wallet.
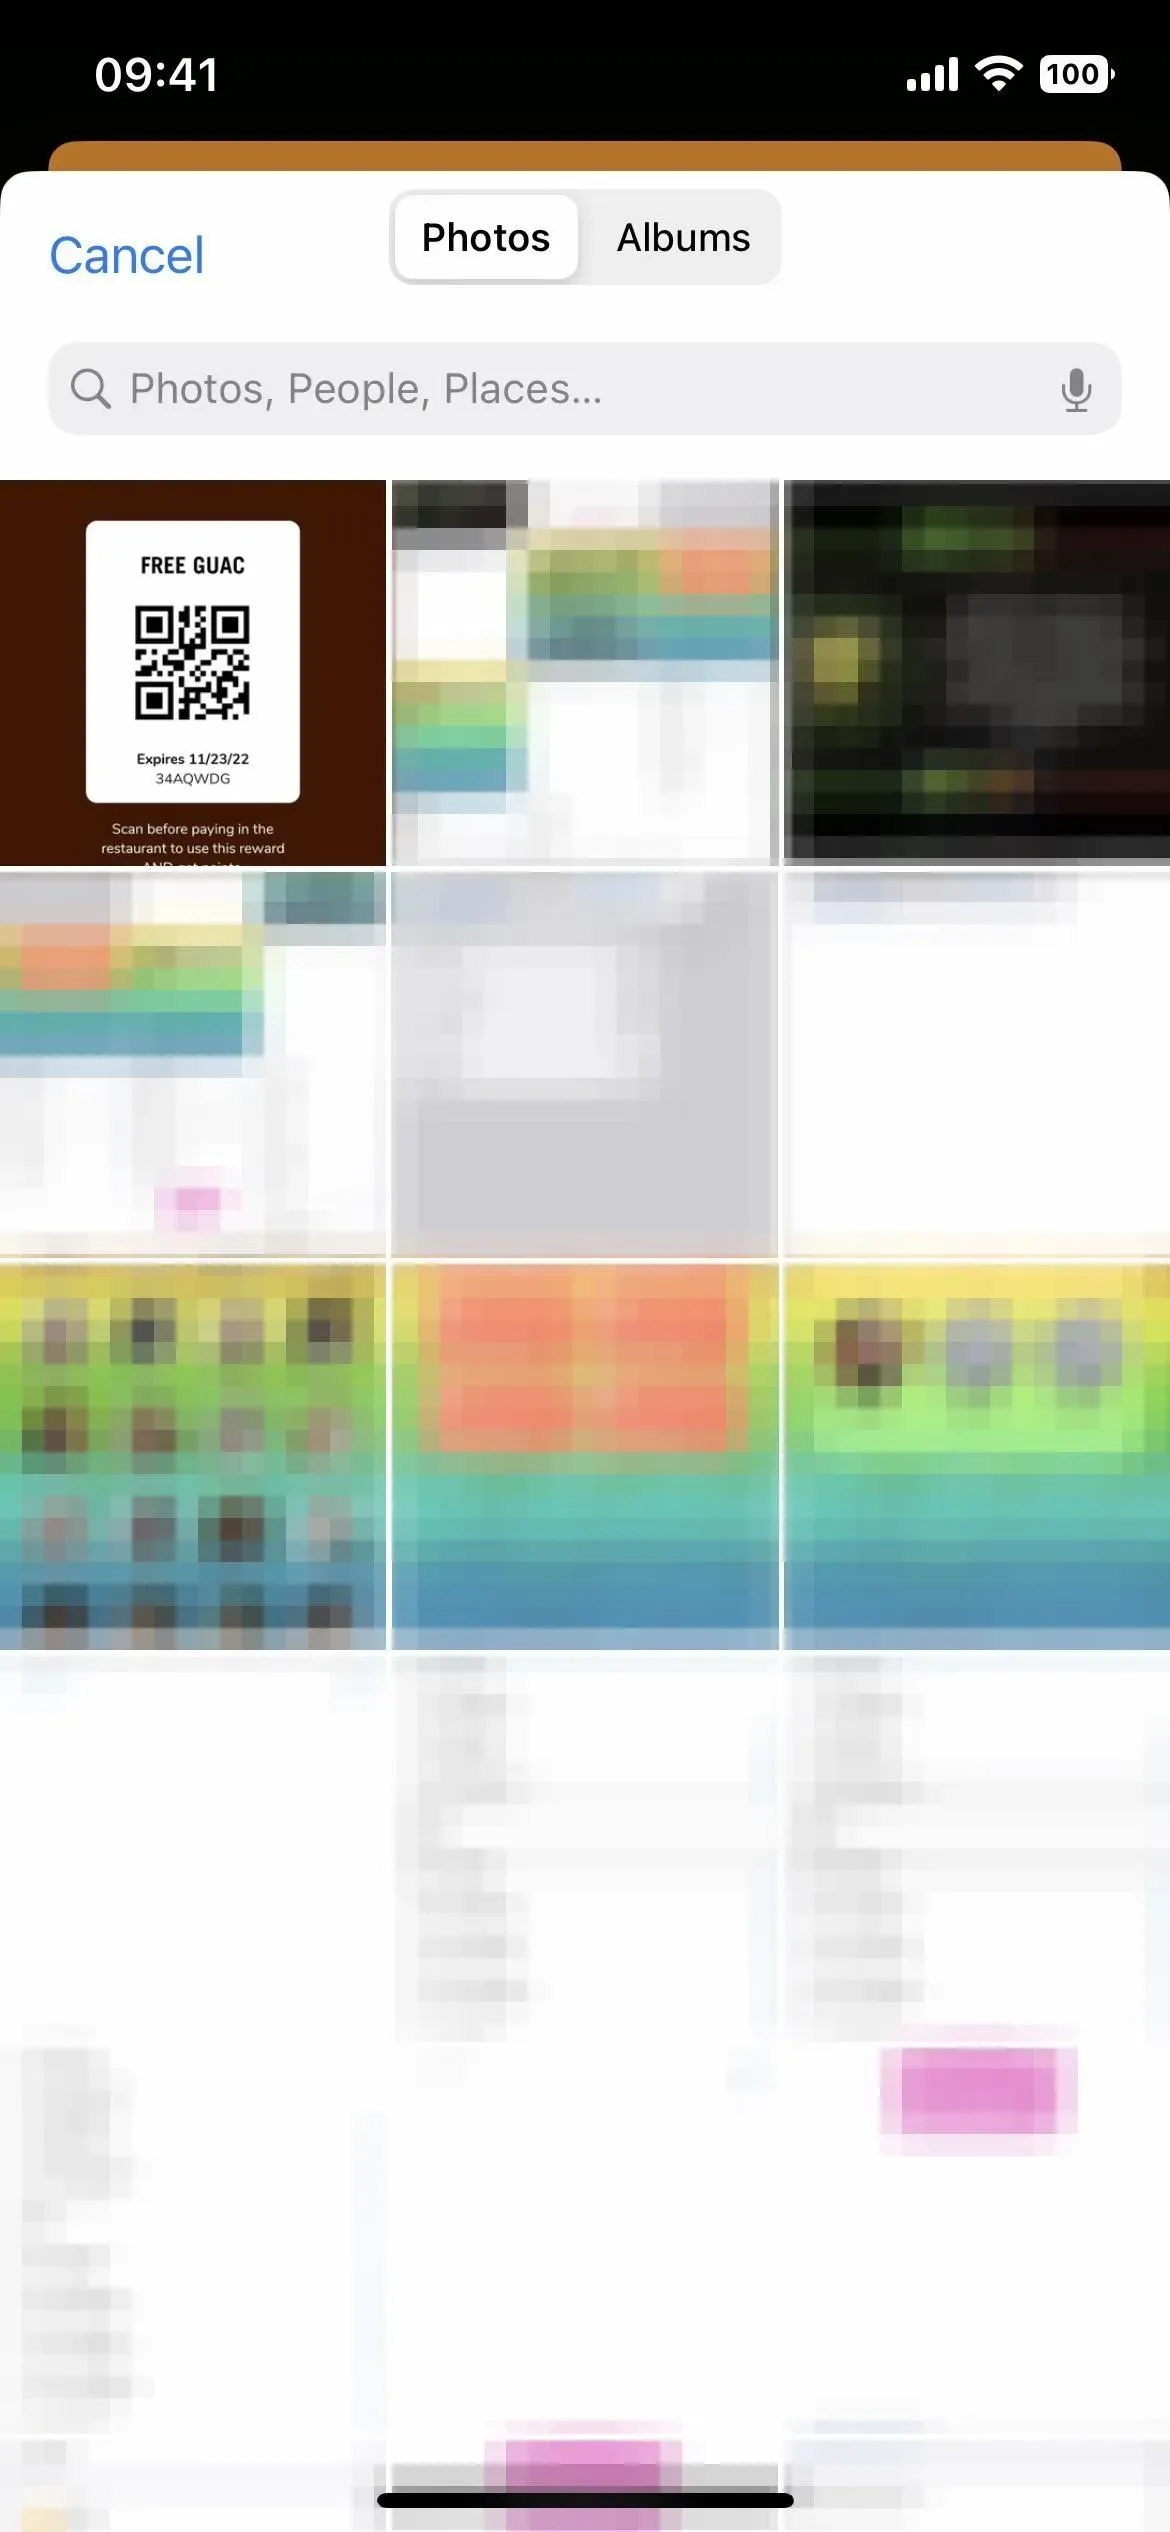
Option 4: get a barcode on a photo
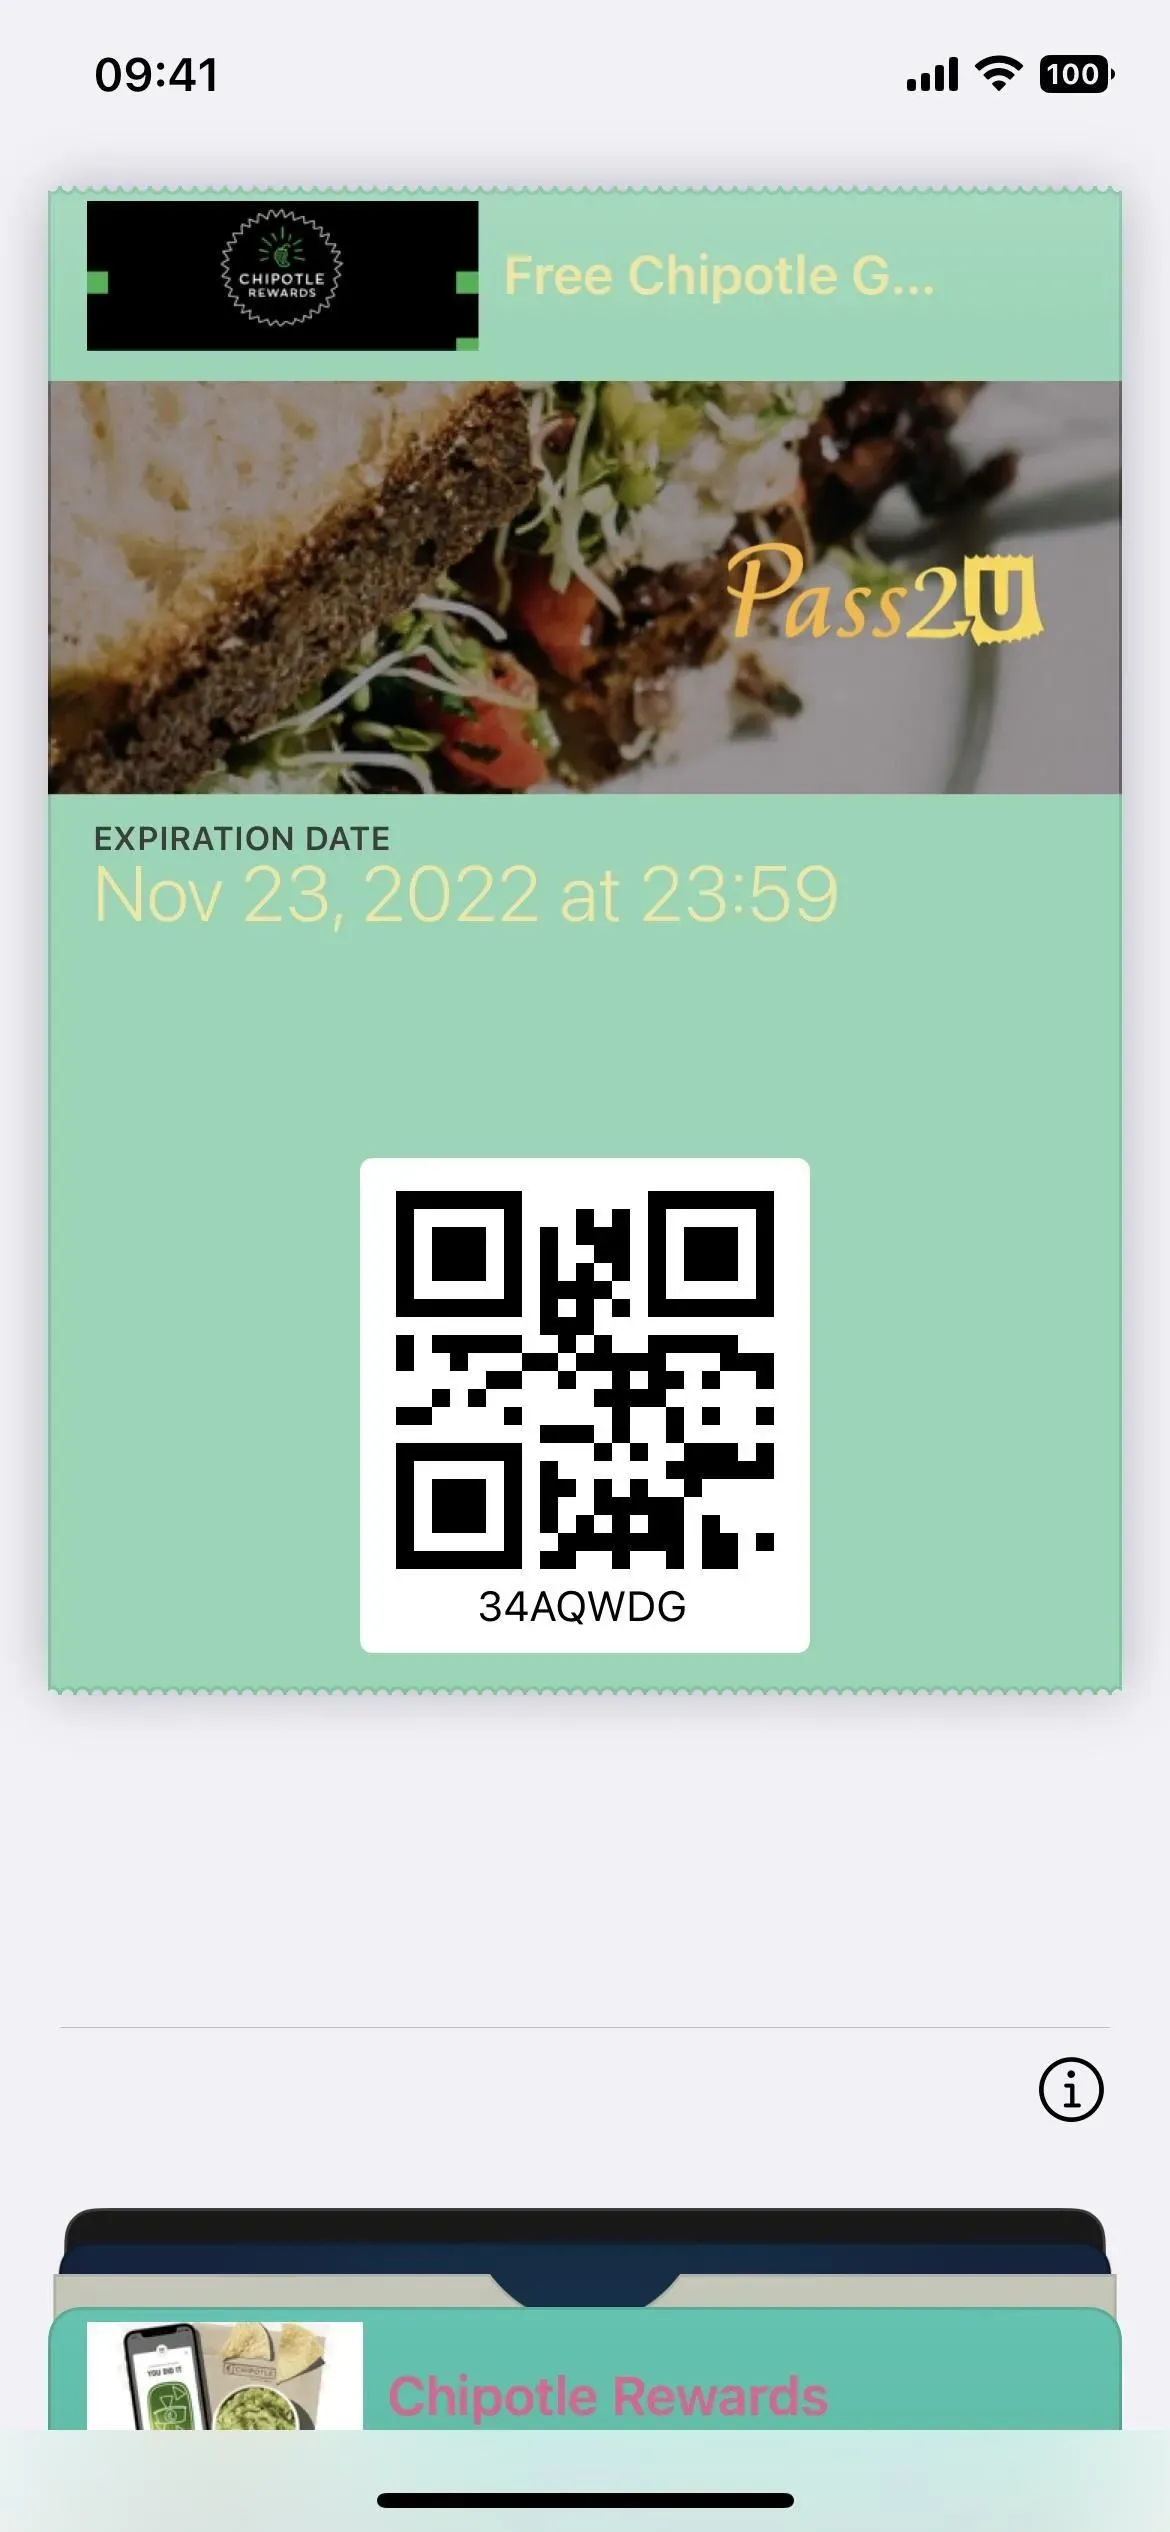
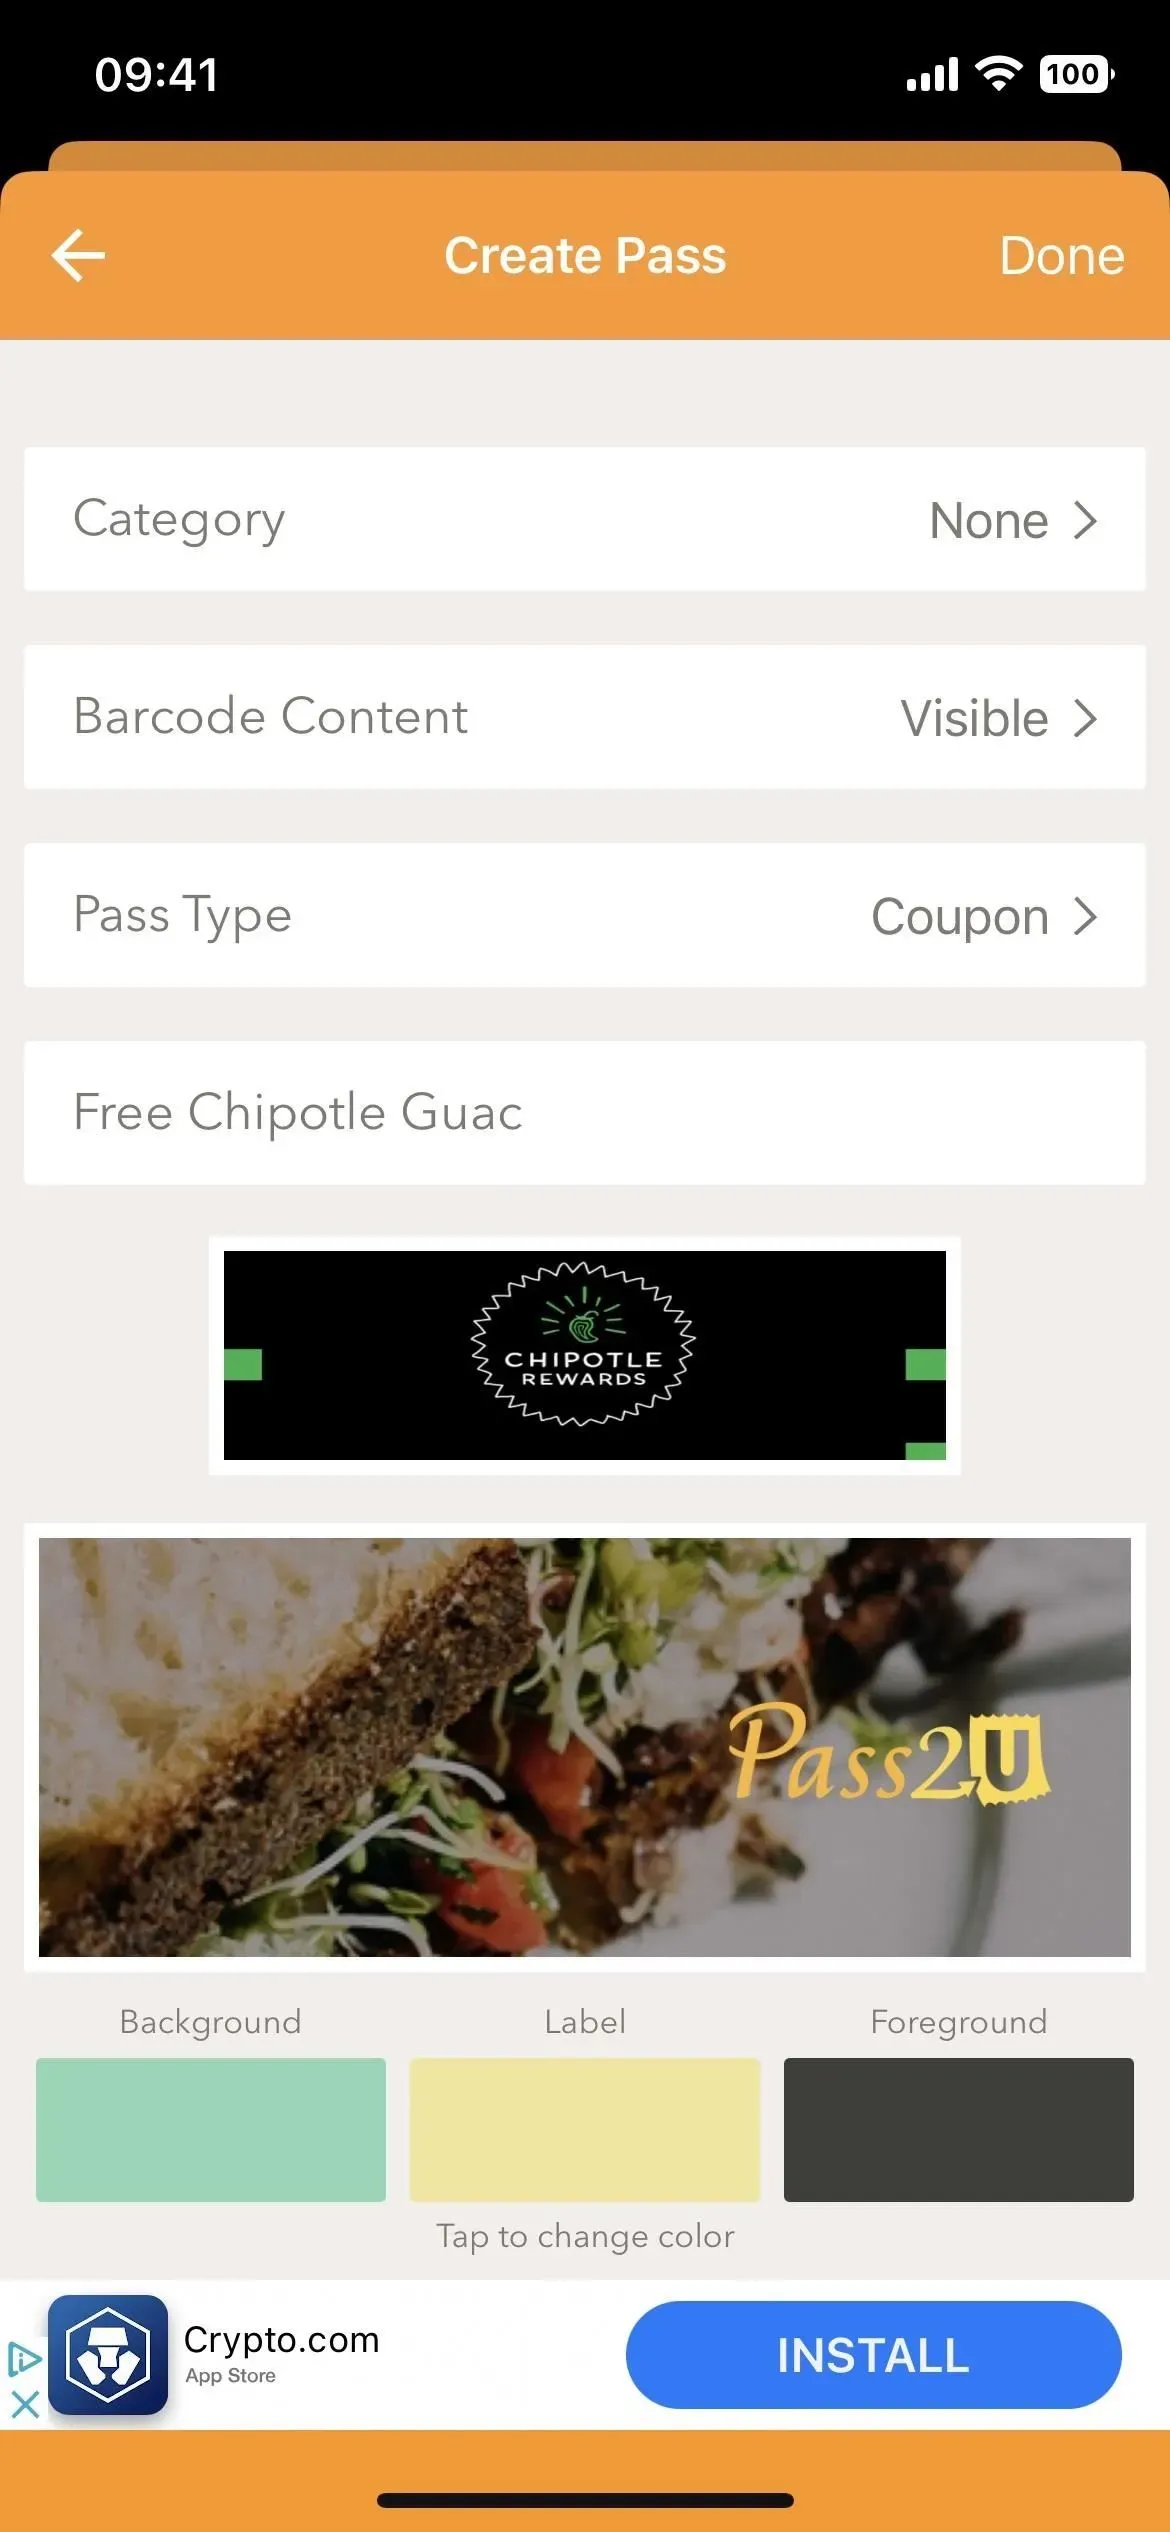
Your last option is to scan a barcode from a screenshot in your iPhone’s Photo Library. This is useful for maps, passes, and tickets that only exist online. Find and select a screenshot in your photos and the app will scan it and recognize the barcode. Click “Confirm”to continue, select the type of pass (I have a coupon) and enter a name for the pass.

For a coupon, you can also add a logo, offer details, expiration date, description, or location. When you add a location, a map will appear where you can enter an address or pin its location. The address will be displayed on your badge as a convenient reminder.
Click “Done”to create your pass and it should ask you if you want to upload the data to create the template and the pass it requires for the pass, so click “Yes”.
It will show you a preview of your wallet card; click “Add”to add it. It will be instantly available in Apple Wallet and you can find it in your Pass2U pass list. When you click on it in Pass2U, the card will open in Apple Wallet.
Step 4: View Your New Cards/Cards in Apple Wallet
Each pass or card will be a separate pass or card in the Apple Wallet app. So when you double-click on the Home button or Side button to open Apple Wallet, or if you don’t have a shortcut enabled, open the Wallet app, you’ll see each pass or card as a separate card to choose from..