
iPhone XS, XR, and all later models, including the new iPhone 14 series, support multiple SIM cards. As a result, you can add/store up to 8 (or more) eSIMs on your iPhone (although only two will work at a time).
If you are currently using two or more SIMs on your iPhone, such as one for personal contacts, one for business, and one for international travel, then it becomes necessary to have filters.
Thankfully, you can now filter your texts according to SIM in the Messages app of iOS 16.
Filter messages by SIM card or phone number on iPhone
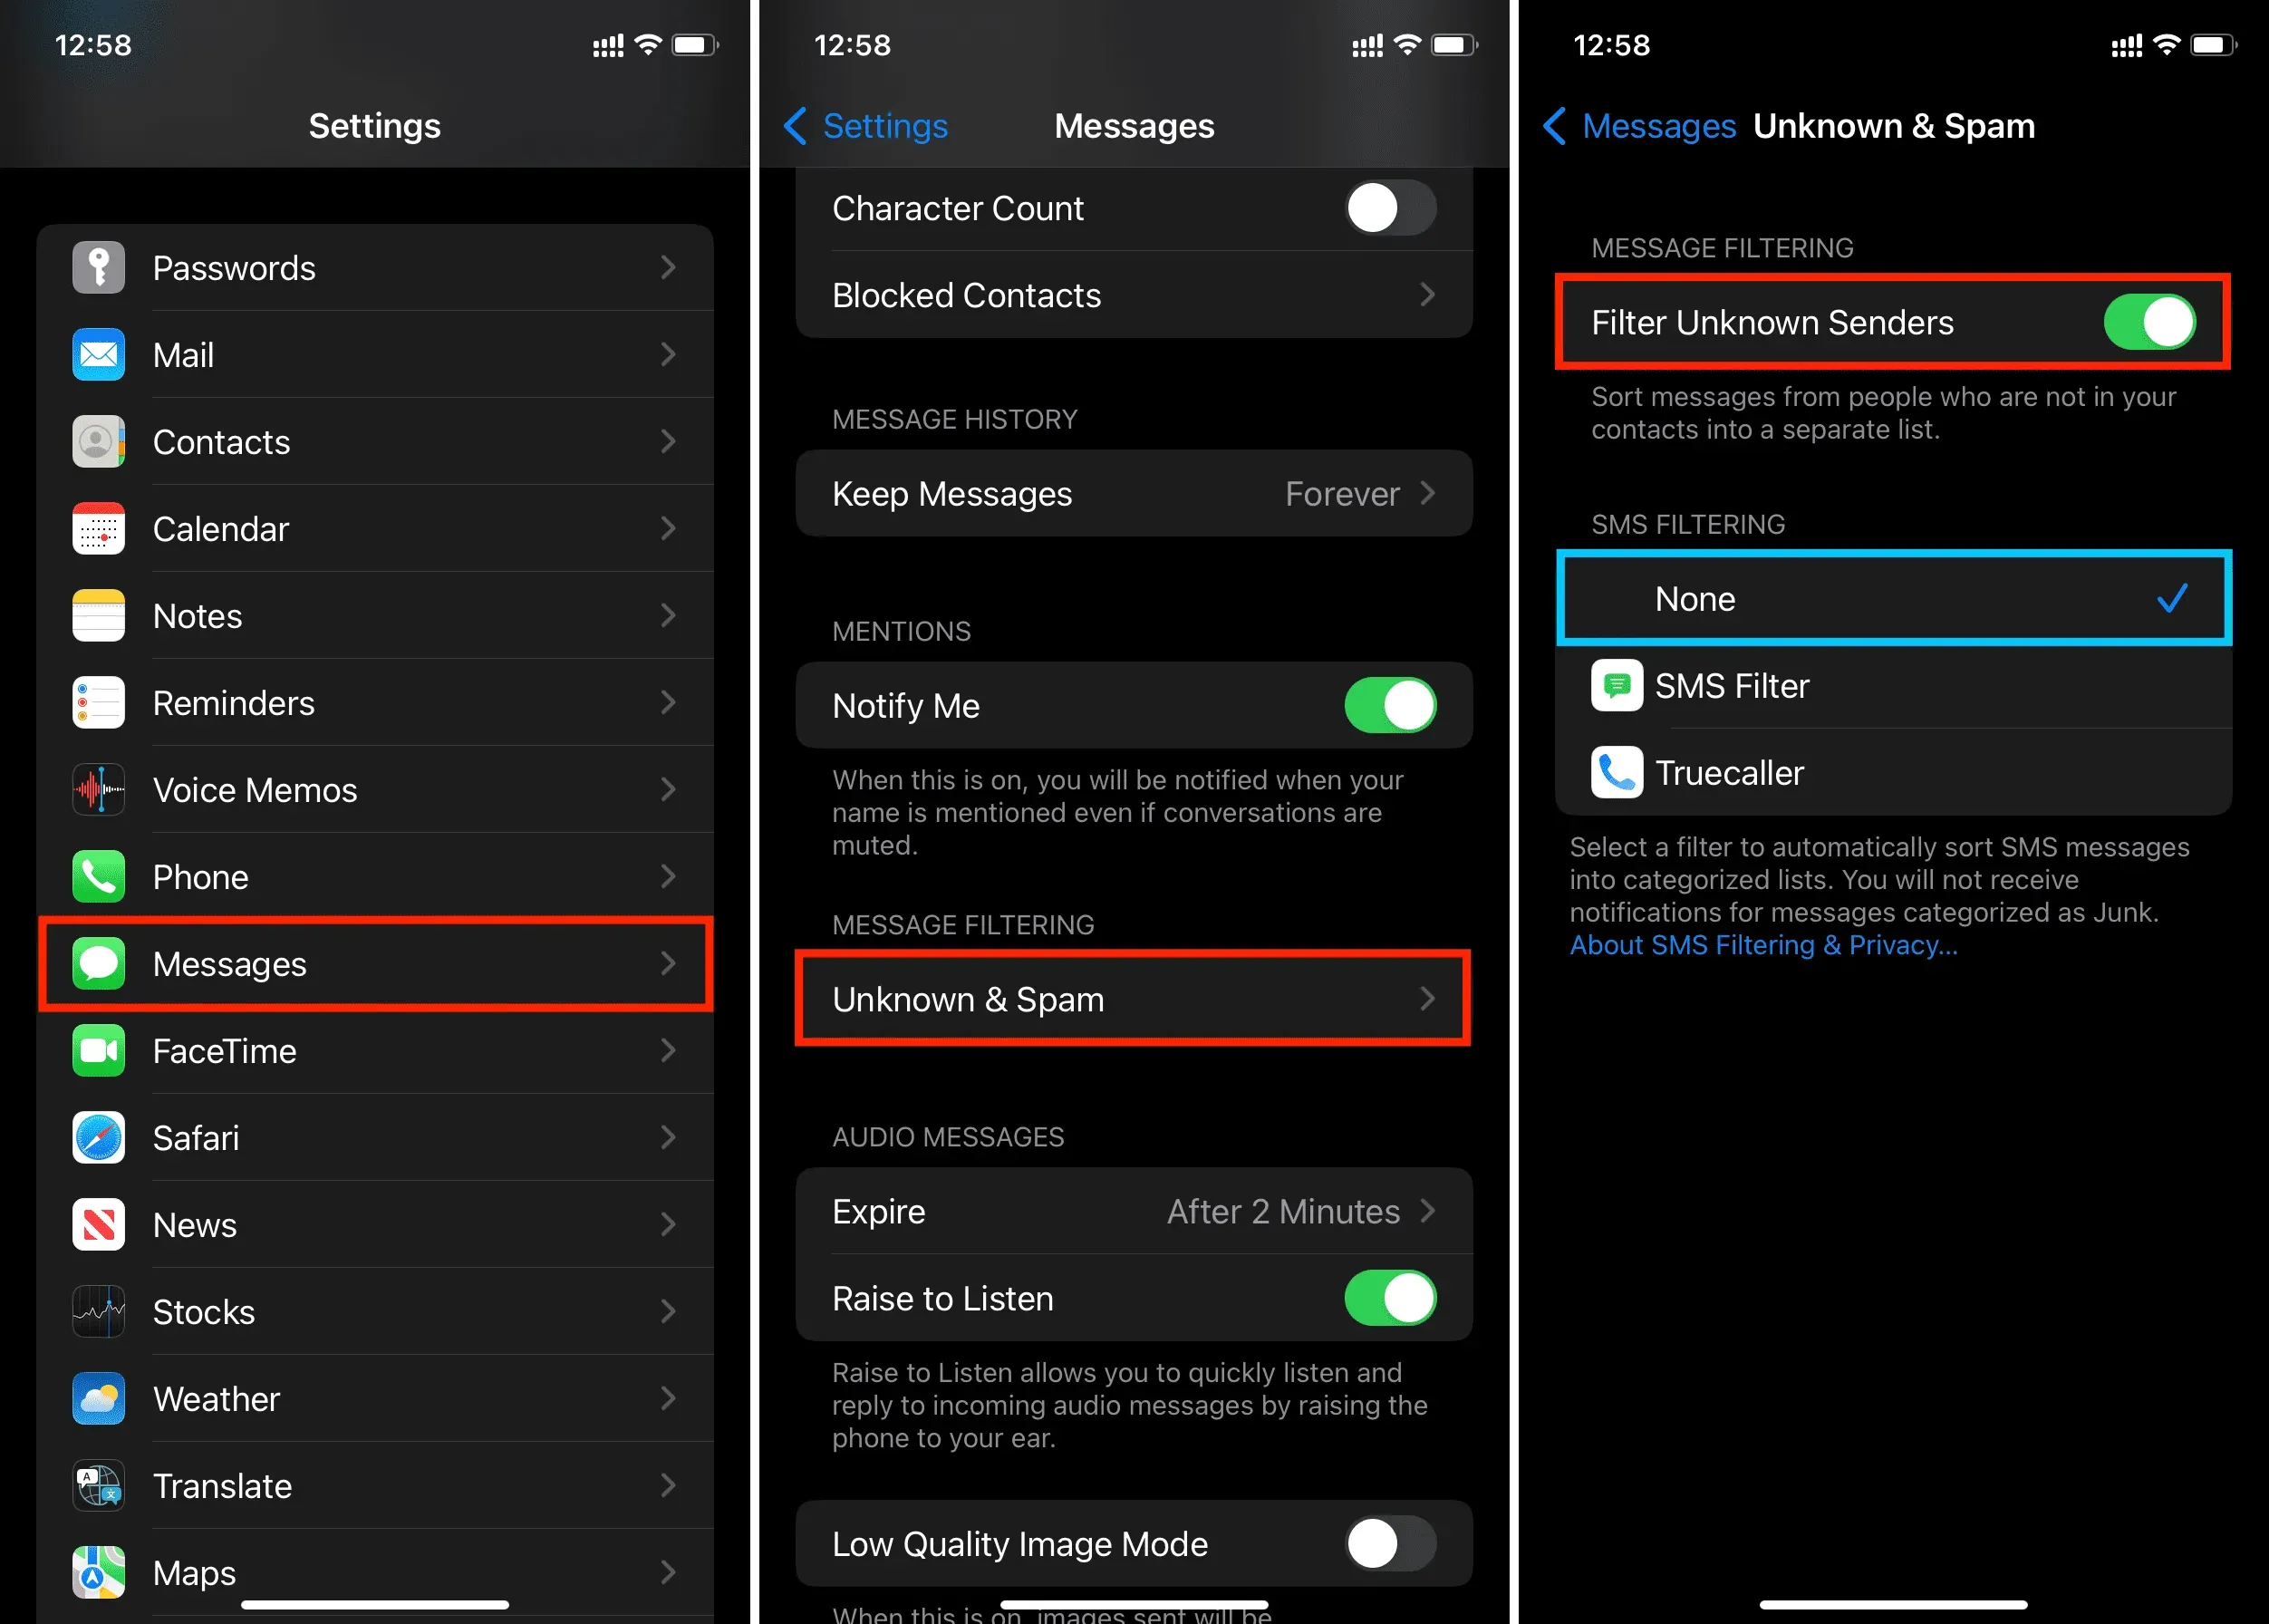
1) Open the Settings app on an iPhone running iOS 16 and tap Messages.
2) Scroll down to “Message Filtering”and click “Unknown & Spam”.
3) Turn on the unknown sender filter. For SMS filtering, you can select “None”, “SMS Filter”or any other third party application you have installed that offers text and spam filtering.
4) Exit the Settings app and open the Messages app.
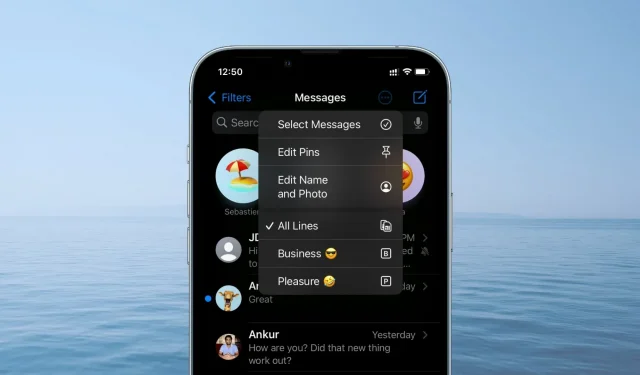
5) Click the newly appeared “Advanced”button in the upper right corner.
6) Select a line/operator and now the iOS Messages app will filter out all other texts and only show you the SMS and iMessage you received on the selected line.

Here’s how you can sort text conversations by line, carrier, or phone number.
Note. This filter does not affect pinned messages.
To return to a single inbox that shows all messages, click the More button and select All Rows.
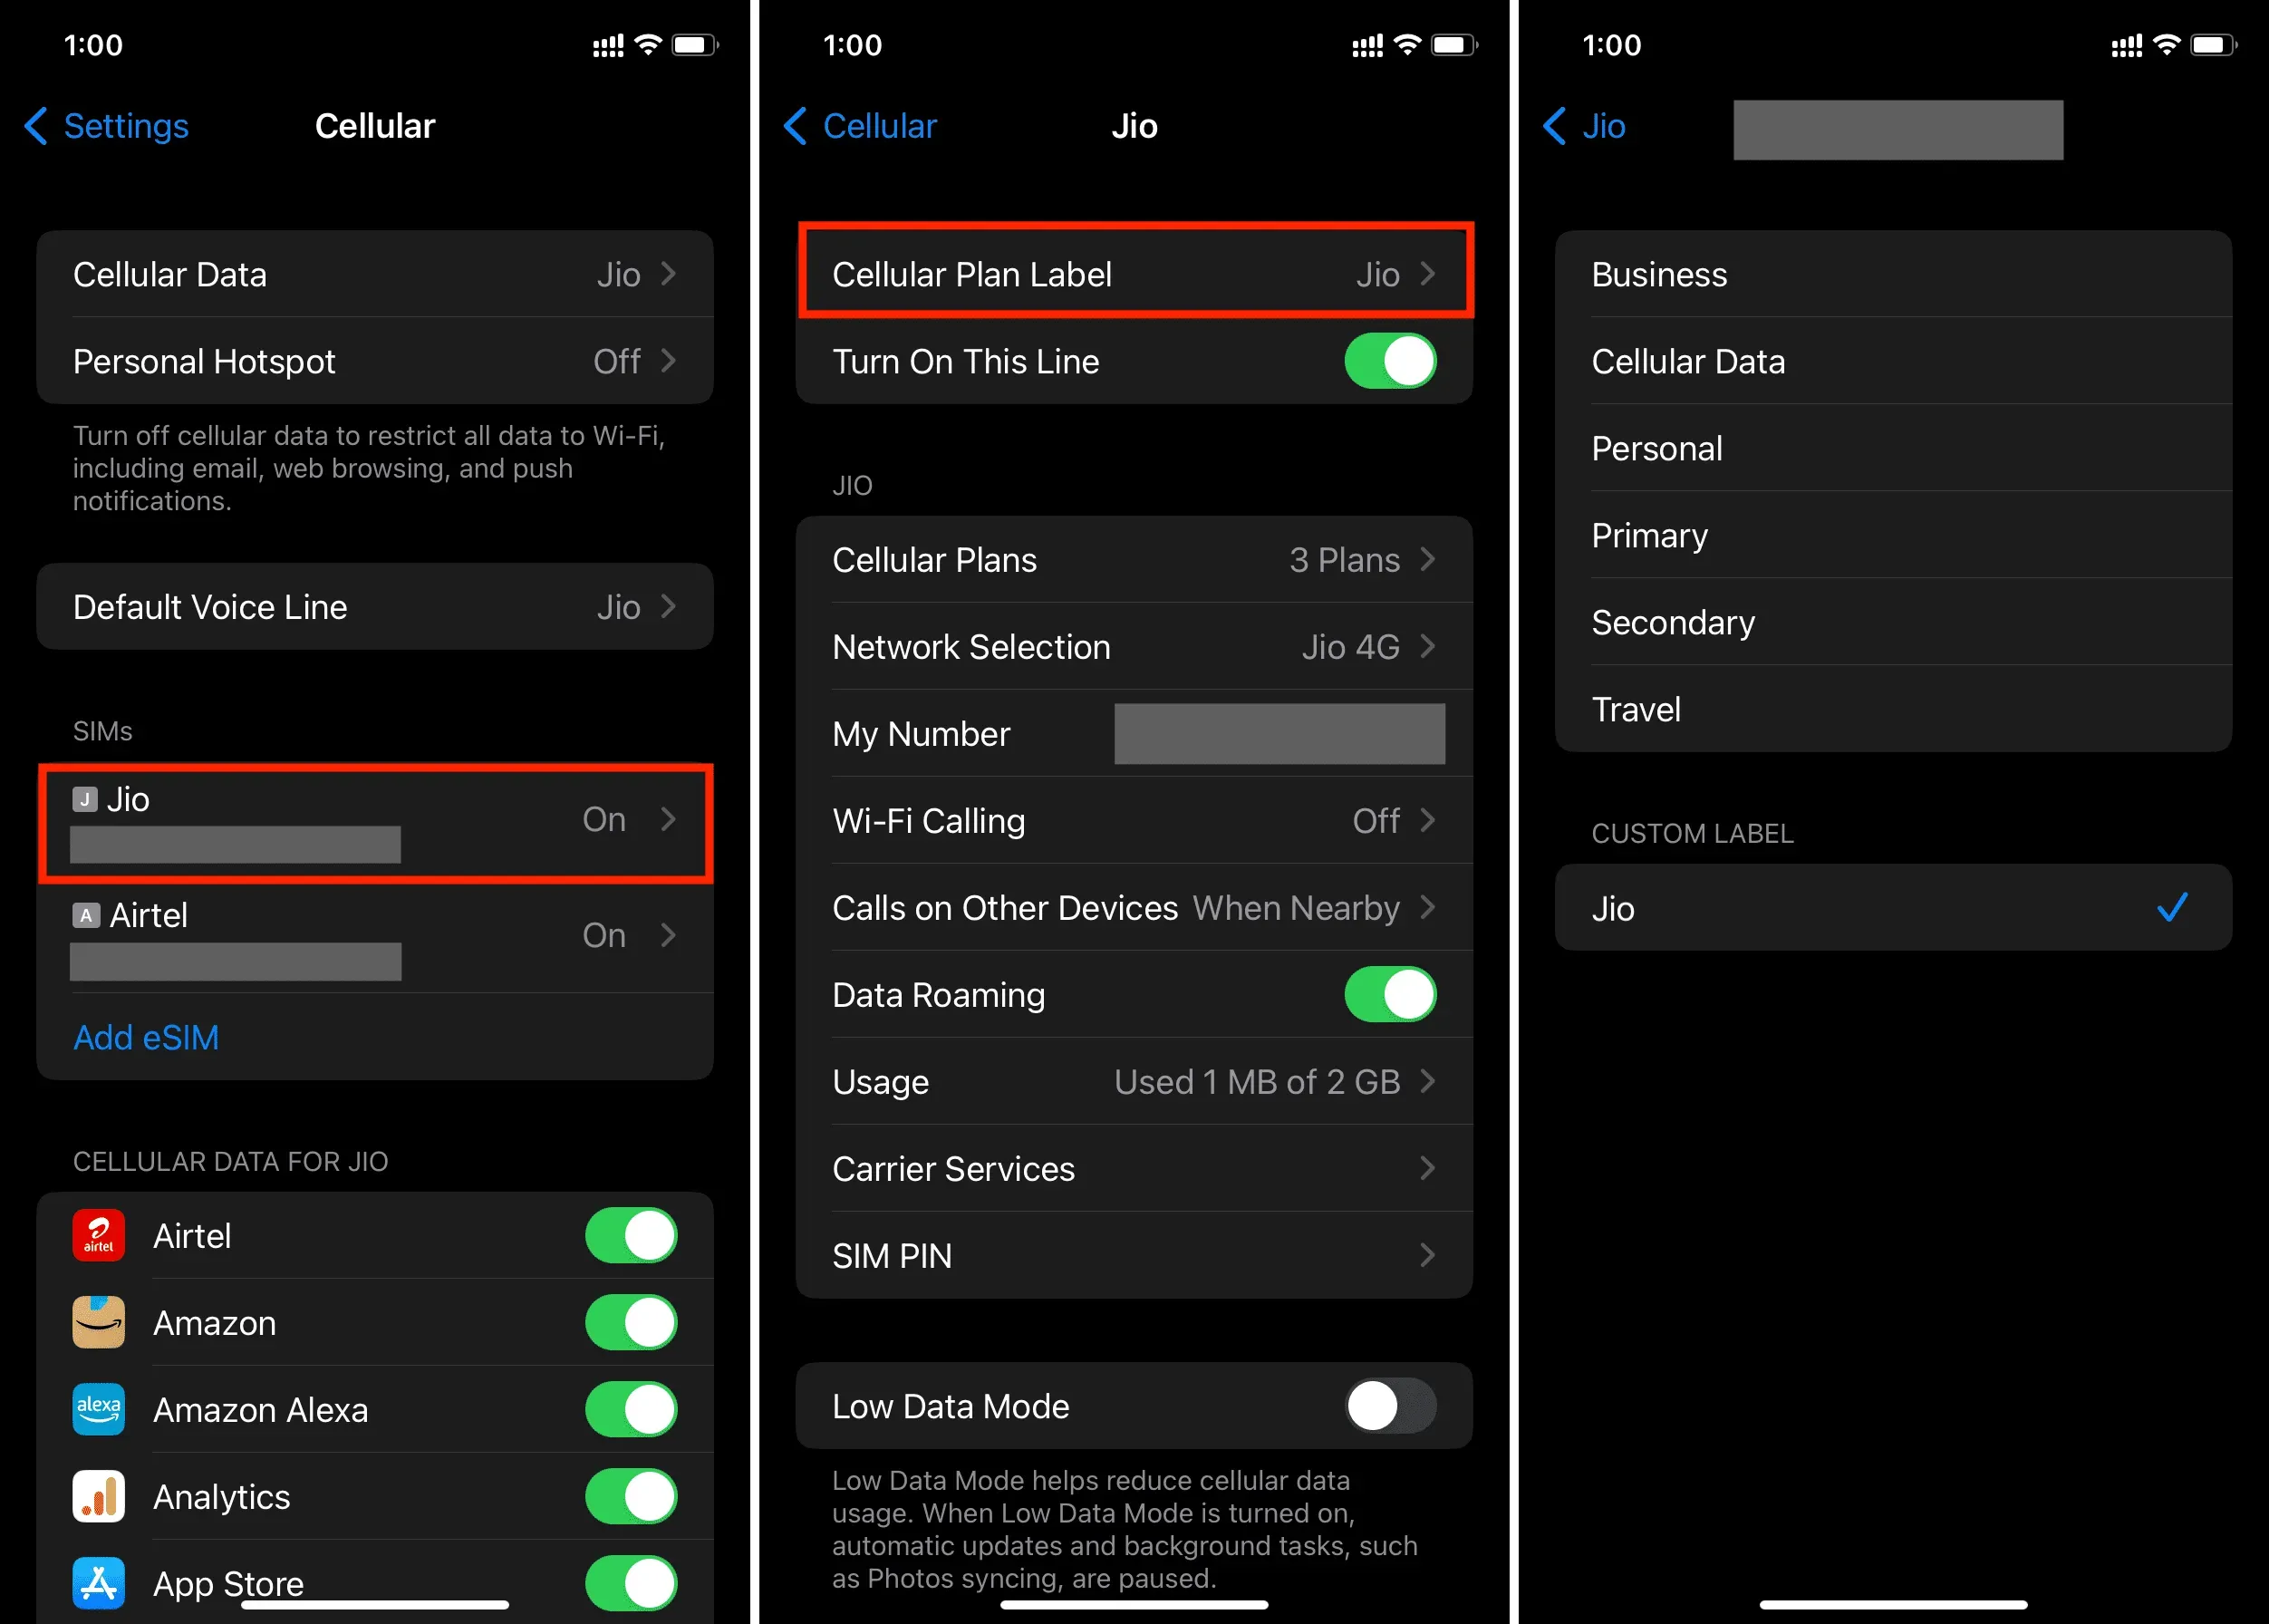
Change SIM/Line Name
I use two SIM cards on my iPhone. For simplicity, I gave them the names of the operators – Jio and Airtel. But this can easily be changed by going to Settings > Cellular > select SIM card > Cellular plan label. From here, tap to use a suggested name, such as Business, Cellular, Personal, Primary, Secondary, or Travel. Or set up your own label, where you can even use emojis in the name!