

Continuity Camera on Mac allows users to click images, scan files, create thumbnails on iPhone and add them on Mac. You can even use your iPhone as a webcam to make up for the mediocre cameras of a MacBook and iMac. I love the seamless process and utility of using your iPhone to click images or scan documents to share on the go. Read on to learn how to do all of these features and master the Continuity Camera feature on Mac.
How to use the Continuity Camera on Mac to take photos, sketch, or scan
I’m sure you’ve heard the praise for the impeccability of the Apple ecosystem. The Continuity Camera is another feature that contributes to this well-deserved fame. Before continuing, let’s review the requirements for this feature and the applications that support it.
Requirements for using the Continuity Camera
- The devices must be next to each other.
- Mac and iPhone or iPad must be connected to Wi-Fi and Bluetooth must be turned on.
- Both devices must use the same Apple ID with two-factor authentication enabled.
- Mac device running macOS Mojave or later.
- iPhone or iPad running iOS 12 or iPadOS 12 or later, respectively.
Applications that support the Continuity Camera for taking photos, sketching, or scanning documents.
- Seeker
- Keynote 8.2 or later
- Messages
- Notes
- Numbers 5.2 or later
- Pages 7.2 or higher
- TextEdit
Take photos, sketch or scan documents with the Continuity Camera.
The steps for clicking images, creating and adding thumbnails, or scanning documents are the same. In addition to supported applications, you can also insert images or scan documents to your desktop. Here’s how:
- Open a supported app on Mac.
- Now Control-click or double-tap the trackpad where you want to paste the image, sketch, or scanned document.
- Select “Take Photo”, “Scan Document”, or “Add Thumbnail”according to your needs from the context menu. Now you can click on an image, sketch to your heart’s content, or scan a document through your iPhone.
- The image, document, or thumbnail will be pasted where you originally clicked.
As mentioned earlier, you can also do the same on the desktop. The process is familiar.
- Control-click or double-tap the trackpad.
- Click “Import from iPhone”in the context menu.
- Now select Take Photo, Scan Document, or Add Thumbnail.
- As soon as you click on an image, document, or thumbnail, it will be saved to your desktop.
How to use iPhone as a webcam
There’s not much to say about the MacBook and iMac cameras, and the video quality is just mediocre. On the contrary, the iPhone has an excellent set of cameras. To take full advantage of the iPhone’s hardware capabilities, Apple has introduced a new feature in Continuity Camera that lets you use your iPhone as a webcam.
This feature was recently introduced in the latest Apple software updates such as iOS 16 and macOS Ventura. This is a minor change that could have a significant impact on daily use. Read on to find out the requirements, supported apps, and everything you can do with your iPhone camera as a webcam.
Requirements for using iPhone as a webcam in macOS Ventura
- Your Mac has been updated to macOS Ventura.
- iPhone updated to iOS 16 (iPhone 8 and above).
- Both Mac and iPhone must be signed in with the same Apple ID.
- Bluetooth and Wi-Fi must be enabled on both devices.
- Only iPhone 11 and later support Table View and Center Stage.
- Only iPhone 12 and above support the Studio Light feature.
How to enable Continuity Camera webcam on iPhone
While the Continuity Camera is enabled by default in iOS 16, it’s wiser to check the setting for a smooth experience.
- On your iPhone, go to the Settings app.
- General → AirPlay and Handoff.
- Here, enable the Continuity Camera.
Your iPhone is now ready to act as a webcam for your Mac. It can capture video as well as audio. So you get a boost in video quality and better audio input thanks to the microphones on your iPhone.
However, only the rear camera can be used as a webcam. Also, keep your iPhone close to your Mac so it’s within reach.
You can now use the Continuity Camera feature in applications downloaded to your Mac or video call/conferencing websites. We have listed step by step guides for both methods.
Use Continuity Camera in any video calling app on Mac
You can use Continuity Camera with any app that supports video calling on your Mac; FaceTime, Zoom, Skype, etc. are some examples.
We used FaceTime as an example. Chances are the exact titles in the menu bar may differ, but the steps below should give you a general idea of how to navigate turning on the Continuity Camera.
- Open FaceTime (or the app of your choice) on your Mac. Make sure your iPhone and Mac are connected to Wi-Fi and Bluetooth.
- Click the Video tab located on the menu bar. The name may differ depending on which application you are using.
- Select your iPhone from the list of available devices. (For example, “iPhone 13 Pro Max camera”)
- Your iPhone will now work as a webcam.
You can see the difference in image quality between a 720p Mac camera and an iPhone camera in the images above.
Use Continuity Camera on Video Conferencing Websites
At the time of this writing, this feature works flawlessly in Safari and Chrome web browsers, and we expect it to be supported by most web browsers.
- Open Google Meet (or any video calling website of your choice) on Mac. (e.g. Google Meet, Zoom, etc.). Make sure your iPhone and Mac are connected to Wi-Fi and Bluetooth.
- Go to settings.
- Click Video. (Select the video input settings on the website)
- In the camera section, select your iPhone from the list of available devices. (For example, “iPhone 13 Pro Max camera”).
- Your iPhone will now work as a webcam.
Please note that you cannot use your iPhone while it is being used as a webcam. If you want to stop using your iPhone as a webcam, click Disable on iPhone.
It will be automatically locked and a message similar to “Connected to MacBook Pro”will appear on the screen. You also have the option to pause the use of your iPhone as a camera.
How to use Portrait Mode, Center Stage, Studio Light, and Desktop on Mac
Apple has done a great job of leveraging the iPhone’s camera hardware. One of the benefits of using your iPhone as a webcam is that you get access to several features that would otherwise be unavailable.
Portrait Mode, Center Stage, Studio Light, and the newly introduced Desktop are the available features, and here’s what they offer:
- Portrait Mode: The camera focuses on the subject (the person taking part in the conversation) and applies bokeh (blur) to the background of the video. It works similar to the cinematic mode used when recording video on iPhone.
- Center Stage: Uses machine learning and adjusts the iPhone’s ultra-wide lens to track your movements. If you’re moving from side to side, this feature helps you stay centered in the frame. Suppose more people enter the frame during a conversation; the lens will zoom out and adjust for additional people.
- Studio Light: Brightens the subject and darkens the background.
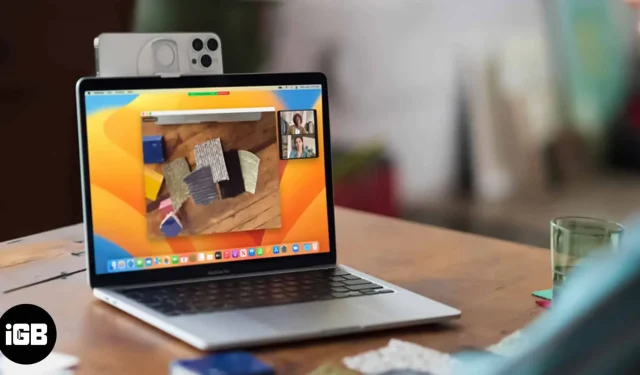
- Desk View: The Desk View implementation looks like some kind of Apple magic. It uses machine learning and the ultra-wide sensor on the iPhone to capture video from your desktop. This feature is only supported on iPhone 11 and later with an ultra wide angle lens. So, iPhone SE 2nd and 3rd generation do not support this feature.
With all that said, here’s how you can use these features.
How to manage video effects in Continuity Camera
- Open Control Center on Mac.
- Go to the Video Effects tab. This tab is only available when using the Continuity Camera feature.
- Select Center Stage, Portrait, or Studio Light.
- Click Desktop View to use this feature.
Note. To use the Desk View feature, you’ll need to connect your iPhone to your MacBook.
Completion…
If you’re using an iMac or MacBook, the Continuity Camera feature will help you improve video quality during video calls, conferences, and more. But it’s most useful for people using a Mac mini, Mac Studio, or other Mac devices that don’t have a built-in camera.
Have you used a continuity camera? And, if so, what do you think about the quality of the video and the overall implementation of the software? Let me know your thoughts in the comments below.