
Apple has introduced a lot of cool features in iOS 16. Among them, iCloud Shared Photo Library is an important addition. When you share your iCloud Photo Library with someone, they get owner access and can edit, delete, and add captions.
What’s even more interesting, you can shoot videos or take photos and upload them directly to the shared library. In this article, I will show you how to create and use iCloud Shared Photo Library on iPhone, iPad, and Mac, and share selected photos with friends and family.
- To create and access a shared iCloud Photo Library, all members of the shared library must have an iCloud account and use one of the following devices: – iPhone running iOS 16, – iPad running iPadOS 16 or later, – or Mac running Ventura. .
- You can share your library with up to five people at a time.
I won’t blame you if you’re confused between the two ways of sharing photos. Apple should have worked a little harder on naming. While iCloud Shared Photo Library and Shared Album are somewhat similar, they have a few differences:
| Shared iCloud Photo Library | Shared iCloud Photo Album | |
| Platform and OS support | Exclusive to Apple (iOS 16 and Mac with Ventura or later) | Exclusive to Apple (iOS 6 or later and Mac with macOS 10.8.2 or later) |
| Subscribers | 6 max. | 100 max. |
| smart filter | Available (you can filter shared photos by date or people) | Not available |
| Filter apps for photos | Efficiently filters your photos by libraries | Shared photos are saved in shared albums |
If you haven’t tried Shared Albums yet, check out these guides on how to create Shared Albums on your Mac or iPhone.
- Open iPhone settings → Photos.
- Click Shared Library. Then click “Start”.
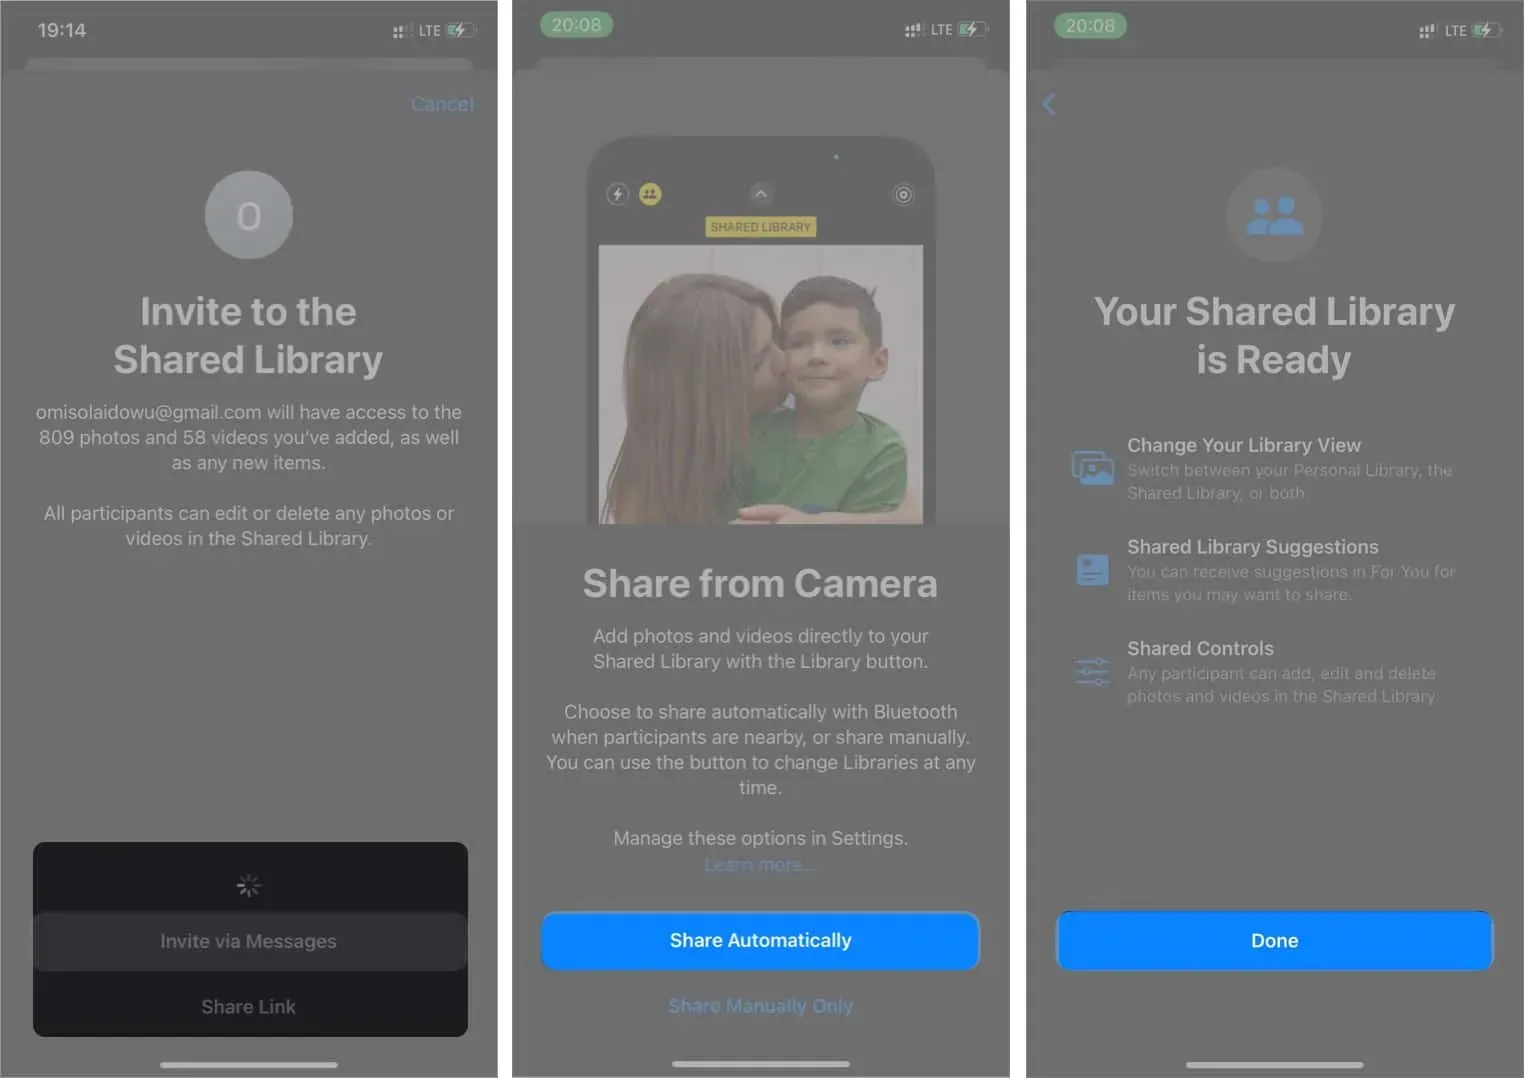
- Click Add Members to select people from your contact list.
- Enter an email address or phone number in the recipient field, or tap the cross (+) icon to select from your contact list. Advice. Keep in mind that the first time you share an album, you can only add up to four people.
- When you’re done adding people, click “Add”in the top right corner.
- Click next.
- You will now be presented with three options (general settings):
- All my photos and videos. Share your entire photo library except for screenshots and hidden or deleted items.
- Select by People or Date: Sort your shared library by specific people or dates from your library. For example, you can do this for partners. It also does not include screenshots and hidden or deleted photos.
- Select Manual: This allows you to manually select what you share. This is very handy if you only want to select certain photos. This ensures that you only share selected images with recipients.
- Click “Next”after choosing an option.
- In the next menu, you will see the people you are going to share your library with.
- Click “Next”if you are satisfied with the list.
If you selected “All my photos and videos”:
- Select Shared Library Preview.
- Click “Continue”in the top right corner.
If you chose “Select by people or date”:
- You will be asked to identify the added contacts from your photos. Tap this prompt to sort your shared library by people. Make sure you have selected at least two people to continue. Click “Done”in the top right corner after identifying people.
- The next step is to sort the images by date. Click “Start Date”and set the date you want your shared library to be distributed.
- Click next.
- Then select Shared Library Preview to preview images before uploading.
- Click “Continue”in the top right corner.
If you select images manually:
- Select the images you want to include in your shared library by tapping on each one.
- Click “Add”in the top right corner.
- Then click View Shared Library.
- Click “Continue”in the top right corner.
How to save camera images to a shared or personal library
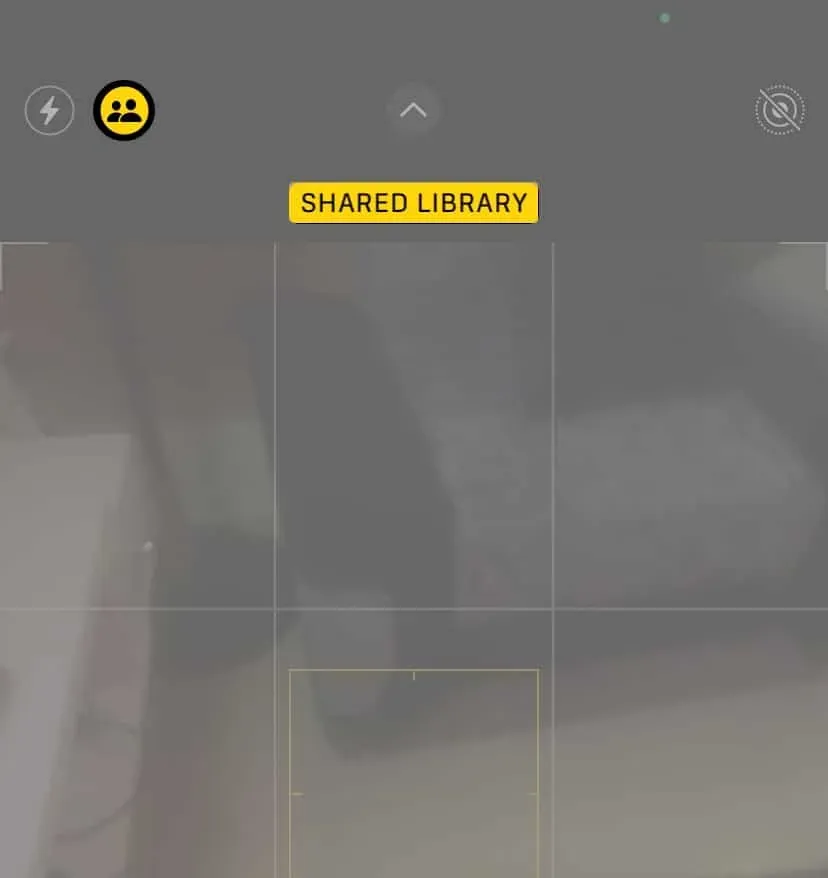
After you share your iCloud library, you can choose where to save the output when you create a video or shoot. For example, if you select “Shared Library”while taking a photo or recording a video, iPhone will automatically share the result.
- When you open the iPhone camera, look in the top left corner. You will see a double profile icon (showing two people).
- Tap this icon to switch between the shared and personal storage library.
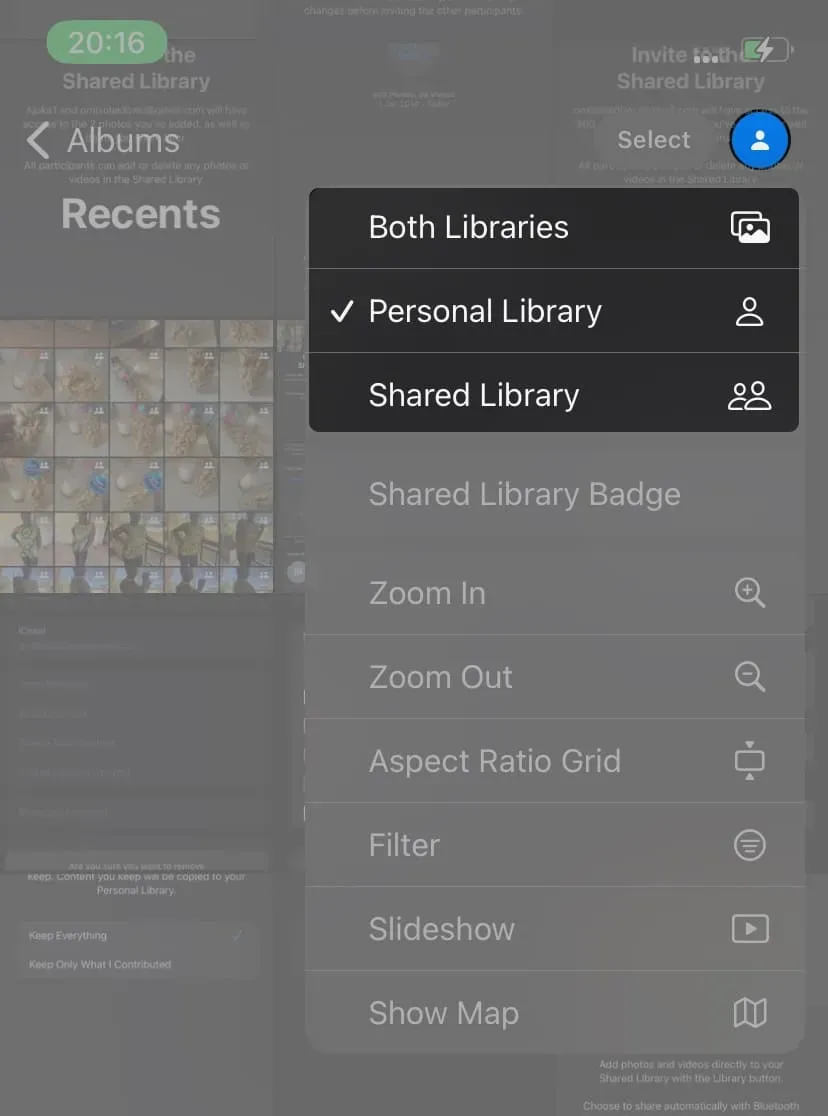
Filter images by library type in the Photos app.
Once you’ve created a shared library, you can choose to display only the photos you’ve shared, your personal library, or a combination of both.
Do it:
- In the Photos app, tap the profile icon in the top right corner.
- Then click Both Libraries, Personal Library, or Shared Library to filter the images accordingly.
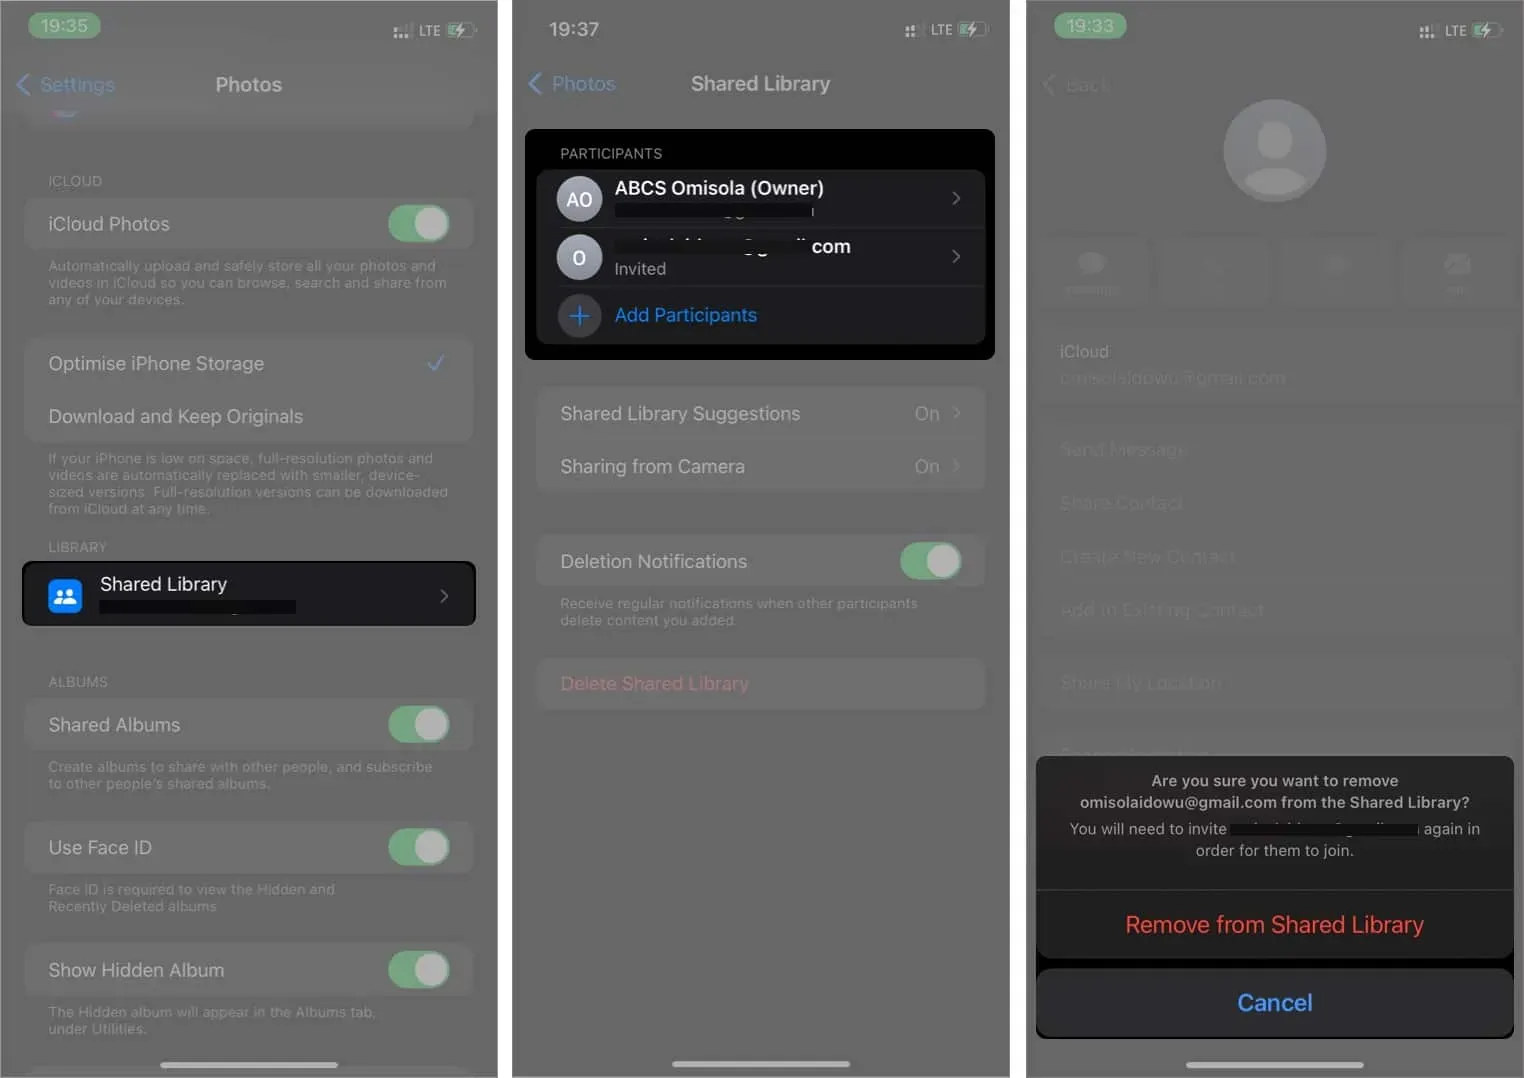
How to remove a member from a shared library
You can remove a member from a shared library if you change your mind:
- Open Settings on iPhone or iPad → Photos.
- Click Shared Library.
- Select the contact you want to delete.
- Click Remove from Shared Library. Then select Remove from Shared Library.
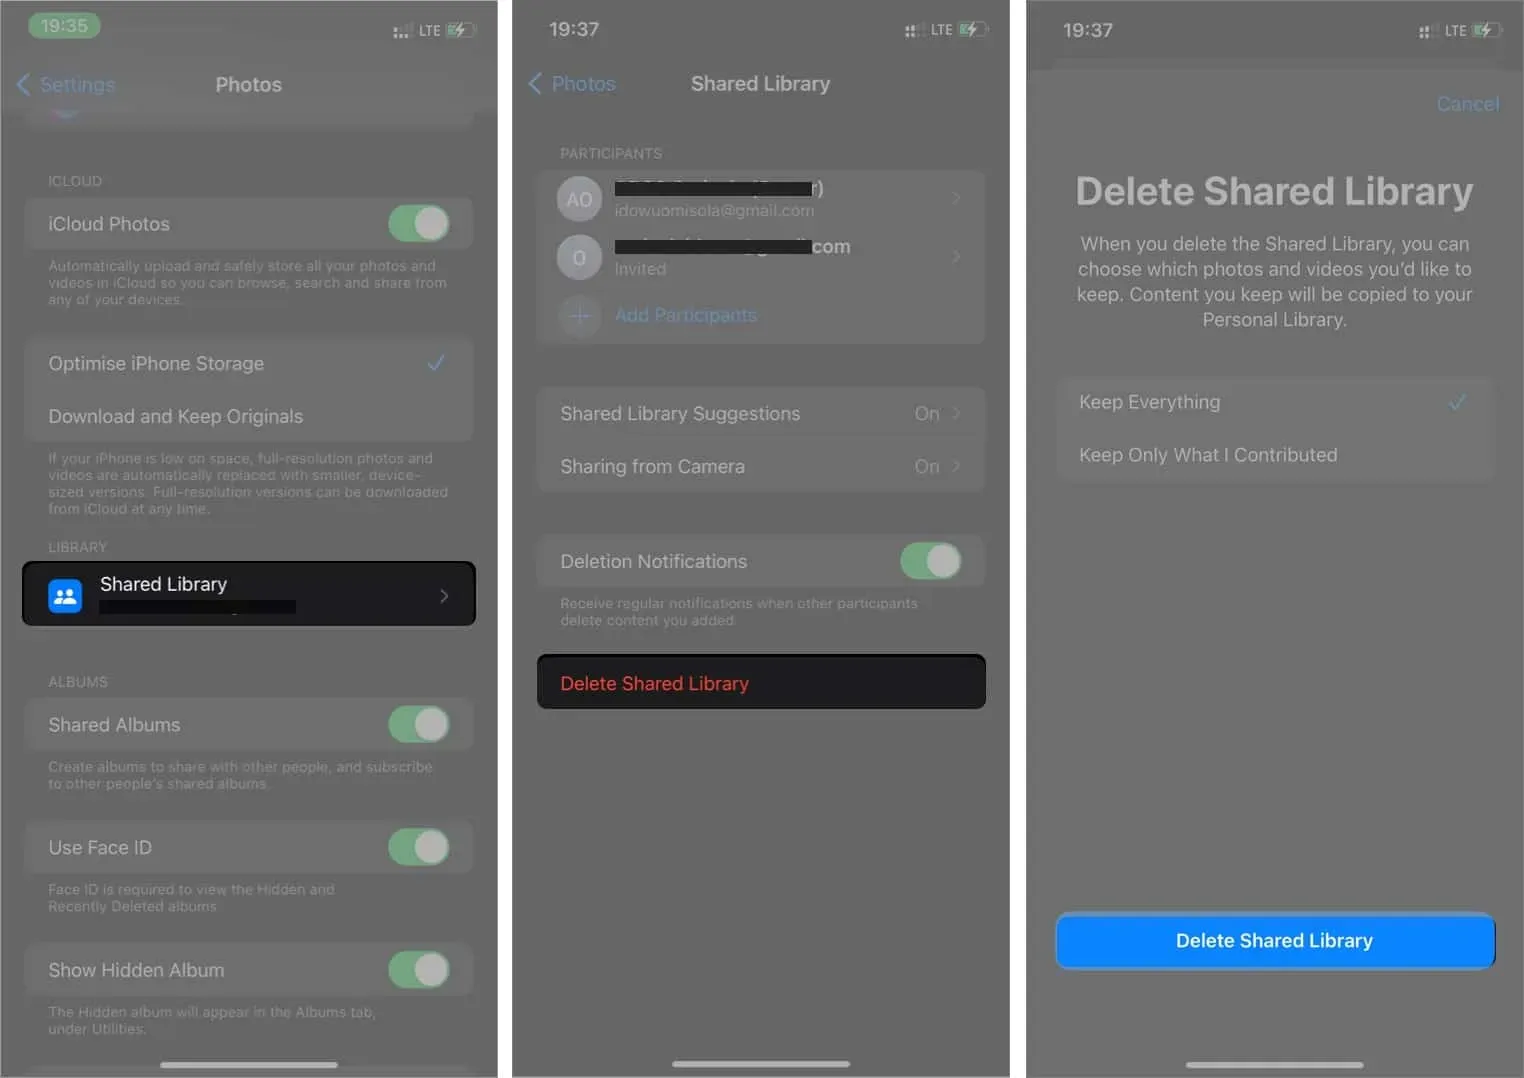
How to Delete a Shared iCloud Photo Library
To delete an iCloud Shared Library:
- Go to iPhone Settings → Photos.
- Click Shared Library.
- Then click Remove Shared Library.
- Finally, click “Delete Shared Library”then click “Delete Shared Library”again to complete.
As mentioned, Macs running Ventura or later come with the iCloud Photo Shared Library feature. To set it up:
- Go to photos. In the top bar → Settings.
- Click Shared Library.
- Then click “Get Started”to get started.
- Choose a sharing method. You can choose: “All my photos and videos”, “Select by people or date”, or “Select manually”.
- Click “Continue”in the lower left corner.
- Then follow the instructions for the selected option to complete the setup.
Filter photos by libraries on Mac
As with iPhone, you can also filter images by library type on Mac. Do it:
- Open the Photos app on your Mac.
- Click “Both Libraries”in the top left corner.
- Now switch between personal library and shared library to filter images accordingly.
That’s all! Now that you know how to set up a shared iCloud Photo Library on your iPhone, iPad, or Mac, it’s time to share memorable moments with your loved ones. I find this feature more convenient than sharing albums as it feels more flexible and less repetitive.
As you know, this feature is exclusive to the latest OS version. So, to experience the power of iCloud’s new shared photo library, consider upgrading to the iOS 16 beta if you haven’t already.
Have questions or comments? Leave them in the comment box below.