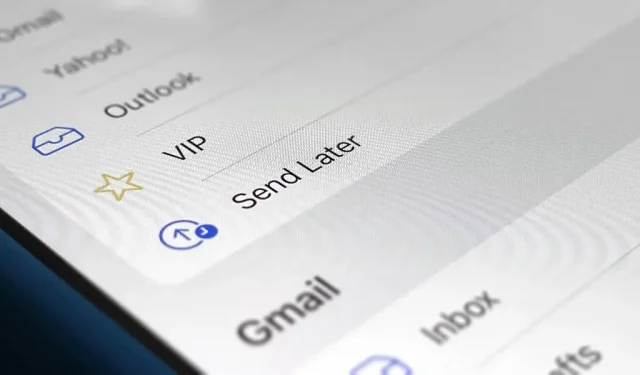
You no longer have to resort to a third-party email client on your iPhone to schedule messages to be sent at any time. Apple has built scheduling into its email app, and it works with any email client you use, be it iCloud, Gmail, Yahoo, Outlook, or whatever.
To try it out, make sure your iPhone is running iOS 16. This change also appears in iPadOS 16 for iPad and macOS 13 Ventura for Mac, which are still in beta.
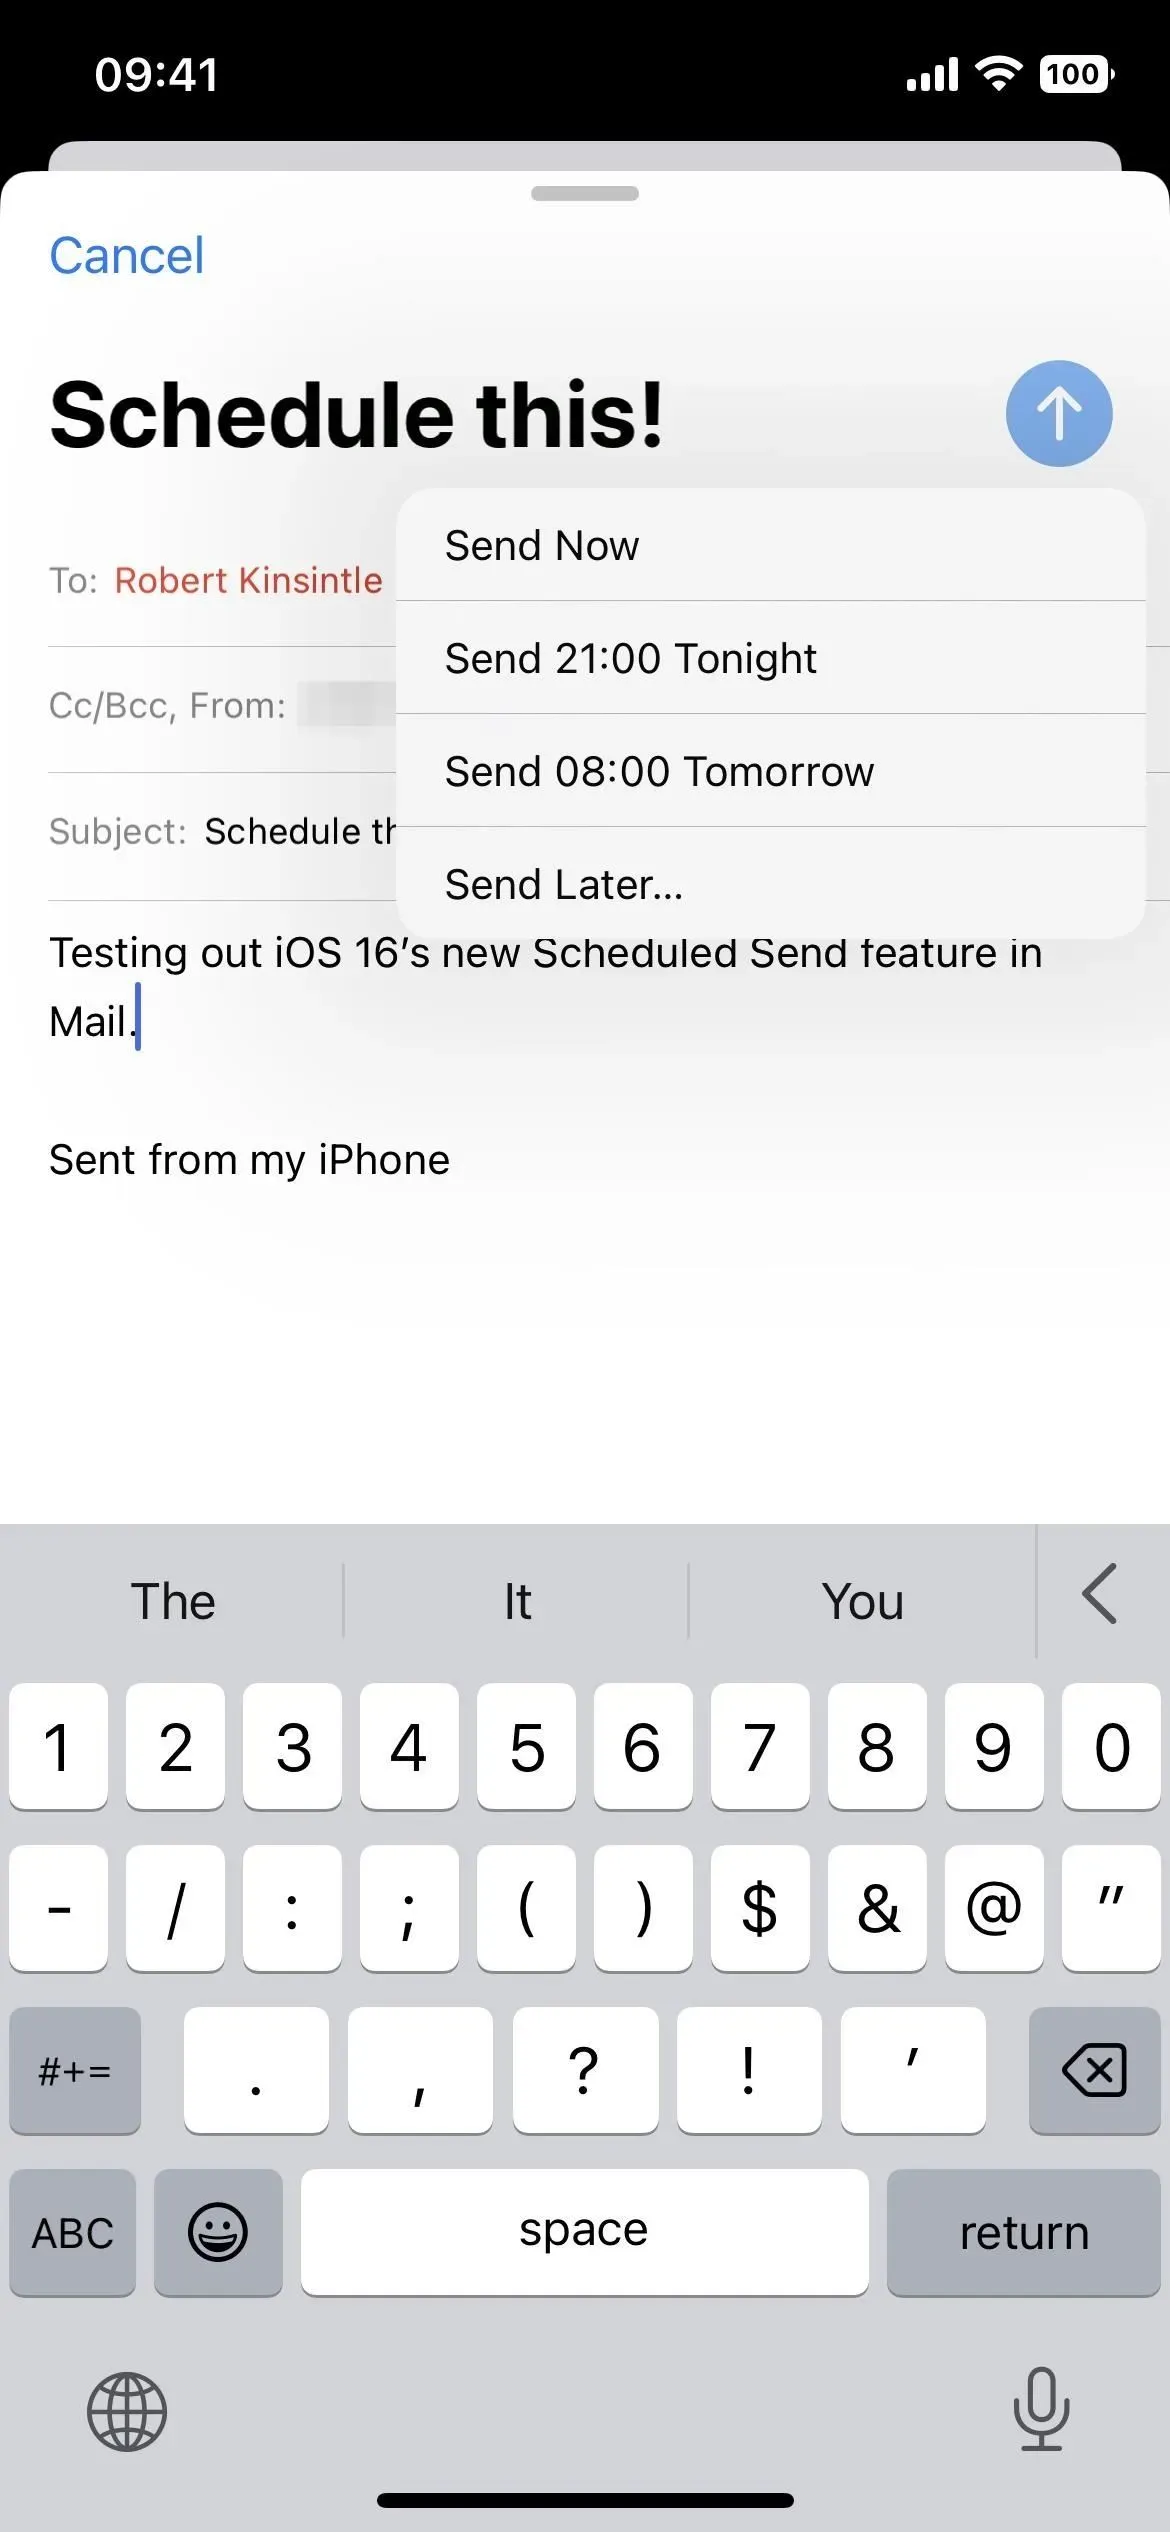
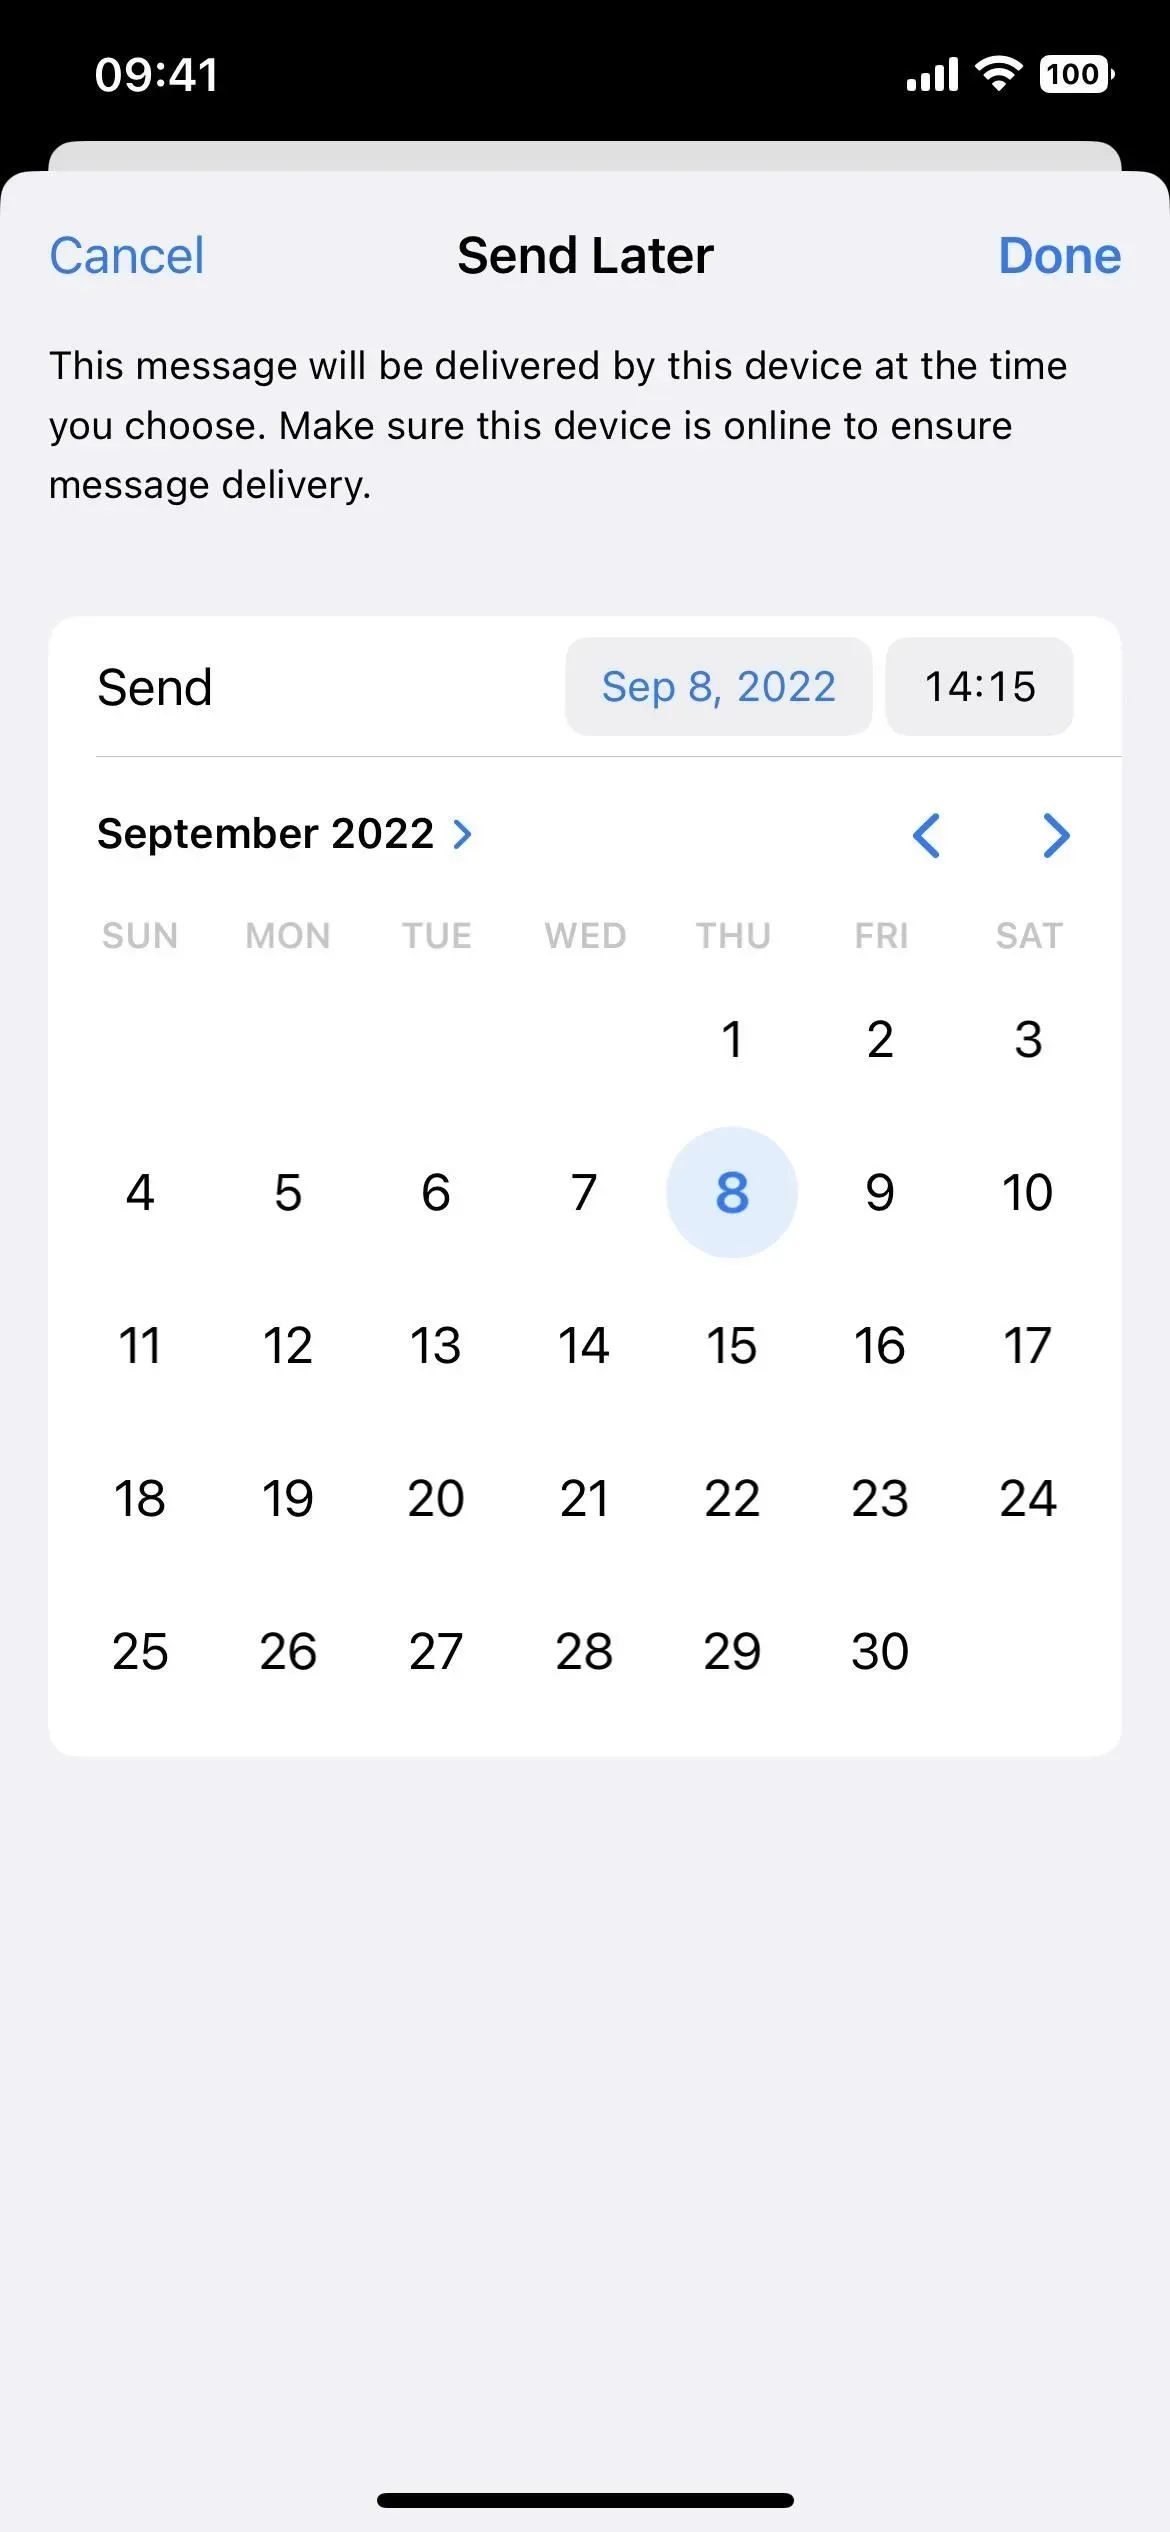
Start or open a draft in the Mail app from any email account. When you’re ready to schedule a send later, press and hold the send button. From the menu, you can select preset times such as Send Tonight and Send Tomorrow, or use Send Later to choose your own date and time. When you use “Send Later”, just click “Done”after setting the date and time.
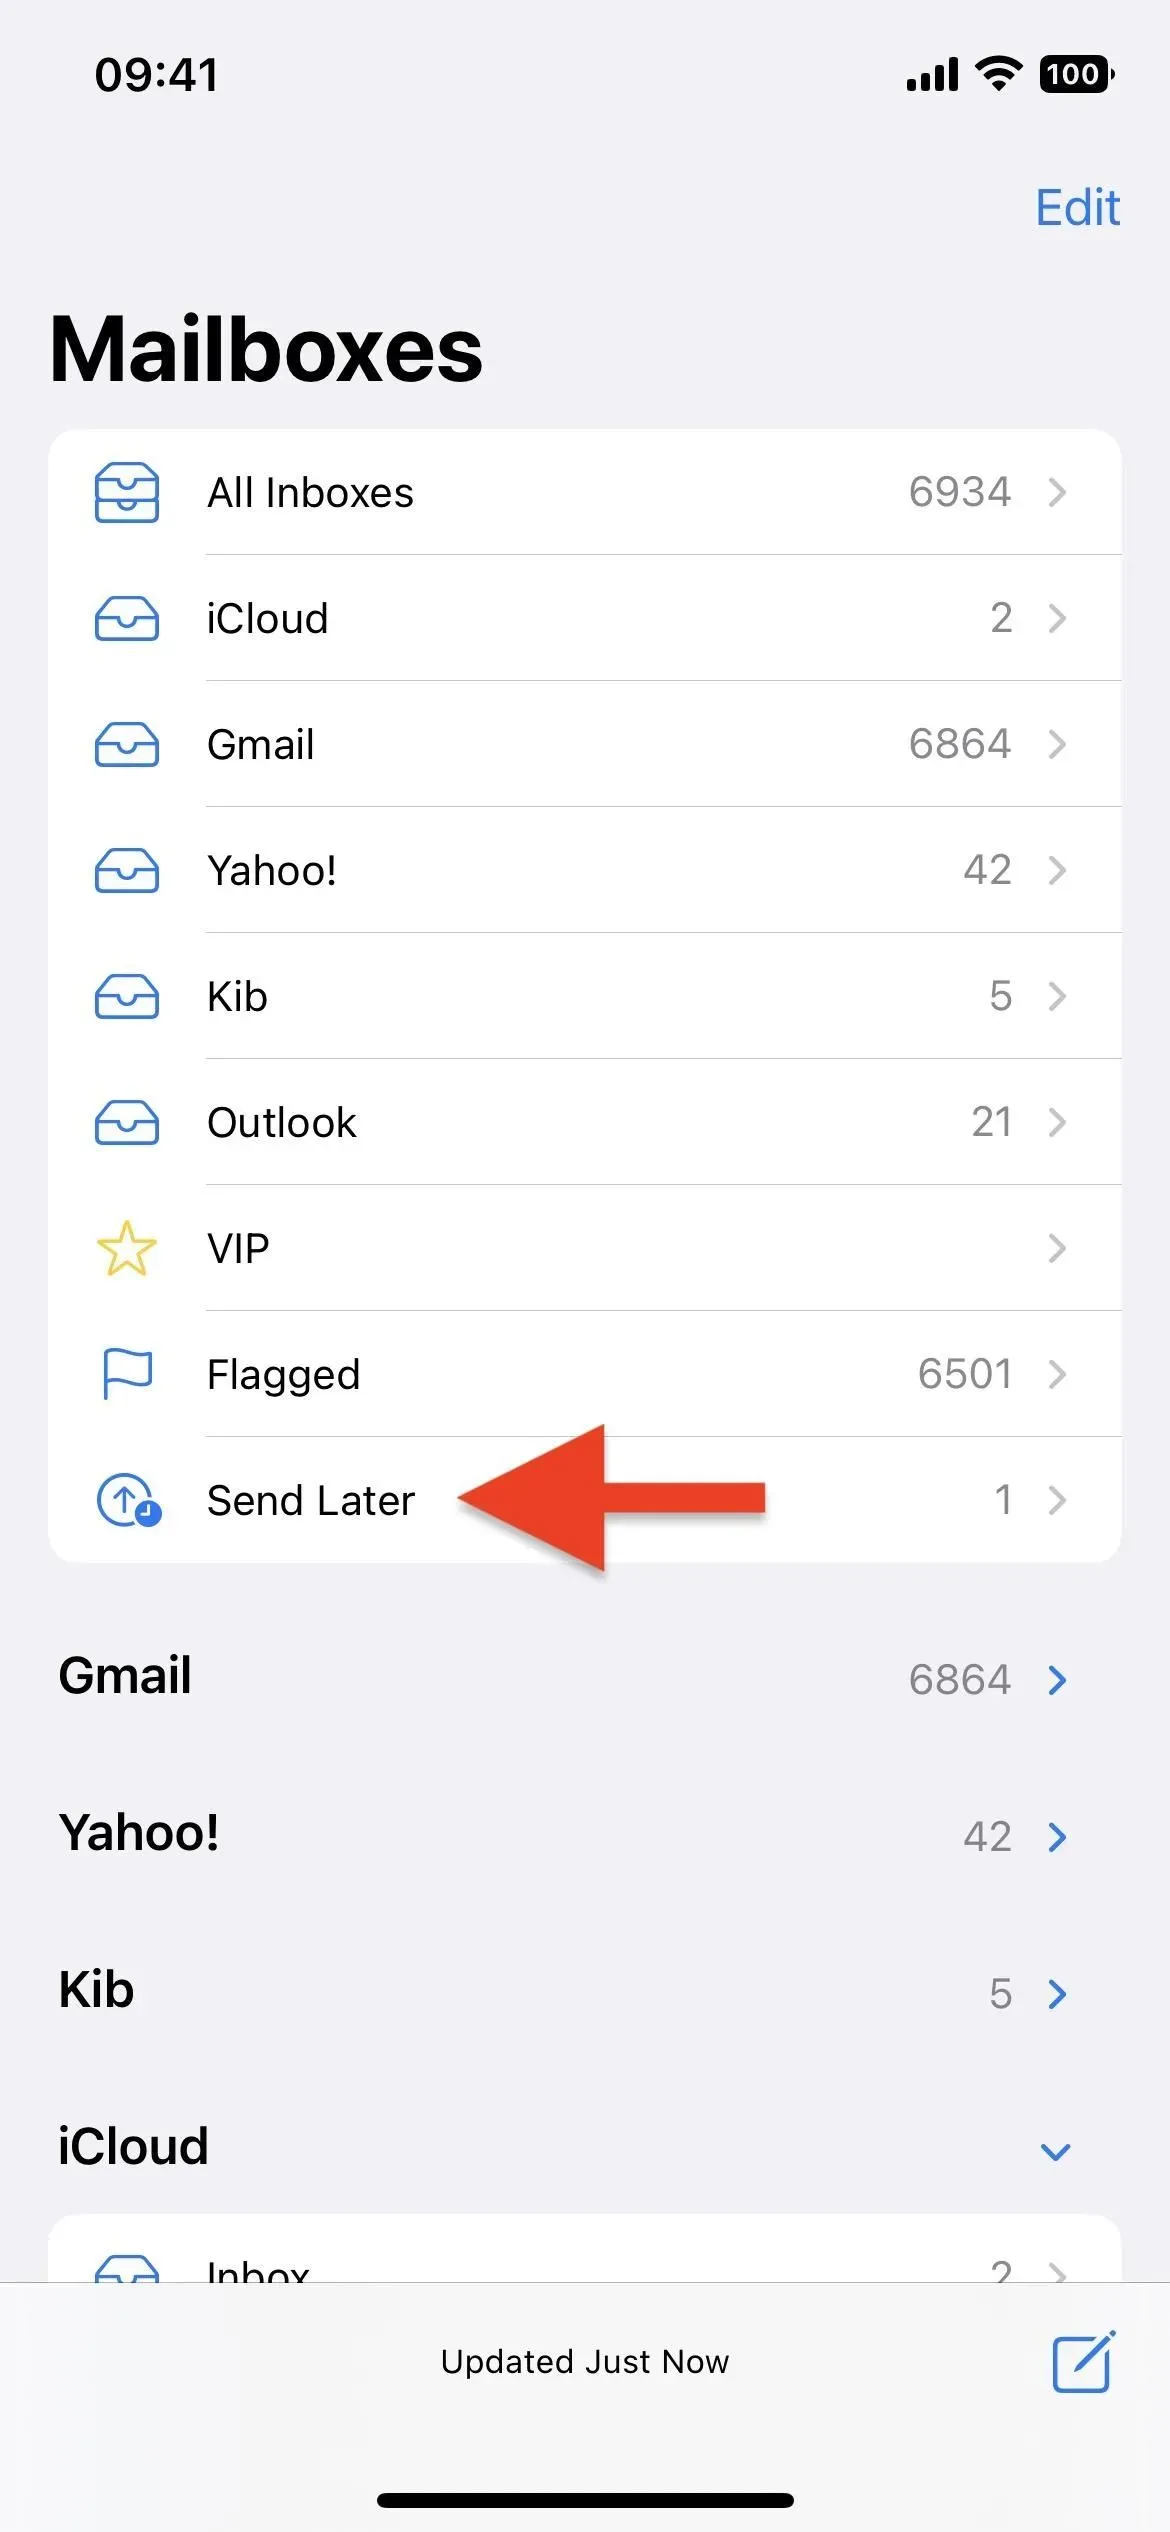
No matter what date and time you choose, you can view scheduled emails from the new Send Later folder in your mailbox list. In the folder, you should see the date and time that each message was automatically sent. If you no longer want to send an email, you can delete it like any other draft.
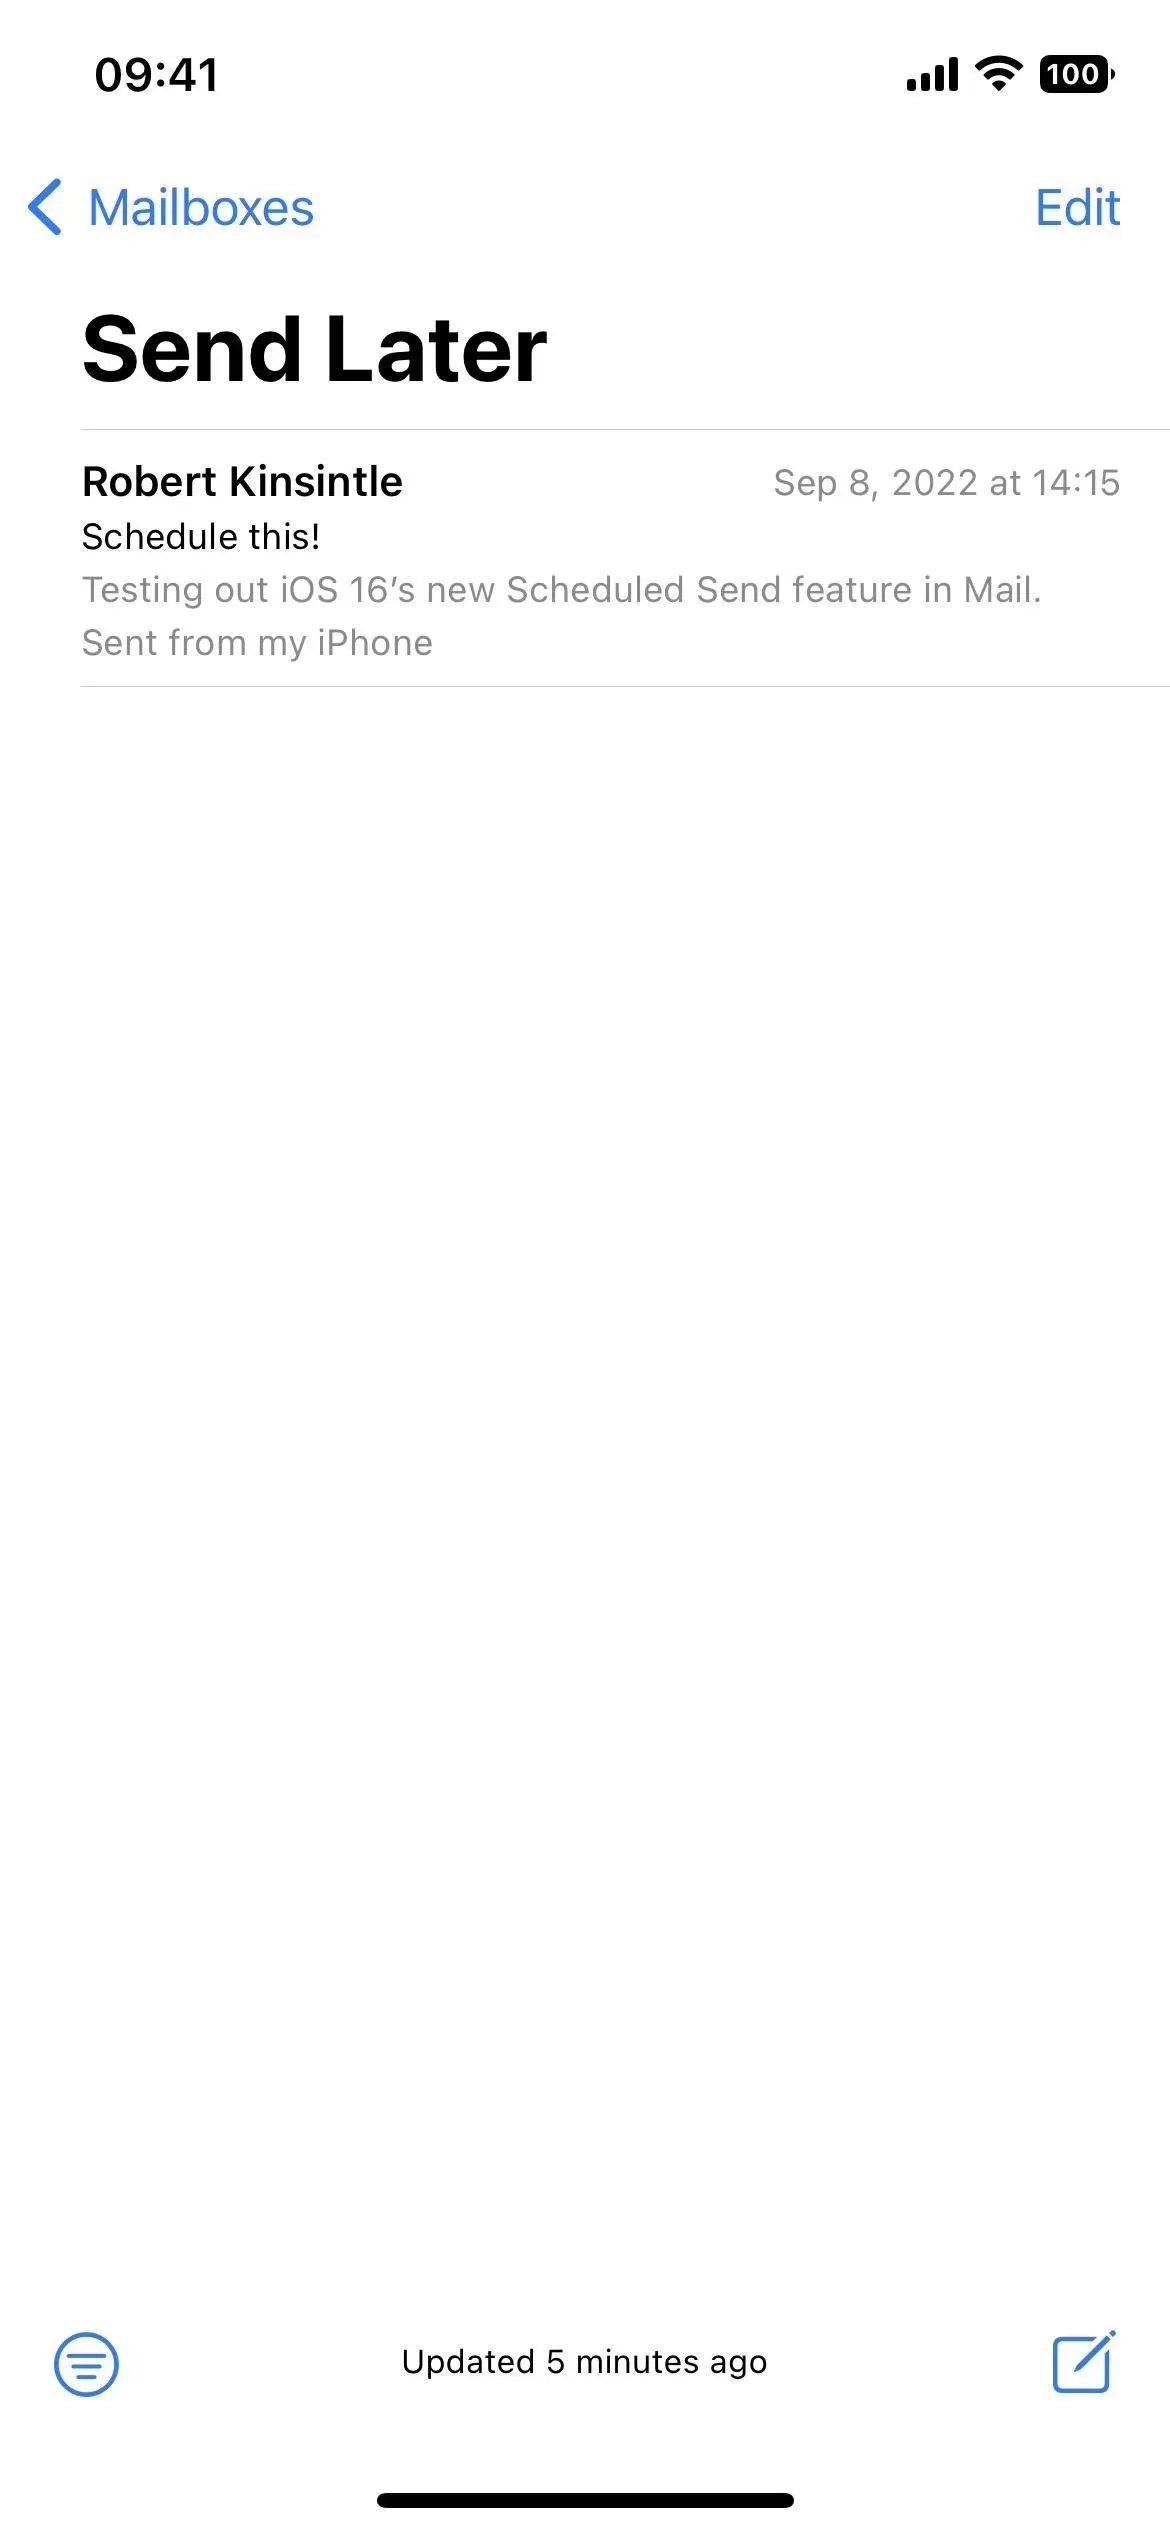
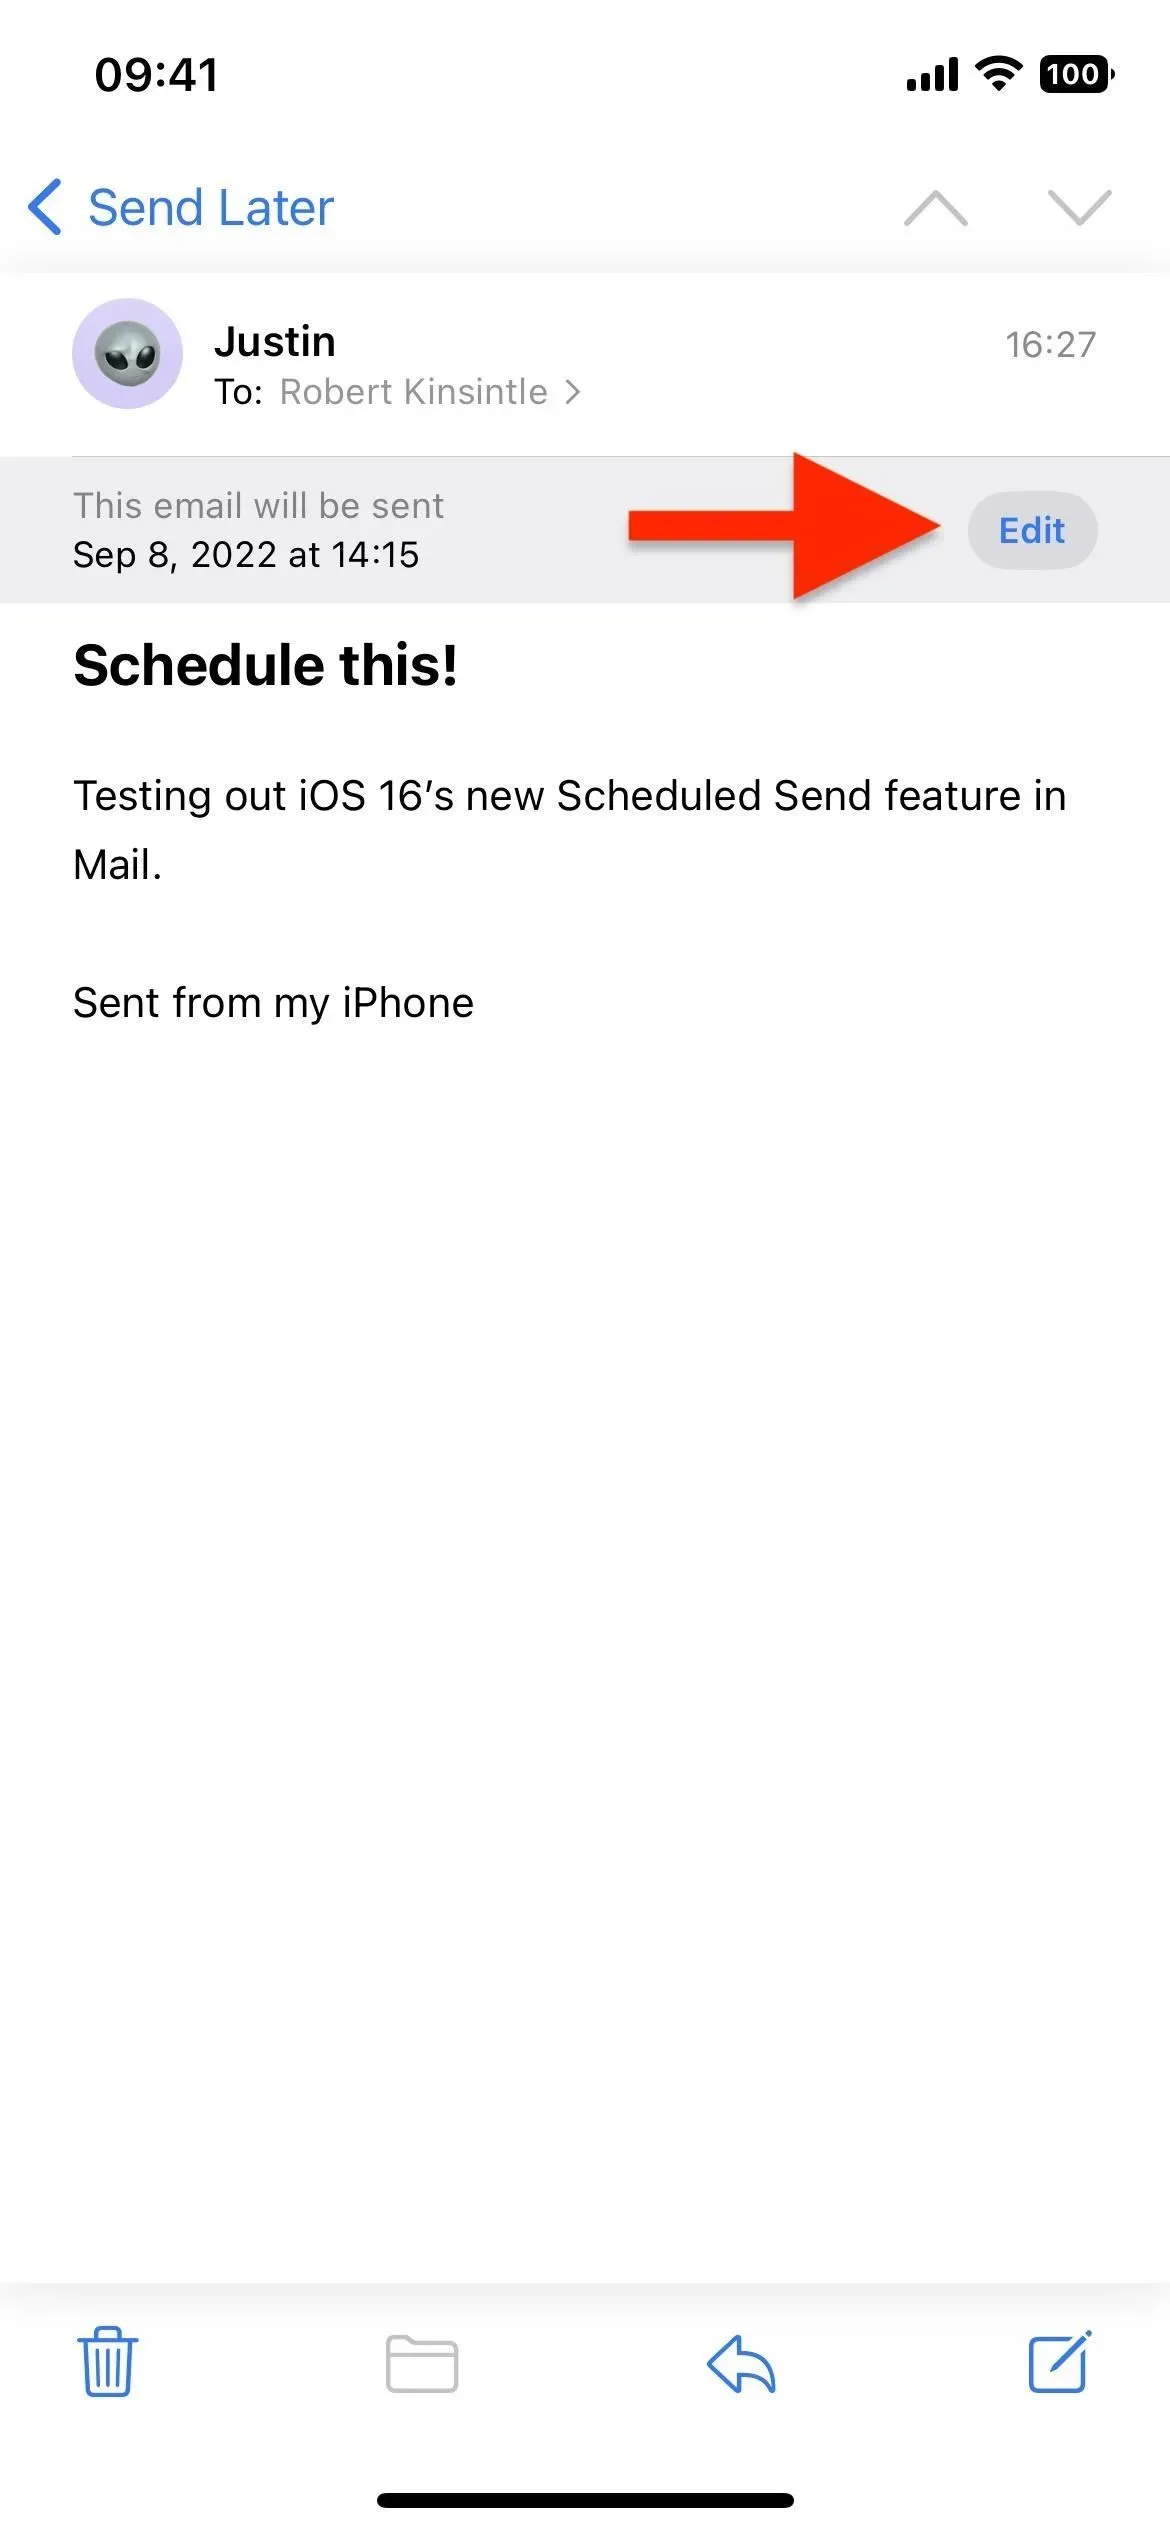
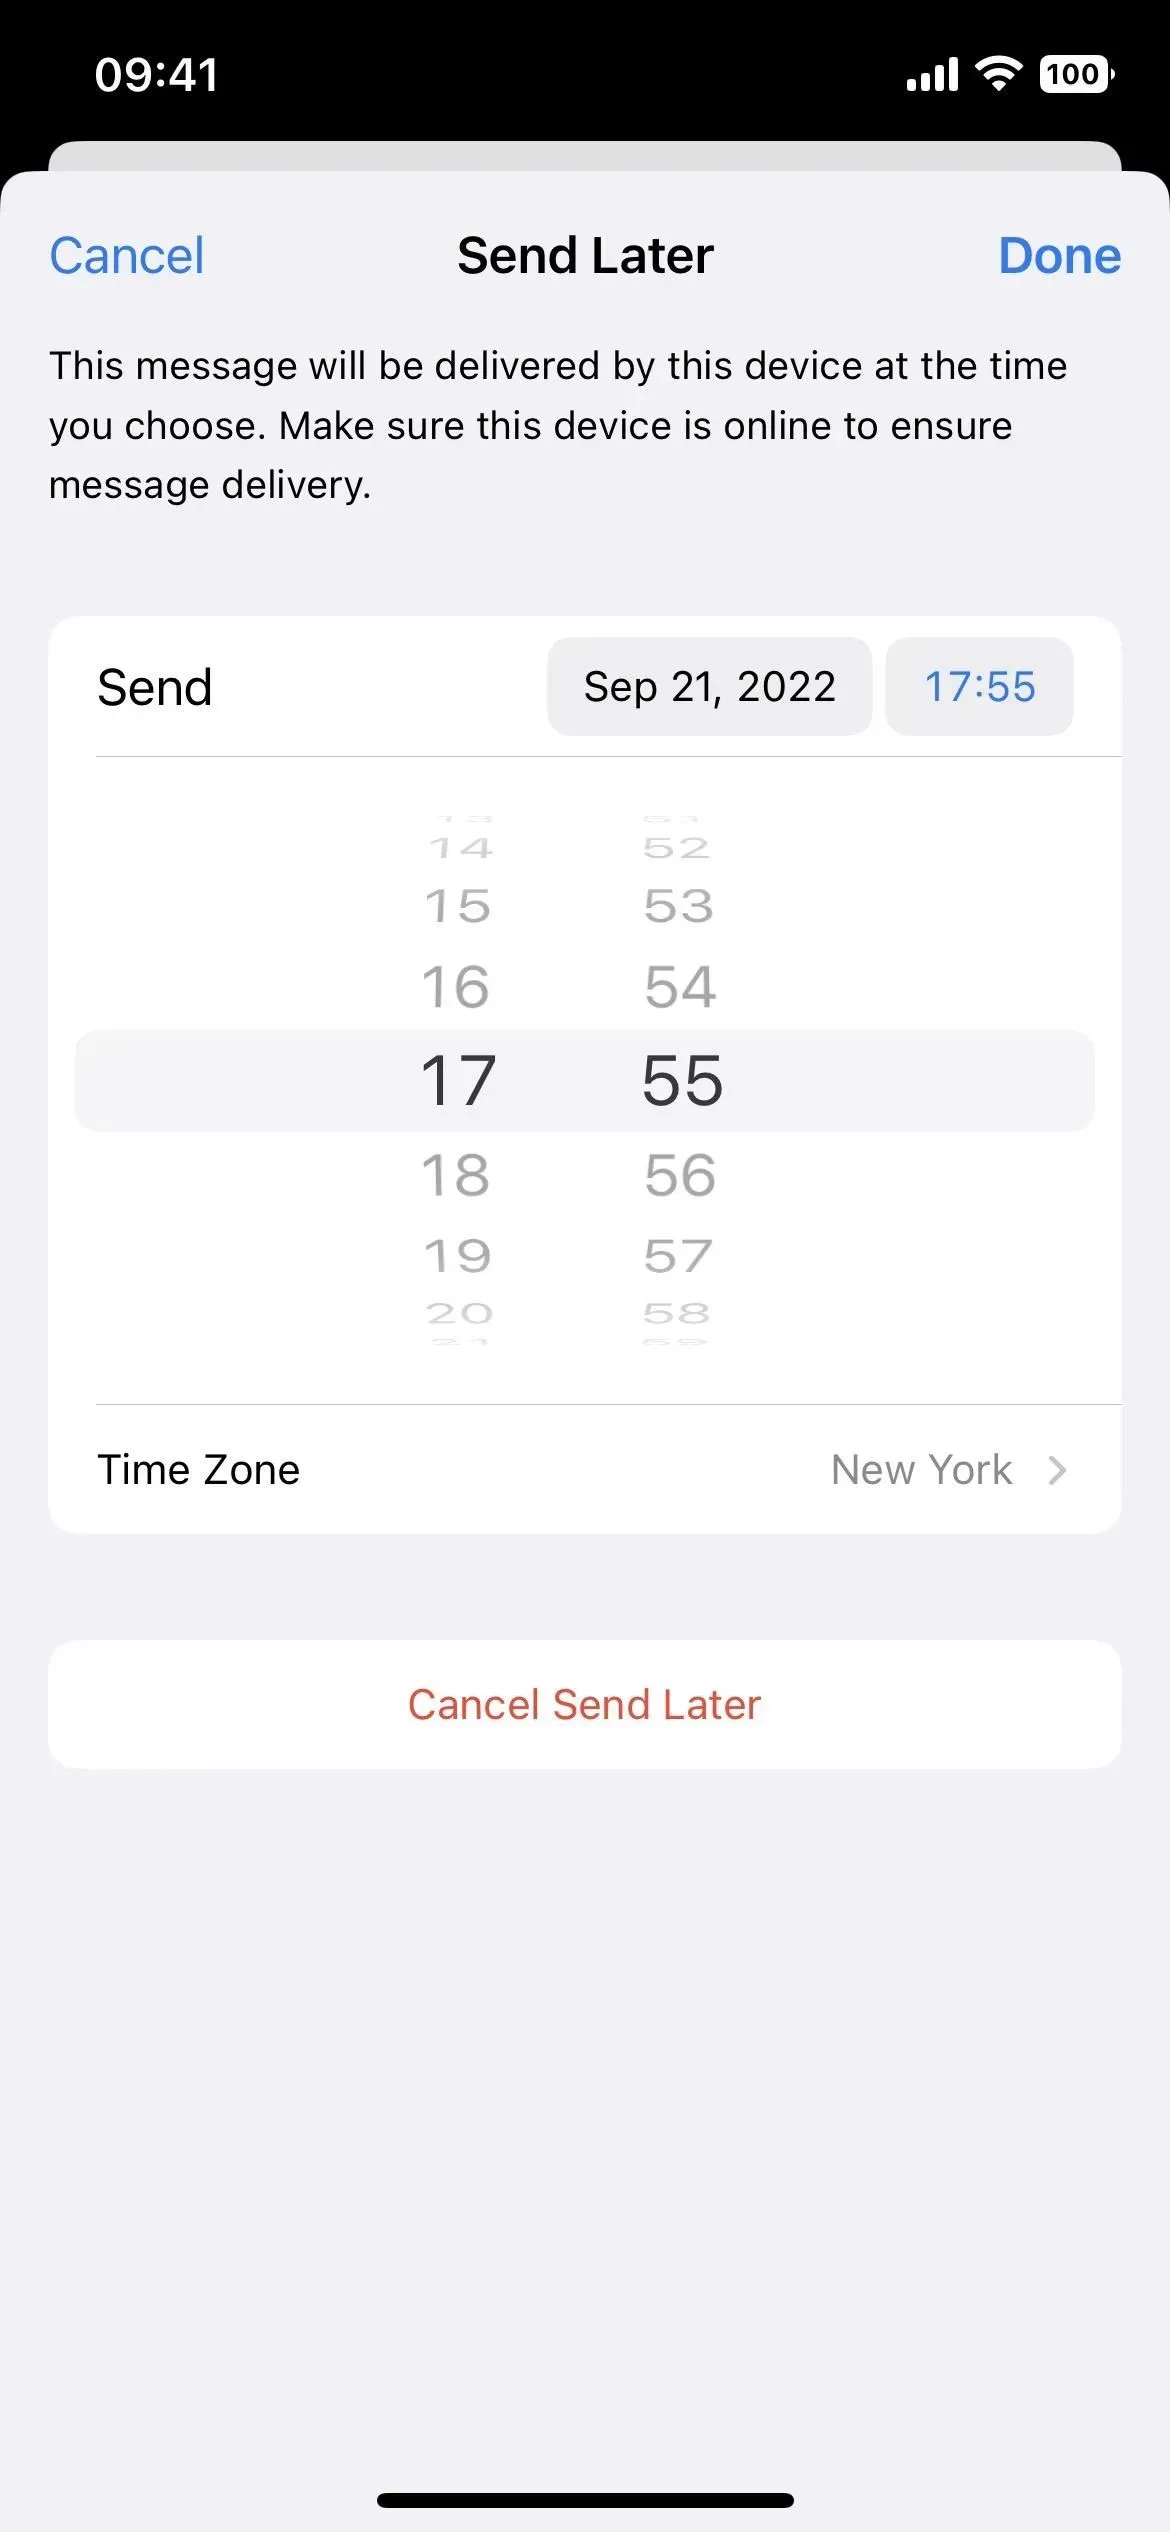
If you want to change the date and time, open the draft and click “Edit”next to “This email will be sent on [date] at [time].”The same “Send Later”interface will appear so you can transfer it. You can click “Cancel Send Later”to delete it completely (it won’t become a draft) or “Done”to save your changes.
“Send Later”doesn’t sync to iCloud or any of your email accounts as it’s a device feature, meaning it only works from the source device. For Mail to successfully send a scheduled message, your iPhone needs to be online at the scheduled time to ensure delivery.
If your iPhone is not connected to the Internet at the scheduled time, Mail will move your email from the Send Later folder to the Outbox folder. The message will automatically be sent as soon as your iPhone connects to the internet – email won’t be canceled entirely.
