


Many people use VPNs to access geo-restricted content and even to hide their browsing experience. Users have recently reported issues with their VPN. Many users have complained that Windows 11VPN is not working. This problem usually occurs due to reasons such as outdated Windows, faulty drivers, DNS problem, firewall problem, etc.
Fix VPN Not Working in Windows 11
This guide will help you fix Windows 11 VPN not working.
Use a third party VPN
The first thing you should try is to use a third party VPN. You can install a dedicated VPN on your computer that meets your requirements. Use a dedicated VPN instead of a built-in VPN and that will most likely solve the problem. If this does not resolve the issue, continue to the next troubleshooting step in this article.
Update Windows
Another thing you can try is to update the windows folder. To do this, follow the steps given below:
- Open the Settings app by pressing the key combination Windows + I.
- On the left sidebar, click on Windows update.
- Now on the right click Check for Updates.
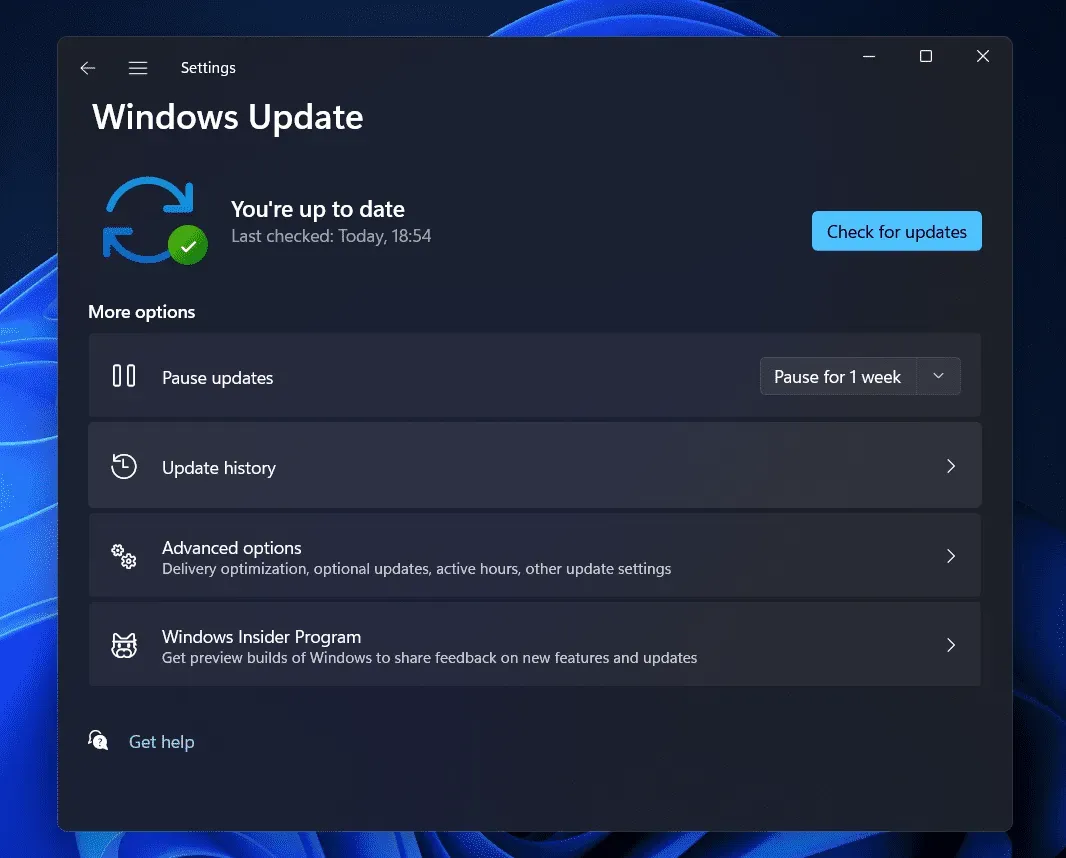
- Download and install the update, and then try using the VPN again.
Reset DNS
If Windows 11 VPN is not working, try flushing DNS. Flushing DNS should most likely fix the issue for you. To do this, follow the steps given below:
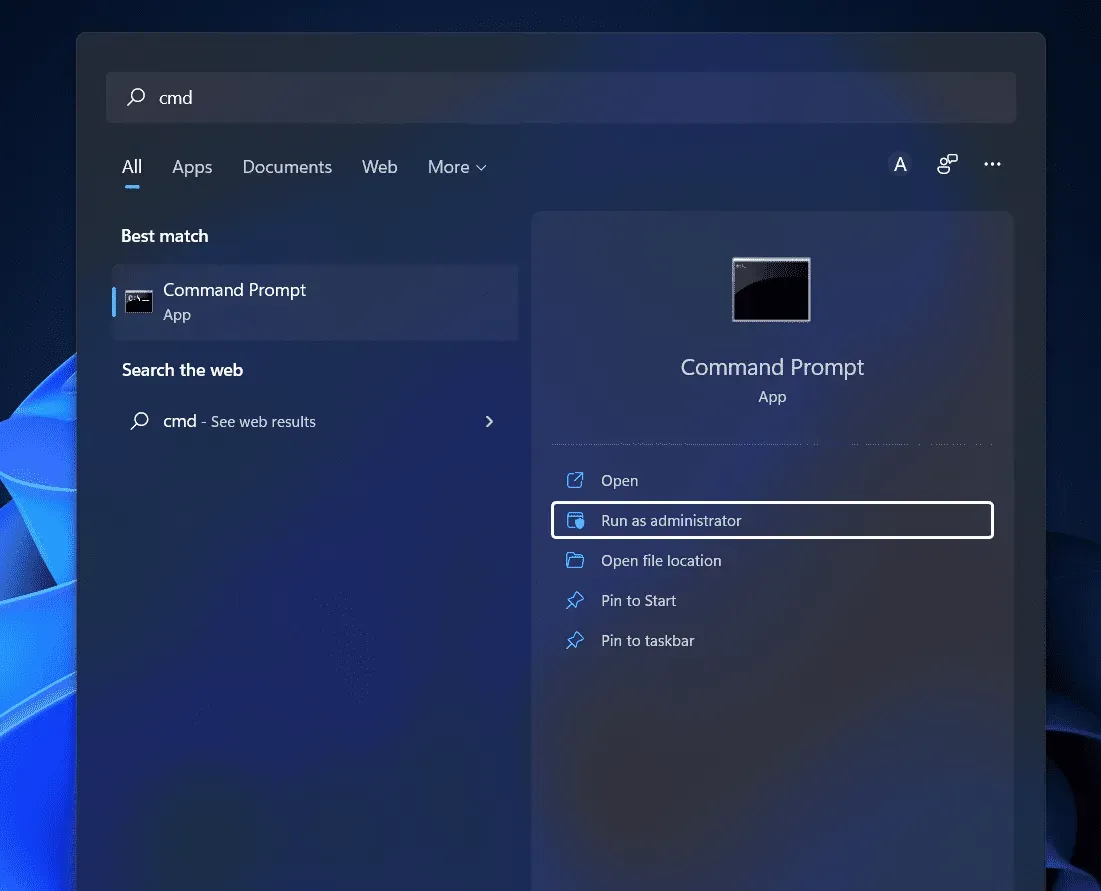
- Press the Windows key to open the Start menu.
- From the Start menu , search for CMD. Right-click Command Prompt and select Run as administrator.
- At the command line, run the following commands:
- ipconfig /release
- ipconfig /flushdns
- ipconfig /update
- netsh int ip reset
- netsh reset winsock
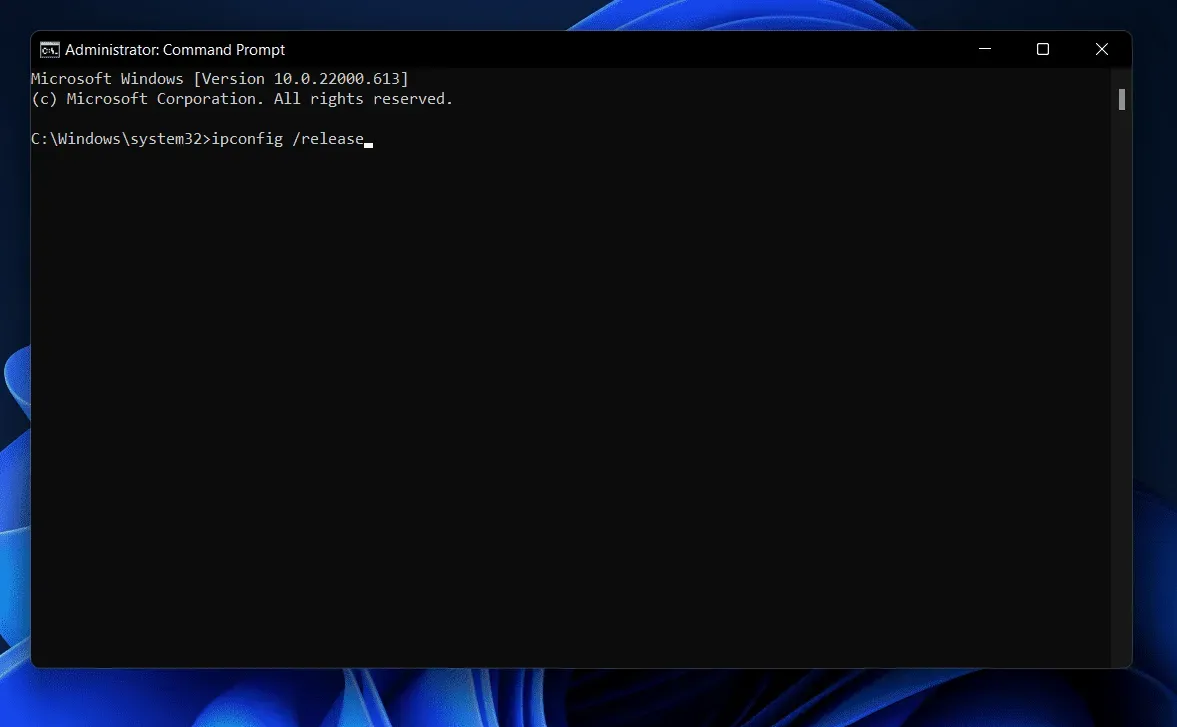
- After that, close the command prompt and restart your computer.
Disable firewall
You may also run into a problem due to a conflicting firewall. If you have a third-party firewall, try disabling it to resolve the issue. However, if you are using Windows Defender Firewall, you will have to disable it. To do this, follow the steps given below:
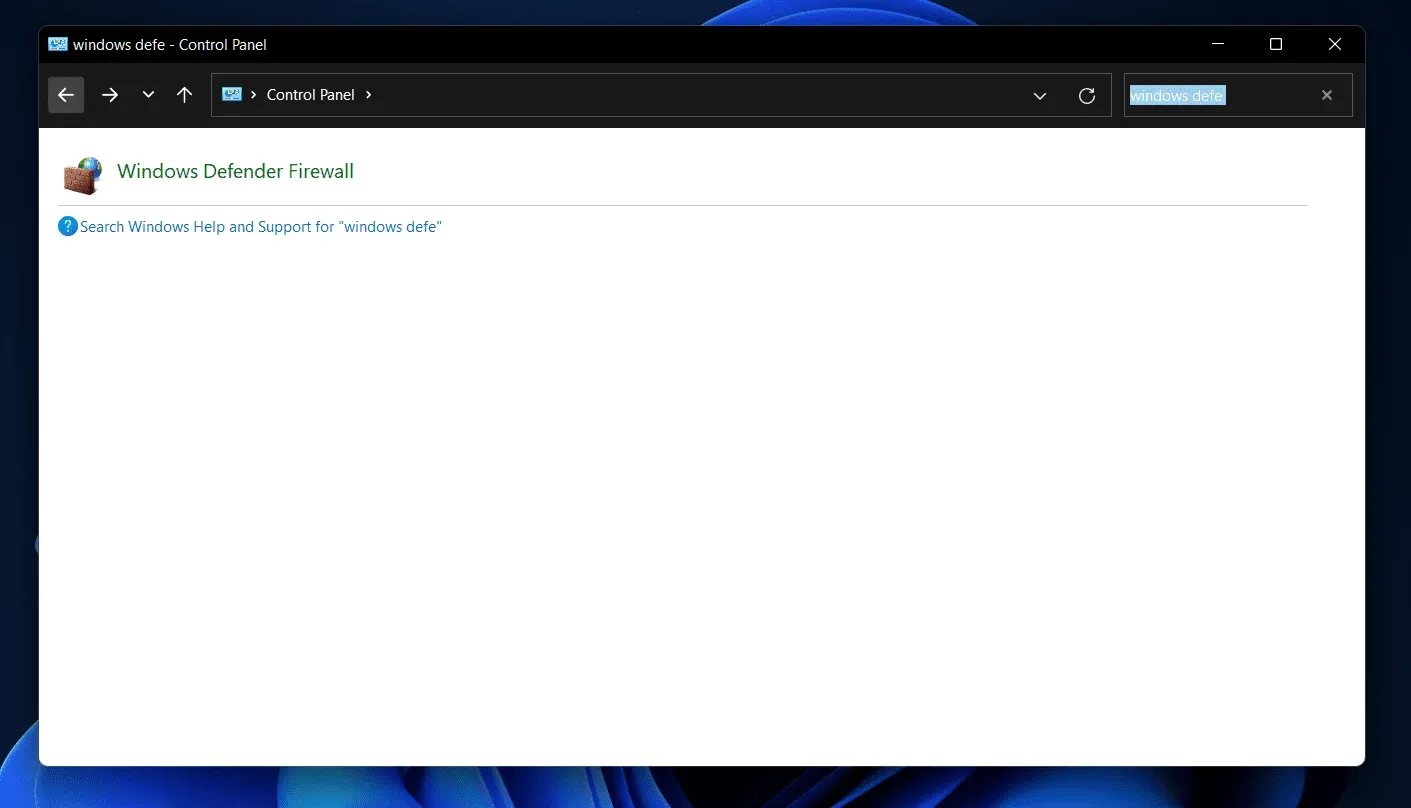
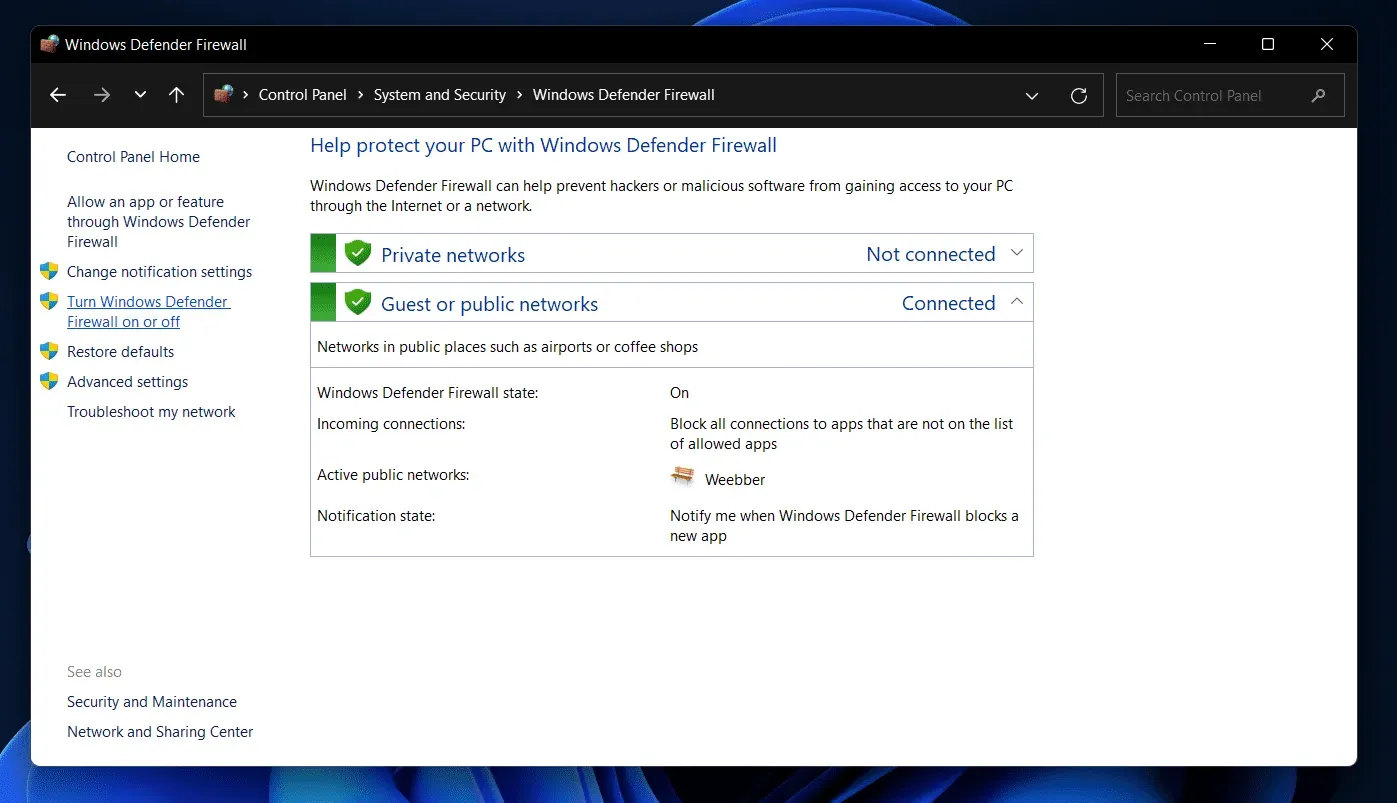
- Press the Windows key, find Control Panel and open it.
- In the Control Panel, find Windows Defender Firewall and open it.
- Then click Turn Windows Defender Firewall on or off on the left sidebar.
- Now select Turn off Windows Defender Firewall for both private network settings and public network settings.
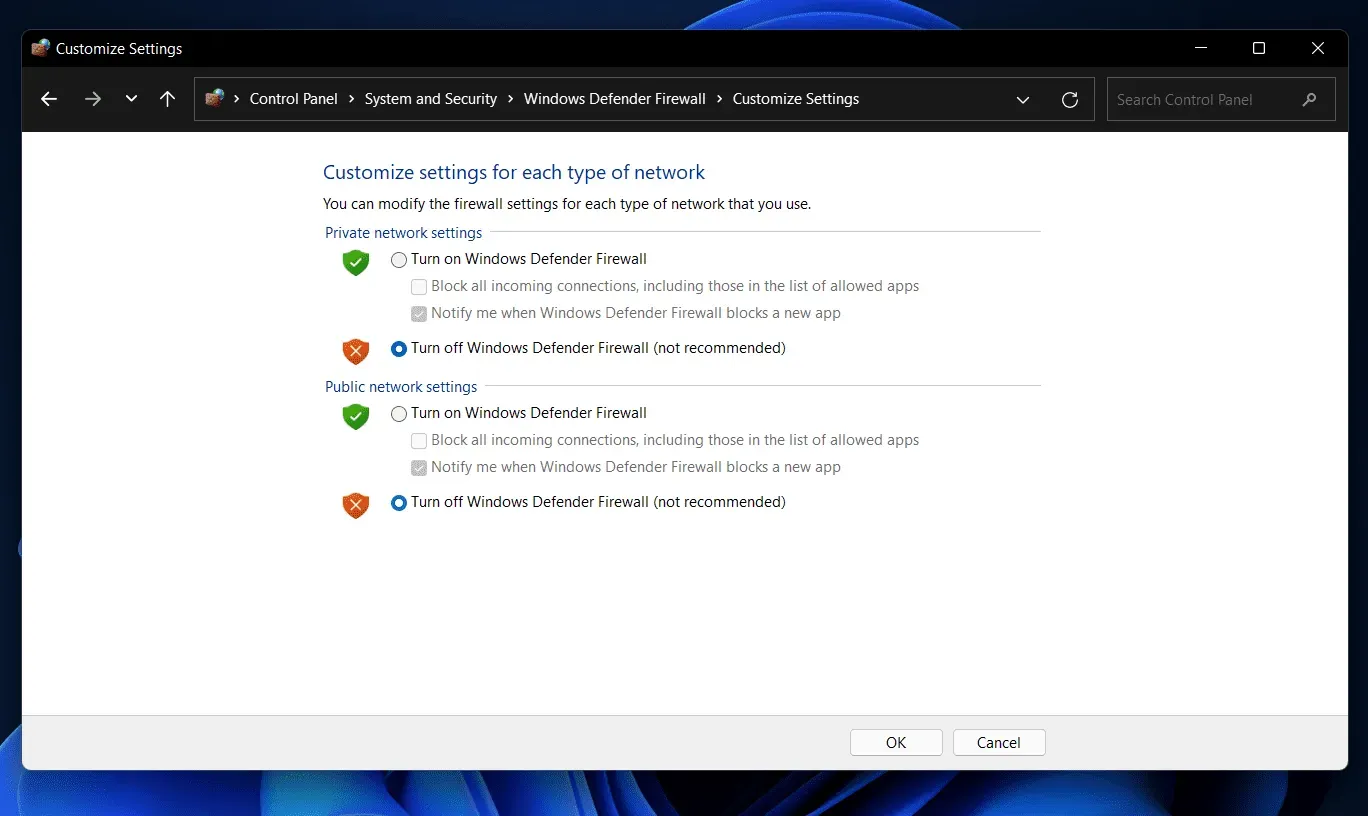
- Click OK to save your changes.
Reinstall WAN Miniport NICs
The next thing you should try is to reinstall the WAN Miniport NICs. To reinstall WAN Miniport network adapters, follow these steps:
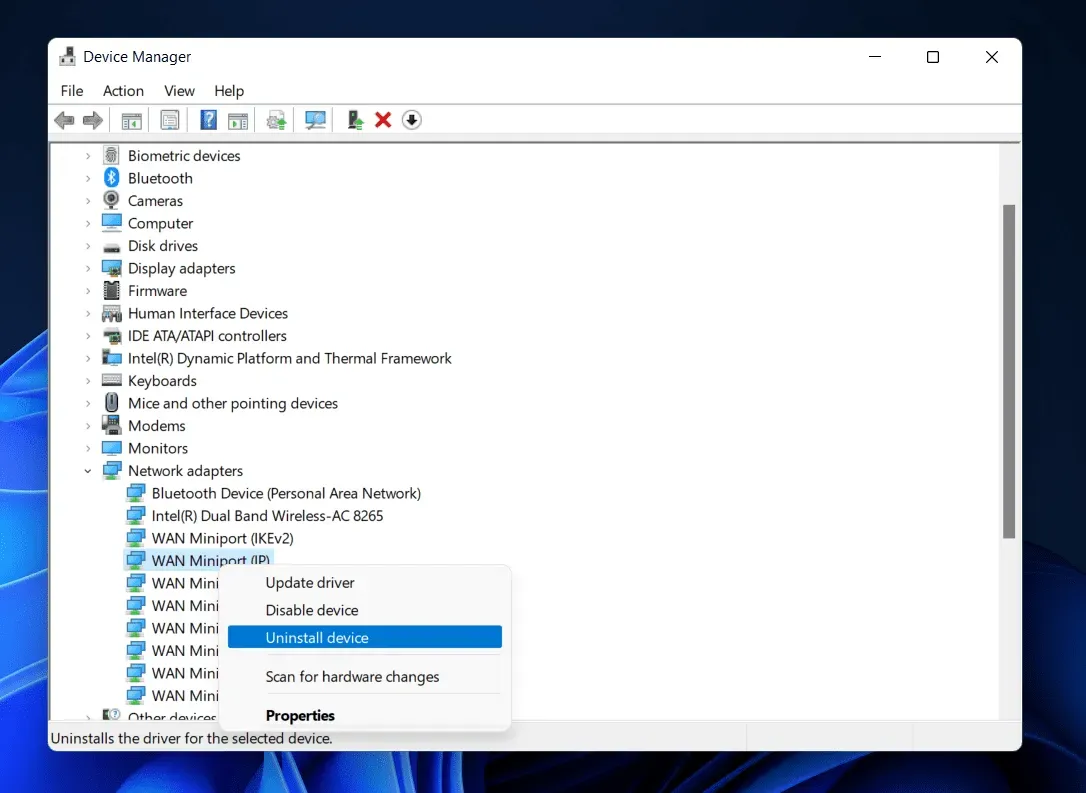
- Press the key combination Windows + X, and then click Device Manager.
- In Device Manager , expand the Network adapters tab .
- Now right-click on the WAN (IP) miniport and select Uninstall device.
- When asked to confirm uninstalling the driver, click Uninstall.
- Do the same for the WAN miniport (PPTP) and WAN miniport (IPv6) .
- Now restart your computer to reinstall the network adapter.
Disable proxy settings
If you are still facing the issue, try turning off your proxy settings. You can do this by following the steps given below:
- Open the Settings app on your PC by pressing the key combination Windows + I.
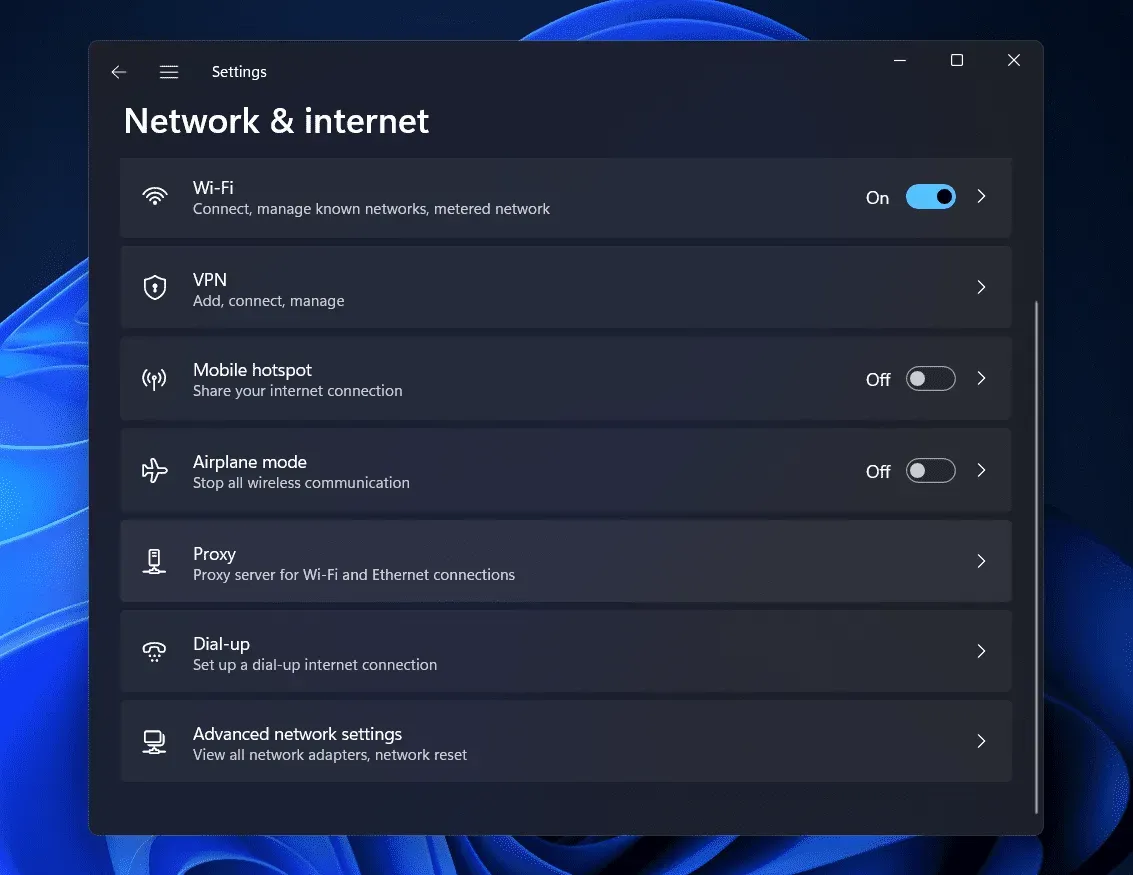
- On the left sidebar of the Settings app, click on the Network & Internet section .
- Now on the right click on the Proxy option .
- Click the Settings button , and then turn off the switch to use a proxy server. After that, click Save to save your changes.

Set exception for UDP
If Windows 11 VPN is not working, you can try setting up an exception for UDP. To set an exception for UDP, follow these steps:
- From the Start menu , search for Registry Editor and open it.
- In the Registry Editor , go to the following address:
- HKEY_LOCAL_MACHINE\SYSTEM\CurrentControlSet\Services\PolicyAgent
- On the right side, right-click the PolicyAgent, then select New and then DWORD (32-bit) Value.
- Rename it to AssumeUDPEncapsulationContextOnSendRule .
- On the right side, double click on the new key you created to edit it.
- Set the Value to 2 and click OK to confirm.
- Restart your computer and the issue should be fixed.
Restart your computer
The above steps should most likely resolve the issue. However, if you are still facing the issue, try restarting your Windows 11 PC. To do this, follow the steps given below:
- Open the Settings app on your Windows 11 PC.
- Make sure you are in the System section in Settings .
- Now on the right click Recovery.
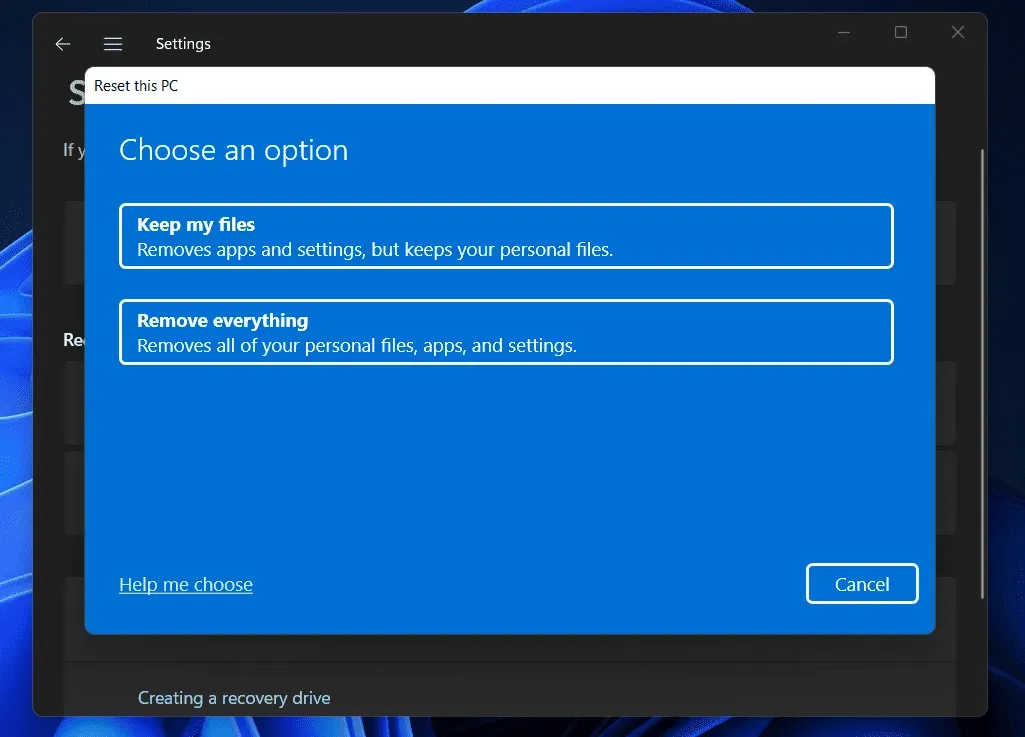
- Click the Reset PC button under Recovery Options.

- You will now see two options : Keep my files and Delete everything.
- Keep my files. This will remove apps and settings but keep your personal files.
- Delete all . This will delete all your settings, apps and also personal files.
- Now follow the instructions on the screen to restart your computer.
Final words
Here’s how you can fix Windows 11 VPN not working. By following the steps in this article, you should be able to resolve the issue. The last step we discussed in this article should be done at the end if none of the other steps solve the problem.