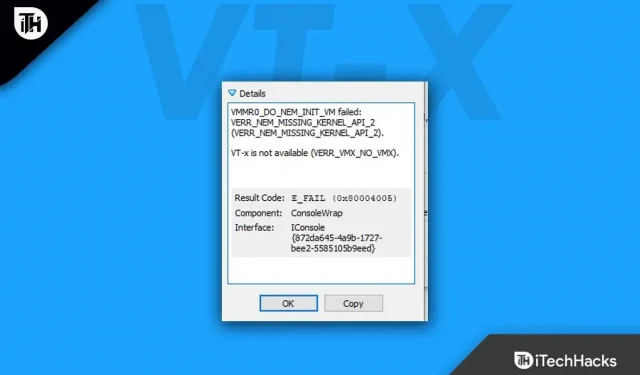
When you try to start a virtual machine using the VirtualBox application, you get the error message Vt-X Is Not Available (verr_vmx_no_vmx) on your computer. The most likely explanation is that virtualization has been disabled.
VT-x can often be enabled or disabled in your BIOS. Press DEL (or a similar key) to access BIOS settings the first time you turn on your computer. You can make VT technology available.
Read this post to find out how to fix the Vt-X Not Available (Verr VMX No VMX) issue and why it happened in the first place.
Content:
- 1 VT-X fix not available (VERR_VMX_NO_VMX)
- 2 Fix VirtualBox Vt-X (Verr_vmx_no_vmx) error 2023.
- 2.1 1. Disable Windows Defender Core Isolation
- 2.2 2. Enable Vt-X in BIOS (Boot Menu)
- 2.3 3. Using the command line, disable Hyper-V virtualization
- 2.4 4. Enable nested virtualization in Avast
- 2.5 5. Disable Device Guard / Credential Guard
- 2.6 6. Removing Third Party Antivirus Software
- 2.7 7. Enable virtualization
- 2.8 8. Disable Memory Integrity
Fix VT-X Not Available (VERR_VMX_NO_VMX)
I have investigated the issue by trying to reproduce it and by checking other users’ reports. As far as I understand, several circumstances will cause this error message to be generated:
VT-X is not enabled in the BIOS.
Some third-party software in the BIOS settings allows you to disable VT-X manually or disable it remotely. This will result in the “Vt-X Not Available”(Verr VMX No VMX) issue.
Processor does not support VT-X
Rarely, but sometimes the problem can be related to the PC’s inability to use VT – X due to its hardware limitations .
Windows Hyper-V virtualization is enabled.
VT-X is hindered by Microsoft Hyper-V technology. The OS will automatically disable VT-x if Hyper-V virtualization is enabled.
VT-X has been disabled since the Avast update.
Avast recently released an update that completely disables VT-x. Real-time protection is active at the same time unless the user activates multi-layer virtualization in the options menu.
Core isolation enabled:
The VirtualBox application may run into problems after enabling the Core Isolation option on your machine, resulting in VT-x (VERR VMX NO VMX) being unavailable. Therefore, we advise you to disable this feature and check if the problem is gone.
Fix VirtualBox Vt-X (Verr_vmx_no_vmx) error 2023
1. Disable Windows Defender Core Isolation.
Windows Defender Device Core Isolation is known to conflict with VT-X. Check if kernel isolation is enabled if you are having issues with Vt-X Not Available (Verr VMX No VMX) and using Windows Defender as the default security setting.
- Use the star icon located in the lower left corner to search for Windows Defender.
- Go to the Windows Defender Security Center and select it to access the built-in security feature.
- Select Device Security from the menu on the left in Windows Defender Security Center.
- From the Device Security menu, select Core Isolation Details (under Core Isolation).
- Make sure the memory integrity switch in the kernel isolation menu is turned off.
- After disabling the setting, restart your computer to check if the issue is resolved.
- Verr vmx no vmx solves the “Vt-X not available”issue.
2. Enable Vt-X in BIOS (Boot Menu)
Disabling the “Virtualization Technology”option in the BIOS settings can significantly affect this issue. So, check if this option is disabled and enable it if it is.
Vt-X is not available (Verr VMX No VMX), most likely caused by the technology being disabled in the BIOS settings. Don’t give up on this method until you’ve checked to see if any third-party apps can change these settings.
- To enter “BIOS mode”, first “boot”the computer, and when the “Windows logo”appears on the screen, press the setup button.
- In BIOS mode, select the Security tab and then select System Security.
- Find the “Virtualization Technology (VTx/VTd)”setting and make sure it is “enabled”. Do it now if it’s not already enabled.
- “Reboot”the machine using virtualization technology (VTx/VTd). Verr vmx no vmx solves the “Vt-X not available”issue.
3. Using the command line, disable Hyper-V virtualization.
First, make sure VT-x is not interfering with Hyper-V virtualization. The virtualization equivalent of VT-x is instantly disabled when enabling or enabling Hyper-V virtualization. Hyper functionality disabled after update. Installing an app may have caused this issue. Keep in mind that in most cases, Hyper-V technology continues to work even after you uninstall the application that enabled it.
There are various ways to disable Hyper-V virtualization. To uninstall Microsoft Hyper-V, run the following instructions from a command prompt (as an administrator):
- Hold the Windows key and R together to open the Run dialog box. To open an elevated command prompt, press Ctrl + Shift + type “cmd”. When the UAC (User Account Control) window asks you a question, click Yes.
- Type each of the following commands one at a time into an elevated command prompt to disable Microsoft Hyper-V:
- bcdedit /disable hypervisor startup type
- bcdedit /change VM No
- dism.exe / Disable Feature: Microsoft-Hyper-V / Online

- After the commands run correctly, close Command Prompt and restart your computer.
- When you restart your VirtualBox machine, see if the same error message appears.
- Verr vmx no vmx solves the “Vt-X not available”issue.
4. Enable nested virtualization in Avast.
If you are using Avast, be aware that a recent antivirus update introduced an automatic feature that disables VT-X on your system when certain conditions are met. This issue can be resolved without uninstalling the third-party security client.
Enable the Avast Settings and Troubleshoot checks before selecting “Use virtualization nested within nested virtualization”.
Also, enable hardware virtualization.
Check if the “Vt-X Not Available”(Verr VMX No VMX) issue has been resolved.
5. Disable Device Guard / Credential Guard
Use “Window + R”at the same time to launch the “Run”dialog box. Press “Enter”after typing “gpedit.MSC”in the dialog box.
- Navigate to the Local Computer Policy, Computer Configuration, Administrative Templates, System, Device Guard, and Disable Virtualization Based Security menu options in the Group Editor window.
- Here is another way to complete the task if you cannot use the Group Policy Editor.
- In the registry, change the value of the key “key HKLM > System > CurrentControlSet > Control > DeviceGuard > EnableVirtualizationBasedSecurity > Enabled”to “0”.
- Check if the “Vt-X Not Available”(Verr VMX No VMX) issue has been resolved.
6. Remove Third Party Antivirus Software
This issue can be caused by any antivirus software you have installed on your computer. It is better to remove it temporarily and check if that solves the problem. The following procedures will allow you to disable Windows Defender Firewall if you are using it:
- In the search box next to the Start menu, type “Settings”and press the Enter key.
- Select “Windows Security”after selecting “Update & Security”in the left pane of the Settings window.
- Under Protection scopes, click Virus & threat protection, and then click Manage settings under Virus & threat protection settings.
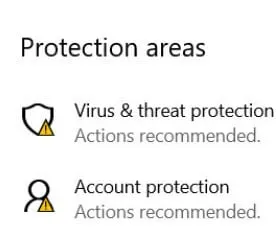
- vt-x is not available
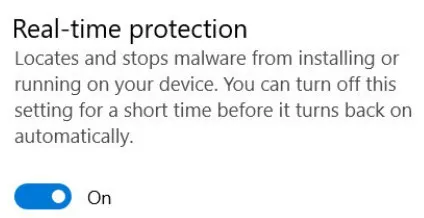
- Make sure that the “Real-time protection”switch is turned off in this window.
- Select “Firewall and Network Protection”in the left pane of the “Windows Security”tab.
- Select “Domain Network”, “Private Network”, and “Public Network”in order in this field.
- Check if the “Vt-X Not Available”(Verr VMX No VMX) issue has been resolved.
7. Turn on virtualization
- Launch a command line window.
- Now type systeminfo.exe into the command prompt.

- vt-x is not available
- You can see that virtualization is enabled in the firmware to the right of the Hyper-V system requirements.
- Select settings from the drop-down menu by going to the start menu.
- Then select Update & Security from the list. Click “Recovery”on the newly added tab that will appear.
- Restart by clicking on the “Restart Now”button under “Advanced Startup”which can be found under “Recovery”and click.

- When a blue screen appears with certain icons, Troubleshoot must be selected.
- Click the “Advanced”tab. The firmware is the cause of our problem, so you should look for this setting.
- Once we find them, click on the UEFI firmware settings option and the restart button will appear once again. Press Enter to restart.

- vt-x is not available
- By pressing the corresponding function key, find the BIOS setting.
- There will be a new panel; select “System Configuration”(you can use the arrow keys for this) and then search for “Virtualization Technology”.
- At this point, your virtualization technology is activated. By pressing F10 you can exit this.
- Make sure you resolve the “Vt-X is not available”error (Verr vmx no vmx).
8. Disable Memory Integrity
Windows security comes with a virtualization-based security feature that can detect low-level code injections and protect your computer from even the most serious infections. However, this conflicts with VirtualBox just as it does with Hyper-V.
However, most users do not need the high level of protection that Core Isolation offers. On modern laptops, it is disabled by default because it interferes with already installed software to optimize hardware performance.
To see if your problem is fixed, you can disable the memory integrity feature of Windows Security. Do the following to help with this:
- In the search box on the taskbar, type “Windows Security”.

- Click on a specific search result.
- Click the Device Security tab on the left side.
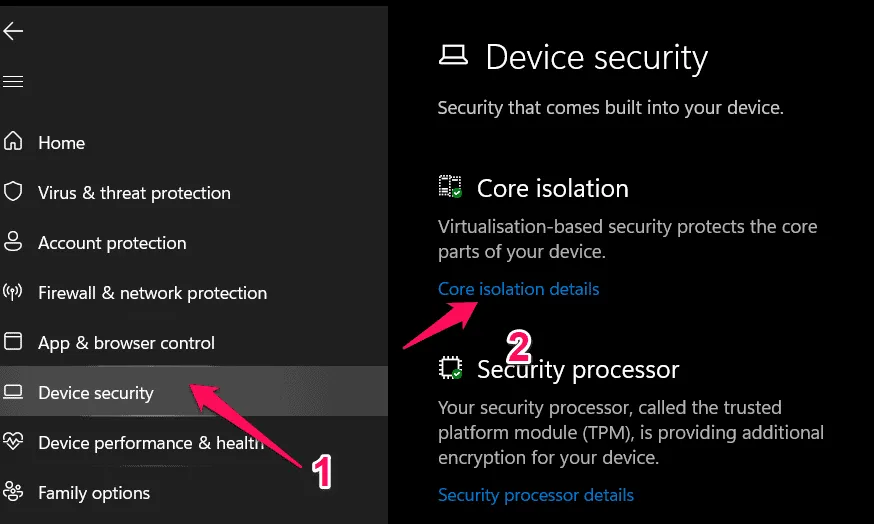
- Select Core Isolation Details.
- Disable Memory Integrity by toggling the button.
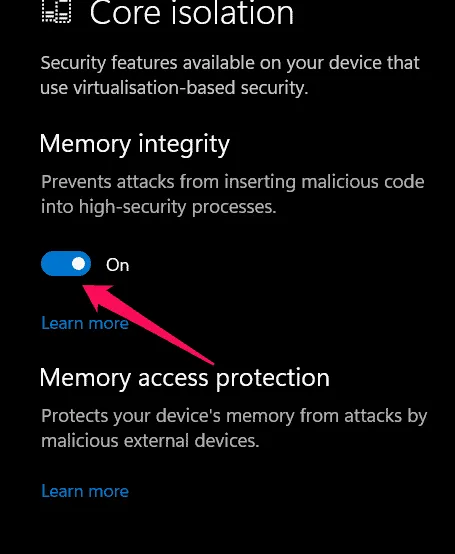
- After doing that, restart your computer to check if the issue is still there.
Conclusion
Your Windows computer will display a “VT-x disabled in BIOS for all CPU modes”error if virtualization is not enabled. However, the BIOS settings of many Windows PCs disable virtualization by default; virtualization must be enabled to create a new virtual machine. I hope this post was helpful to you. If you have any questions or comments about this article, please leave them in the comments section below and we will get back to you.
