
This is a worrying moment when the iPhone touch screen is not working in the latest version of iOS 16. Many iPhone owners have reported that the device was ignoring touch input and intermittently responding. Some of the owners have speculated that the case and screen protector are the main reason for this. We must take into account a few points and then solve the touch screen problem.
Content:
- 1 Why iPhone touch screen not working in latest iOS update
- 2 Fix iPhone Touch Screen Not Working on iPhone
- 3 Outcome
Why is the iPhone touch screen not working in the latest iOS update
A Plaxo survey shows that 33% of consumers either lose their device or break their smartphone. In another report, SquareTrade reported that Americans break 50 million phone screens each year, which equates to about $3.5 billion in replacement costs. It wouldn’t surprise me if most readers have a small or large crack in their iPhone display.
I had an iPhone 4 with a broken glass, but the touch was responsive and it could perform everyday tasks. Let’s take a look at a few reasons why your smartphone’s touch screen is having trouble registering input.
- physical damage
- Software error
- Misconfigured iOS
- Accessories
- Interference from debris and dust particles
- Service
Contact an Apple Service Center if the touch screen doesn’t work after applying the solutions. Read the entire tutorial, then apply the solutions.
Fix iPhone Touch Screen Not Working on iPhone
We’ve cited a few caveats, so don’t keep trying solutions while you’re reading the guide.
Restart your iPhone
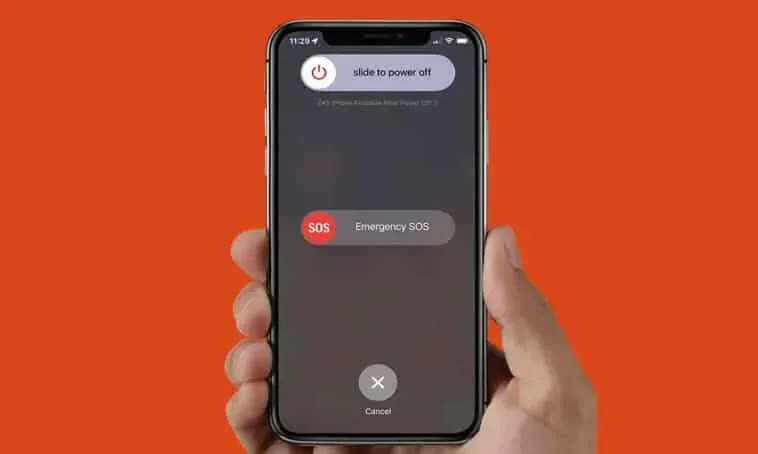
Millions of smartphones do not get enough sleep and continue to work in standby mode for months. I haven’t let my smart device down for weeks, and I decided to let it rest for a few minutes. Manufacturers are aware of user behavior and have equipped the hardware to deal with stress.
You must keep in mind that smart devices are a combination of software and hardware. The iPhone needs to rest for a few minutes a week so that it can shed temporary files and the internal components can rest. Turn off your iPhone and leave it aside for a few minutes and then turn it back on.
Let me show you another way if the sleep/wake button or the side button is not working.
- Open the Settings app.
- Tap the General option.
- Swipe down and tap the Turn off button.
- Swipe the power button to the right to turn off your iOS device.
Let your iOS device rest for five minutes.
- Plug in the charging cable and plug in the power adapter to wake up your phone.
Your iPhone wakes up automatically and does not require side button intervention. Periodic hibernation improves performance by allowing the software to dump temporary files and then run the drivers again.
Clean iPhone
You may have read somewhere that there are more germs on smartphones than on toilet seats. Your iOS device accumulates dust, debris, and harmful bacteria from months of use. Do not take this lightly and wipe the device with a dry cloth.
You should not take a random cloth from the wardrobe and clean the device. Take the necessary measures to prevent damage, and device owners should avoid liquid damage. Let me share a couple of tips that I use to clean my iPhone or any other smartphone in my collection.
A. Take a dry microfiber cloth.
Don’t buy expensive microfiber cloth online, you can get it for less than $1 at nearby stores.
B. Do not use liquid to remove more stubborn stains such as water.
Most repair shops have 99% isopropyl alcohol. I had my phone repaired a few days ago and the engineer wiped it with alcohol.
You should get 99% isopropyl alcohol from your local store and it’s good to have it in your pantry. Don’t worry about online pricing because you can get the same product at your local store for a nominal price.
C. Repair glass.
A third of an iPhone breaks every year and 15% of them still use it with a cracked screen. Do not apply liquid solution to a broken screen, and you should avoid contact with the liquid even if the screen has a small crack.
Broken iPhone glass
I myself had a cracked smartphone, but I had the glass replaced for $16 at a third-party store. Contact a trusted 3rd party engineer and have them replace the glass if the touchscreen and display are working.
Of course, you can request an Apple Care+ warranty to replace your broken screen. Many consumers have not opted for the Care+ service and the device warranty has expired. The Apple service center charges a ridiculous amount for repairing a broken part, and then you can turn to third-party repair shops for help.
However, you should be careful as third party repair shops are notorious for stealing original parts from the device. Millions have faced the problem, and an outside spokesperson justifies the action by saying “it’s part of the business.”In general, you can replace the glass if the display and touch functions work.
Remove the case and protective film
Apple does not ship iPhone with a compatible screen protector. Owners of new smartphones have to rely on the market to supply tempered glass for the model.
Unfortunately, tempered glass doesn’t do extensive testing on the product, and they want to monetize it as soon as possible. There is no testing phase, and you end up with a screen protector and case that poses problems with capacitive touch.
Remove the tempered glass and cover/case from your iPhone, then restart your device. The phone sensor should work smoothly and it will no longer have problems registering input. Read verified customer reviews and then add tempered glass to your shopping cart.
Adjust 3D Touch sensitivity settings
Light sensitivity determines the pressure on the display and may reject some inputs. iPhone is used by millions of users around the world, so you have 3D Touch sensitivity options. You can adjust the sensitivity settings in the iOS software and find the right pressure value for your environment.
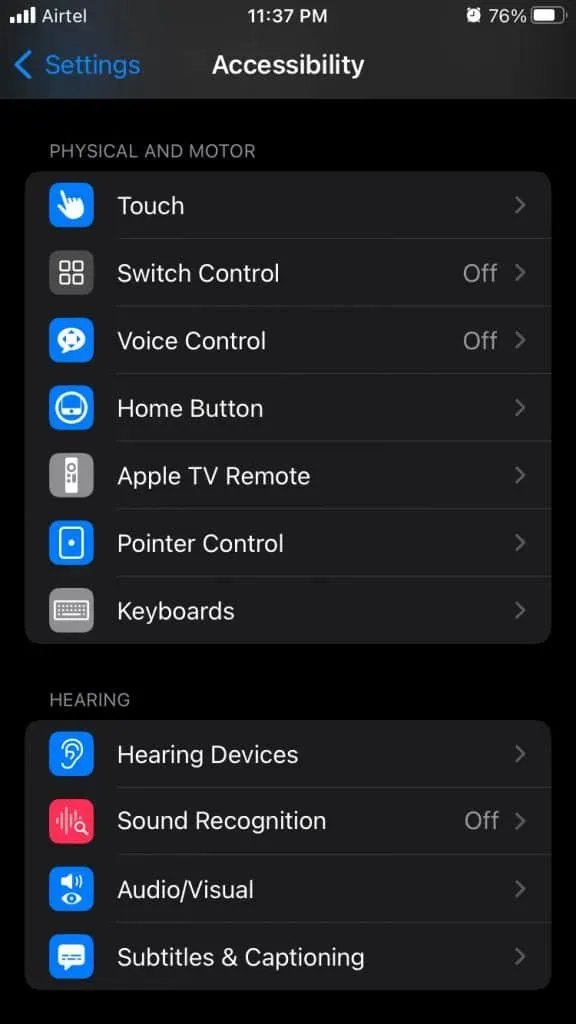
- Tap the Settings app.
- Select the Accessibility setting.
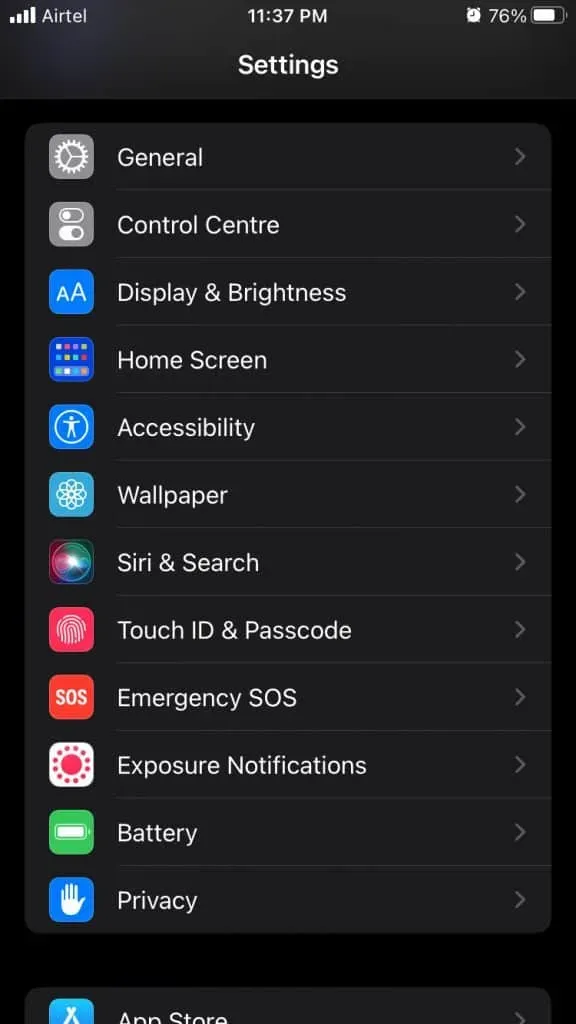
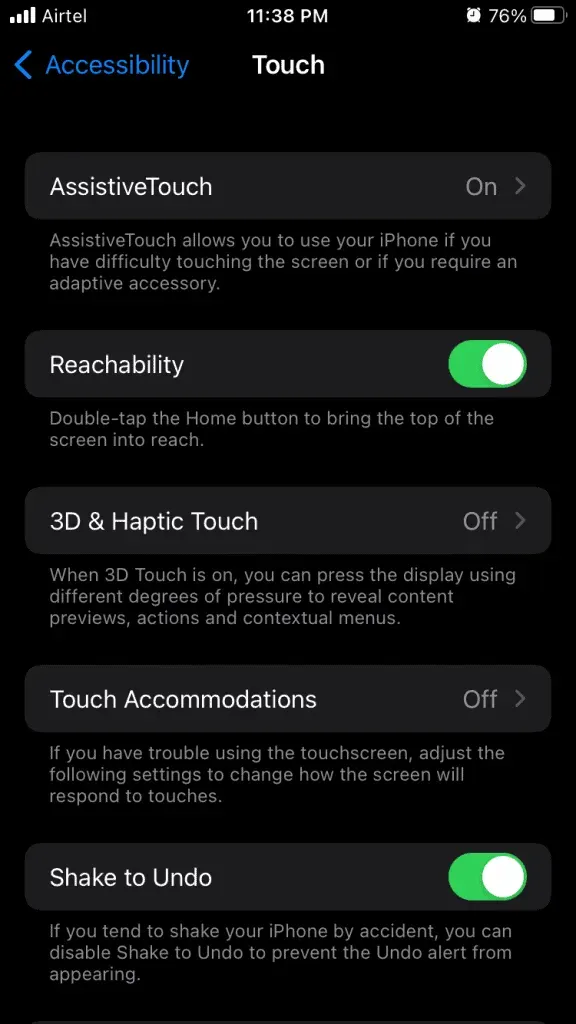
- “Tap”option on the first line and tap to view more.
- Select the “3D and Haptic Touch”options.
- You can increase the 3D Touch sensitivity from Light, Medium and Firm.
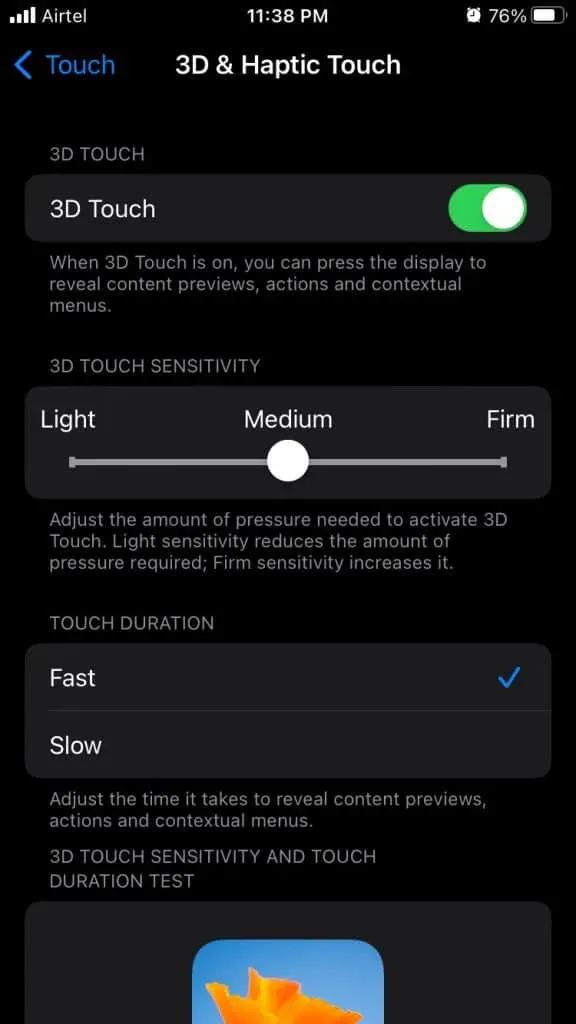
The iOS software defaults to medium 3D Touch sensitivity and switches to hard for best results. You can return at any time to restore settings so you don’t lose important features.
Free internal storage
Apple boasts about the combination of software and hardware, and to some extent this is true. Many Linux operating systems (LTS) are optimized as iOS software. I highly doubt you will ever run into performance issues unless this is the latest release from the official developers.
Free up internal storage if you have one of these devices with 32GB/64GB ROM. First, find what is taking up most of the memory, and then delete unnecessary files from the device.
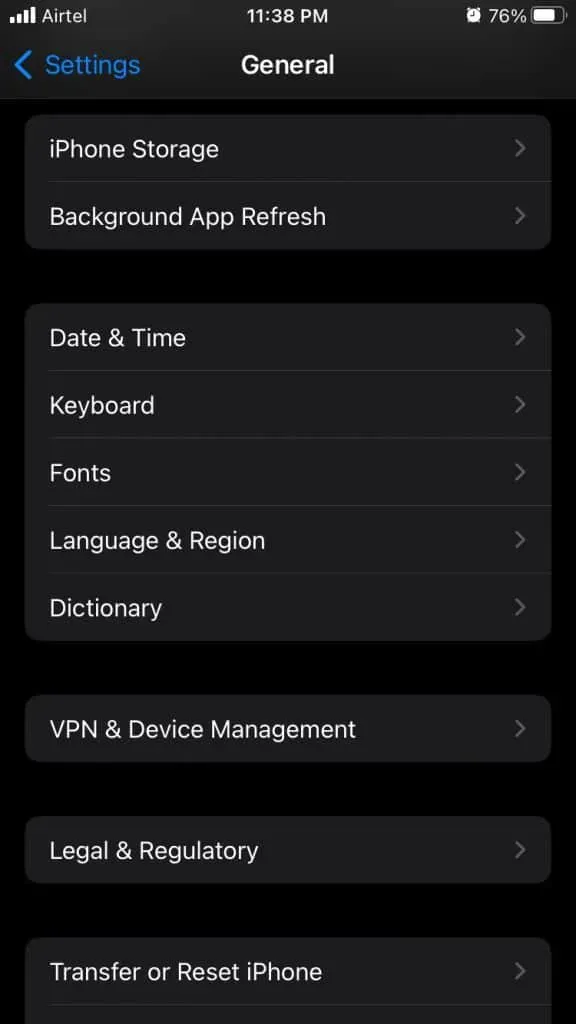
- Open “Settings”from the home screen.
- Tap the General option.
- Select “iPhone Storage”to continue.
- Find an app or media on your smartphone that is taking up a lot of memory.
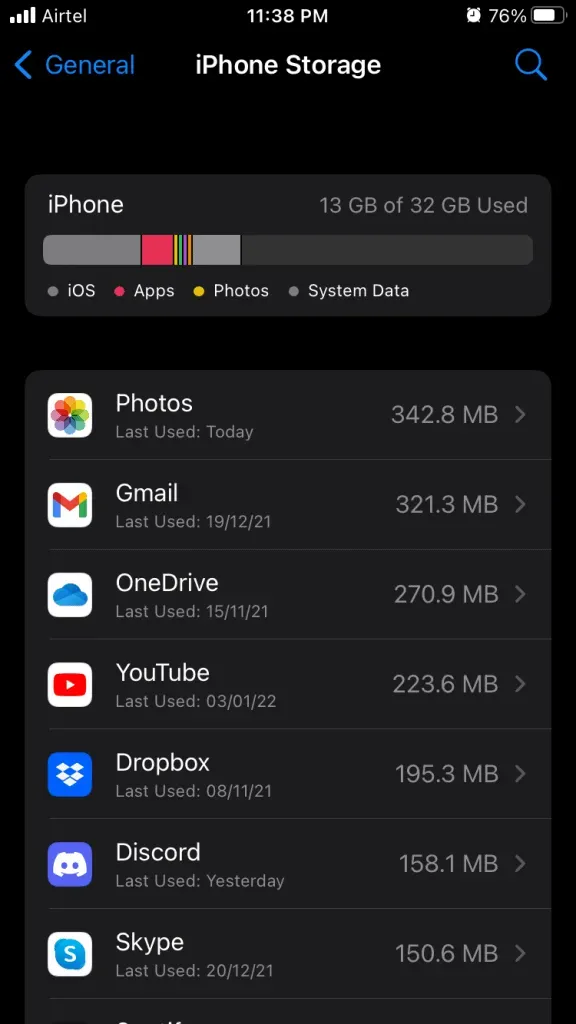
- Delete unnecessary files from your device.

The internal memory must have at least 2 GB of free space. It’s a shame that Apple sells 64GB without SD card expansion in entry-level models. iOS uses internal storage and helps the software manage RAM better.
iOS reset software
Factory reset has been around since the days of regular phones and it has been an effective option for Java mobile phones. Thankfully, iPhone OS 1 has an option to reset the software, and the official developers have gone ahead with it.
Use iTunes or Finder (Mac) to back up your data to local storage. I skipped iCloud backup and you can backup your data to cloud storage if it has no limit. Charge your iPhone and keep the battery at least 85% charged.
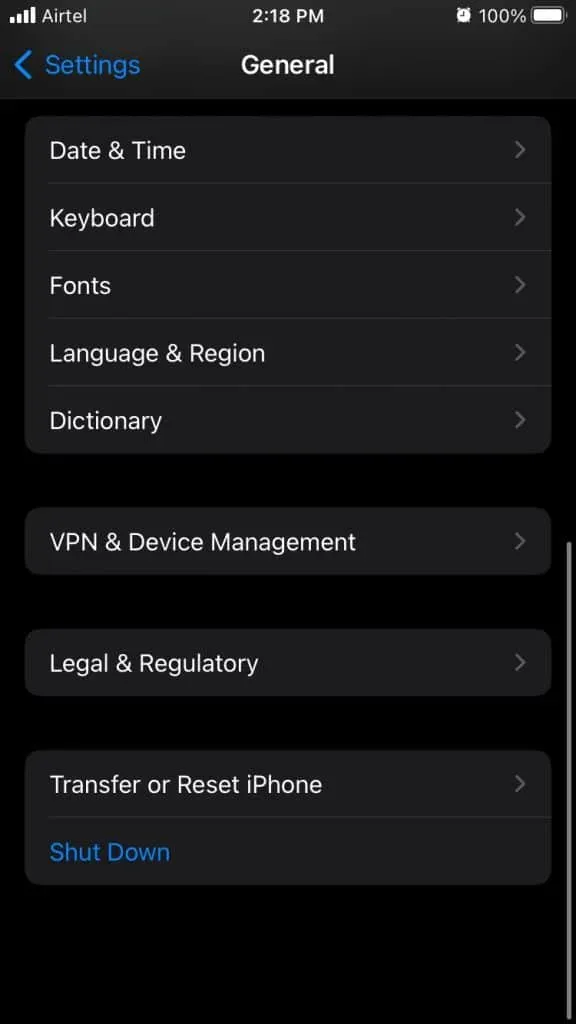
- Open “Settings”from the home screen.
- Tap the General option.
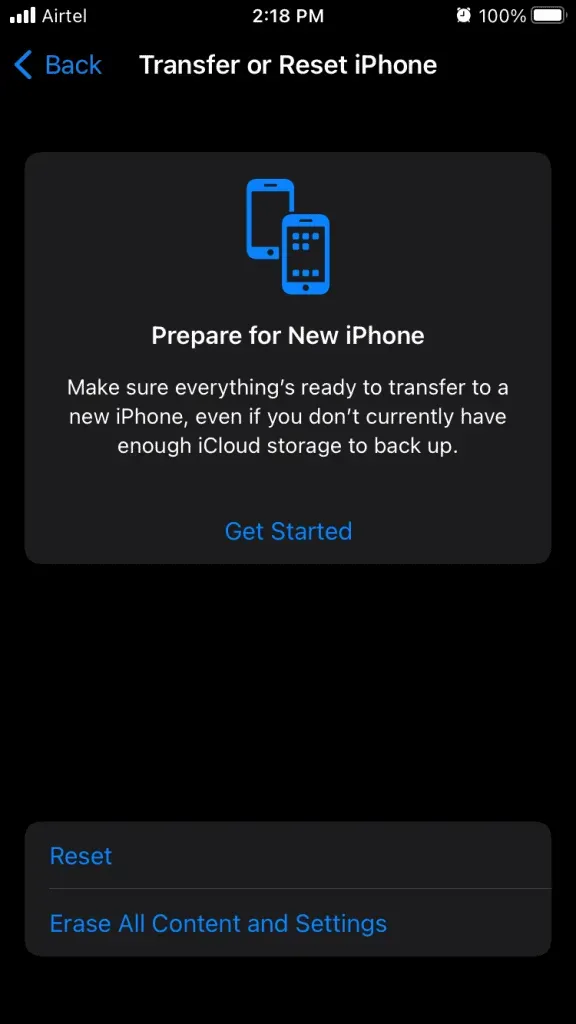
- Click Transfer and Reset iPhone from the bottom.
- Click on the “Reset”button.
- Click Reset All Settings.
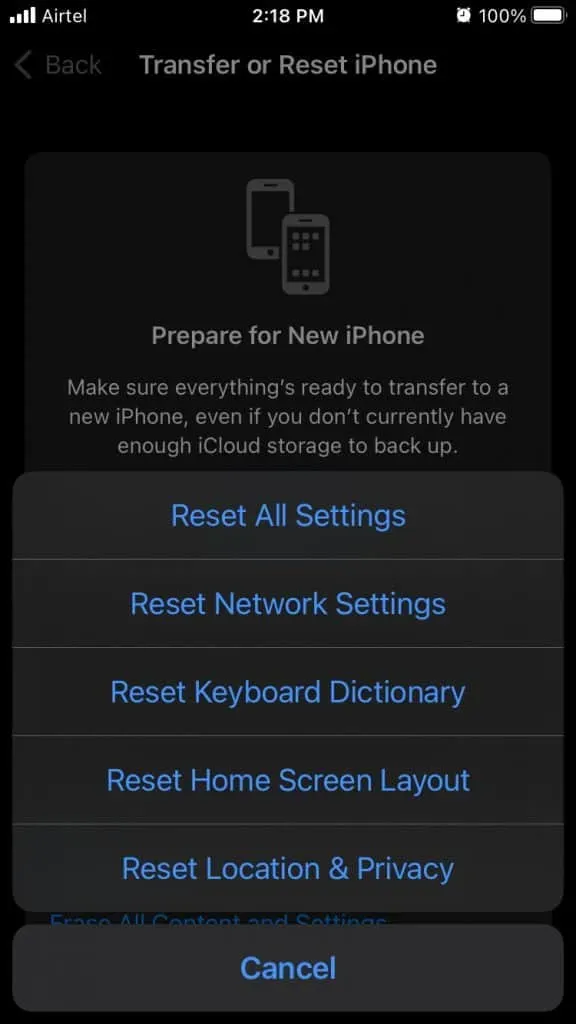
- Go through security protocol.

- Click “Reset All Settings”to start the reset process.
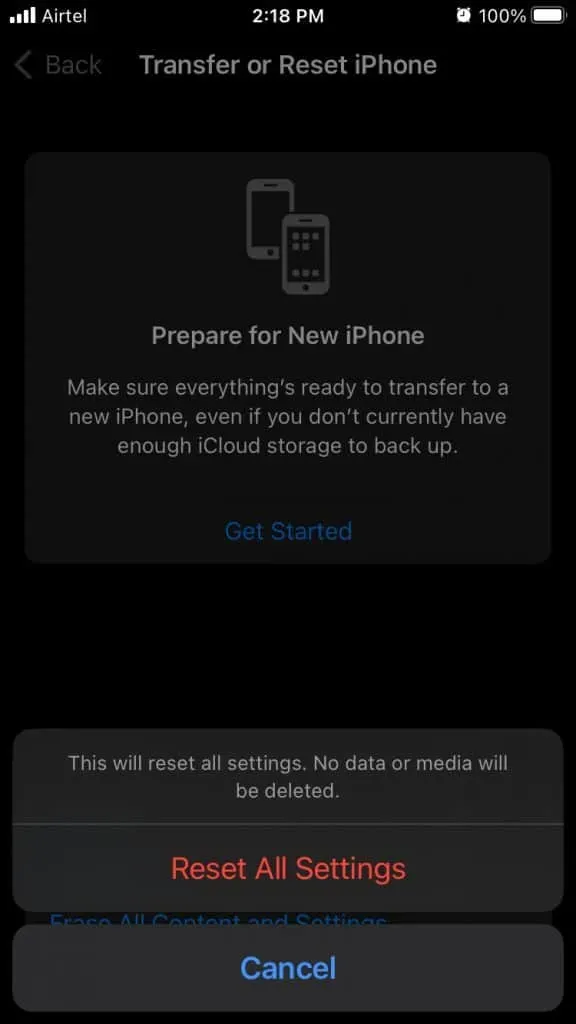
Your iPhone will restart and it will show you a progress bar with the Apple logo. Now you need to sit down and wait for the reset process to complete. You don’t have to set up the software from scratch, but you will lose user data.
Reinstall the iOS software
I always ask readers to reinstall the iOS firmware and this is effective in resolving many software related issues. Of course, we are not asking you to avoid damage at the hardware level, but you can consider this as a last resort.
Note. You must remember your Apple ID credentials so you don’t become the next victim of an iCloud lock.
Step #1: Data backup
I implore everyone to back up on Windows or Mac computers and iCloud account. The internal memory of iPhone will be cleared and saved data will be deleted permanently. Take your time and back up to local storage or cloud storage.
Step #2Put iPhone into Recovery Mode
Follow the guide below to put your iPhone into recovery mode.

iPhone 8 or later:
- Press the volume up button and quickly release it.
- Press the volume down button and quickly release it.
- Press and hold the side button until the Apple logo appears on the screen.
The Recovery Mode technique works with iPhones with Face ID and SE (2nd generation).
iPhone 7 series:
- Press and hold the Sleep/Wake and Volume Down buttons at the same time.
- Do not release the button until the recovery mode appears on the screen.
This guide applies to iPhone 7 and 7 Plus models.
iPhone 6S or earlier:
I will share a trick that will boot iPhone directly into recovery mode.
- Turn off your iOS device.
- Connect the lighting cable to your Windows 11 PC or Mac.
- Open iTunes on Windows and Finder on Mac.
- Hold the home button and plug in the lighting cable.
- Do not release the Home button until Recovery Mode appears on the screen.
You can return the device to the iOS software by holding the side button for a few seconds and releasing it when the Apple logo appears on the screen.
Step #3: Repair the iOS Software
You will need an internet connection with no bandwidth limitations and a Windows/Mac computer with iTunes installed. The latest version of macOS Catalina is integrated with iTunes in the Finder app.
- Open iTunes.
- Click “Restore”and iTunes will detect the iPhone in recovery mode.
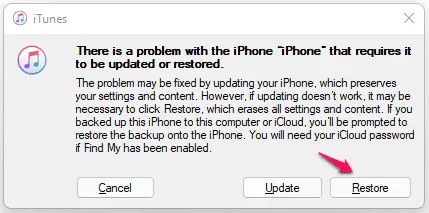
- Click on the “Restore and Update”option.
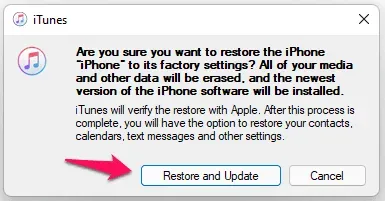
You no longer need to step in and treat yourself to a cup of coffee. iTunes will download the IMG file from the servers and clean up the internal storage in the meantime. You should sit back and relax until the iOS software is successfully restored.
bottom line
Find an Apple Service Center in your area and talk to them about your iPhone touchscreen not working on the latest iOS 15. Have your display replaced at an Apple Care+ Service Center. I would advise you to go to a trusted 3rd party shop for cheaper replacement solutions. Let us know which solution helped you resolve your iPhone touchscreen issues in the comment section below.