When creating a Microsoft account, you may make mistakes, such as entering the wrong name. If you want to change your Microsoft account name in Windows 11, this article will help you with that. There are many ways you can change your Microsoft account name. These methods depend on the type of account you are using. Here we will provide you with many ways to change your Microsoft account name.
Content:
How to change your account name in Windows 11
Following are the different ways to change your Microsoft account name in Windows 11.
Change your Microsoft account name using the Settings option
When you create a Windows 11 account using your Microsoft account and want to change it, you can do so by changing your online settings. To do this, follow the steps given below:
- Open the Settings app by pressing the key combination Windows + I.
- Click on Accounts and then click on the Your Information page which is on the right.
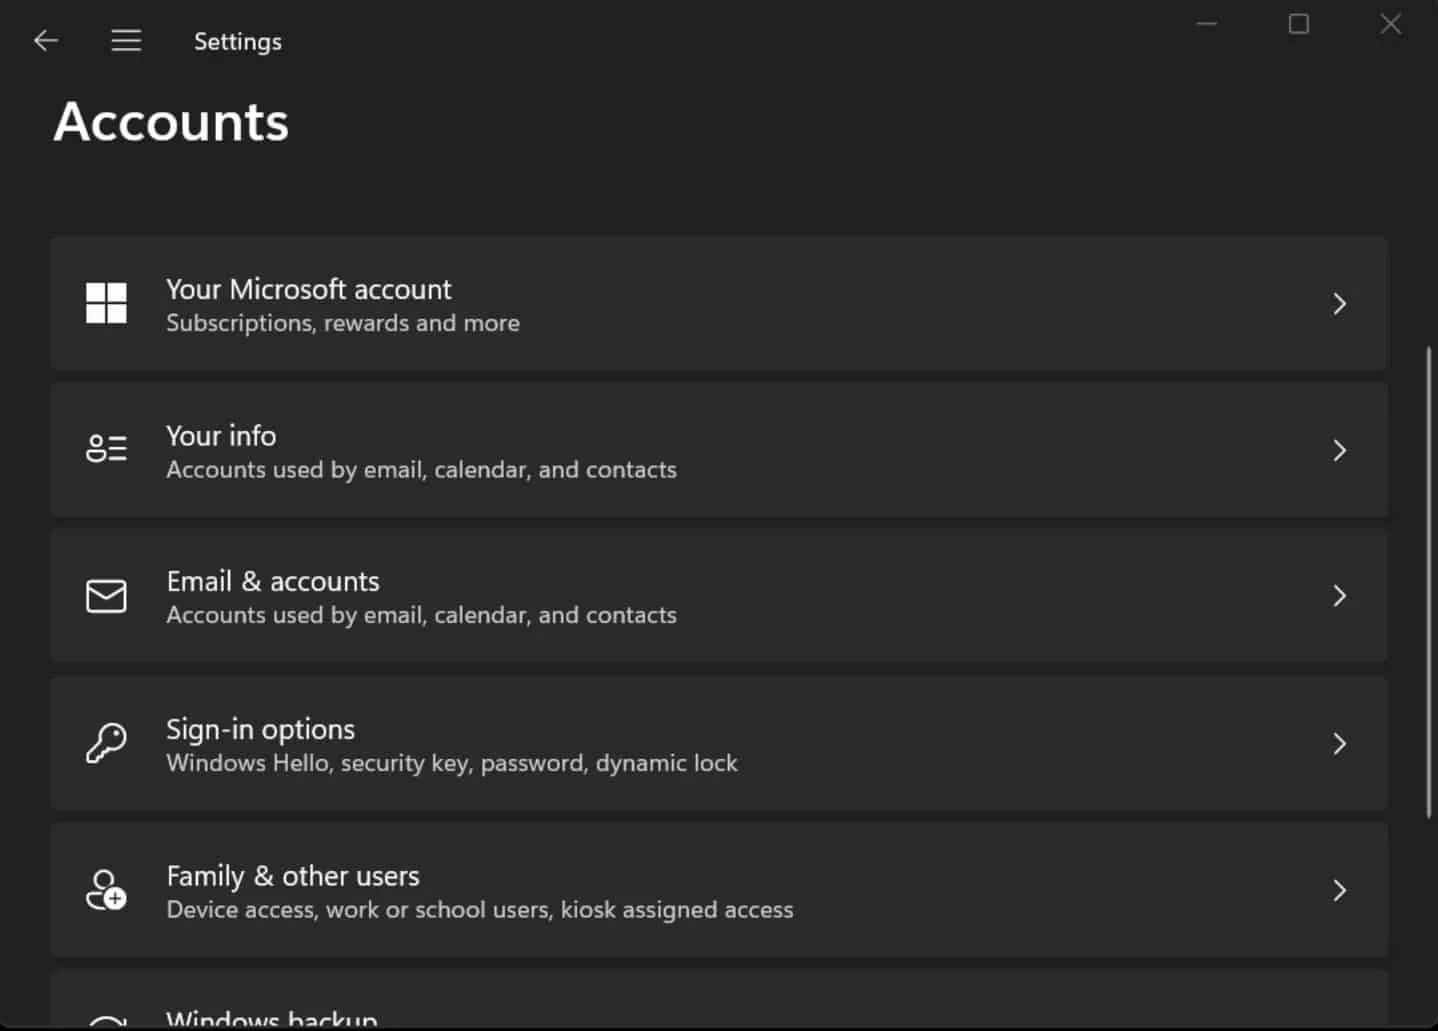
In the Related Settings section, click Manage My Accounts.
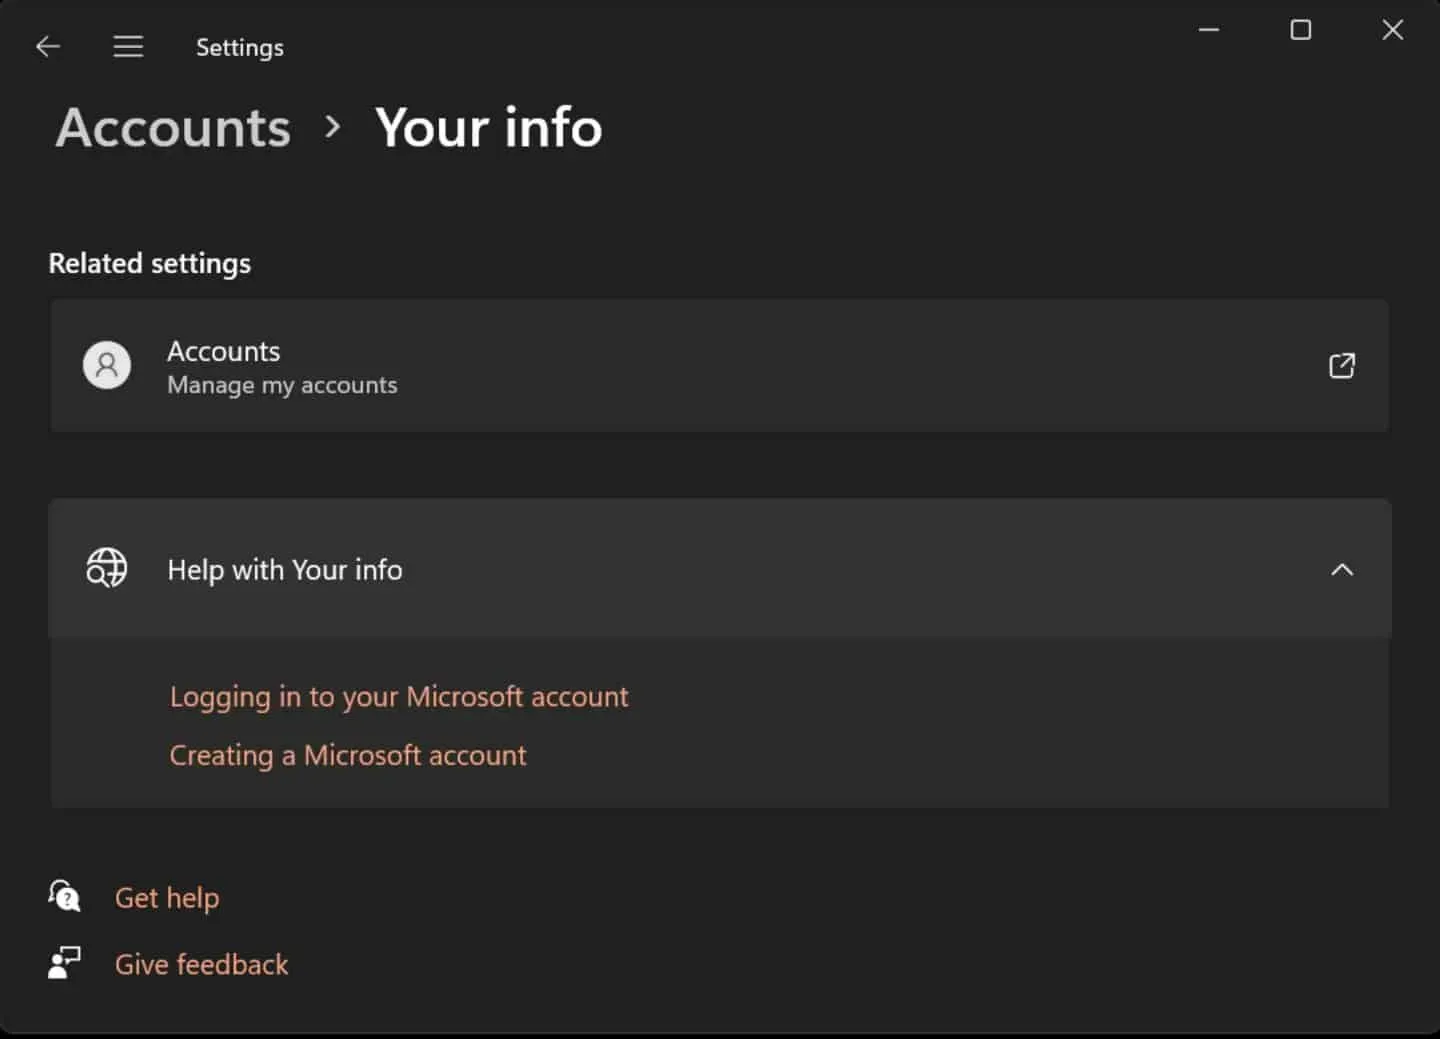
- You will be taken to your Microsoft account page. You must sign in with your Microsoft account if you haven’t already.
- Go to the “Your Information”tab.
- Under your current account name, click on the Change name option.
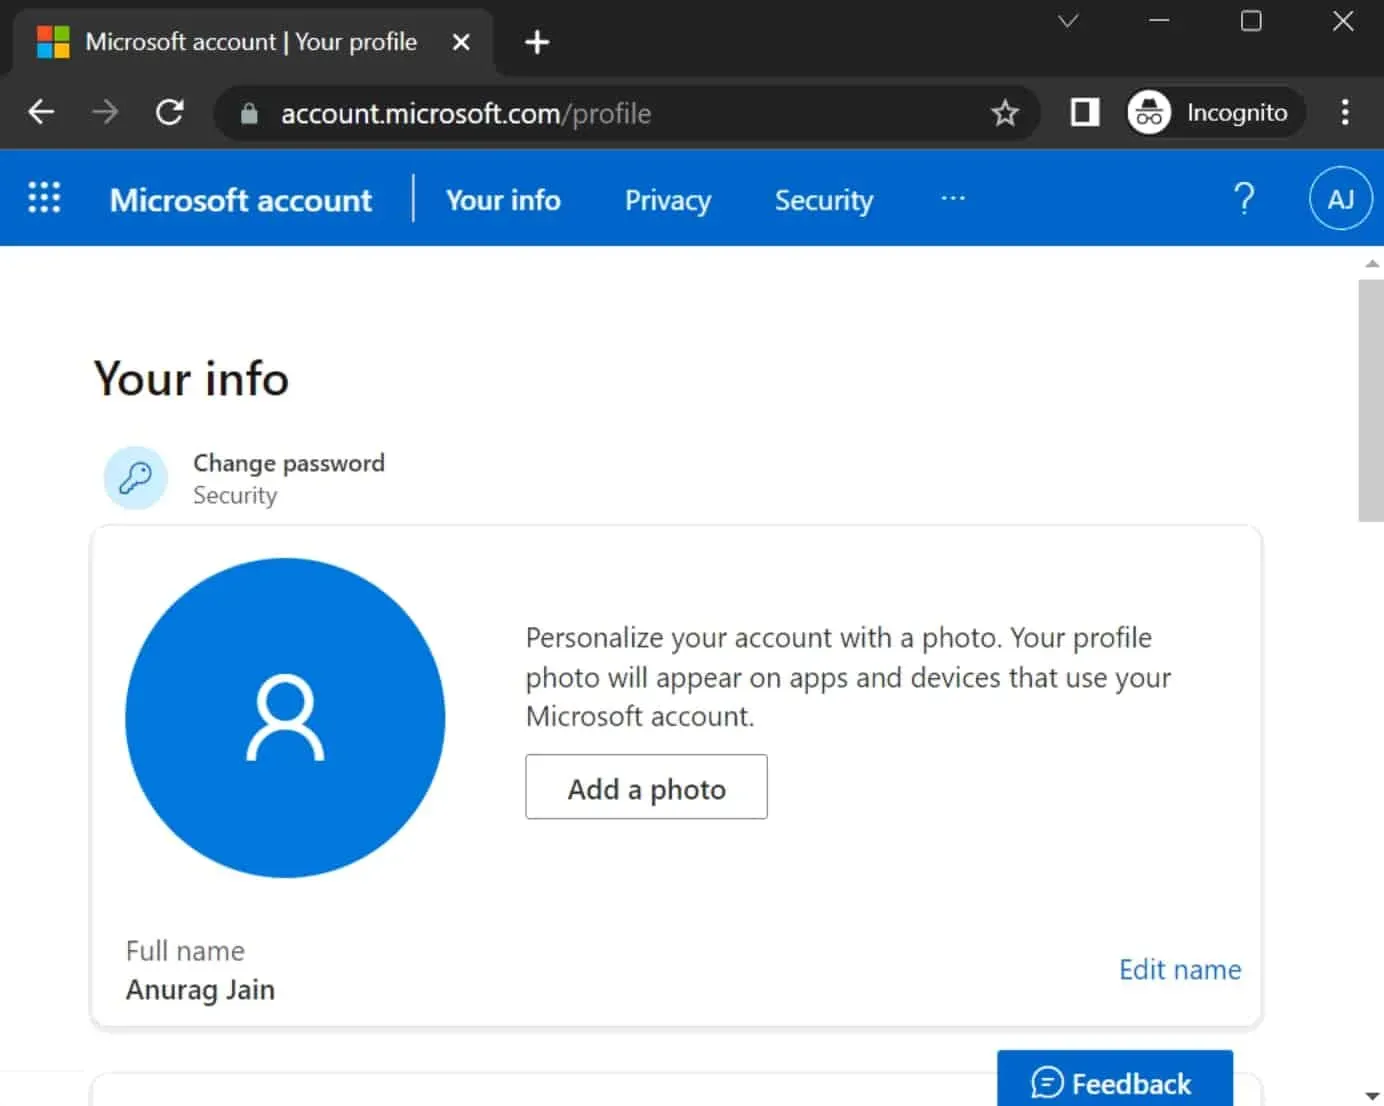
- Now change your account name as you wish.
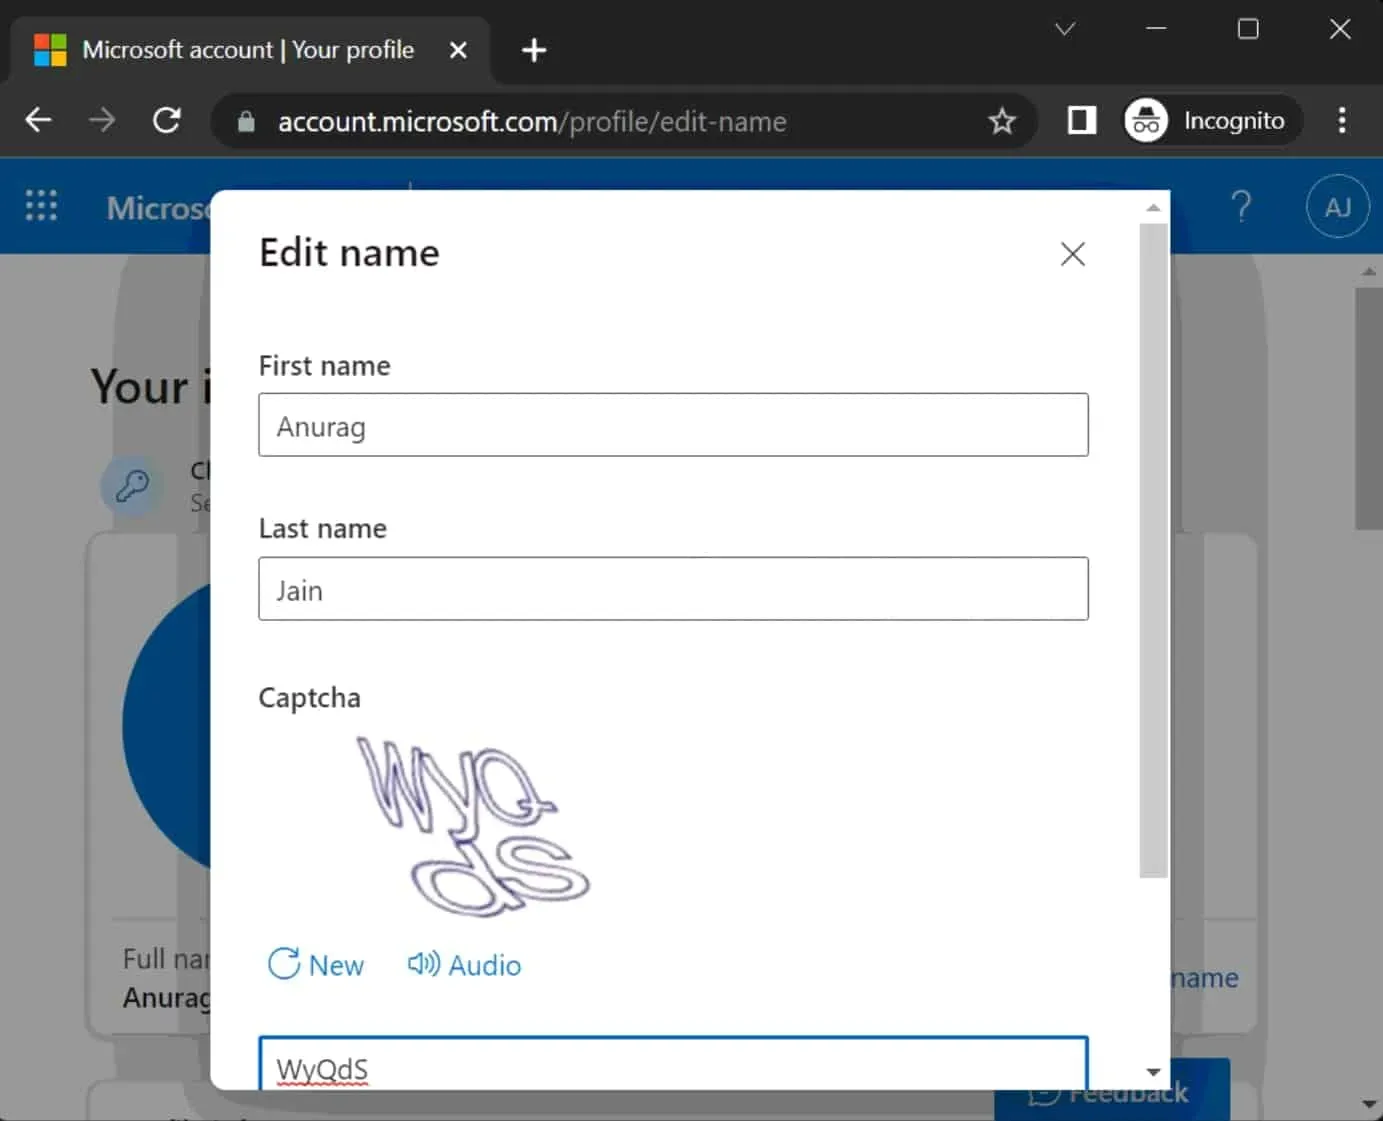
- Check the captcha and click Save.
- Restart your computer and the Microsoft account name will change.
Change your Microsoft account name with User Accounts
Follow the steps to change your Microsoft account name by changing user accounts.
- Open the Start menu by pressing the Windows key on your keyboard.
- Here, locate Control Panel and click on the first option to open it.
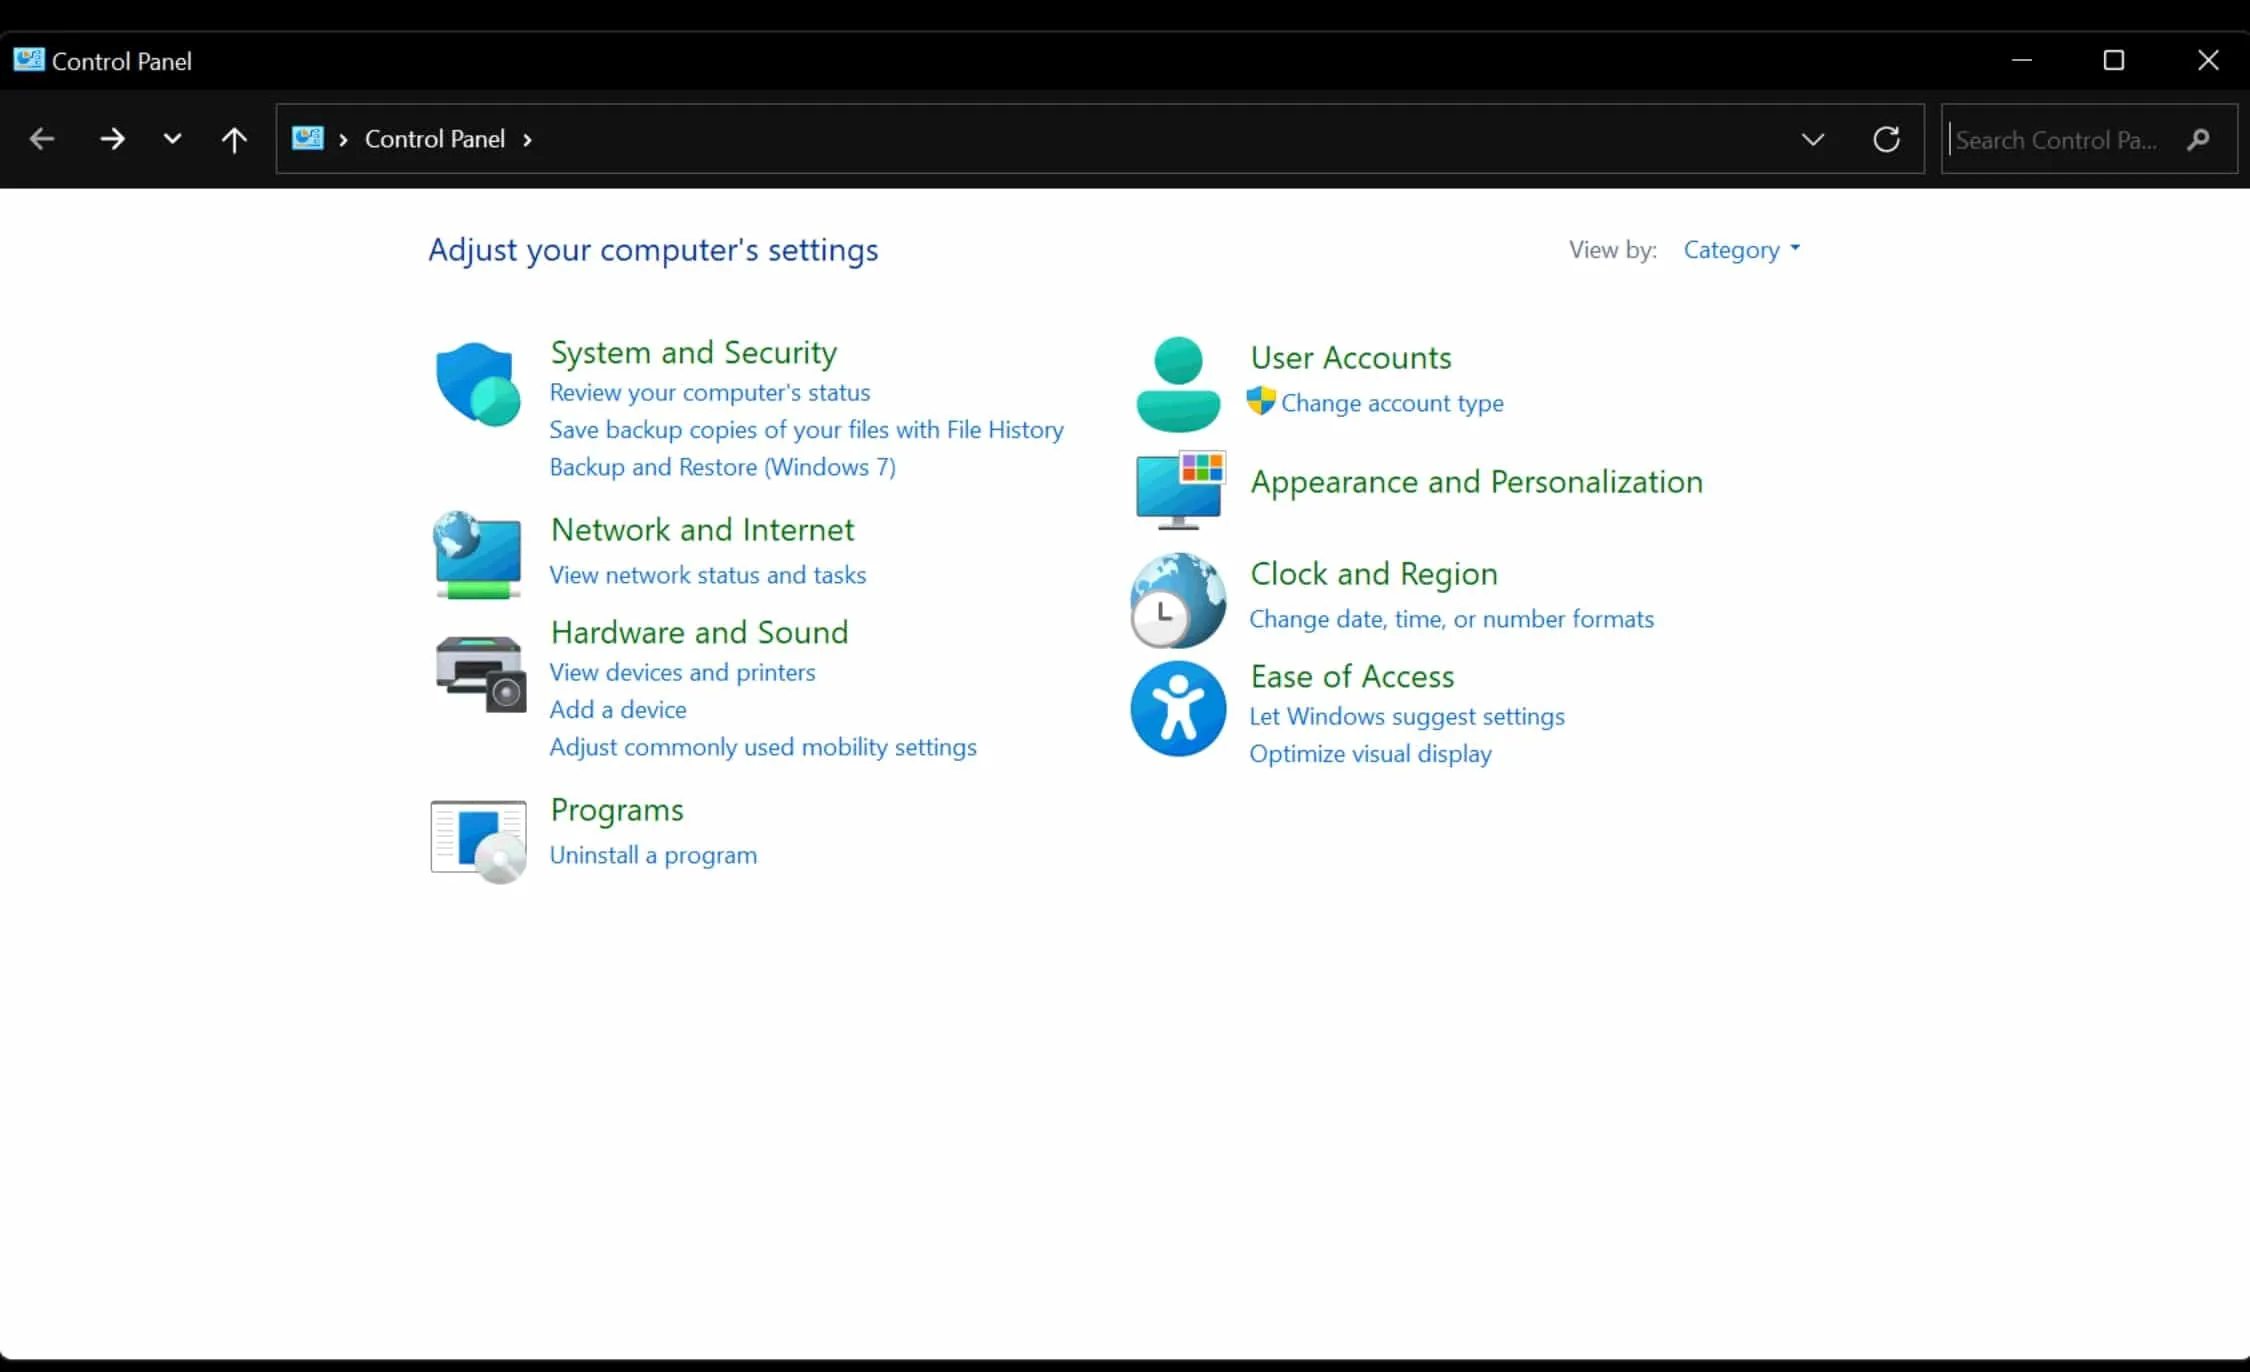
- Click “User Accounts”and then “User Accounts”again.
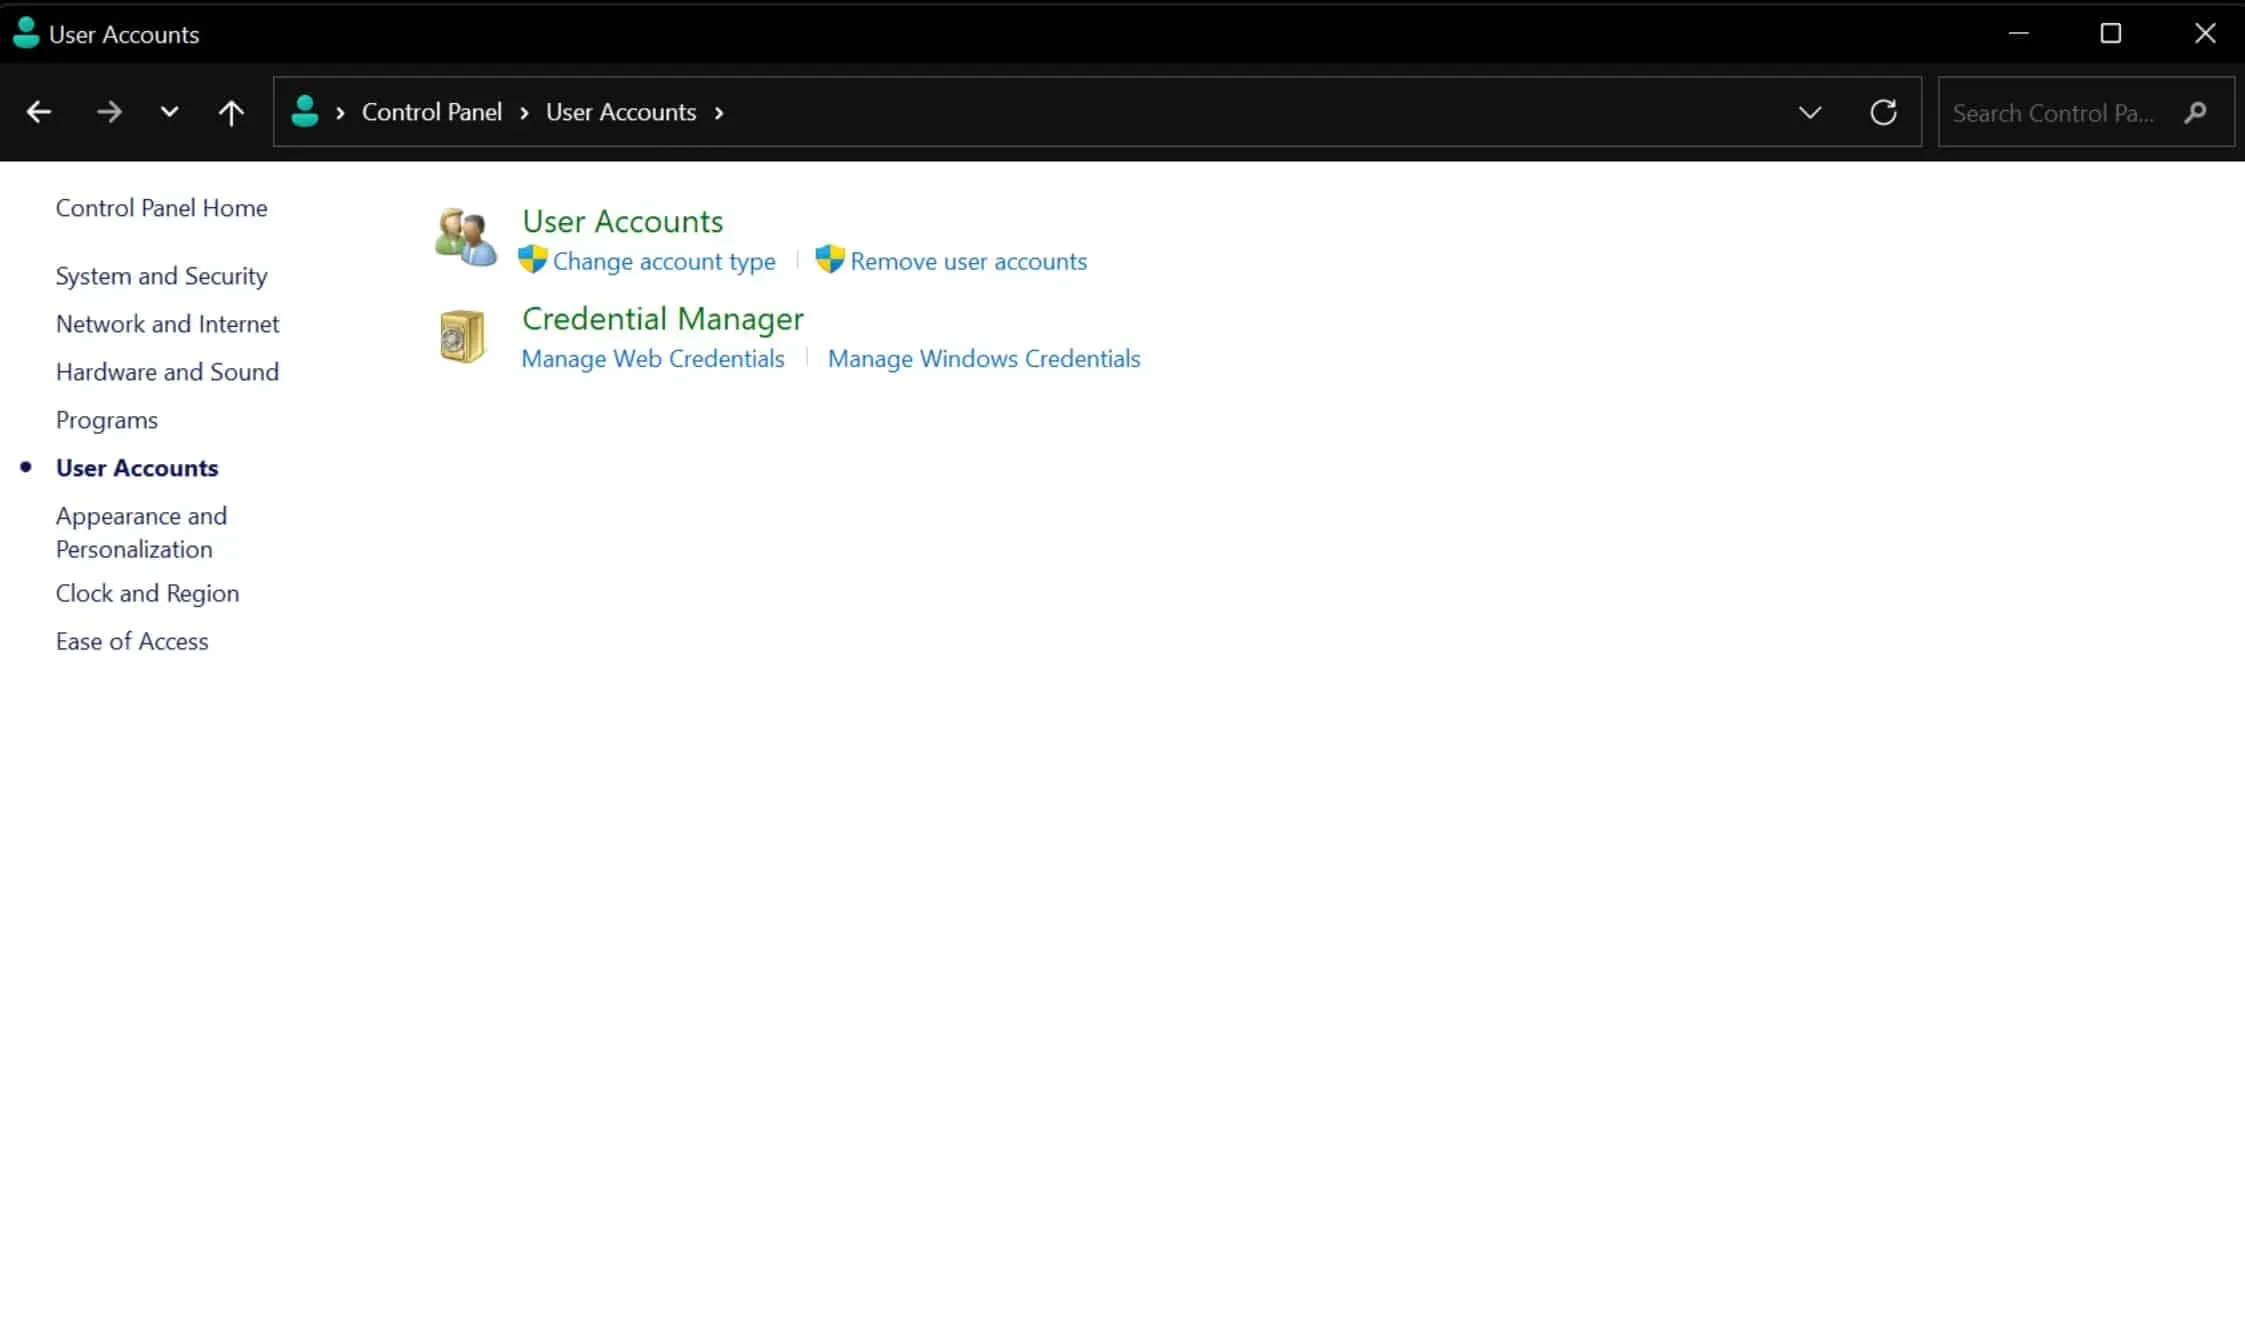
- Click on the account you want to update or whose name you want to change.
- Now click “Change account name”.
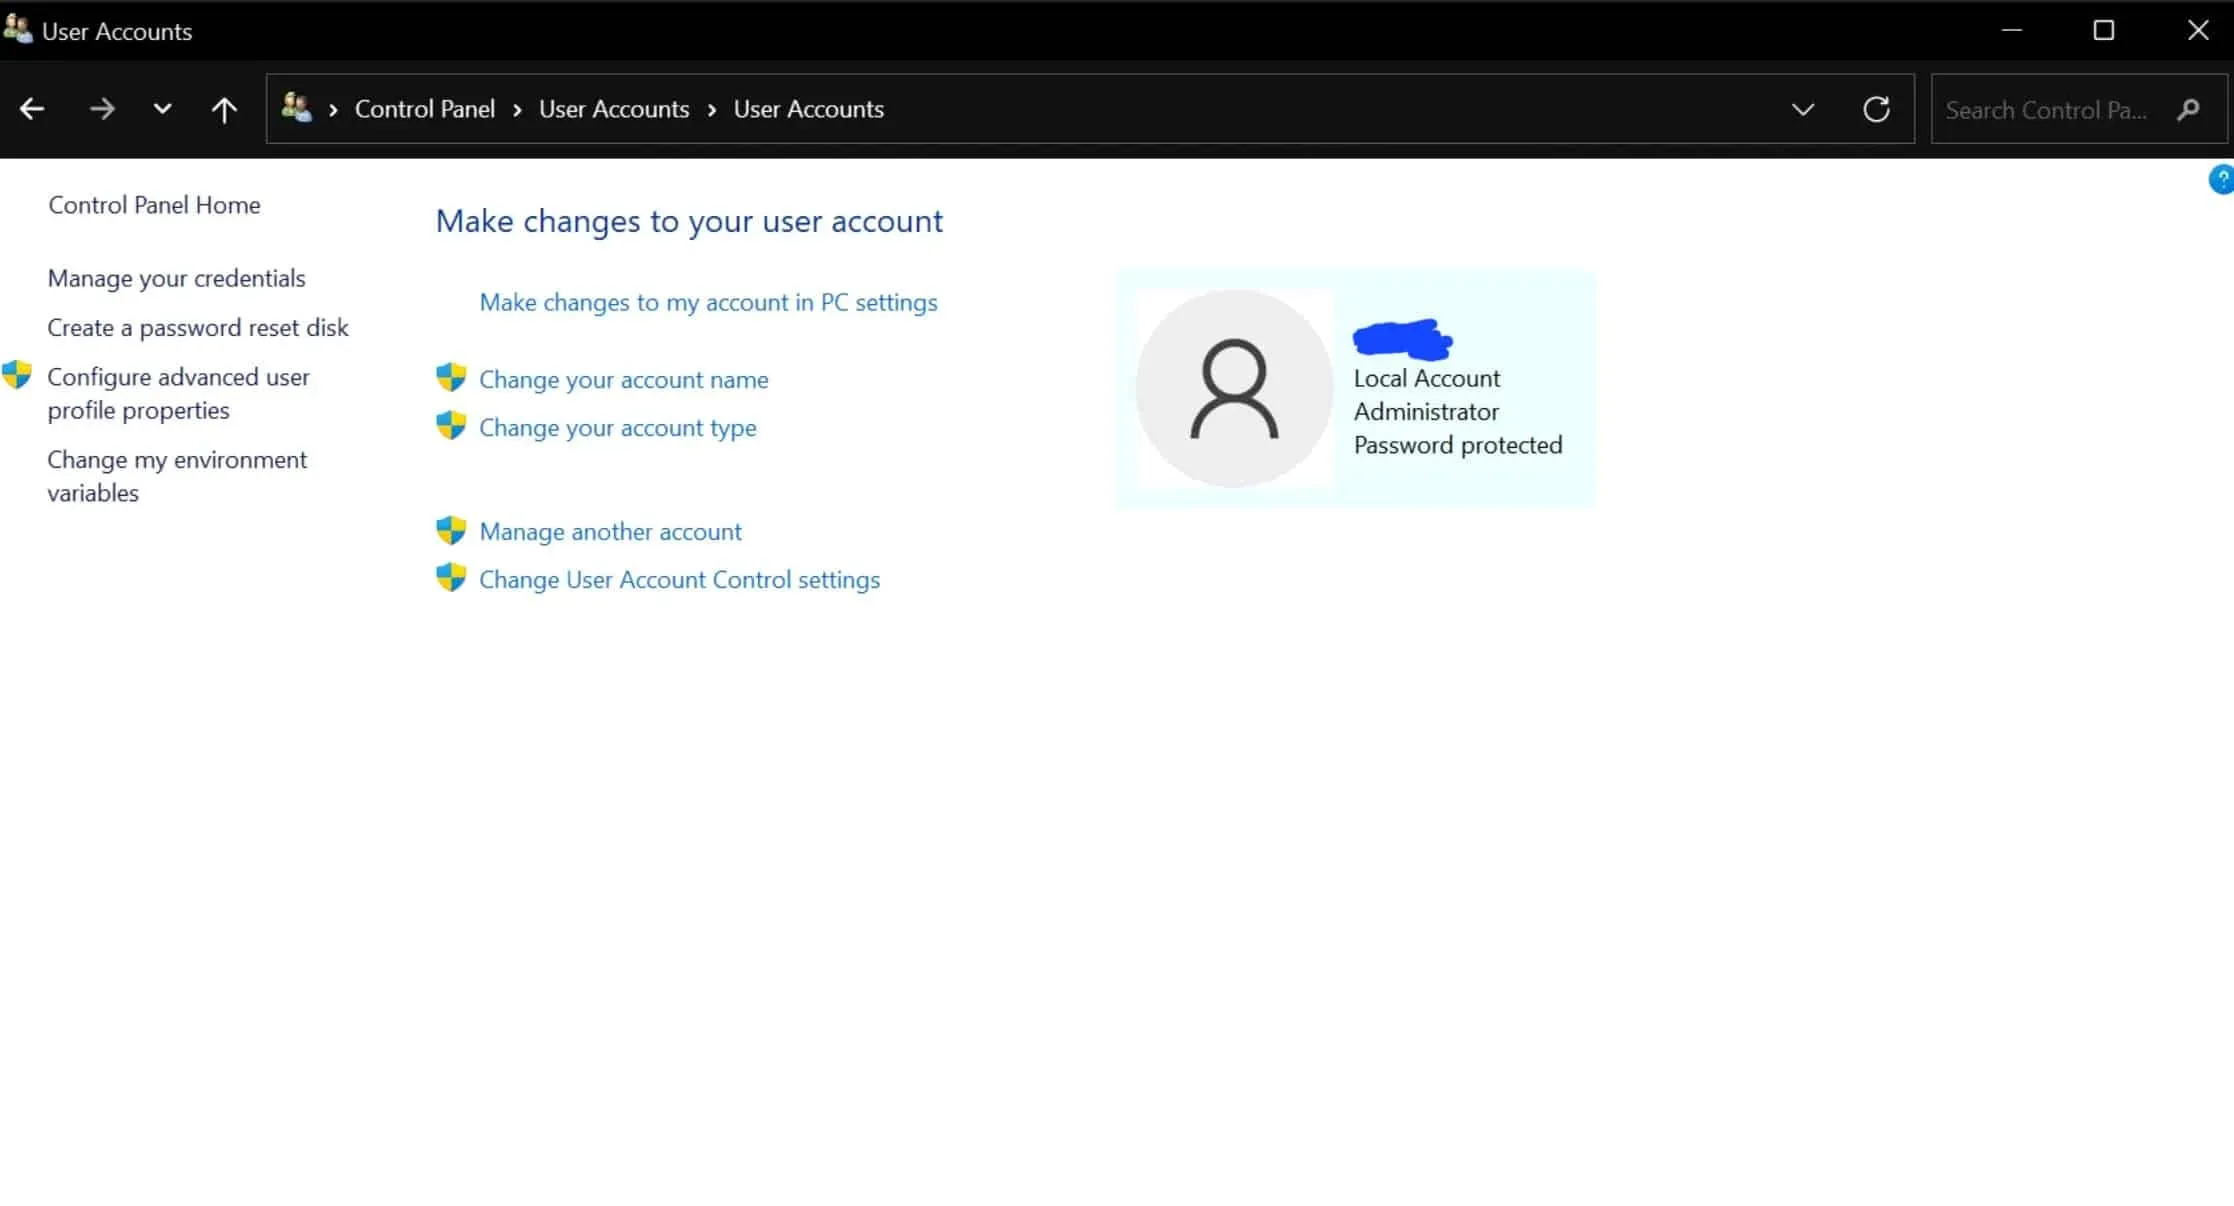
- Now change your account name.
- Finally, click the Change Name button .
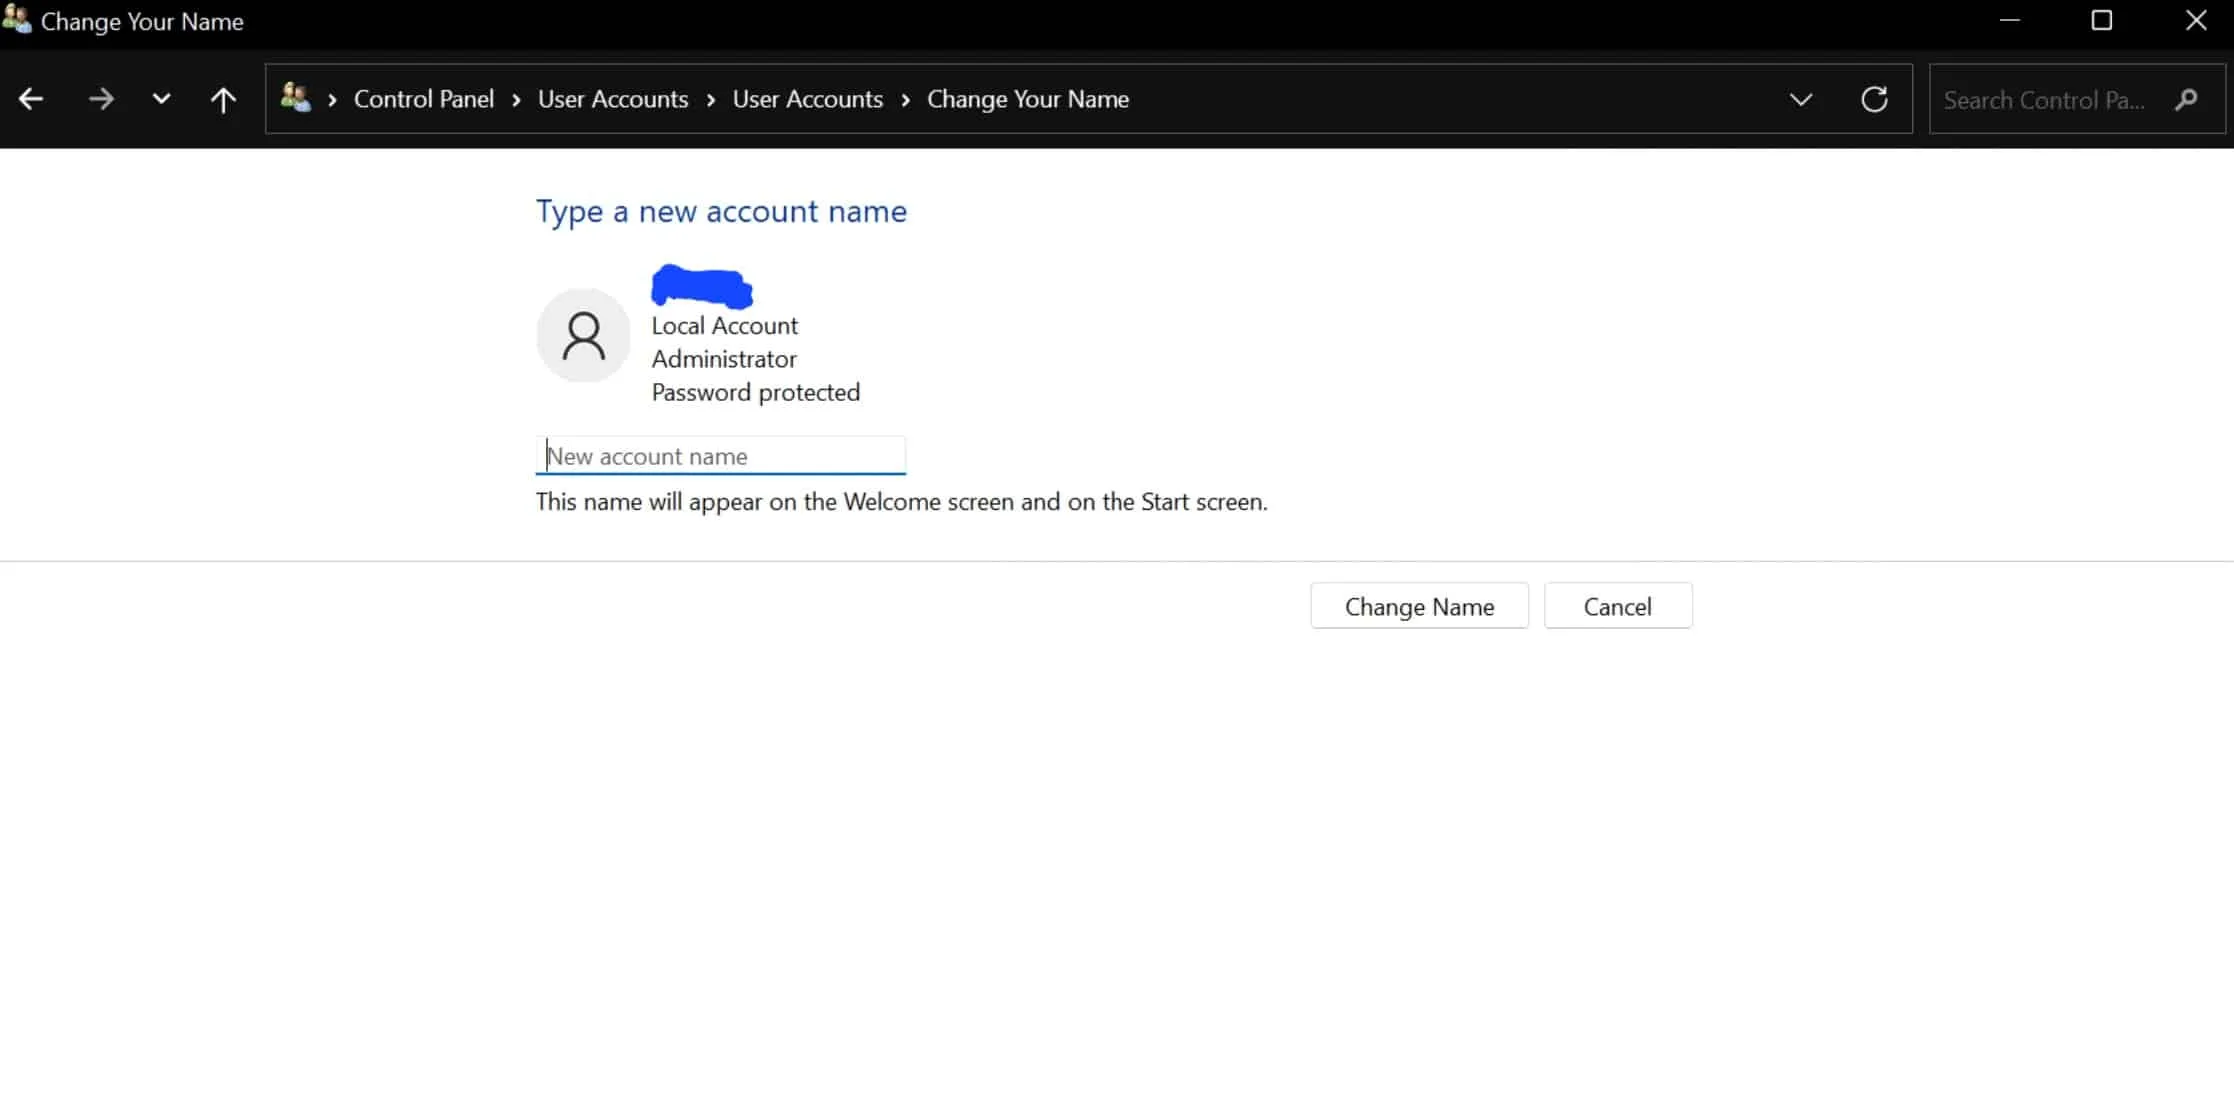
- Restart your computer and you will see that the name has been changed while logging into your account.
Change your Microsoft account name with Netplwiz
Netplwiz is a legacy user management program that is basically pre-installed on your Microsoft Windows operating system. So, with this program, you can also change your Microsoft account name by following these steps:
- First, click on the Start icon to open the Start menu . Here, find Netplwiz and open it.
- Now click on the Users tab and the account whose name you want to change.
- After that, click on the “ Properties” option.
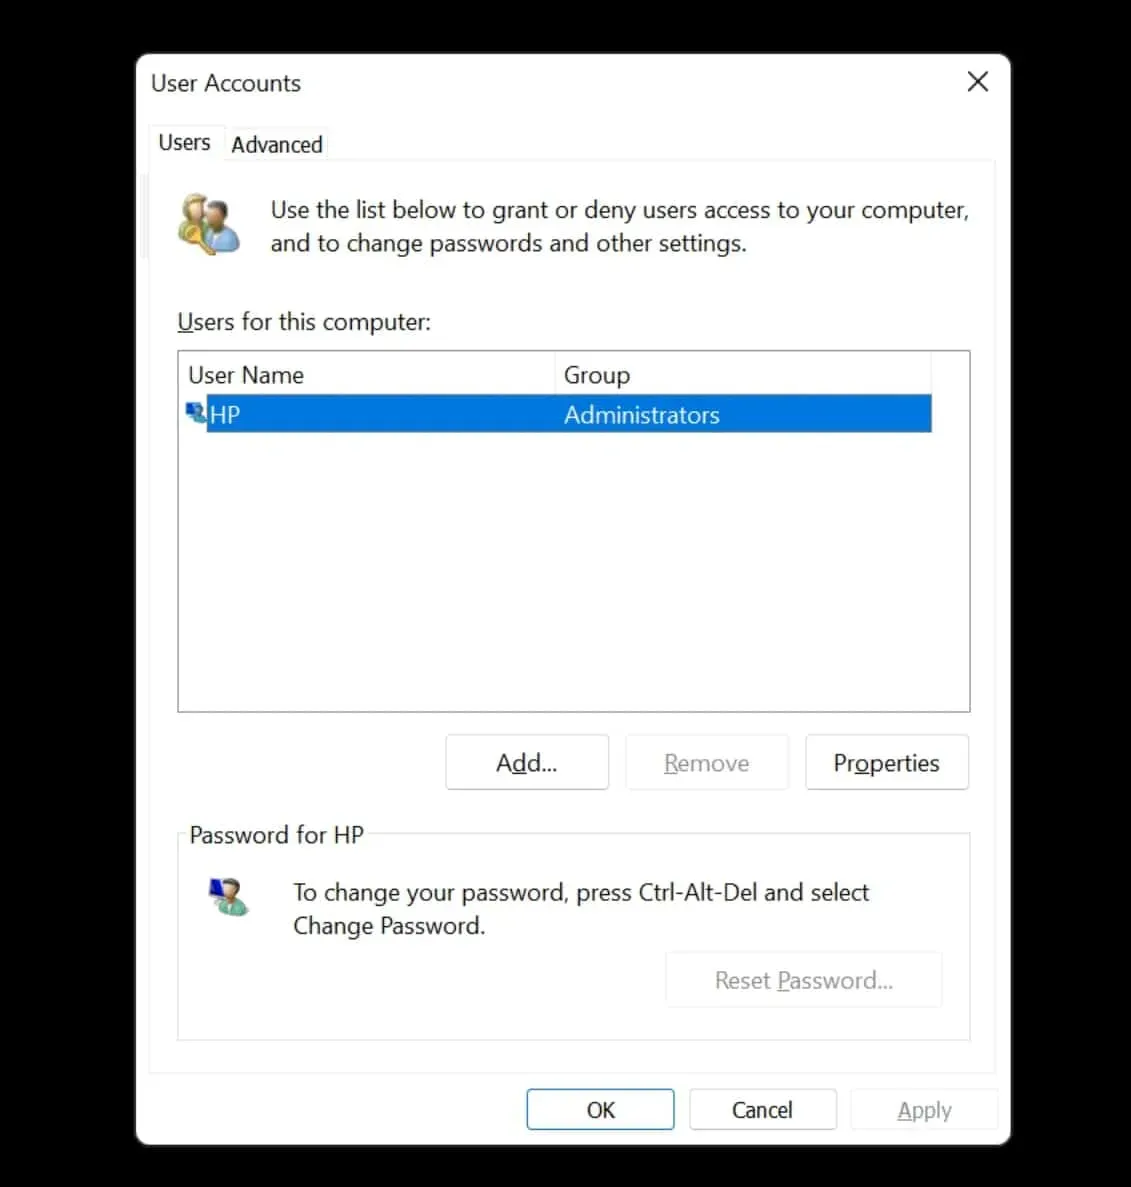
- Now change the full name and username.
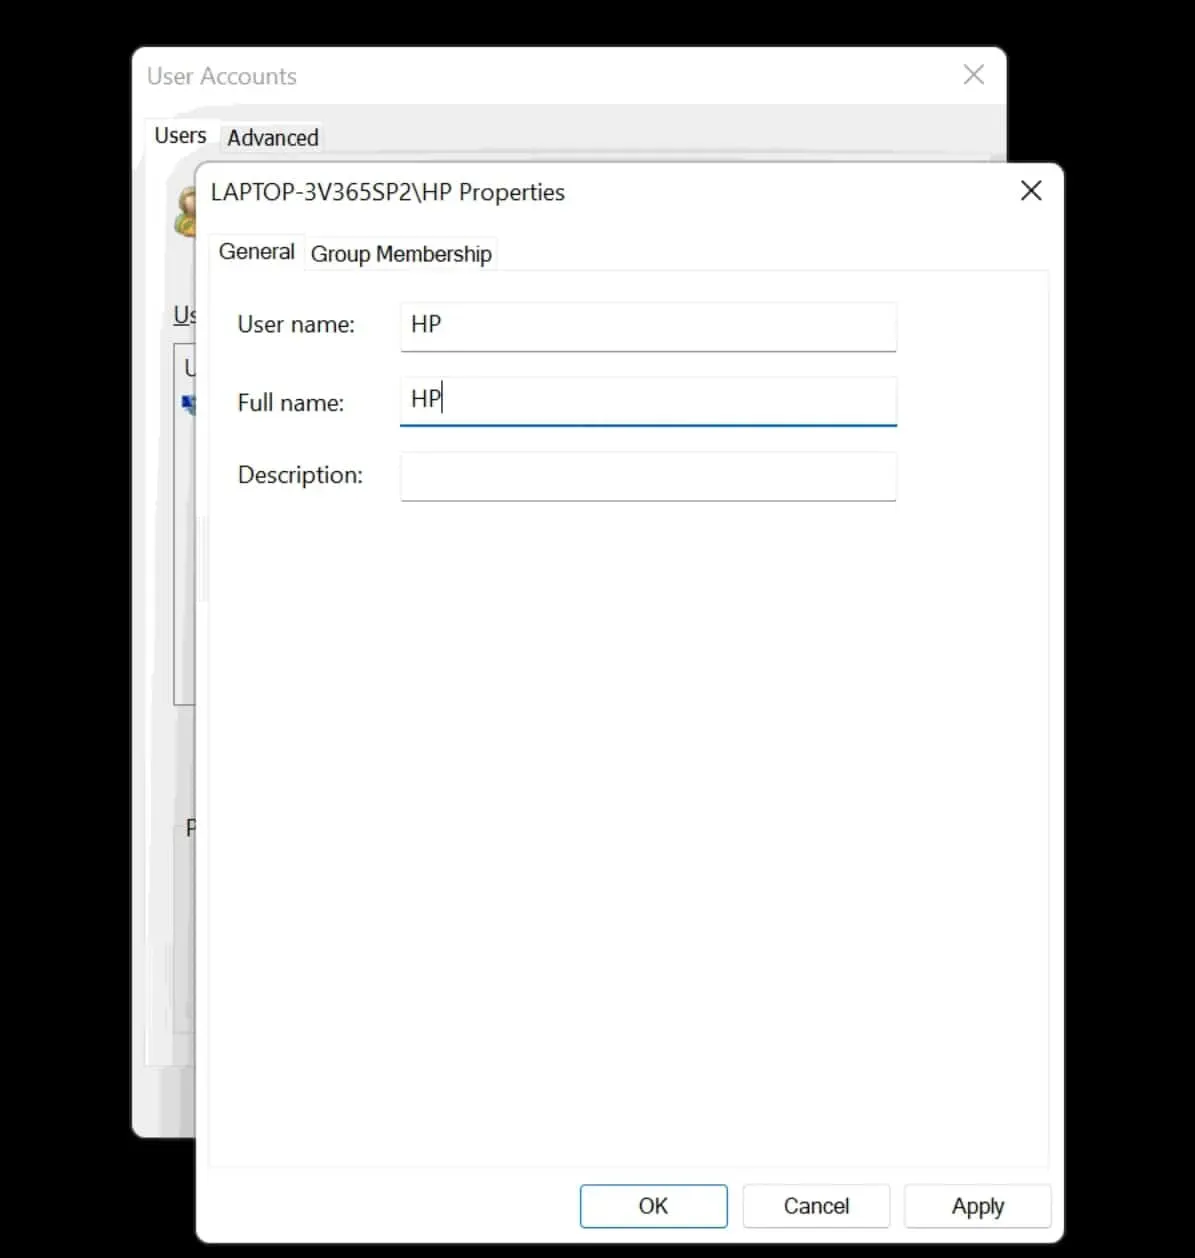
- When you’re done with the changes, click Apply and then OK .
After all this process, you will see that the new name will be displayed in your Windows 11. If you change your account name using this tool, the changes will also be made to your Microsoft account name and the cloud settings will overwrite the information.
Change your Microsoft account name using Computer Management
Computer Management is a set of Windows tools that you can use to manage your computer. With this program, you can change your Microsoft account name. Follow the given steps for the same-
- Open the Start menu , search for Computer Management and open it.
- Expand System Tools by double-clicking on it.
- Double-click Local Users and Groups and then click Users .
- Now click on the account whose name you want to change and then select the Properties option .
- Here, go to the General tab . Write a name next to the Full Name option.
- Now click “Apply” and then “OK” to confirm it.
After all the steps are completed, you will see that your Microsoft account name will be changed in Windows 11.
Conclusion
This article provides ways to change your Microsoft account name using various settings and programs. You can change your name as you wish, but you must keep your information private, which prevents it from being made public. We hope this article will help you with what you are looking for.
