Windows 11 has given users a lot of customization options. If you’re new to Windows 11 then you’ll probably want to tweak your PC to the settings you want, then you’ll probably want to start by changing the cursor size and color. The cursor has always been the same in Windows 11 and there haven’t been many changes to it by default. However, Windows 11 allows you to change the cursor size and color as part of all the customizations it offers.
There are two ways to customize the cursor in Windows 11, you can customize it using the Control Panel or the Settings app.
Change cursor size, theme and color in Windows 11
This is a step by step guide to change cursor size and color in Windows 11.
Customizing the Cursor with Settings
The very first way to change the cursor size and color in Windows 11 is to use the Settings app. If you want to customize the cursor on a Windows PC, follow these steps:
- First, open the Settings app on your PC by pressing the Windows + I key combination on your PC.
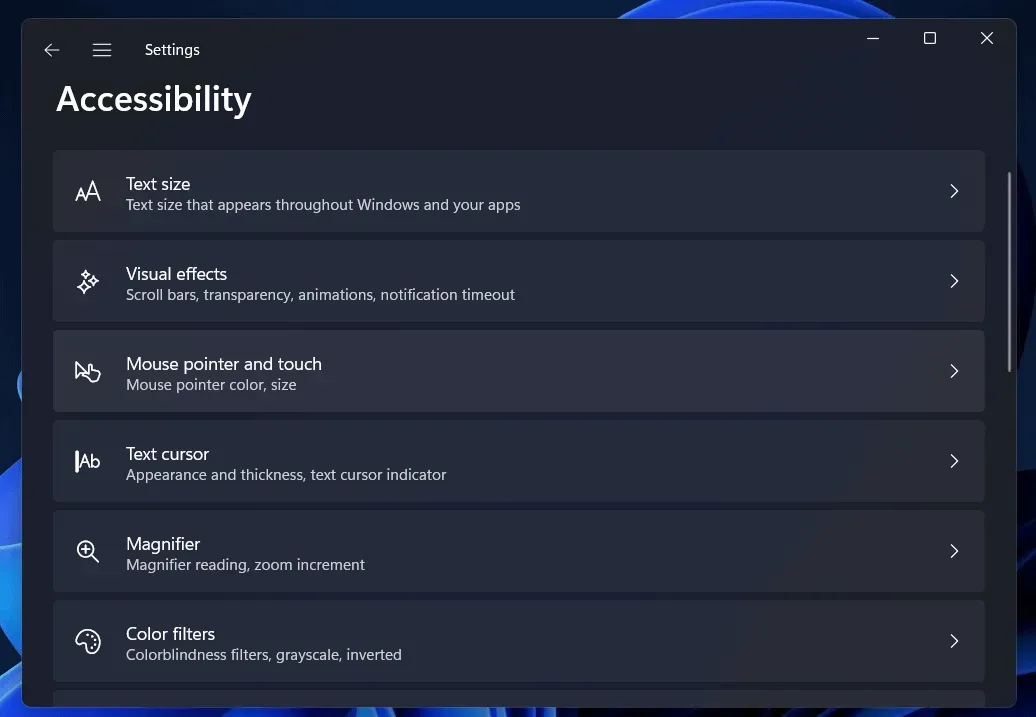
- On the left sidebar of the Settings app , go to the Accessibility section .
- Now on the right side, click the mouse pointer and tap.
- Then, under Mouse Pointer Style, select a pointer style. In the Recommended Colors section , choose a color, or choose a different color in the Choose a different color box.
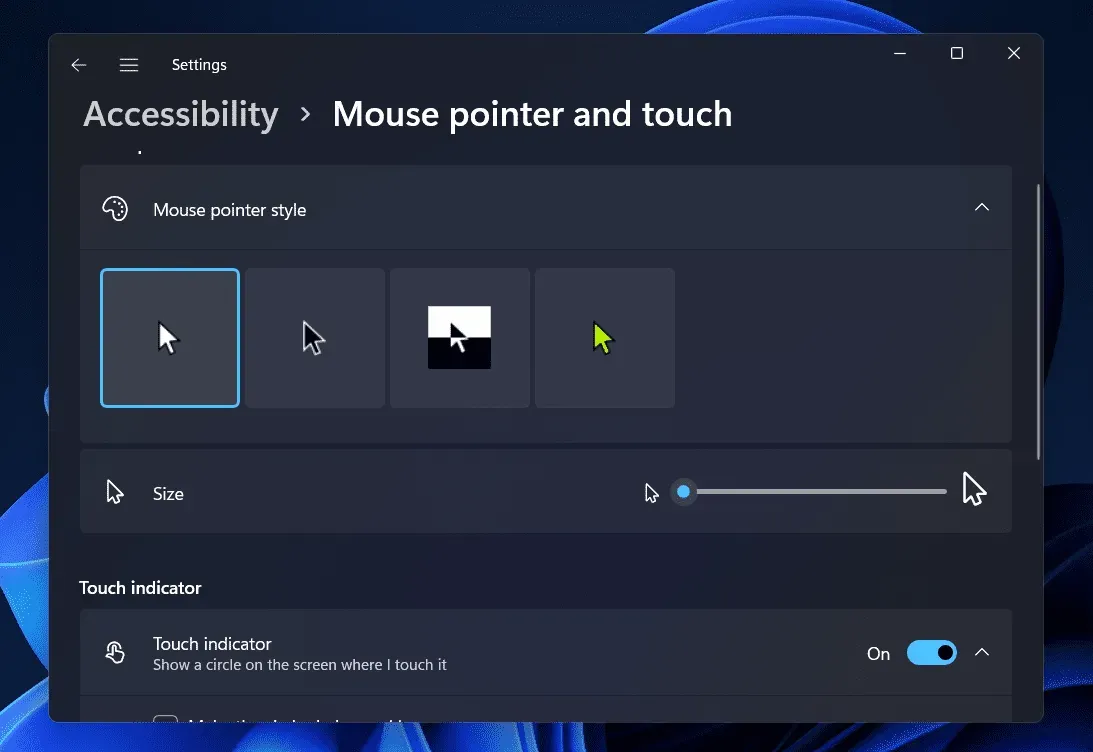
- Now drag the Size slider to the right to increase the size of the cursor, or drag it to the left to decrease the size.
Cursor Adjustment Using the Control Panel
The next way to change the cursor size and color in Windows 11 is to use the Control Panel. The Control Panel can be used to configure various settings in Windows 11. However, Microsoft is now planning to replace it with the Settings app, which will have all configurations and settings available. Well, the Control Panel app isn’t gone yet, and you can still use it to customize your cursor. To change the cursor size and color in Windows 11, follow these steps:
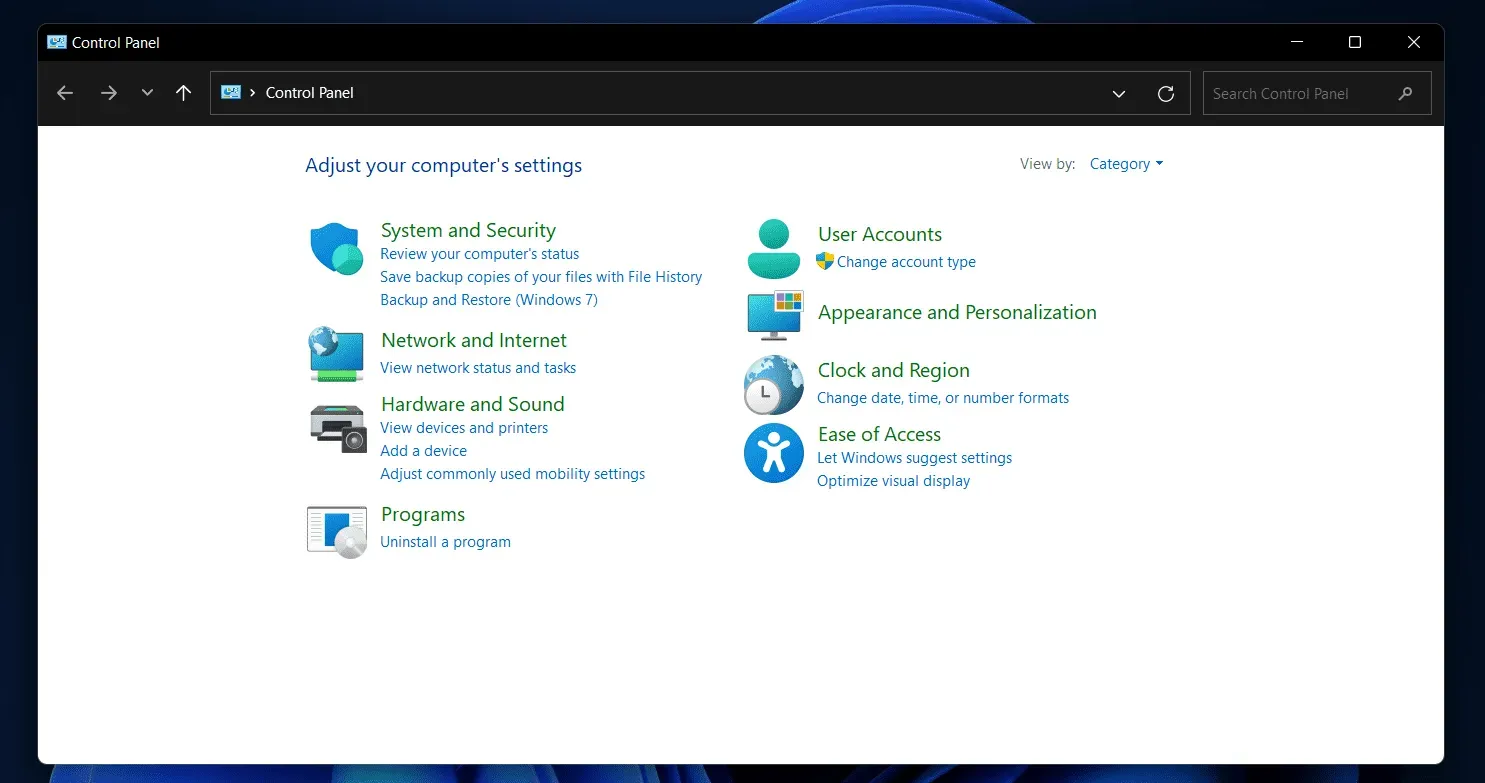
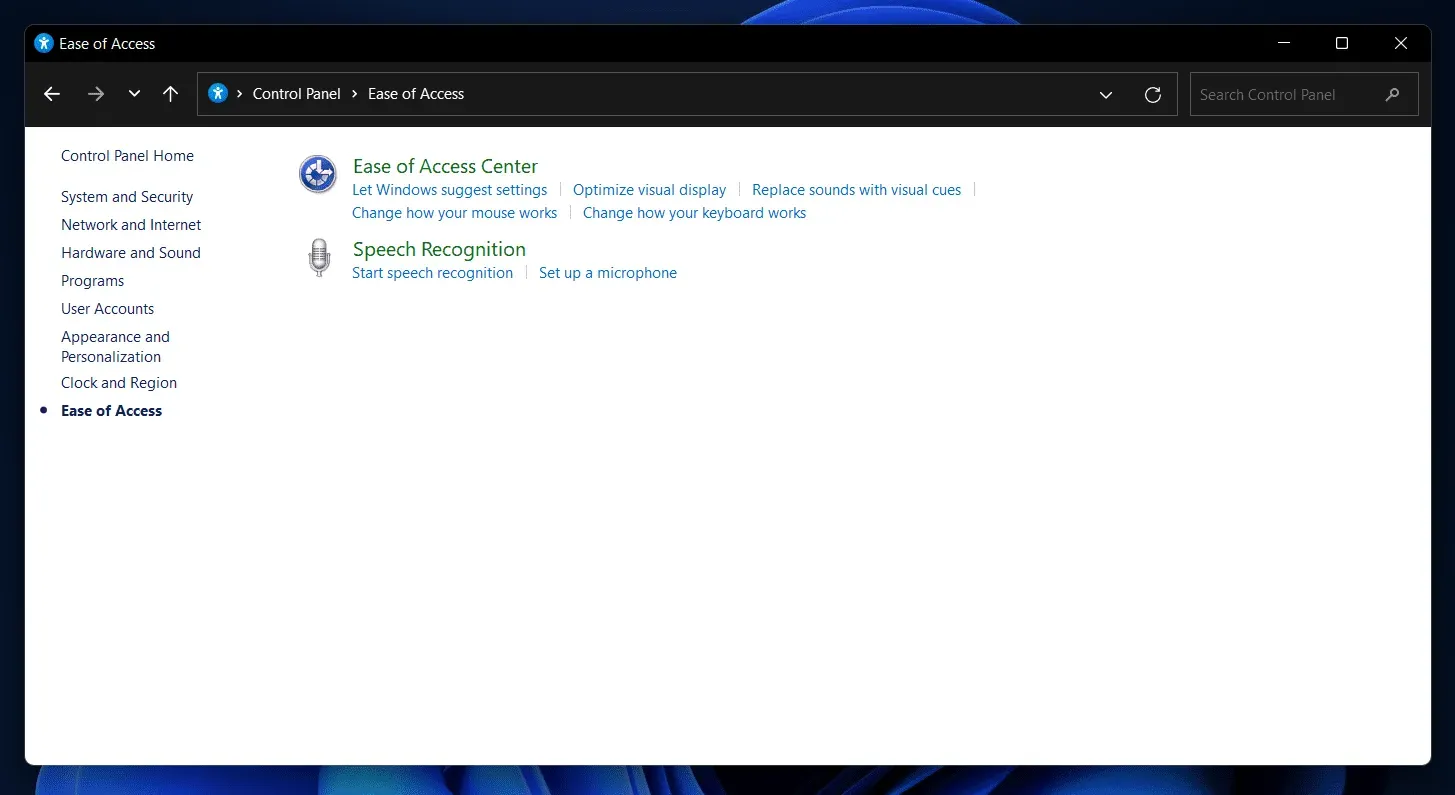
- Open the Start menu on your PC by pressing the Windows key . From the Start menu , find” Control Panel “and click on the very first result to open it.
- Click on the Ease of Access option in the Control Panel.
- Then click the option that says Change the way the mouse works.
- Now, on the next shout, select the desired size and color of the mouse pointer.
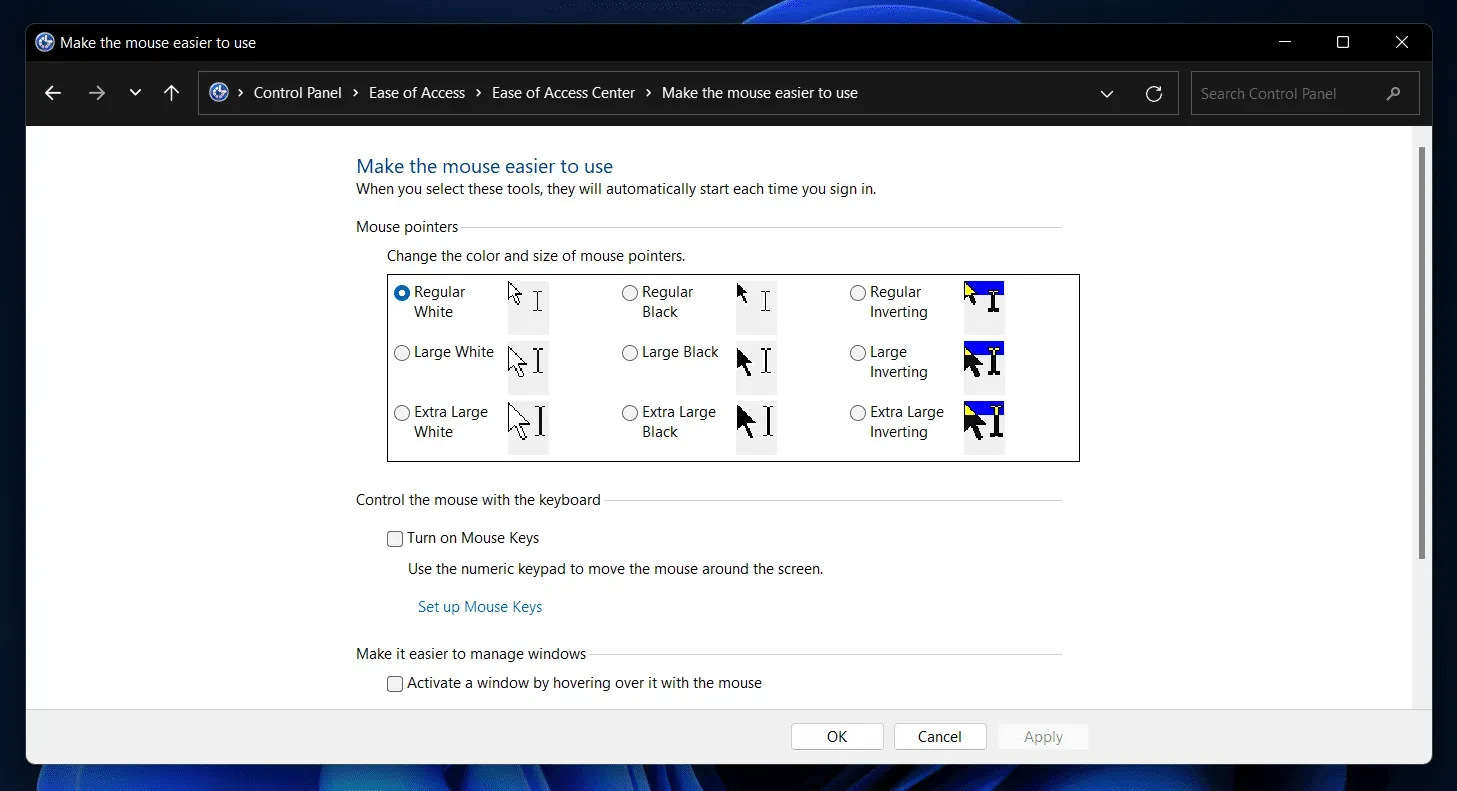
- After that, click Apply and then OK to save the changes.
Conclusion
These were the two ways to customize the cursor in Windows 11. We discussed how you can change the size and color of the cursor in Windows 11 using Settings and Control Panel. By following the steps above, you will be able to easily customize the cursor.
