


Windows laptops and AIO desktops may have a better camera. The quality of the internal camera on a Windows PC sucks, and for this reason, many people choose to switch to an external webcam for better quality. When you switch to an external webcam, it is not recognized by your Windows PC; even if it is, your computer will continue to use the internal webcam instead of the external webcam.
So why does this happen and how can it be prevented? The internal camera is set as the default camera in Windows, so whenever a camera is required, your computer will use the internal camera rather than the external webcam. To prevent this, you will need to set up an external webcam and make it the default; this way your computer will only use the external webcam. This article will guide you through the entire process of changing the default webcam to an external webcam in Windows 11/10.
Content:
Change Default Webcam to External Webcam in Windows 11/10
Most external webcams are plug-and-play. The plug-and-play device is ready to use without any configuration. This means that once you connect your webcam, you will be able to use it without any configuration; Windows will automatically install the necessary drivers. However, if you don’t have a plug-and-play webcam, you must go through the full setup process to use it. You can follow the steps below to change the default webcam to external on a Windows PC.
Through the settings app
You will have to disable the internal webcam on your PC. This way, your computer will no longer use the internal webcam, but will use the external one. You can do this using the Settings app on your Windows PC. To do this, follow the steps given below:
- Press the Windows key, and then click the Settings app icon to open it.
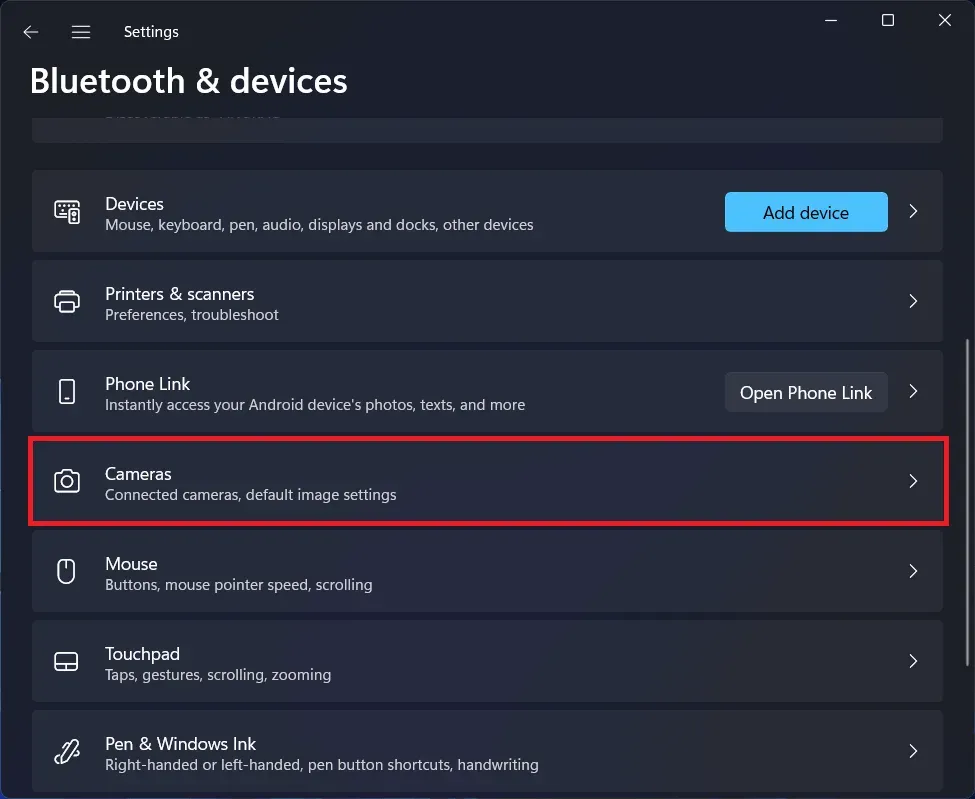
- Here, on the left sidebar, click on Bluetooth and devices .
- Now on the right, click on Cameras .
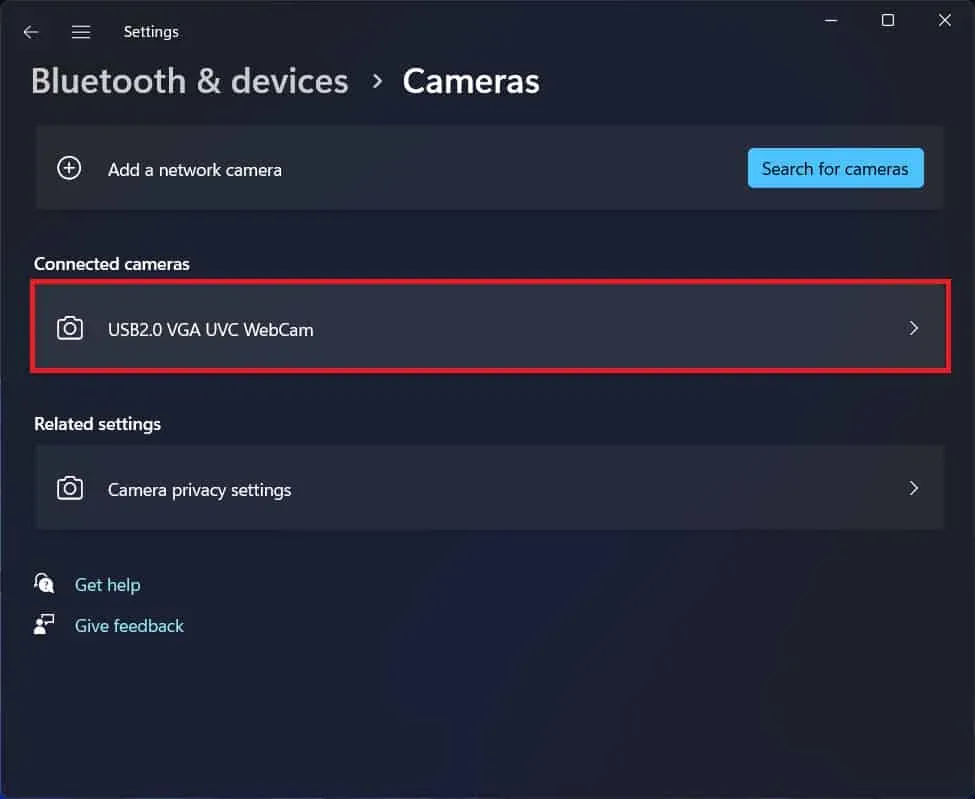
- Here, in the Connected Cameras section , click on your PC’s internal camera.
- On the next page, click Disable to disable your PC’s internal camera.
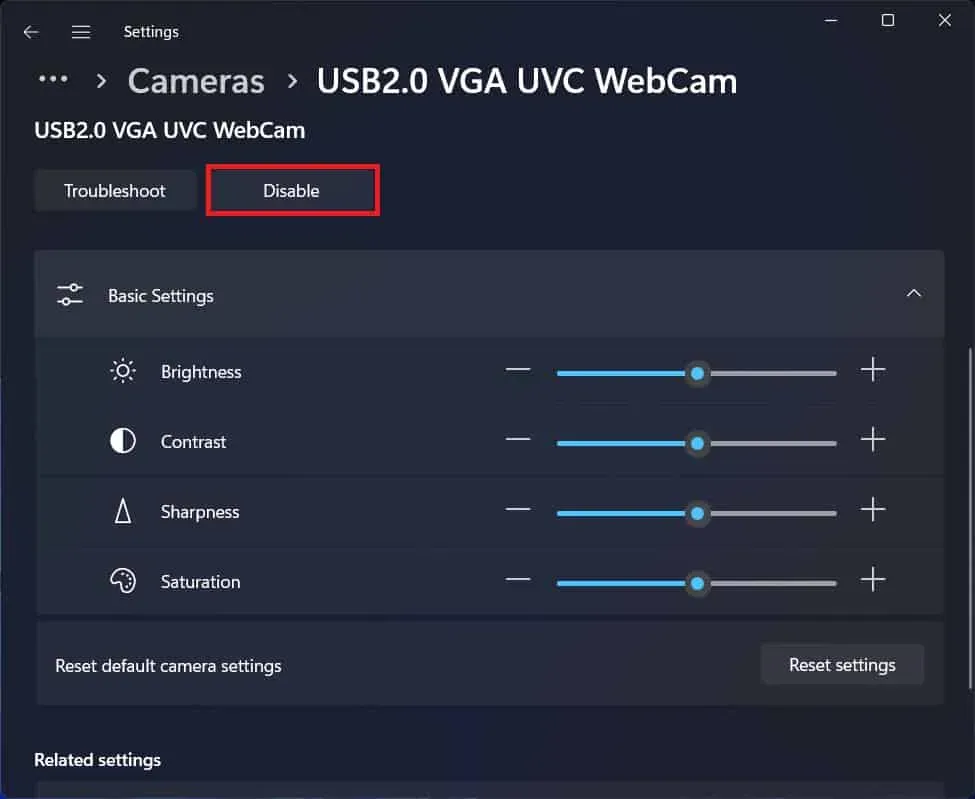
- Windows will then automatically use the external webcam instead of the internal webcam.
Via device manager
You can also use Device Manager to disable the internal webcam. When you do this, your computer will automatically recognize the external webcam as the default camera and will use it for every camera-related task. To do this, follow the steps given below:
- Press the key combination Windows + X , and then click Device Manager from the menu that opens .
- In the Device Manager, expand the Cameras section by double-clicking on it.
- Right-click the internal camera in the camera list and select Disable device.
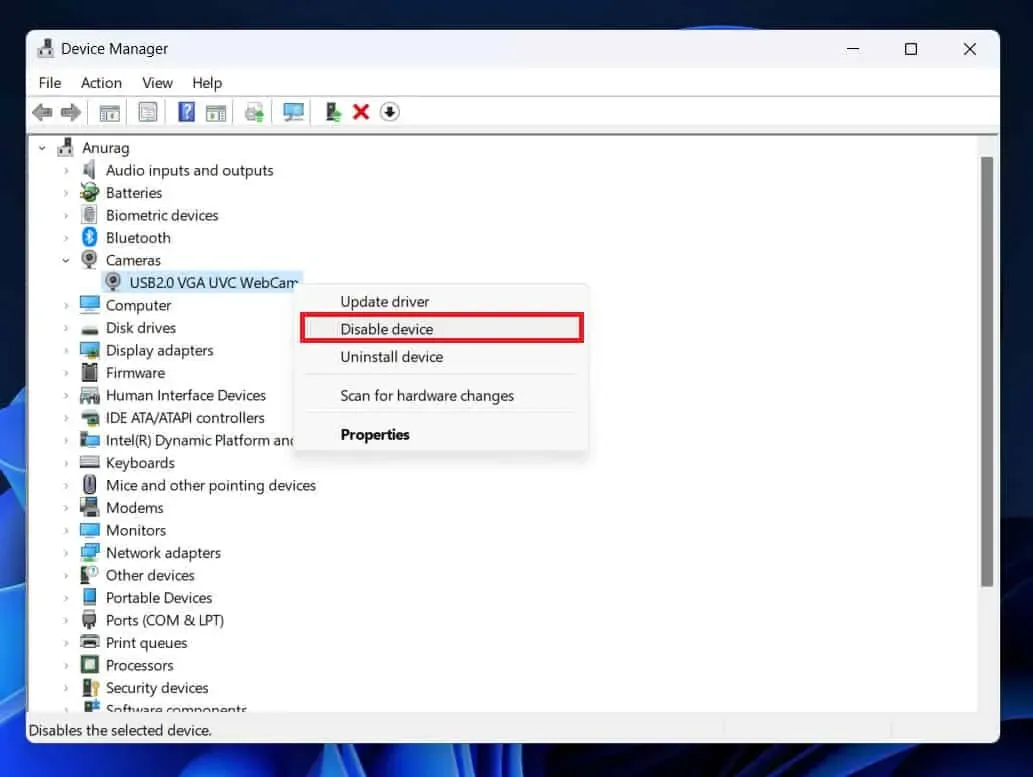
- This will disable the PC’s internal camera and Windows will now only use the external webcam.
Directly from the video calling app
When using the video calling app on a Windows PC, you can directly switch to the external webcam from the app. Video calling apps can switch between cameras, microphones, and speakers connected to your device. You can switch to an external webcam connected to your PC and the video calling application will only use the external webcam for video conferences.
Final words
If you have switched to an external webcam but your Windows PC continues to use the internal webcam, this article will help you prevent it. We have discussed the steps to set an external webcam as the default webcam so that your Windows PC does not use the internal webcam. You can follow the steps mentioned in this article above to change the default webcam to an external webcam in Windows 11/10.