
Without realizing it, you may be giving away the GPS coordinates of your home, work, school, and other important or secret locations. If you haven’t blocked this feature on your iPhone, location data is stored on almost every photo and video you take, and anyone you share content with can find out where you are or have been. But there are a few things you can do to protect your information.
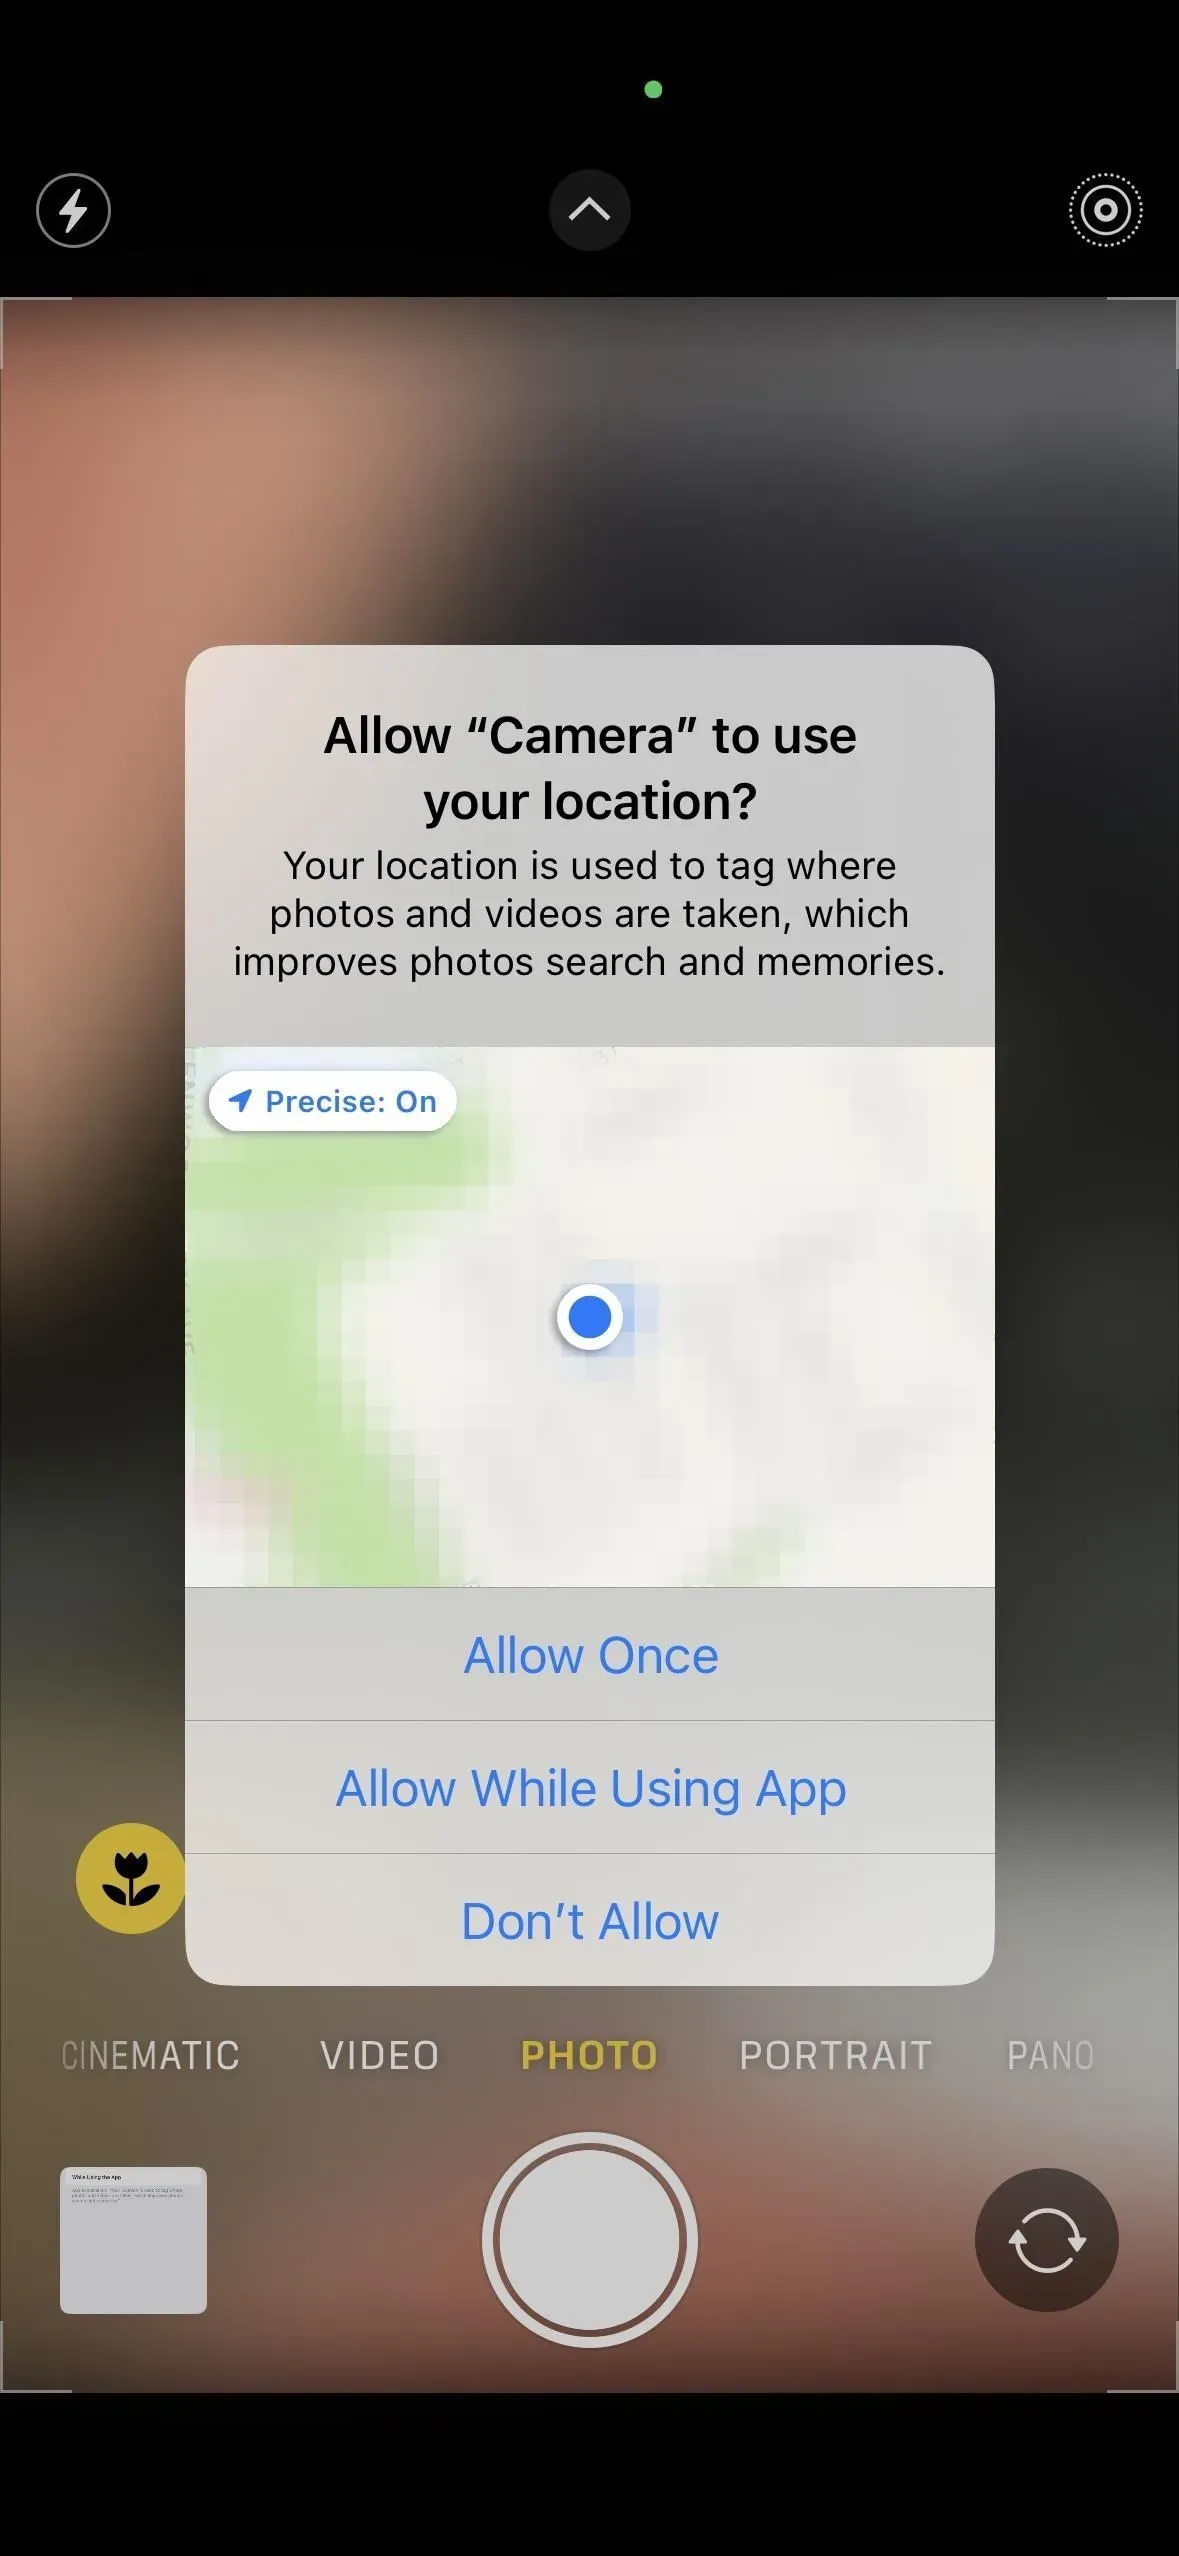
When you first opened the Camera app, it asked you if your location could be used while using the app, and you probably approved the request. And that’s great. Tagging your photos and videos with location data helps you organize and keep track of important moments in your life, and helps the Photos app create memorable videos for you, just to name a few of the benefits.
However, you may not remember that each image’s metadata stores the exact or approximate location where it was taken, or that anyone you share the image with can easily find this information. You can even share GPS coordinates with hackers and the world if you upload content to services like DeviantArt, Flickr, Google Photos, and Unsplash.
Without location services turned off for camera apps, your iPhone doesn’t just use GPS networks to determine your location—it also uses Bluetooth connections, local Wi-Fi networks, and your cellular network. So even if you don’t have cell or Wi-Fi coverage, location data can still be an invisible stamp on your images.
Skip to section:
- Completely disable geotagging
- Remove geotags on post
- Remove geotags before publishing
- Fake geotags before posting
Option 1: Disable Geotagging Completely
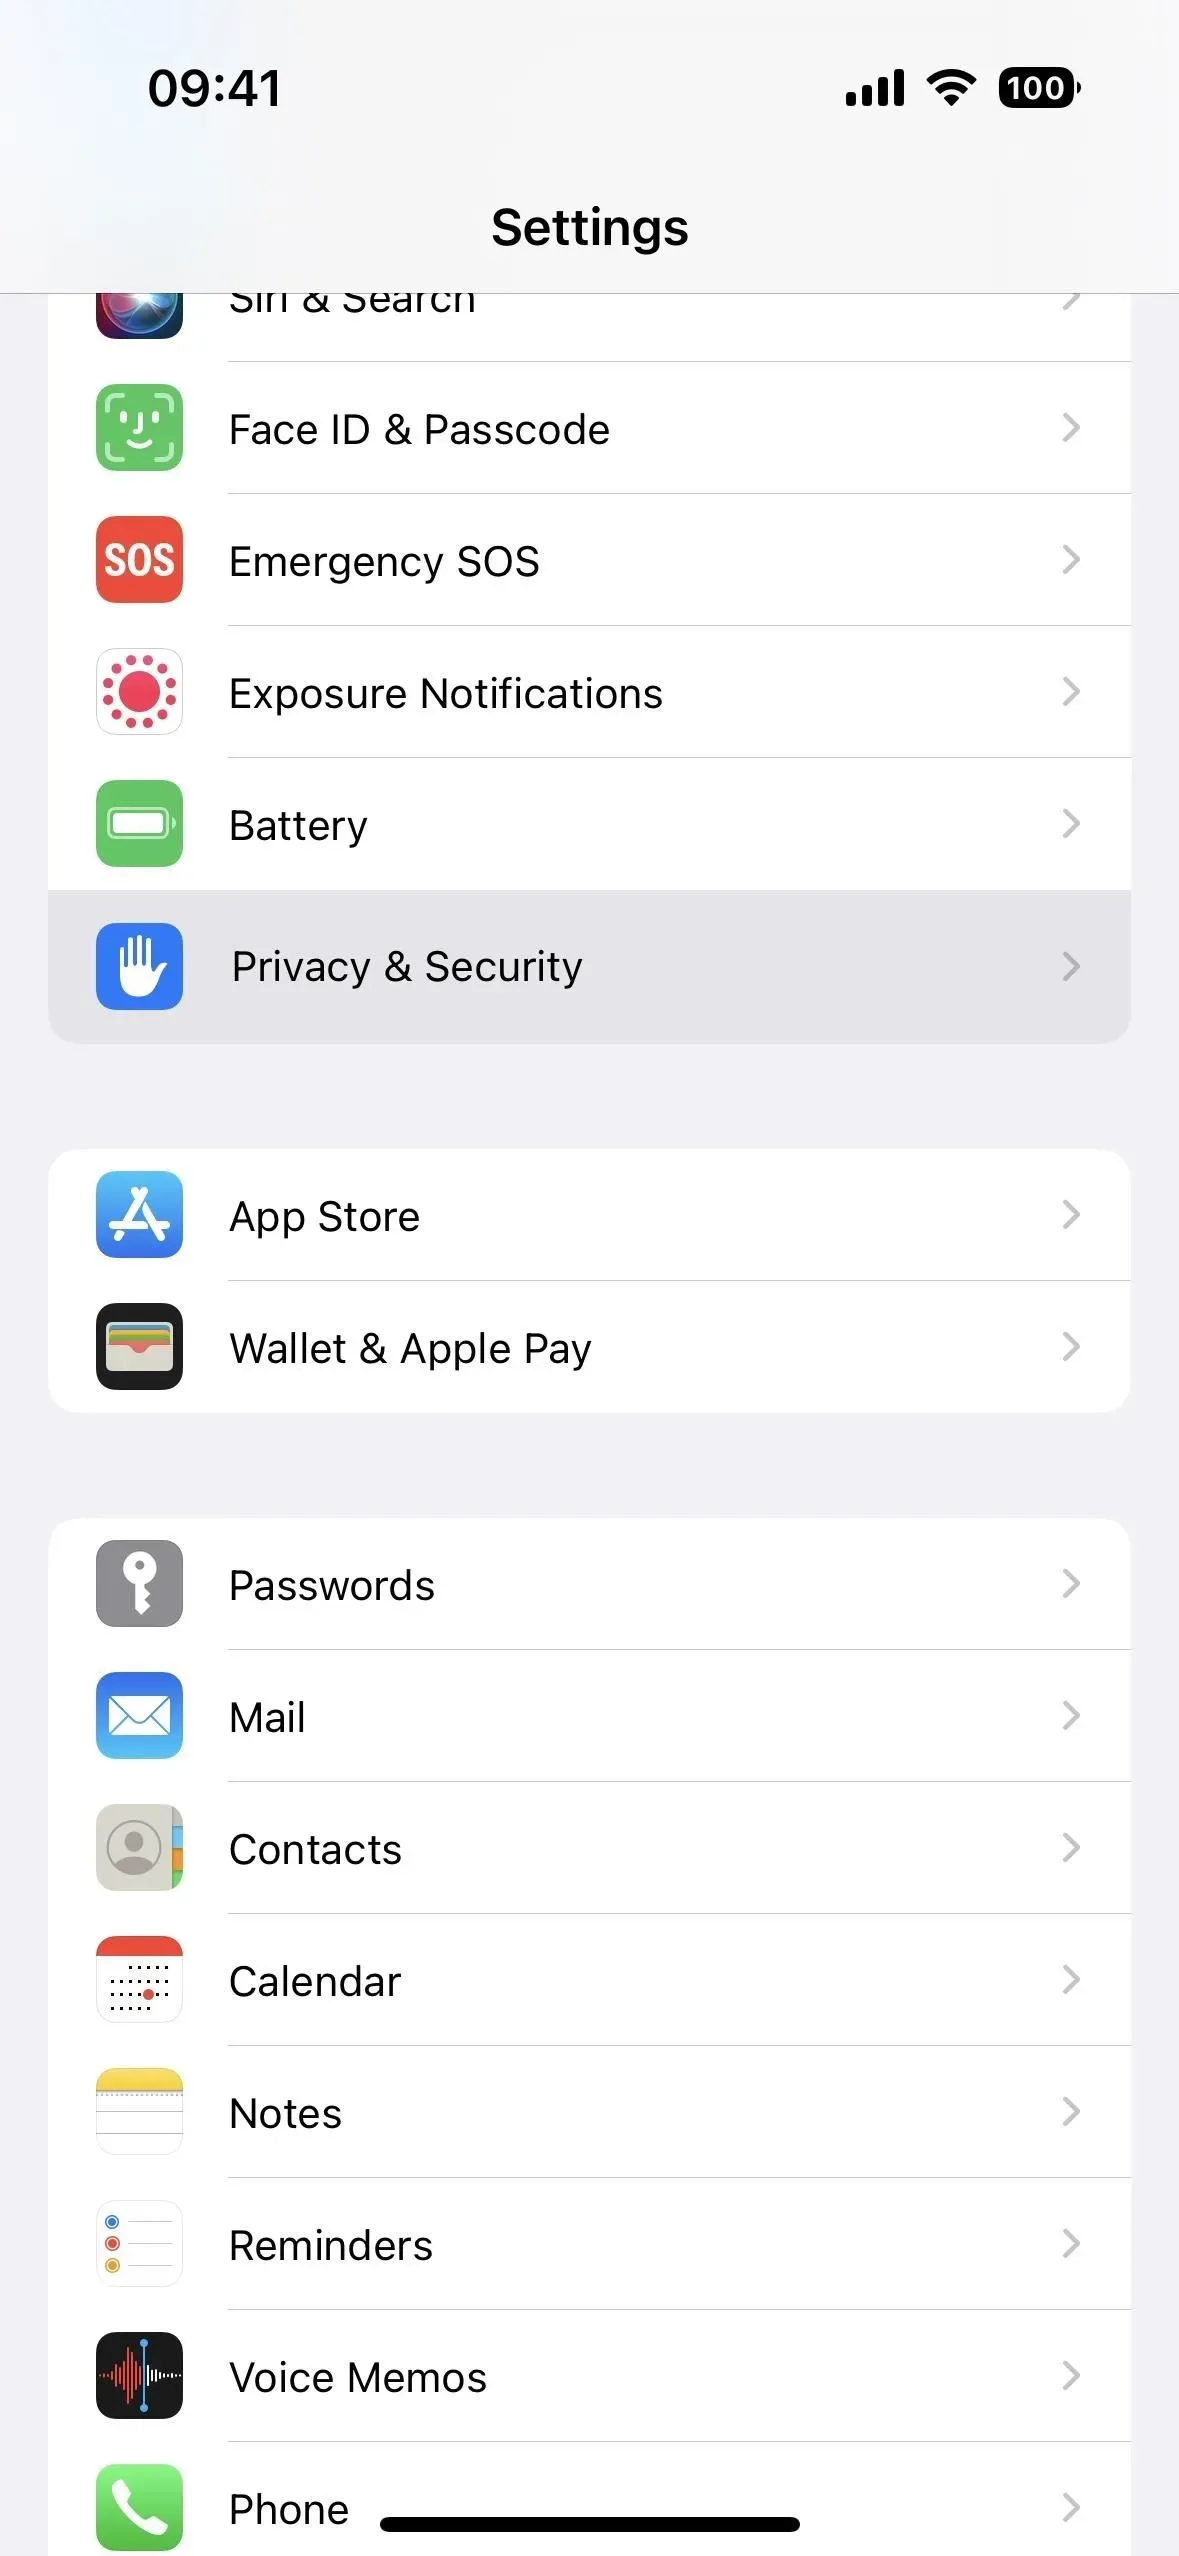
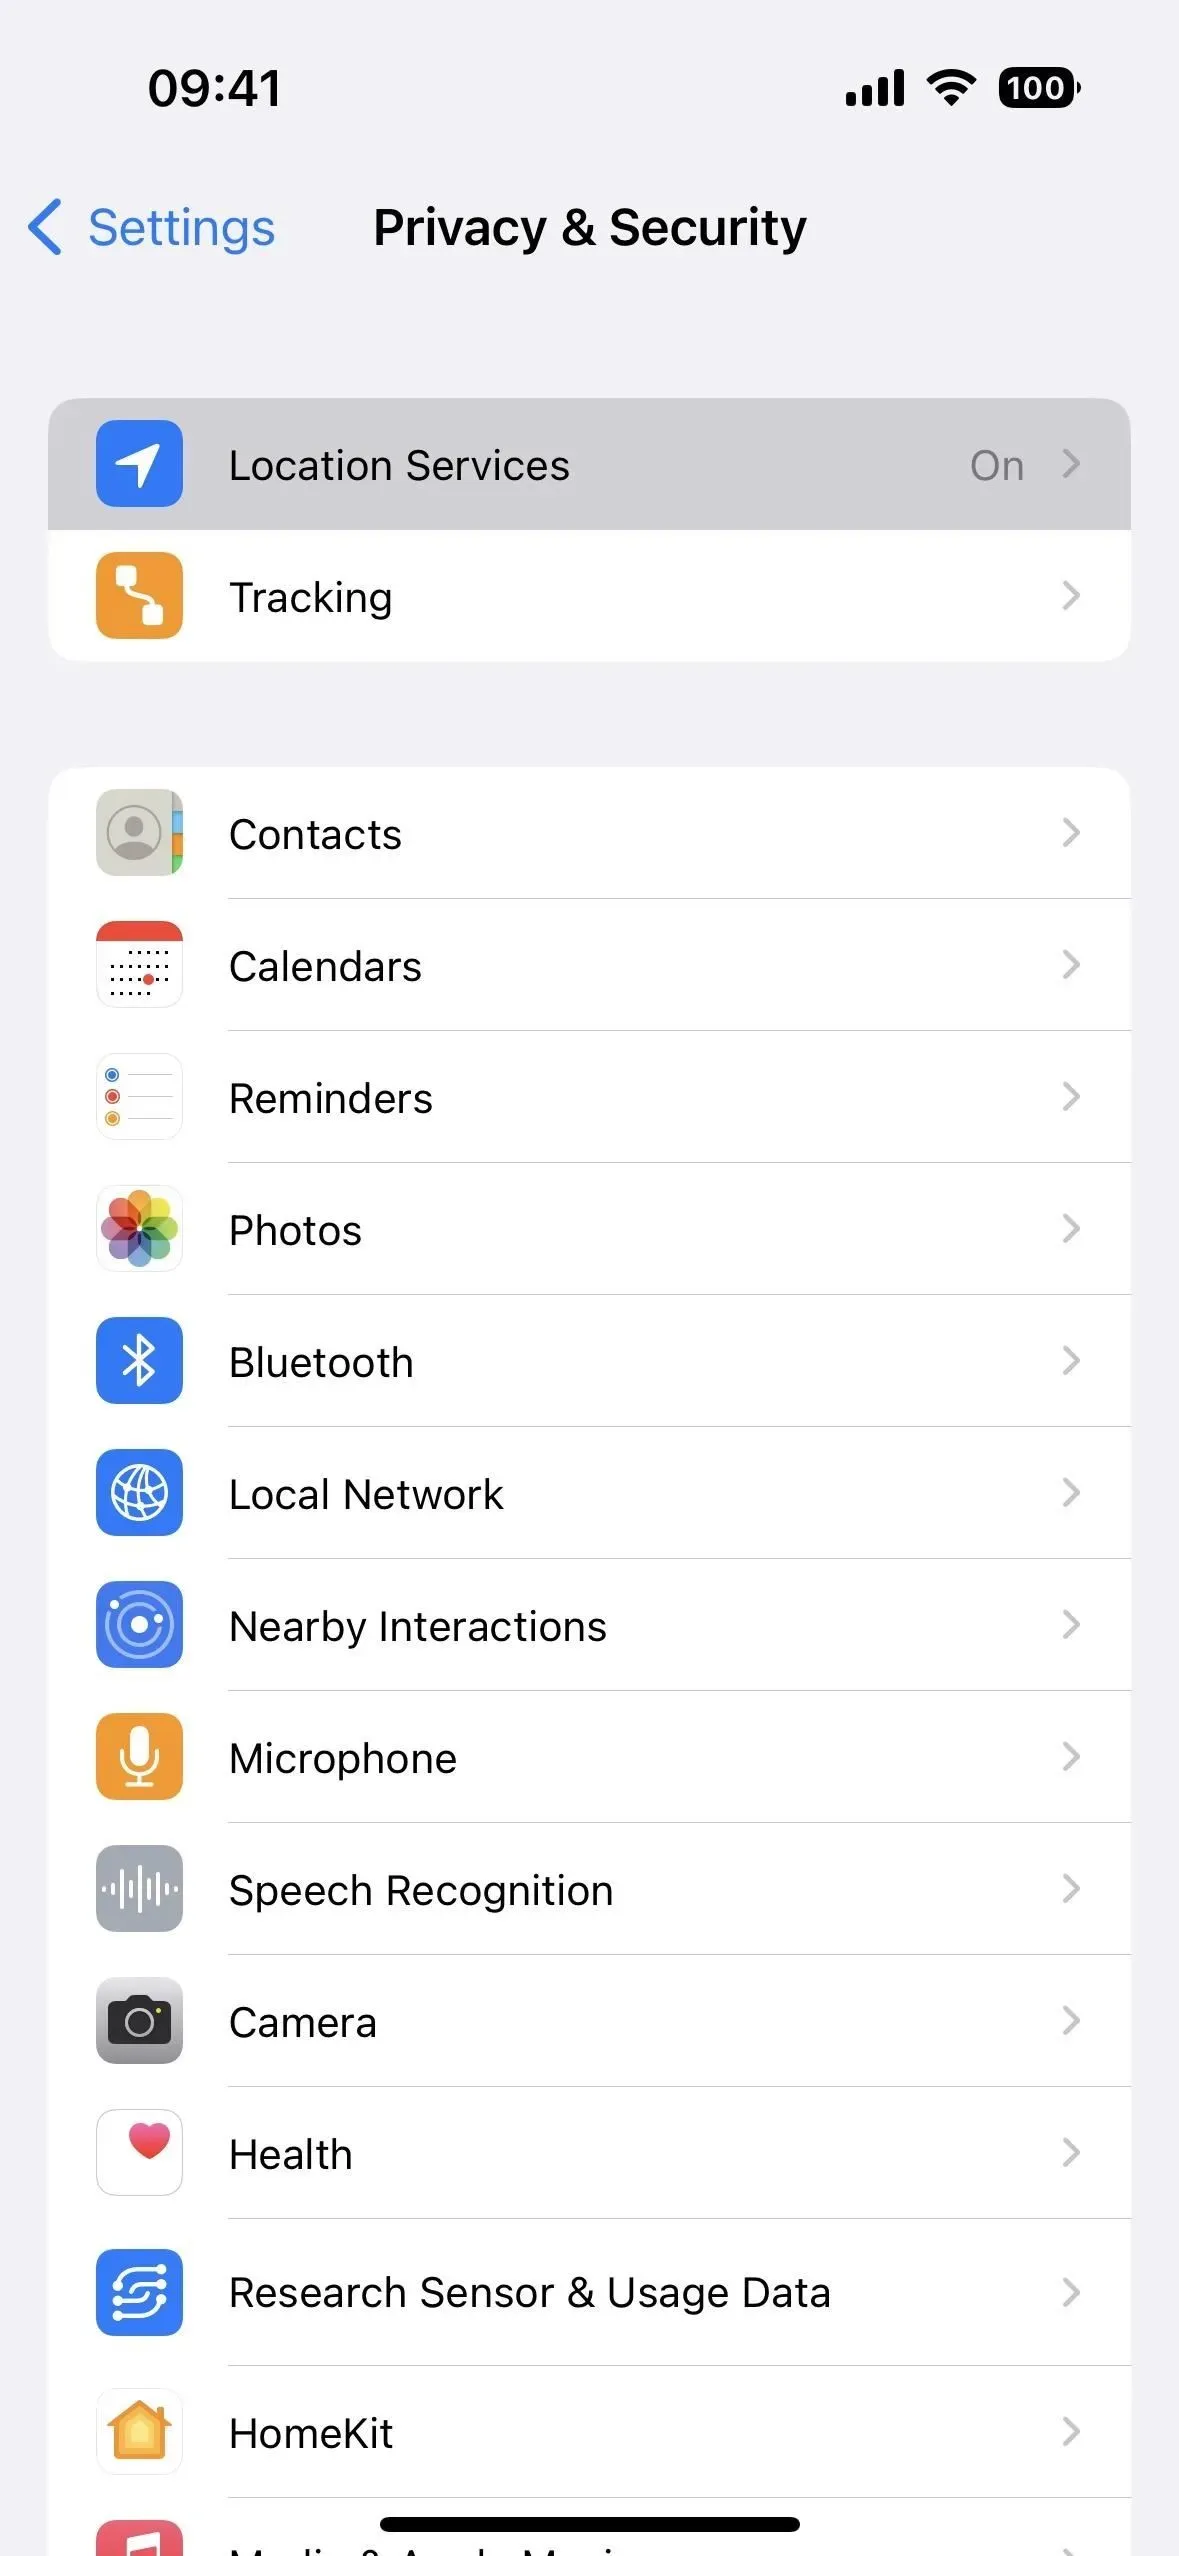
If you never want your iPhone to tag photos and videos with geographic information, you can disable Camera Location Services and any other camera apps you use. To do this, go to Settings -> Privacy (iOS 15) or Privacy & Security (iOS 16) -> Location Services, then select Camera or another app from the list.
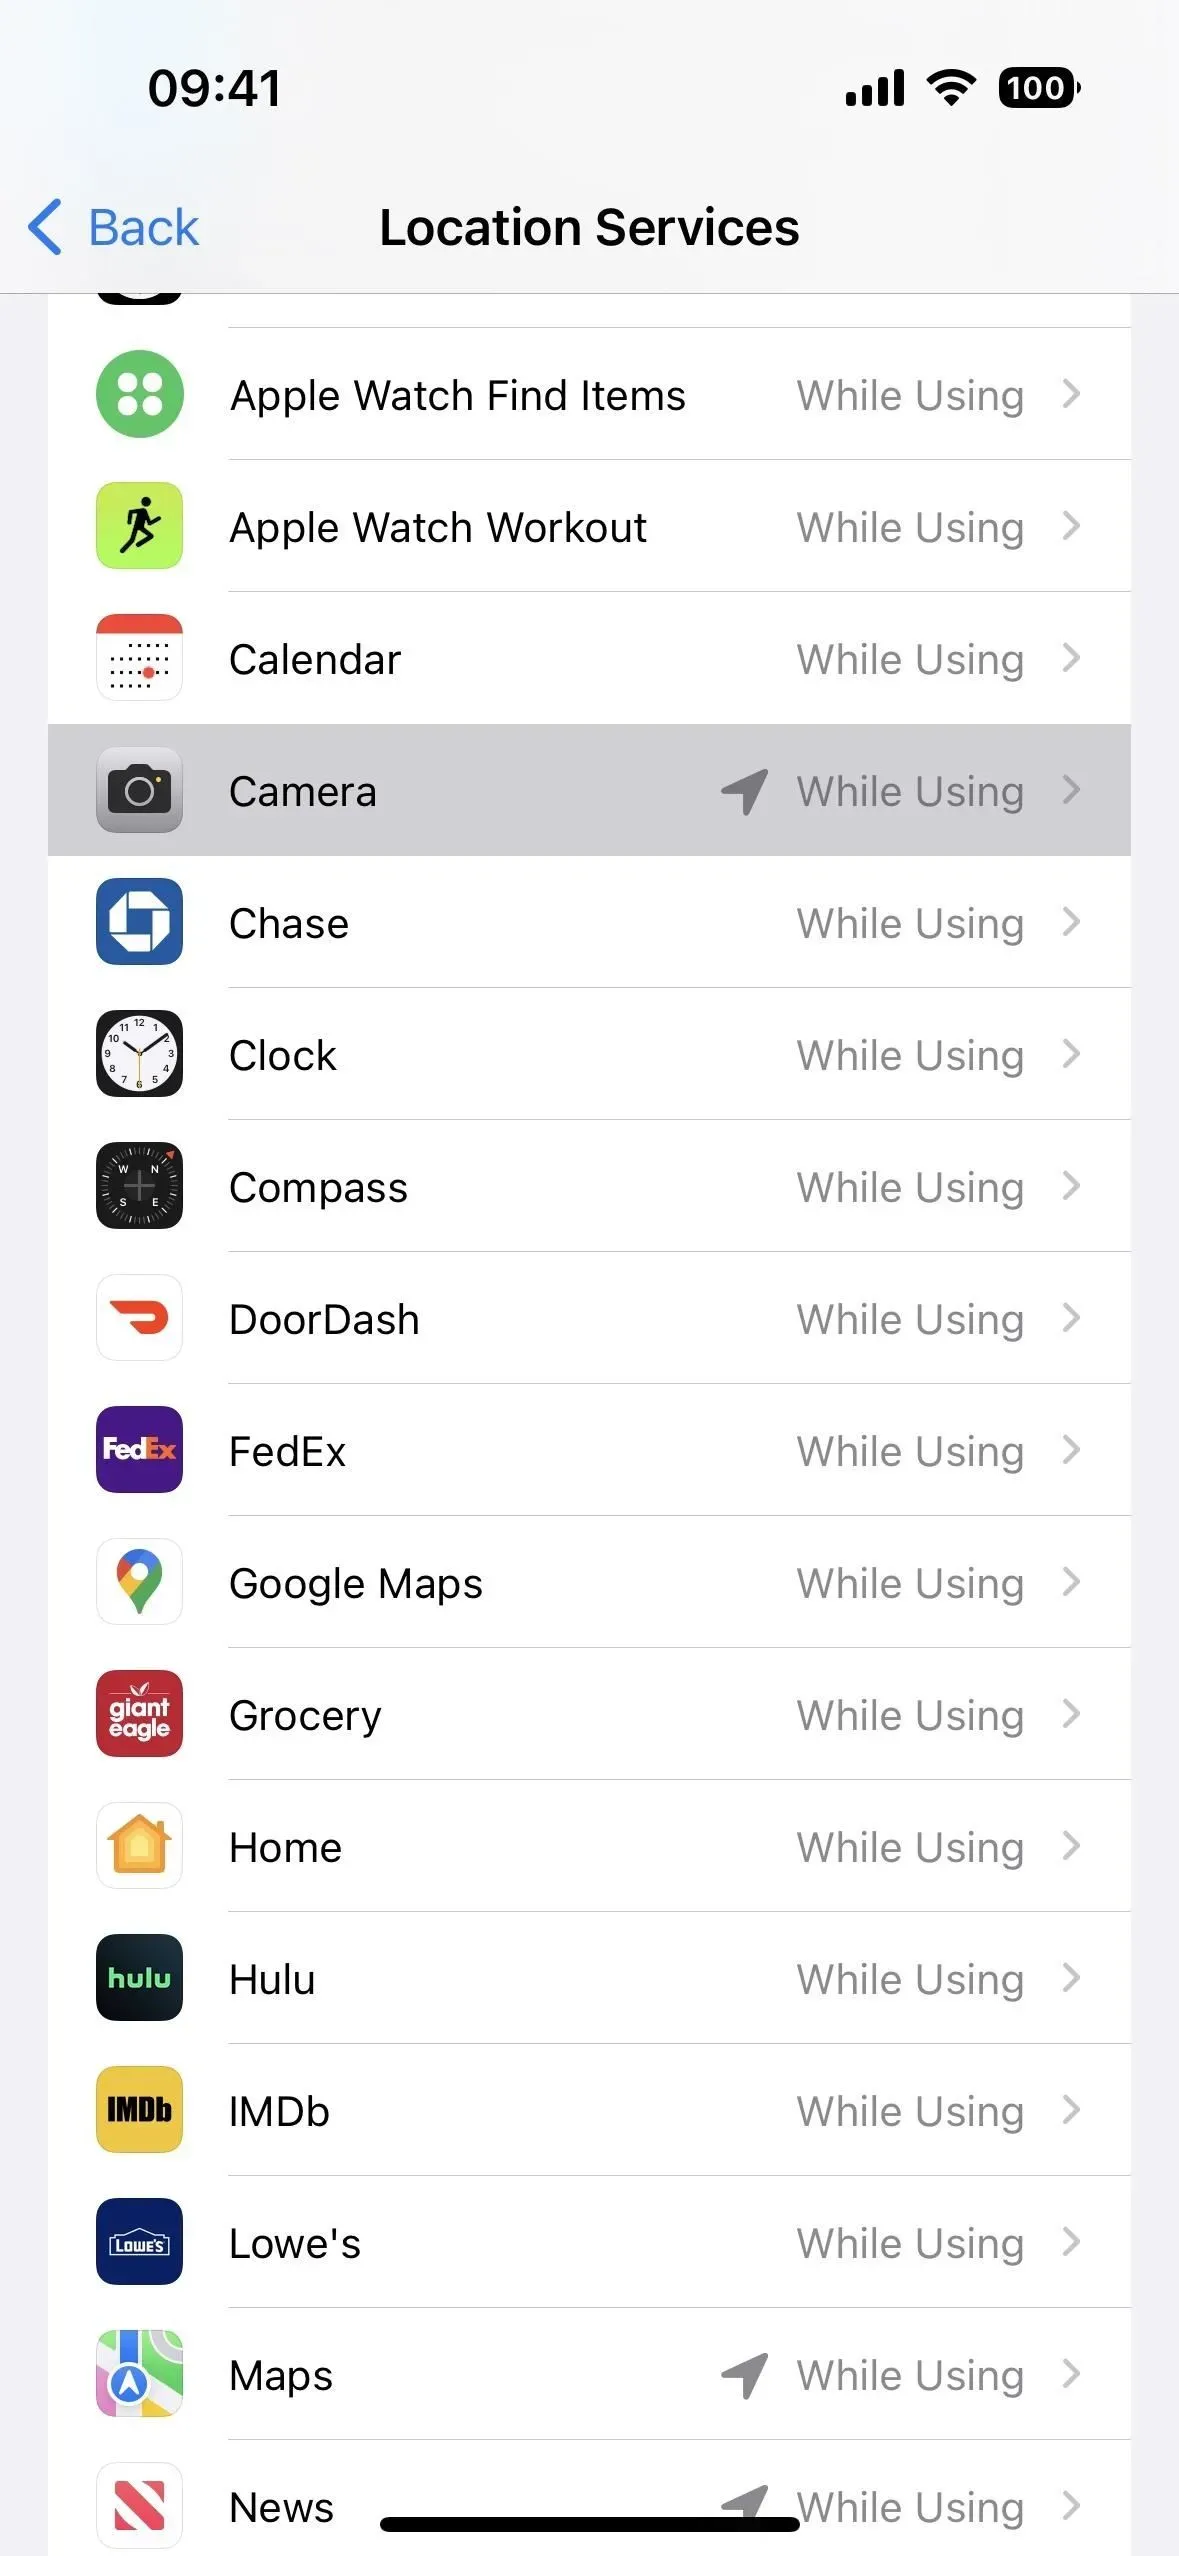
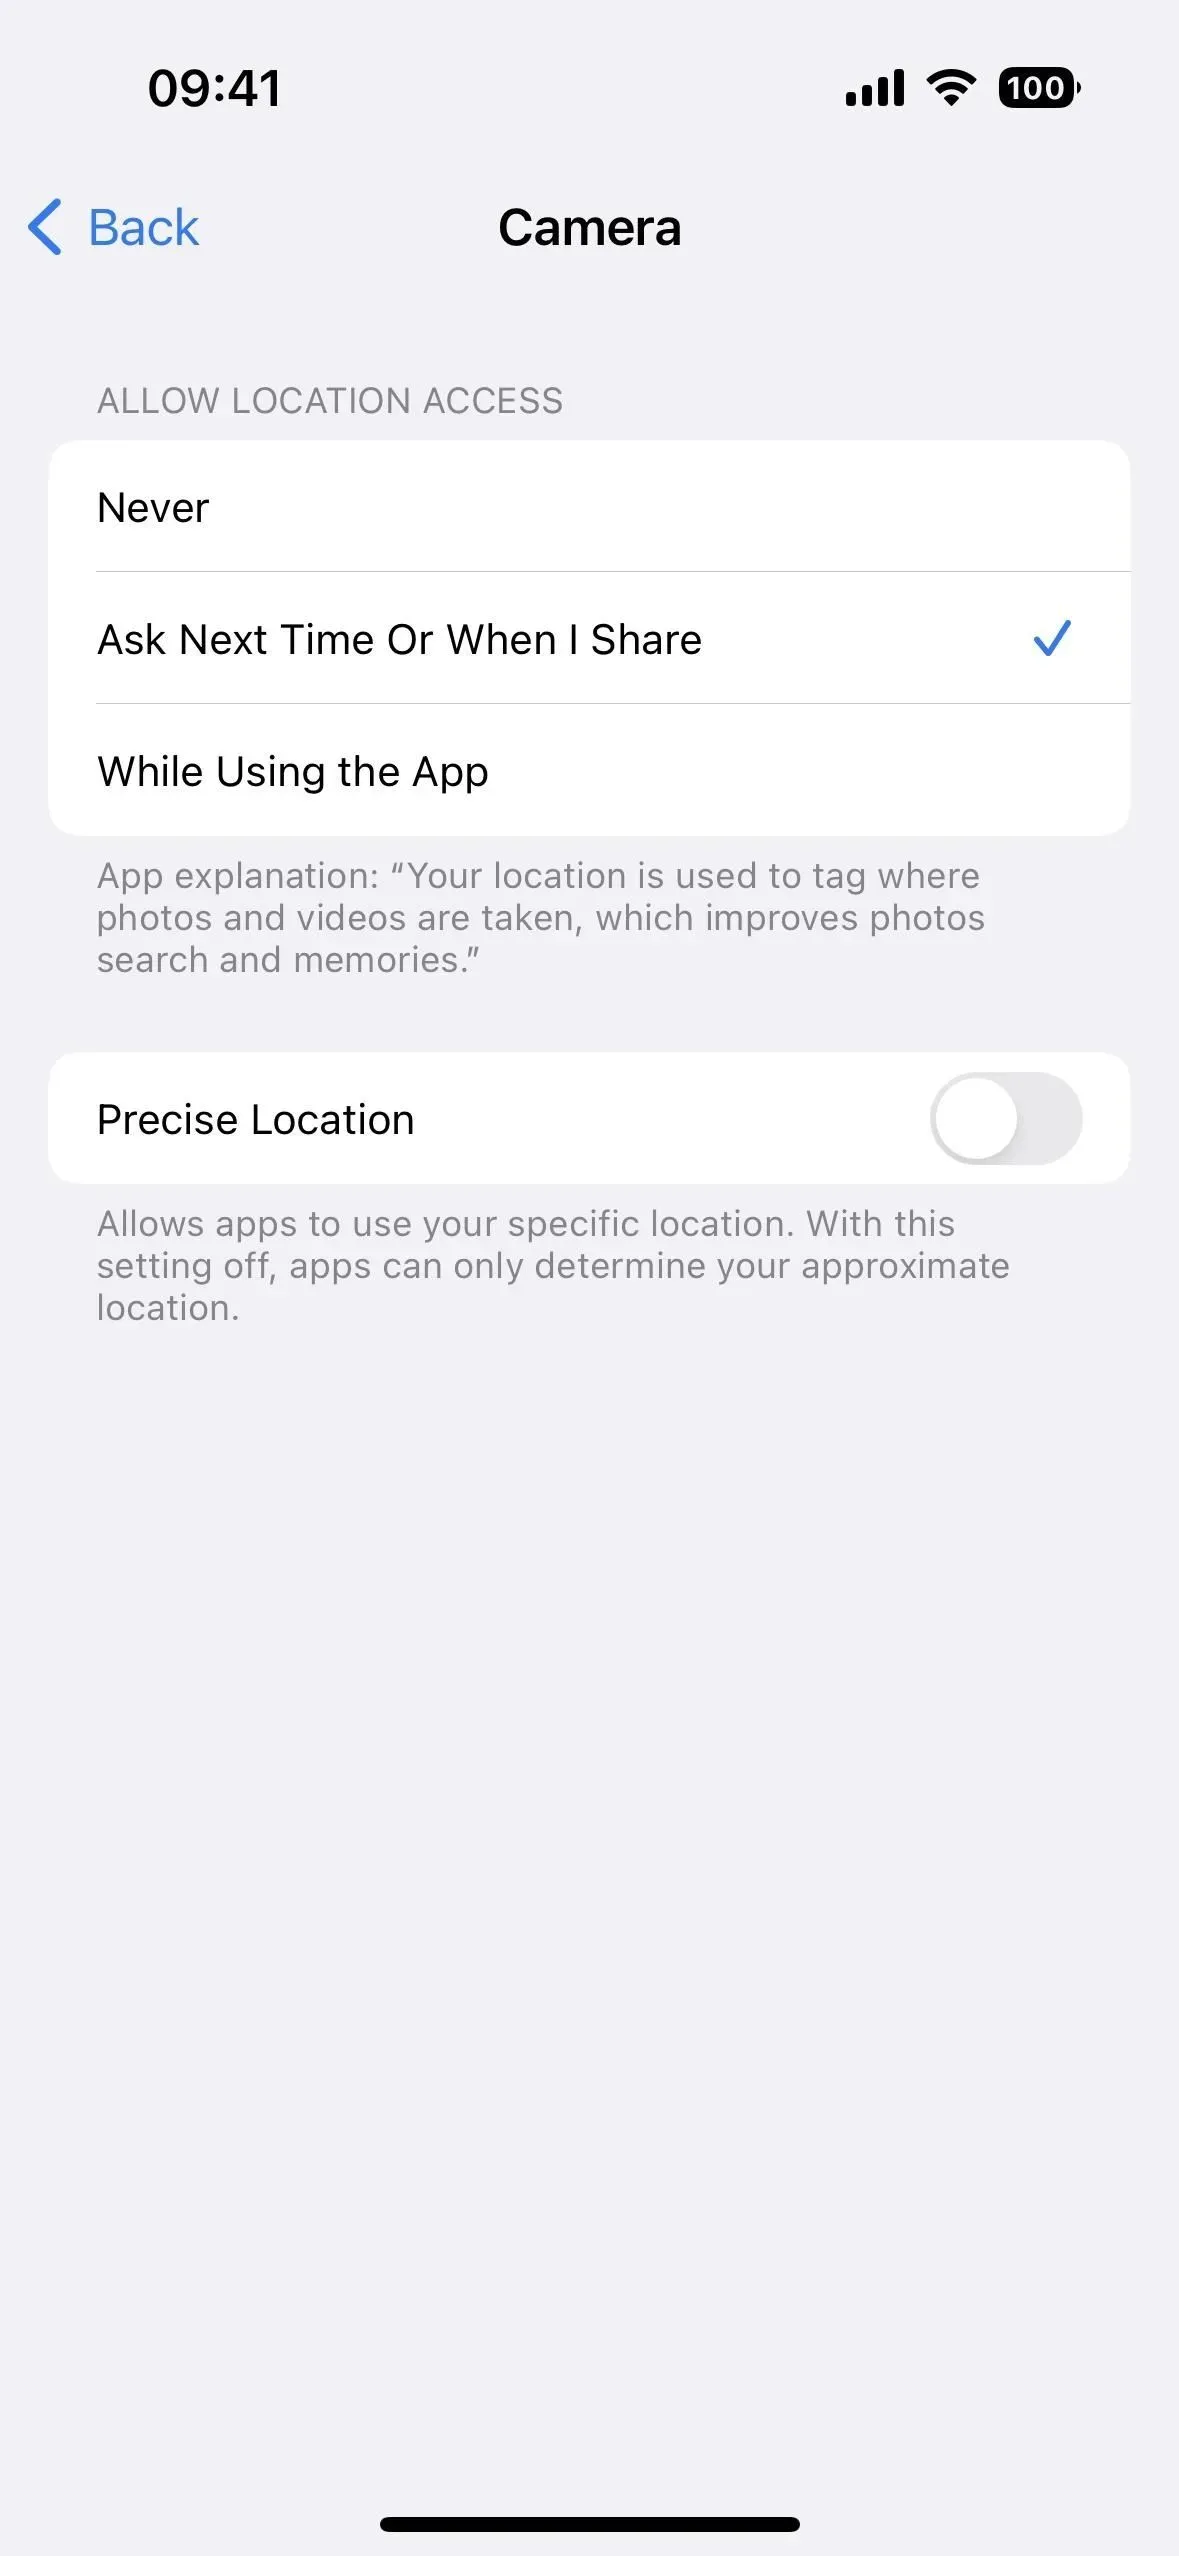
In the app settings you can:
- Disable Precise Location to summarize recorded location data.
- Change “When using the app”to “Never”to turn off the location access period.
- Change “When using the app”to “Ask next time or when I share.”When you open a new session in the camera app, it will ask you for location access. You can turn off exact location and choose “Don’t Allow”(to never allow him to access your location) or “Allow Once”(to have him ask the same question each time he logs in).
Option 2: Remove geotags when posting
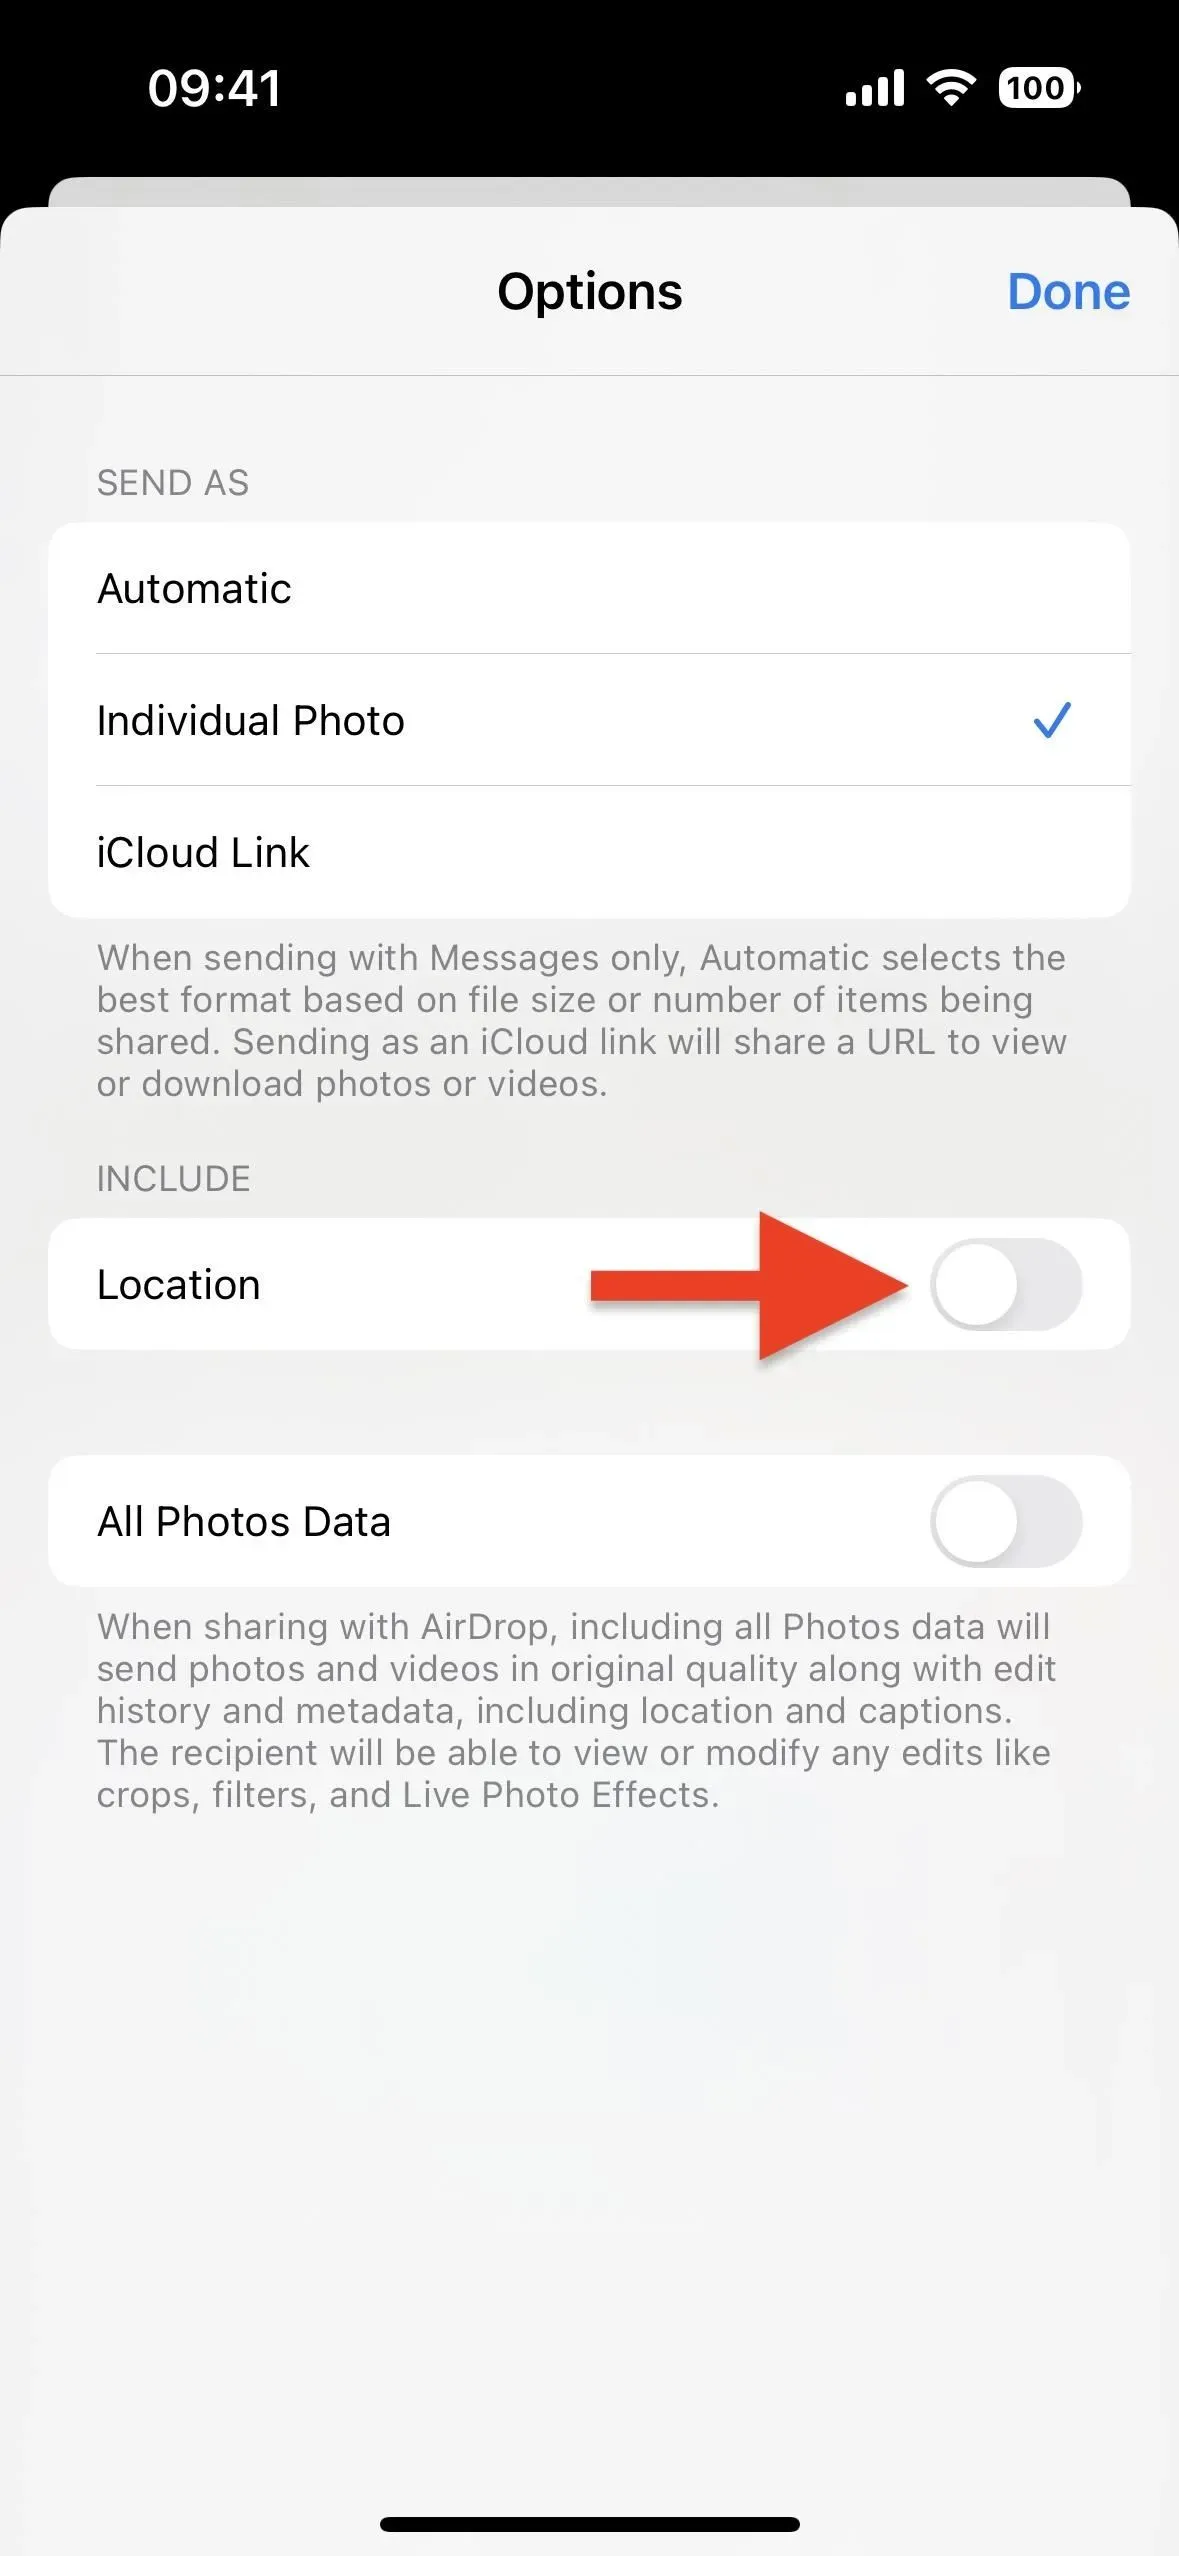
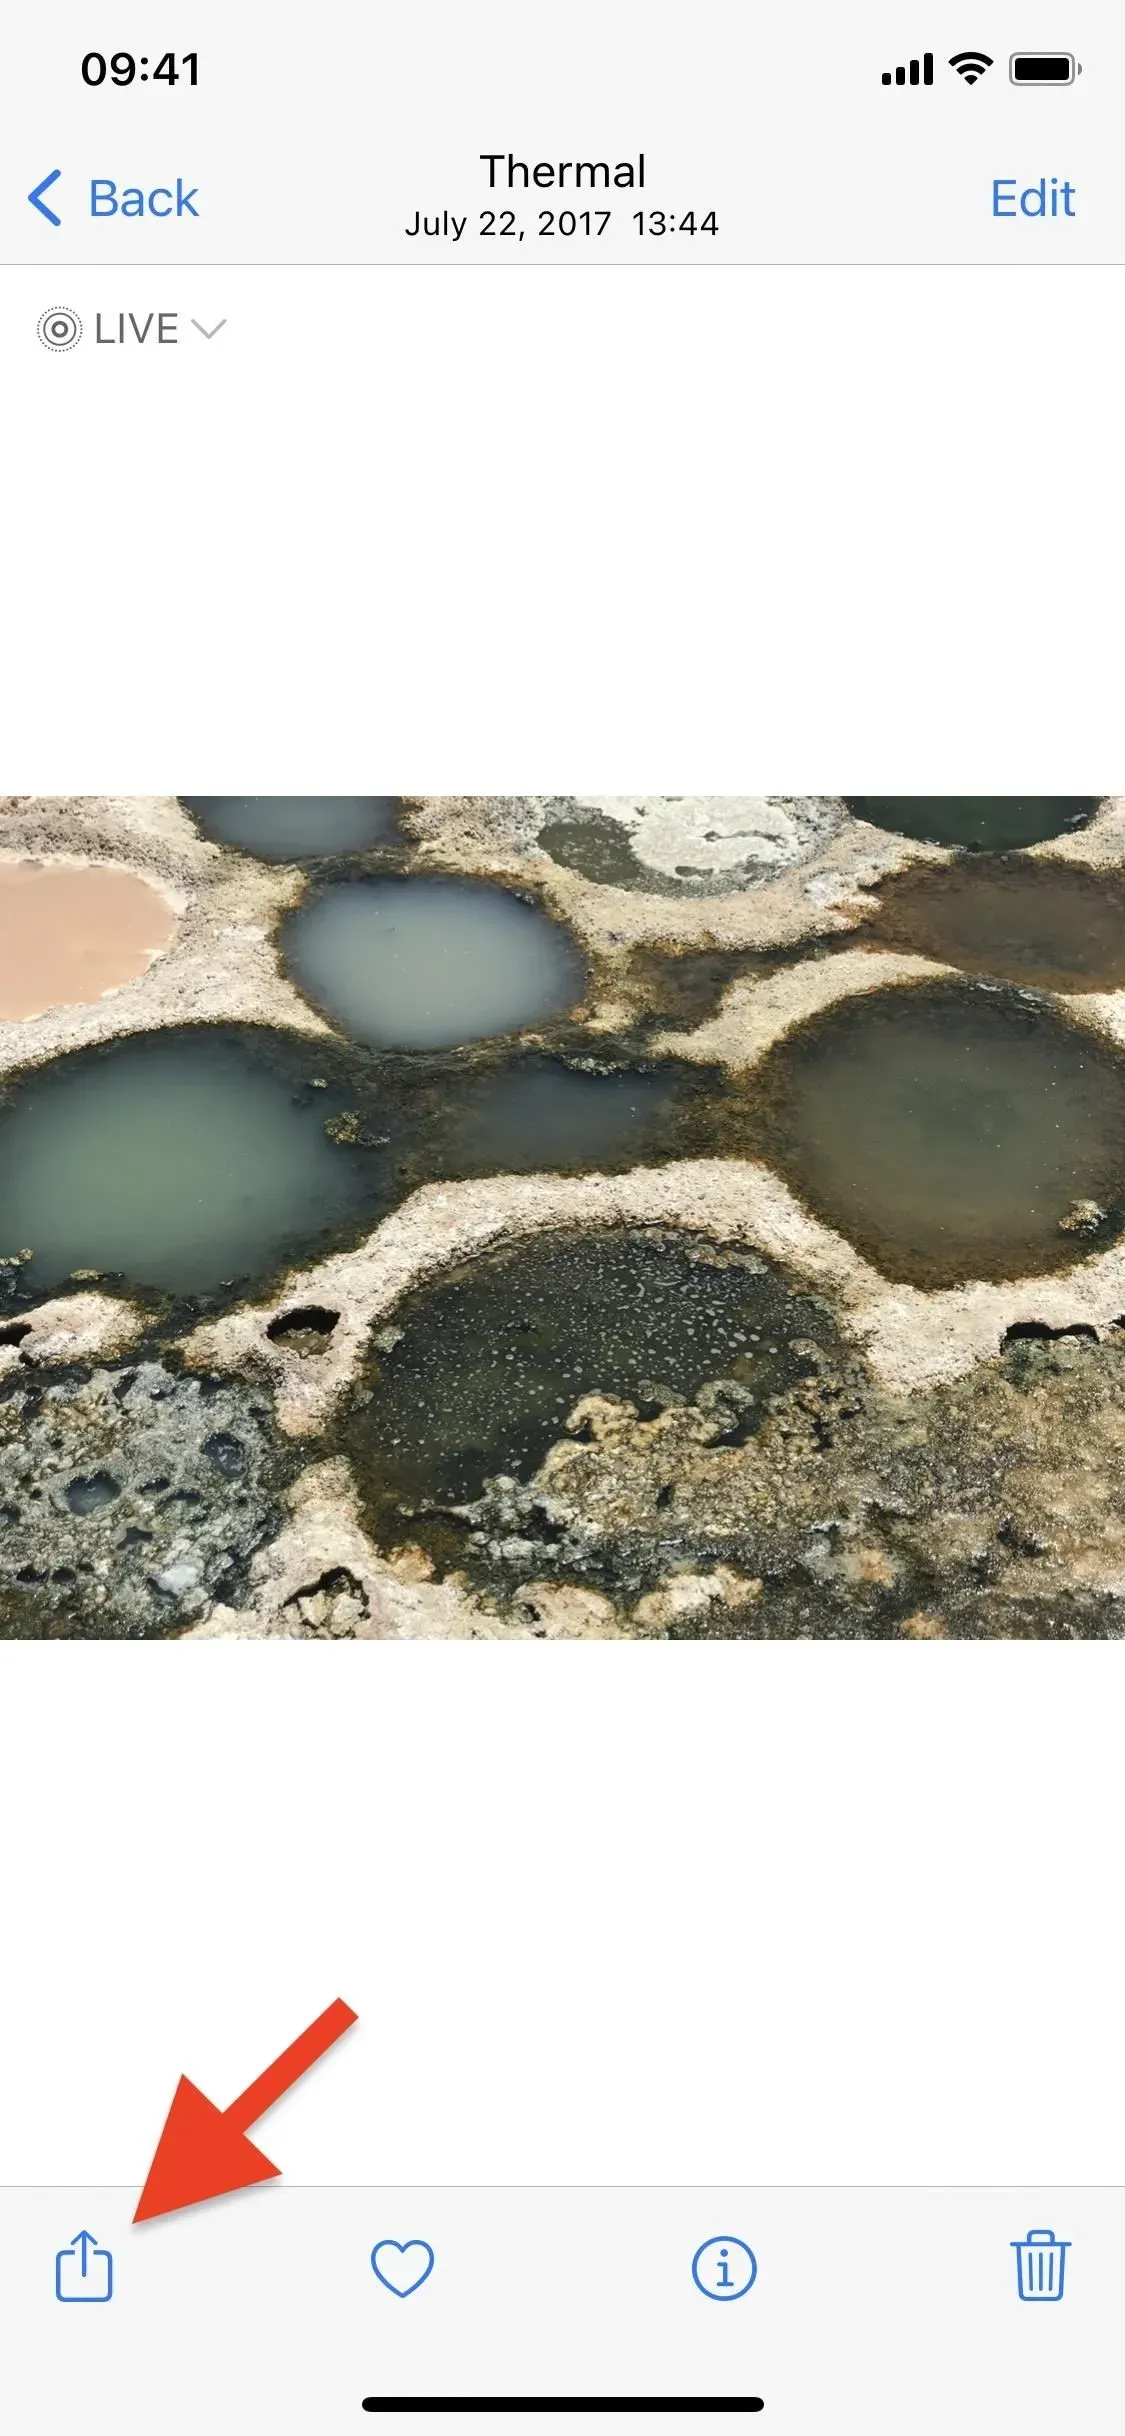
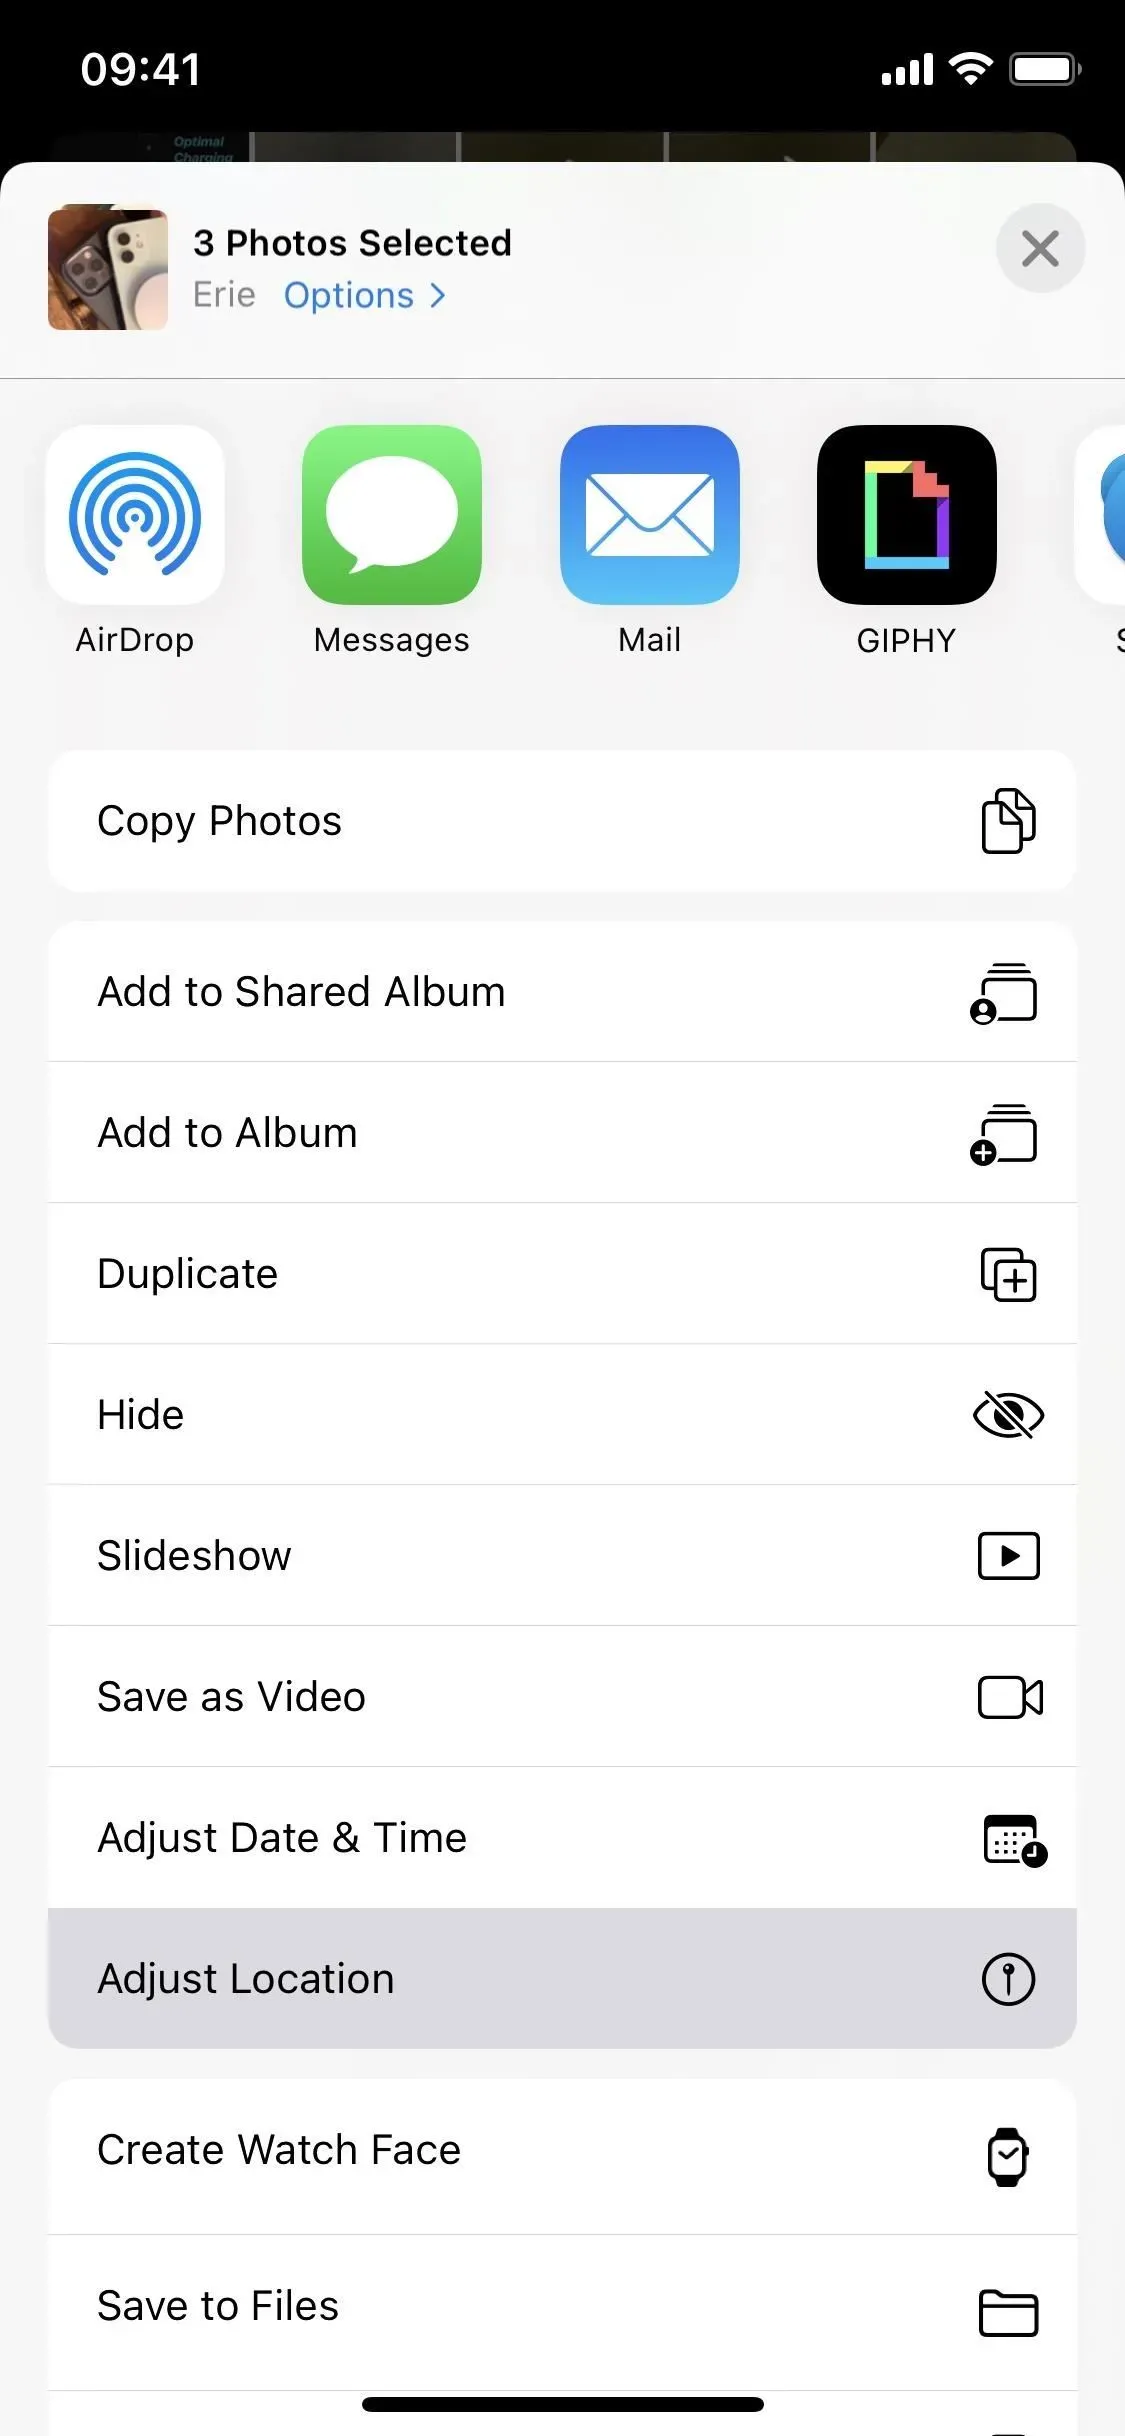
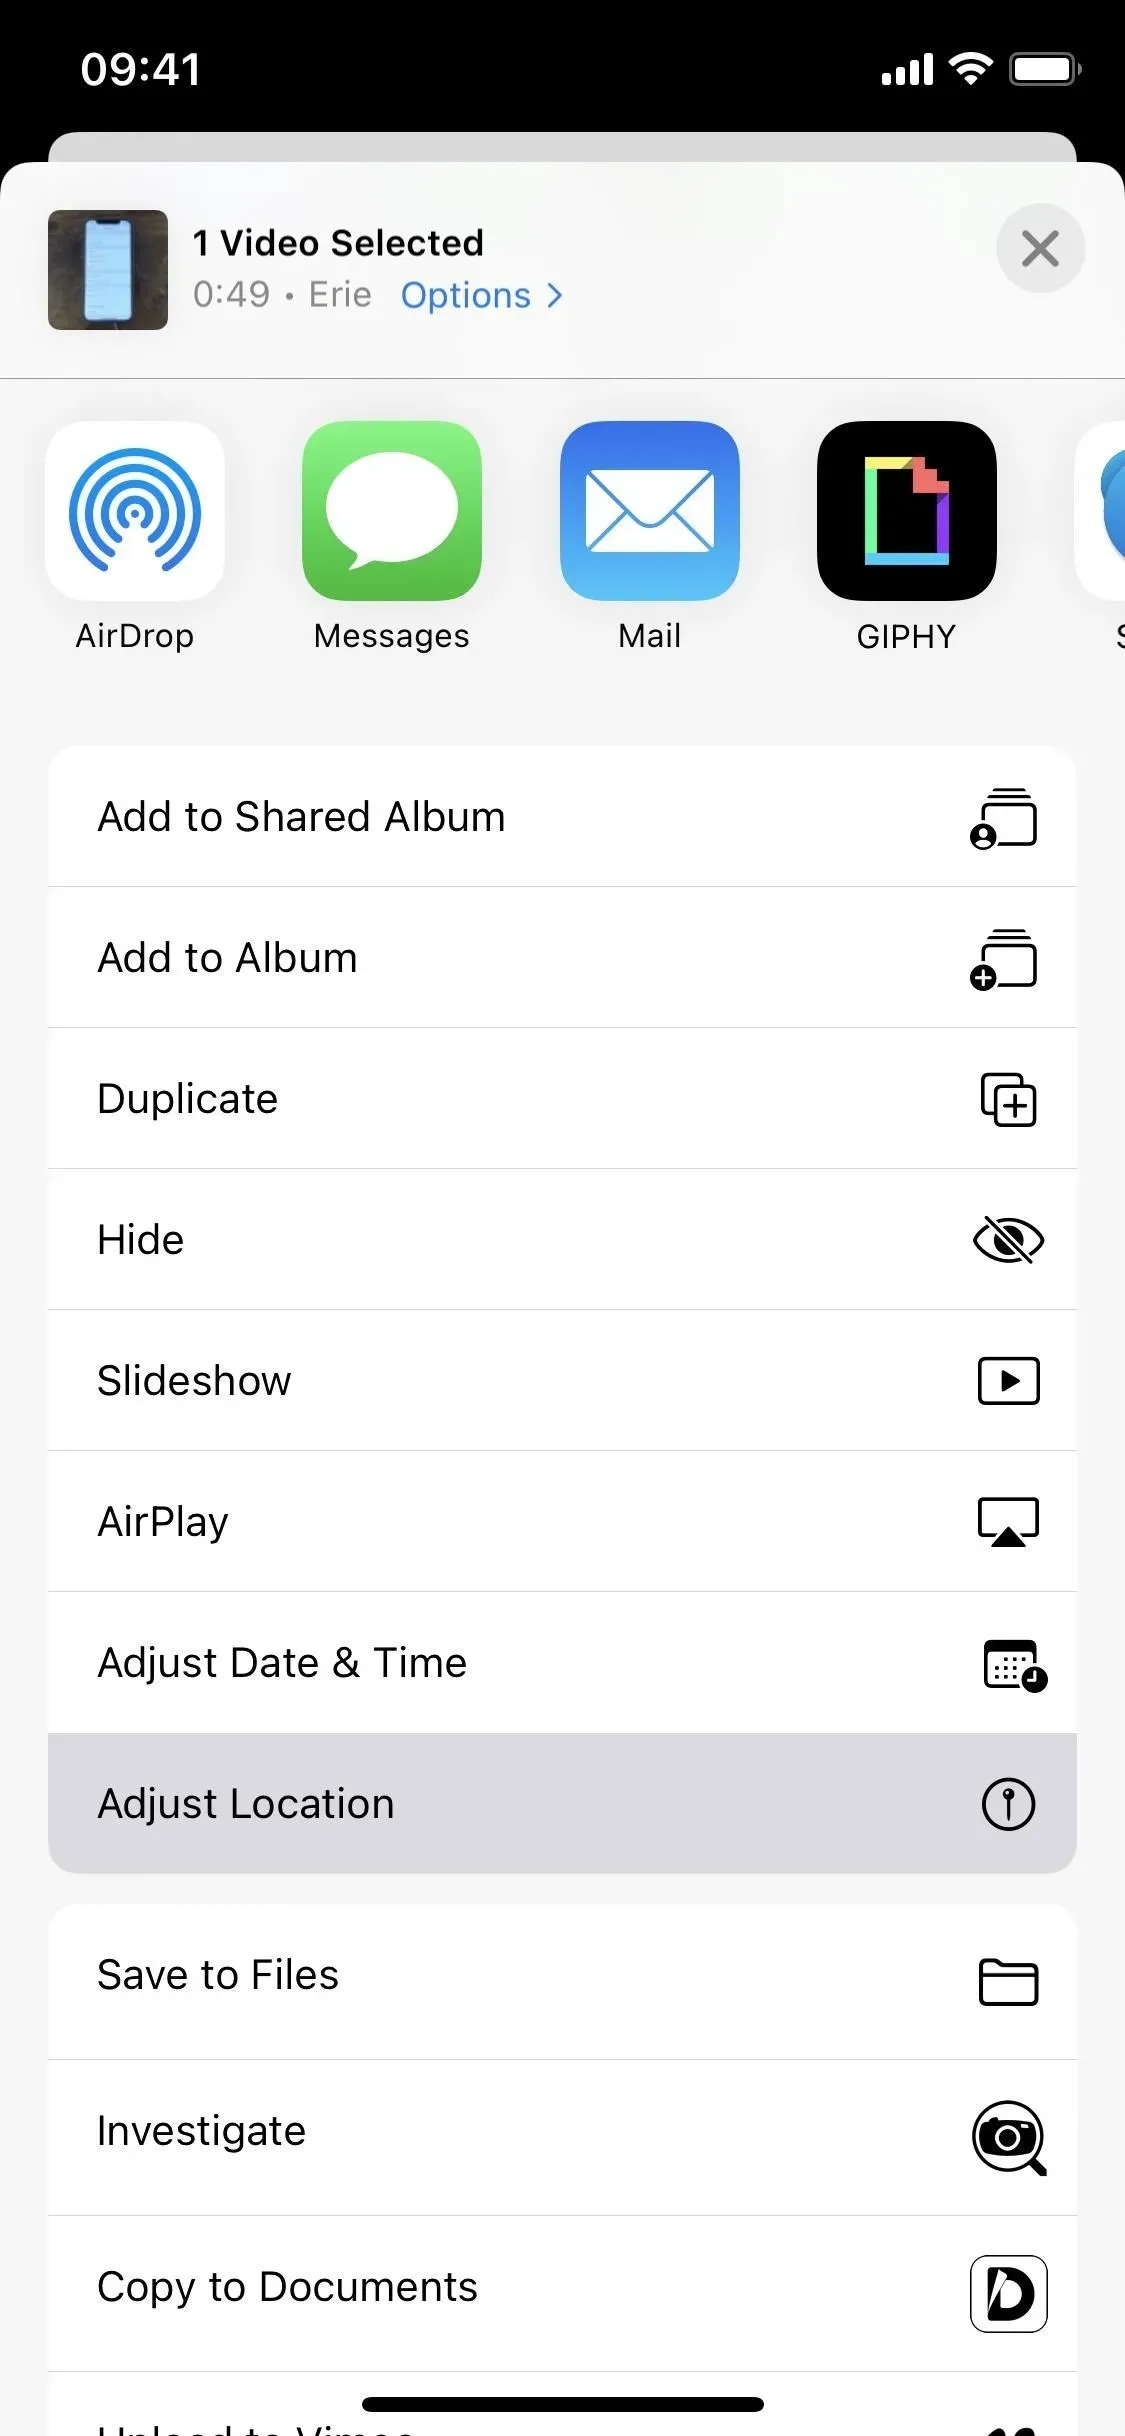
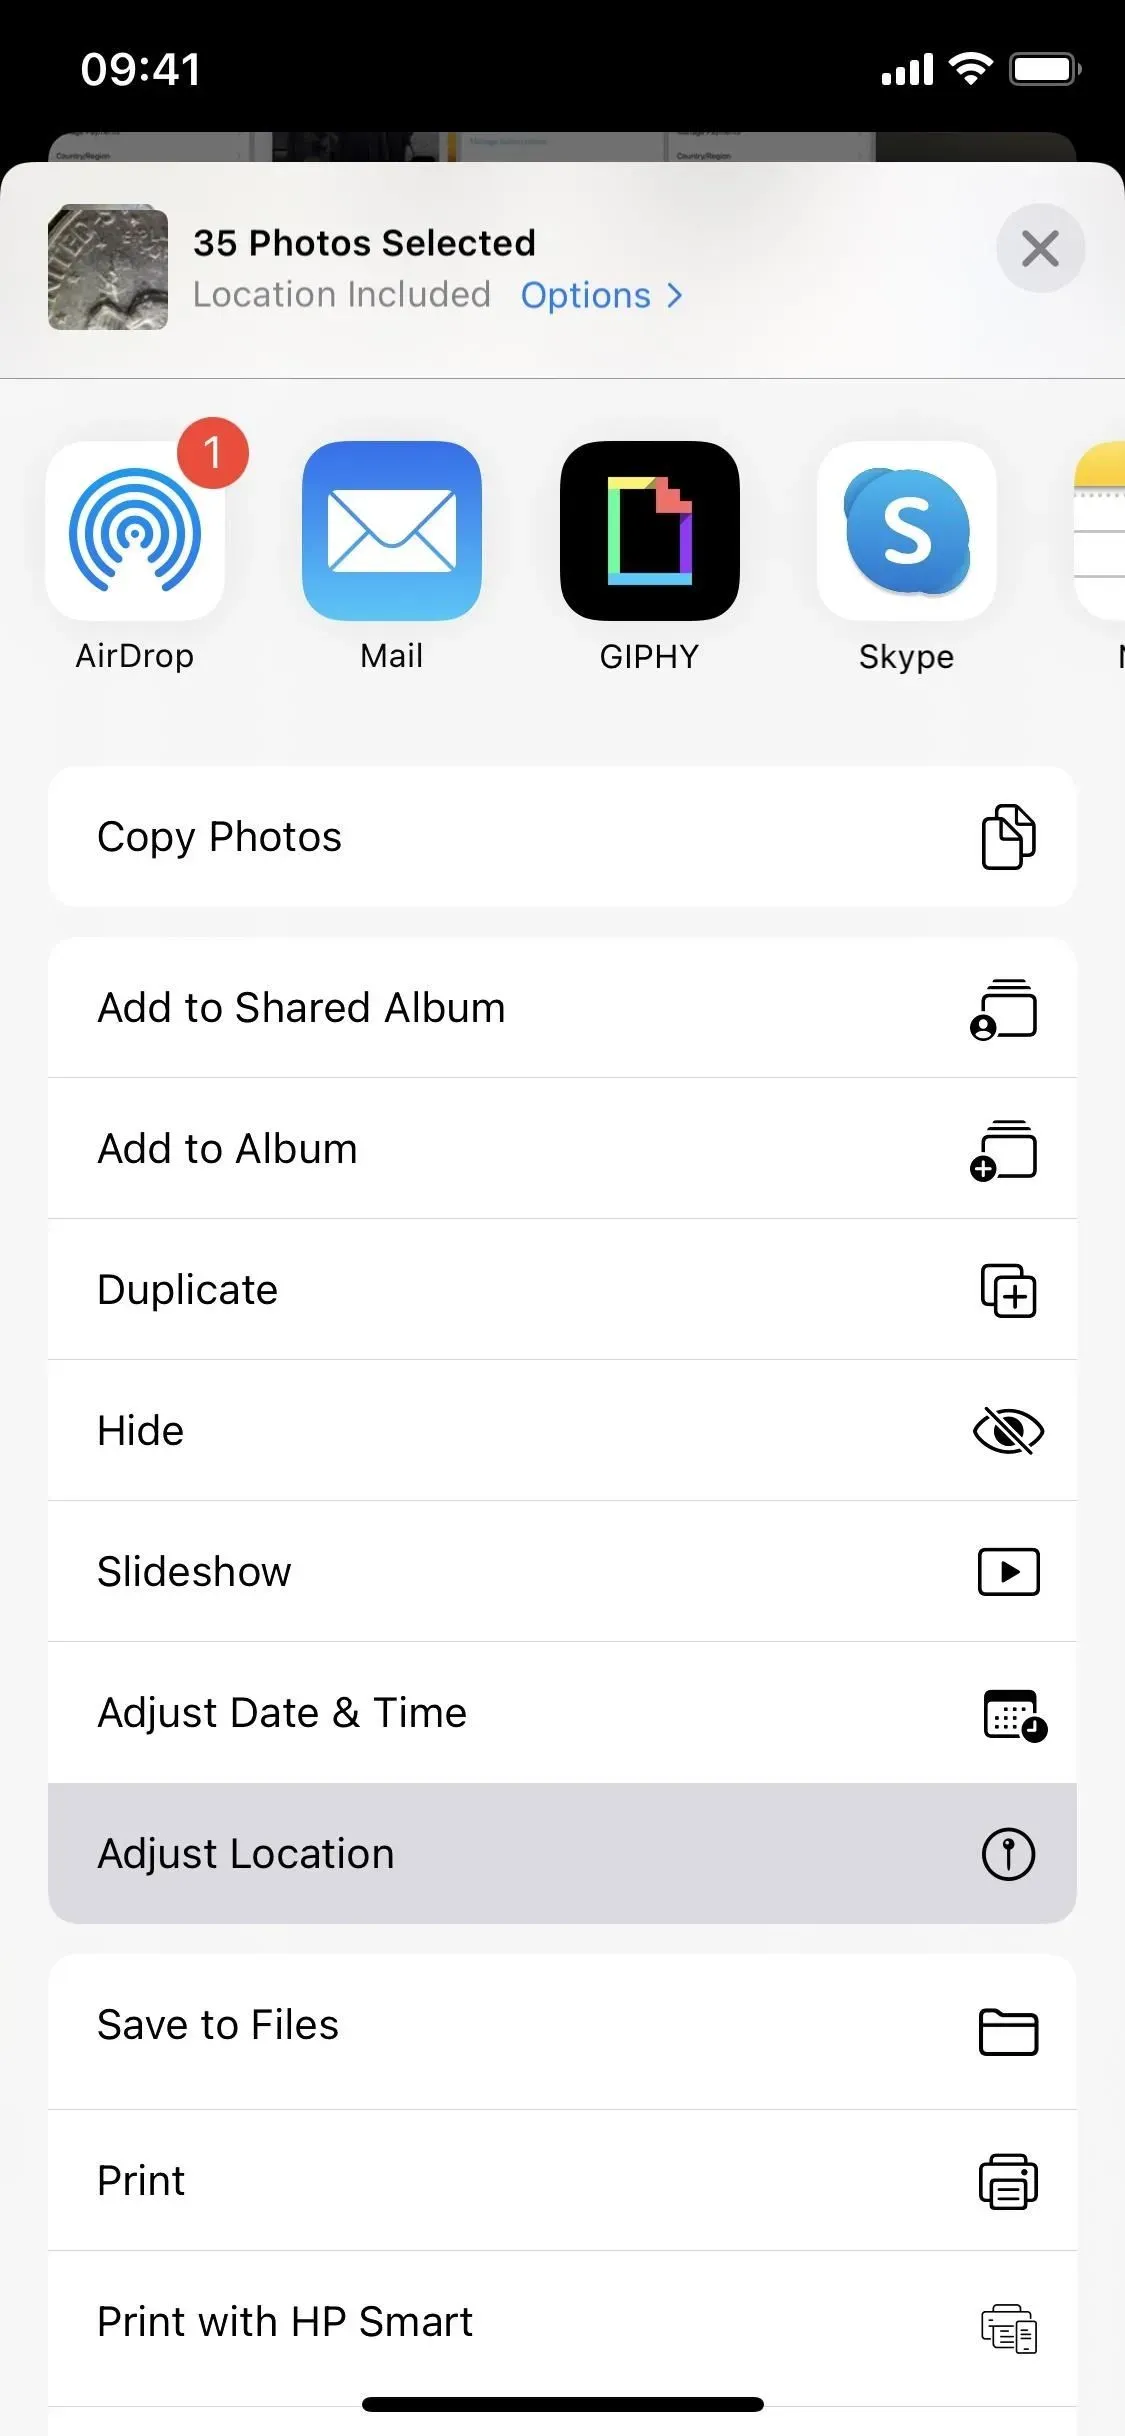
Starting with iOS 13, you can quickly remove a location from any image or video you share from the Photos app. Once you open the shared sheet, click Options at the top and turn off the Location toggle before sharing content with any person or service. This works even when sharing multiple geotagged photos or videos. If you don’t see the “Location”toggle, the content does not include location data in its Exif metadata.

Option 3: Remove geotags before publishing
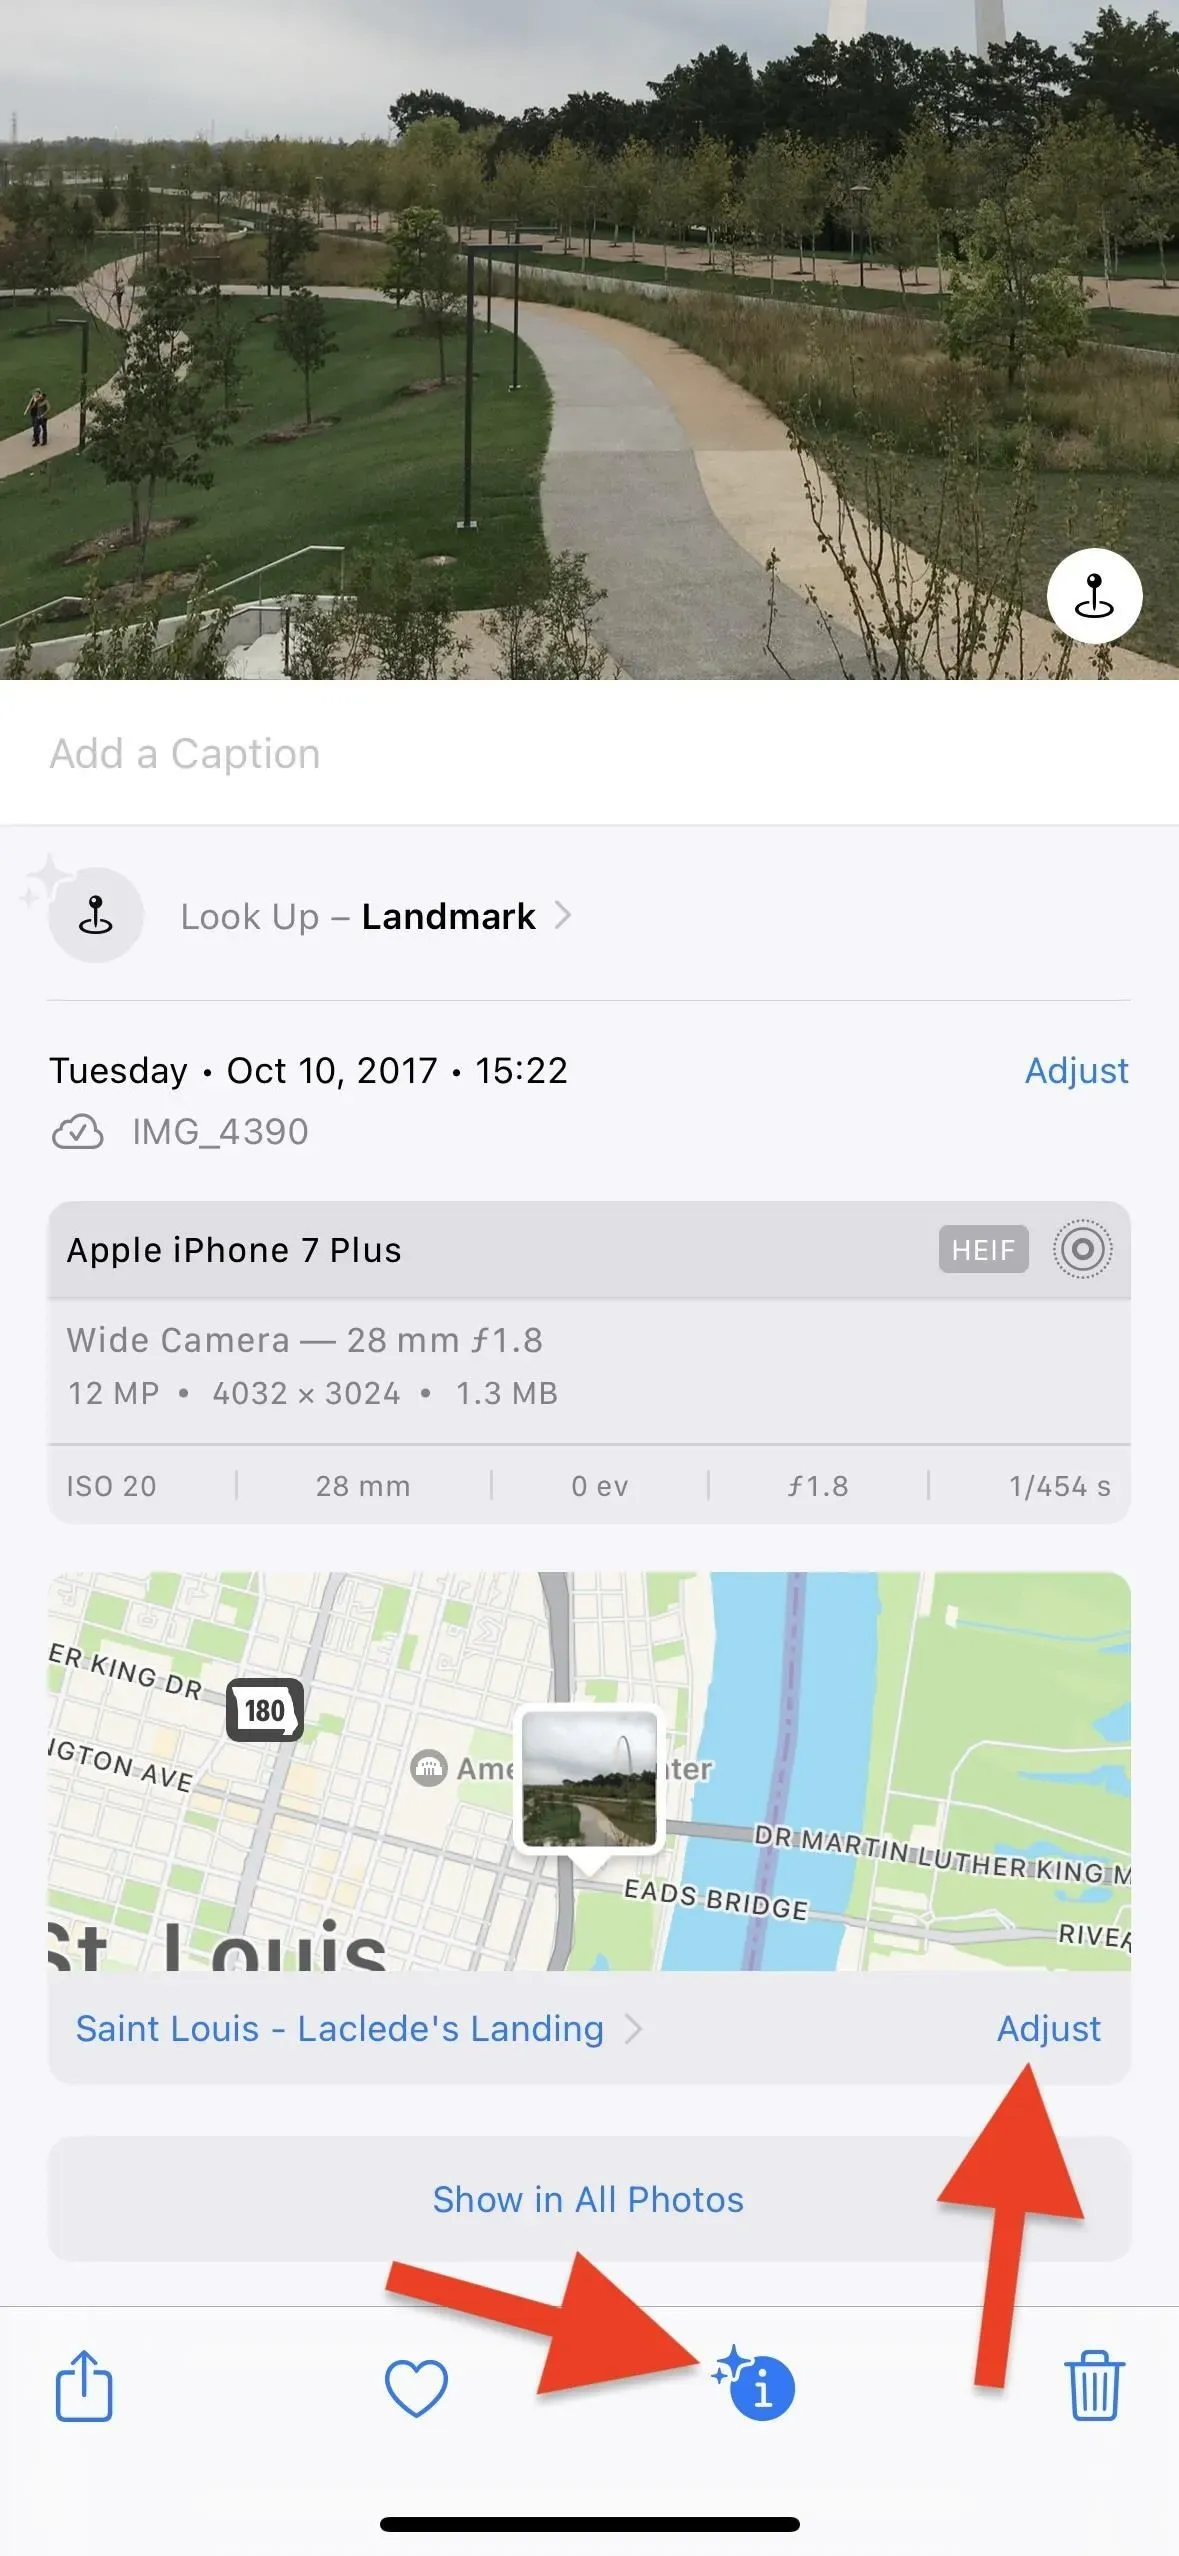
Starting with iOS 15, you can remove geotags from your photos and videos from the Photos app, which is great if you don’t plan to share content yet but know you probably will.
To remove a geotag from a single photo or video:
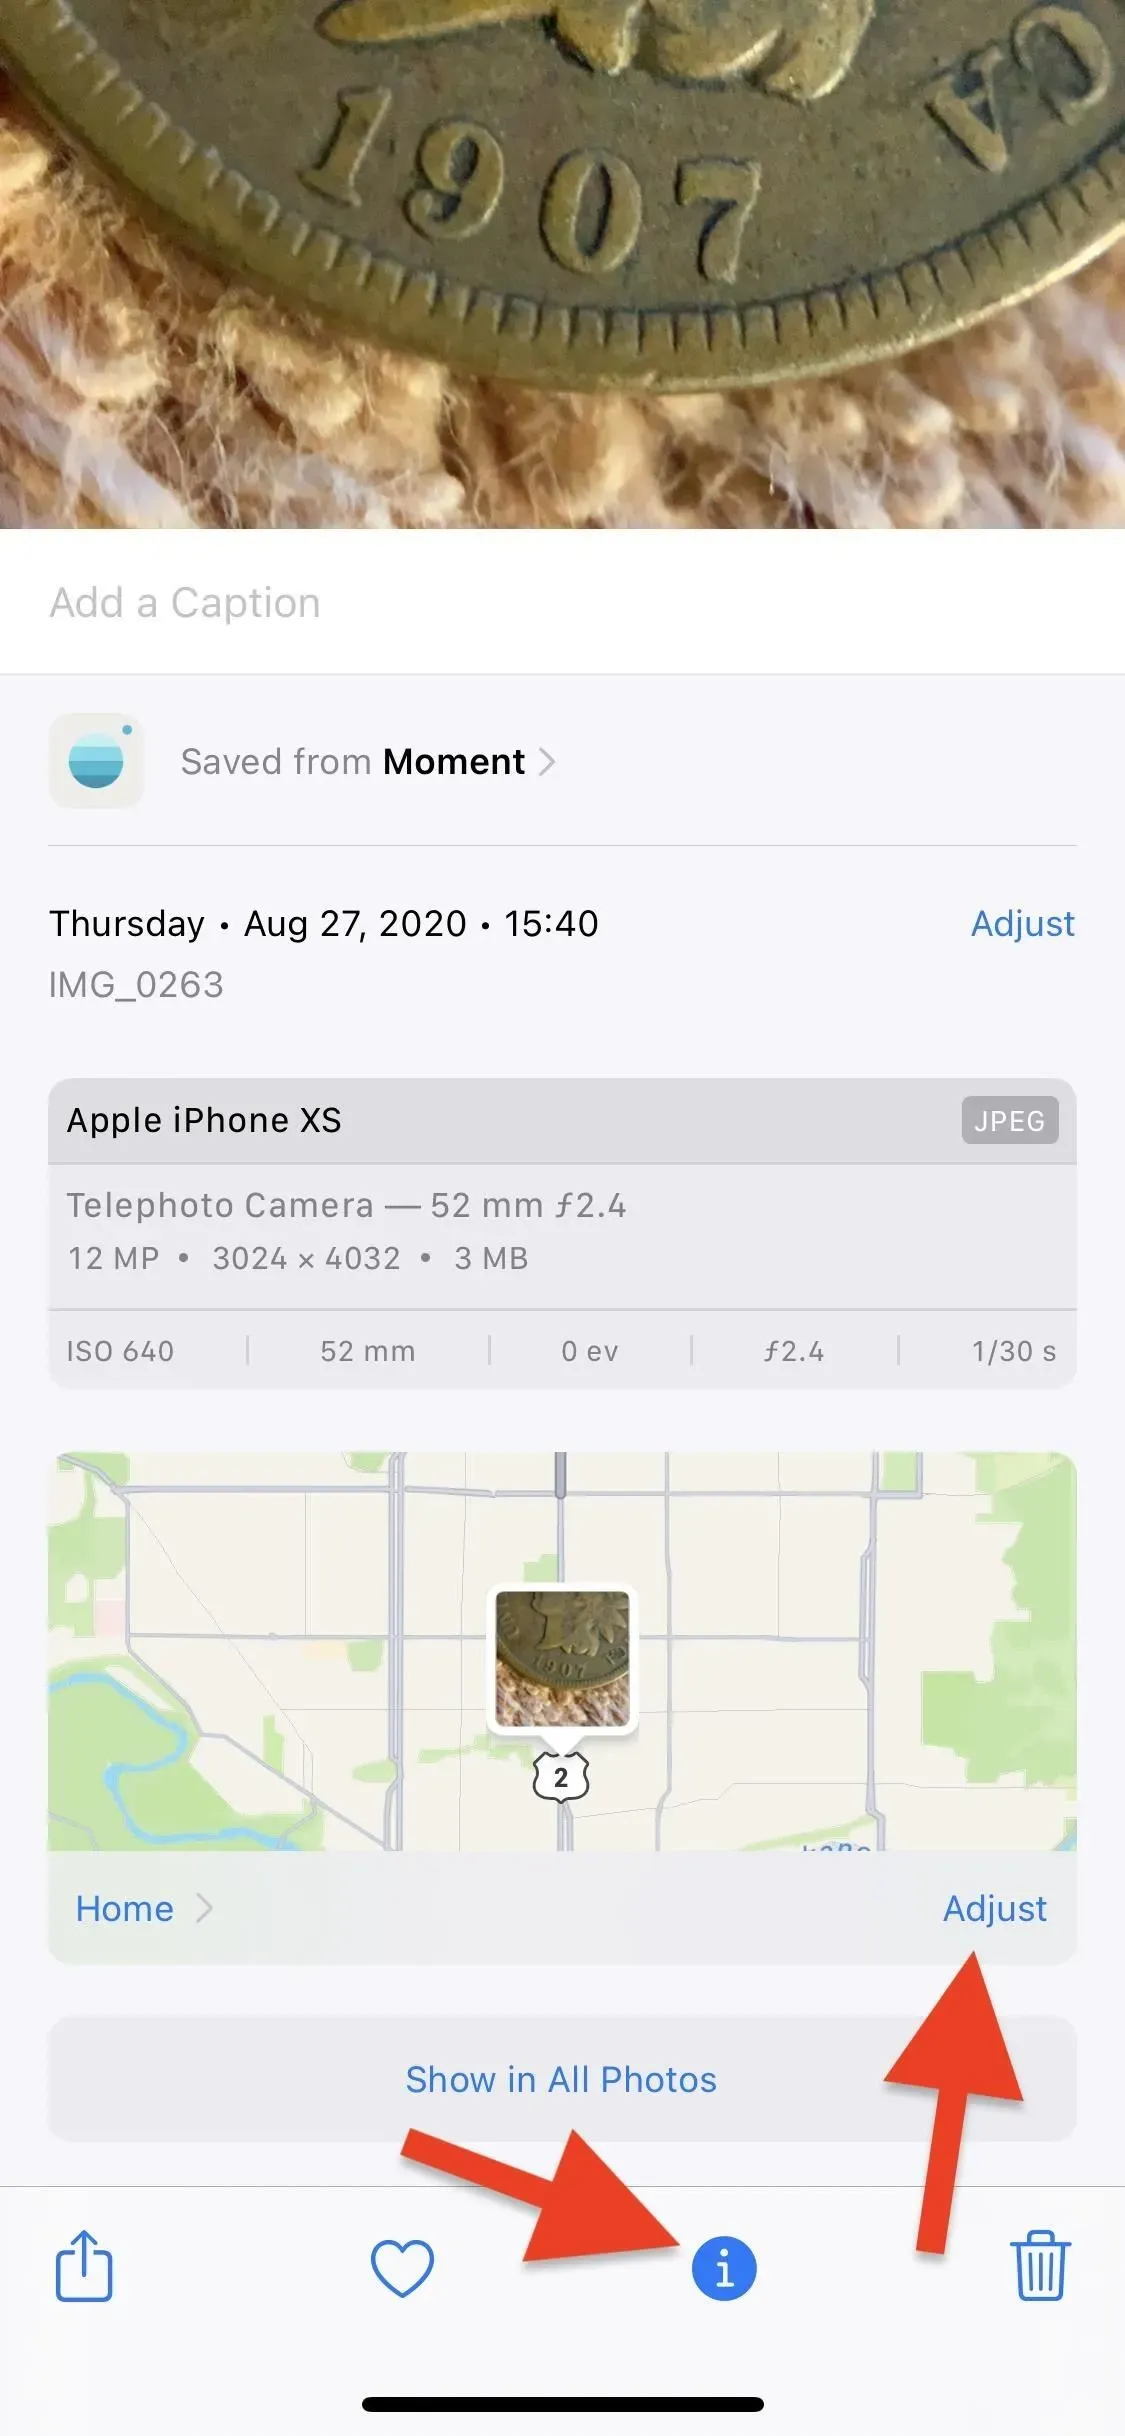
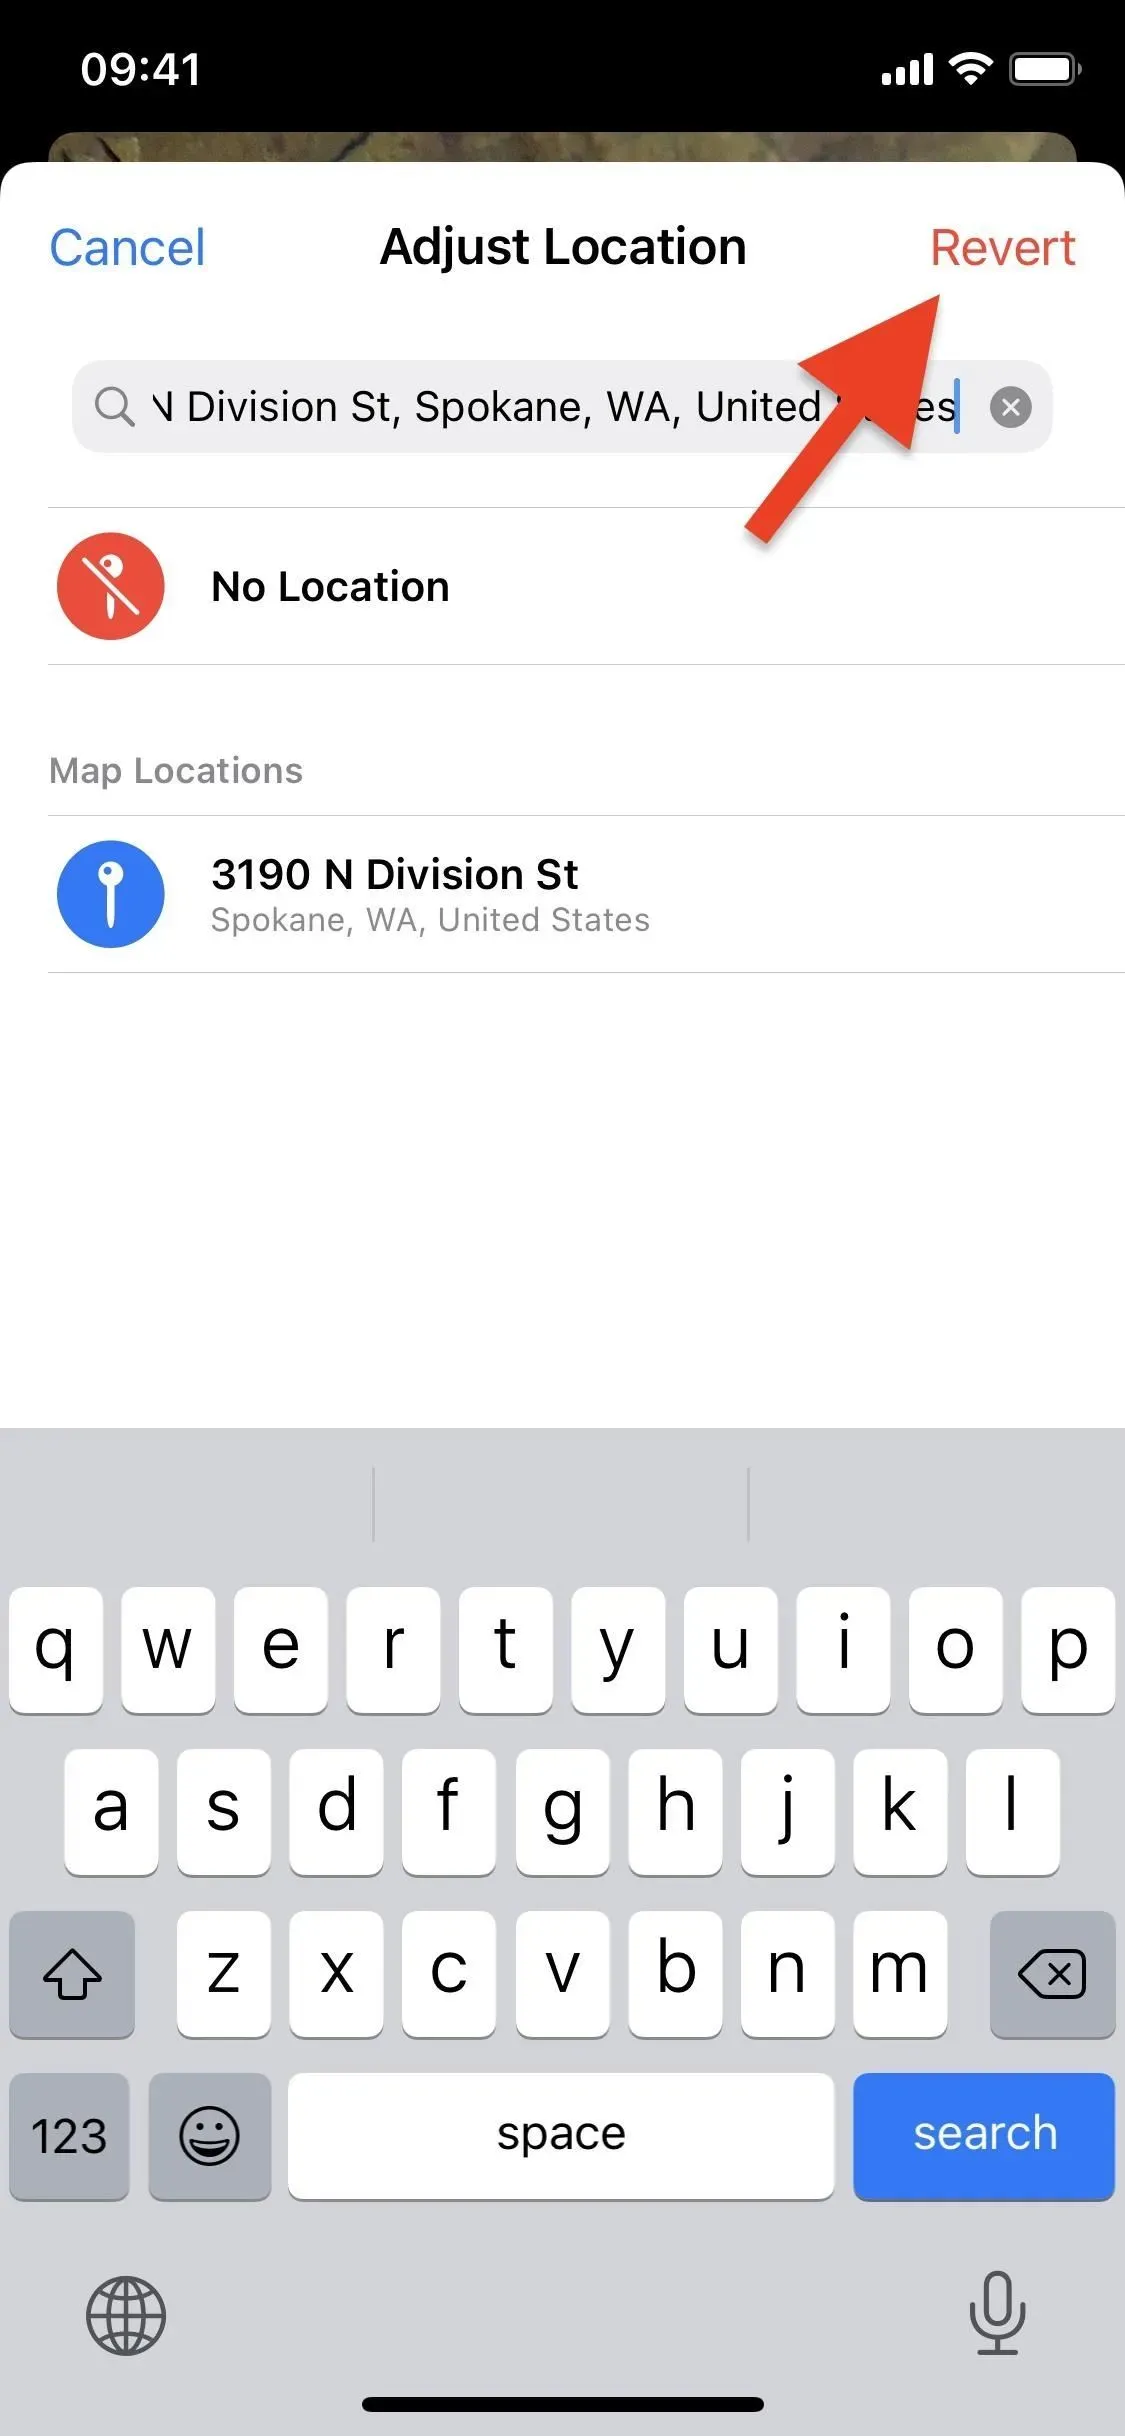
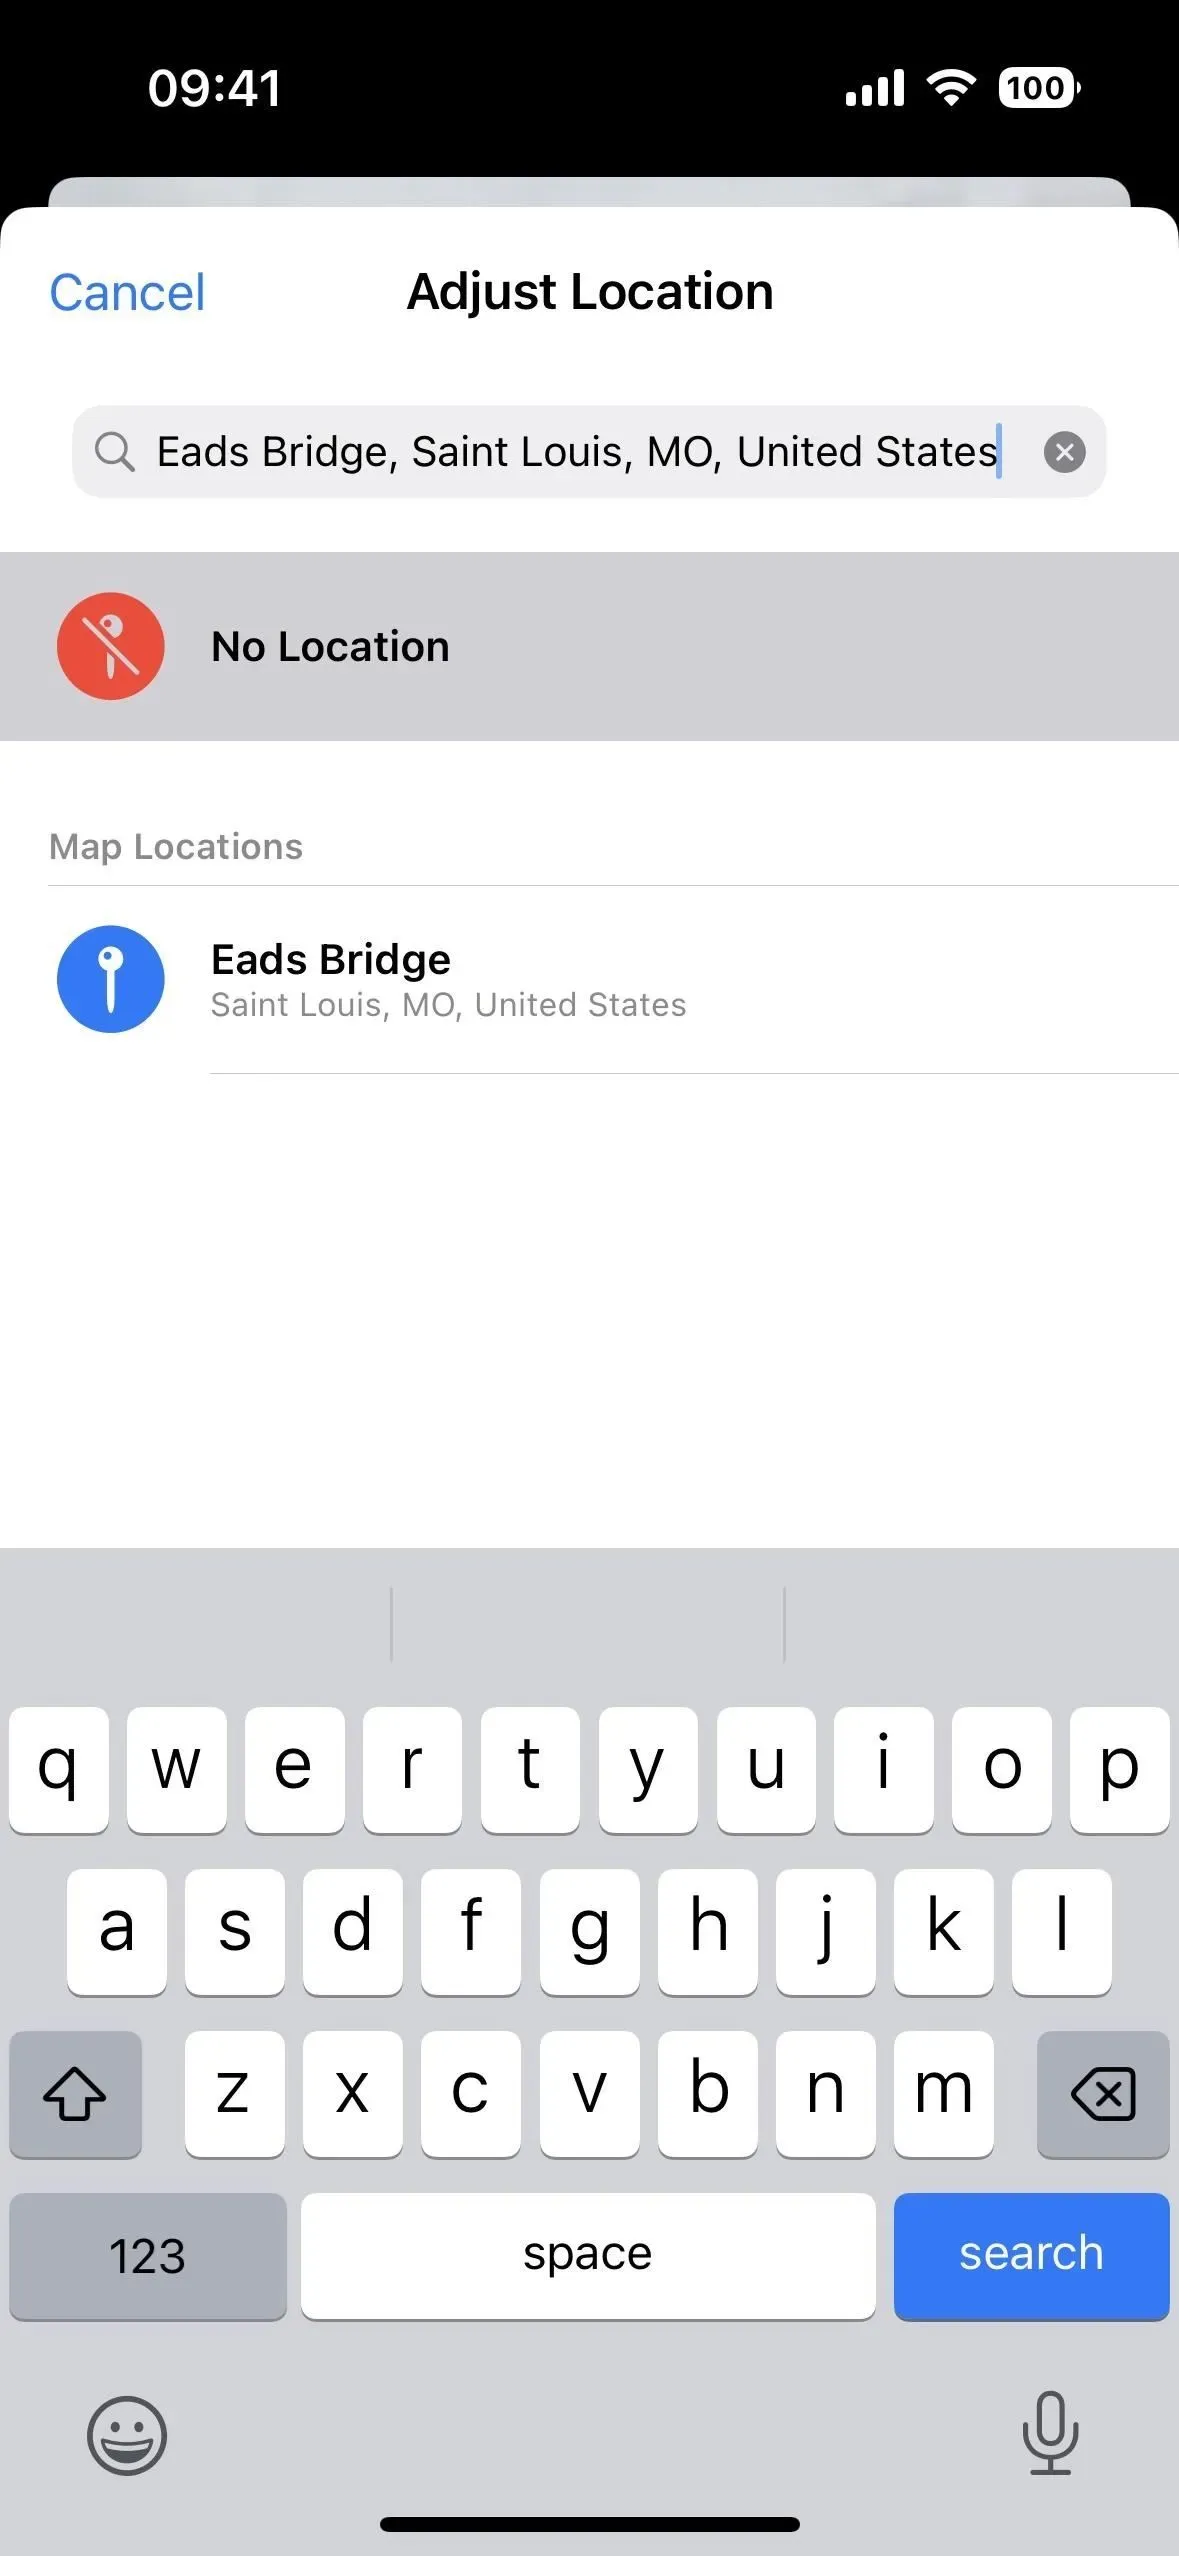
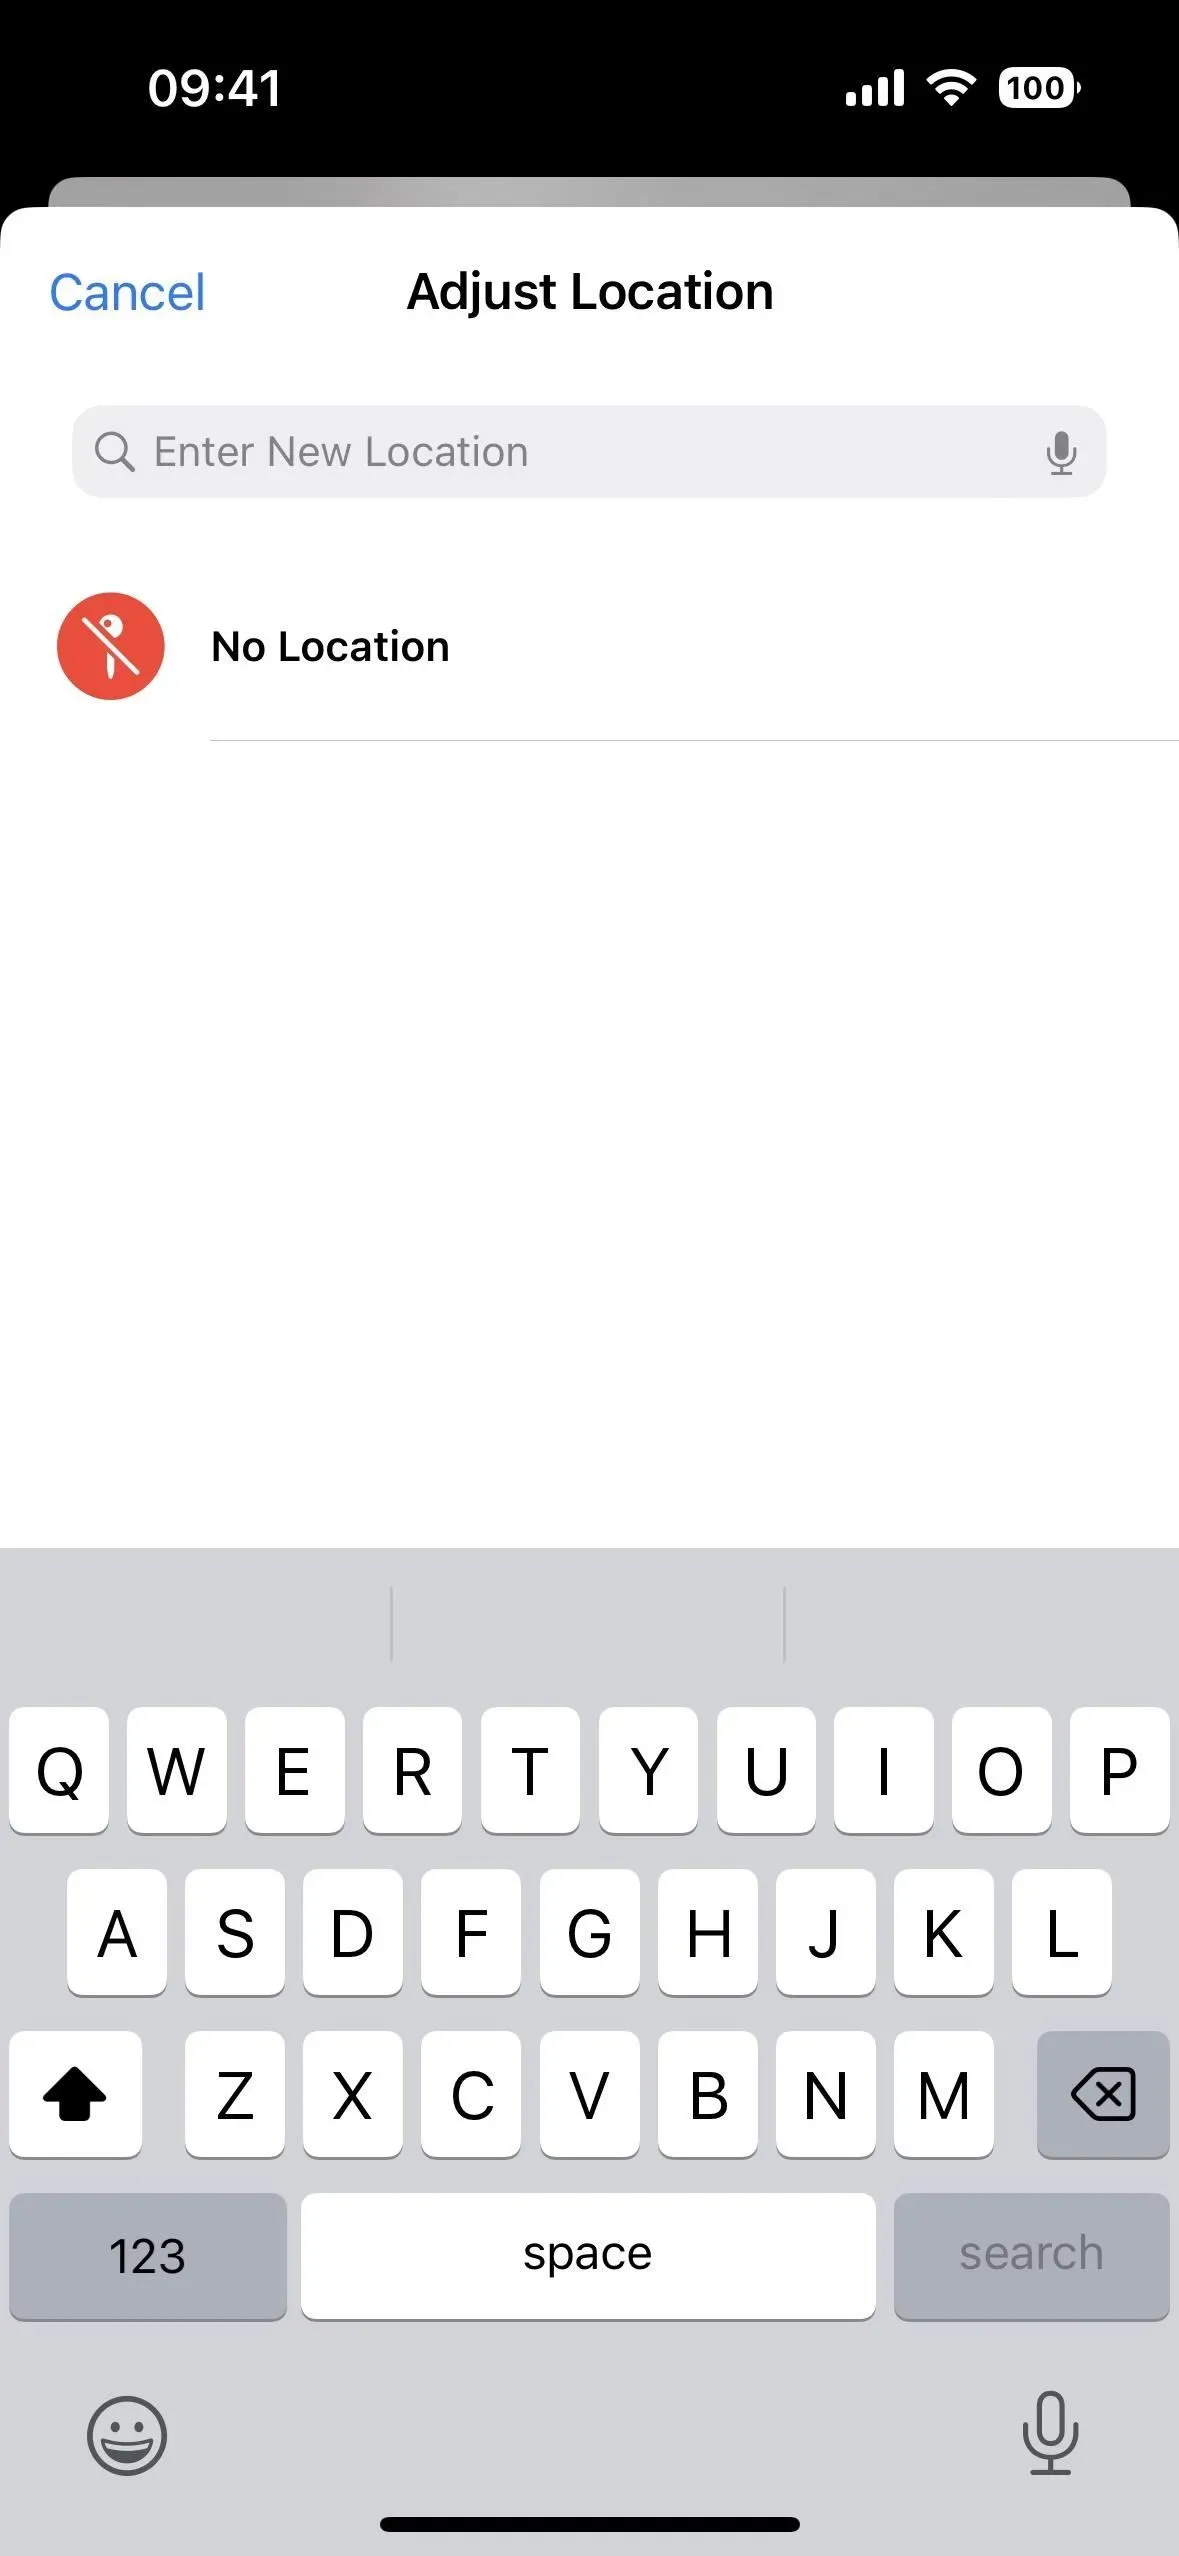
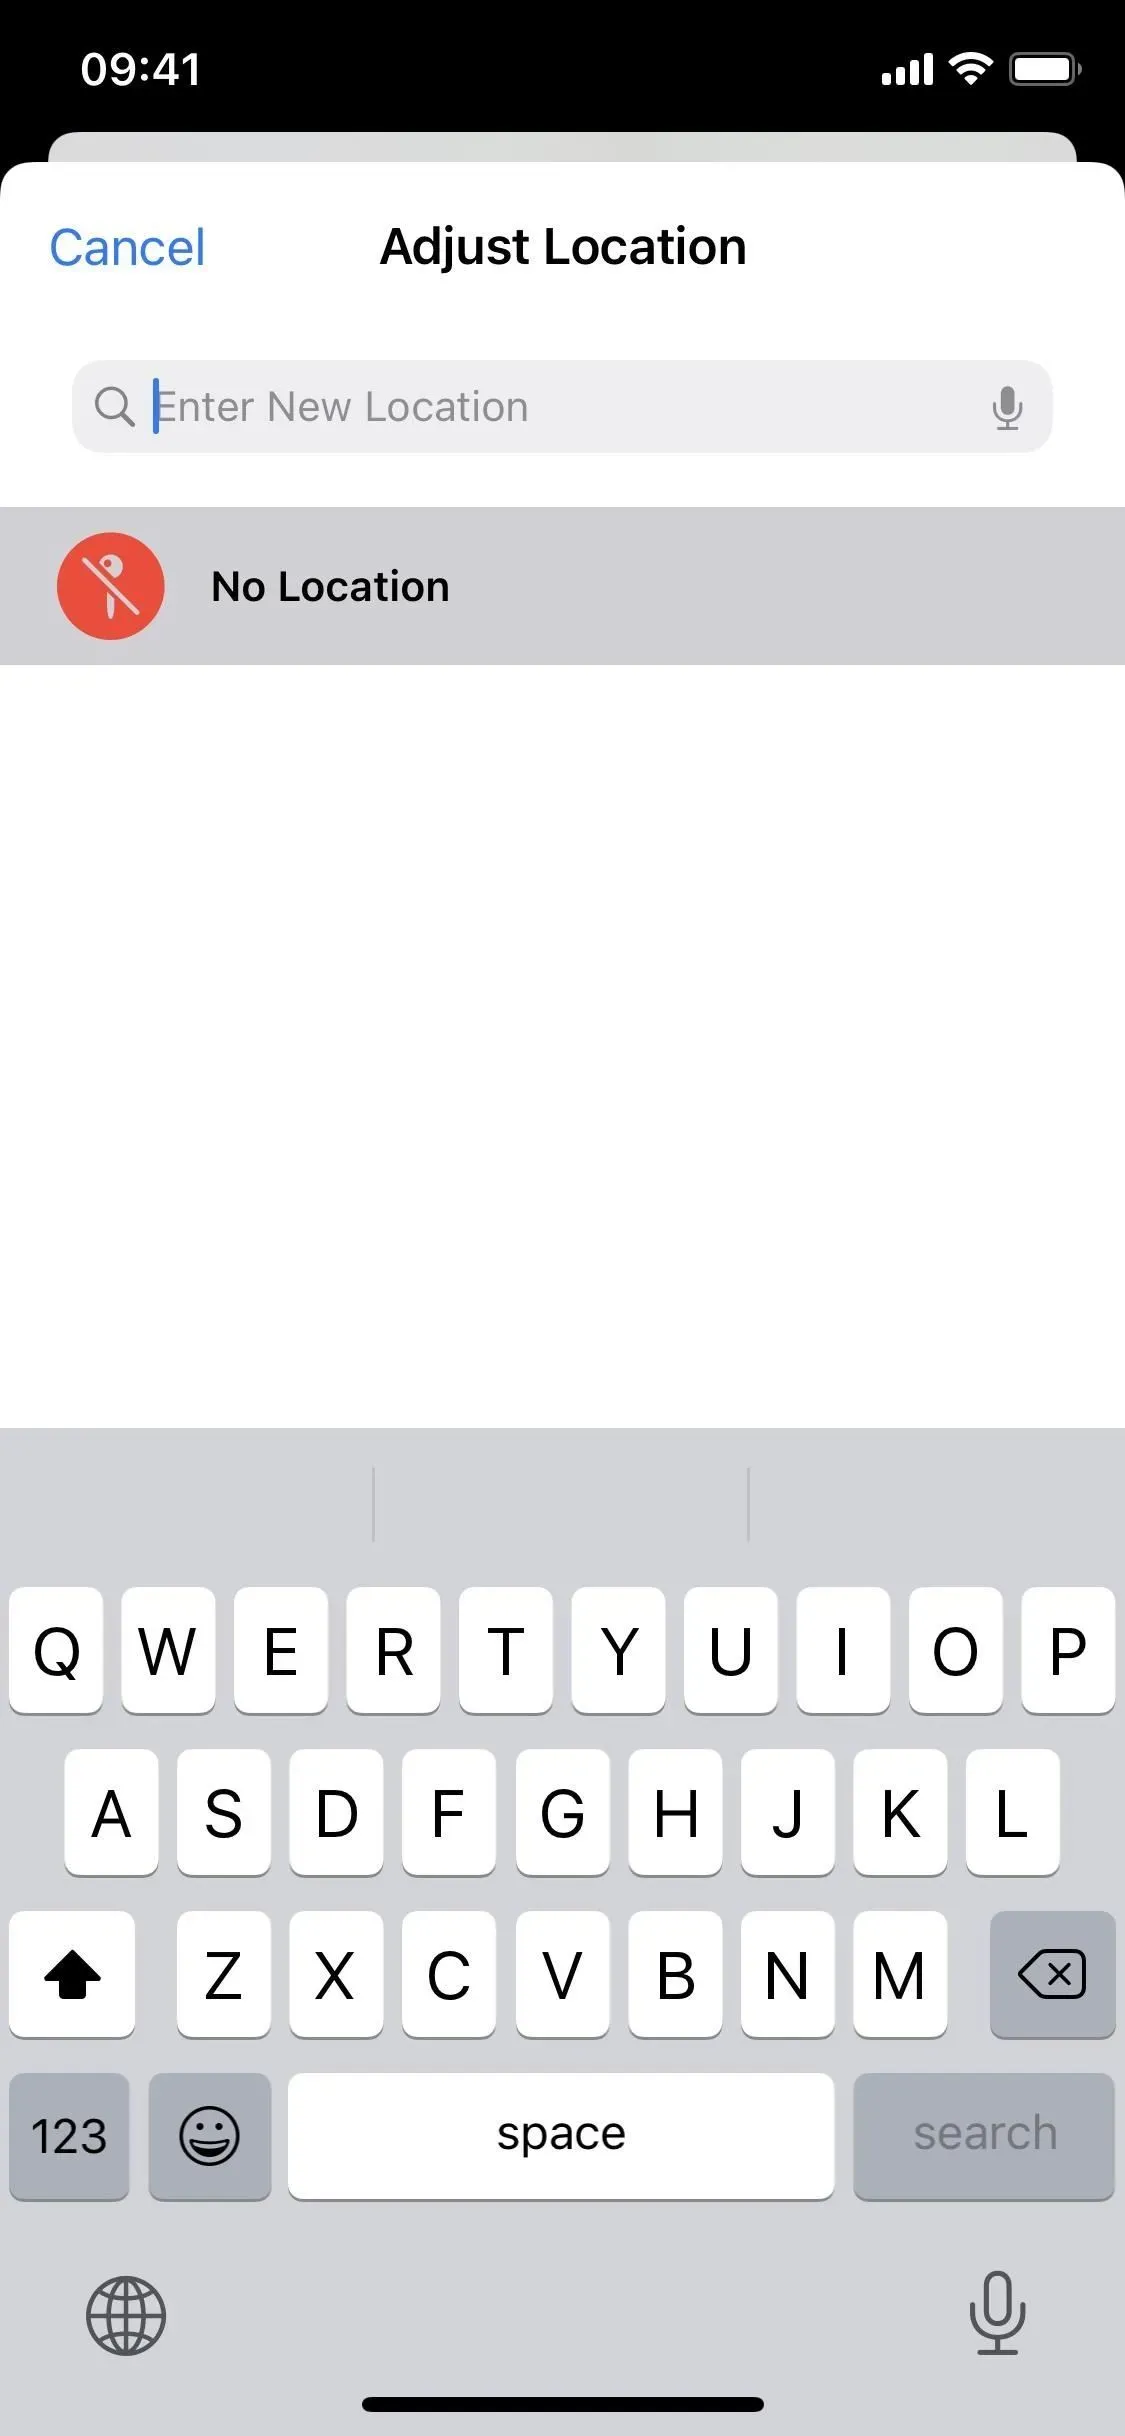
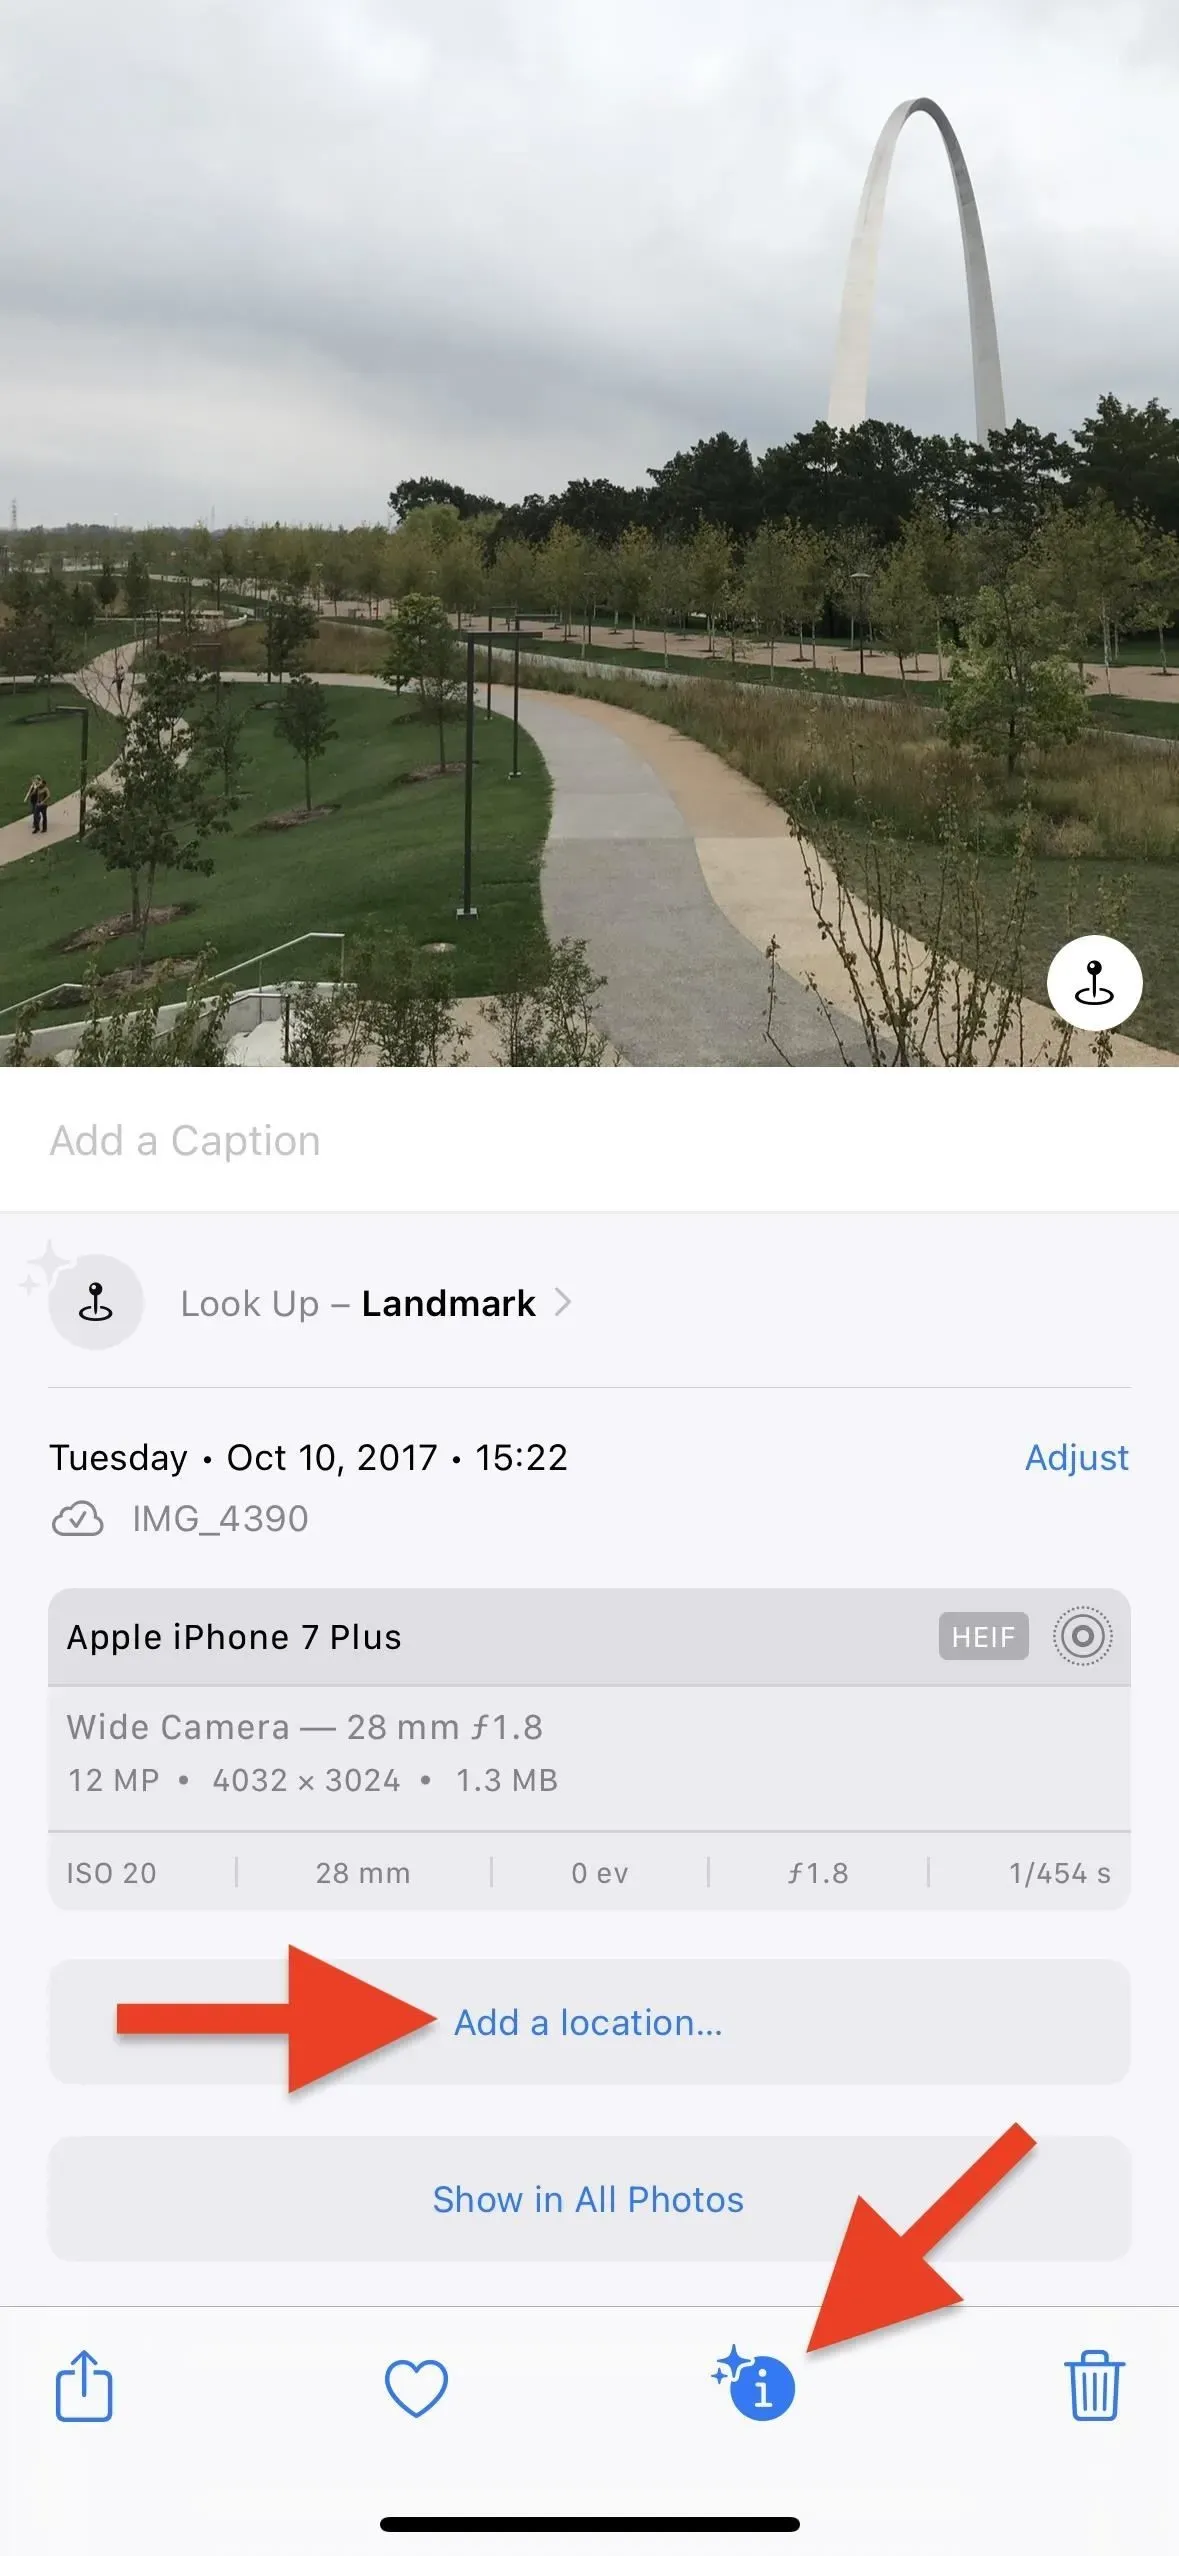
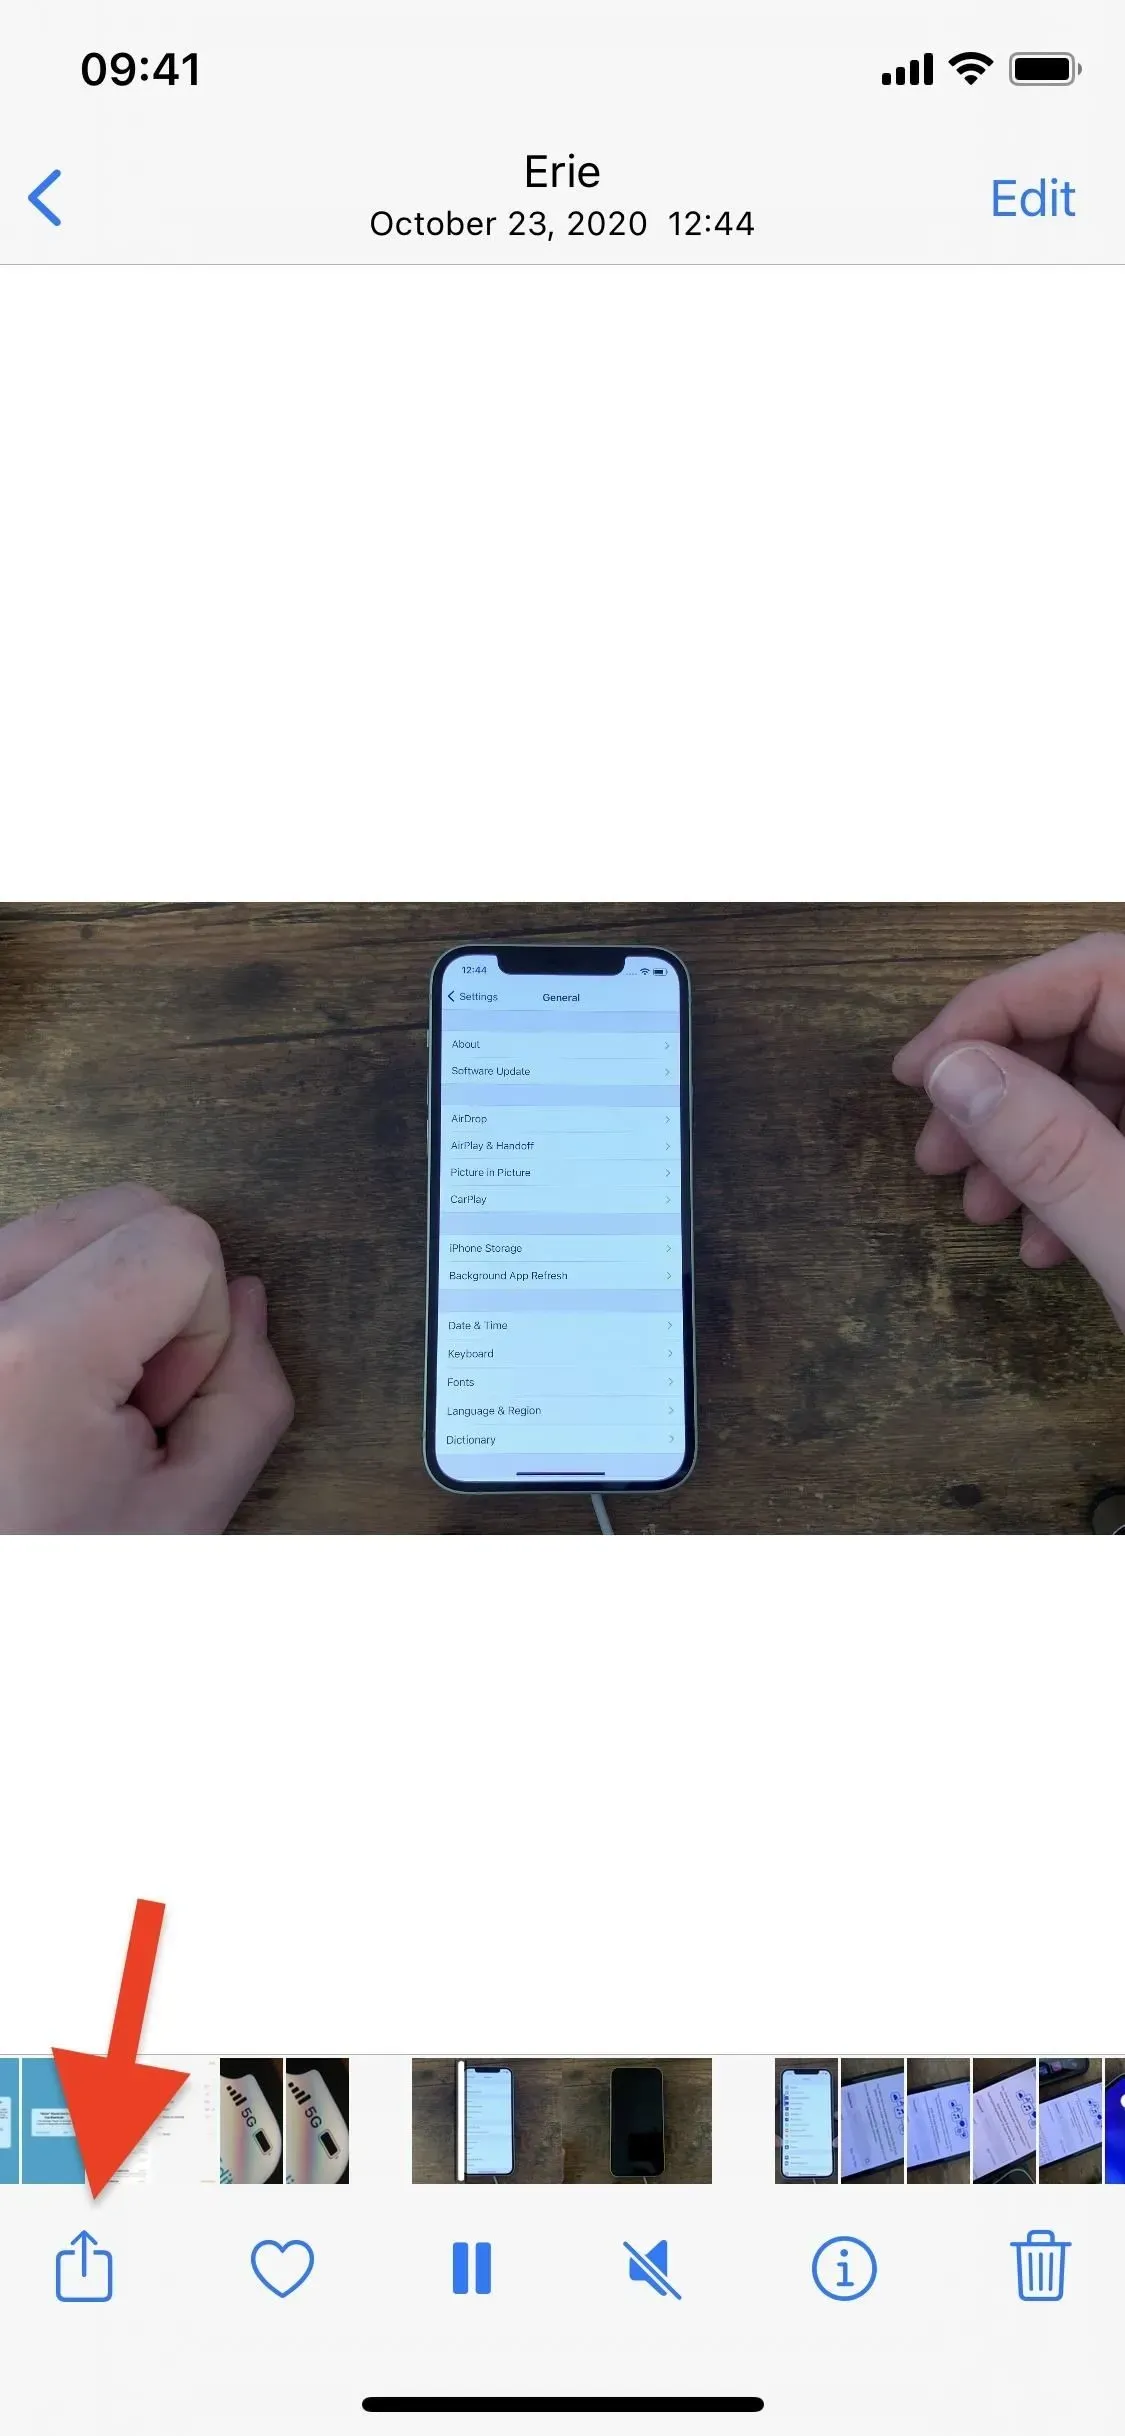
- Open content, then swipe up or tap the info button (i) to open content metadata. Click Customize below the map, then click No Location.
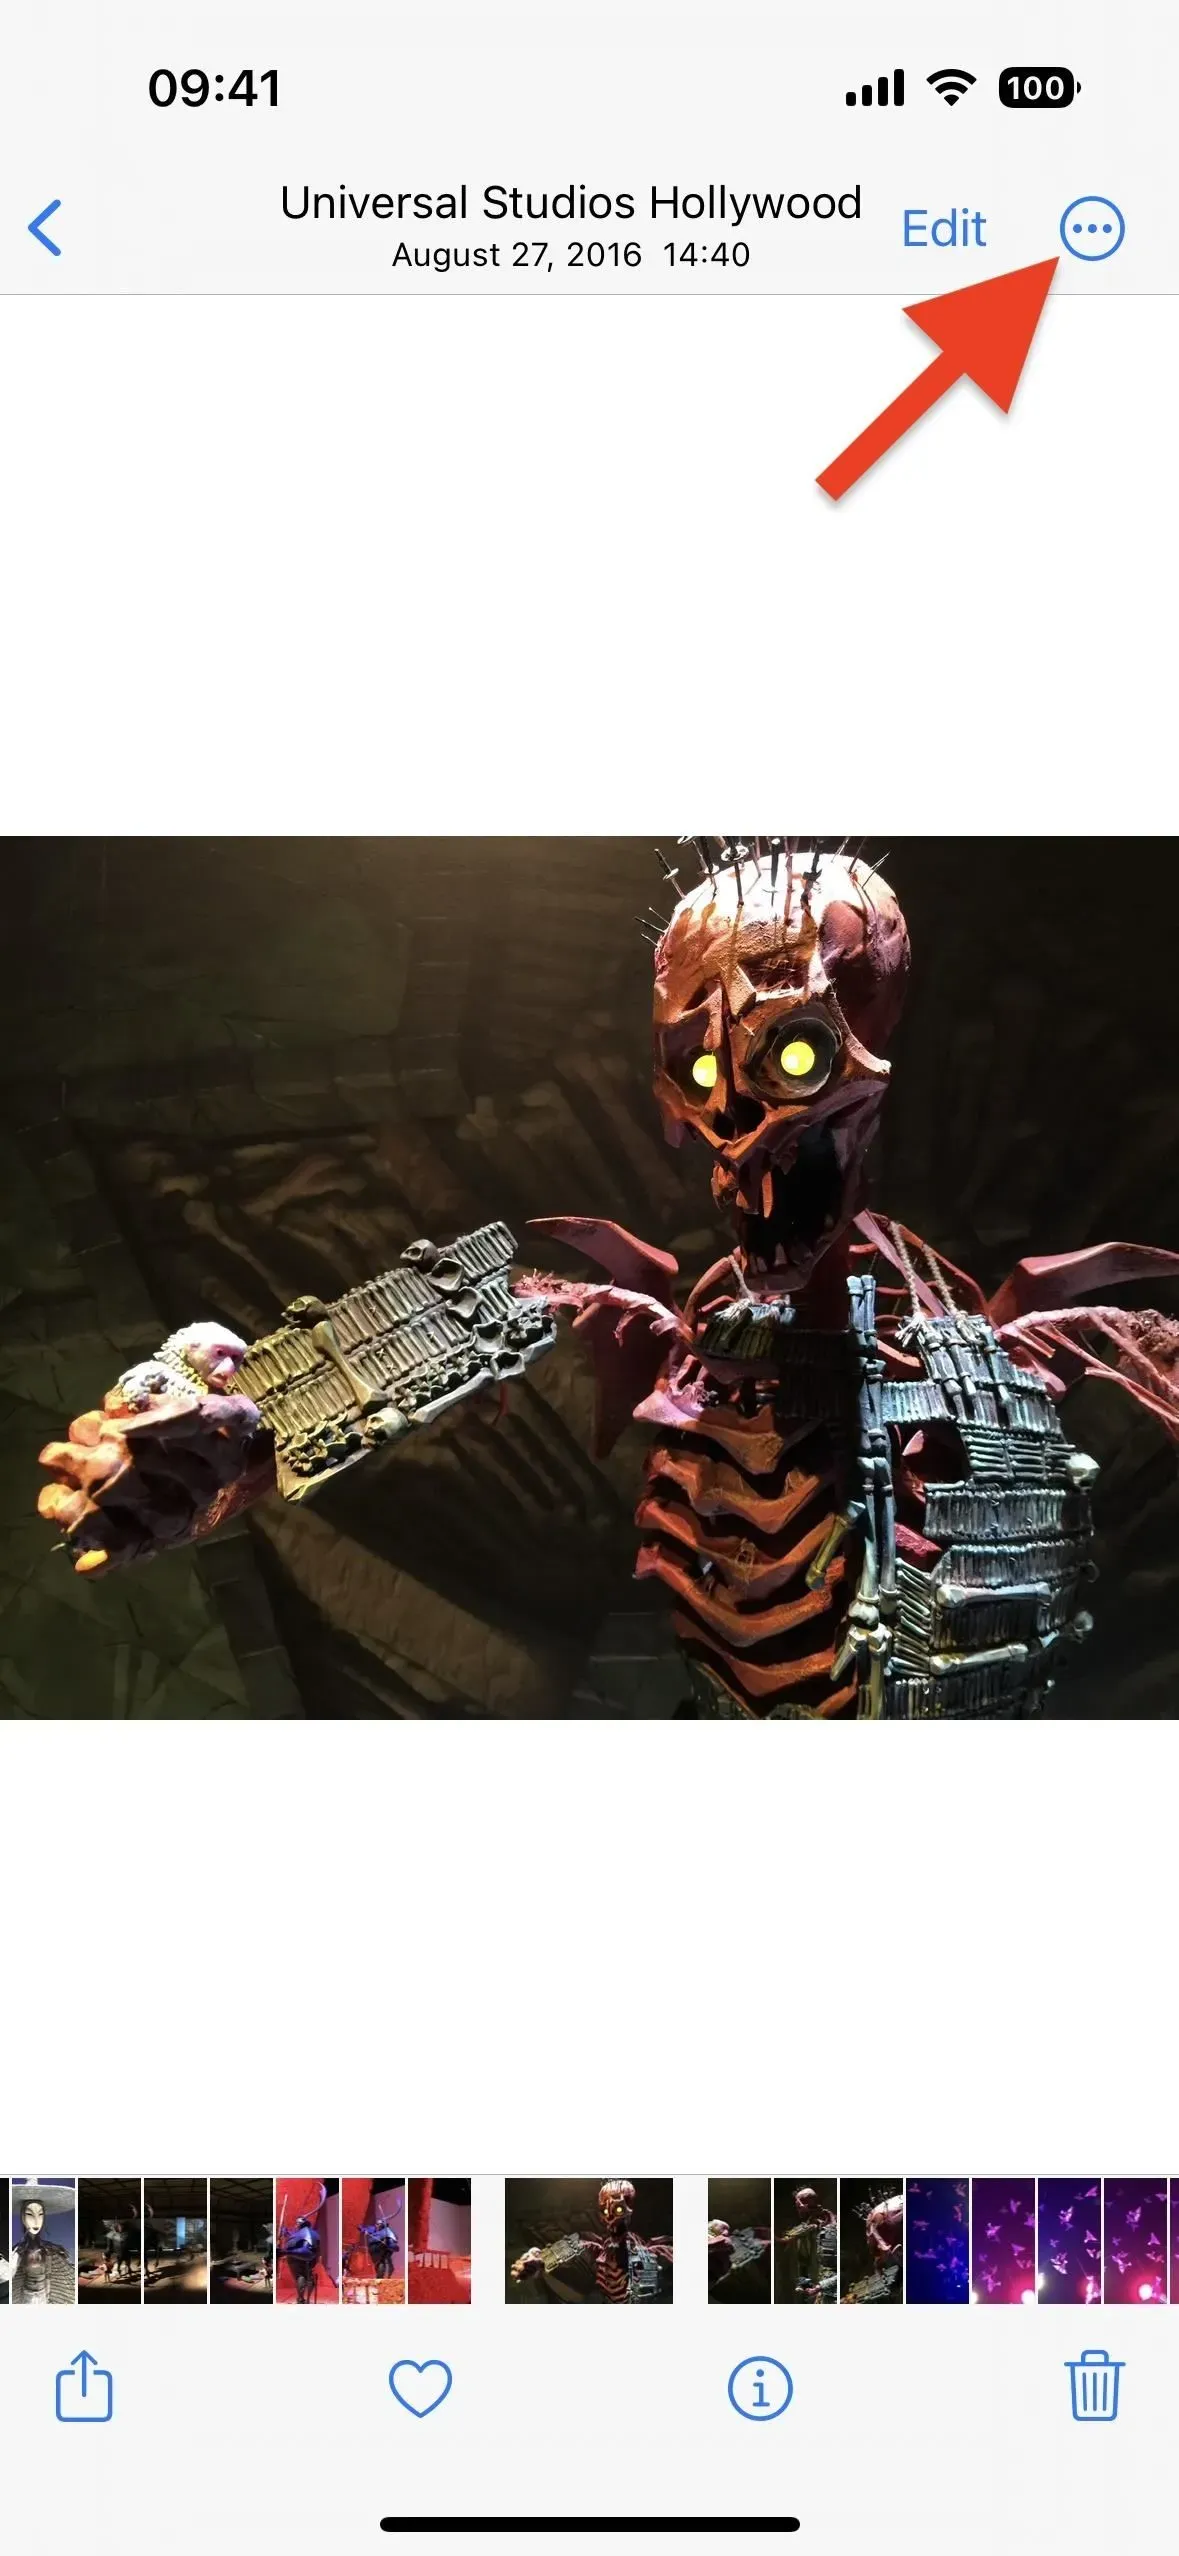
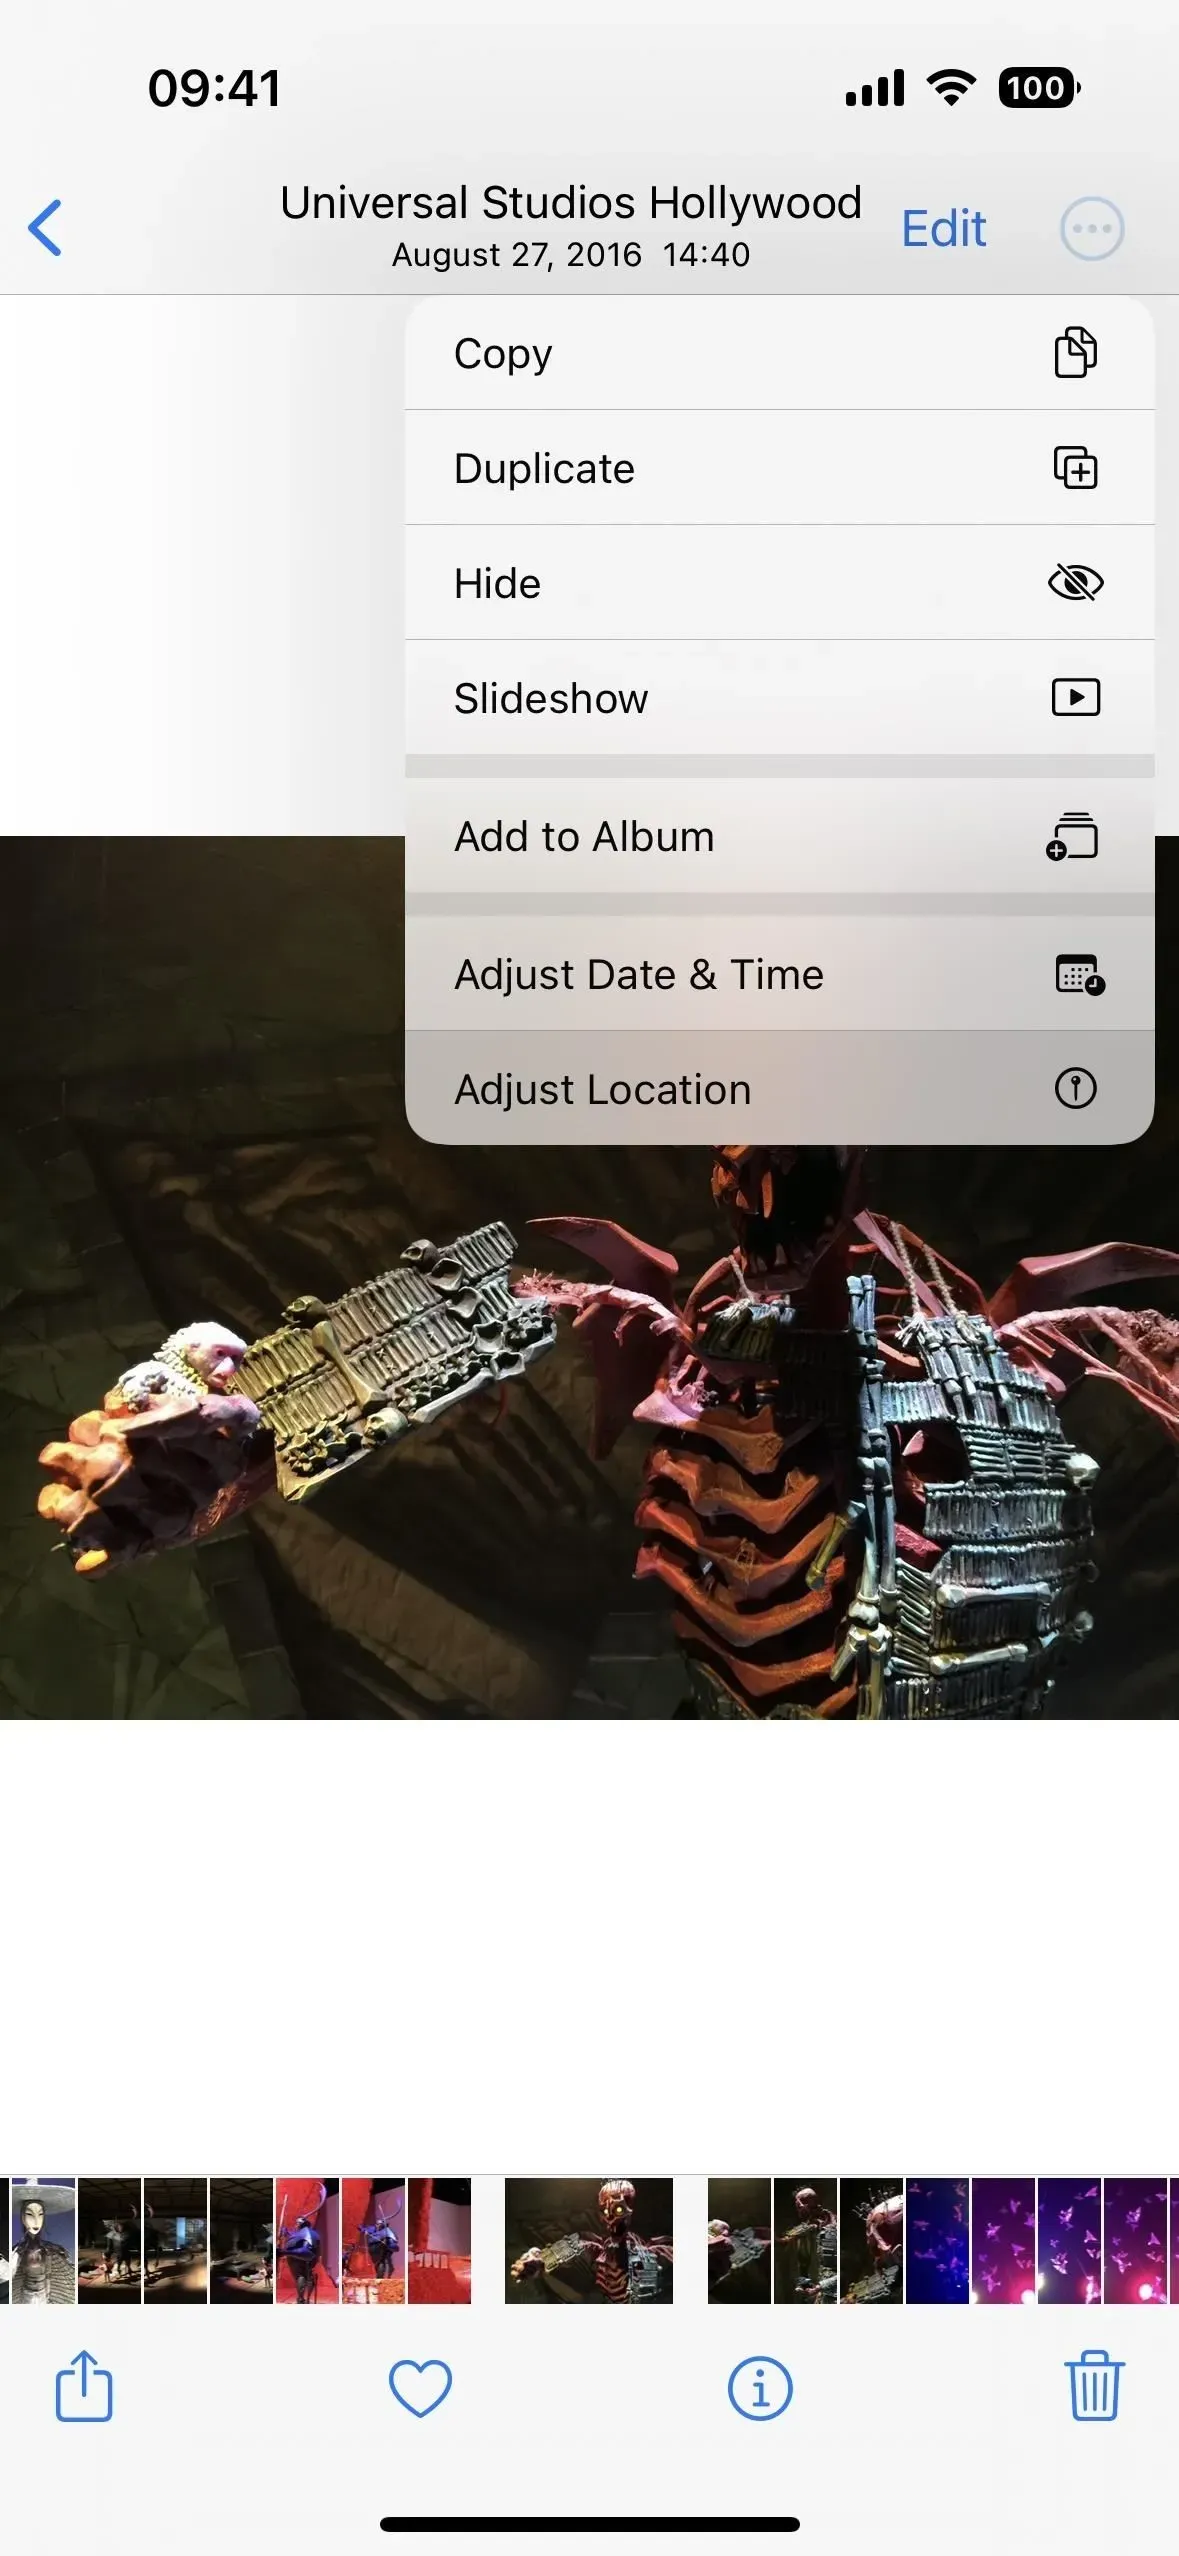
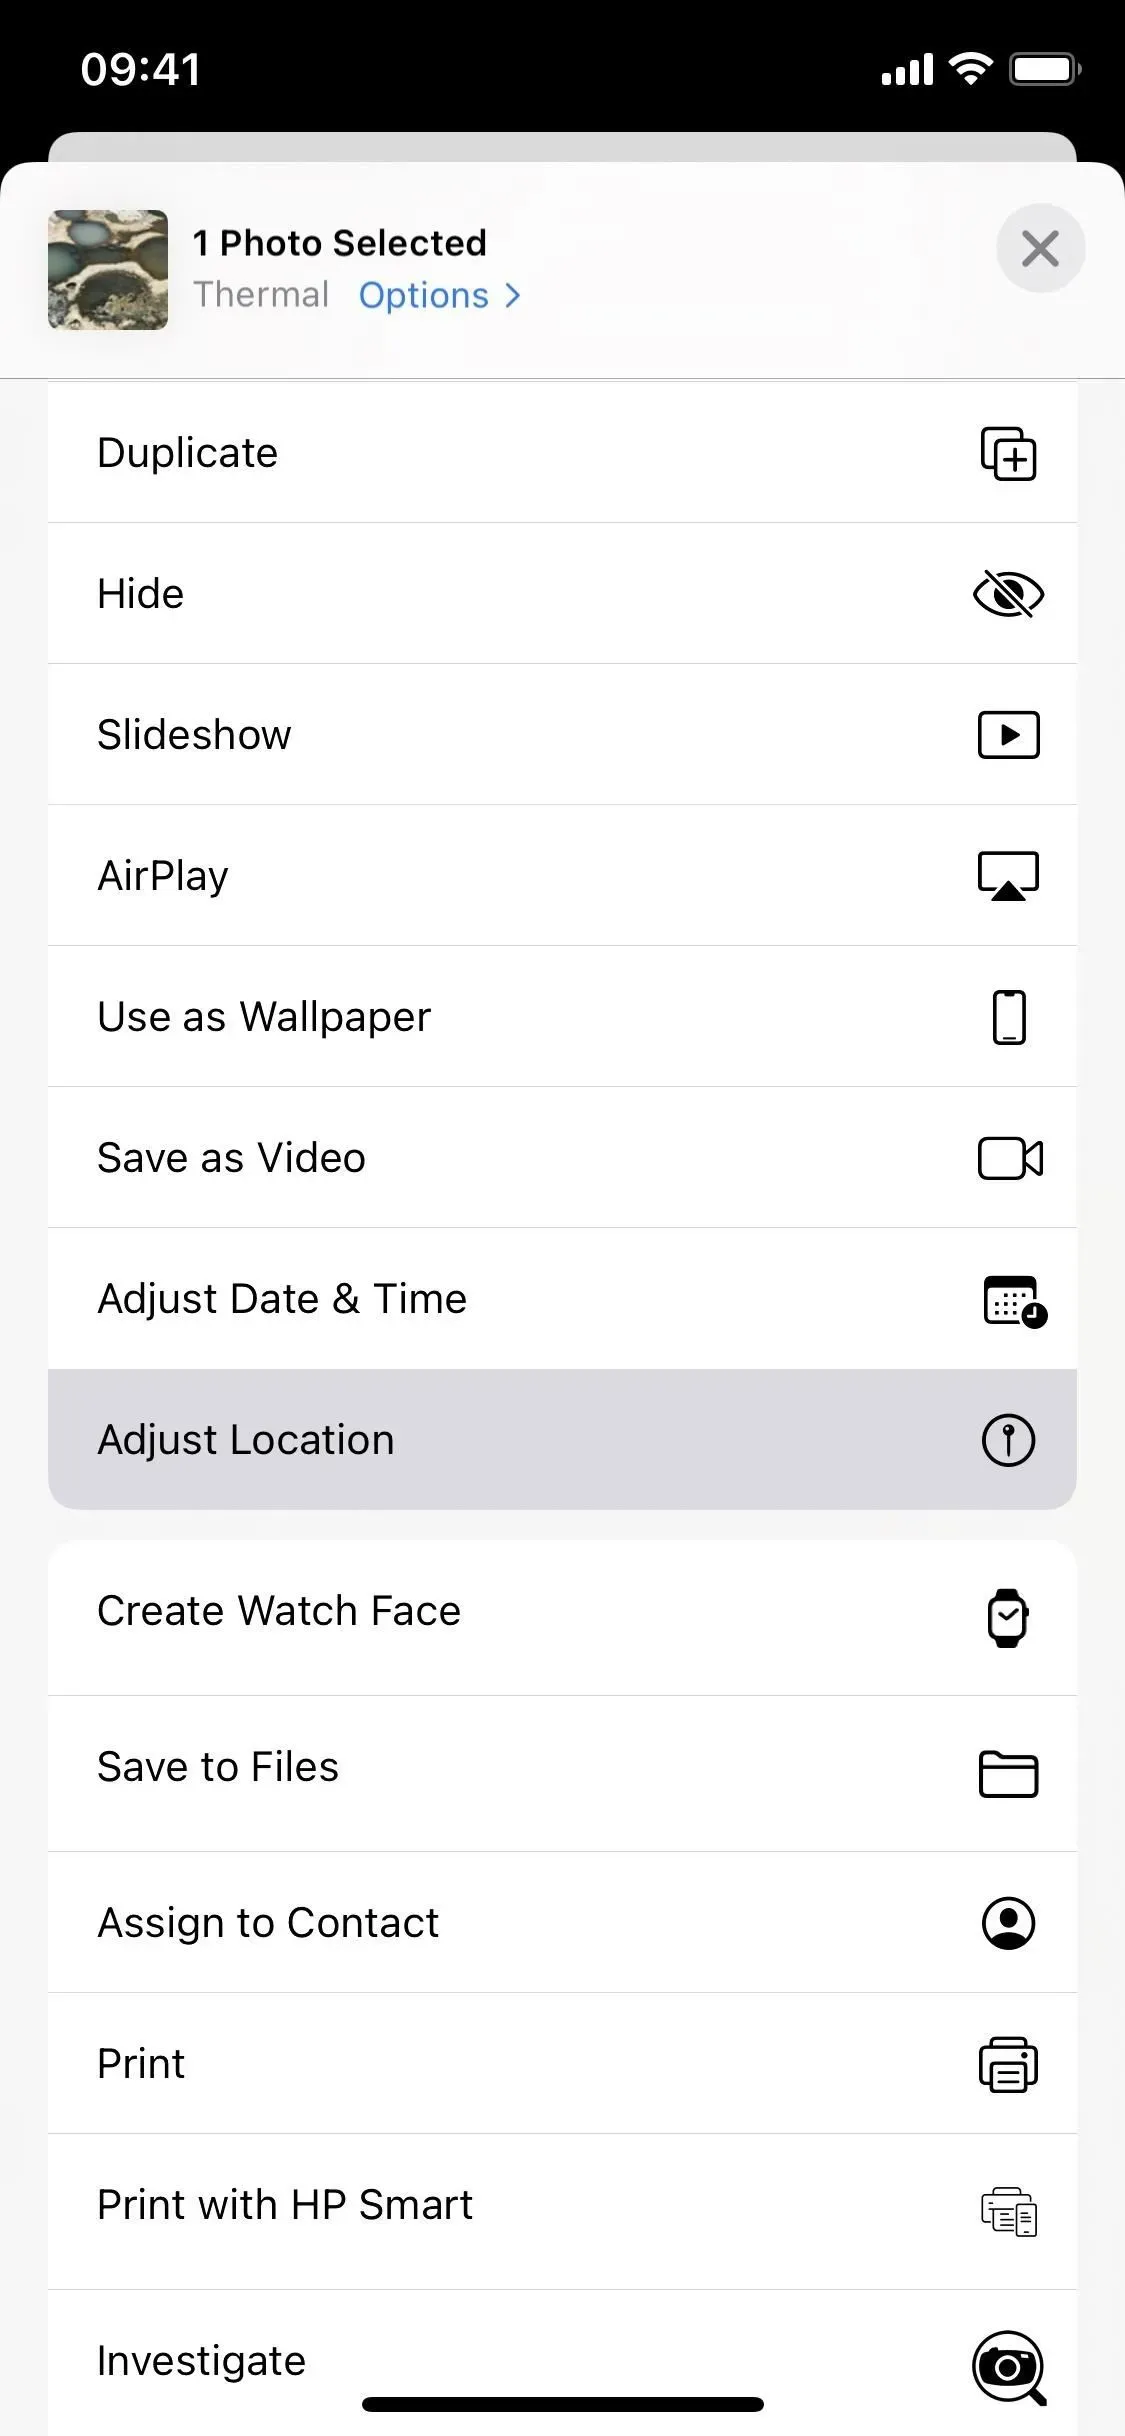
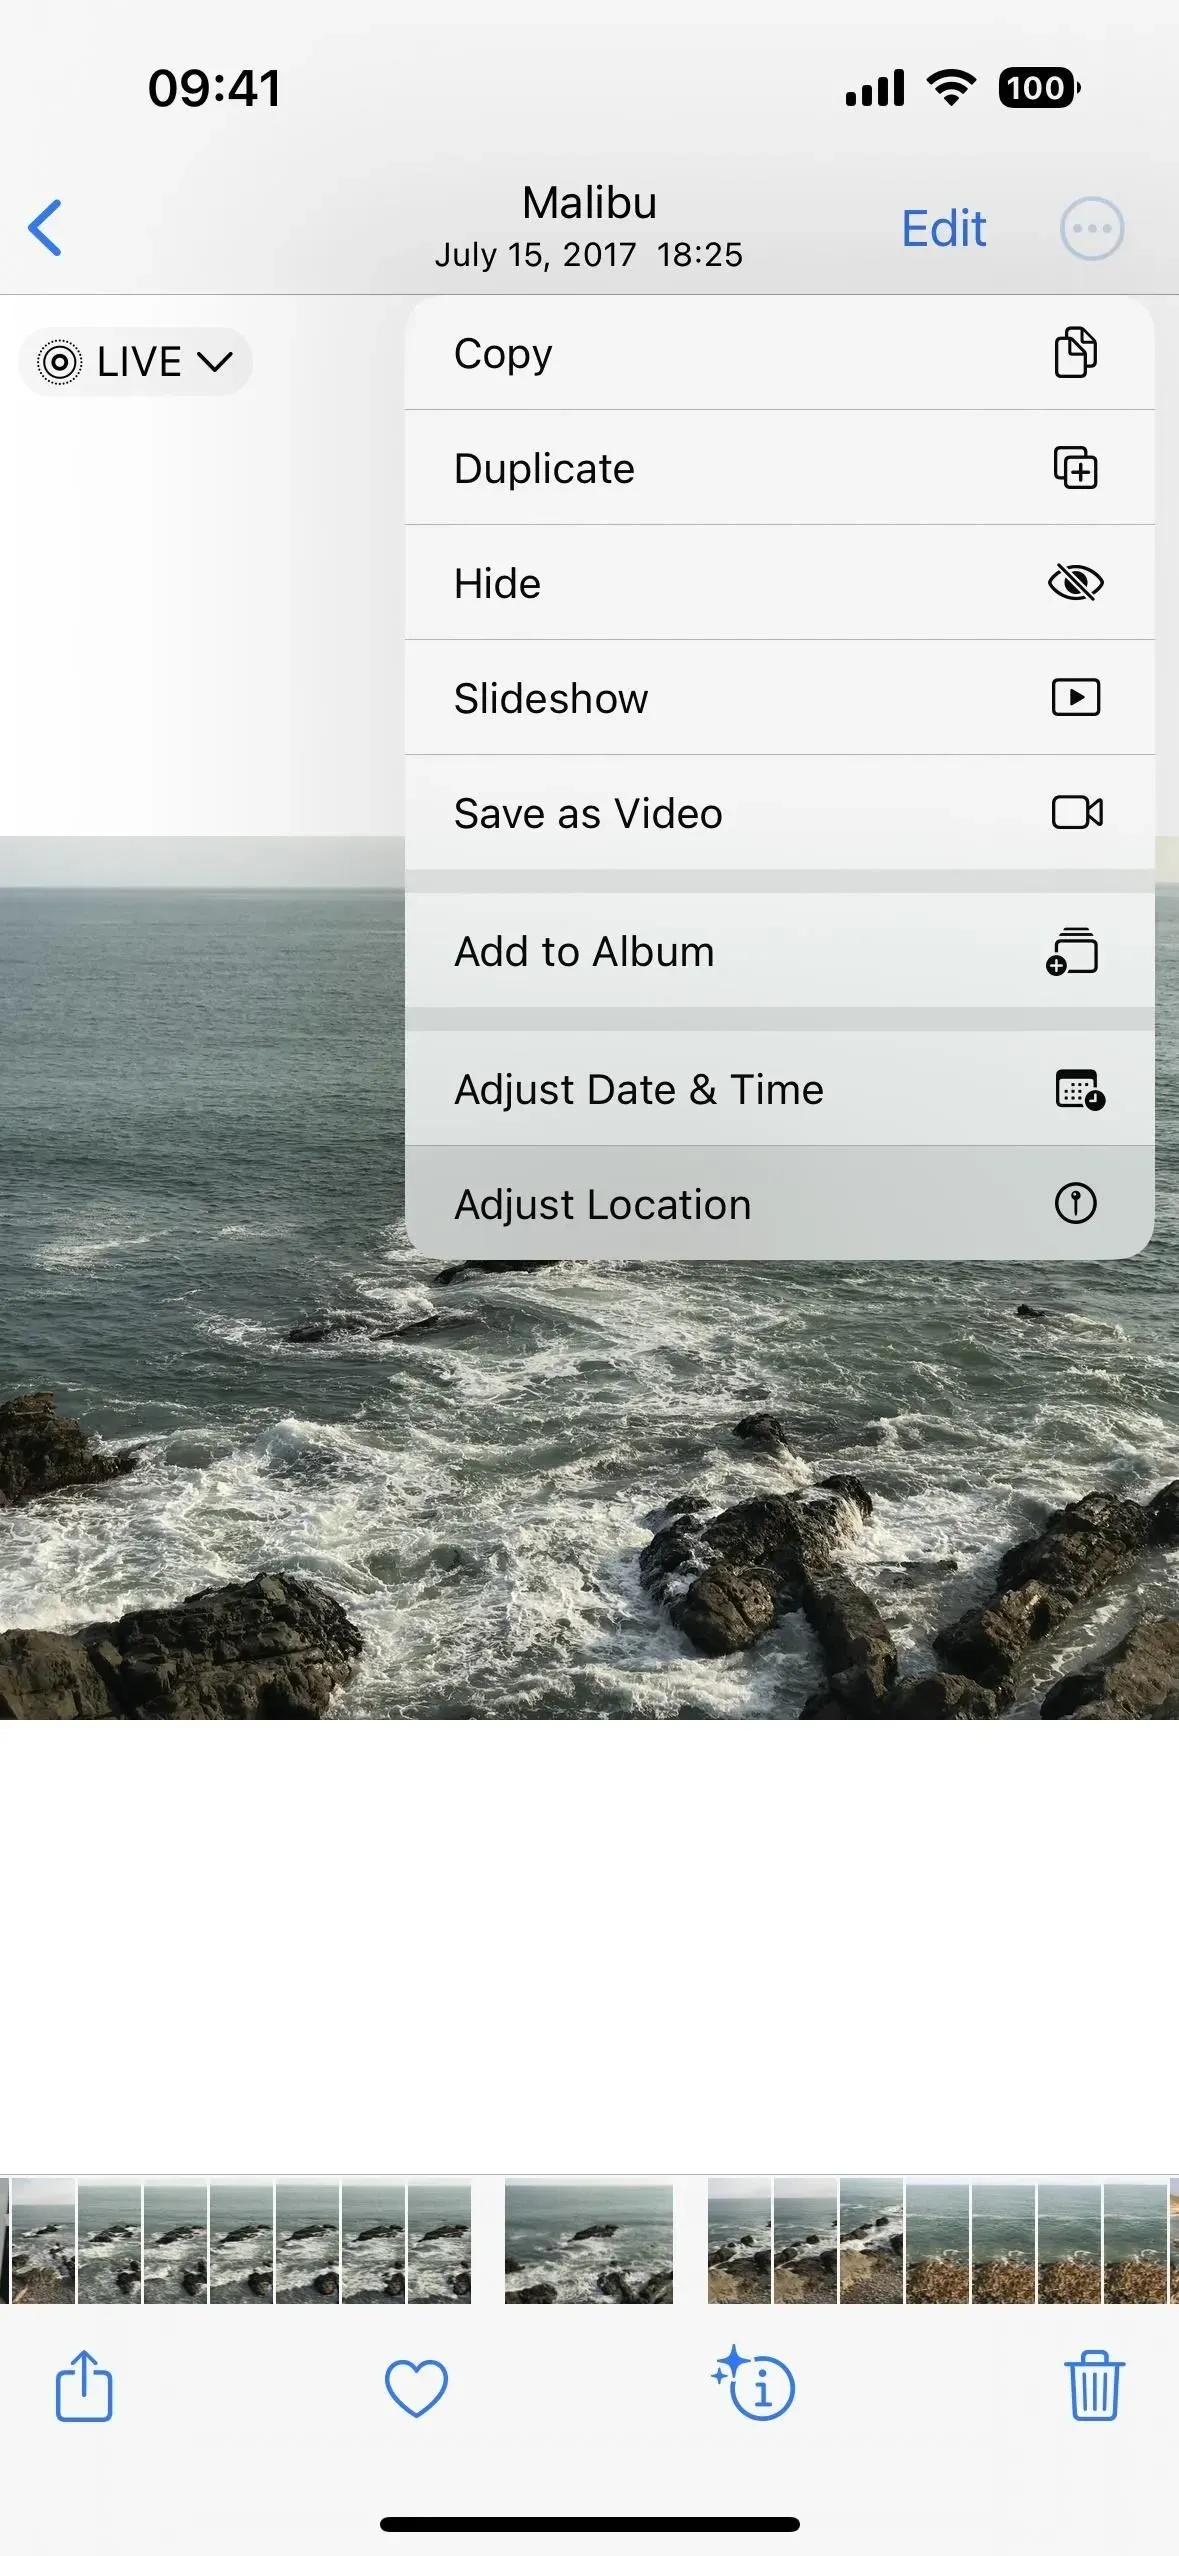
- Open content, tap the ellipsis (•••) icon, select Set Location from the Quick Actions menu, then tap No Location. (This only works on iOS 16 and later.)
- Open content on iOS 15, tap the Share icon, select Set Location on the sharing page, then tap No Location. (This only works on iOS 15.)
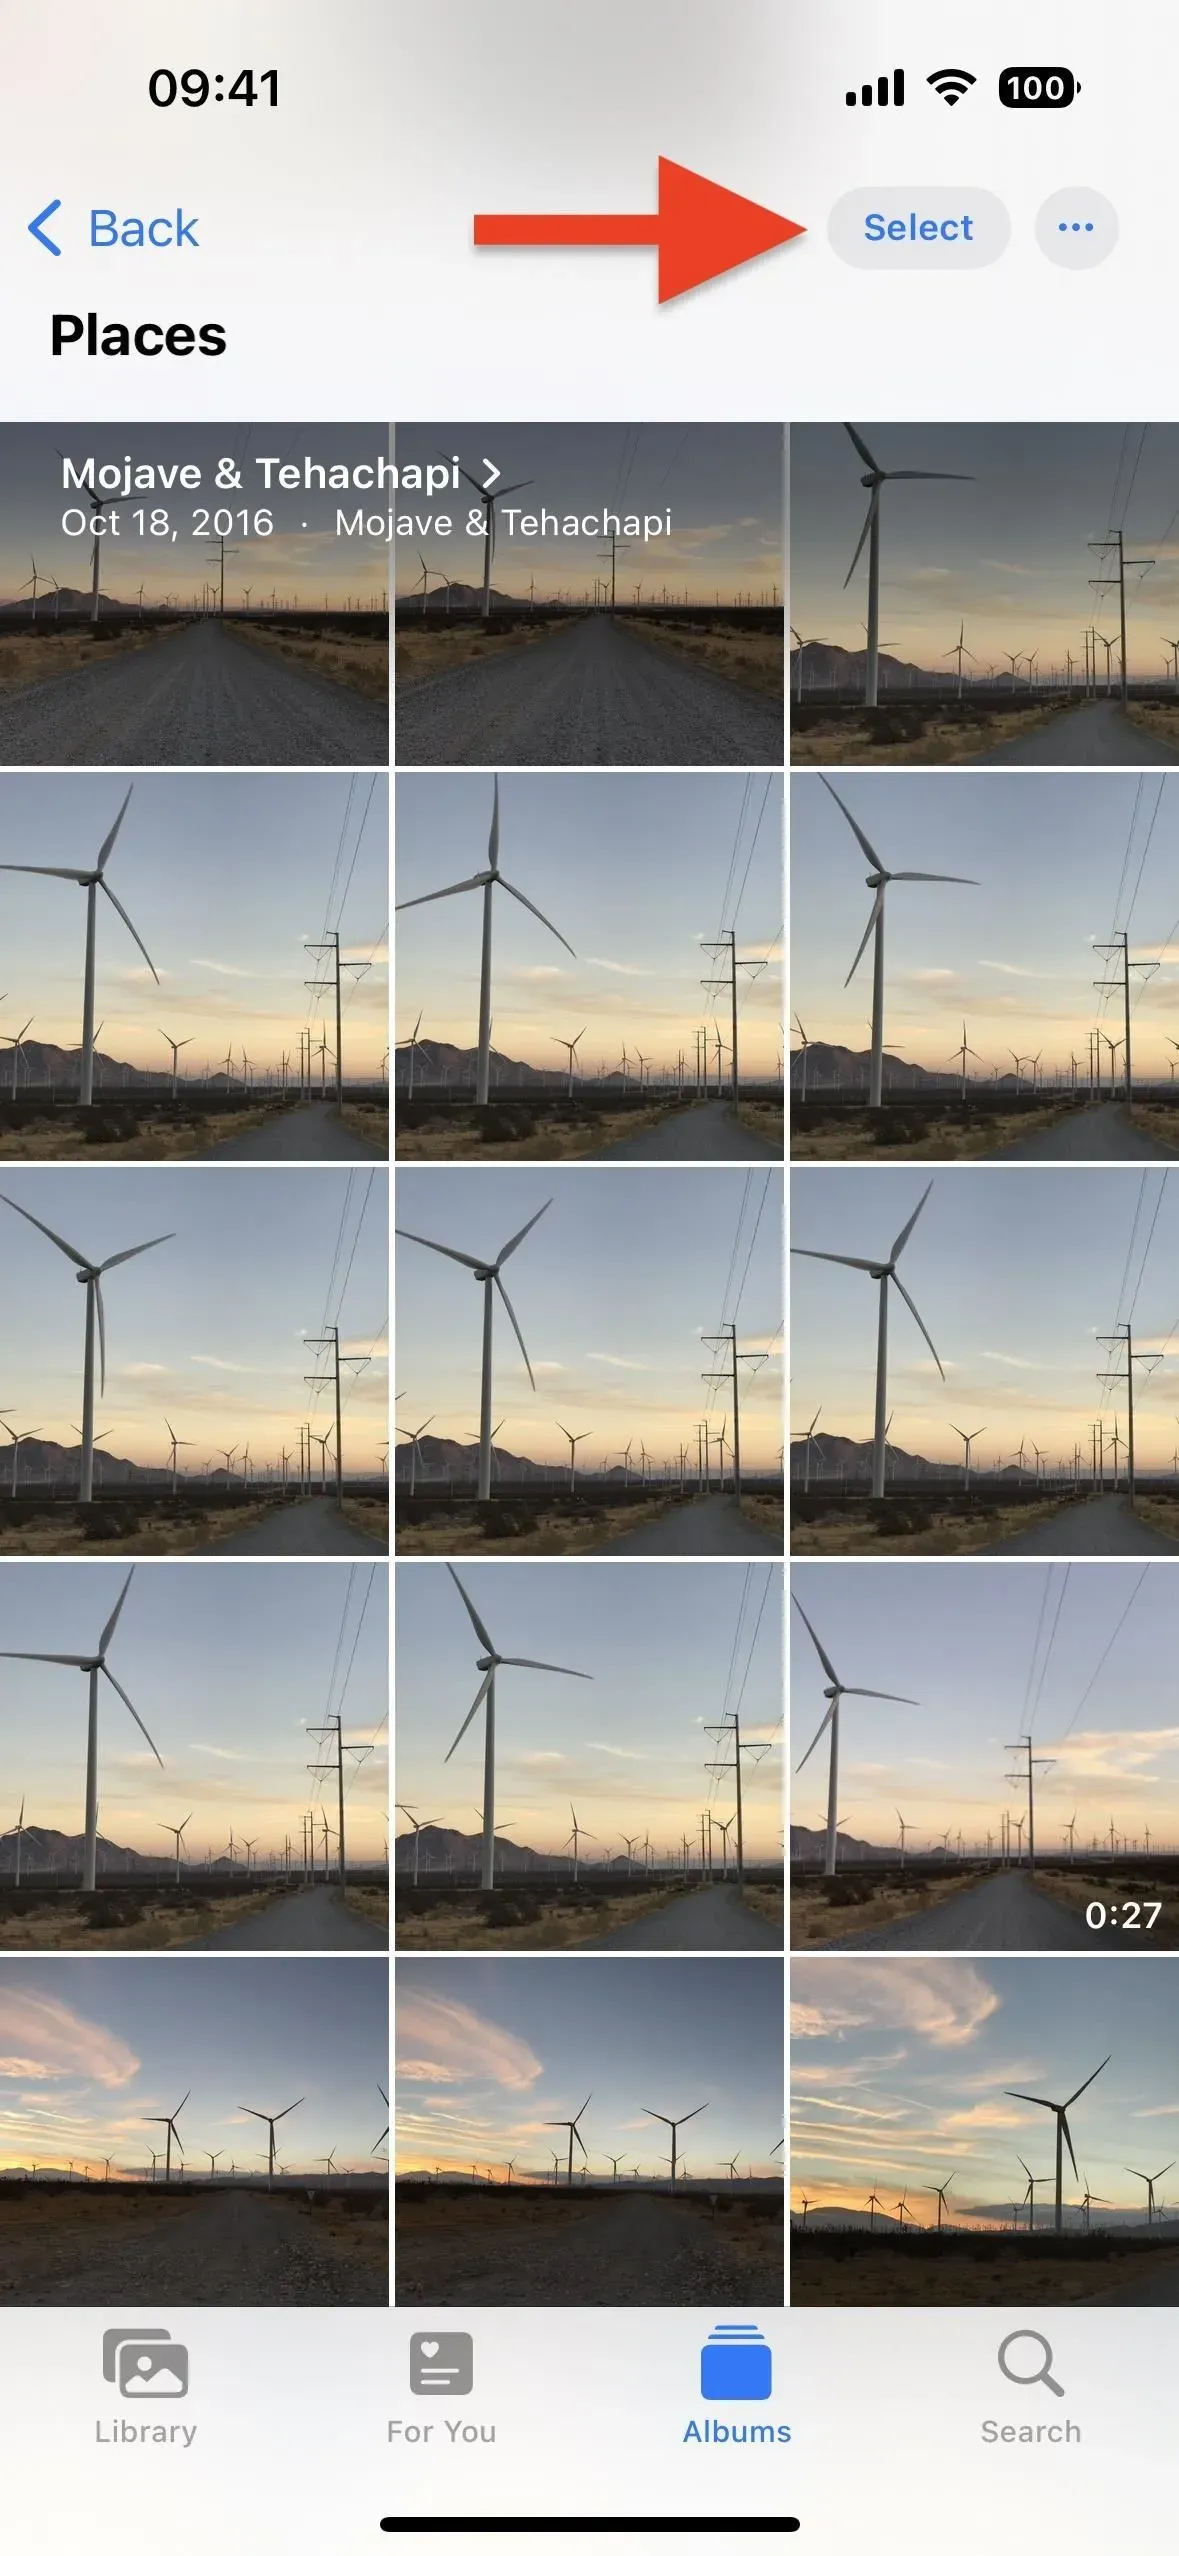
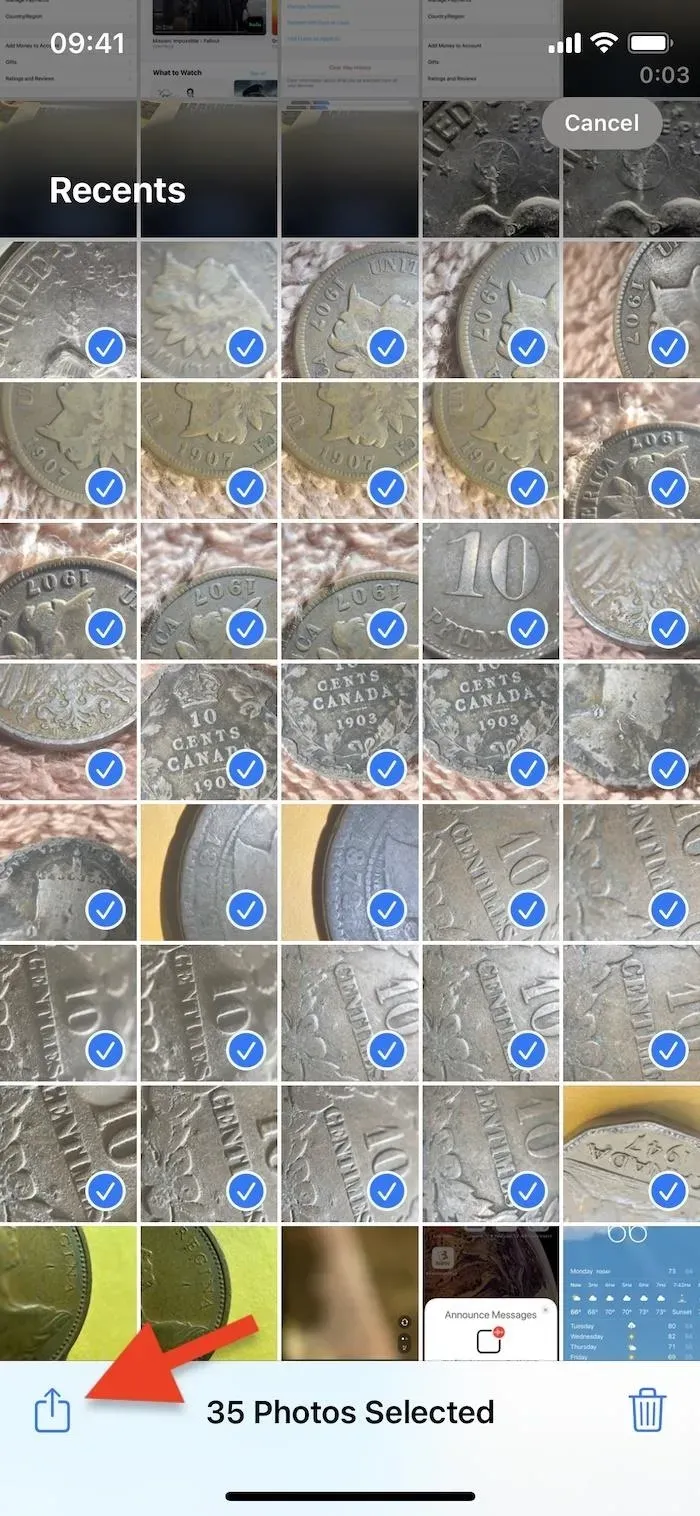
To remove a geotag from one or more photos or videos:
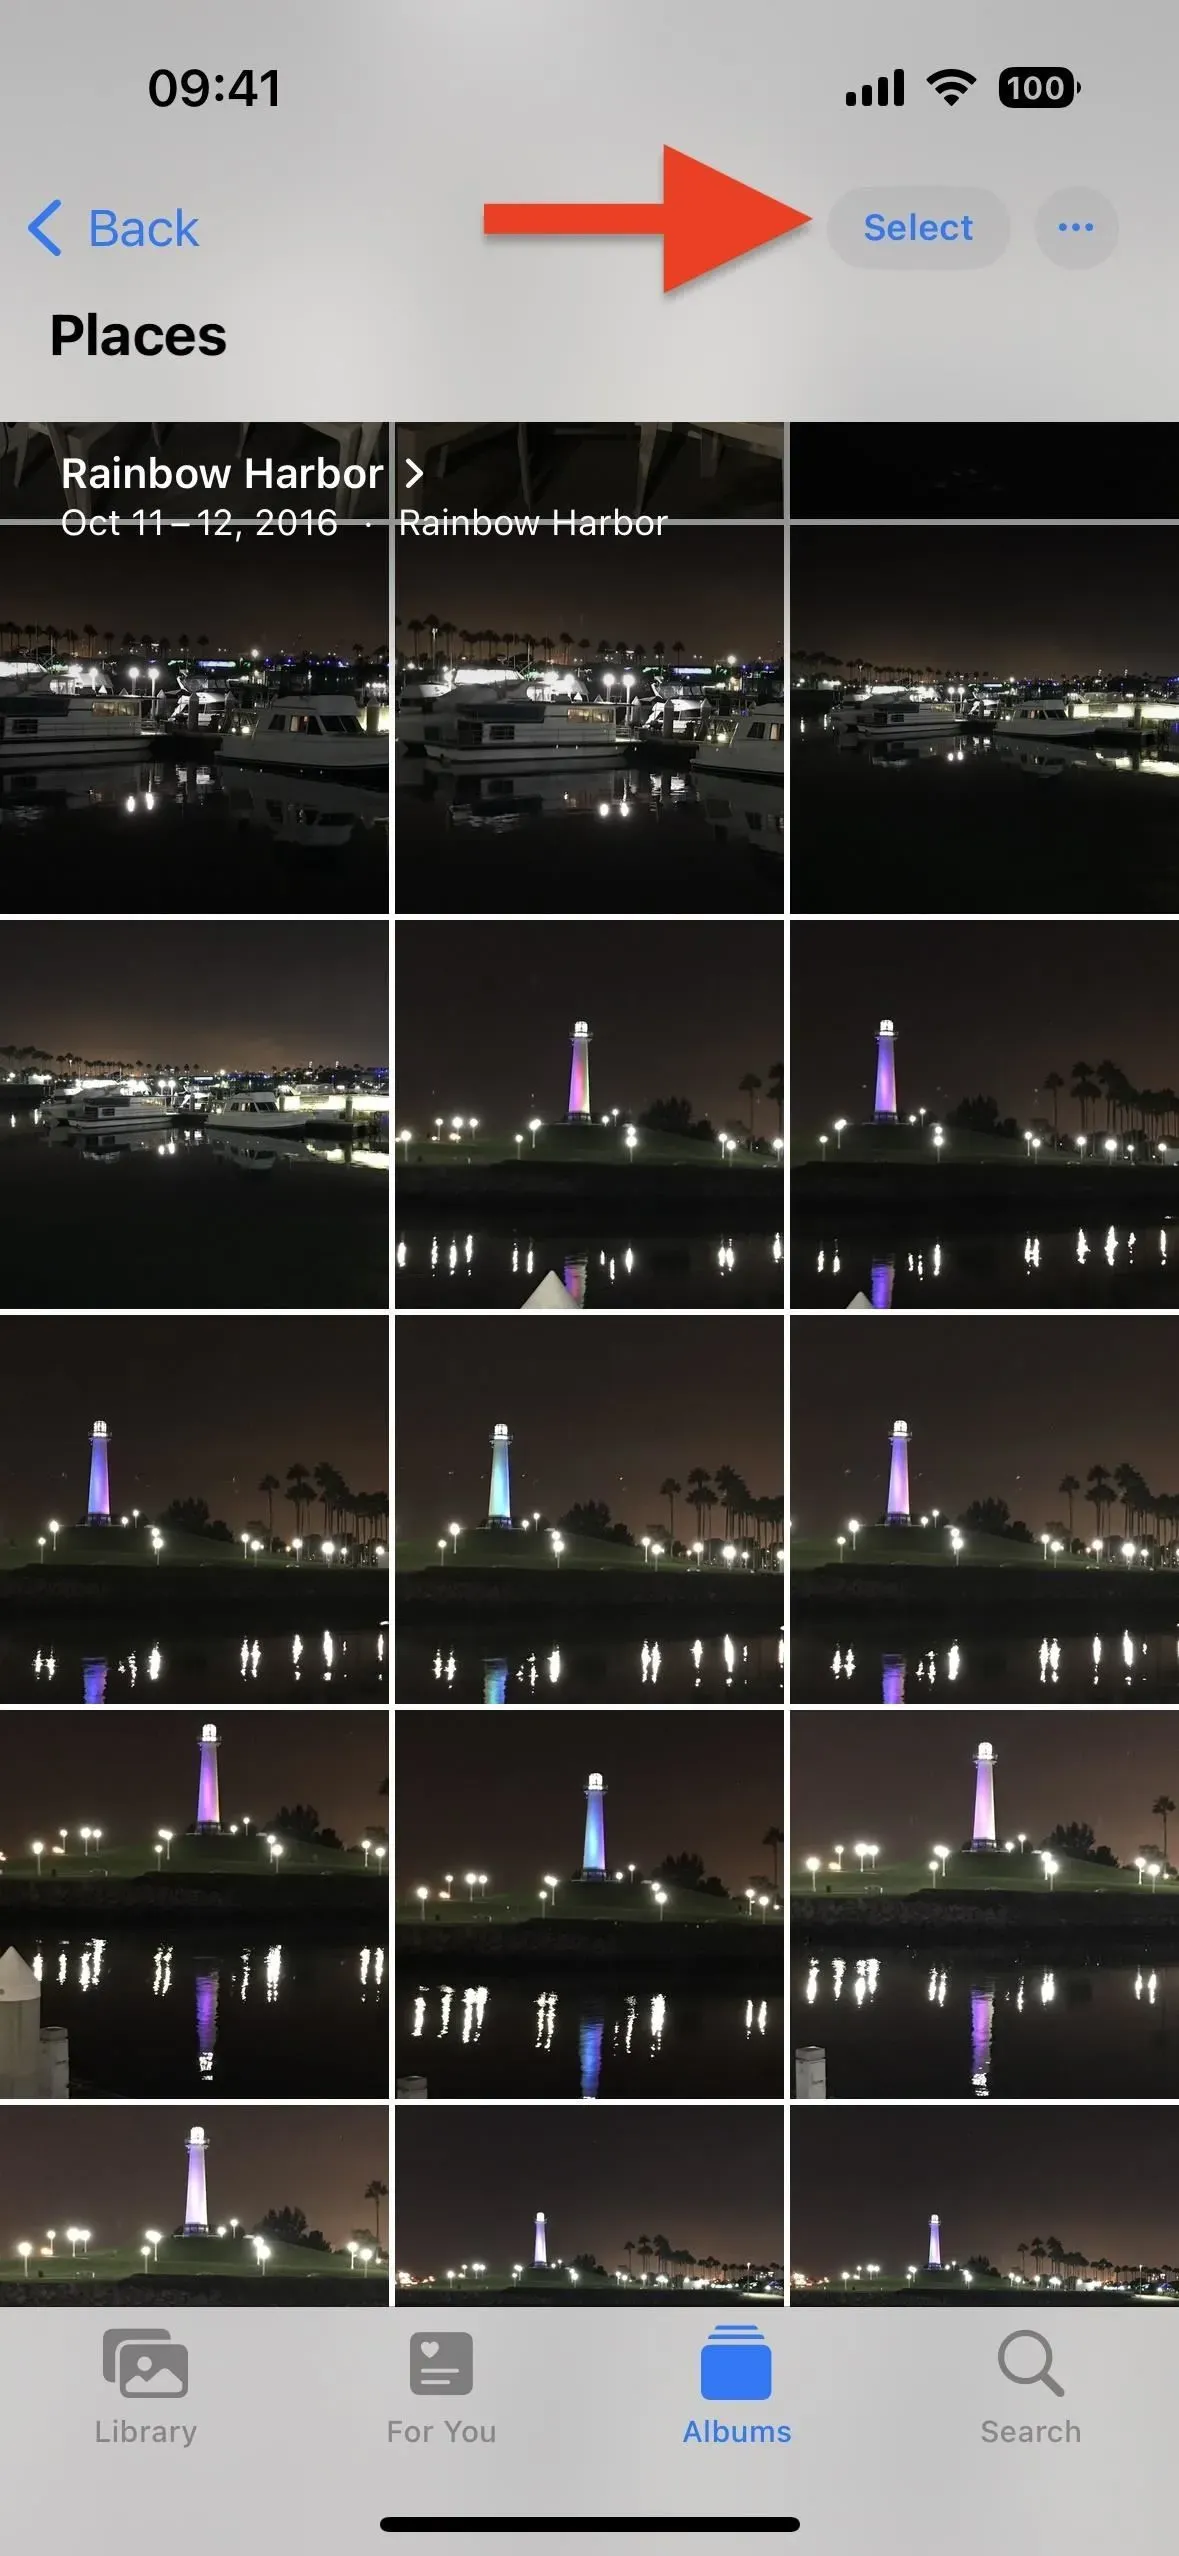
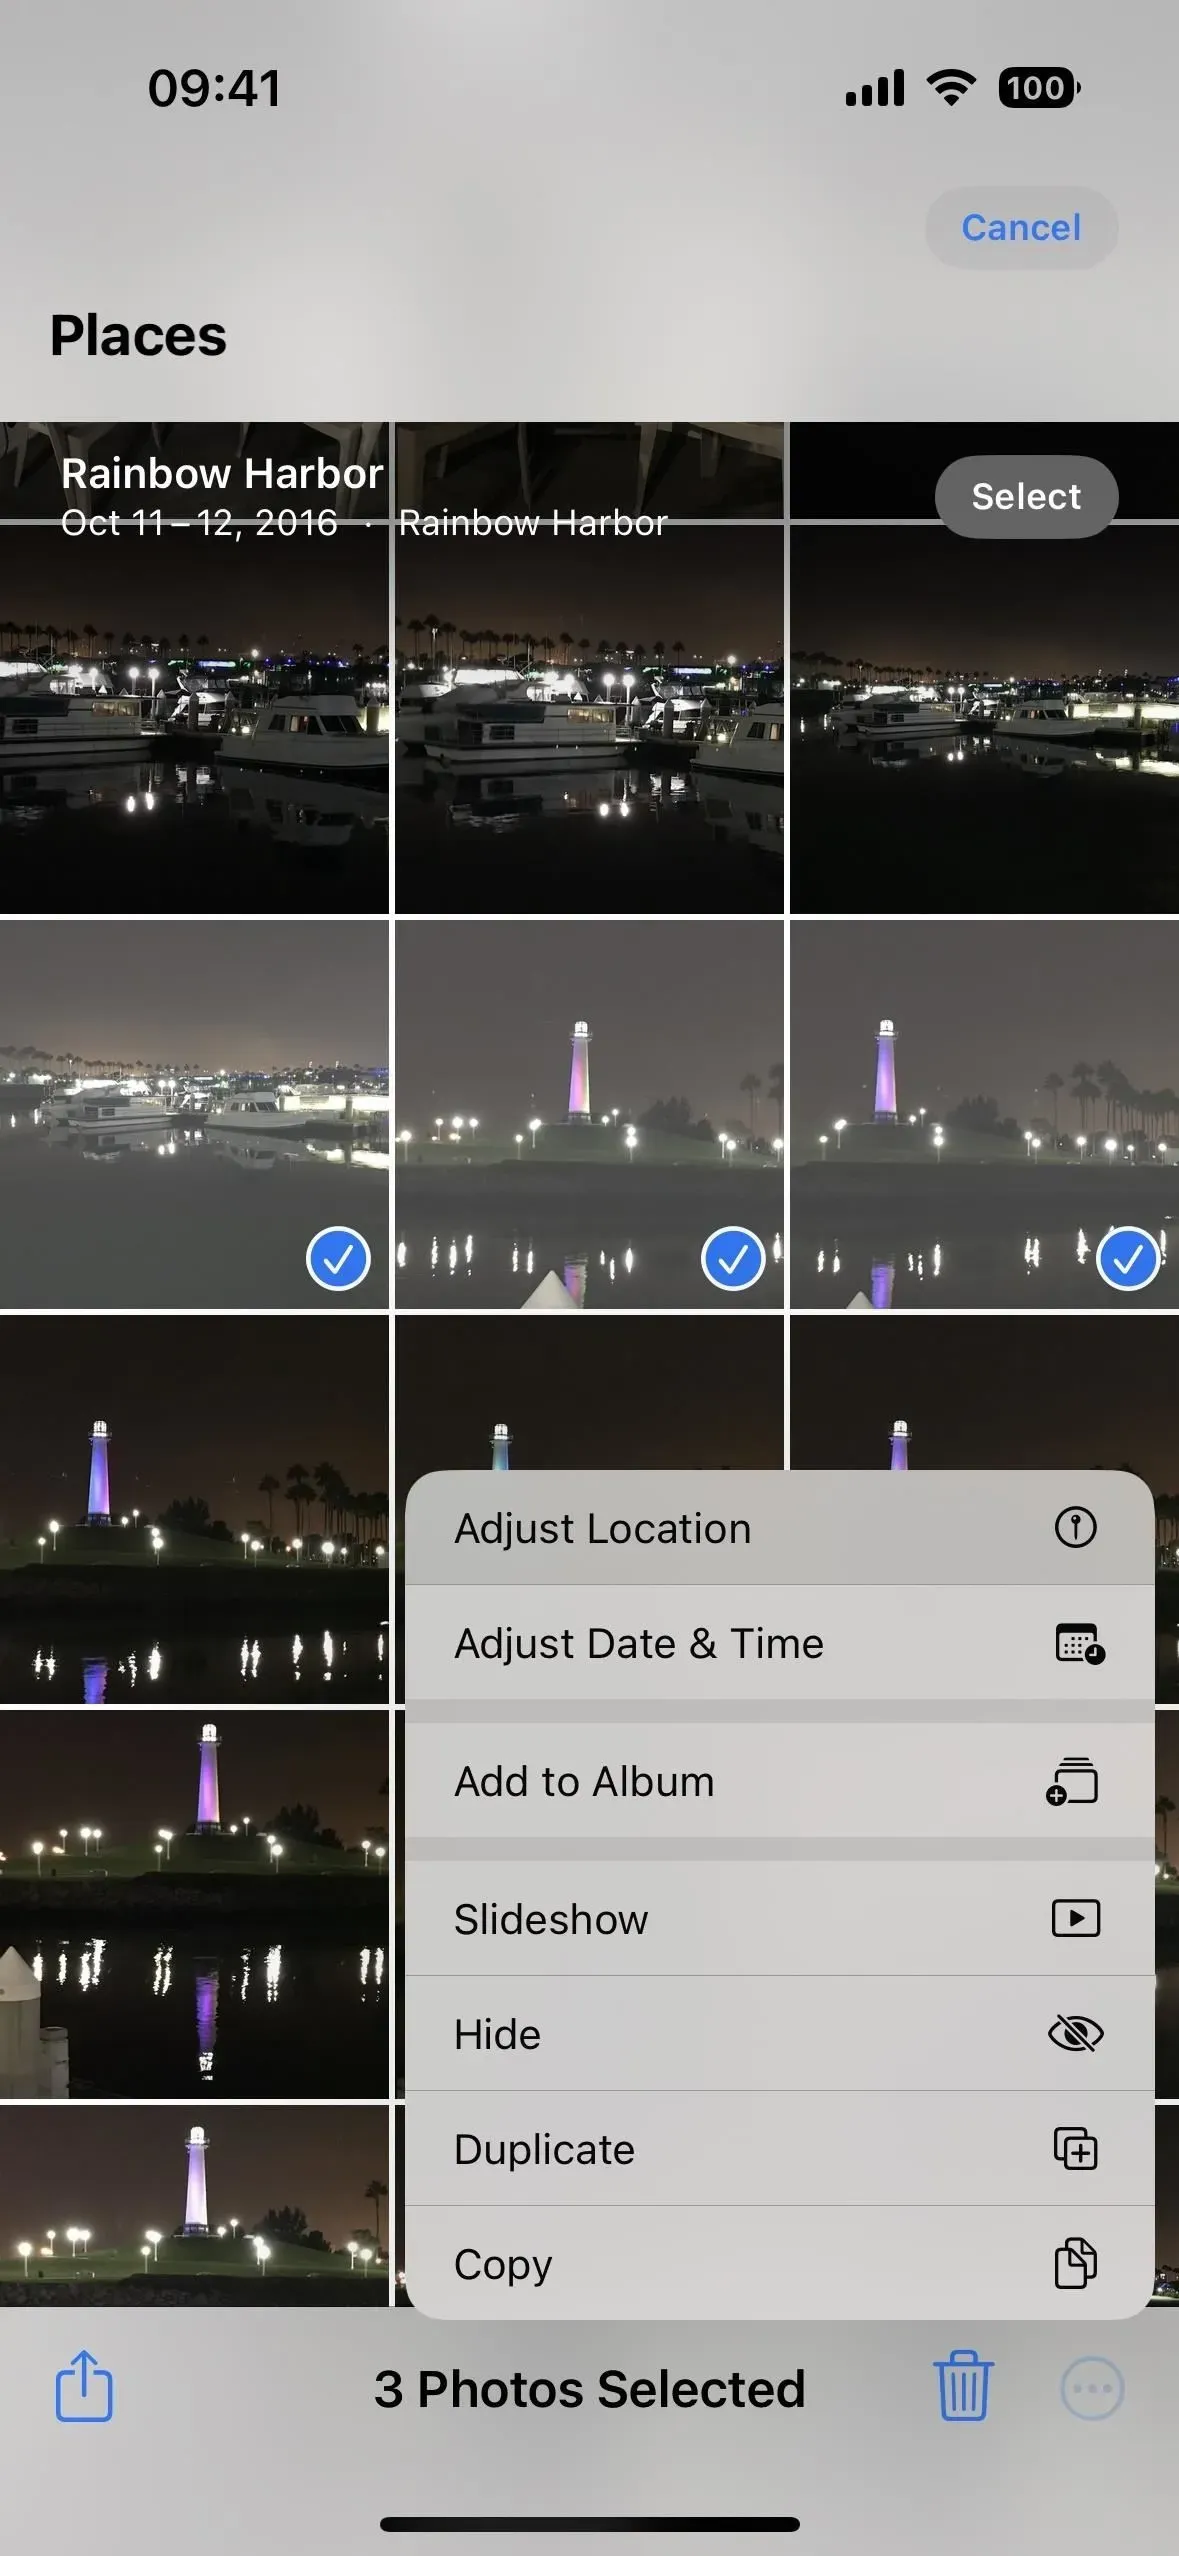
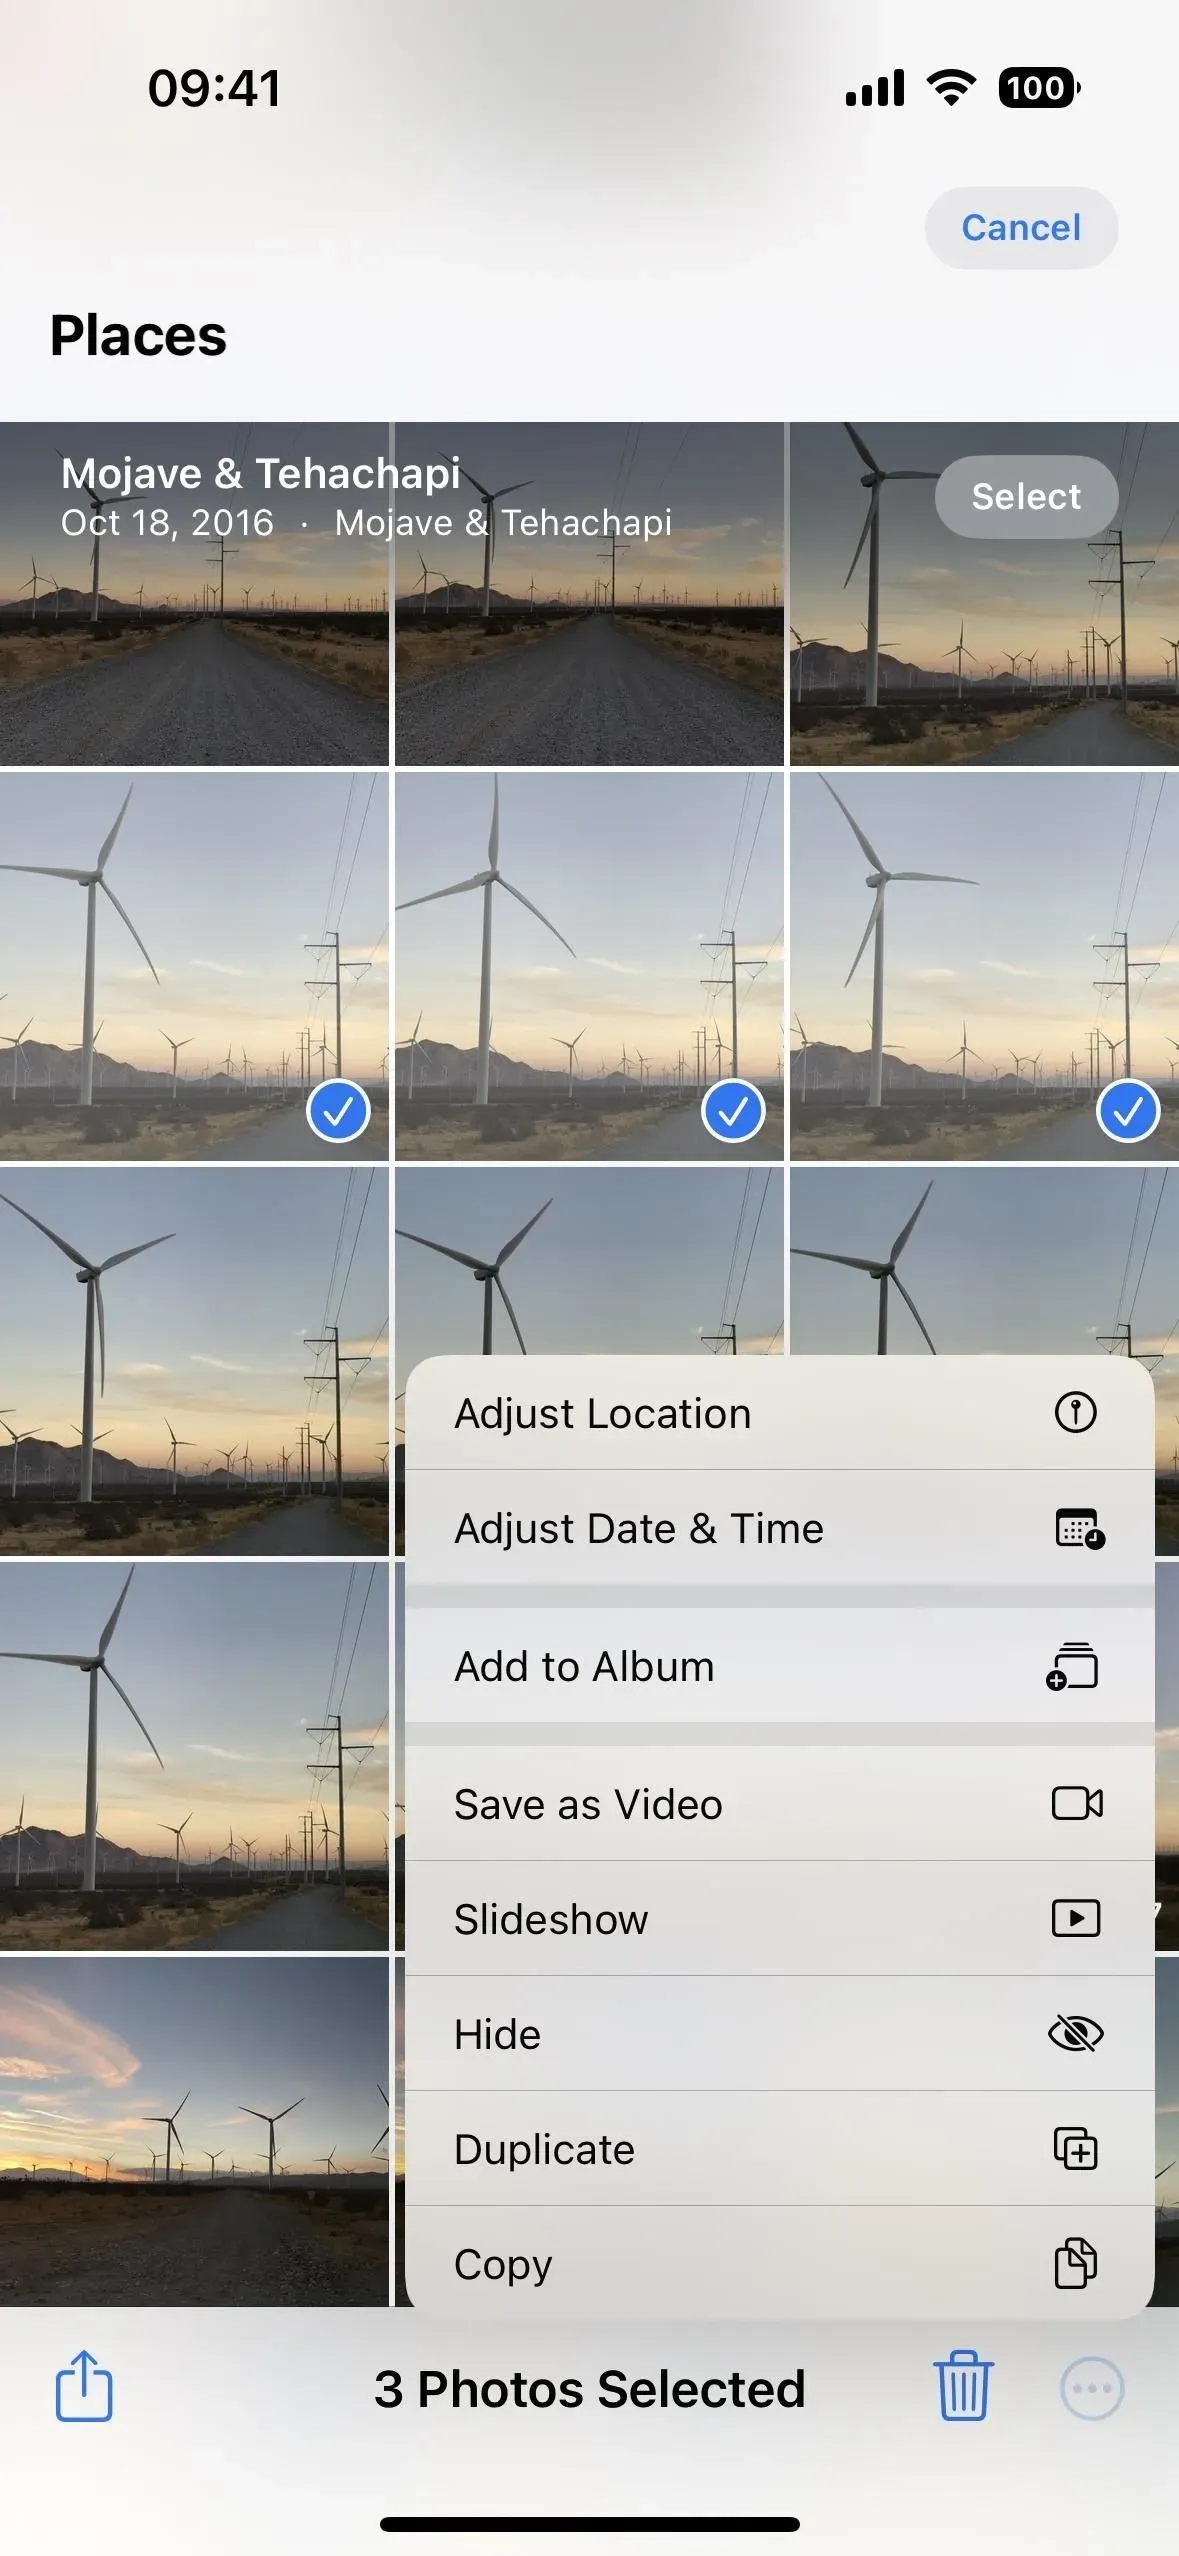
- Tap Select in the grid view, select content, tap the ellipsis (•••) icon, select Set Location from the Quick Actions menu, then tap No Location. (This only works on iOS 16 and later.)
- Click “Select”in the grid view, select content, tap the “Share”icon, select “Set Location”on the sharing sheet, then click “No Location”. (This only works on iOS 15.)

To return to the original location:
If you need to return the actual location, use the same process as above for individual photos and videos.
- Open content, then swipe up or tap the info button (i) to open content metadata. Tap Add Location below the map, then tap Restore.
- Open content, tap the ellipsis icon (•••), select Set Location from the quick actions menu, then tap Revert. (This only works on iOS 16 and later.)
- Open content on iOS 15, tap the Share icon, select Set Location on the sharing page, then tap Revert. (This only works on iOS 15.)
You can’t return multiple photos or videos to their original location at the same time, so you’ll have to do this individually if you have more than one to return.
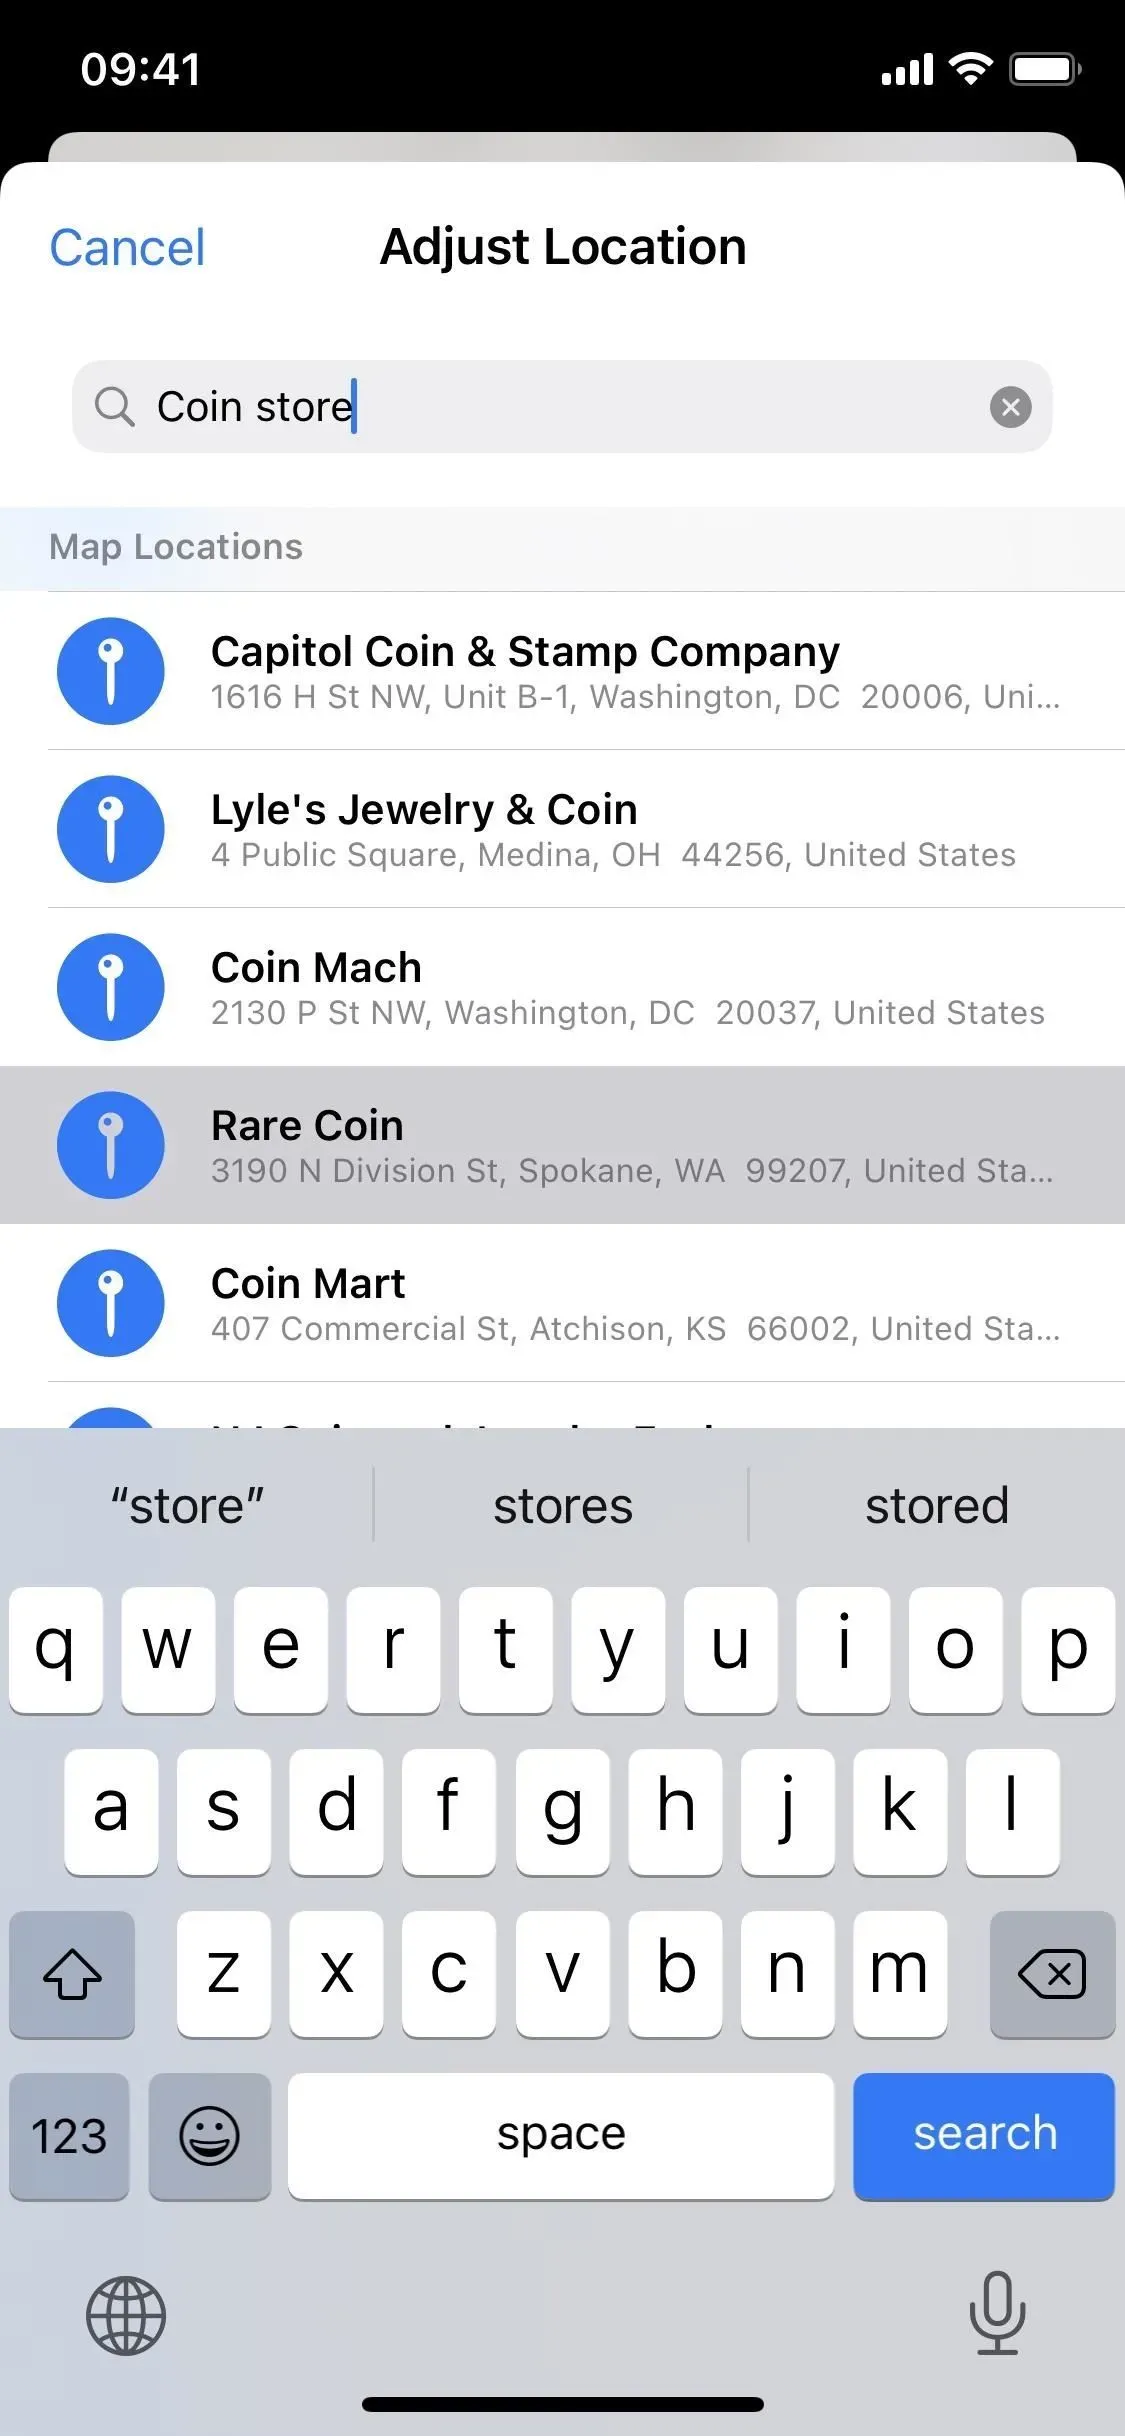
Option 4: Fake Geotags Before Posting
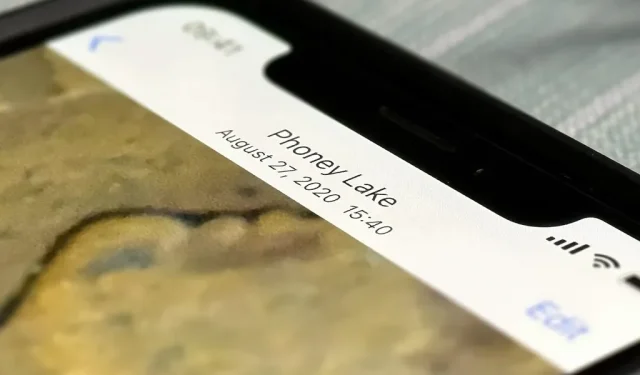
While it’s quick and easy to completely delete location data when sharing photos and videos, you can also make it look like you’ve been somewhere else. This way, if someone views the content’s metadata, they will see the fake location instead of the real one. If they try to pinpoint your location, favorite hangouts, or frequented places, it could lead them to chase wild geese.
The process of changing the address of a photo or video in the Photos app is almost the same as deleting it as shown in option 3 above, only you select a specific location instead of “No Location”.
To falsify the geotag of a single photo or video:
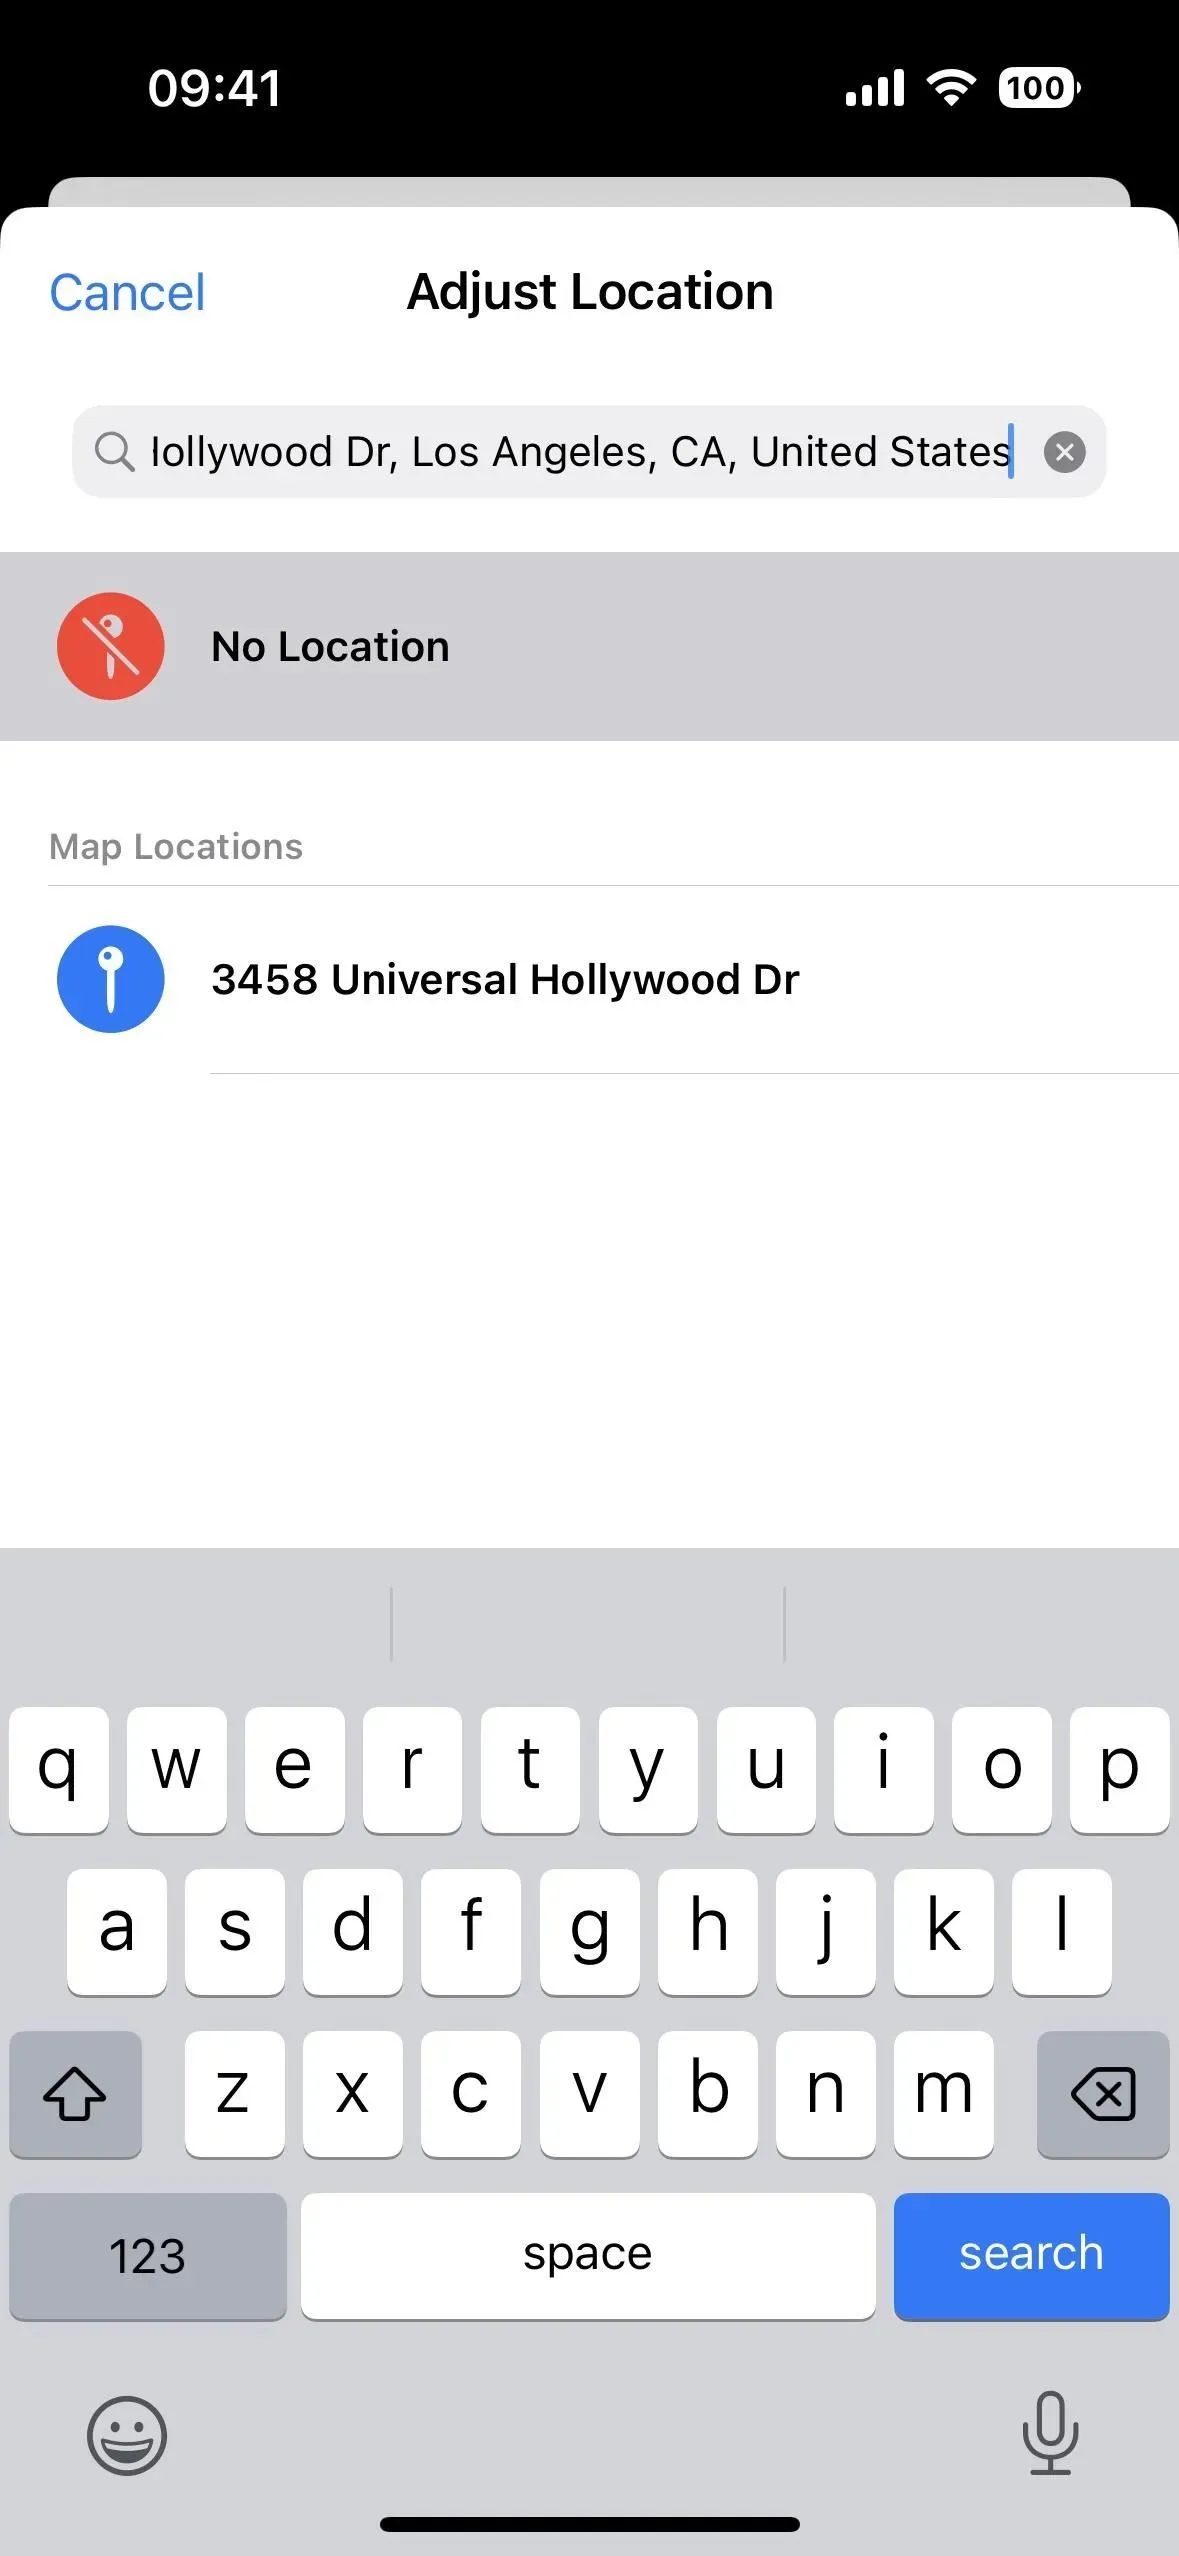
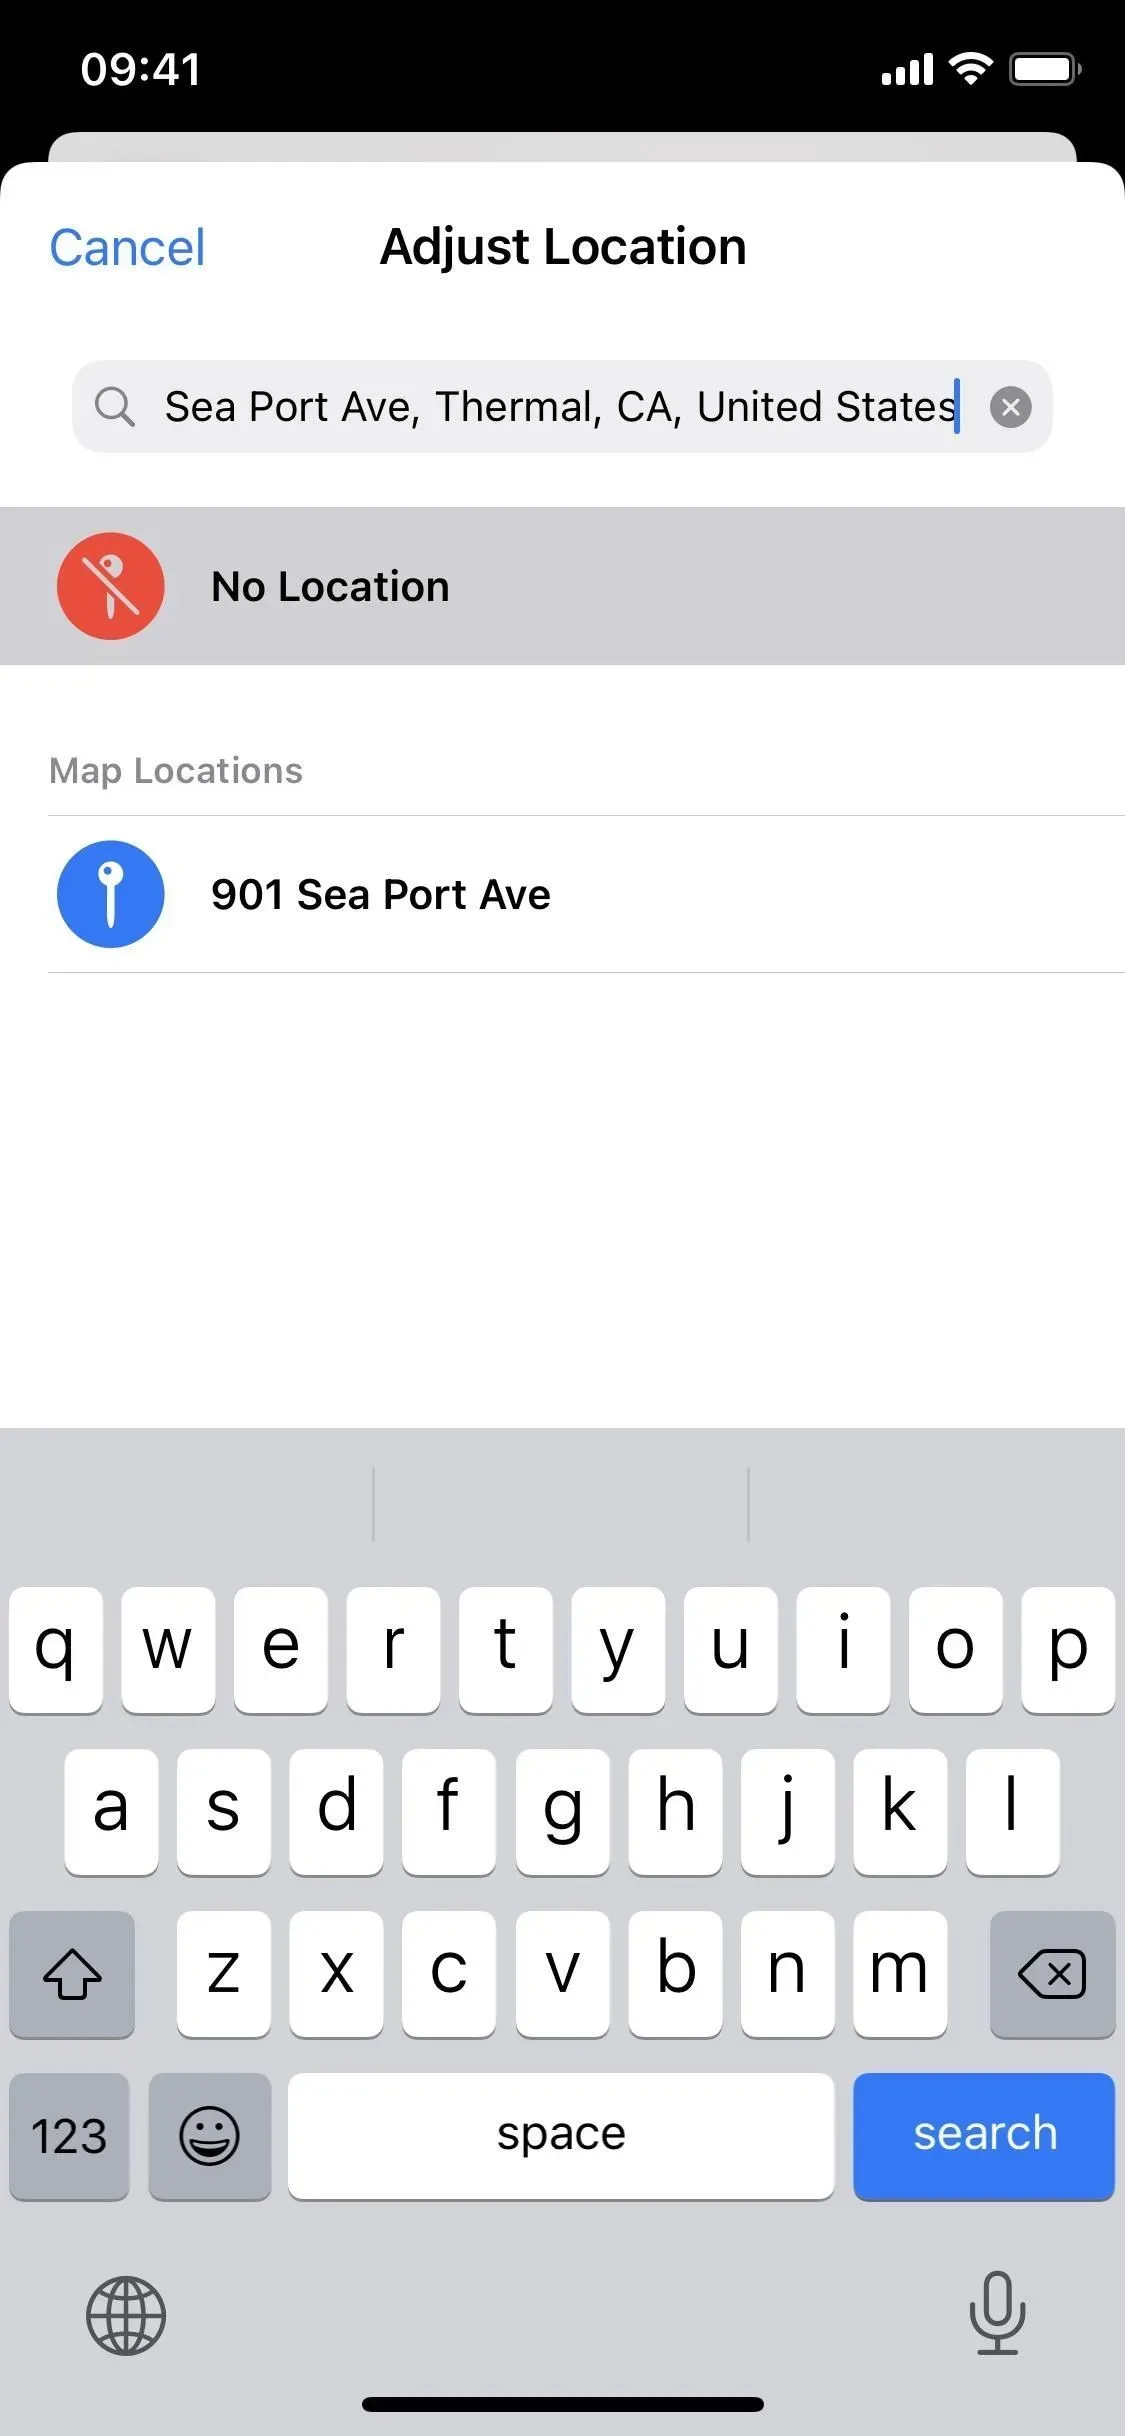
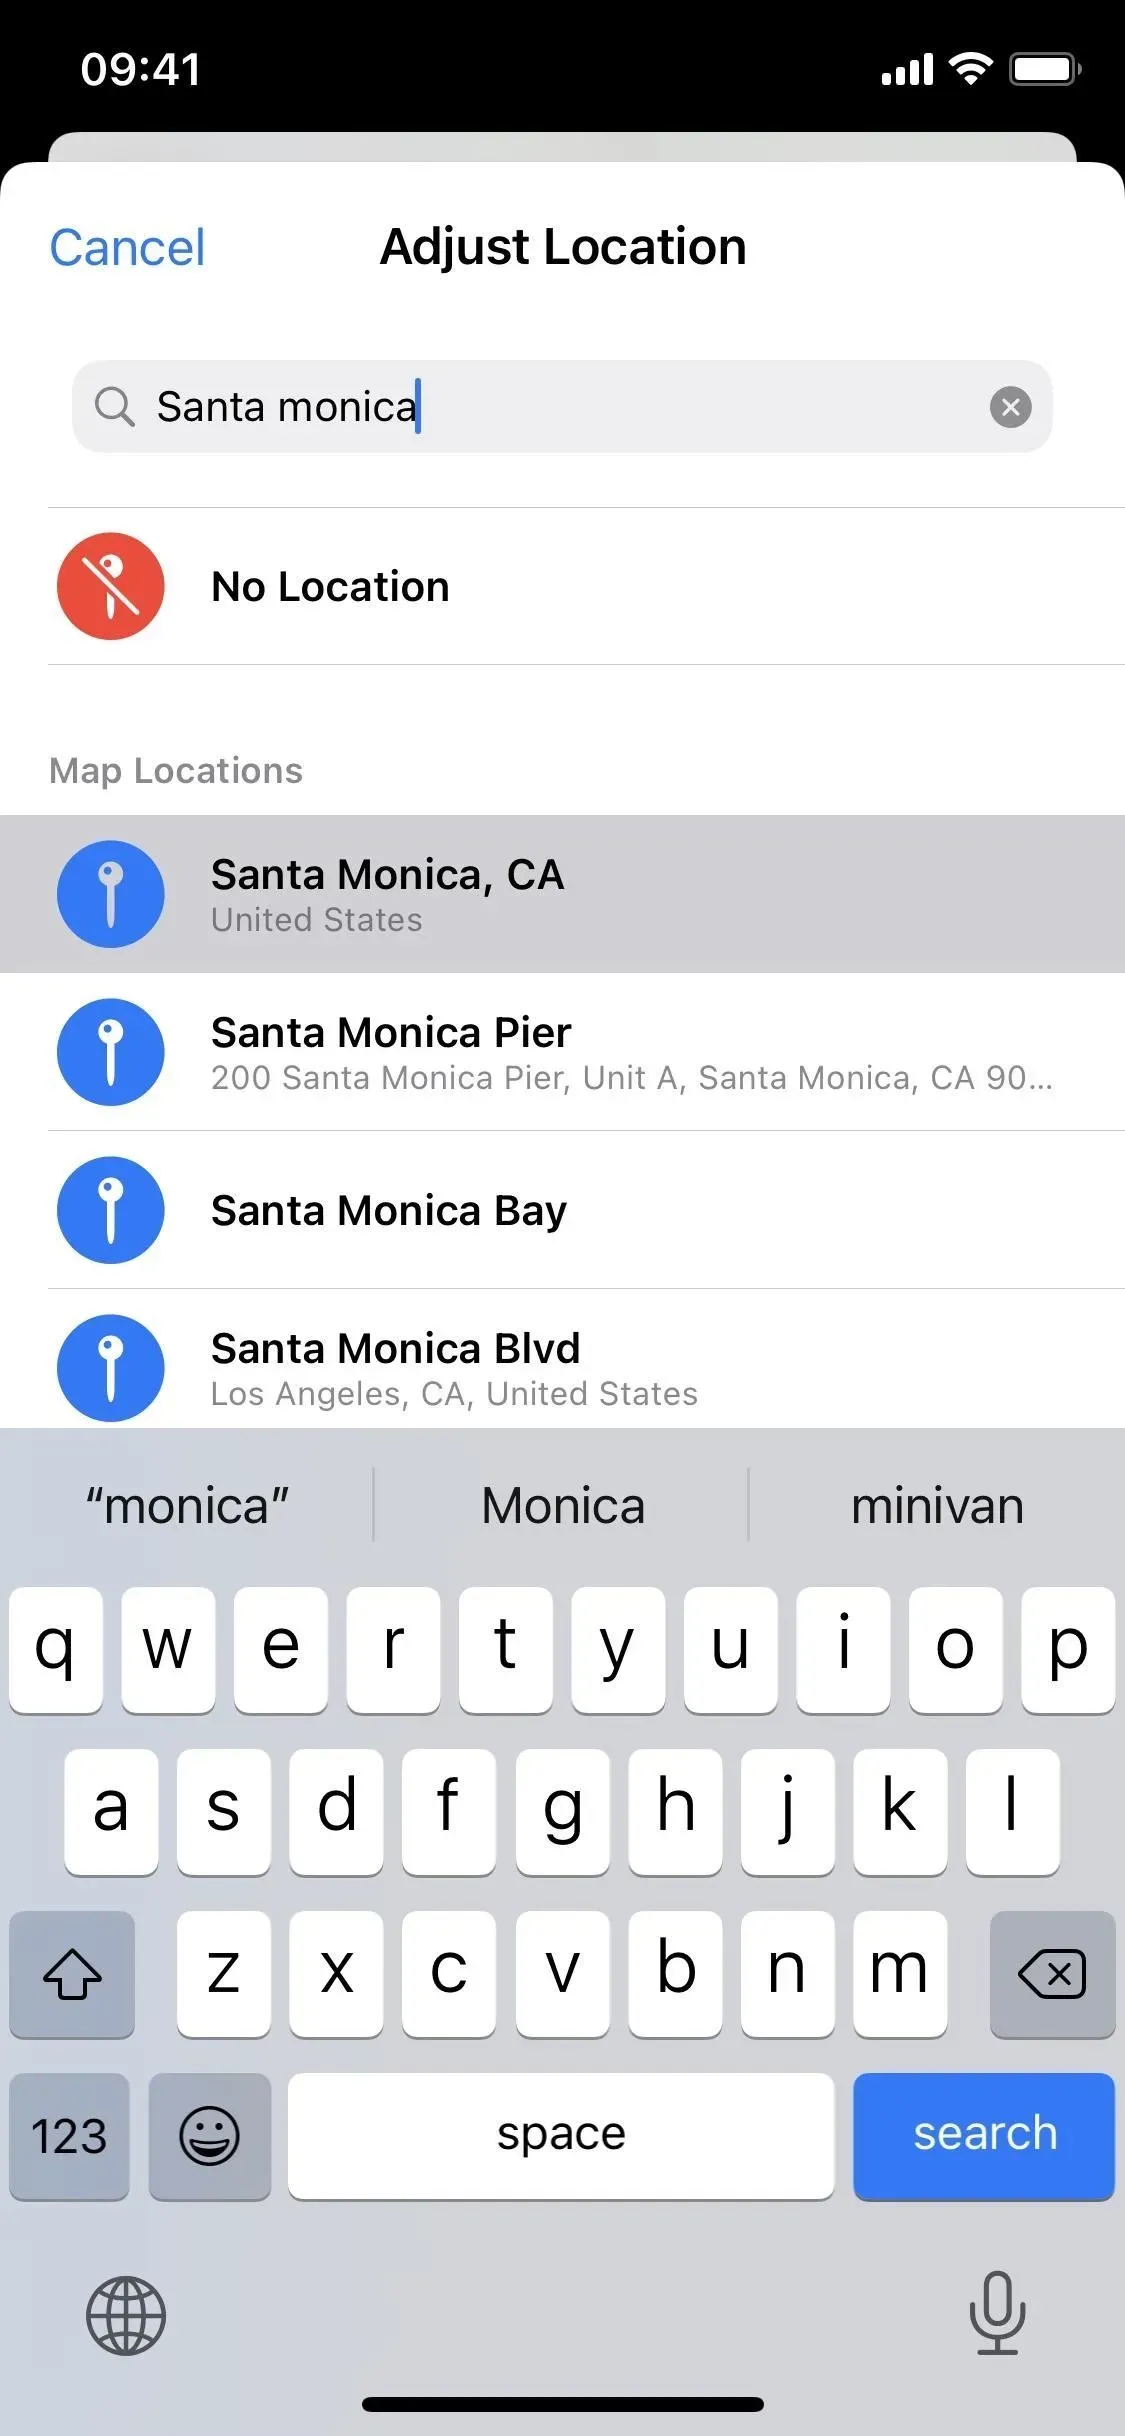
- Open content, then swipe up or tap the info button (i) to open content metadata. Click “Customize”below the map, then find and select any location you want.
- Open content, tap the ellipsis (•••) icon, select Set Location from the Quick Actions menu, then find and select any location. (This only works on iOS 16 and later.)
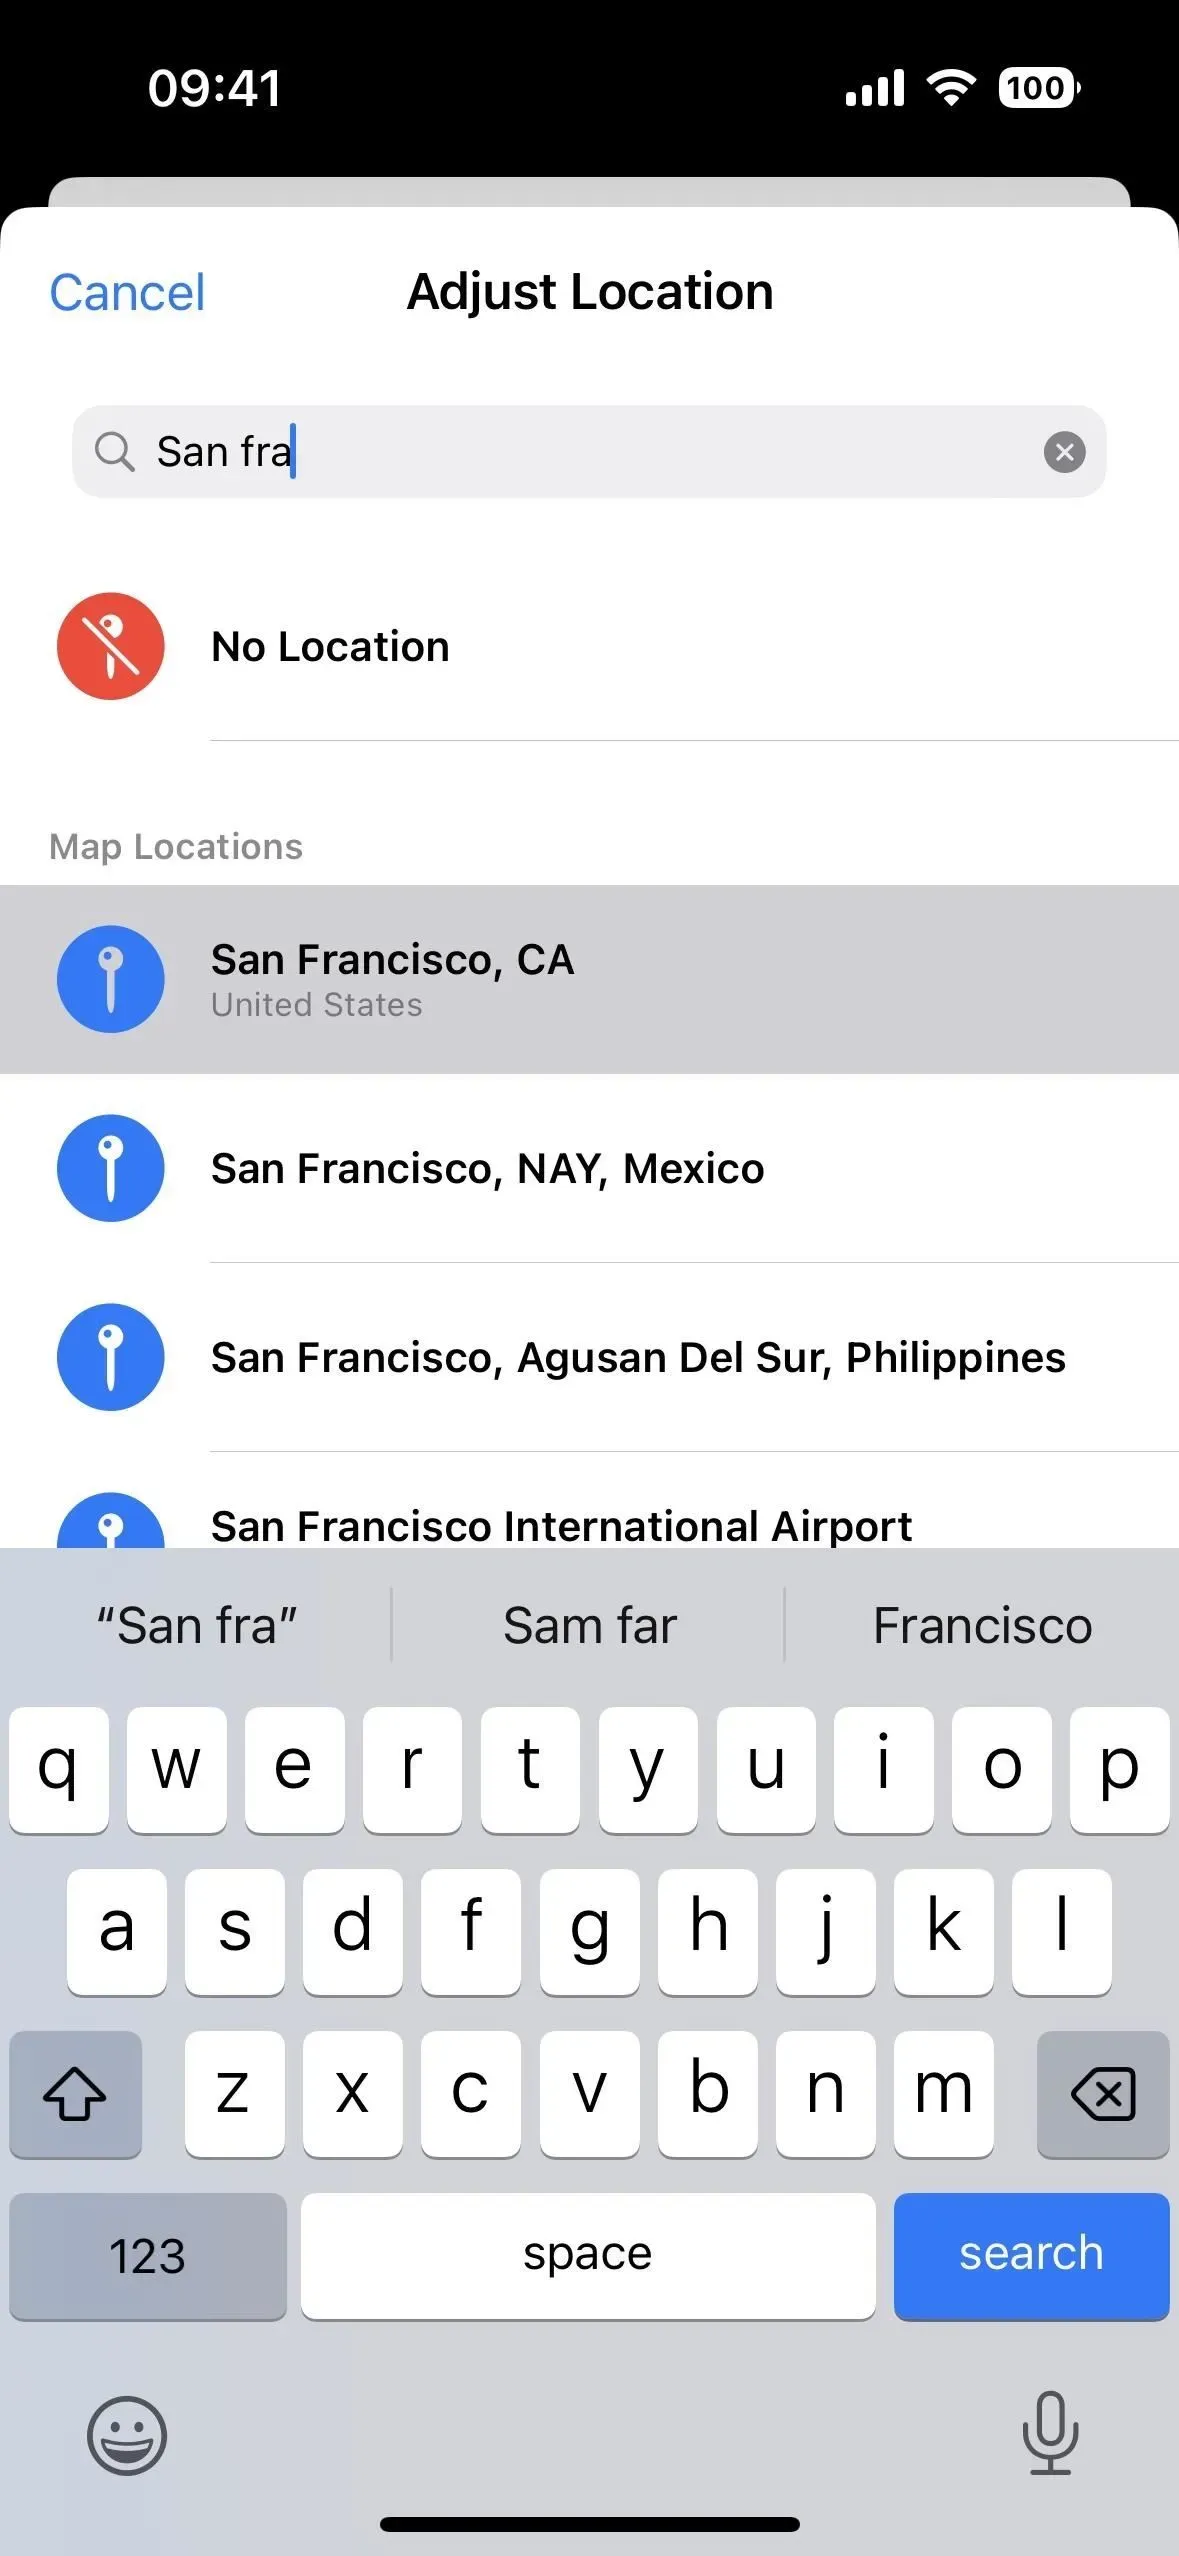
- Open content on iOS 15, tap the share icon, select “Set up location”on the sharing page, then find and select any location you want. (This only works on iOS 15.)
To forge a geotag for one or more photos or videos:
- Tap Select in the grid view, select content, tap the ellipsis (•••) icon, select Set Location from the quick actions menu, then find and select any location you want. (This only works on iOS 16 and later.)

- Click “Select”in the grid view, select content, tap the “Share”icon, select “Set up location”on the sharing sheet, then search and select any location you want. (This only works on iOS 15.)
To return to the original location:
If you need to return the actual location, use the same process as above for individual photos and videos.
- Open content, then swipe up or tap the info button (i) to open content metadata. Click “Customize”below the map, then click “Revert”.
- Open content, tap the ellipsis icon (•••), select Set Location from the quick actions menu, then tap Revert. (This only works on iOS 16 and later.)
- Open content on iOS 15, tap the Share icon, select Set Location on the sharing page, then tap Revert. (This only works on iOS 15.)
You can’t return multiple photos or videos to their original location at the same time, so you’ll have to do this individually if you have more than one to return.