

Over the years, the Weather app for iPhone has evolved over time. However, iOS 16 and iPadOS 16 handled a slightly better and bigger leap. You can now view weather maps, have the Weather widget on your home screen and lock screen, and get bad weather alerts.
And, as Apple does, it has added this feature quite skillfully. You can activate emergency weather notifications and precipitation reports for your region and locations that you have specified in the Weather app. So, without further ado, let’s see how to set up emergency weather alerts on your iPhone and iPad.
- What are Severe Weather Alerts?
- How to enable weather alerts for your location on iPhone or iPad
- Enable weather notifications for other locations
- If you are not receiving weather notifications?
What are severe weather warnings and will I receive them?
As the name suggests, the Weather app for iPhone and iPad will notify you if a severe, emergency, or bad weather alert appears near you. This includes real-time notifications for precipitation, rainstorms, tornadoes, hurricanes, flash floods, heat waves and more.
However, this feature is not available in all countries and regions. At the time of writing, it was available for:
- United States
- Canada
- Mexico
- Australia
- India
- Japan
- China
- Brazil
- Thailand
- And most countries and regions in Europe
Remember that you can enable these alerts for your current and favorite locations.
Note. iPadOS 16 will be officially released in October, so for now, you can only enjoy this feature on iPhones running iOS 16.
How to enable weather alerts for your location on iPhone or iPad
The process involves two steps: first, allow the Weather app to access your location, and then enable weather notifications from within the app.
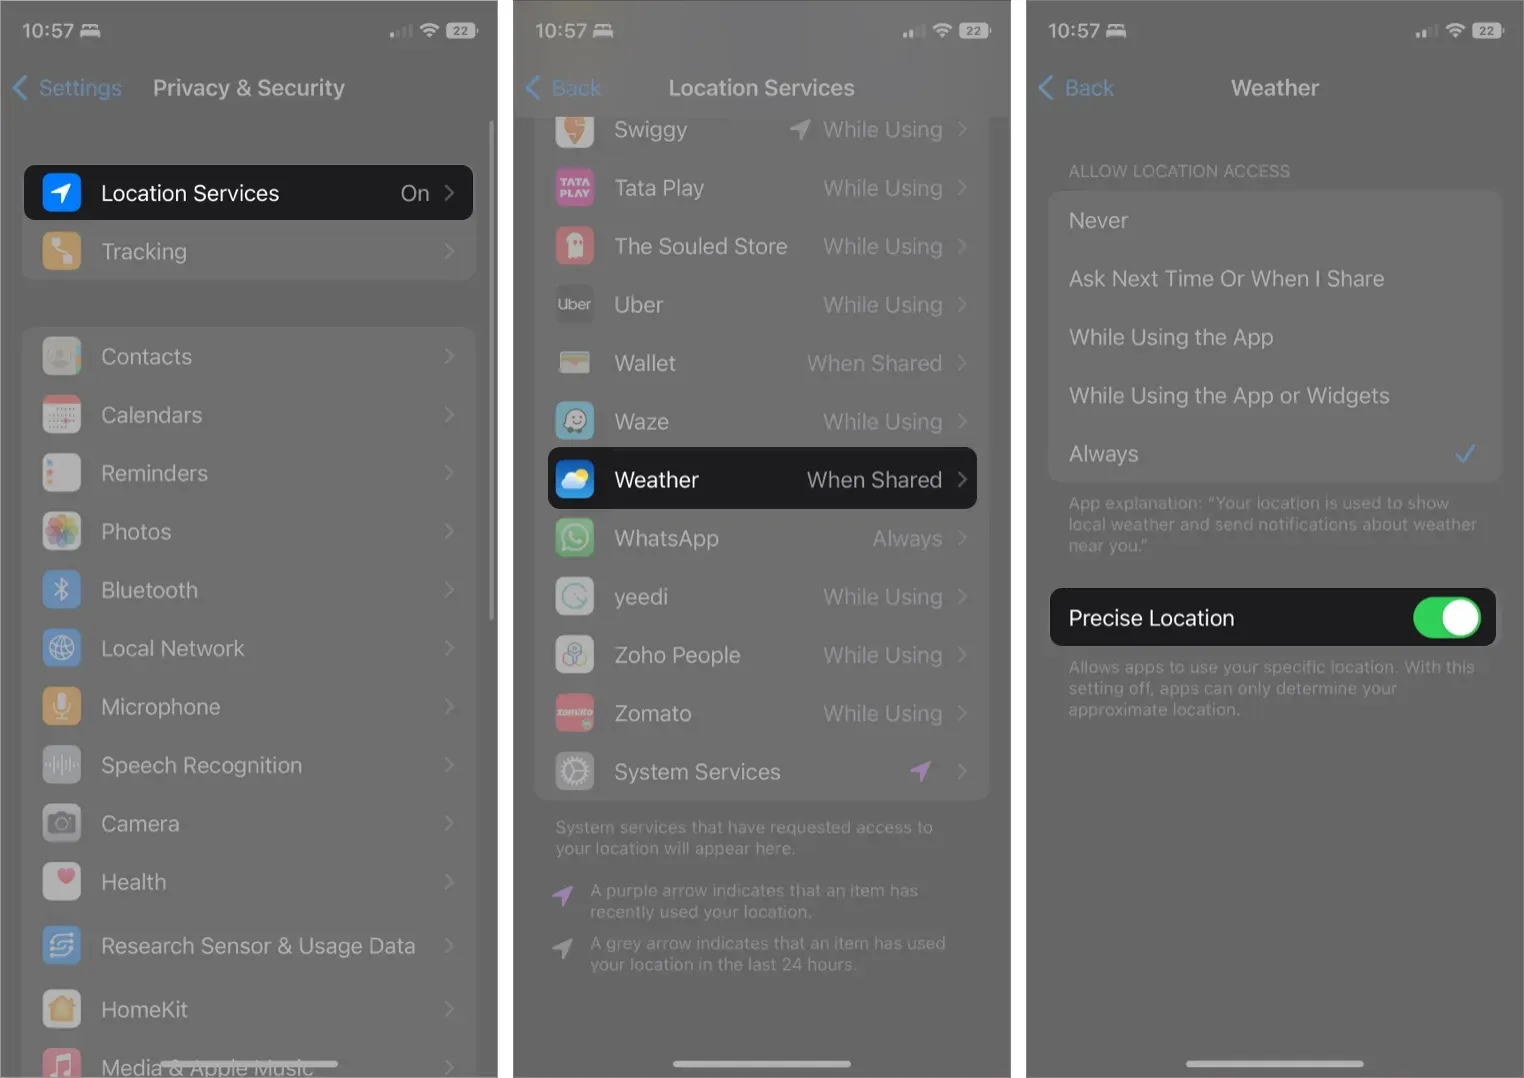
1. Turn on location access
- Open settings.
- Swipe down and select Privacy & Security.
- Tap Location Services → turn on Location Services if it isn’t already.
- Find and select Weather from the list.
- Click Always. Make sure you turn on Accurate Location for the Weather app to access your exact location.
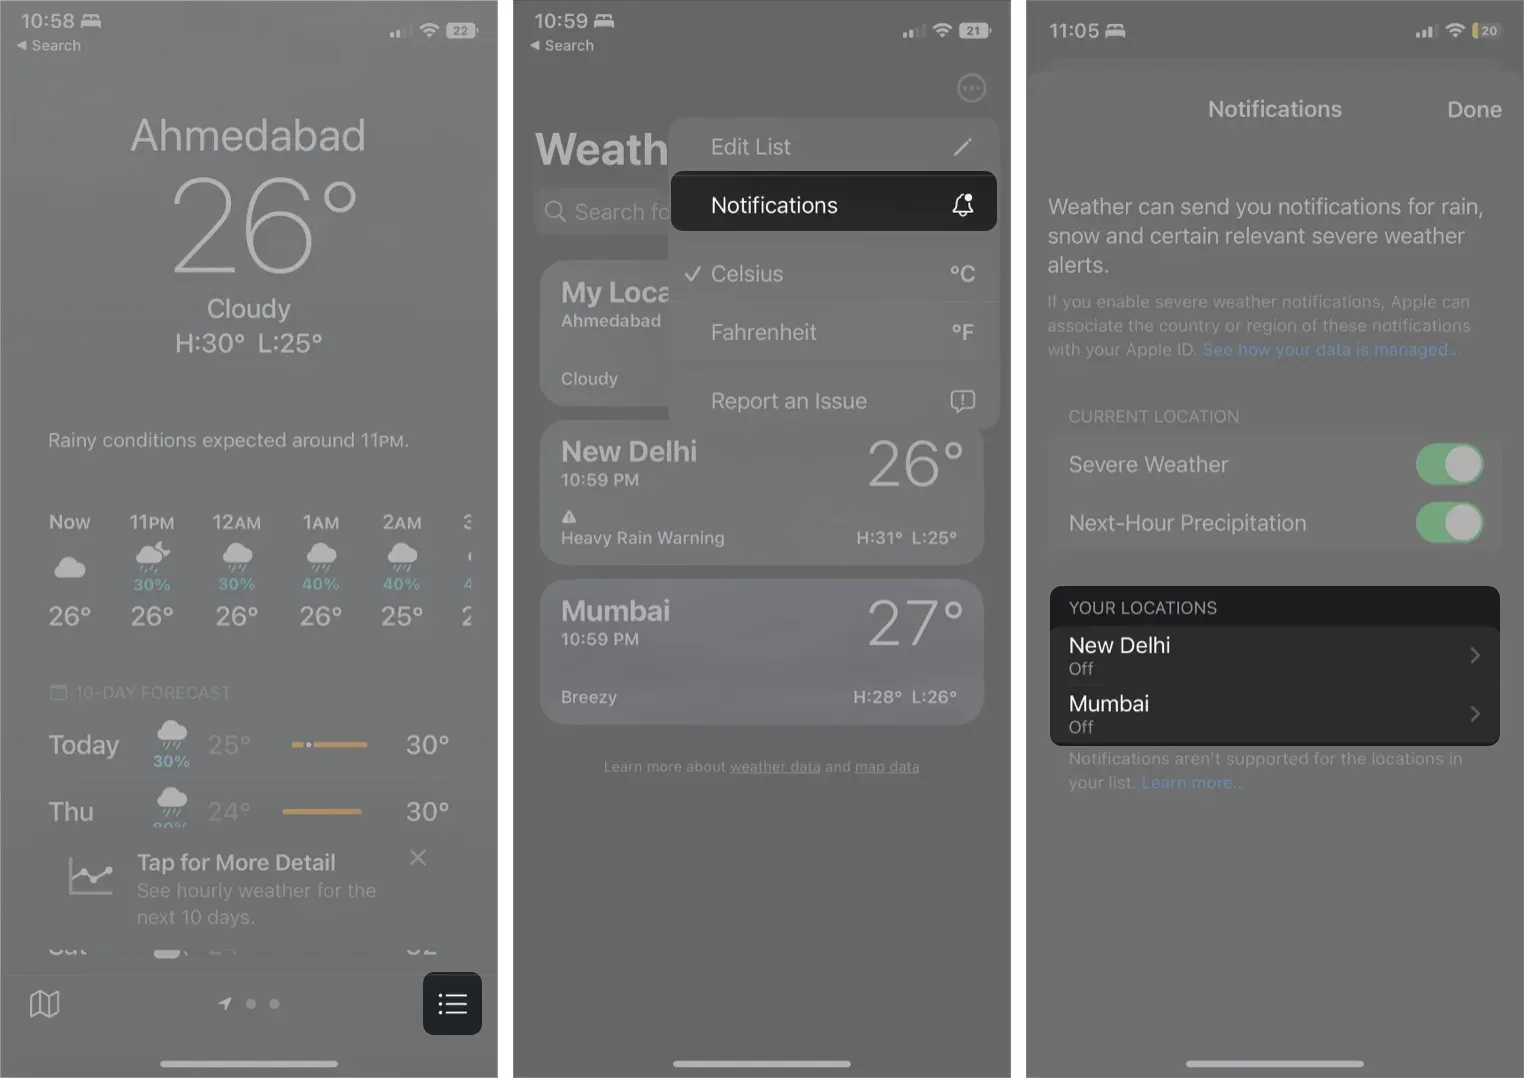
2. Turn on notifications in the Weather app.
- Open the Weather app.
- Tap the bulleted list icon in the lower right corner.
- Then tap on the three dots icon in the top right corner.
- Select Notifications.
- Tap Continue.
- When prompted, select “Allow”and then “Allow”again.
- Enable according to your preferences:
- Severe weather
- Precipitation next hour
- Click Done
You will now receive real-time notification updates for the different weather conditions supported in your area.
Enable weather notifications for other locations
- Go to the Weather app → bulleted list icon.
- Tap the three dots → Notifications.
- In the Locations section, select a location.
- Turn on:
- Severe weather
- Precipitation next hour
- Click Done.
To turn off the weather notification for your location or other locations on your weather list, repeat the steps above, toggle off, and tap Done.
If you are not receiving weather notifications?
Apple is updating the Weather app with real-time weather information from a variety of data sources. Most of them are location dependent. Therefore, you may not receive a notification if the Weather app is unable to access data from your region.
Therefore, while notifications for some weather changes are available in some countries, some are not. If you’re in the areas listed above, make sure you’re on the latest iOS 16.
Conclusion
While Apple still has a long way to go to compete with other third-party weather forecasting apps; I’ll take these small victories for now. At least we got a weather app on the iPad for the first time in 12 years.
I suggest you don’t let the Weather app sit around doing nothing. Instead, turn on severe weather alerts to exercise your muscles and let Apple know they’re on the right track. Have more questions or ideas to share? Use the comments section.