Screen recording can be useful many times. Many people record their screens to show troubleshooting steps and various similar scenarios. When it comes to Windows PC, users have to download third-party screen recording apps. However, the same cannot be said for Chromebooks because Chromebooks have a built-in screen recording tool. If you want to view a recording on a Chromebook, this article will help you with that. In this article, we will discuss how you can record screen on Chromebook.
Screen Recording on Chromebook
Screen recording on a Chromebook is pretty straightforward. You can do this by following the steps given below:
- Click on any item on the shelf that you will find in the lower right corner. This will open the Quick Settings panel on your Chromebook.
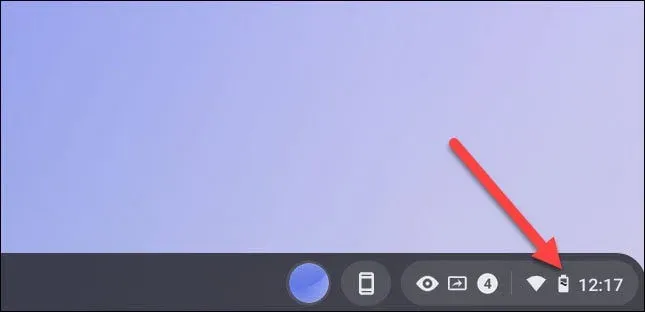
- Click the arrow in the top right quick settings menu .
- Here, click the “Screenshot” button . When you click this button, a screen capture toolbar will appear at the bottom of the screen.
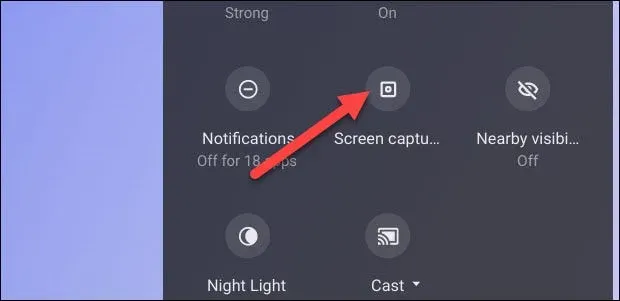
- On the screen capture toolbar, you will see a camera icon and a video camera icon. Clicking the camera icon will take a screenshot, and clicking the video camera icon will record the screen.
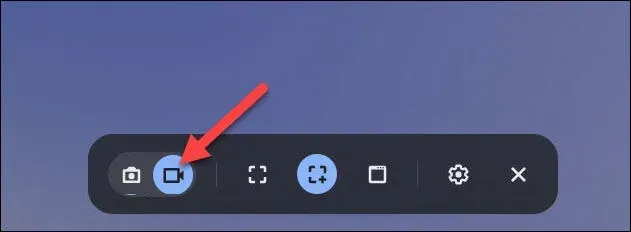
- When you click on the video camera icon, you get various options to manage your screen recording settings. You can set the aspect ratio (screen size of the screen recorder). You can set it to full screen, partial screen and window.
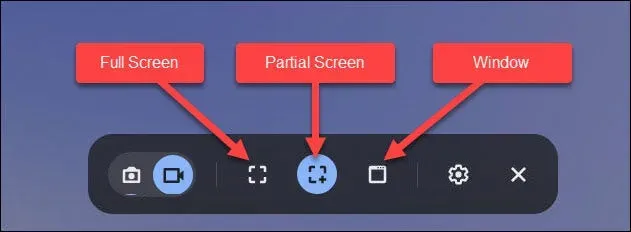
- Full Screen: Click anywhere on the screen to record full screen.
- Partial Screen: You will need to drag to select the area you want to record and then click the Record button .
- Window. To record a window, click on the window or screen area you want to record.
Final words
Here’s how you can view recordings on a Chromebook. You won’t need third-party screen recording software on your Chromebook as there is a built-in tool to help you with this. By following the steps above, you will be able to record screen on Chromebook easily.
