

Whether you’re a Mac or Windows user, it’s always a good idea to have more than one hard drive partition. That’s because if you ever mess up macOS, you can save important files in a second partition. You can quickly restore macOS without losing data. Creating a hard drive partition on a Mac is unlikely to take a few minutes.
Macs have a built-in app called Disk Utility, but there are also some third-party partition management apps that make things a lot easier. Also, if you have Time Machine backup turned on, you should keep it safe. You can connect an external hard drive and create a separate partition for your Time Machine backups. Even if you end up with a damaged Mac, you can restore it as new and then use a Time Machine backup to get everything back.
Anyway, if you are new to this partitioning business, follow this guide to partition your hard drive on Mac.
How to Create a Hard Drive Partition in MacOS
Note. If you are creating a partition on your primary hard drive on a Mac, be sure to close all other applications. This is not required, but is recommended for security reasons.
Step 1: Open the Disk Utility app on your Mac. You can use Launchpad from the Dock or Spotlight search to find it.
Step 2. Now click on the hard drive in the left menu and then click on partition at the top.
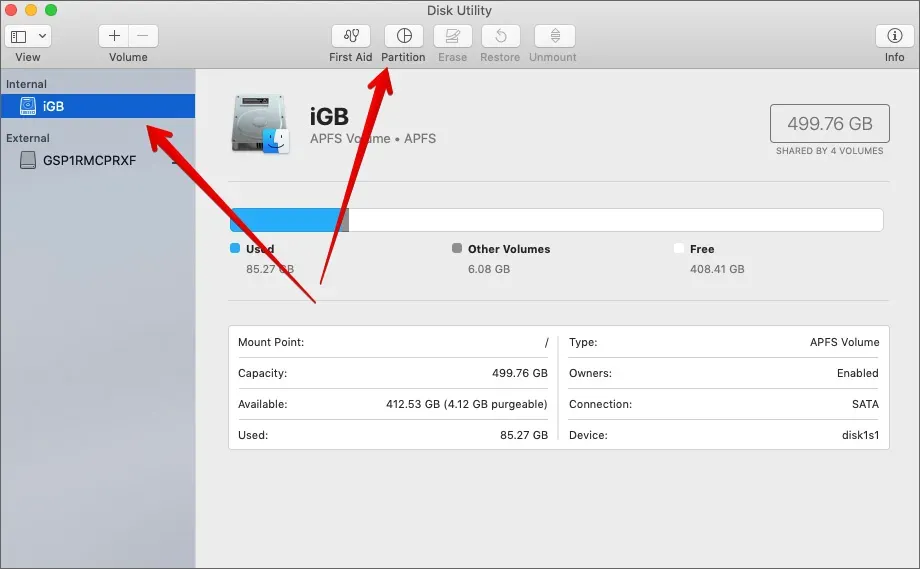
Note that you need to click on the hard drive and not the partitions if you have them.
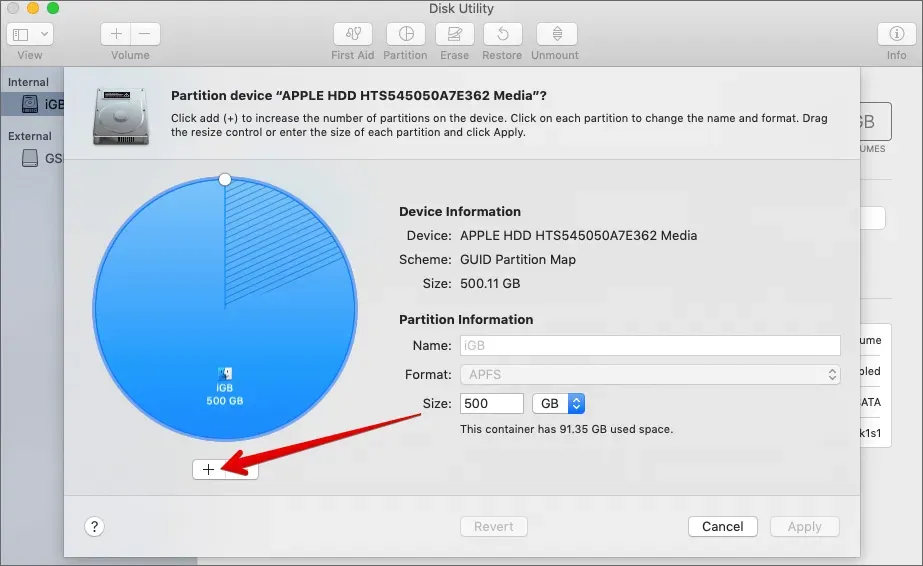
Step 3. Your drive will be displayed as a pie chart on the left. Right below the pie chart there is a “+”icon. Click on it.
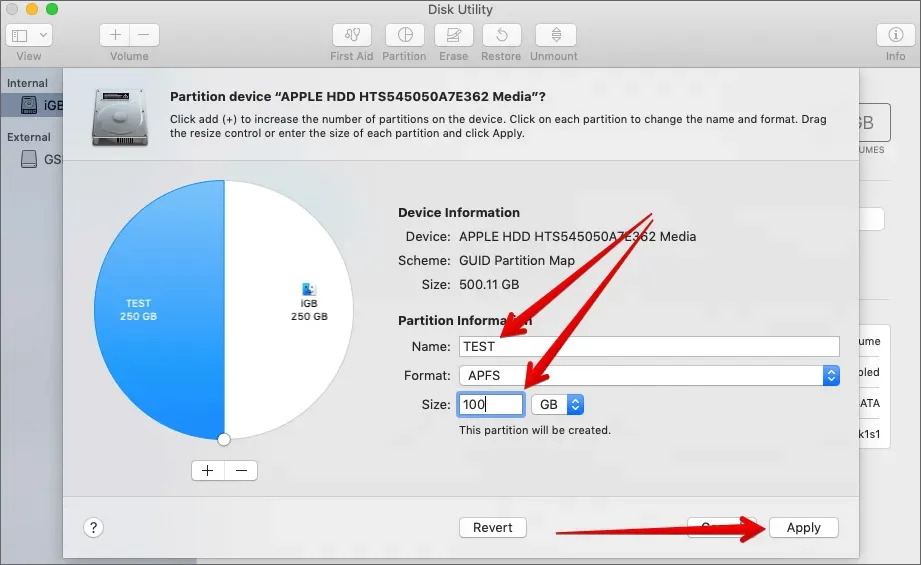
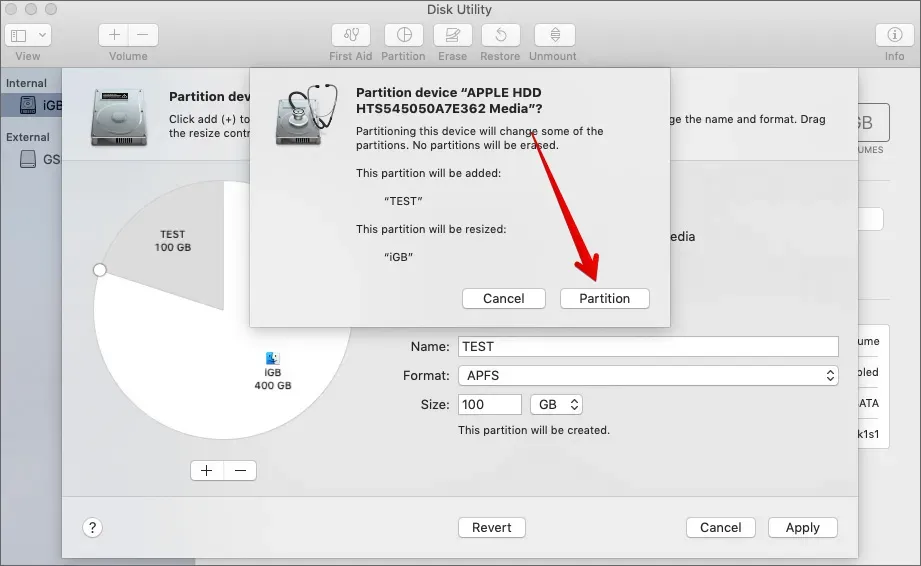
Step number 4. On the next screen, name the partition if you like, and then enter the size of the partition. Make sure you have enough space for macOS and don’t compress it too little. Now click “Apply”in the lower right corner.
Step #5: On the pop-up window, click Section. You will get another popup, click Continue.
That’s all. The partitioning process will start immediately. As said earlier, make sure you close all your apps to make sure there are no data loss or corruption issues.
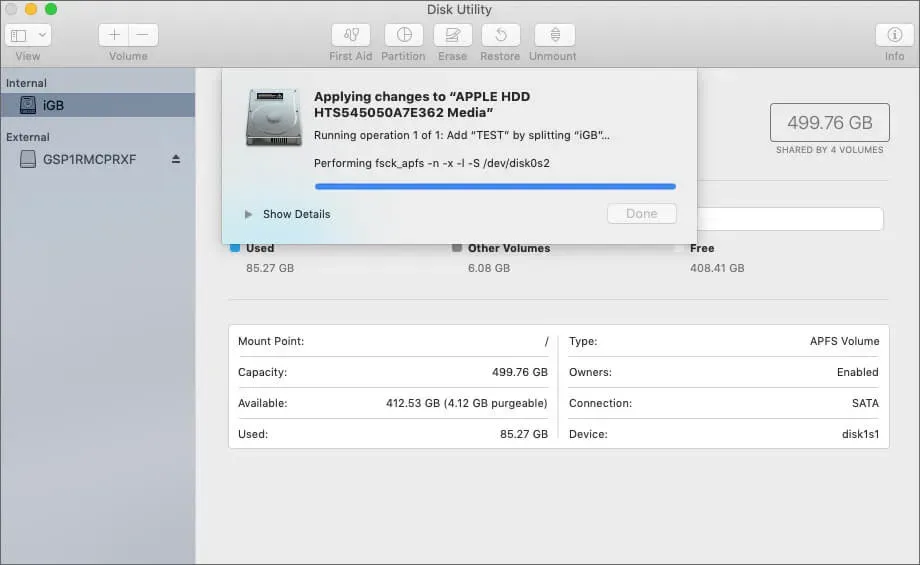
The partitioning process may take some time depending on the size of the partition. Also, your Mac may become unresponsive, don’t panic. Once the process is complete, you can click Finish and go to the Finder app to check the newly created partition.
Summarizing
Sections are a great way to organize your data. But it should be noted here that the boot partition must have at least 100 GB of space to store cache files. Even though Mac doesn’t use that much space, it certainly affects your PC’s performance.
What partition structure have you set up on your Mac? And why? Share your recommendations for other users by leaving a comment below.