
Have you ever tried downloading your favorite songs from Apple Music or putting them into a playlist? That’s quite a lot of time, right? Well, smart playlists are here to the rescue. Follow the instructions and you will learn what it takes to create a smart playlist step by step.
If you’re an Apple Music or iTunes desktop user, you’ve probably come across the option to create a smart playlist. This feature can save you time when creating a specific set of songs in a playlist with a few clicks.
- What is a smart playlist in Apple Music?
- Create Smart Playlists on Mac or PC
- Setting rules for creating smart playlists
- Sync playlists on your iPhone, iPad and Mac
- Create smart playlists on iPhone with the Shortcuts app
What is a smart playlist in Apple Music?
Smart playlists are adaptive playlists that can be customized based on the criteria you specify. You can even set a data limit or number of songs to include, and the Smart Playlist feature does the rest for you. It can be set to update automatically, and you can even change the rule set after it’s created. Playlists created using the Smart Playlist feature will have a gear icon (⚙️) in front of them.
Create Smart Playlists on Mac or PC
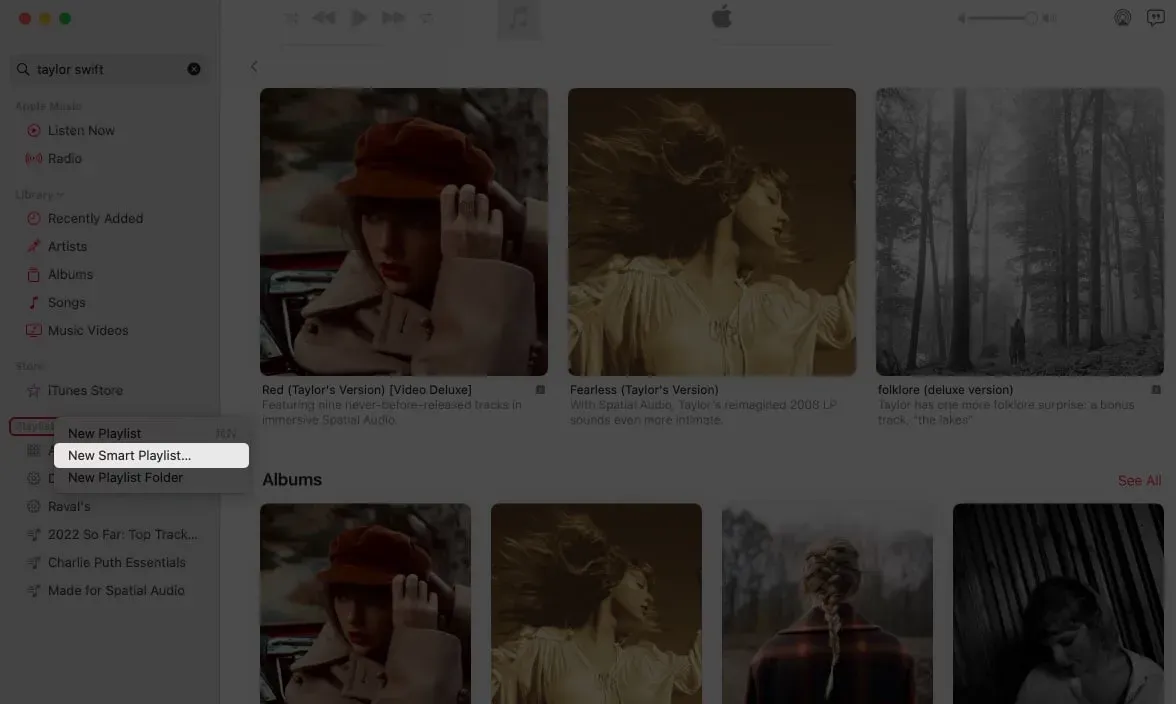
Apple gives us the function to create smart playlists in the iTunes Music app. The process of creating a Smart Playlist is quite simple and almost identical in both iTunes and the Music app. To trigger the Smart Playlist popup on your Mac or Windows, follow any of the 3 methods below.
- In menu bar: Music App/iTunes App → Menu Bar → File → New → Smart Playlist
- Using keyboard shortcuts: On Mac: Option (⌥) + Command (⌘) + N On PC: Ctrl + Alt + N
- On the sidebar: Left sidebar → Playlists/Music playlist → Right click → New smart playlist
Setting rules for creating smart playlists
This feature provides a more efficient and unified way to group songs and create playlists. We will go through the criteria one by one so that you can understand how to create different playlists according to your needs.
The good part is that you can change the rules or criteria for creating a playlist even after you’ve created it. Just navigate to the playlist you created and you will see the Edit Rules option highlighted.
Compliance with the following rule
- The first dropdown gives you a lot of options to choose from. With this, you can choose the album, artist, bitrate, favorite songs, etc.
- The second drop-down list is a conditional operator with options “contains”, “does not contain”, “is”, “is not”, “starts with”, and “ends with”. All this speaks for itself.
- The third is an input field where you can add the artist name, genre, number of performances, etc.
There is also a plus button next to it, from where you can add an additional set of options according to the following rule.
Limited to
You can set a limit limit using the Limit to option. Below the “Limit to”option, there is a numeric input field where you can add a limit in numerical form.
- The first dropdown list allows you to set a limit for minutes, hours, MB, GB, or items using the dropdown menu.
- The second dropdown is the “selected”option where you can select checks (options) such as most/least recently added or played based on ratings or artist or album name.
live update
The real-time update feature updates the playlist on its own based on the selection you make in the settings. Keep in mind that it will not be able to add more items than the specified item limit.
For a detailed guide on setting up a smart playlist and getting the most out of it, see this article at the link.
Sync playlists on your iPhone, iPad and Mac
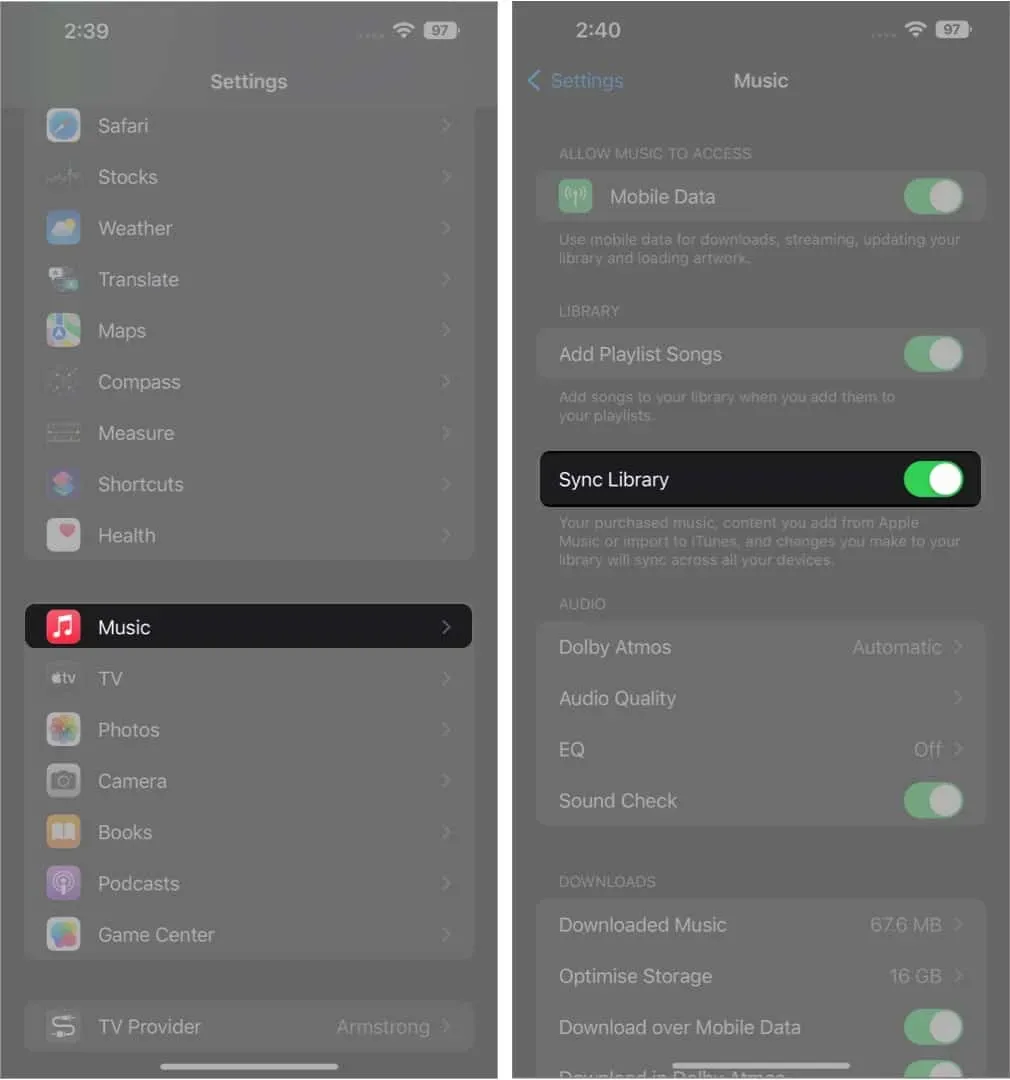
To keep all your playlists and library changes in sync across all your devices, turn on the “Sync Library”toggle in Settings.
On iPhone: Settings ➝ Music ➝ Sync Library. On a Mac: Music app ➝ Menu Bar ➝ Music ➝ System Preferences (Settings) ➝ Sync Library.
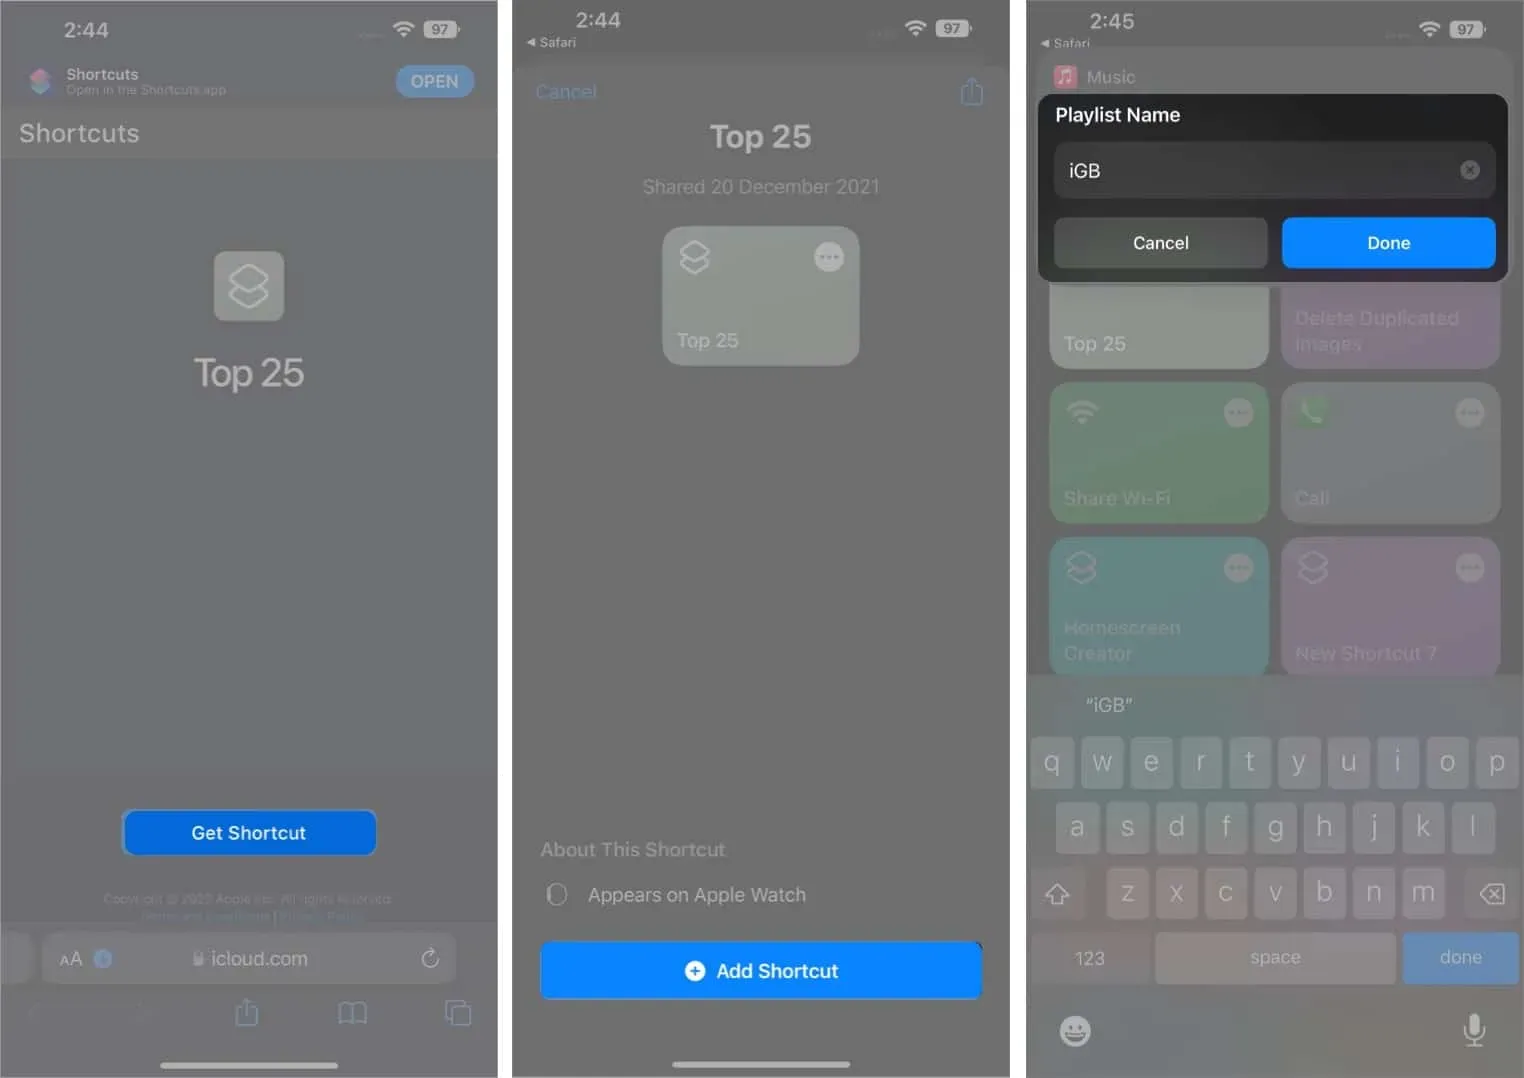
Create smart playlists on iPhone with the Shortcuts app
The music app, unfortunately, does not offer the ability to create a smart playlist on mobile devices. Let me tell you how to create a smart playlist using the Shortcuts app. With the “Top 25″shortcut we mentioned here, you will be able to extract 25 songs. Thanks to Ronald Langeveld for creating this extremely useful shortcut!
- Download this shortcut.
- Click Add Label.
- Go to the Shortcuts app.
- Tap the “Top 25″label.
- When prompted, add a playlist name.
- Click Done.
Check out this article to get the best Siri Shortcuts for Apple Music.
To customize the playlist library in your own way and specify the criteria for curating playlists, click the 3 horizontal dots in the upper right corner of the shortcut and change the “Sort”, “Order”and “Limit”options according to your preferences.
It’s a wrap!
It’s almost all on my part. I hope you got the right idea about Apple Music library download. If you have any suggestions or questions, please post them in the comments section below.