
This step-by-step guide will show you how to clean up and format your flash drive, hard drive, or other external drive using the built-in Disk Utility app on your Mac.
Why format a drive
To change the file system format: If the external drive you are trying to connect is not recognized by your computer, smart TV, tablet, phone, or other similar devices, it is probably because the drive’s existing file system format is not supported. operating system of this device. In this situation, you will have to format the external drive with a supported file format. More on this later.
To fix a damaged drive: The flash drive may be damaged and show errors when connected to the computer. For example, you may see a pop-up warning: “You need to format the drive before you can use it.”In such cases, formatting the drive should solve the current problems.
To Erase Everything: Formatting a drive erases everything, and it’s a quick way to clean up a drive without having to manually delete files.
To make data unrecoverable: While formatting, you can safely erase the drive, which will make its existing data unrecoverable by file recovery applications. More on this at the end of the post.
Which file system format to choose
Ask yourself where you want to use your external hard drive, SSD, SD card, flash drive, etc.
- If you only want to use it on Mac computers, you can choose Mac OS Extended.
- If you want to use it on Windows, macOS, Linux, TVs, phones, and other devices, choose ExFAT (recommended) or MS-DOS (FAT).
Learn more about the different file system formats.
Make a backup
Warning. When you format a drive, all of its contents will be deleted and it will henceforth be treated as a brand new drive set up for initial use. If the existing data on the drive is valuable, be sure to copy it to your Mac or somewhere else before formatting.
How to Erase and Format an External Drive on Mac
1) Connect an external drive to your Mac’s USB port.
2) Open the built-in Disk Utility application on your Mac.
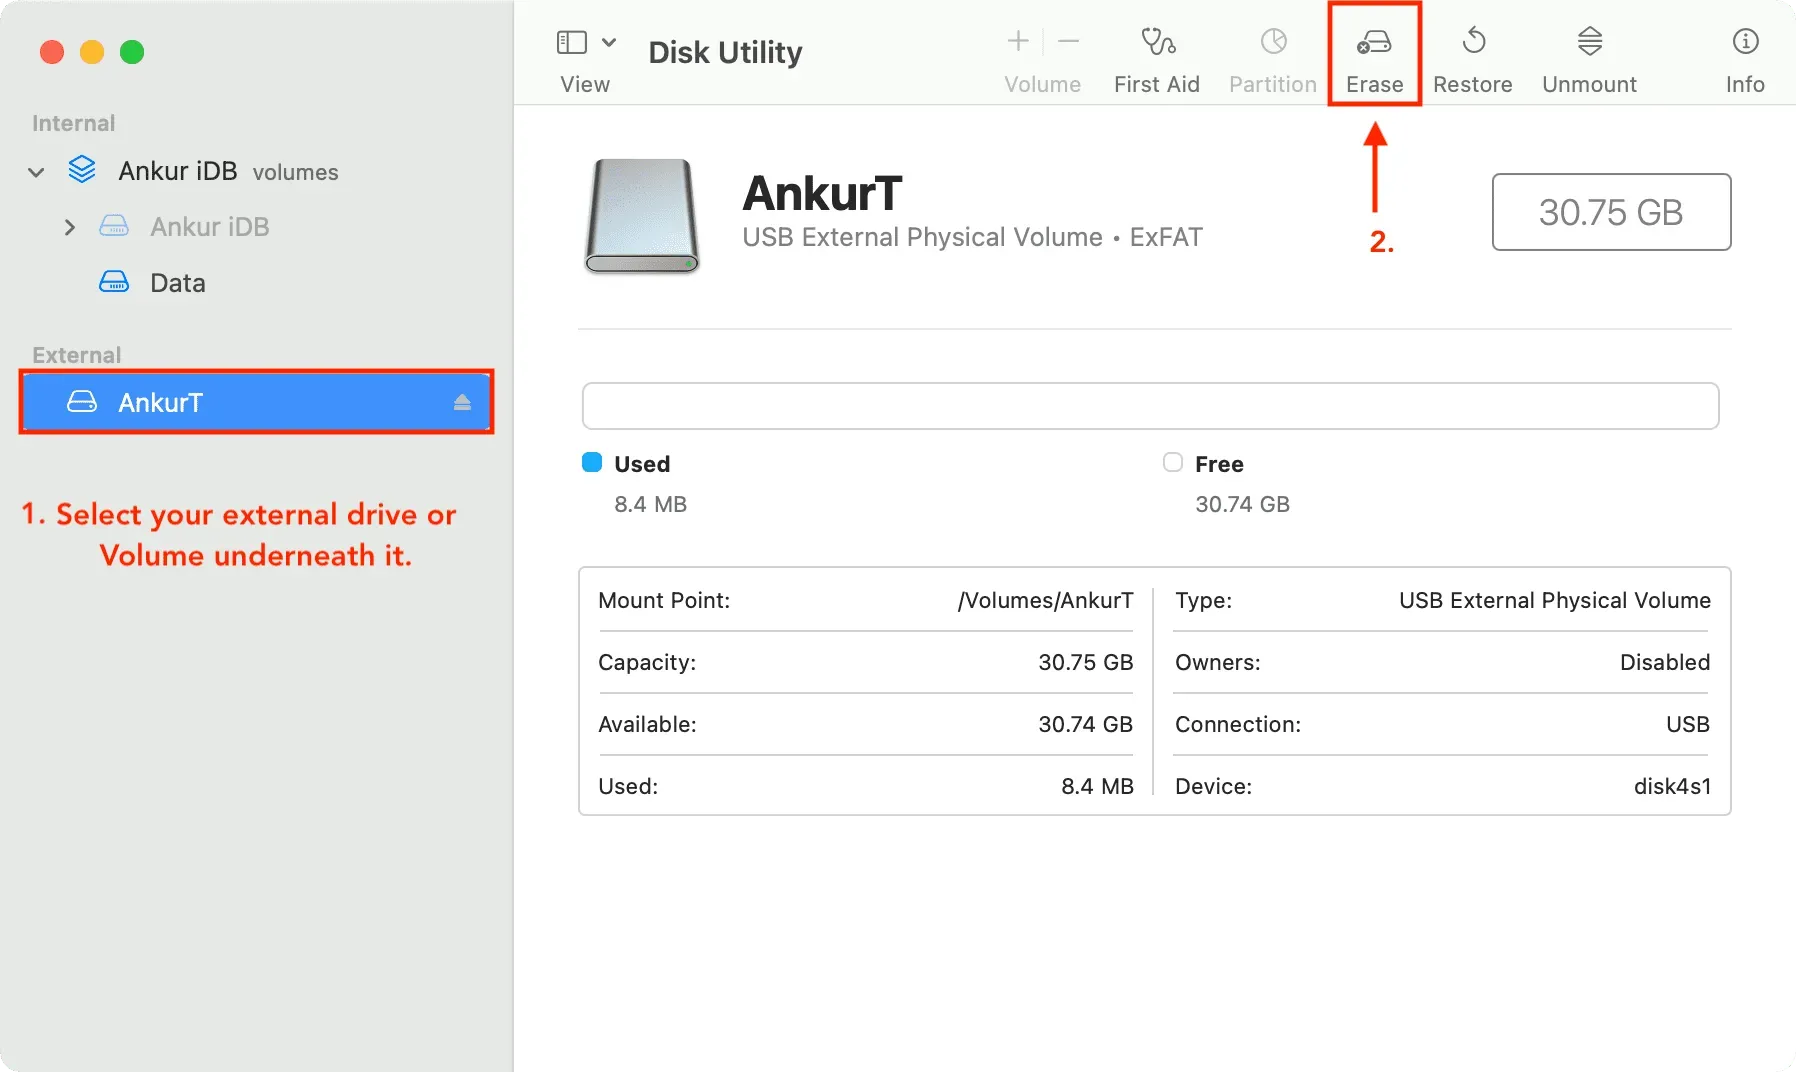
3) In the sidebar, select the drive or volume you want to erase.
4) Click Erase.
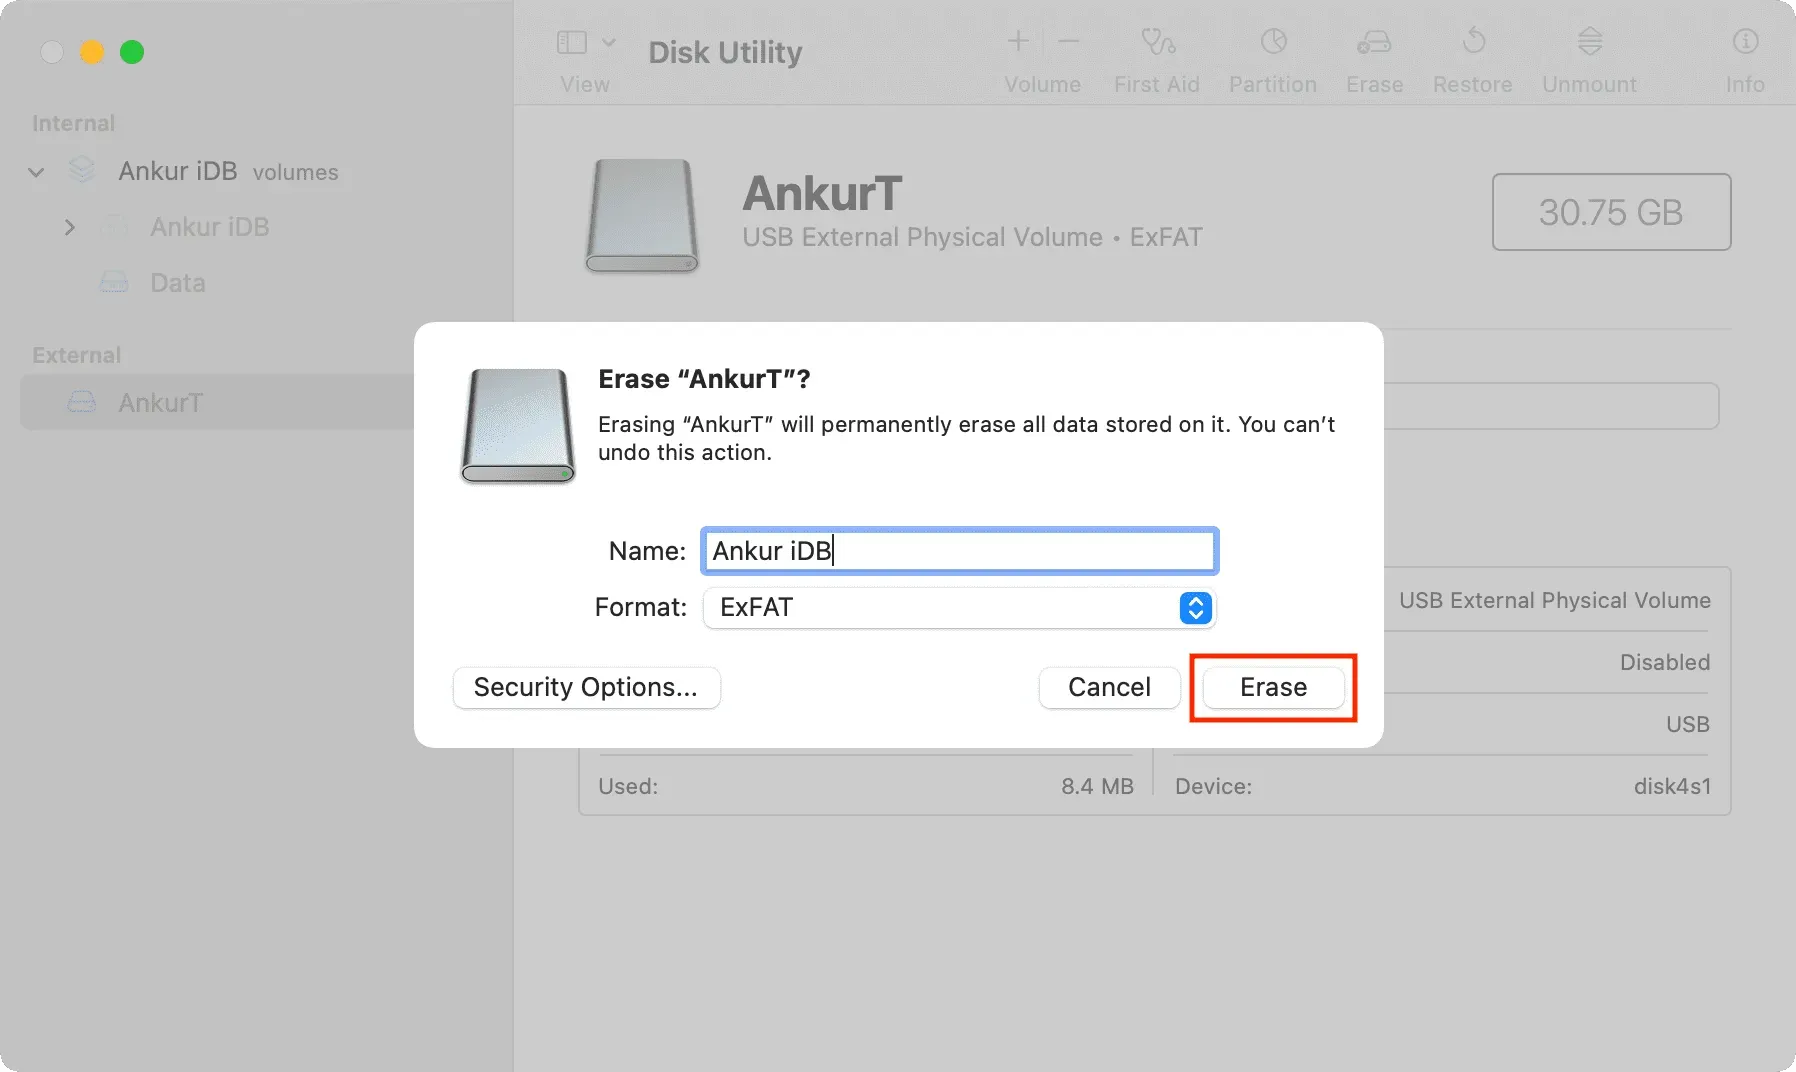
5) Enter the name you want to use as the new drive name after formatting it. Note. If you select the MS-DOS and ExFAT format (next step), the drive name must be no more than eleven characters due to legacy Microsoft file system restrictions.
6) Click the Format pop-up menu, then select the desired disc format. We will choose ExFAT as it is universally compatible. Note. Depending on the type of disc you are using, some format options may not appear here.
7) Do you see an option to choose a scheme for your drive? If so, you most likely don’t need to change it, or you can choose GUID Partition Map.
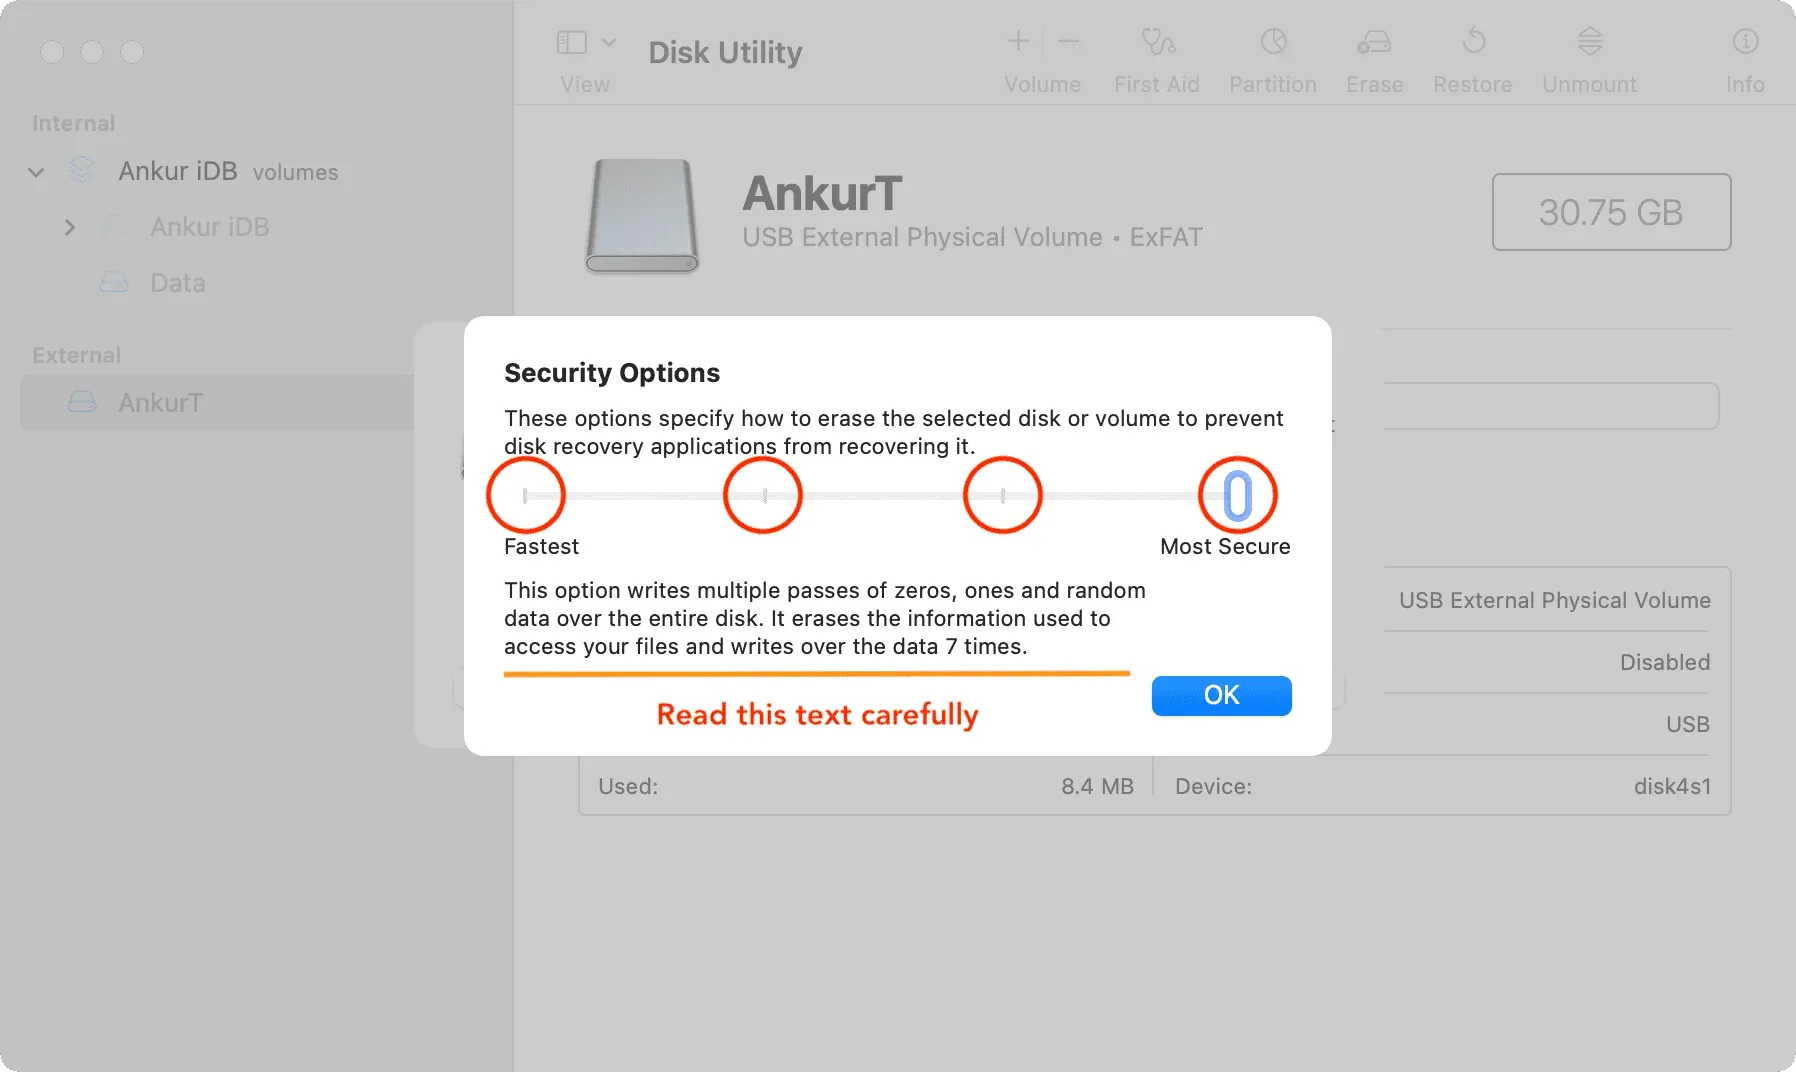
8) If you have sensitive files on a drive and are currently selling or giving away that drive, you can use the Security Options button to make things unrecoverable. From here select “Most secure”(far right option) or something in between.
9) Finally, click the “Erase”button to have Disk Utility start formatting your drive. You will notice that the disk icon has disappeared from the desktop. But don’t worry. It will reappear on the system as soon as Disk Utility finishes formatting it.
10) When the drive has been erased or formatted, click Finish and close Disk Utility.
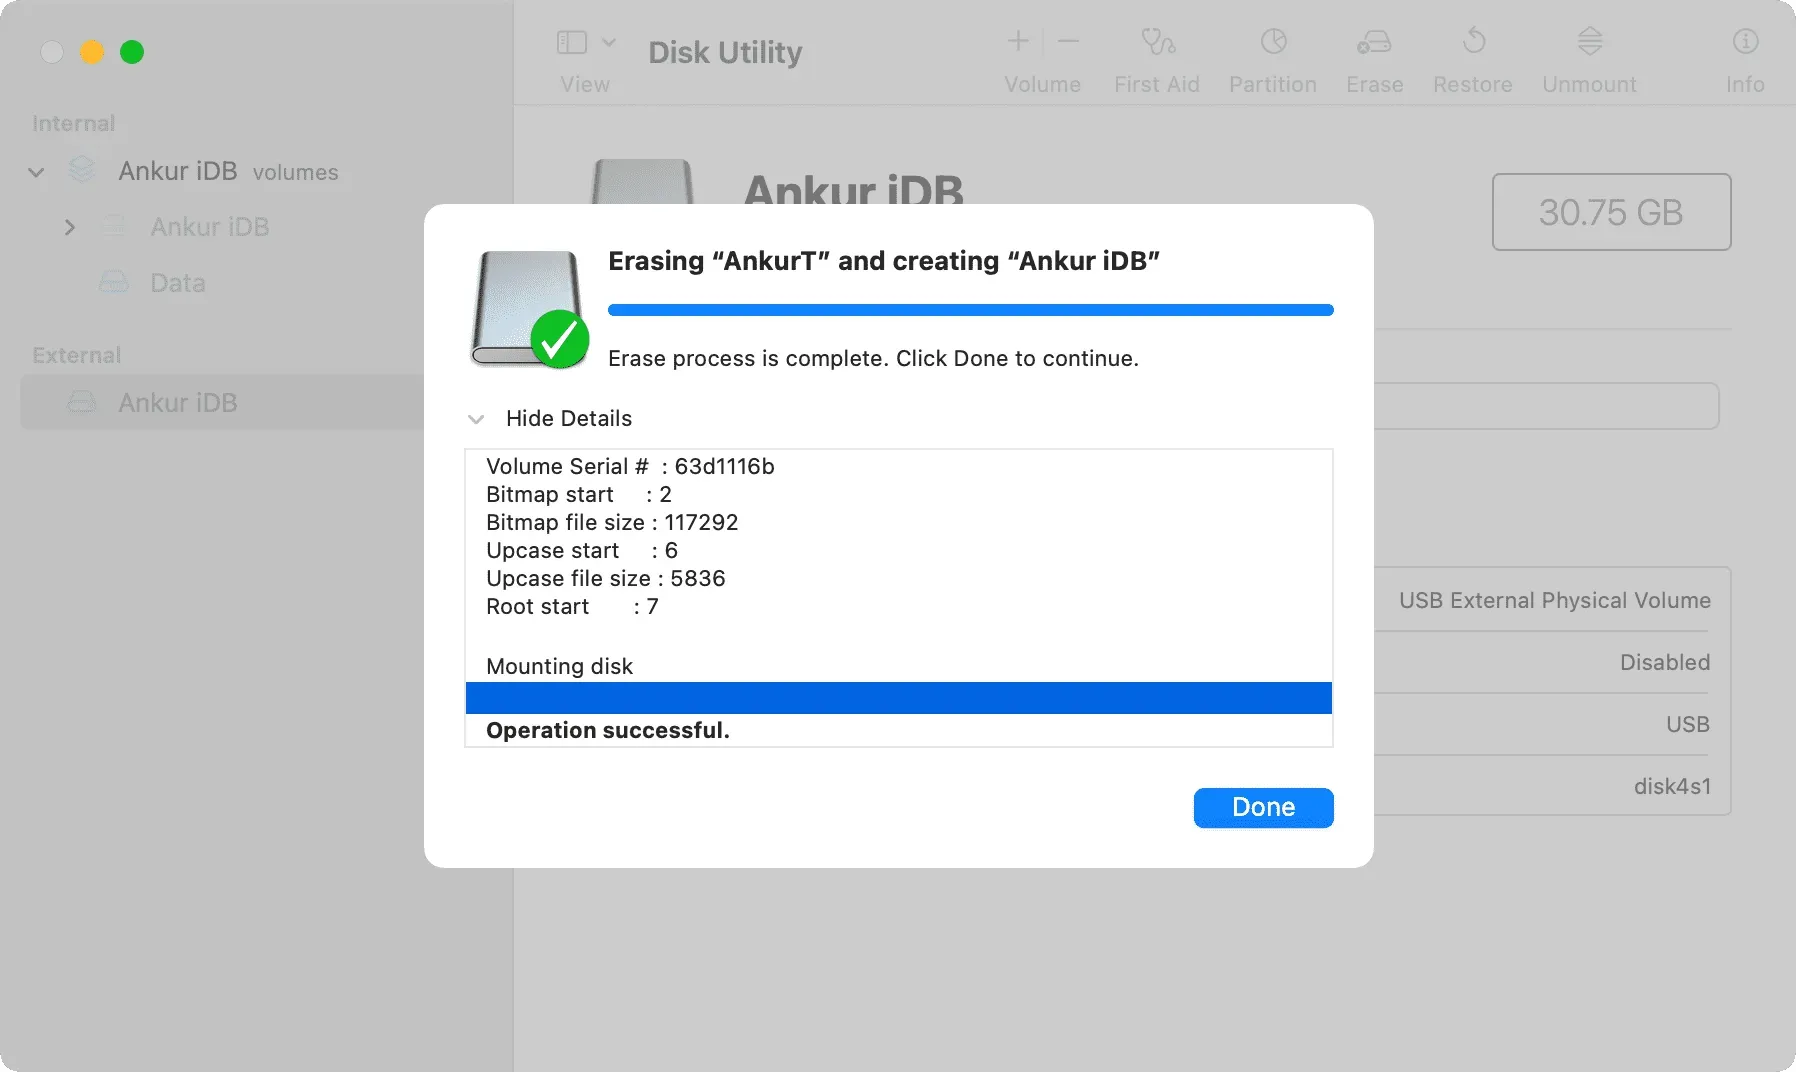
Your drive is now erased, reformatted and ready to use!
Don’t forget to remove your external storage devices when you’re done using them. Failure to disable the external storage device before unplugging it may result in data loss.
Erase disk and volume
Disk Utility allows you to erase disks or volumes. Erasing a drive deletes all of its volumes and files. Erasing a volume deletes all files on that volume, but does not affect other volumes.
If you want to erase the entire drive, along with any partitions on it, be sure to select your storage device in the Disk Utility sidebar, not one of its partitions.
Learn More: How to Add, Mount, Unmount, Erase and Delete Volumes with Disk Utility on Mac
Schema supported by Disk Utility on Mac
When you format a drive, you may see an option to select a scheme. You can leave the schema field untouched and leave it as what Disk Utility shows. Or you can use one of these three schemes:
- GUID Partition Map: Choose this option if you have a Mac with an Intel processor or the latest machine with an Apple processor (M1, M2 and its successors). Newer Windows computers also use this scheme.
- Apple Partition Map: Choose this layout if you want the drive to be compatible with ancient PowerPC-based Macs.
- Master Boot Record (also known as “fdisk”): Select this to make it compatible with all Windows computers.
Erase Security Options in Disk Utility
The “Fastest”option does not securely erase files on the drive, which means that the drive recovery application can recover them.
The next option writes a pass of random data and then a single pass of zeros across the entire drive, erasing all information used to access your files.
The third option overwrites the data three times, which meets the US Department of Energy standard for securely erasing magnetic media.
And the “Most Secure”option overwrites data up to seven times to meet the US Department of Defense standard 5220-22-M for securely erasing magnetic media.
Note. The Security Options button is not available for all types of storage devices. If you don’t see it, your Mac won’t be able to securely erase the drive. It will perform a simple wipe and the data can be restored using recovery apps.
Do you want to erase the boot volume?
Keep in mind that with the steps above, you cannot erase the primary internal drive that contains the boot volume. To do this, start your Mac from a different drive or boot it into recovery mode. This special troubleshooting mode allows you to not only erase your startup drive, but also access terminal commands, reinstall macOS, and perform other maintenance tasks.