
Your Apple ID or iCloud ID (the same) contains valuable data such as your contacts, messages, photos, calendar events, files, third-party app data, payment methods, Apple ID balance, device backups, shipping and billing addresses, contact information., and more.
Therefore, it is essential to keep your Apple account secure, and in this guide, we will share 13 essential tips for achieving a high level of security.
1. Turn on two-factor authentication
Suppose someone has your Apple ID email address and password. Without two-factor authentication (2FA) or the older two-step verification, they can log into any iPhone, iPad, Mac, or iCloud website and get your personal details. But if you have two-factor authentication enabled for your Apple ID, the attacker will need a six-digit code sent to your trusted devices to complete the login (which you obviously won’t share).
If you’re using an iPhone, iPad, or Mac that’s been updated within the last five years, you’ve likely already set up two-factor authentication with your Apple ID. But if, on the rare occasion, you have an older device, be sure to turn on two-factor authentication.
To learn more about this topic, check out our guide to Adding and Removing Trusted Devices for Apple ID Two-Factor Authentication.
Even if you have two-factor authentication set up, never share your Apple ID password with anyone, be it friends or people posing as Apple support.
You should be aware that Apple never asks for your Apple ID password. However, when you contact Apple Support via chat, call, or email, the representative may ask you to verify your Apple ID via a notification sent to your Apple device.
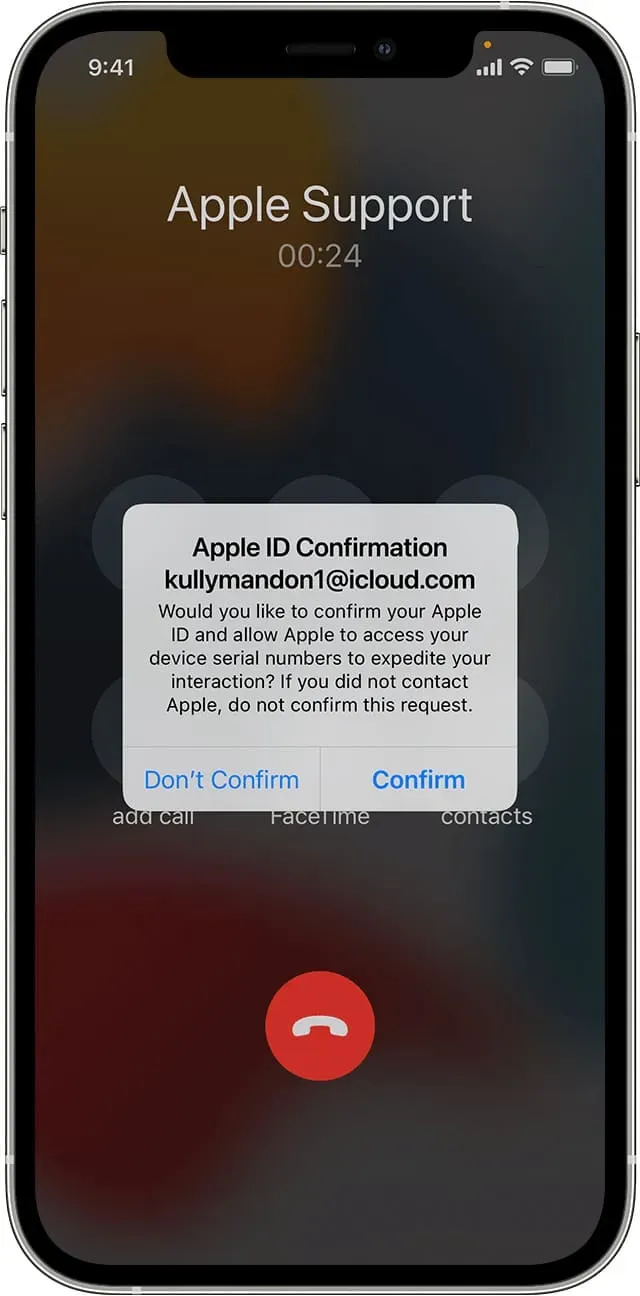
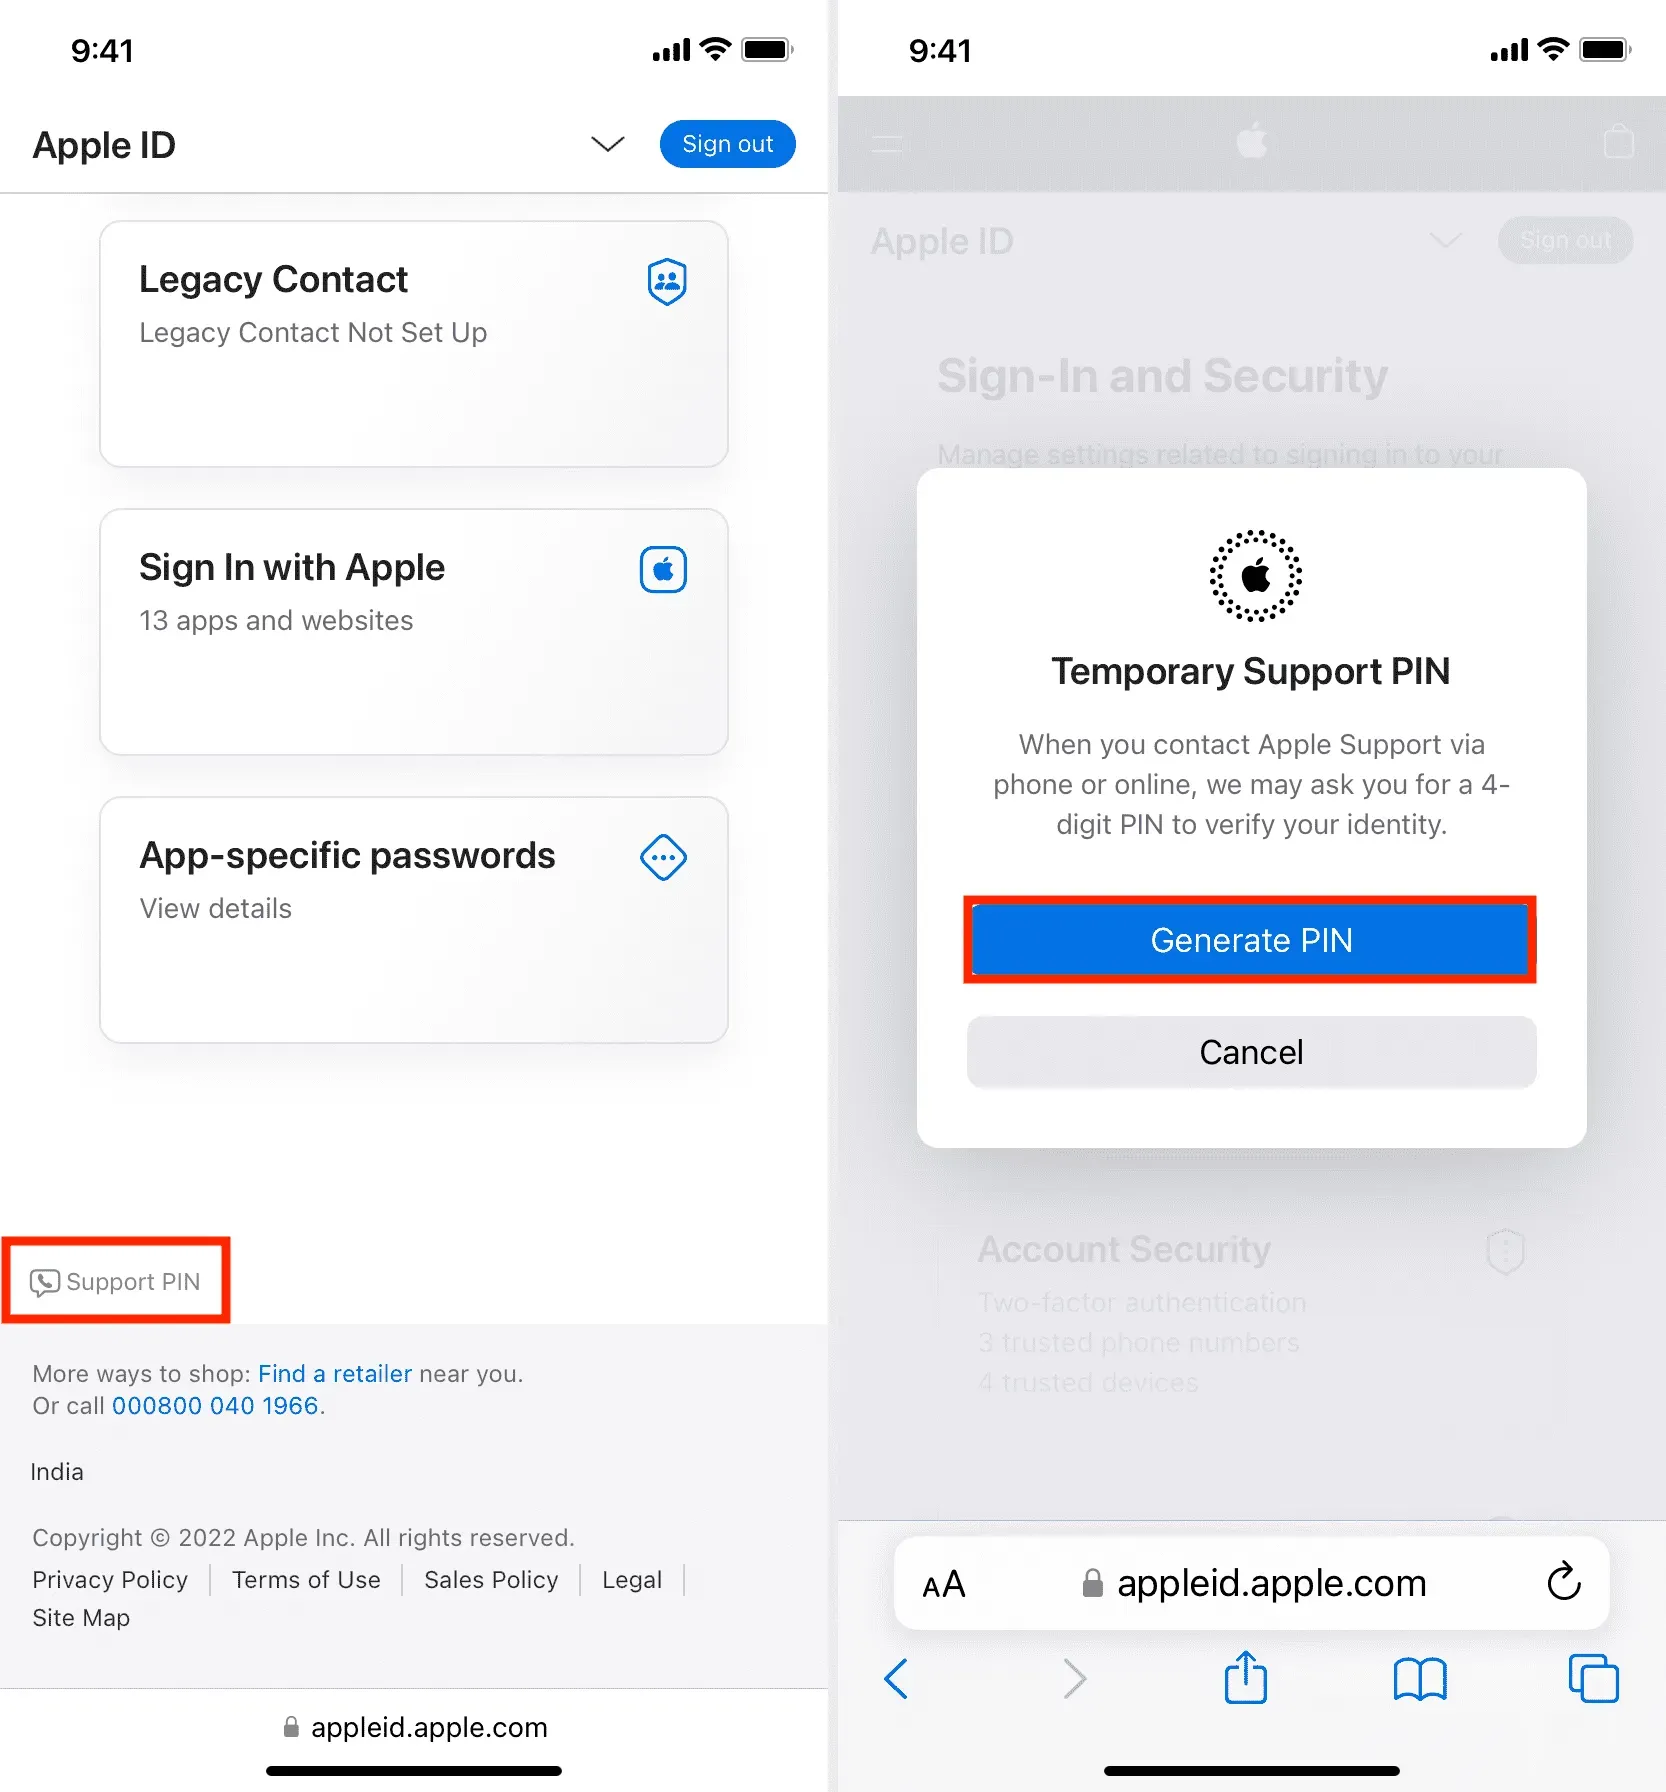
In addition, you can generate a four-digit support PIN and share it with a representative to expedite the support process. Here’s how:
- Go to appleid.apple.com, click Sign In, and complete the process using your Apple ID. Advice. If you’re using Safari, you can quickly sign in with Face ID, Touch ID, or your device passcode.
- Scroll down and tap Support PIN > Create PIN. After a few seconds, you will see a code that is valid for a one-time use for the next 30 minutes. You can share it with Apple Support.
With the exception of the Support PIN we discussed above (which should only be shared with Apple Support), do not reveal any other verification codes you receive on your iPhone, iPad, and Mac. Similarly, don’t share the one-time password (OTP) you get from the phone number and email address added to your Apple ID.
4. Beware of scams!
Did you know that 59.4 million Americans lost $29.8 billion in a year due to phone scams? Most of these scammers are from India, Nigeria, Pakistan, Indonesia and the Philippines.
When you get a call asking you to make a small refundable payment to process a cancellation, purchase gift cards, or transfer a verification code you received on your iPhone, be warned, as this is definitely a scam. Hang up!
Apple clearly says, “If this sounds like a scam, assume it is.”
Several dedicated YouTube channels, such as Scammer Payback, Trilogy Media, Jim Browning, and Pleasant Green, only post videos related to such phone and email scams. Share these videos with the elderly in your family as these scammers are primarily targeting them. In many cases, the person who has been deceived refrains from sharing this ordeal with family members out of fear or shame! So, educate your extended family members and let them know as this is the first step in avoiding such a scam.
5. Learn to Distinguish iOS from Apple ID Password Phishing Popups
iOS has a problem – it can randomly ask for your Apple ID password.
Some websites and apps may try to trick you by showing you a warning pop-up that looks just like the iOS Apple ID password box.
When you get such a popup, swipe up or press the home button to go to the home screen. If the popup disappears, it is definitely a scam to get your Apple ID password and hack into your account. But if you still see the alert, that means it’s a real iOS alert from Apple, in which case you can enter your Apple ID password to authenticate. Alternatively, you can go even further and open the Settings app. If a real problem with your Apple ID requires you to enter your Apple ID password, you’ll see a notification banner at the top of the Settings app. Tap it, and then enter your Apple ID password.
📝 One is Apple asking for your password and the other is a phishing popup that steals your password https://t.co/PdOJcthqL7 pic.twitter.com/6N3lawTVGo
— Felix Krause (@KrauseFx) October 10, 2017
6. Report to Apple
Be alert if you receive a message, email, phone call, or other message impersonating Apple that asks for personal information or prompts you to click a link to update your information. If you think this is suspicious, take a screenshot and email it to Apple at reportphishing@apple.com.
Also, visit this helpful Apple Support page to learn how to recognize and avoid phishing emails, fake support calls, and other types of scams.
7. Set a passcode on all your Apple devices.
iPhone always stays with you, and if you leave it somewhere, its password will protect your data. Set a strong password to keep your Apple ID, device data, and data stored in the cloud safe.
- iPhone and iPad: Go to Settings > Face ID & Passcode or Touch ID & Passcode.
- Mac: Apple icon () > System Preferences > Touch ID & Passcode.
Some people buy a paid app and then sign in with their Apple ID on their friend’s iPhone, so that paid app might also be free on their device.
We strongly advise you to avoid such actions as they may compromise your security.
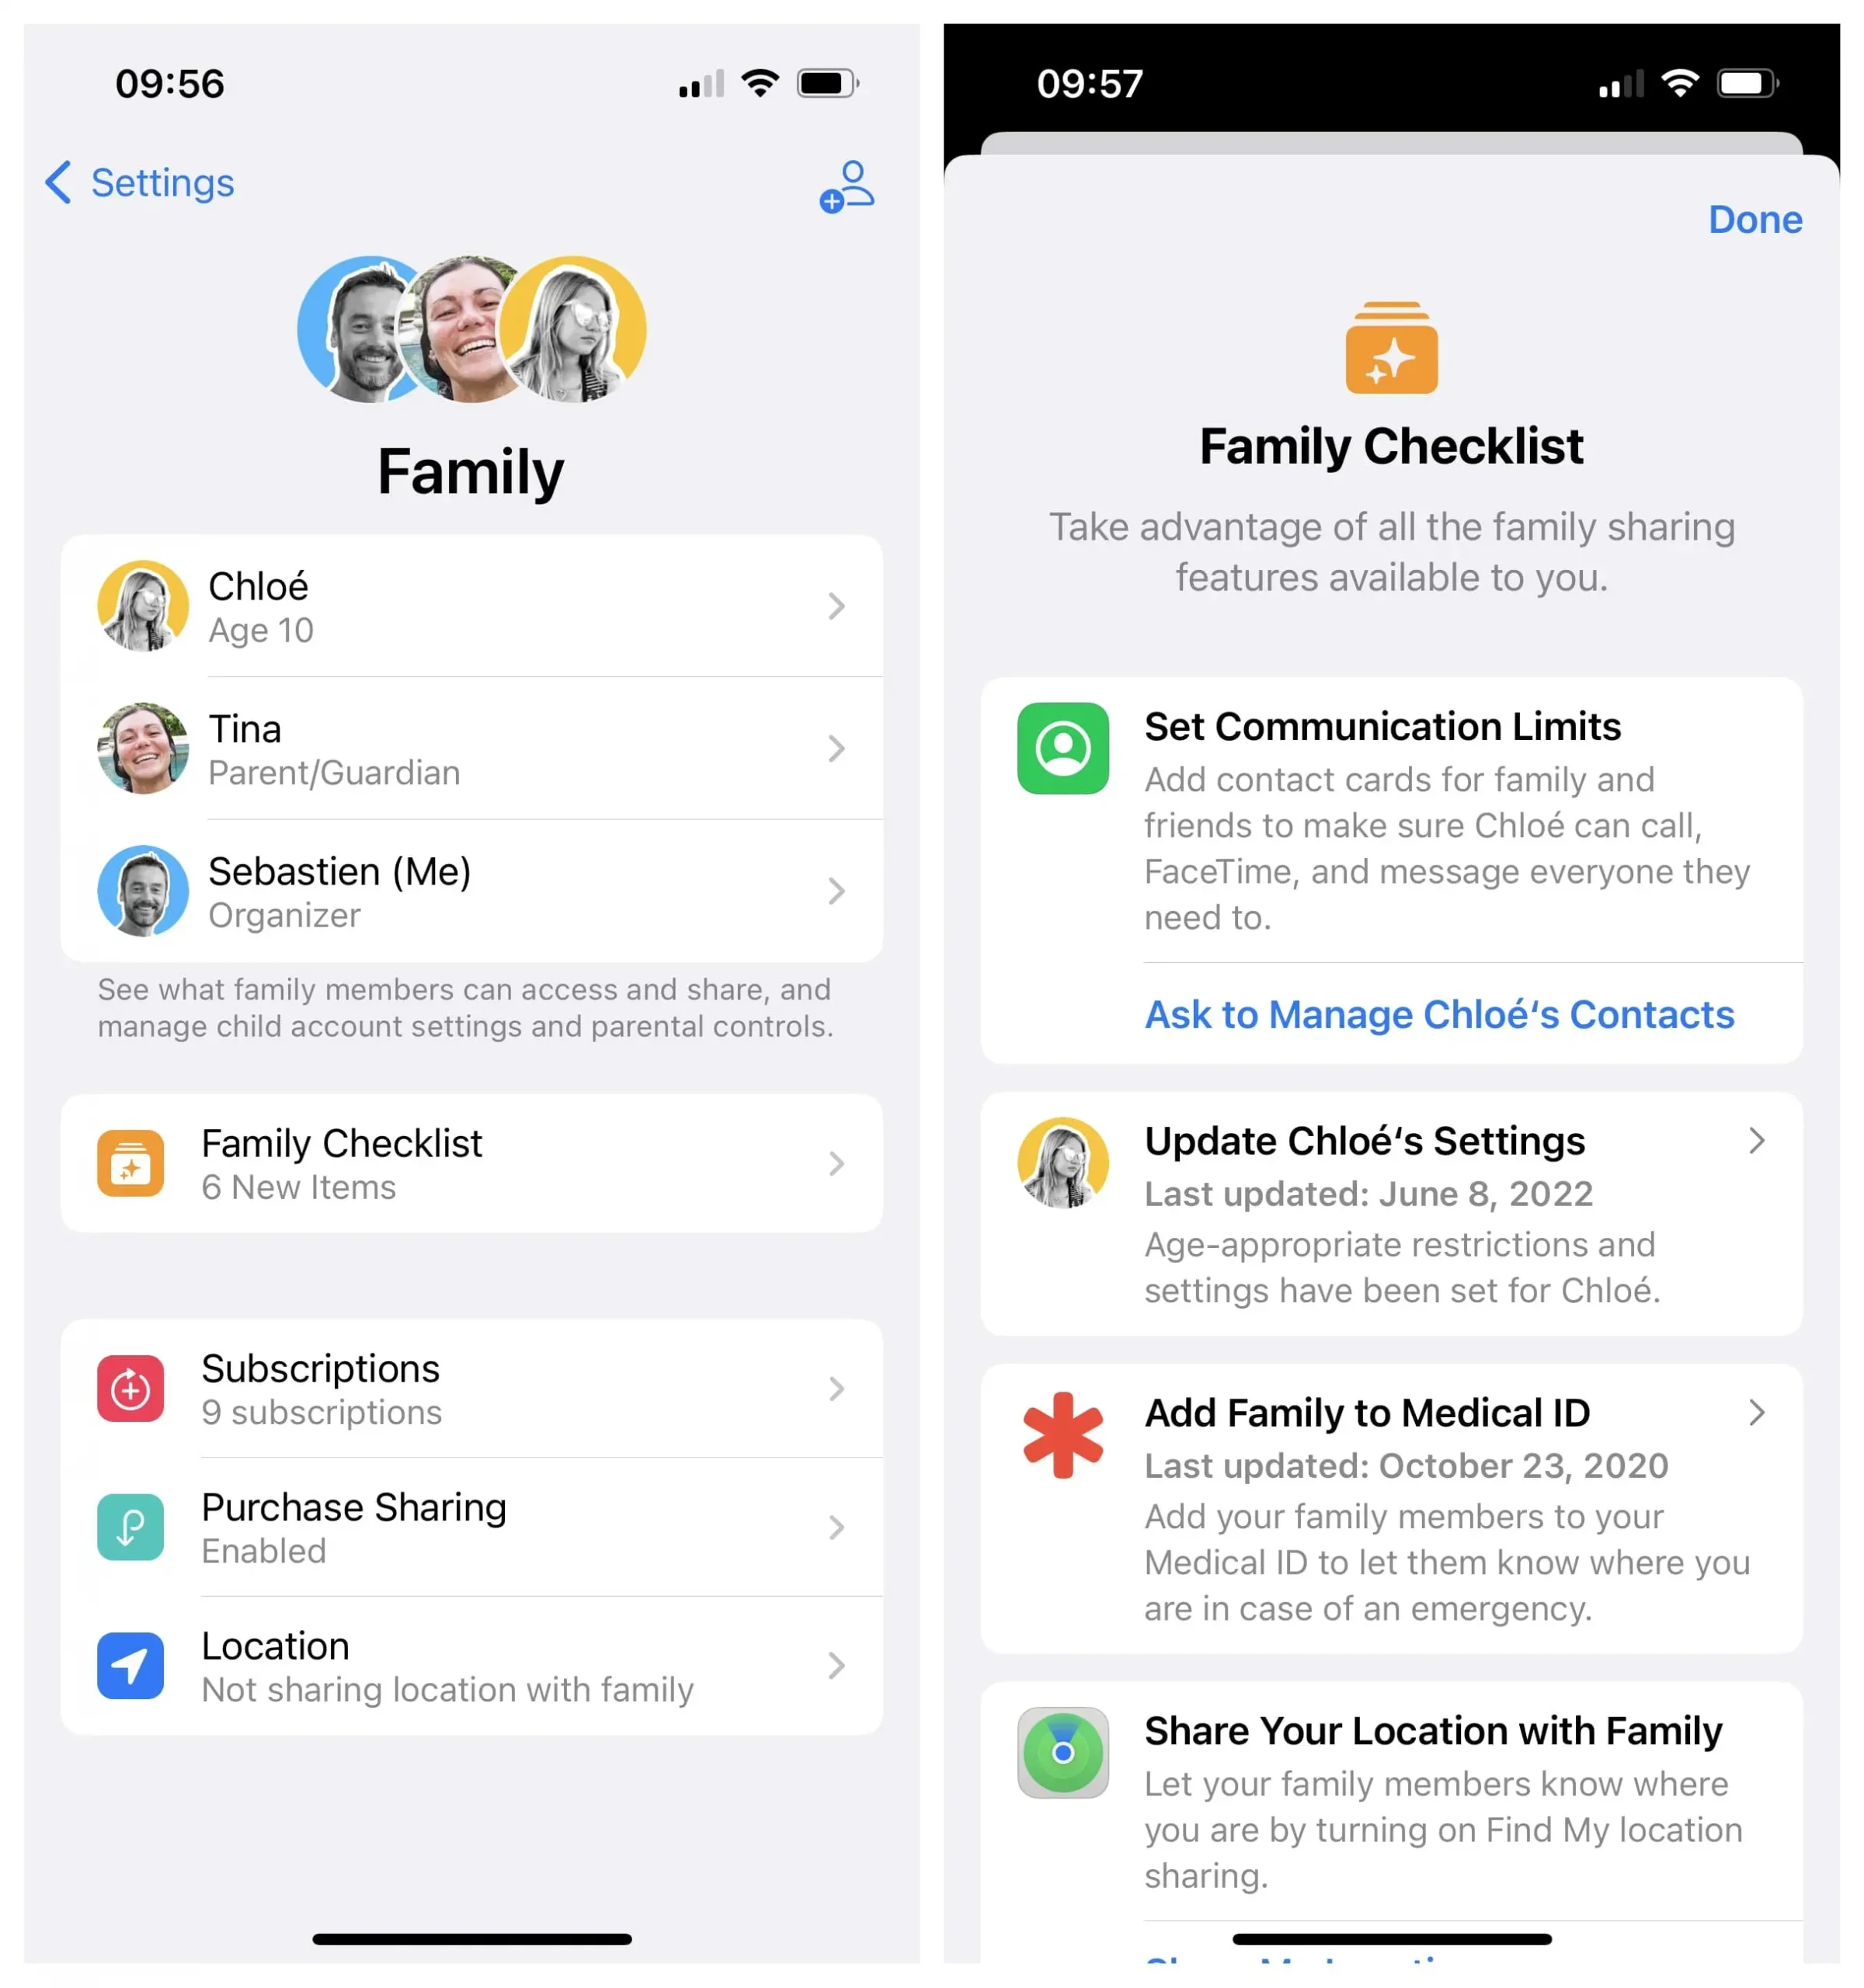
If you want to share a purchased app or media (songs, movies, TV shows, books) with others, use Family Sharing. Again, this should be used with immediate family members such as your spouse, children, parents, siblings.
9. Update Your Apple Devices Frequently
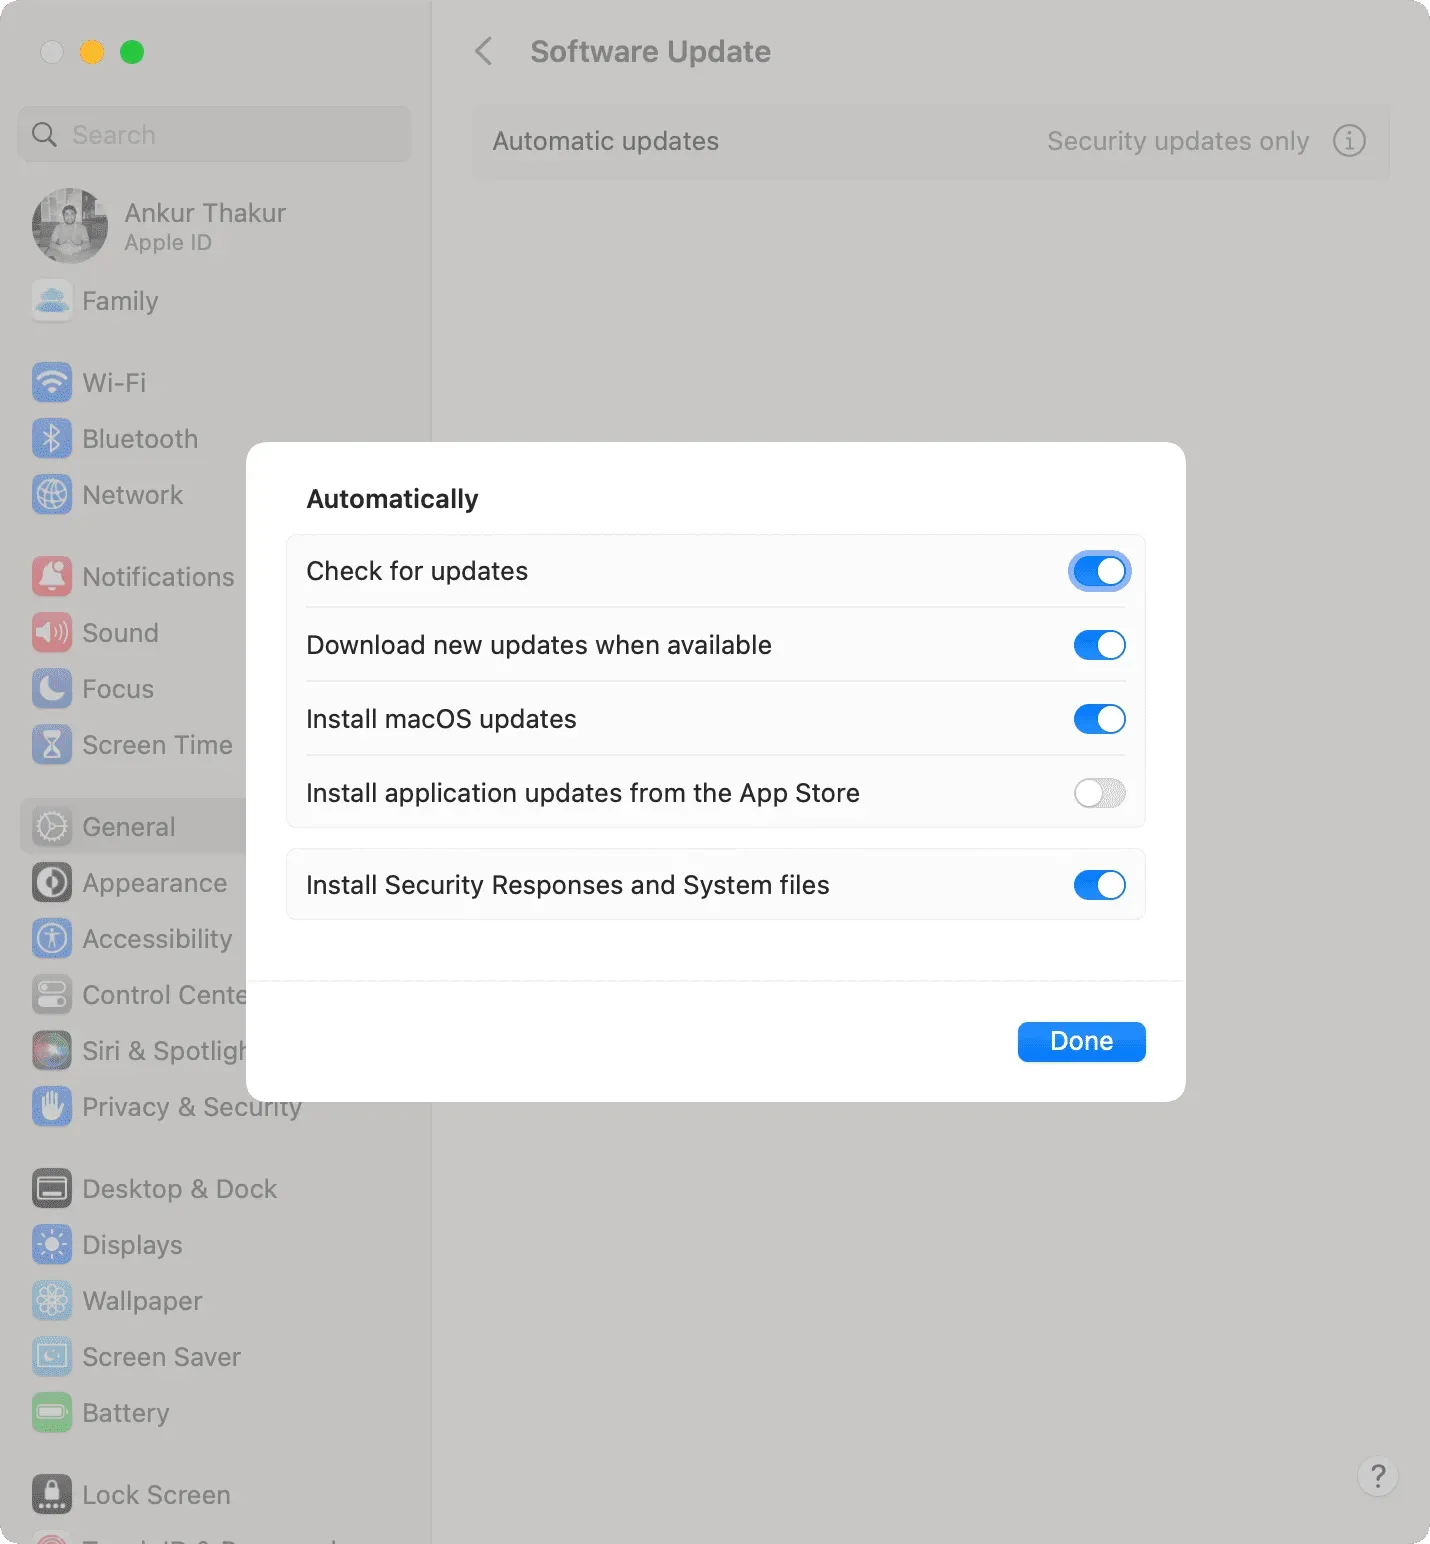
Apple periodically releases updates for all of its major operating systems such as iOS, iPadOS, macOS, watchOS, and tvOS. Make sure your devices are running the latest version of the operating system. If you have multiple devices, you can automate this task by turning on automatic updates. Here’s how:
- iPhone and iPad: Settings > General > Software Update > Automatic Updates. Here, enable “Download iOS updates”, “Install iOS updates”, and “Security responses and system files”.
- Apple Watch: Watch app > My watch > General > Software update > Automatic updates.
- Mac: Apple icon () > System Preferences > General > Software Update > Info (ⓘ) button next to Automatic Update. From here, enable Download new updates when available, Install macOS updates, and Install security responses and system files.
10. Update your Apple ID password
If you’ve been using the same Apple ID password for a long time, consider changing it:
- iPhone and iPad: Settings > tile with your name on top > Password & Security > Change Password.
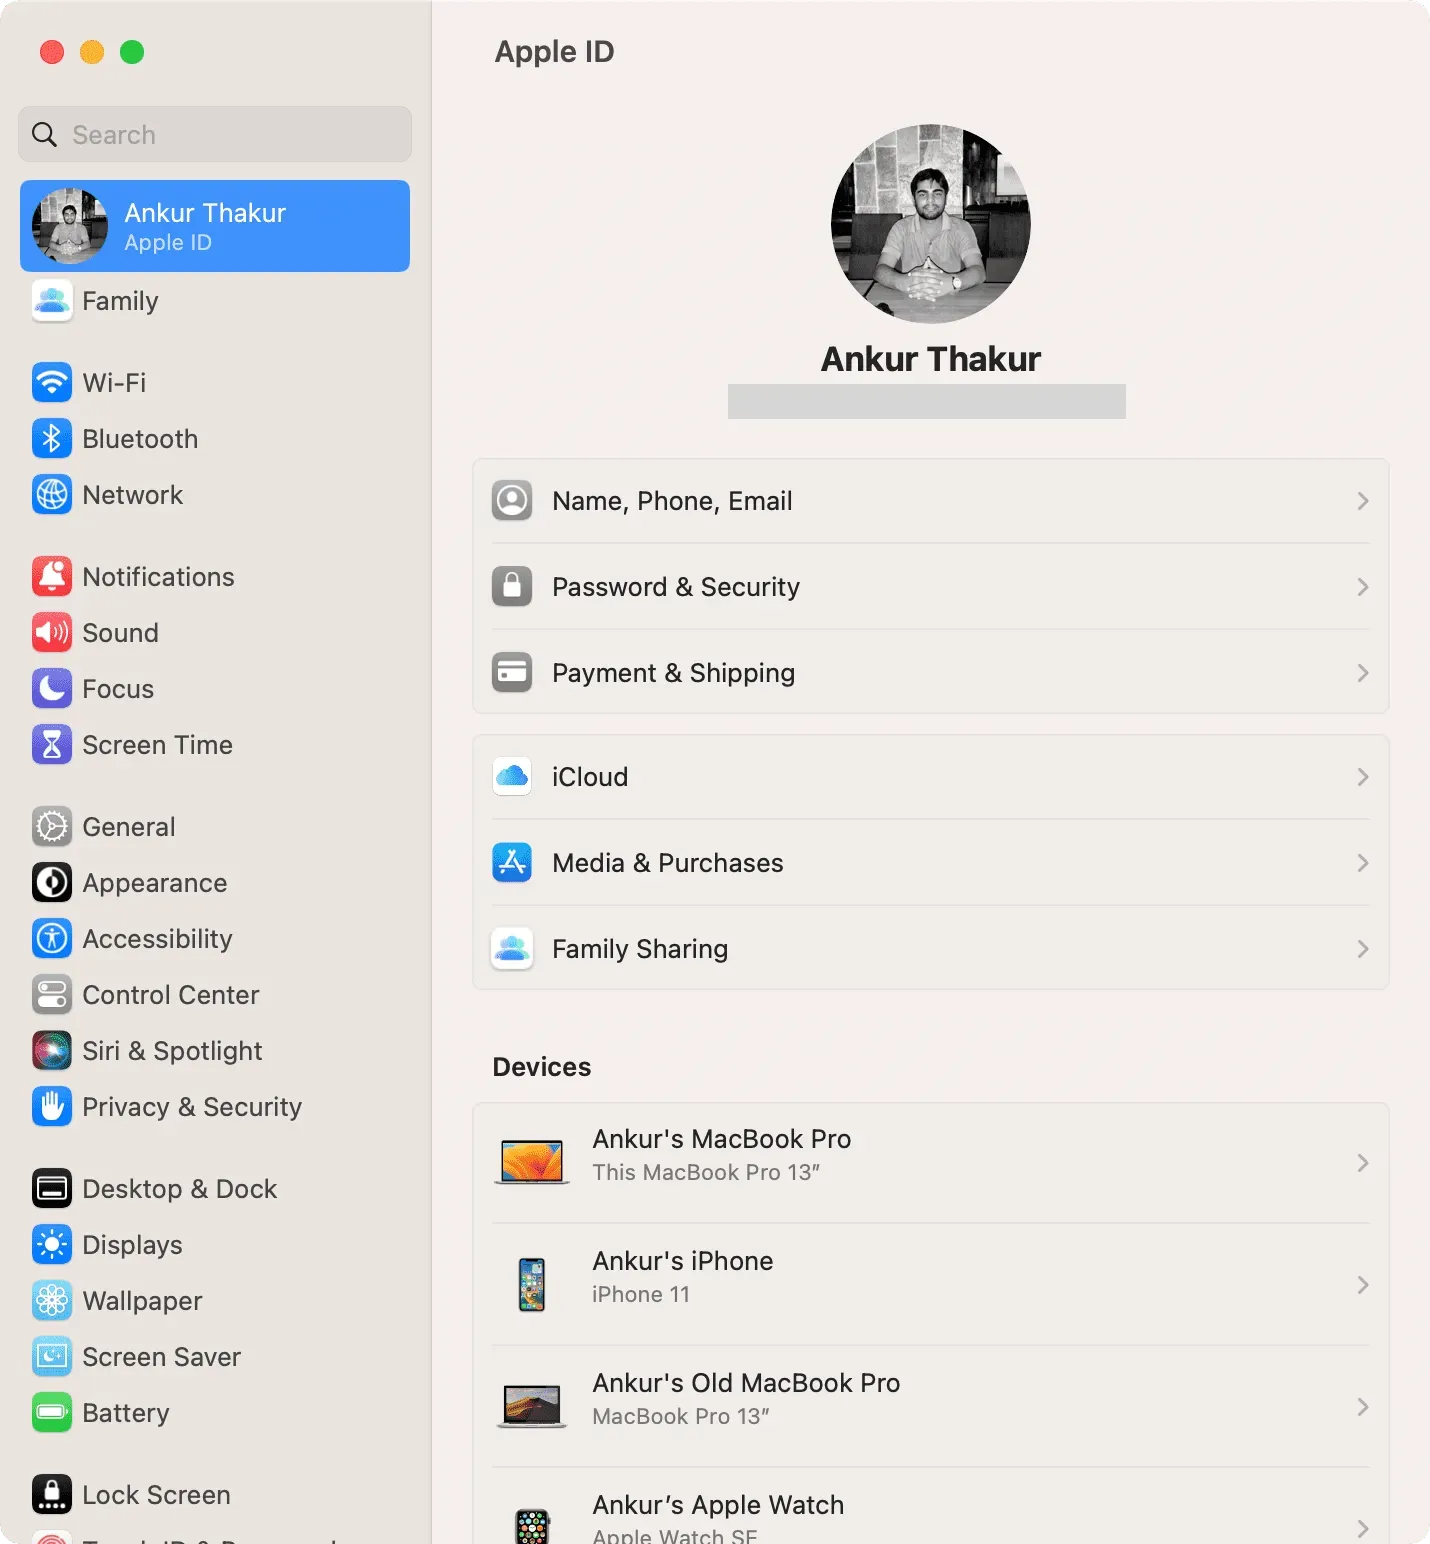
- Mac: Apple logo () > System Preferences > your Apple ID > Password & Security > Change Password.
11. Update your Apple ID details
Your Apple ID contains important information such as your phone number, email address, shipping address, and billing address. If you change them in real life, be sure to update the new one on your Apple ID. You can do this by doing the following:
- iPhone and iPad: Settings app > tile with your name on top > Name, Phone numbers, Email, and Payment & Shipping.
- Mac: Apple logo () > System Preferences > your name > Name, Phone Numbers, Email, and Payment & Shipping.
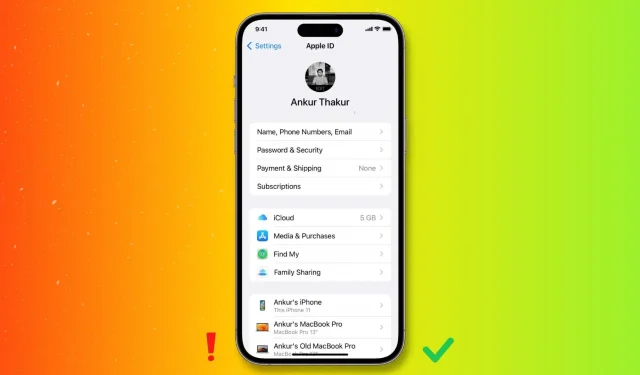
12. See what apps are using your Apple ID and delete the ones you don’t need.
People love the “Sign in with Apple”feature that hides their email address and sends a random email address to apps. But over time, you may end up with apps and services that you no longer use or need. If so, consider removing your Apple ID from dormant apps.
13. Sell or give away your old device after taking proper care
When you sell, gift, or give away your old iPhone or iPad to someone, sign out of your Apple ID, which ensures your contacts, photos, messages, and more are not seen or changed by the next owner of your old device.
Must see: 15 things you should (and shouldn’t do) before selling, giving away, or trading in your iPhone or iPad
Keeping Your Personal Information Safe
The tips above will help secure your Apple ID and keep your data safe from intruders.
In addition, you should also take some precautions to protect your email account, apps, and other online accounts. One of the easiest ways to do this is to enable two-factor authentication for them.
Finally, it would be better to periodically check what permissions you have given to apps on your iPhone and what you are sharing with others. You can do this effortlessly thanks to the security check tool in iOS 16.