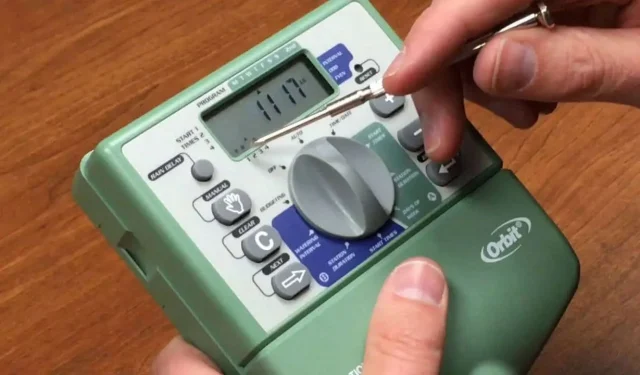

Orbit’s Sprinkler Timer is a state-of-the-art device designed to provide users with an efficient and convenient way to manage their irrigation needs. This guide provides a comprehensive overview of the timer’s features, installation process, and troubleshooting tips.
The Orbit Sprinkler Timer is a product of Orbit® Irrigation Products, Inc. It is designed to be used as an automatic sprinkler timer for activating 24 VAC irrigation valves. The timer is equipped with Orbit’s exclusive easy-set logic™, which combines simple programming with the latest timer technology and versatility. Whether you need a fully automatic, semi-automatic, or manual watering program, this timer has got you covered.
| Step Number | Action | Description |
|---|---|---|
| 1 | Select a Location | Choose a spot near an electrical outlet and ensure appropriate operating temperatures. |
| 2 | Mount the Timer | Use the provided template to mount the timer on the wall. |
| 3 | Connect Valve Wires | Strip wires and connect them to the appropriate terminals. |
| 4 | Connect Electrical Transformer Power | Attach the power connector and plug the transformer into an outlet. |
| 5 | Activate Battery | Remove the plastic strip to activate the pre-installed battery. |
Installation: Required Tools Orbit Sprinkler Timer
- Phillips Screwdriver
- Wire Strippers
- Select a Location: Choose a spot near an electrical outlet, ensuring operating temperatures are between 0° and 70° Celsius. The timer should be easily accessible to sprinkler wires.
- Mount the Timer: Use the provided mounting template to mark the screw location on the wall. Install a No. 8 screw into the wall, leaving the screw head protruding 3mm. Hang the timer on the screw using the keyhole slot.
- Connect Valve Wires: Strip 12 mm of the plastic insulation off each wire. Connect one wire from each valve to a single “Common” sprinkler wire. The remaining wire from each valve should be connected to a separate colored sprinkler wire.
- Connect Electrical Transformer Power: Attach the power connector to the timer and plug the transformer into a 120V electrical outlet.
- Activate Battery: Remove the plastic strip to activate the pre-installed lithium CR2032 battery. This battery retains the program during power outages.
Orbit Sprinkler Timer Manual PDF 2023: Boosting Garden Efficiency, Step by Step
The timer offers two independent programs (A, B) for flexibility. Each program consists of a group of stations with specific start times and run times. Here’s how to set it up:
- Set Clock: Turn the dial to [SET CLOCK] and adjust the current time using the [+/–] buttons.
- Set Date: Turn the dial to [SET DATE] and adjust the year, month, and date accordingly.
- Start Time: Turn the dial to [START TIME] and select the desired watering start time.
Additional Features
- Rain Delay: This feature allows you to delay watering for 24, 48, or 72 hours.
- Manual Watering: Manually water without disturbing the preset program.
- Connecting a Rain Sensor: Connect the rain sensor wires to the yellow terminal ports labeled “sensor” . Use the sensor on/off switch to begin operation.
Troubleshooting
If you encounter issues with the Orbit Sprinkler Timer, here are some common problems and their solutions:
- Valves not turning on: Check for faulty solenoid connections, damaged wires, or incorrect programming.
- Stations activating unexpectedly: Ensure water pressure is appropriate, and check for multiple start times or incorrect AM/PM settings.
- Timer not powering up: Ensure the transformer is plugged into a working outlet.
Warranty and Support
Orbit® Irrigation Products, Inc. stands behind the quality of its products. The Orbit Sprinkler Timer comes with a 3-year warranty from the date of purchase. This warranty ensures that the product will be free from defects in materials and workmanship. If any part is found to be defective under normal use and service within this period, Orbit® will replace it free of charge. However, it’s essential to retain the proof of purchase. Before returning the product, it’s advisable to contact Orbit® Technical Service for guidance.
Safety and Compliance
The Orbit Sprinkler Timer is a Class B digital apparatus that complies with Canadian ICes-003 standards. It’s designed for a normal pollution situation. Users are advised to ensure that the device is installed and operated as per the guidelines provided in the manual to ensure safety and compliance with all regulations.
Environmental Considerations
When installing and using the Orbit Sprinkler Timer, consider the environmental impact. The timer helps in water conservation by ensuring that plants get the right amount of water, reducing wastage. Additionally, if you’re using a rain sensor, it further ensures that the system doesn’t water the garden when it’s raining, saving even more water.
Maintenance and Care
Regular maintenance ensures the longevity and optimal performance of the Orbit Sprinkler Timer. Here are some maintenance tips:
- Cleaning: Dust and debris can accumulate over time. Use a soft, damp cloth to wipe the exterior of the timer. Avoid using harsh chemicals or abrasive materials.
- Battery Replacement: The timer uses a lithium CR2032 battery to retain its program during power outages. It’s recommended to replace this battery annually to ensure uninterrupted performance.
- Software Updates: Periodically check the manufacturer’s website or contact customer service to see if there are any software updates or enhancements available for your timer model.
User Feedback and Community
Orbit values feedback from its users. Sharing your experiences, suggestions, or issues can lead to product improvements. Many users have found solutions and shared innovative ways to use their timers on online forums, blogs, and community groups. Engaging with these communities can provide additional tips and tricks to get the most out of your Orbit Sprinkler Timer.
Accessories and Add-ons
Orbit offers a range of accessories that can complement your sprinkler timer:
- Sensors: Apart from rain sensors, there are soil moisture sensors that can be integrated with the timer to ensure watering only when necessary.
- Extension Modules: For larger gardens or lawns, you might need additional stations. Orbit provides extension modules that can be easily integrated with your existing timer.
- Protective Cases: If your timer is installed in an exposed location, consider getting a protective case to shield it from harsh weather conditions.
Troubleshooting Orbit Sprinkler Timer
| Problem Description | Possible Causes |
|---|---|
| One or more valves do not turn on | Faulty solenoid connection, damaged wire, flow control stem shut off, incorrect programming. |
| Stations turn on unexpectedly | High water pressure, multiple start times set, incorrect AM/PM, B program activated. |
| One station won’t shut off | Faulty valve, dirt or debris in valve, faulty valve diaphragm. |
| All valves do not turn on | Defective transformer or incorrect programming. |
| Timer will not power up | Transformer not plugged into a working outlet. |
Conclusion
In the world of irrigation, having a reliable and efficient timer is crucial. The Orbit Sprinkler Timer not only offers advanced features but also ensures that your garden or lawn receives the care it deserves. By understanding its functionalities, maintaining it well, and integrating it with suitable accessories, you can ensure a green and thriving outdoor space. Remember, every drop of water saved is a step towards a sustainable future, and with Orbit, you’re making that future possible.
- Vizio Sound Bar Manual and Tips – Old and New
- Skmei Watch Operation Manual and Instructions PDF for Free
- Honeywell Home Pro Series Thermostat Manual