


In this article, we’ll explain why and how to put your iPhone, iPad, or iPod touch into recovery mode, including step-by-step instructions for all models, including the latest iPhone 14 Pro as well as the latest iPad Pro. (6th generation). If you’re having problems with your device or just want to start over, recovery mode can be a helpful solution.
What is recovery mode?
Recovery Mode is a useful tool for troubleshooting and restoring an iOS device. It allows the user to reinstall the iOS operating system, fix problems with the device, update it, or restore the original factory settings.
Why Use Recovery Mode
In most cases, simply restarting your iPhone or iPad can fix most minor issues. But if the problem is more serious, you may need to put your device into recovery mode and then update or restore its software.
Here are some examples of serious issues that require putting your iPhone or iPad into recovery mode:
- iOS device stuck on Apple logo and won’t boot
- The device is not responding and you cannot force restart it using the physical buttons.
- Your iPhone or iPad is stuck in a boot loop where it restarts endlessly
- You forgot your iPhone or iPad passcode
- Finder or iTunes cannot recognize an iPhone or iPad connected to your Mac or PC
- Finder or iTunes give restore errors when trying to restore an iOS device
- You are in the process of recovering and the progress bar has not moved for a long period of time.
- You see the “Connect to iTunes”screen on your iOS device.
Do you lose data when using recovery mode?
It depends on what you do after entering recovery mode. If you choose to update the software, all your settings and data will remain intact. However, if you don’t see an update option, or if updating doesn’t fix the problem, your only option is to restore your iPhone or iPad, which will erase all data and settings. More on this in step 6 below.
What you need
In addition to your iPhone, iPad, or iPod touch, you’ll need the following:
- Mac or Windows computer: Make sure your operating system is up to date.
- Lightning or USB-C cable
- Internet connection on your Mac or PC
How to Put Your iPhone or iPad into Recovery Mode
Step 1: Open Finder on your Mac or iTunes if you’re on a Windows PC. If iTunes was already open, close it and open it again.
Step 2: Connect your iPhone or iPad to your computer with a Lightning or USB-C cable.

Step 3: Follow the steps below for your specific iPhone or iPad model to put it into recovery mode.
Important: When you press the button combinations or the last button in the steps below, your iPhone or iPad displays a power off slider. Don’t stop pressing the button! You will then see the Apple logo . Even after that, do not stop pressing the button. Finally, when you see the recovery mode screen (the cable pointing to the laptop), only then can you stop pressing the buttons you are holding.
To put new iPhone models into recovery mode:
This includes all iPhone 14, iPhone 13, iPhone 12, iPhone 11, iPhone Xs, iPhone Xr, iPhone X, iPhone 8, and iPhone SE (2nd generation) models.
Both steps 1 and 2 must be performed in immediate sequence:
- Press the volume up button and quickly release it.
- Press the volume down button and quickly release it.
- Finally, press and hold the Power button and keep pressing it until the recovery mode screen appears on your iPhone.

To put your iPhone 7, 7 Plus, and iPod touch (7th generation) into recovery mode:
- Press and hold the power button and volume down button together.
- Keep pressing them until you see the recovery mode screen.

To put your old iPhone or iPad into recovery mode:
This applies to all older iPhones and iPod touches, such as iPhone 6s, iPhone SE (1st generation), iPhone 6, iPod touch (6th generation) and older.
- Press and hold the front round Home button and the Power button together.
- Keep pressing them until you see the recovery mode screen.

- Press the volume button closest to the top power button and quickly release it.
- Press the volume button furthest away from the top power button and quickly release it.
- Finally, press and hold the Power button until the Recovery Mode screen appears on your iPad.

- Press and hold the Home button and the Power button together.
- Keep pressing them until you see the recovery mode screen.

Step 4: If you’re on a Mac, select your iPhone or iPad in Finder by clicking it in the left sidebar (under Places).

If you’re using iTunes on a PC, click the tiny iPhone or iPad logo at the top of the screen.
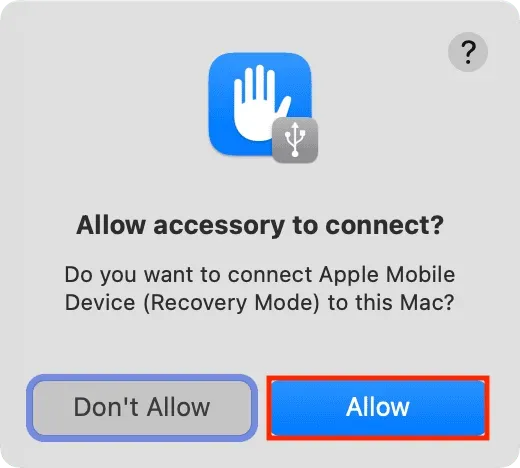
Step 5: You may see the prompt “Allow accessory to be connected?”Do you want to connect an Apple mobile device (recovery mode) to this Mac?” Click Allow.
Step 6: You will then see a prompt in Finder or iTunes saying “There is a problem with the iPhone [or iPad] ‘iPhone’ that needs to be updated or restored.”

Update: Click “Update”and follow the instructions to update your device. This will most likely fix the problem without wiping your device’s data and settings. Once the update is complete, all your apps, text message history, documents, email accounts, settings, and more will remain intact.
Recovery: If you don’t see an update option or updating doesn’t fix the problem, select Repair (you may have to repeat the steps again to enter recovery mode). Restoring will delete everything on your iPhone or iPad.
Once the restore is complete, you will have to set up your device again. You can restore using a computer backup or an iCloud backup file. And even if you don’t have a backup file, you can sign in with your Apple ID during the setup process, which should restore everything you need, like contacts, calendar events, photos, reminders, etc. (if you’ve stored them in iCloud).
Note. If your computer takes more than 15 minutes to download the software during a restore or update, your iPhone or iPad will automatically exit recovery mode. In this case, let your computer finish downloading the file. Once this is done, put the problematic iPhone or iPad into recovery mode again to update or restore it.
Exit recovery mode half way
If for any reason you want to exit Recovery Mode, simply press and hold the Power button on your iPhone or iPad until the Recovery Mode screen disappears. Stop pressing the power button when the Apple logo appears on the screen. Your device will boot up normally.