
In previous versions of Windows, the Windows Startup folder was a useful folder that could be accessed from the Start menu. Beginning with Windows 95, any programs in the Startup folder automatically started and ran each time the computer was turned on.
Those who regularly use a Windows computer probably know that a lot of programs start running in the background as soon as you turn it on.
Launchers are what they are called, and they can be created for a variety of reasons. While most of these applications are quite useful and should be launched as soon as your computer boots up, there are still many situations where you might want to disable them.
Here you will find information on how to access it, manage it, and much more about the Windows 10 Startup folder, which you will understand by the end of this guide.
Where is the Startup folder in Windows 10?
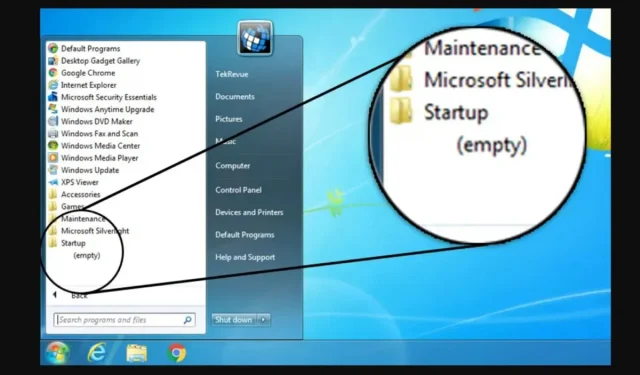
The Start Menu was first introduced in Windows 95 and is very similar to what it was in Windows 10. When you click the Start or Windows icon in the bottom left corner of your desktop, a small pop-up menu appears. This is where the startup folder was located in Windows 95.
Microsoft decided to get rid of the Start menu when Windows 8 was released. Even though the operating system still had all the features, it was much harder to find everything. Microsoft wanted users to take a new approach to program scheduling.
The customer reaction was so strong that the Start menu was secretly restored to Windows 10, much to Microsoft’s dismay.
The startup folder in Windows 10 is comparable to the folder in Windows 7. However, it is no longer accessible in the same way. The Startup folder in Windows 10 no longer appears in the Start Menu like it used to.
Although some features of the work have changed, the functionality has remained. Now it’s a bit harder to get to the Windows 10 startup folder.
- How to find your personal startup folder
- How to find the startup folder for all users
- Finding programs in the Windows Startup folder from the Task Manager
- Managing the Windows 11/10 Startup Folder
- How to remove programs from startup folder in Windows 11/10
- How to find your personal startup folder
You can quickly find the startup folder for the local user currently logged in by following the instructions below.
Open the File Explorer app. You can do this by pressing the Windows Key + E (keyboard shortcut) on your keyboard, or by clicking the File Explorer icon on the taskbar.
To get there, go to the following address: %appdata%Microsoft\Windows\Start Menu\Programs\Startup.
You can also use the Run utility to get to the same place by choosing a different route.
- On your keyboard, press the Windows + R keys. This will launch the Run application.
- Press the Enter key on your keyboard after typing “%appdata%”without the quotes. File Explorer opens with the appropriate folder selected.
- Go to the Microsoft Windows Start Menu and select Start Programs.
2. How to find the Startup folder for all users
If you have two or more local users on your Windows 10 system, they each have their own Startup folder, which determines which applications start when they log in. programs will run for all of them.
- Launch the File Explorer app. You can do this by pressing the Windows + E keys on your keyboard or by clicking the File Explorer icon on the taskbar.
- To go there, go to this address: C:ProgramData\Microsoft\Windows\Start Menu\Programs\StartUp
- Alternatively, you can use the Run utility to take a different route to the same location.
- On your keyboard, hold down the Windows + R keys. This will launch the Run utility.
- Without the quotes, type “shell: common launch”and press the Enter key on your keyboard. File Explorer opens with the desired folder selected.
3. Search for Programs in the Windows Startup Folder from the Task Manager
Task Manager is the most common and efficient way to access Startup Programs or the Startup Folder on your Windows 10 PC. Not only does it display a complete list of all the applications that are running, but it also allows you to disable and enable them as needed. Accessing startup through the Windows Task Manager should be fairly straightforward, as outlined in the following instructions:
- To get started, use Control + Shift + Escape on your keyboard to open the Windows Task Manager.
- You can open it using the startup tab of Task Manager.
- You must select “More”after opening the Windows Task Manager.
- Finally, go to the launch page to get a list of all startup applications on your computer.
- Now you can right click on them and choose whether to enable or disable them according to your preference.
4. Managing the Windows 11/10 Startup Folder
You may be considering how to use the startup folder now that you know how to access, modify, and manage it in the current version of Windows. Accessing and configuring the Windows 10 start folder can be useful for a variety of reasons. You must install antivirus software on your computer to protect yourself from virus threats.
To get started, you should add the software to your Startup folder if you frequently use it on your computer shortly after launching it. You’ll save a lot of time because you won’t have to manually launch frequently used programs every time you boot up your computer.
However, you can remove any other software from the Windows 10 startup folder if you don’t want to use it.
In addition to reducing boot times, since remote software will no longer run at startup, managing the startup folder can also save system resources. Disabling Windows 10 starter programs means they won’t use system resources in the background after you fully set up your computer.
5. How to remove programs from startup folder in Windows 11/10
Some applications, especially free ones, modify your system and install unwanted startup programs. Not only does this slow down startup times, but it can also result in significant performance degradation when those apps are running in the background. The shortcut for Microsoft Edge is also located in the All Users startup folder.
To increase the speed of your Windows 10 operating system, you can disable unnecessary startup applications by following the paths given below.
Use one of the methods below to access Task Manager:
- Right-click any empty space on the taskbar. A context menu will appear. Select Task Manager from the drop down list.
- Alternatively, on your keyboard, press the Ctrl, Alt, and Esc keys at the same time.
- Click “Details”in the lower left corner of the window if your Task Manager was launched in compact mode. This will open a window and display the required presses to access the applications that are running.
- The menu at the top of the Task Manager window can be used to navigate to the Startup tab. This lists all the applications that run on your computer when you boot up.
- Check the Startup Impact column to see which applications significantly affect your computer’s performance. Note. Make sure Microsoft is not listed in the Publisher column of the application you are trying to disable. This software does not usually affect the performance of your system, but may be necessary for Windows 10 to function properly.
- After selecting the program to disable, click the “Disable”button in the lower right corner of the window. It should be set to Disabled.
- Reboot your computer after completing this step for each application you don’t need during startup.
- Your computer should now start without any heavy or unnecessary applications starting automatically. This allows you to check the boot time and performance of your device.
- Changes you make should also be reflected in the Startup folder.
How can you delay the loading of Windows startup programs?
You can use software such as WinPatrol, Windows Startup Helper, or Startup Delayer to delay the execution of such startup programs. This free software, on the other hand, can help you delay not only the launch of programs, but also set a delay time.
This means that you can set Windows to run certain programs only after a certain amount of time has passed. Just create a username after installation and go.
- Start delay
- VinPatrol
- run later
- Windows Startup Assistant
1. Start delay
The standard version of Startup Delayer is completely free. It can be used to determine the startup priority of certain programs. You can also use it to set delay times and delay programs.
Because the software requires the Visual Studio C++ Runtime, this tool can automatically download and install it on your Windows machine during installation.
2. VinPatrol
WinPatrol is a great free program that can be installed on a Windows computer because it monitors it and allows you to make changes quickly. You can also use WinPatrol to specify time delays.
Select the program you want to delay starting from the Startup Programs tab, right-click and select Move to Delayed Programs List.
Now select this program from the Delayed Start tab. When you click “Delay Alternatives”, you will be presented with several options for triggering the delay.
From the drop-down menu, you can choose to run after a certain number of minutes or seconds. Additional options are available in WinPatrol from which you can choose.
3. Run later
You can use LaunchLater to delay the launch of applications that run when you first sign in to Windows. This allows Windows to focus first on downloading and then on executing the list of specified startup applications according to the schedule you set.
4. Windows startup assistant
Another tool designed to alleviate the stress of Windows startup is the Startup Helper, which allows users to choose the order, startup delay, and duration between each program launches. This will allow you to specify the sequence in which your launchers should run and the amount of time they should run when you turn on your PC.
To use it, select “Add New Item”and navigate to the executable using the “Program Path”button. You can then set the delay time.
All recent versions of Windows, including Windows 11/10, are compatible with these utilities.
How to run StartUp for Windows 10
If you put something in any of the startup folders, it won’t start immediately on login, as it did in Windows 95. Instead, the current users startup folder in Windows 10 launches applications in a predefined order, starting with system processes and any items on the Startup tab of Task Manager. After that, there will be programs that you have placed in startup folders.
This usually takes less than a minute, but depending on the processing speed of your computer, it can take several minutes if you have many native and third-party applications and services configured to start automatically on boot.
If you have too many programs in your Windows 10 Startup folder, you risk significant downtime as your computer tries to open each one. It is recommended to limit the number of applications in these folders to a minimum by simply placing the appropriate programs in them.
Final Thoughts
You should have a complete understanding of the Windows 10 start folder after reading this detailed guide and tutorial. We’ve covered not only why the Windows 10 Startup folder is important, but also how to get to it and manage the many Startup apps in Windows 10.
You can speed up boot times, improve overall system responsiveness, eliminate background clutter, and more with the help of the Windows 10 Startup Folder. To do all of this, the previous guide goes into great detail about the Windows 10 start folder.